There is no doubt that Honor V10 has good performance and it is a very worthwhile phone to buy. But before the purchase, we have a question: how about its workmanship? Here we disassemble an Honor V10 to explore its internal structure and workmanship.
Teardown is what we do! Follow us on Facebook for the latest repair news.
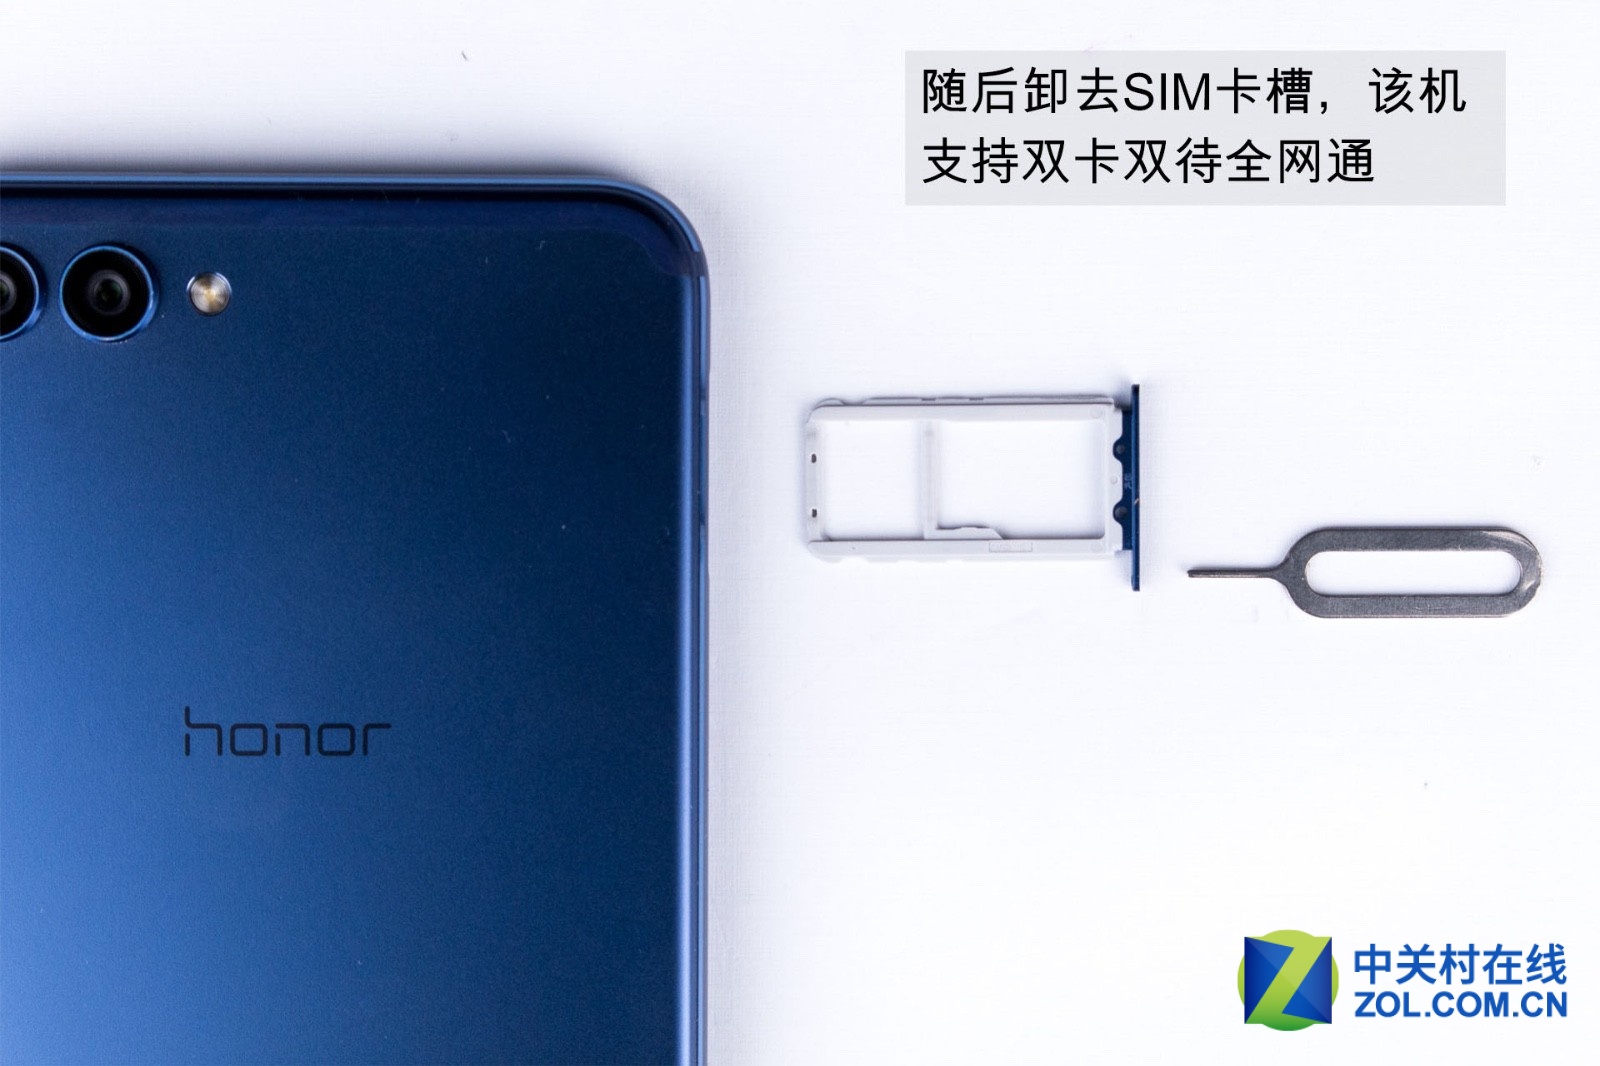
Power off the phone and remove the SIM card tray.
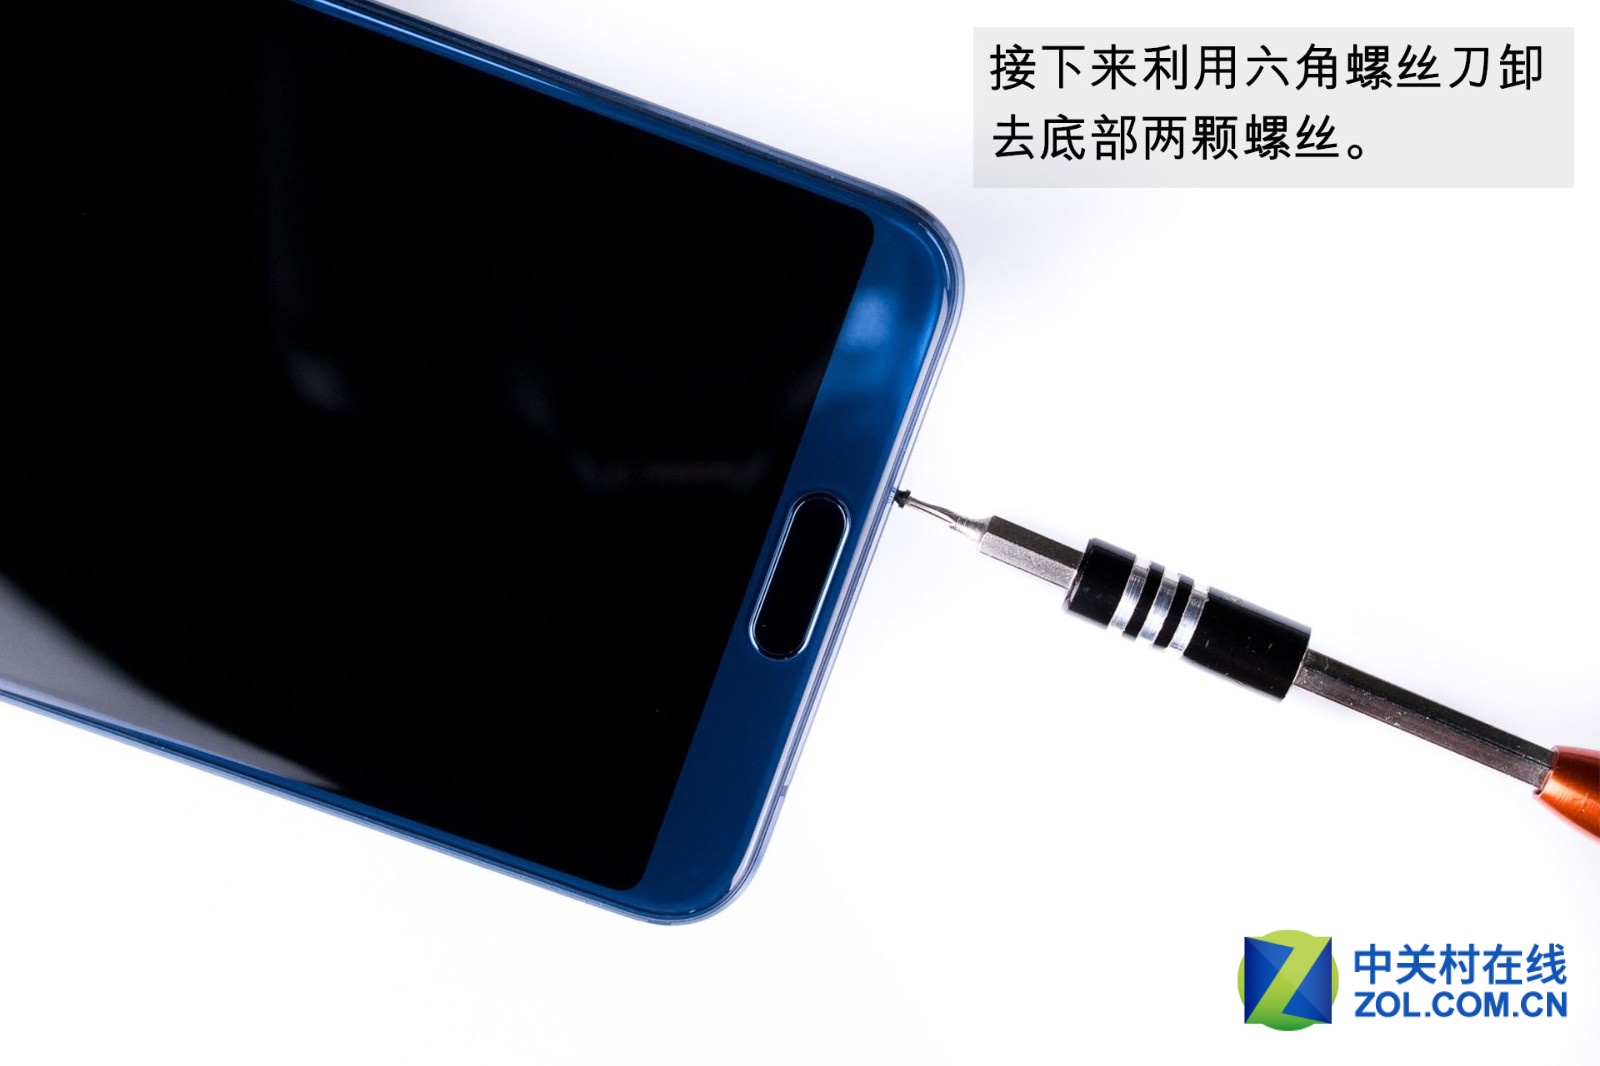
Then, utilize hexagon screwdriver to remove two screws at the bottom.
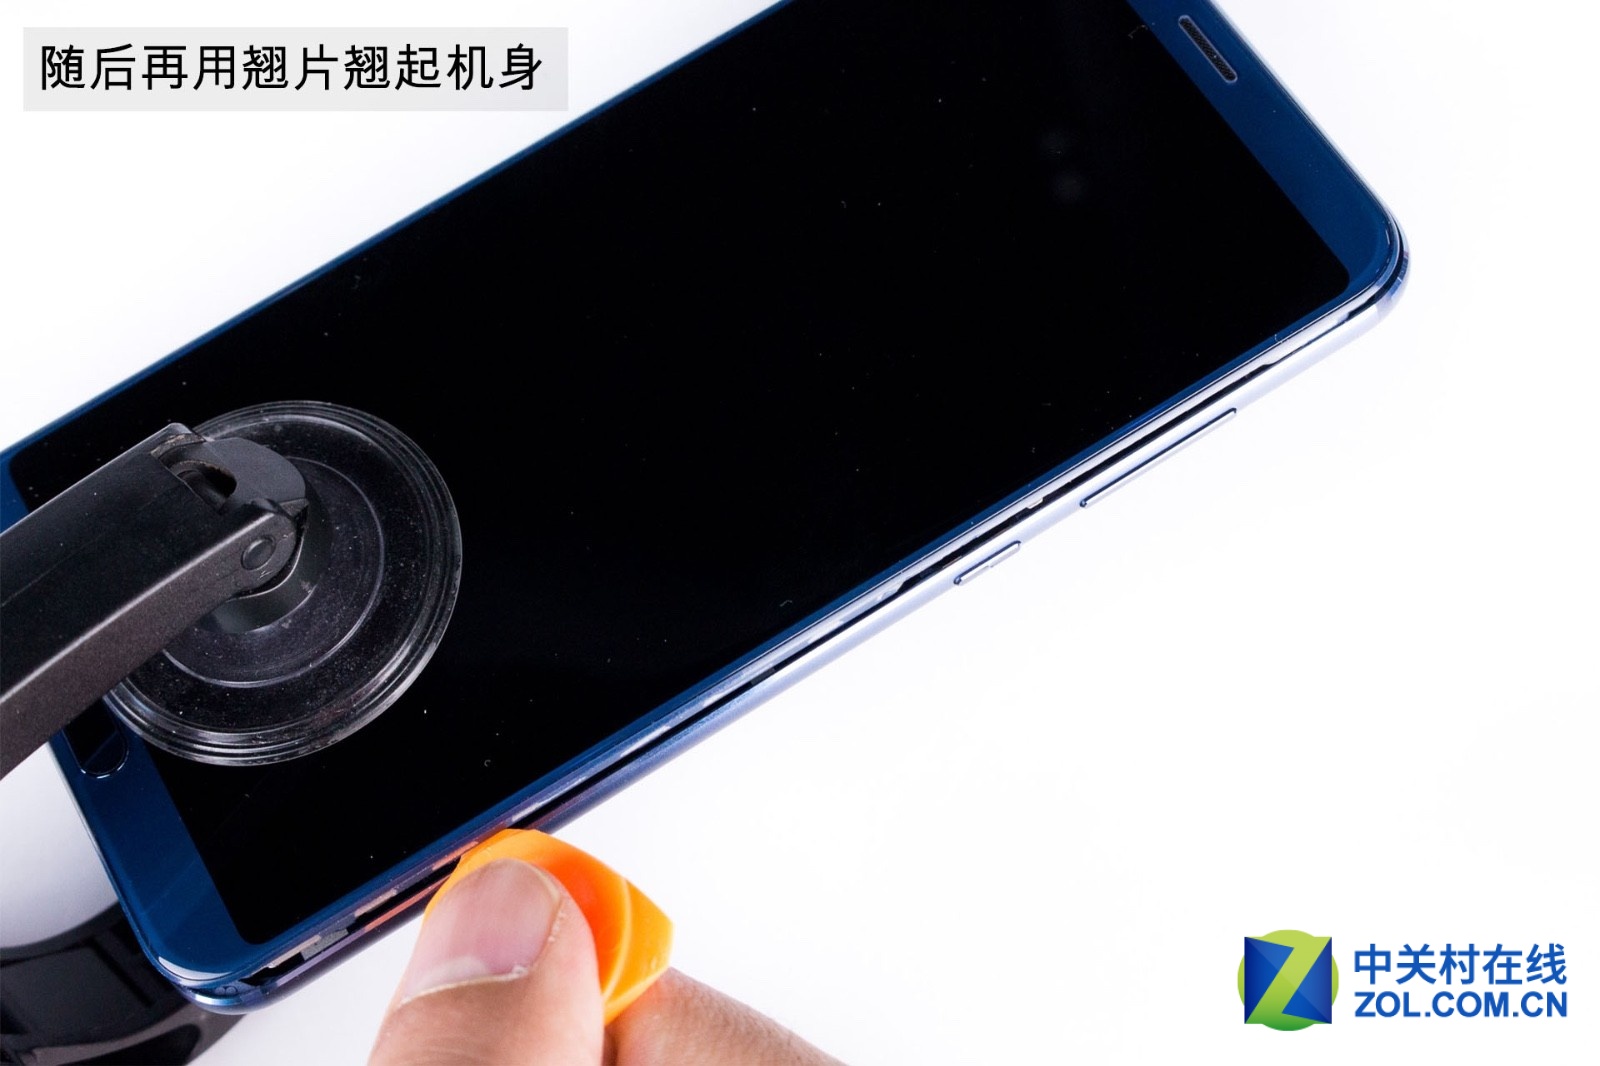
Use a clip to raise the phone body.
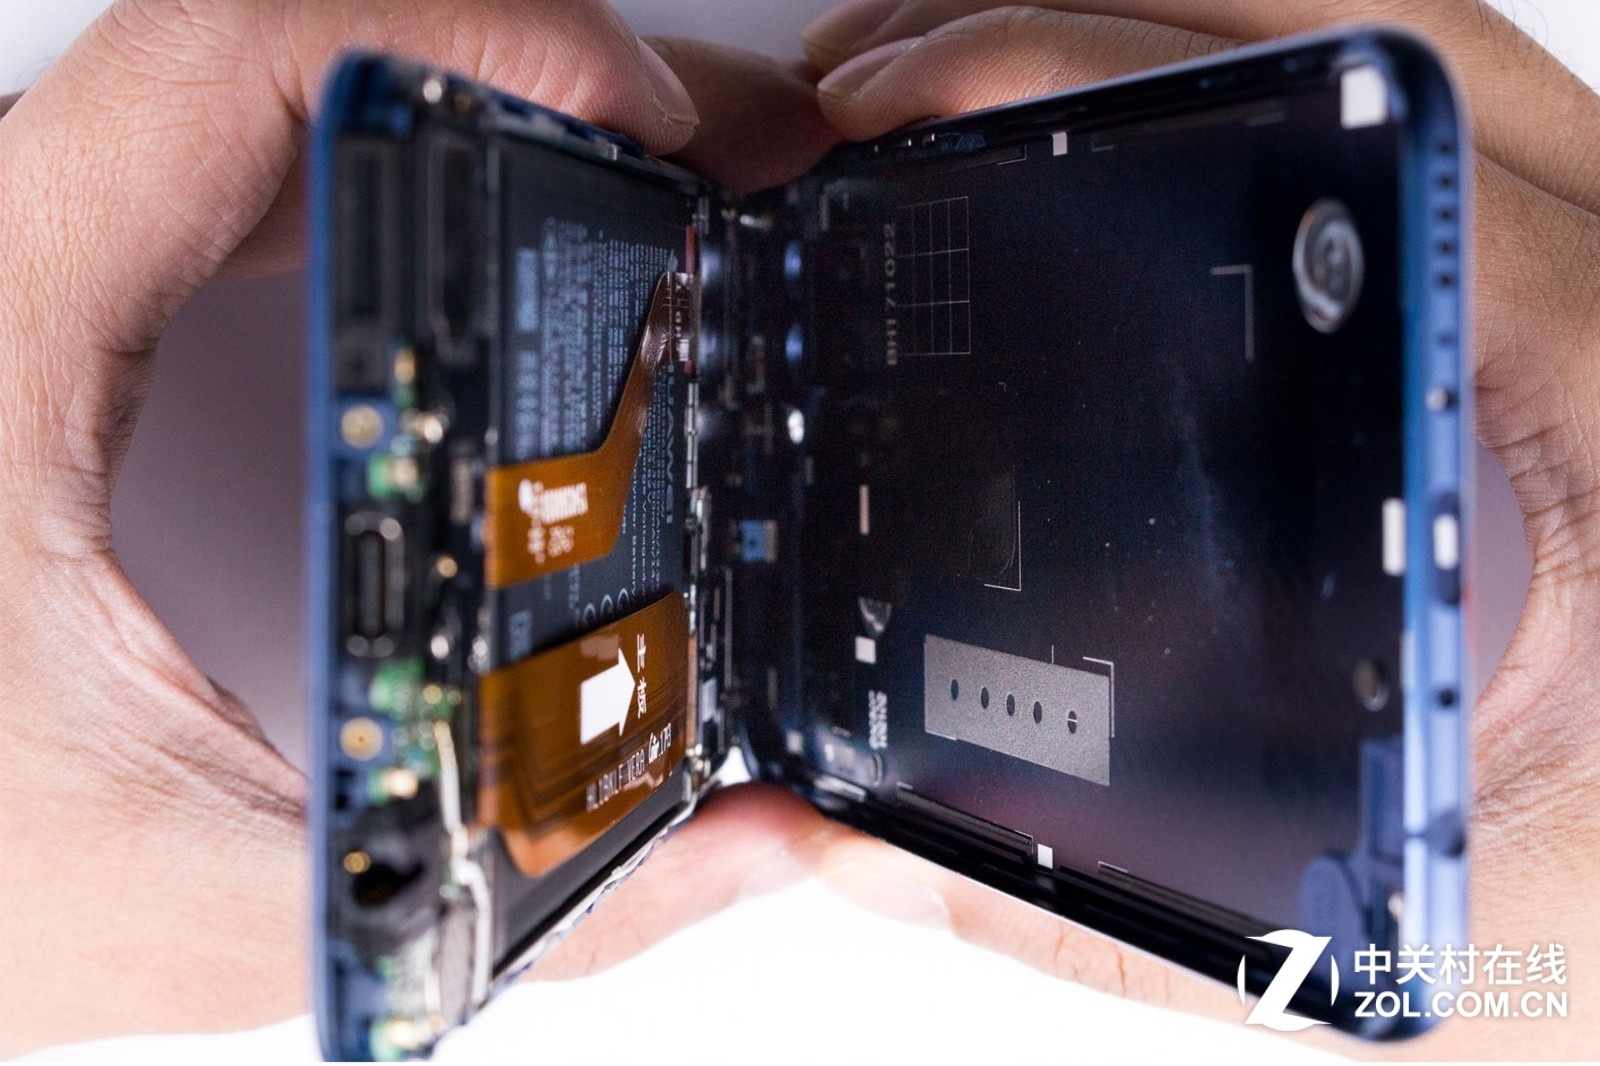
This is what we can see after we haven’t separated the back cover from phone body.
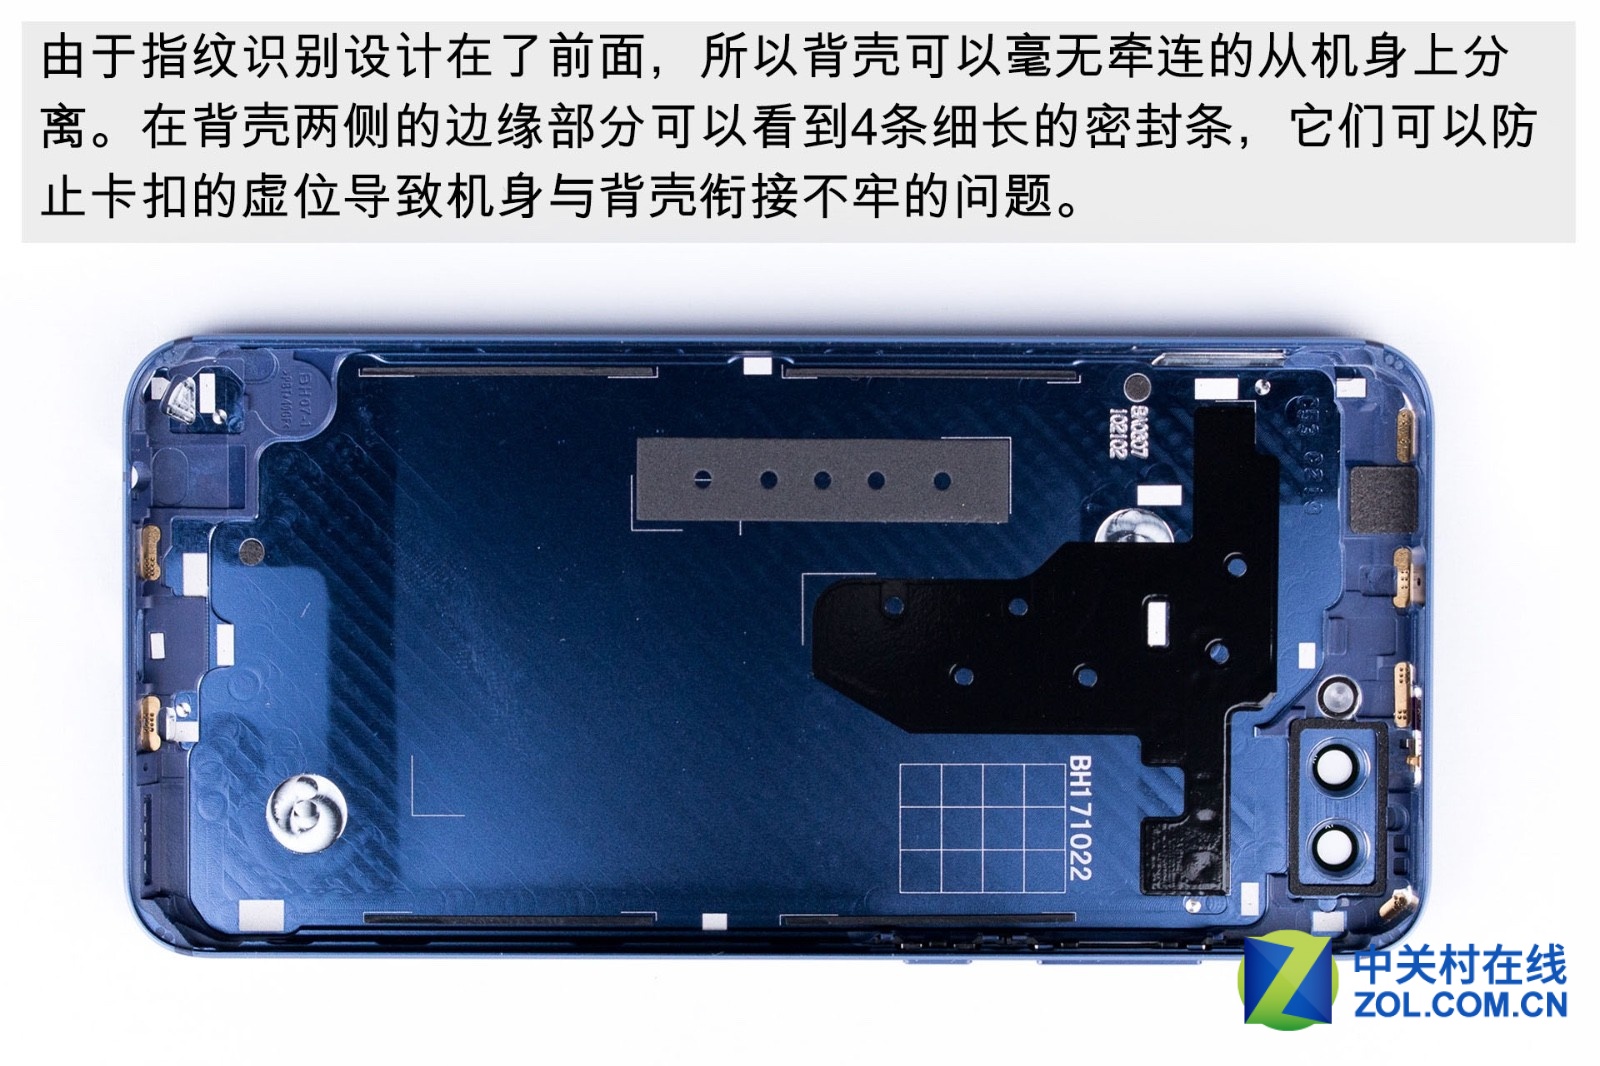
Because fingerprint reader is designed on the front, the phone’s back case can be separated from phone body successfully. There are four slim sealing strips on the smartphone’s verge to avoid the bad connection between body and back case.
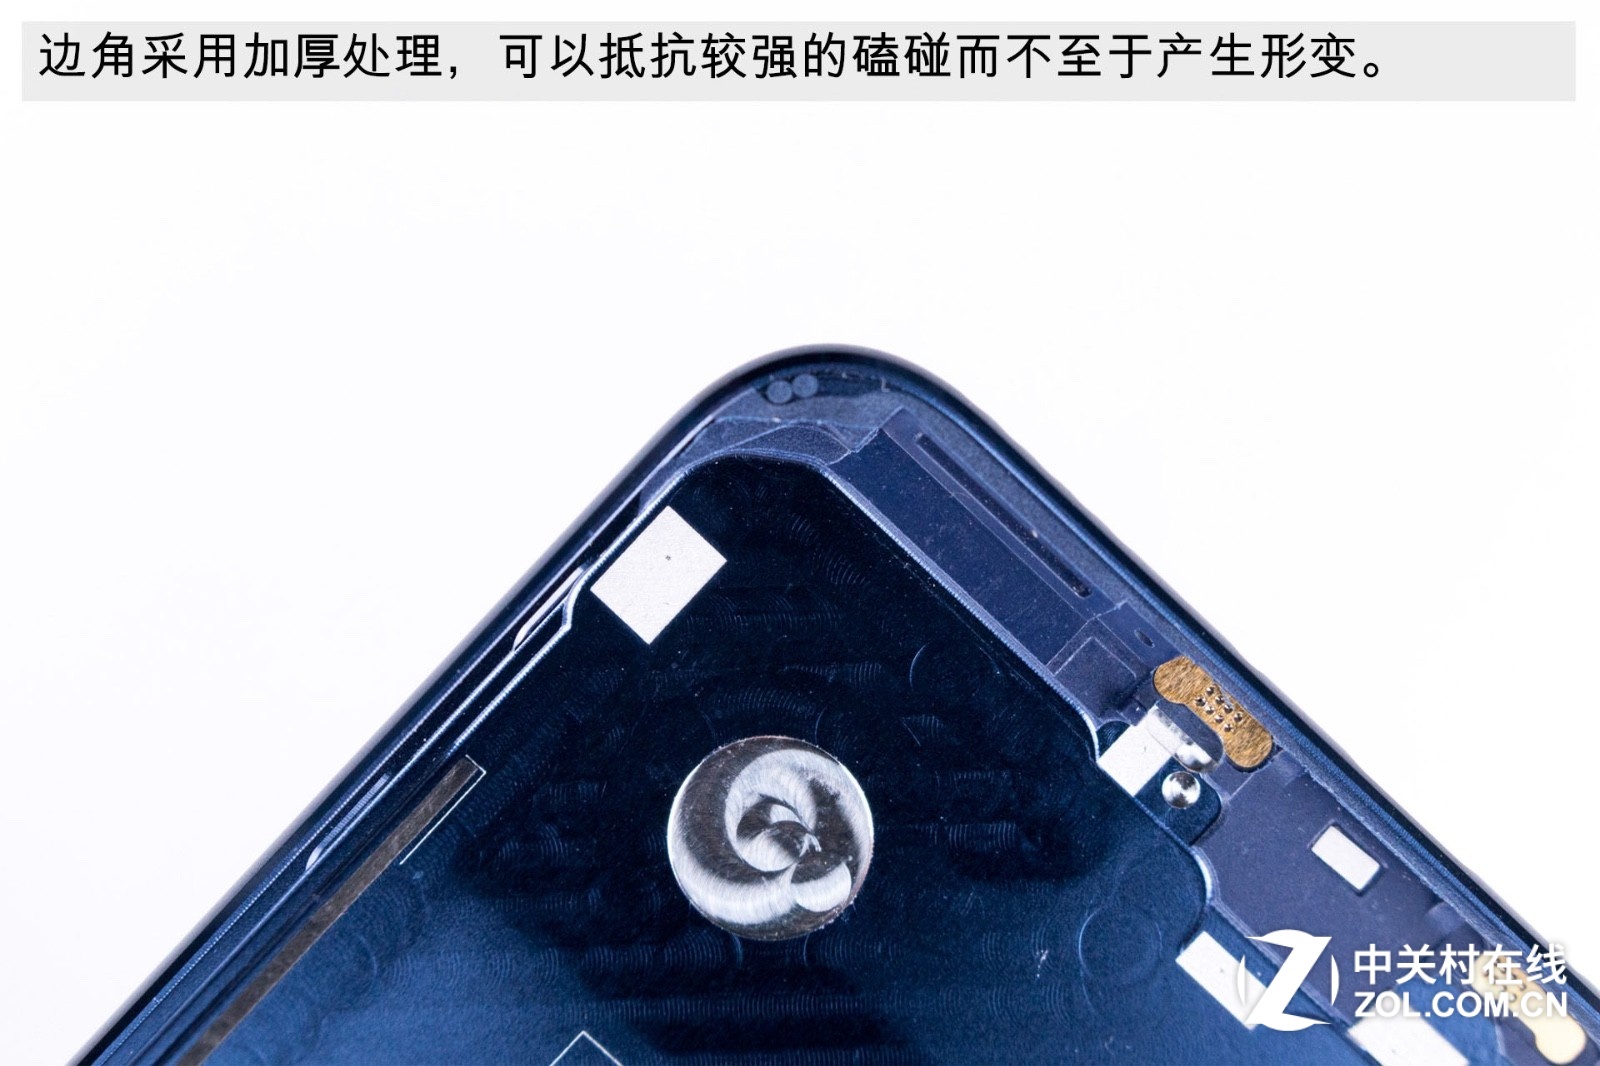
The V10’s four corner angle parts have been thickened to prevent deformation caused by dropping or crash.
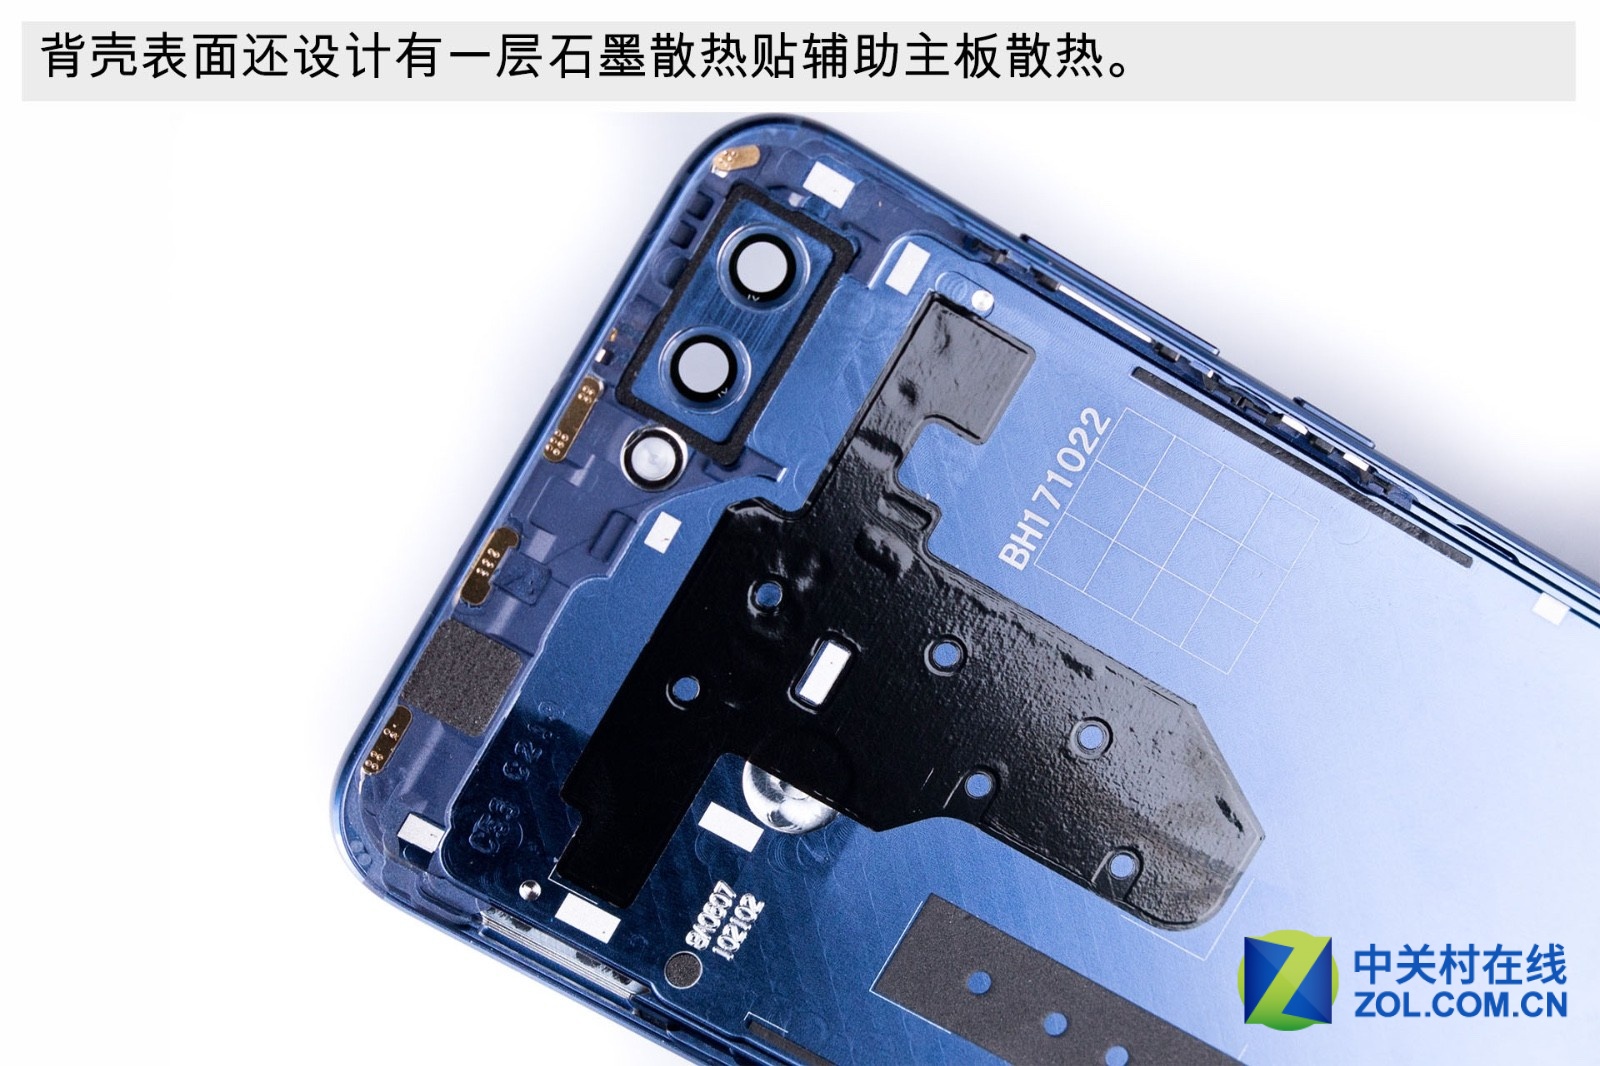
A layer of graphite cooling paste on the surface of the phone’s back case can assist motherboard in keeping cool.
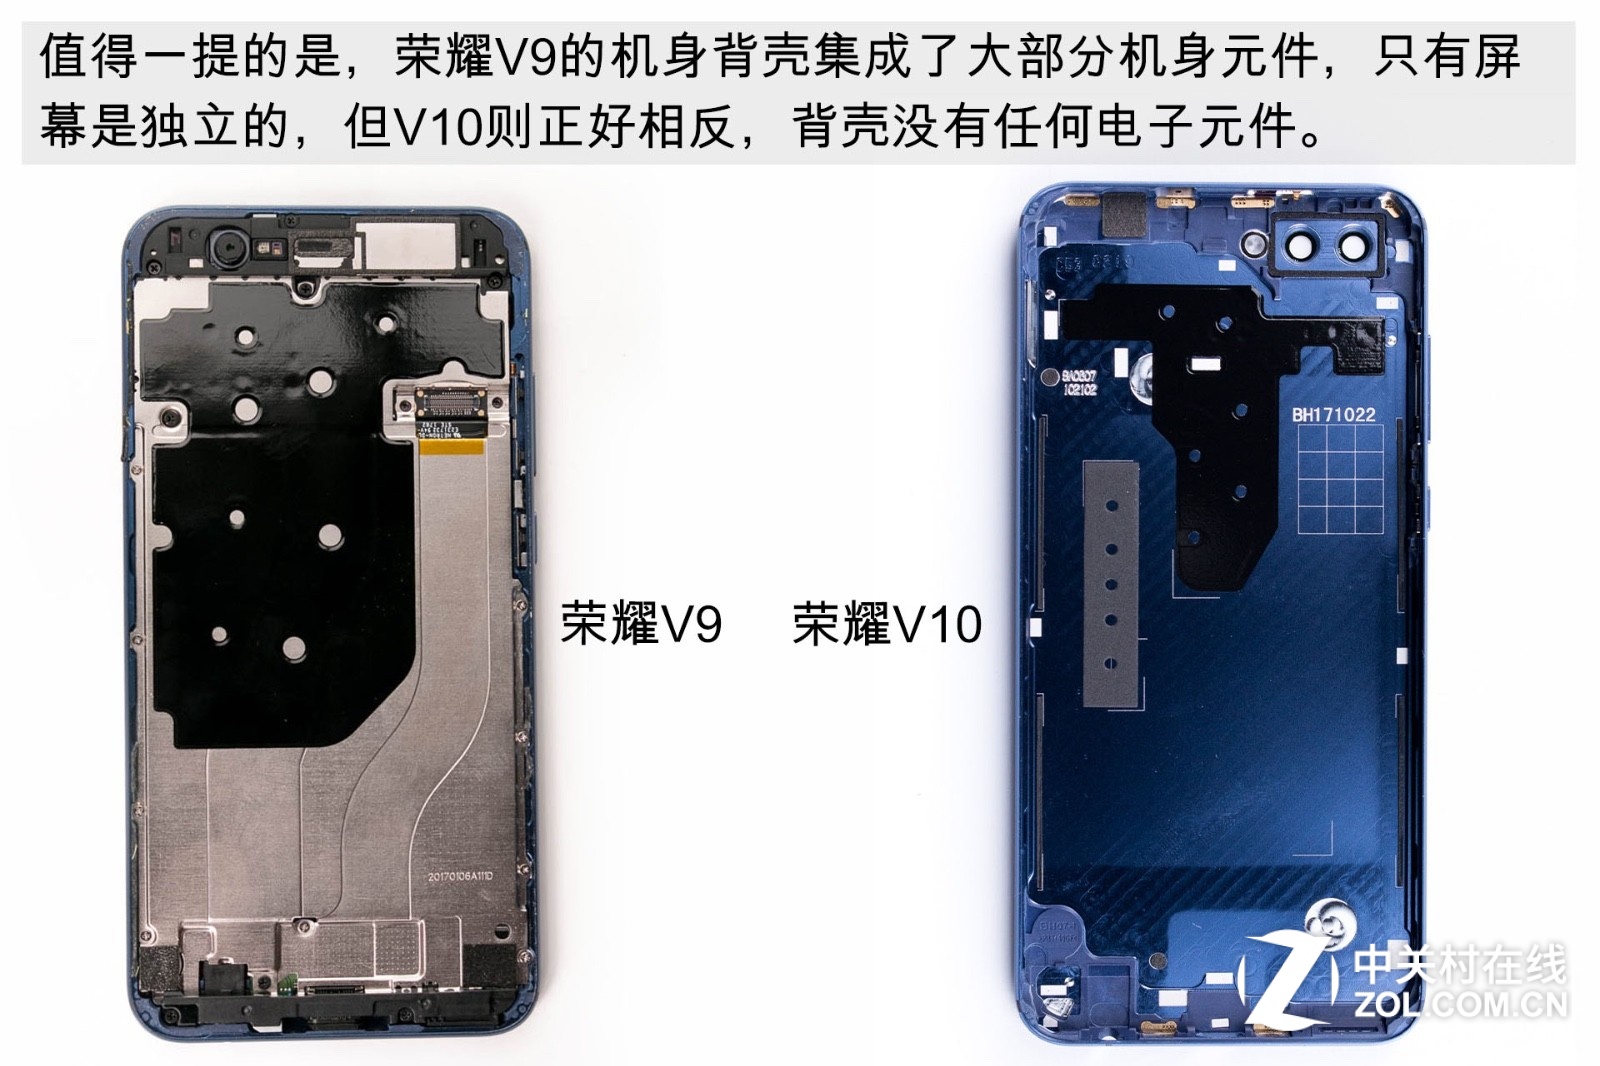
The Honor V9’s back case has been integrated with lots of components, and only its screen is dependent. But the Honor V10 has the opposite design. Its back case hasn’t been integrated with any component.
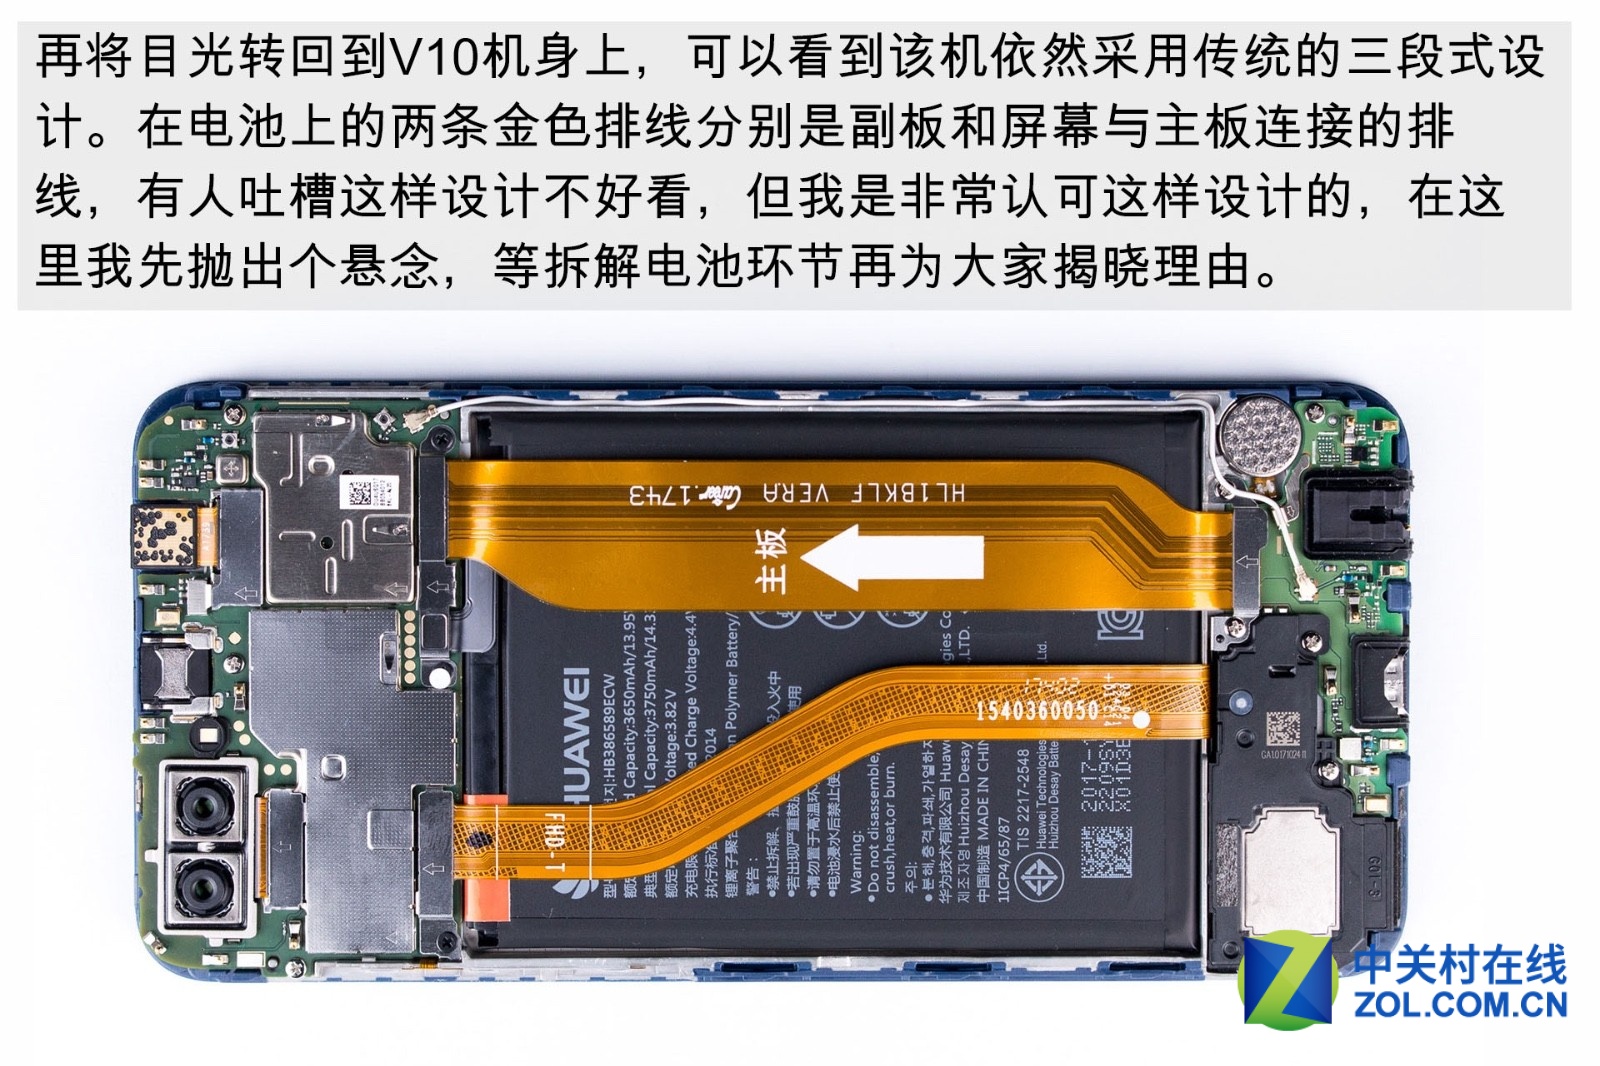
I think that it is the full screen that makes the V10 change its internal design. To achieve full-screen design, it is easier to integrate all kinds of sensors into the screen.
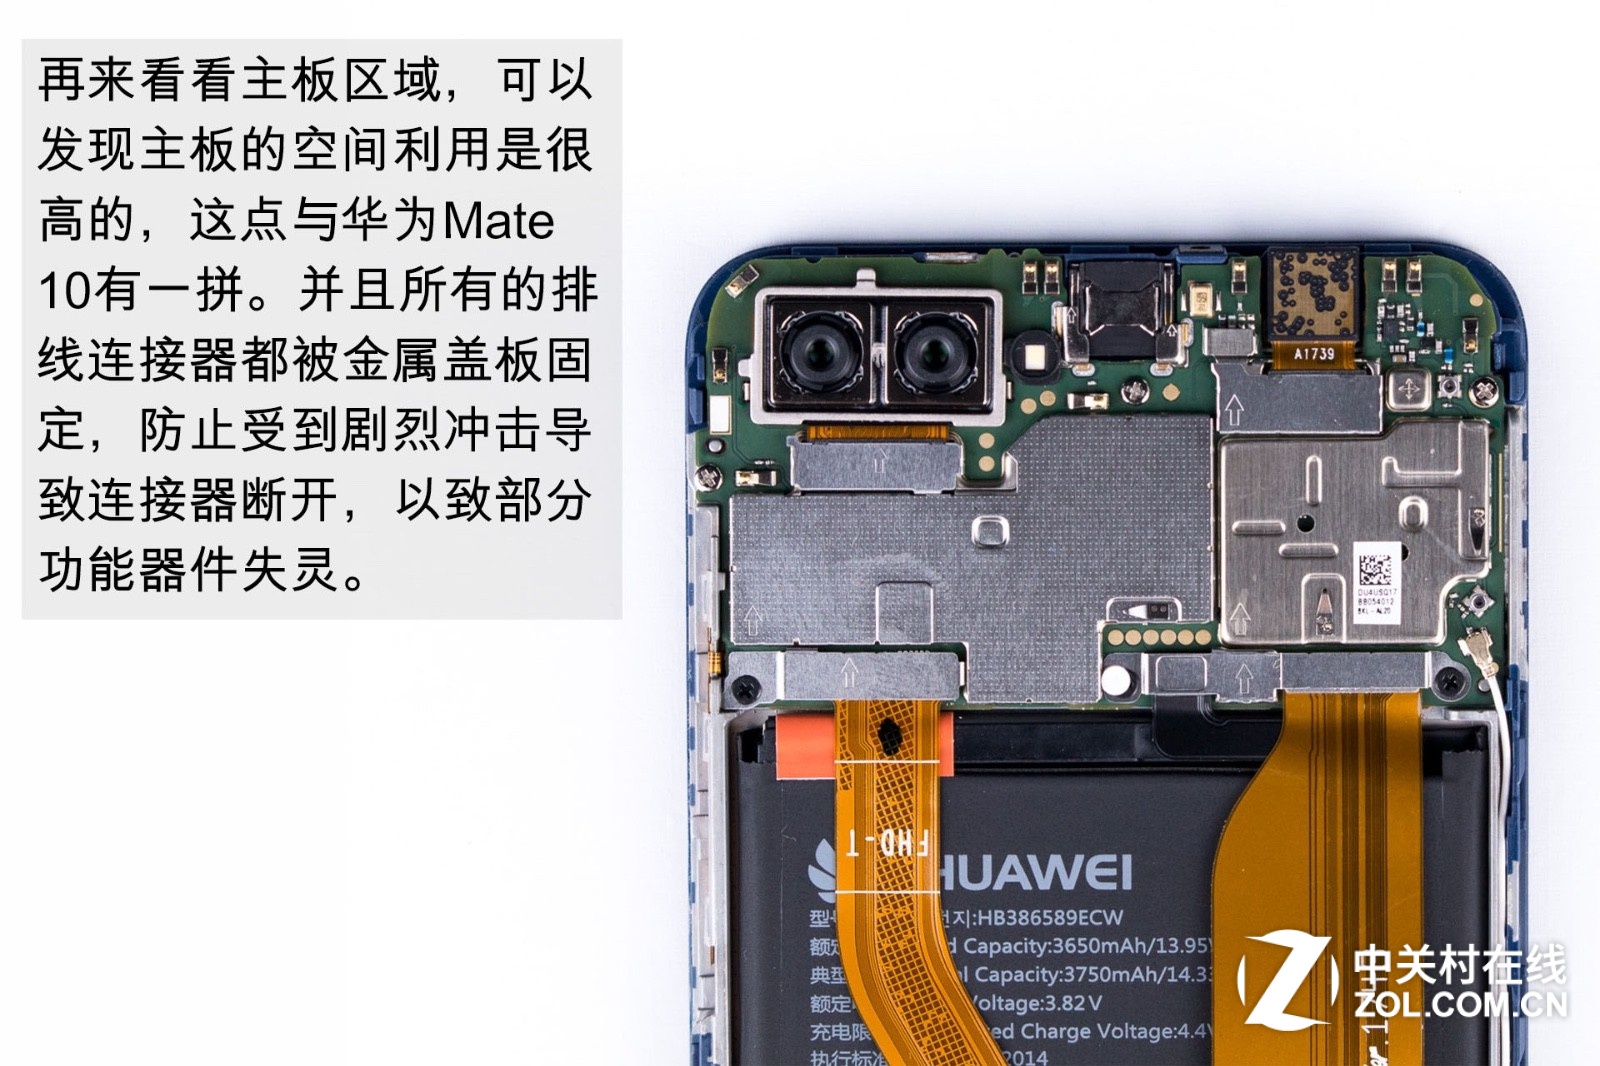
Now, look at the motherboard area. The V10’s motherboard has the high space utilization, which can be comparable with the Huawei Mate 10. All wire connectors have been fixed by the metal cover to avoid malfunction of come functional components which is resulted from disconnected connectors.
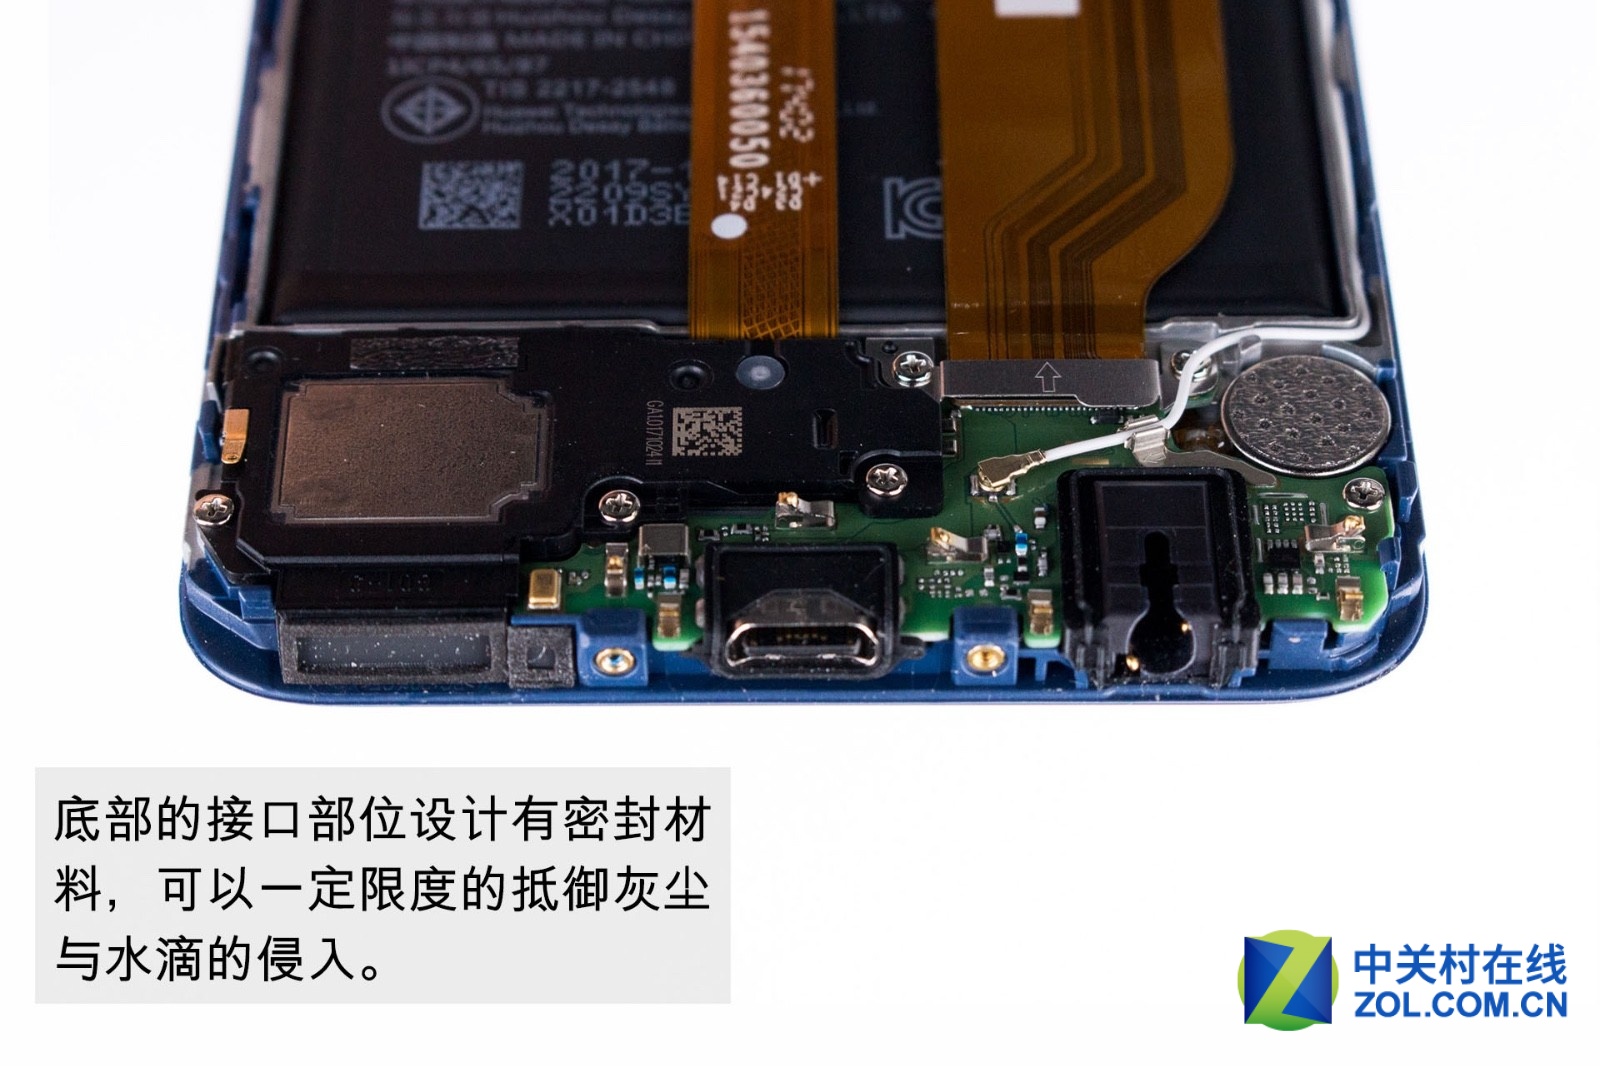
The port at the bottom has sealing material which can prevent dust and water drop.
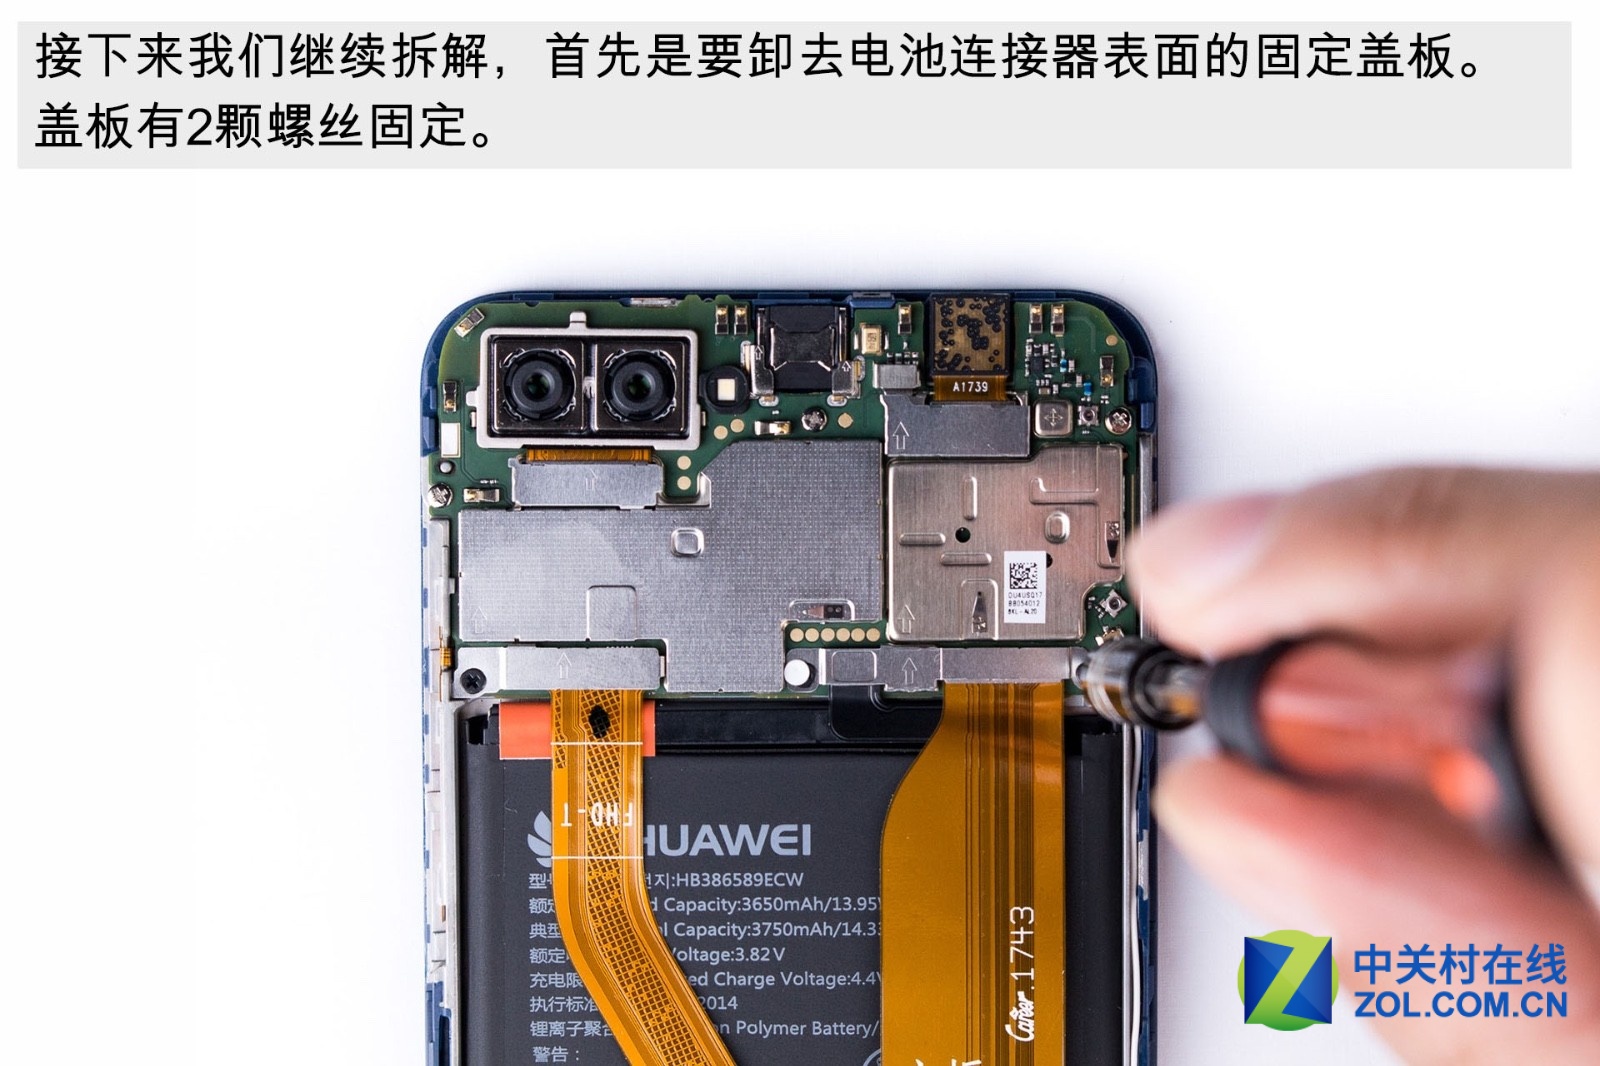
We will continue the teardown. First of all, remove the fixed cover on the surface of the battery connector. The cover is fixed by two screws.
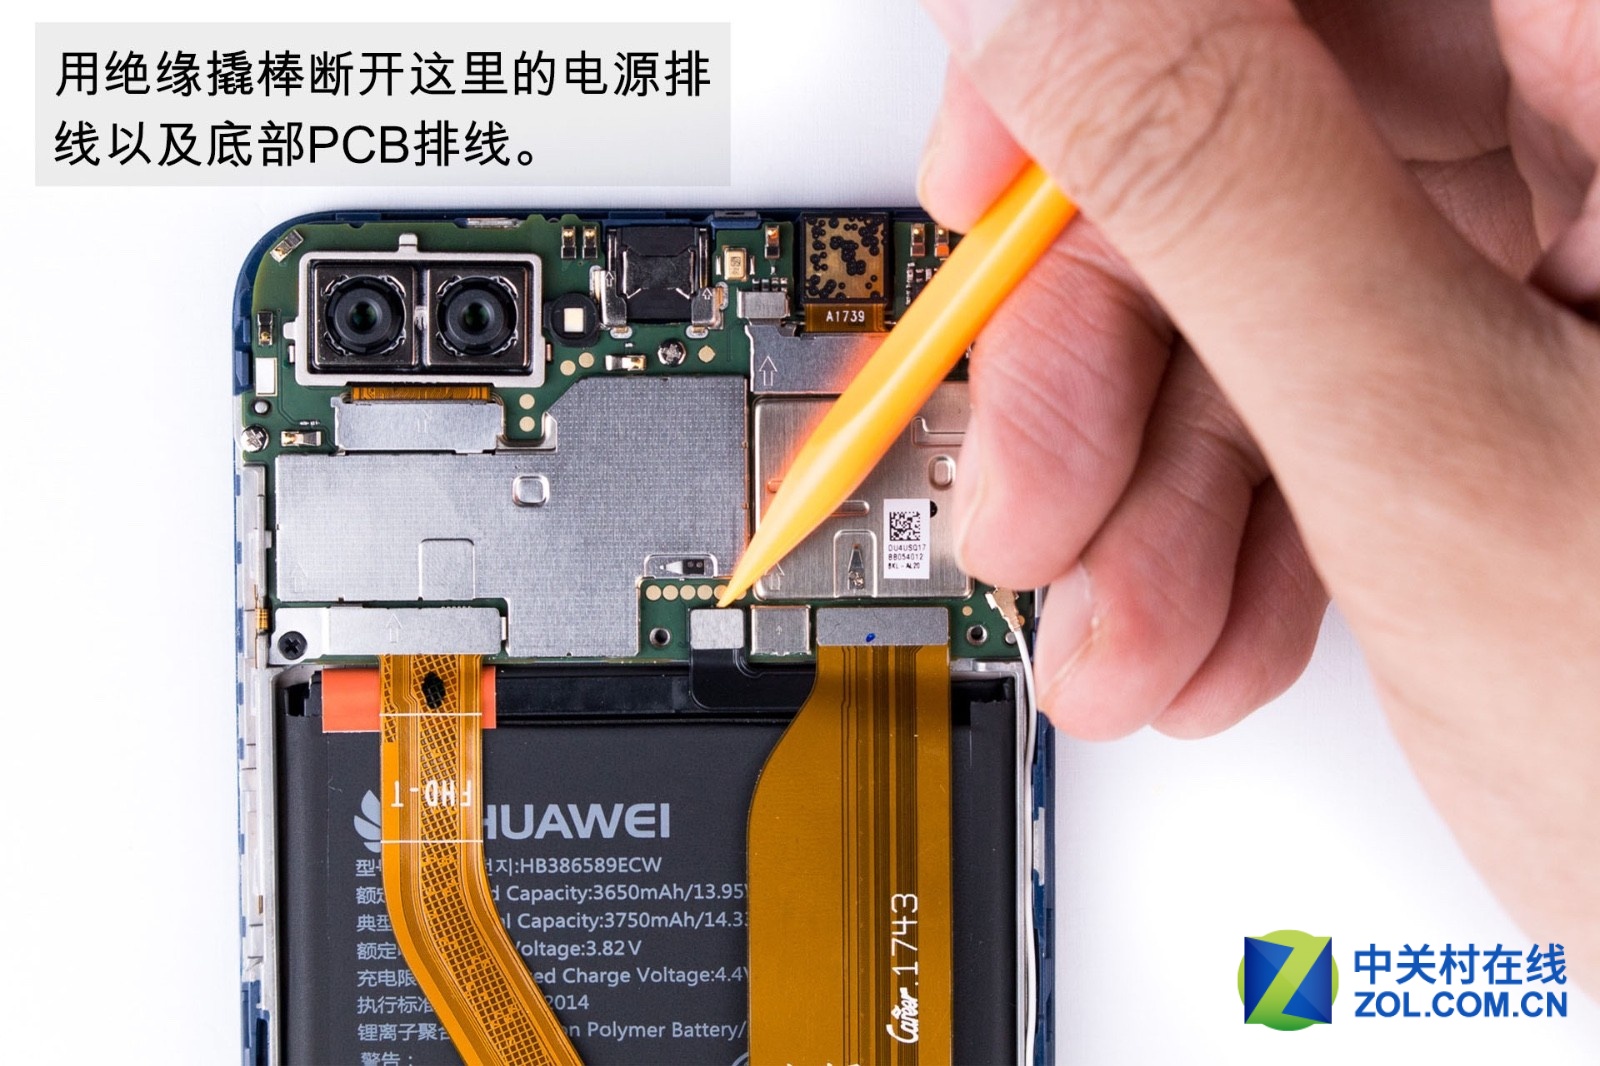
Use insulated pry to disconnect the power wire here and PCB wire at the bottom.
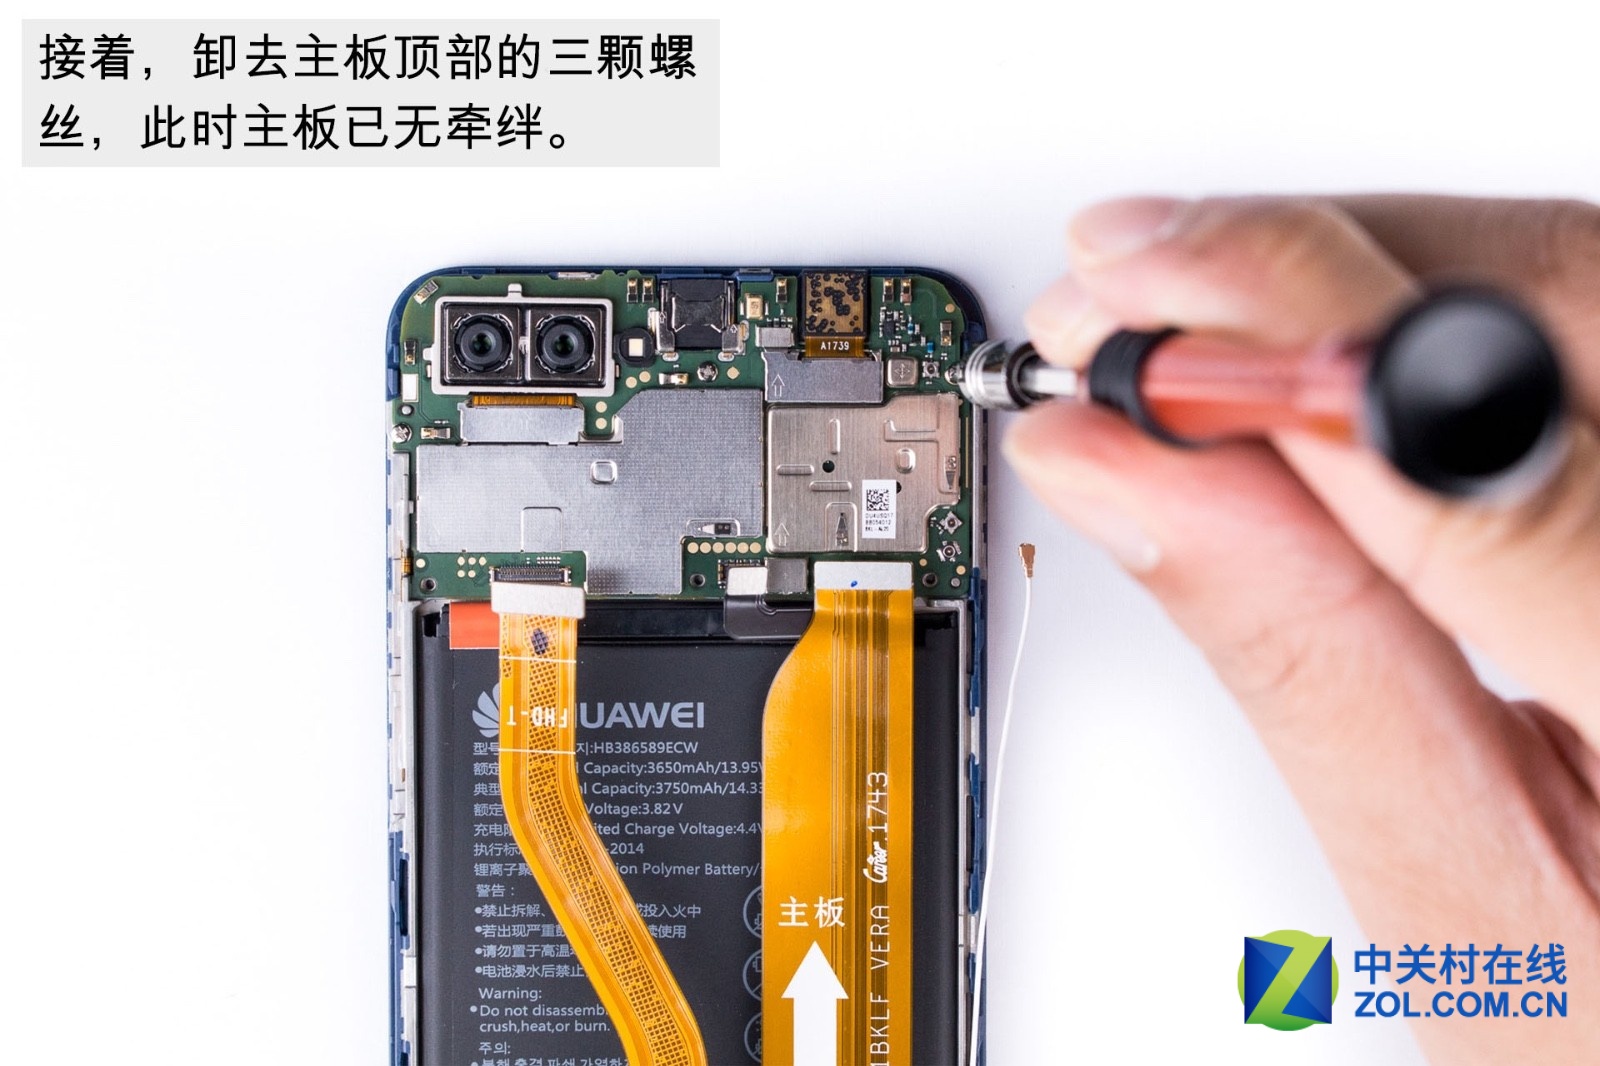
Then, remove three screws on the top of the motherboard.

Now, we can easily remove the motherboard from phone’s body.
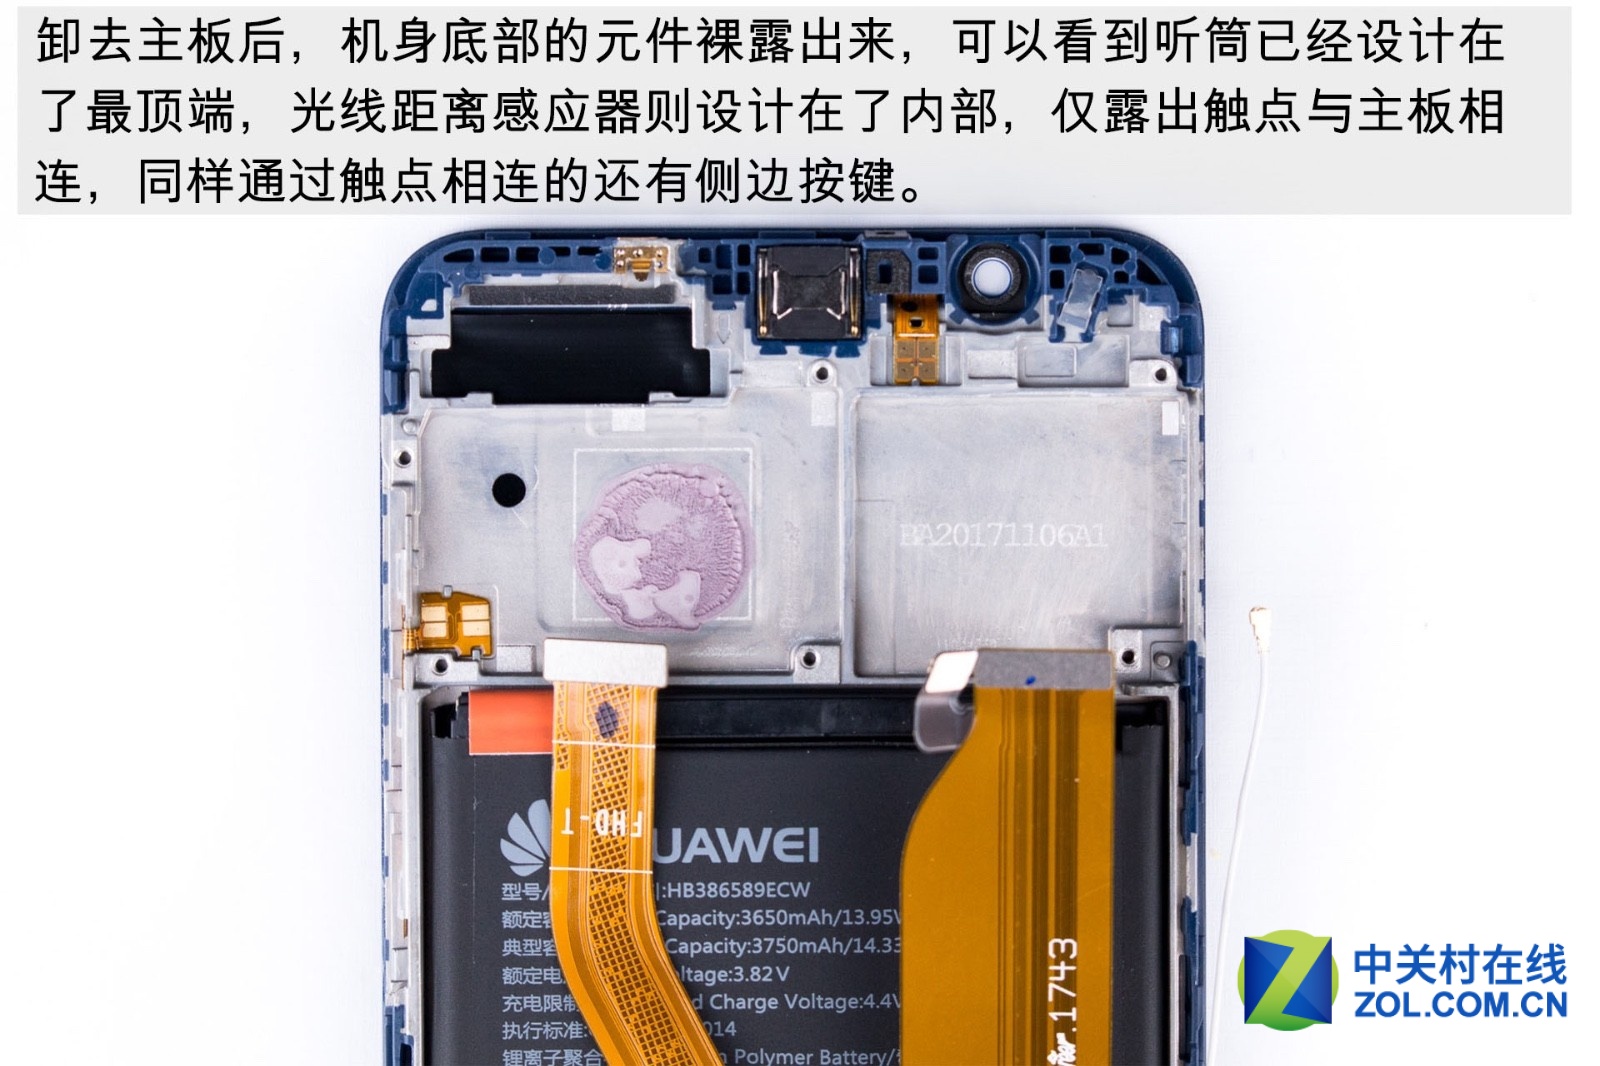
Look at the phone’s front part. After removing the motherboard, components at the bottom can be seen. Earphone has been placed on the top, while the light distance sensor is designed in the internal. Electronic shock is connected to the motherboard, which is the only part that can be seen. Besides, the buttons on two sides are also connected to electronic shock.
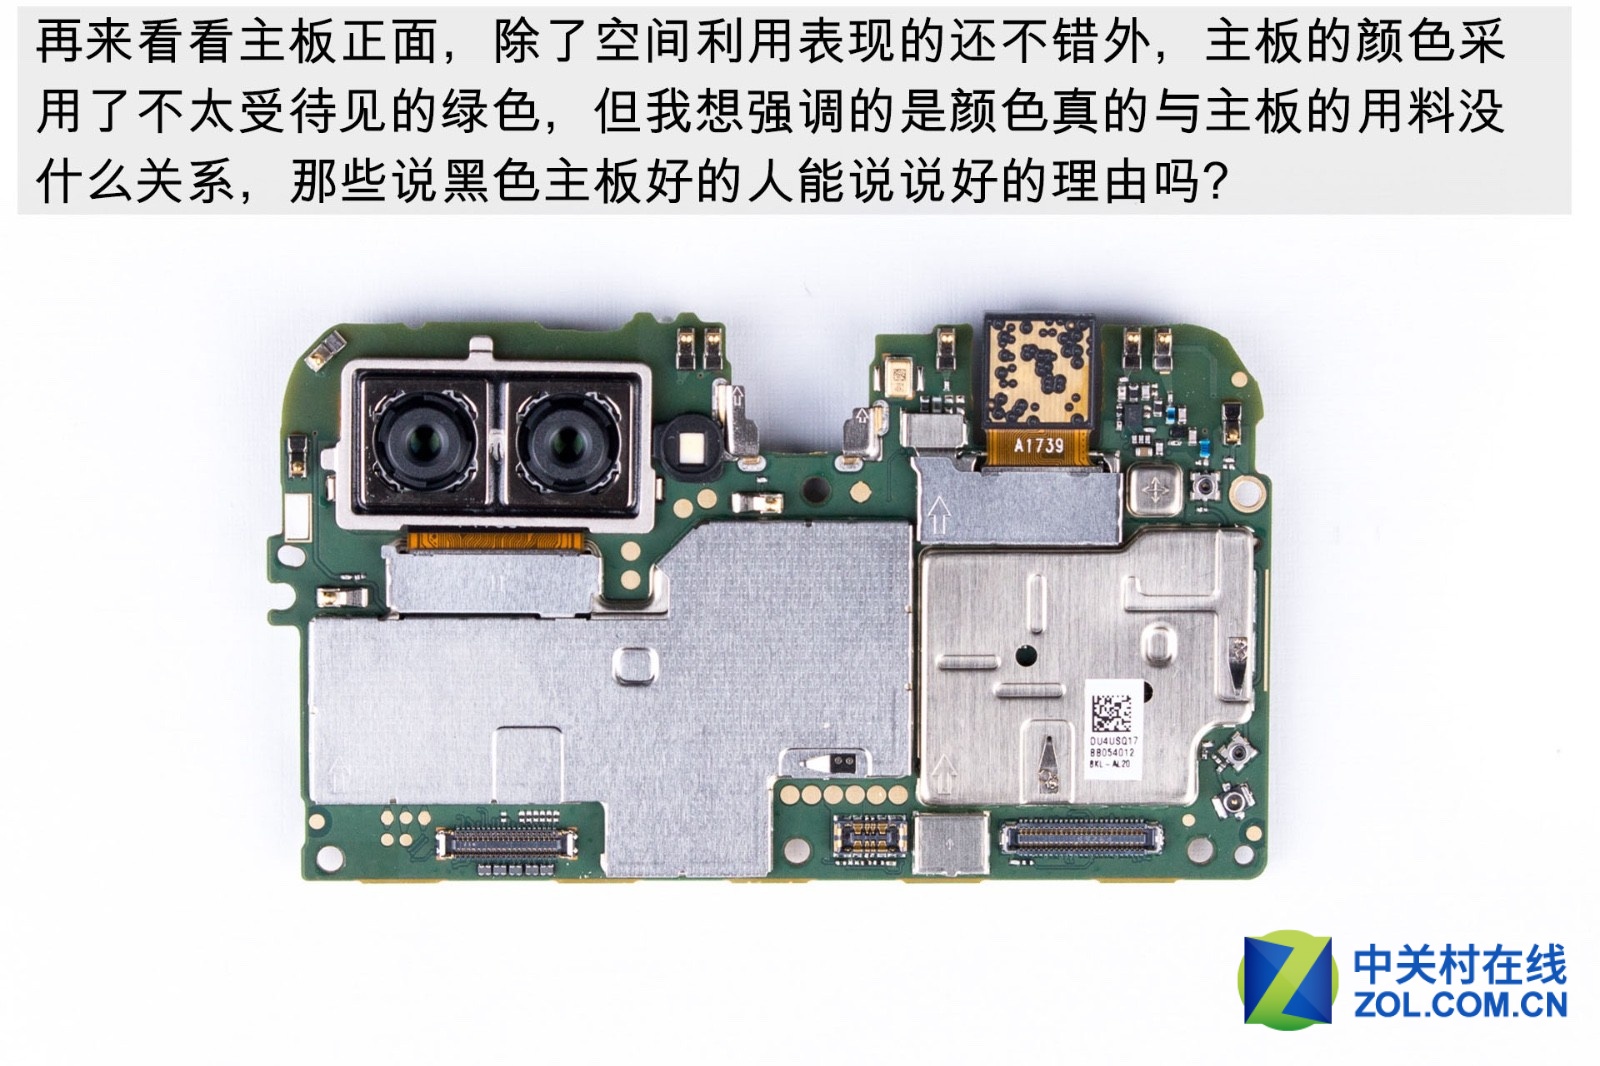
Although motherboard has good space utilization performance, it adopts green color.
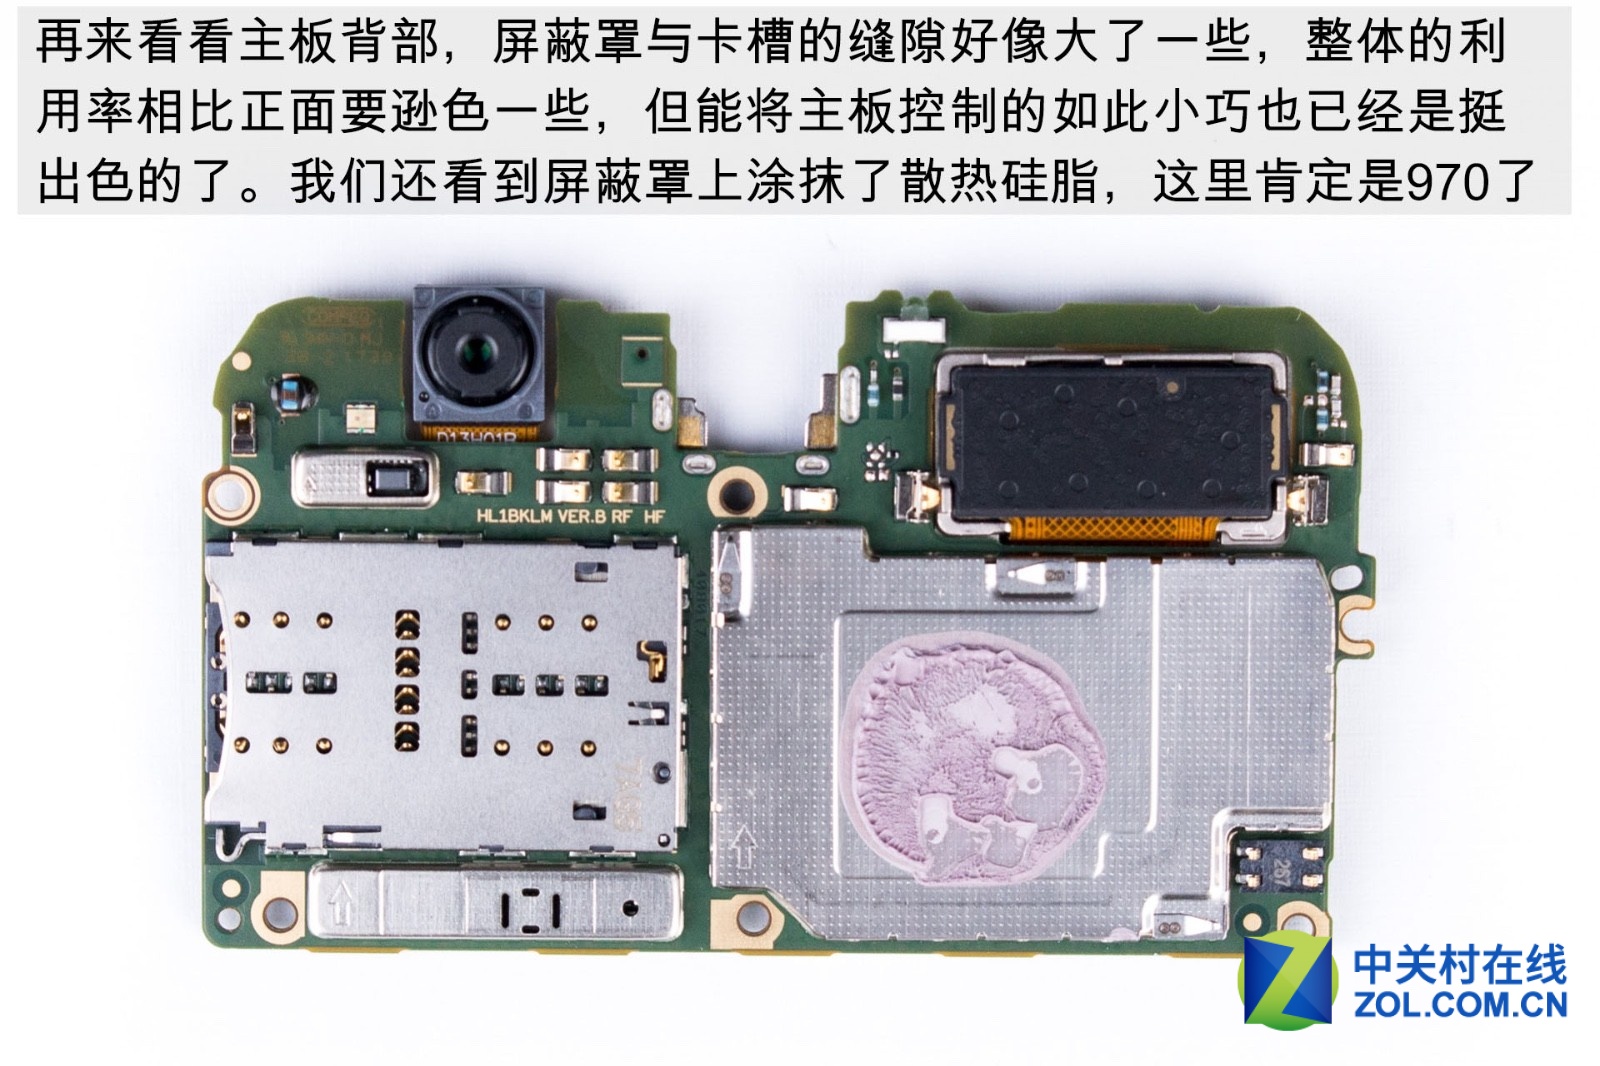
Look at motherboard’s back part. The gap between shield cover and card slot seems to be slightly big. Although its space utilization is lower than motherboard’s front part, it is good to design motherboard in such a small size. We can see the shield is covered by thermal silicone.
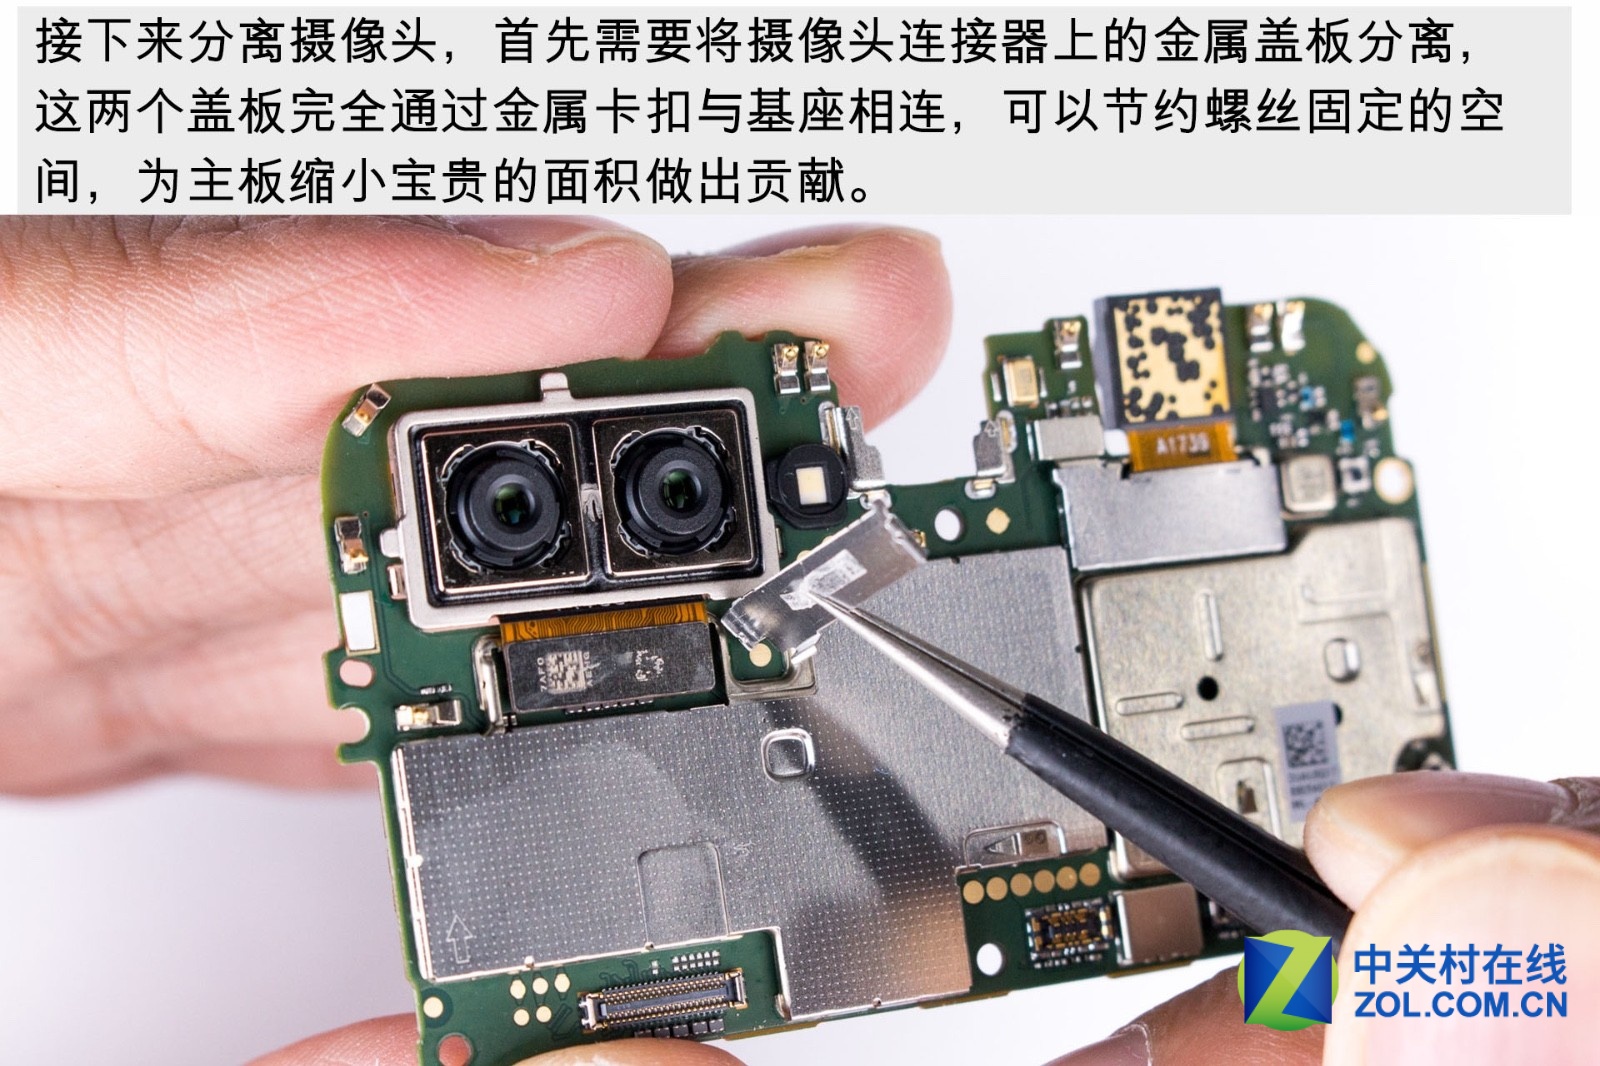
Now, let’s separate camera. The first metal cover on camera’s connector has been removed, and two covers are connected with the base by the metal clip. In this way, it can help decrease motherboard’s area.
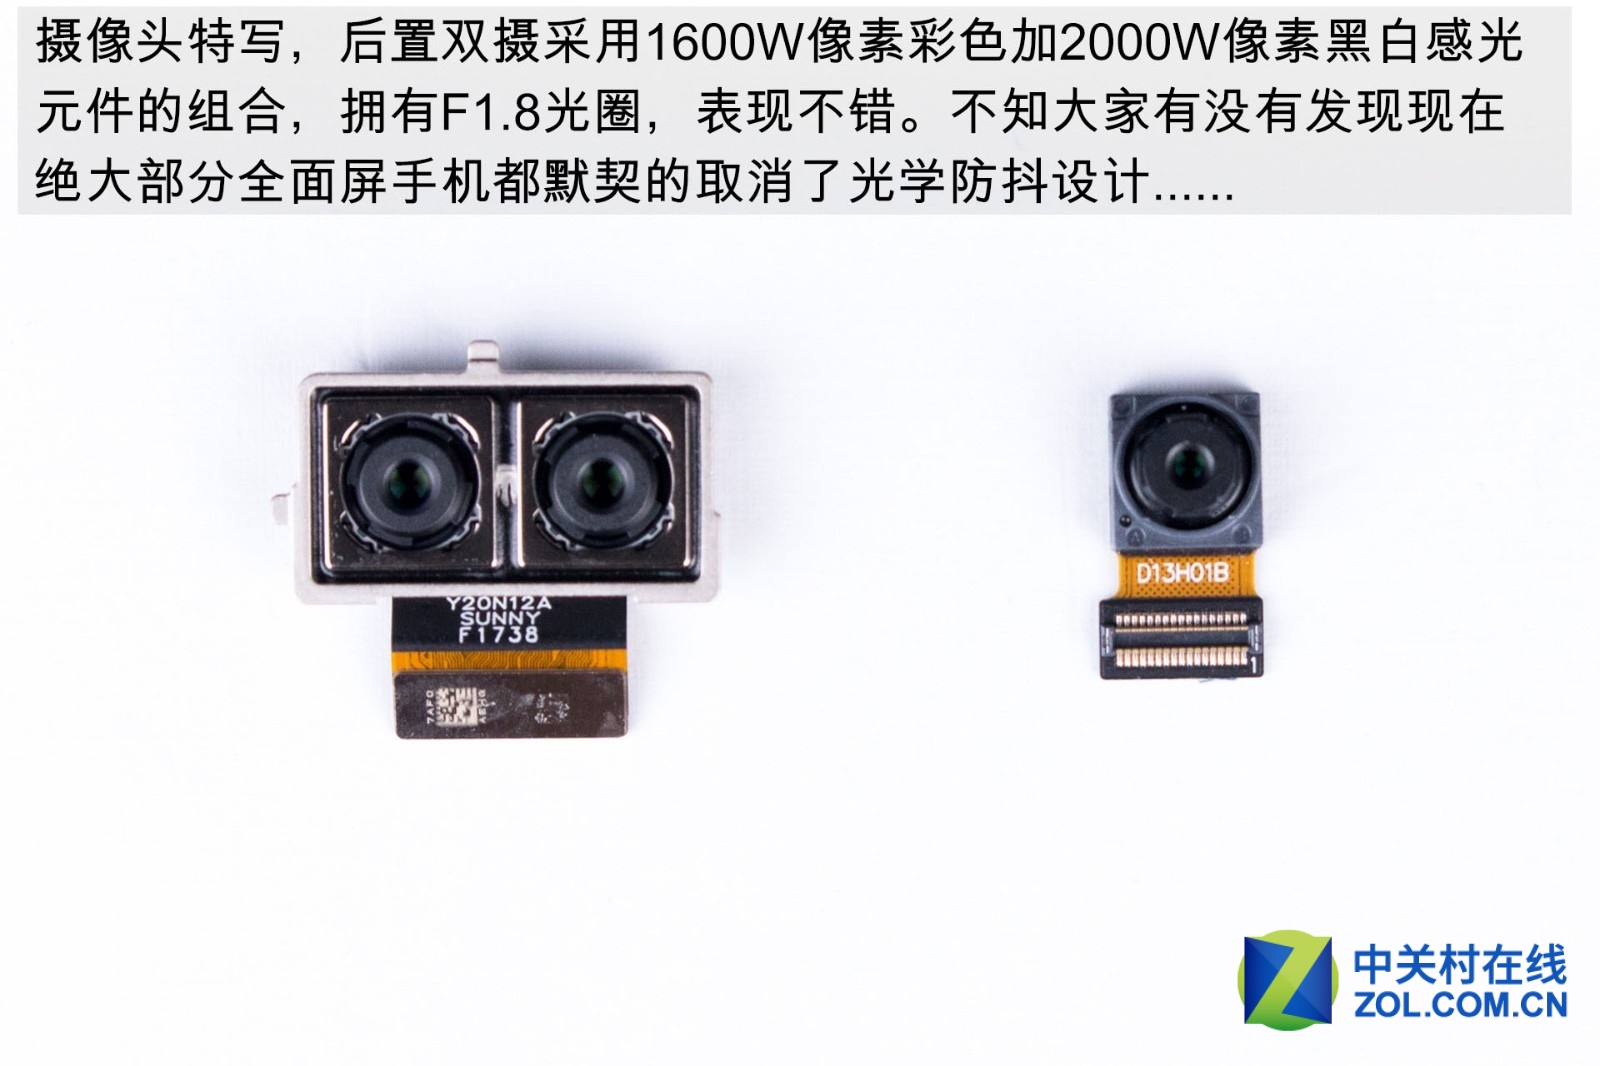
The phone boosts of the 16MP and 20MP black and white dual-rear camera setup which has a F/1.8 aperture. A majority of full-screen phones have canceled OIS function on the camera.
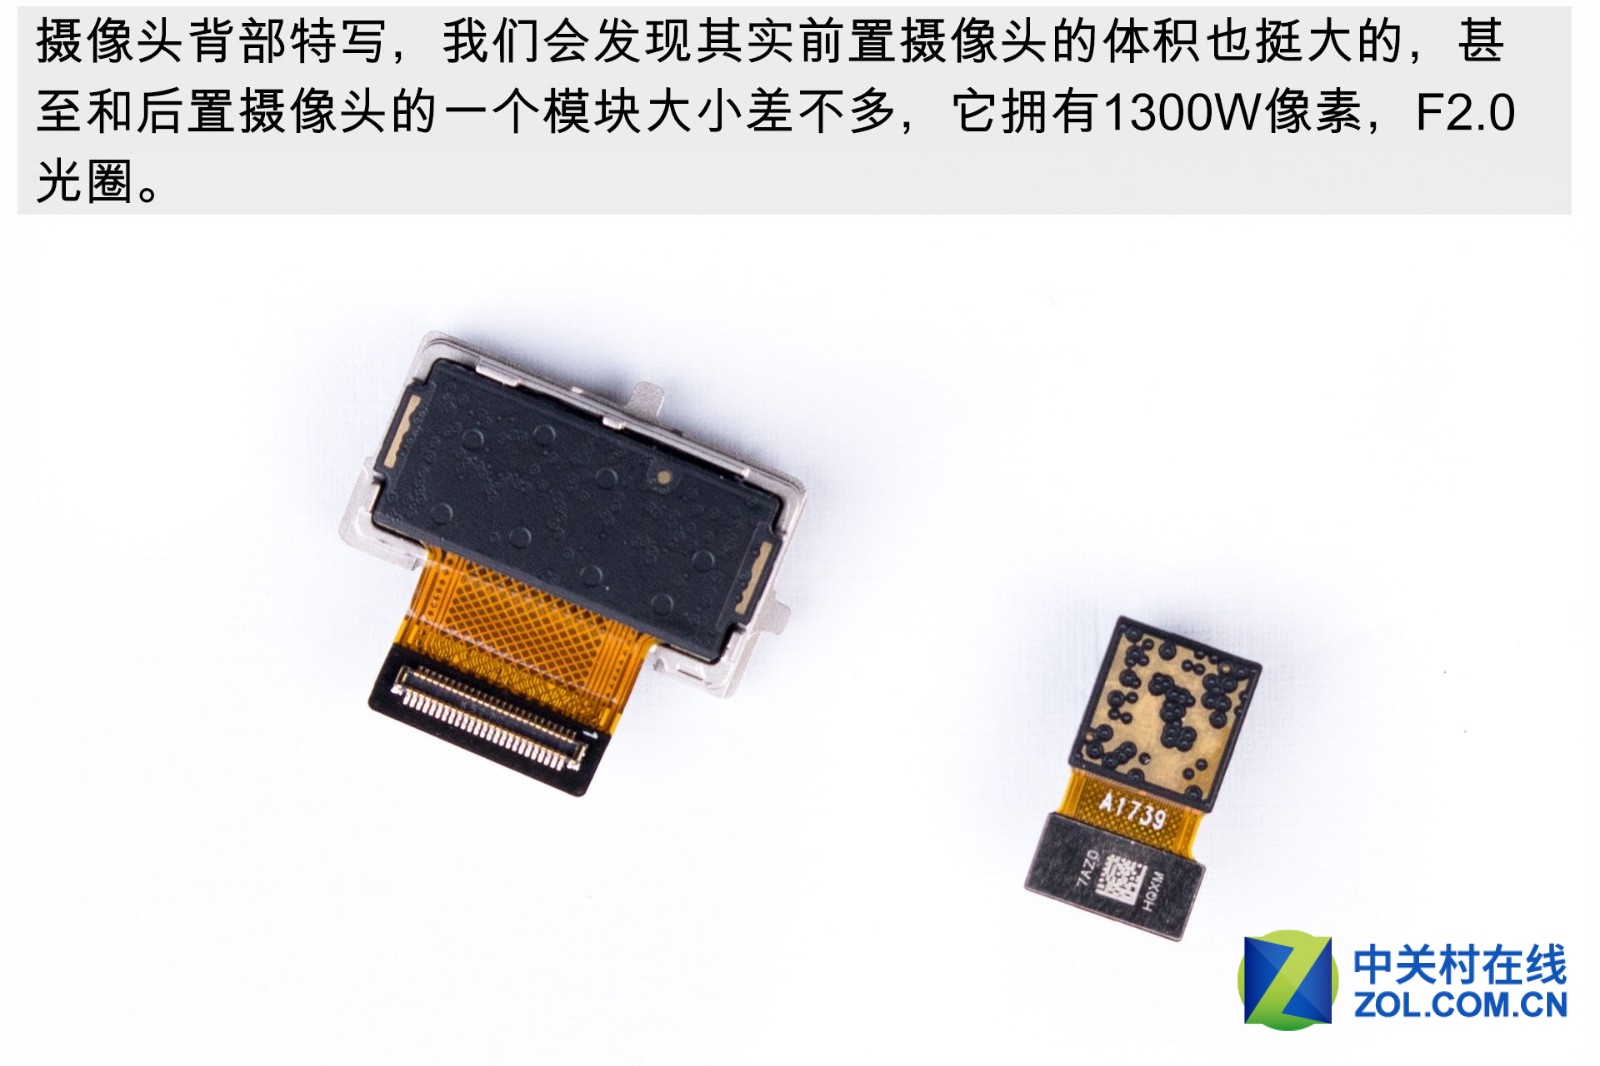
We can find that front camera has big volume. The phone comes with a 13MP front camera which has F/2.0 aperture.
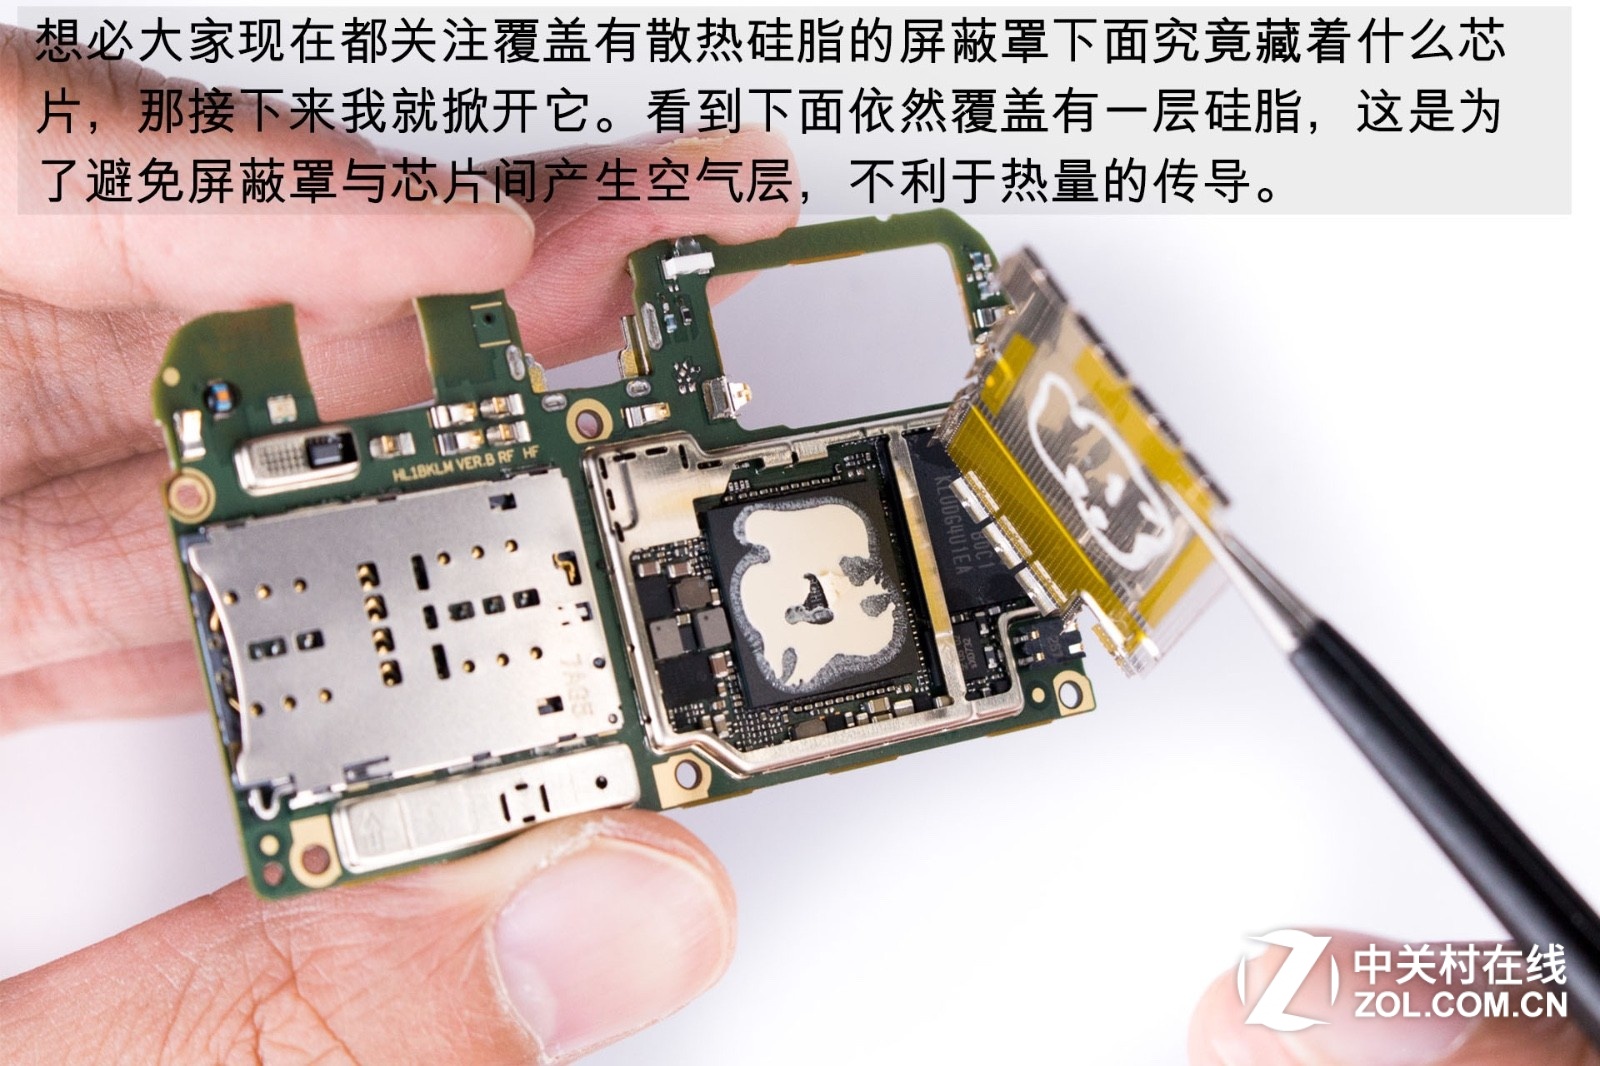
After removing shield cover, there still covers a layer of silicone, which is to avoid air layer caused by shield cover and chip because the air layer will hinder conducting heat.
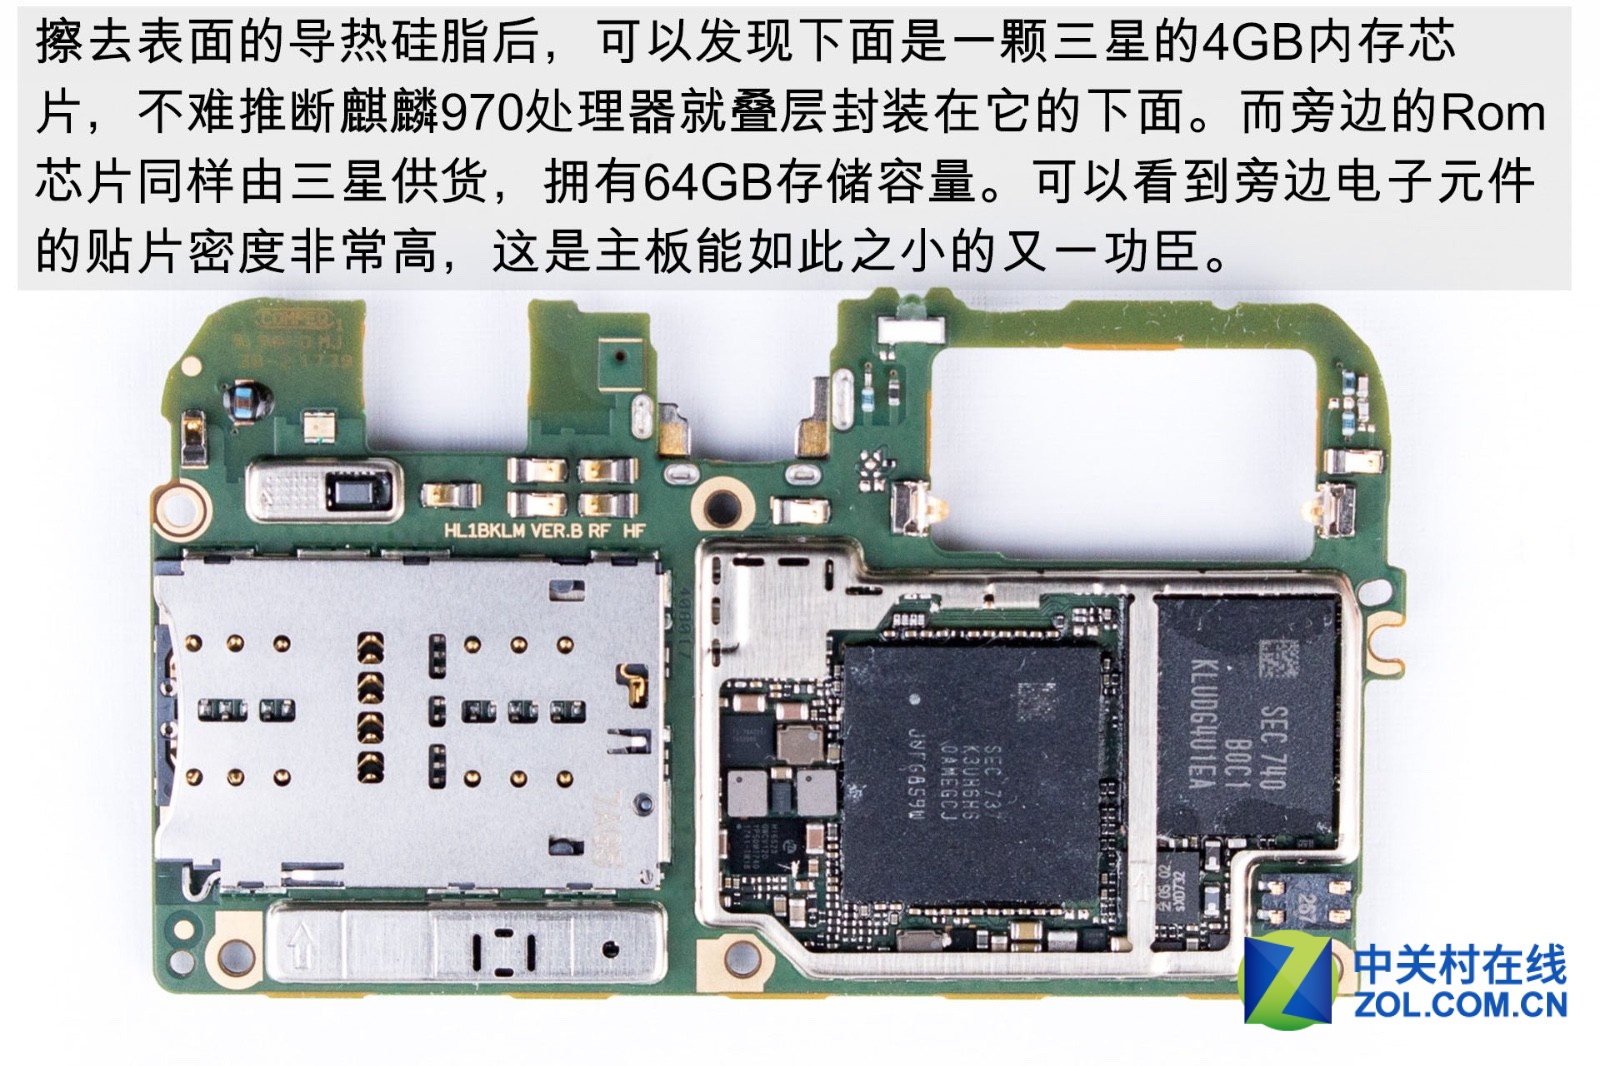
After erasing the conductive silicone on the surface, we can see 4GB of RAM chip below. It is obvious that Kirin 970 processor is sealed under the chip. The 64GB of ROM chip and the RAM chip is provided by Samsung.

Only a large shield cover on the front of the motherboard can be removed. The components under the cover have been densely arranged. The cooling design is not excellent, and no conductive material which can help dissipate is found. Most chips are made by Huawei, and they have optimized on power consumption and heating control.
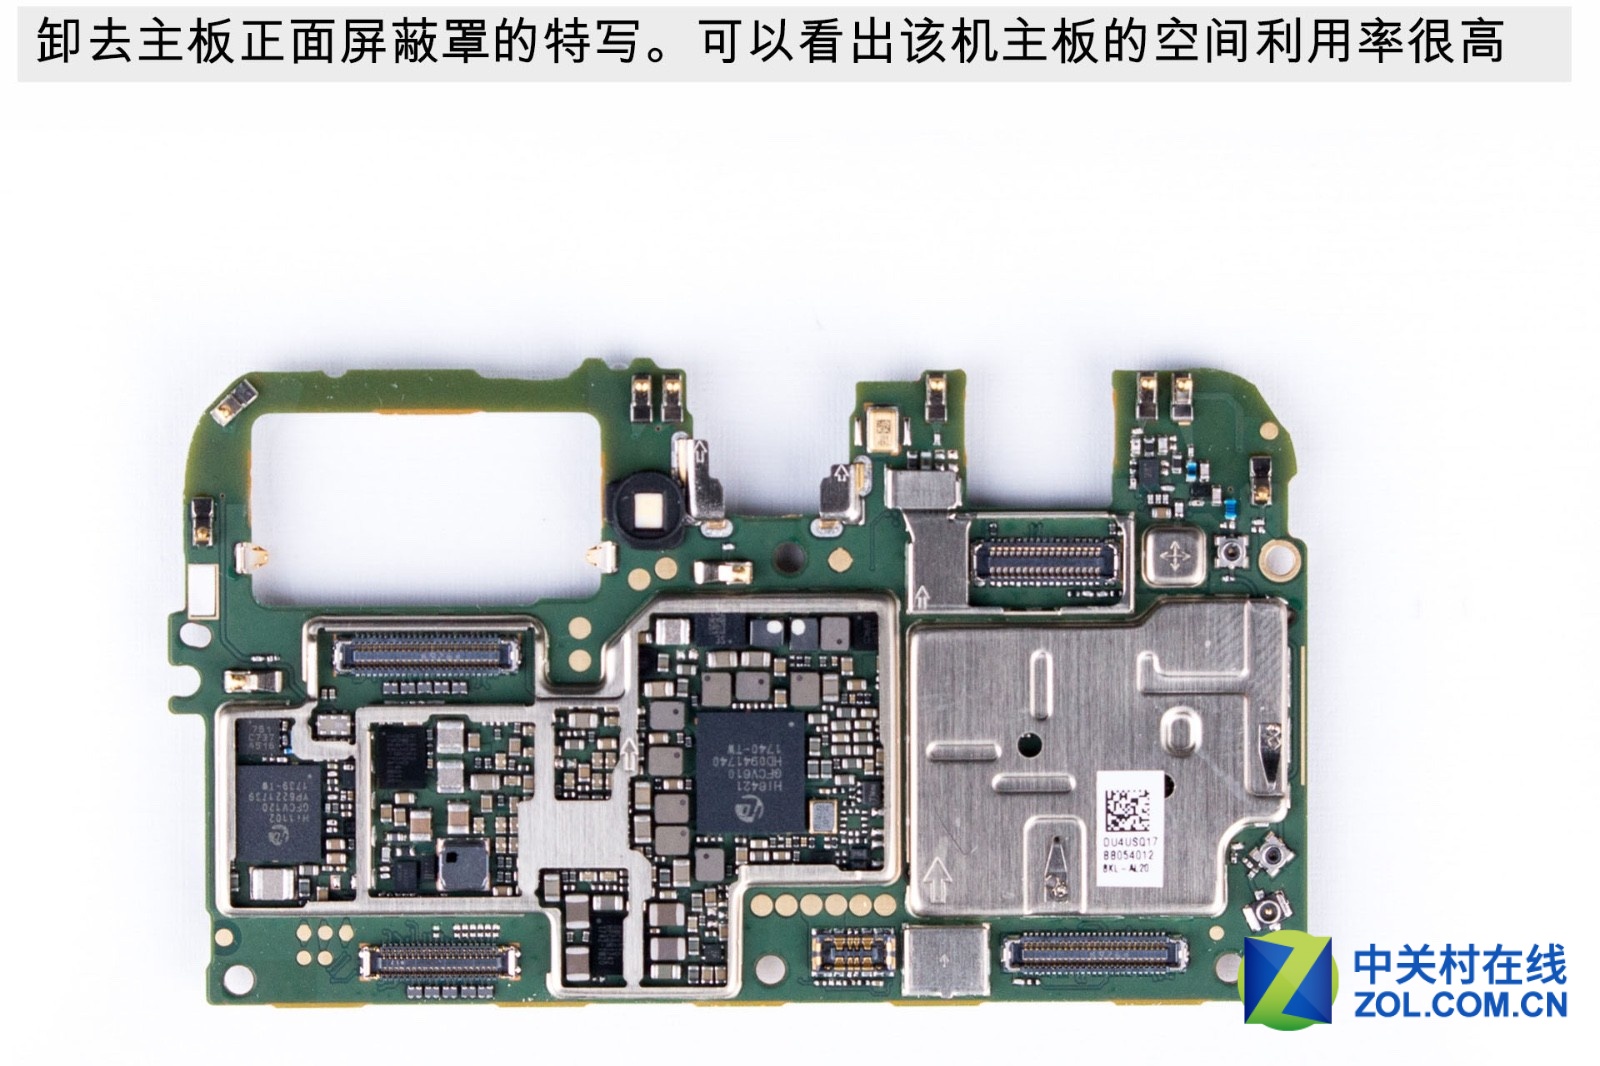
Close-up view without shield cover on motherboard’s front part. We can see that the phone’s motherboard has quite high space utilization.
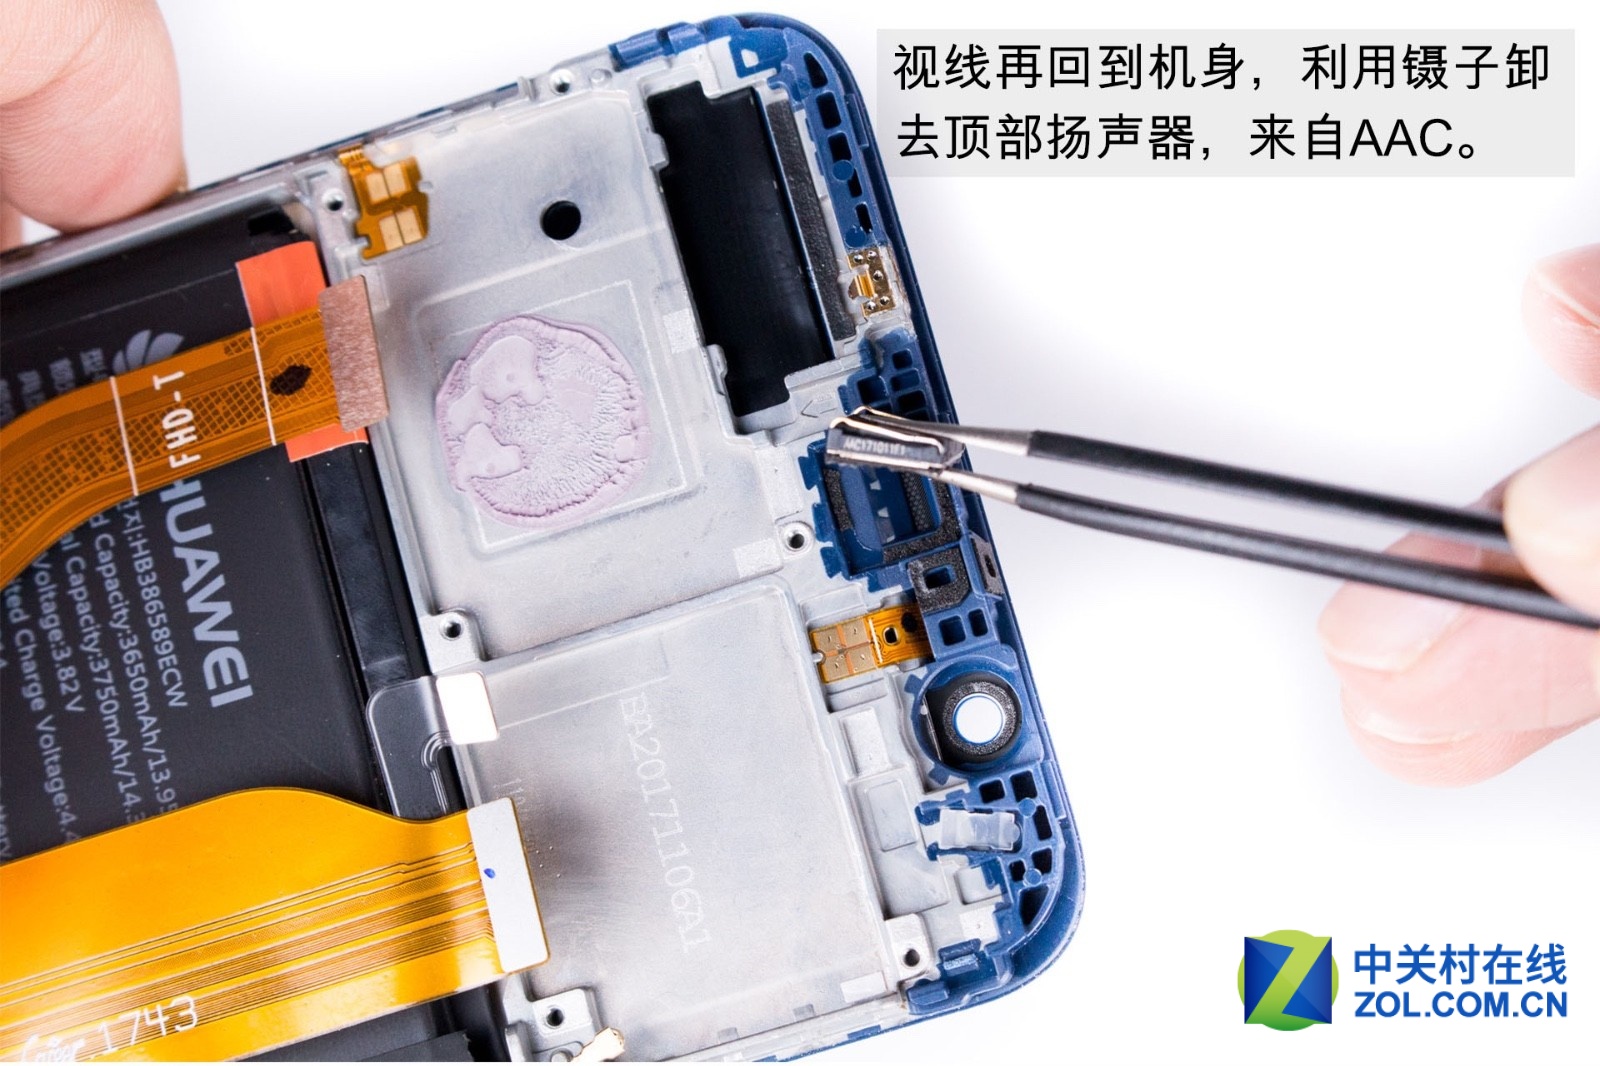
Utilize the clip to remove loudspeaker from AAC on the top.
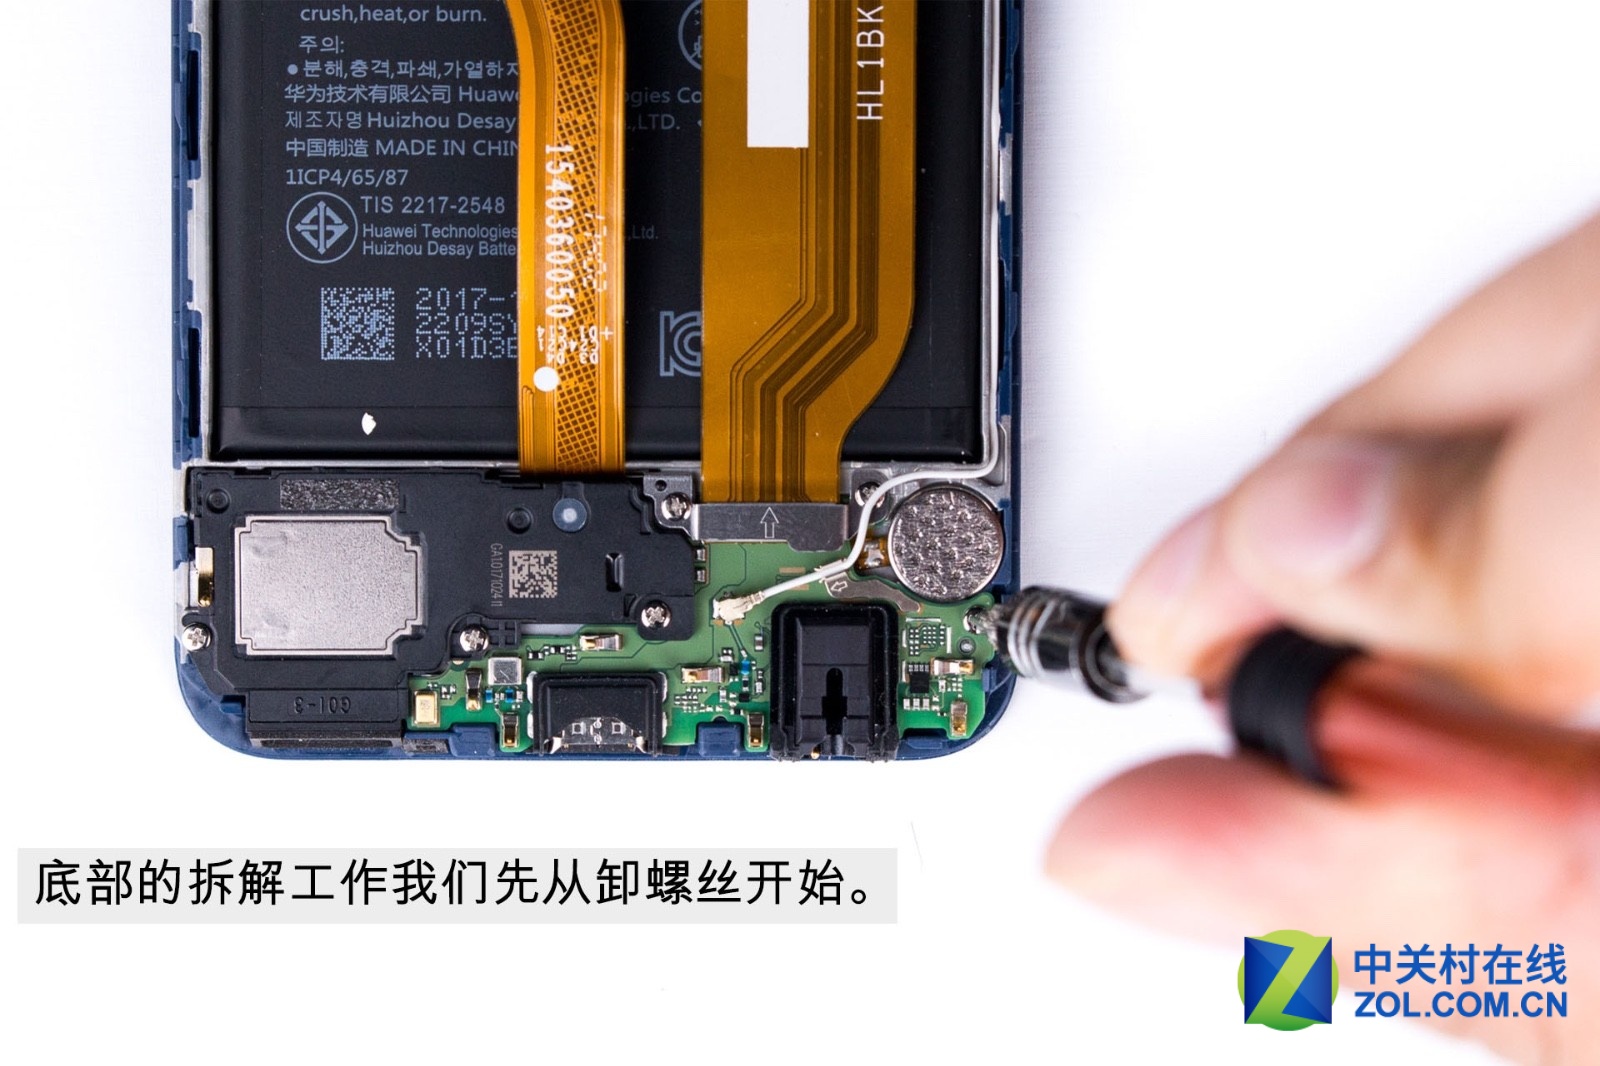
The teardown work at the bottom begins with screw removal.
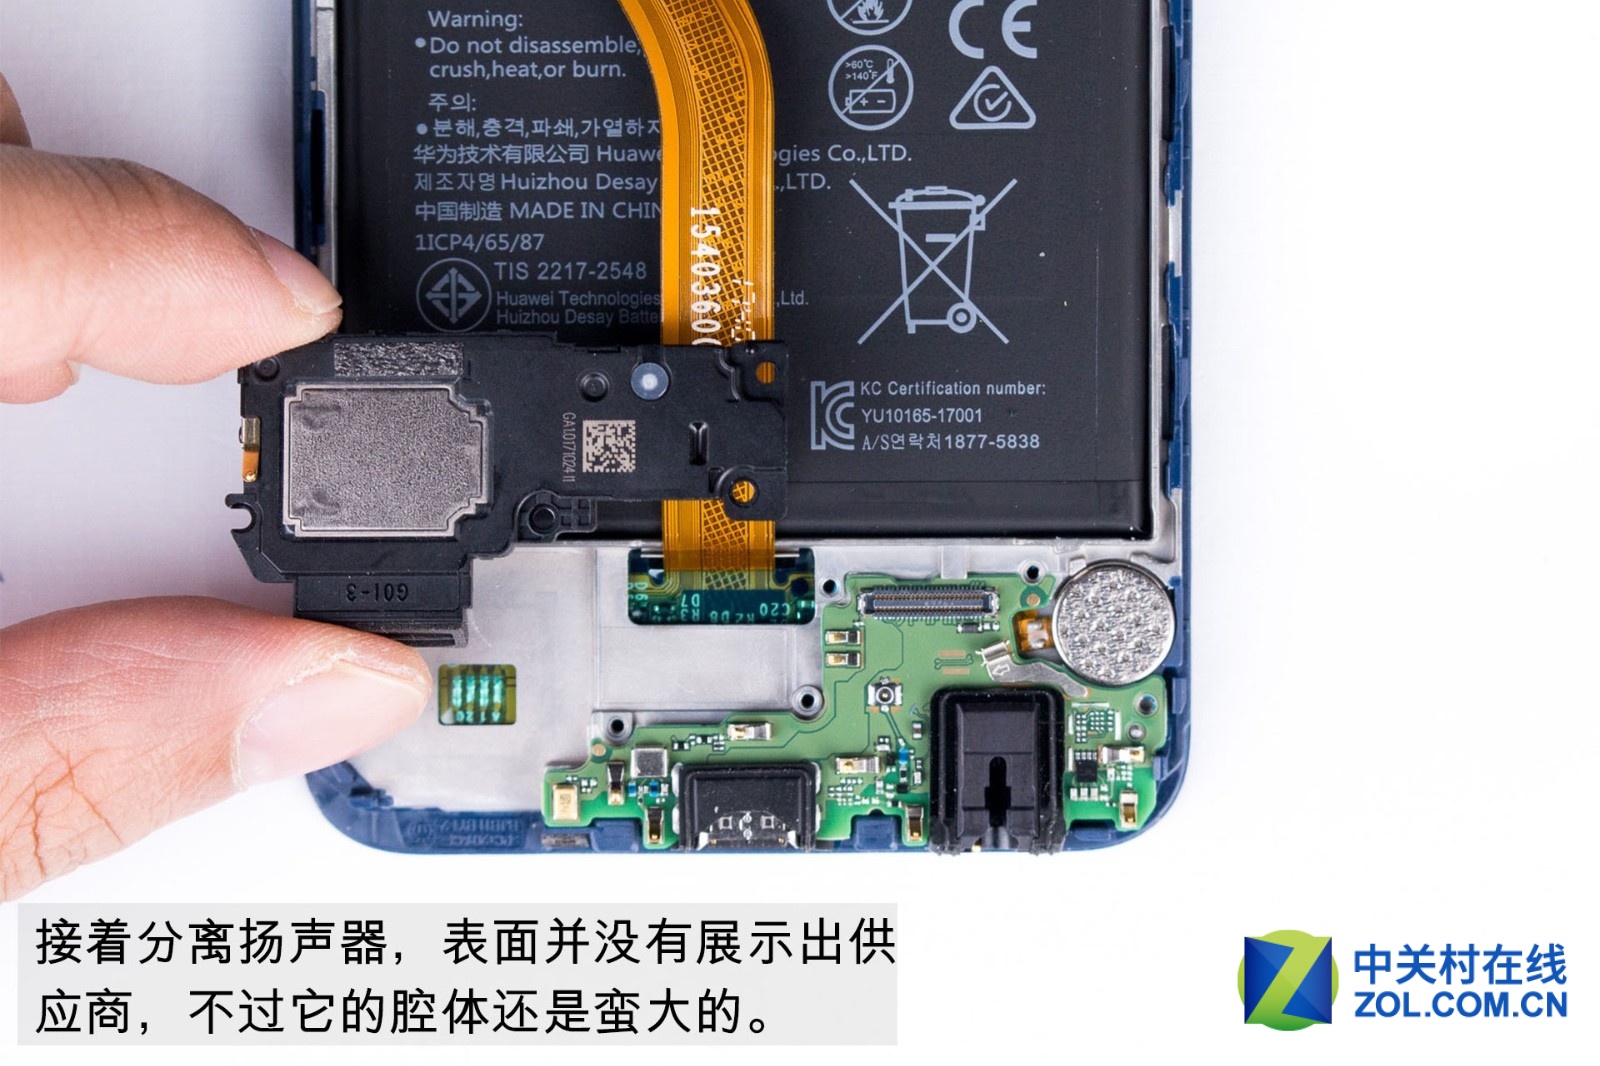
Remove the loudspeaker. The surface of the loudspeaker doesn’t show its supplier.
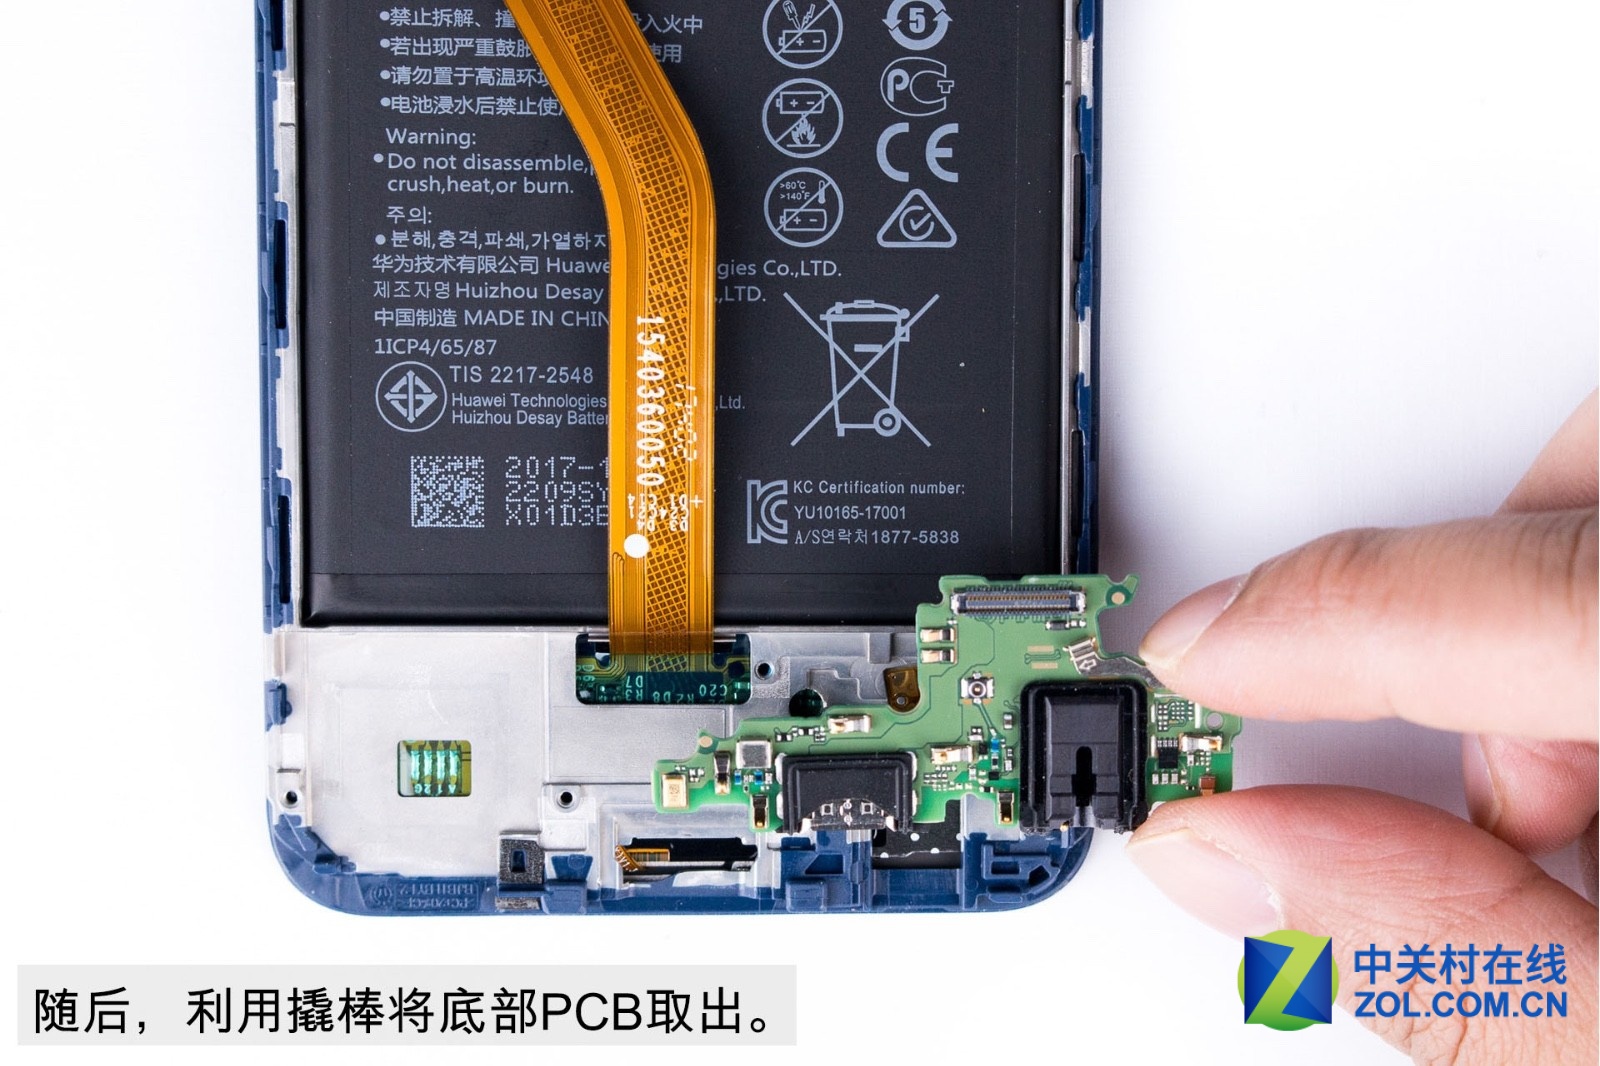
Next, utilize the pry to take out PCB at the bottom.
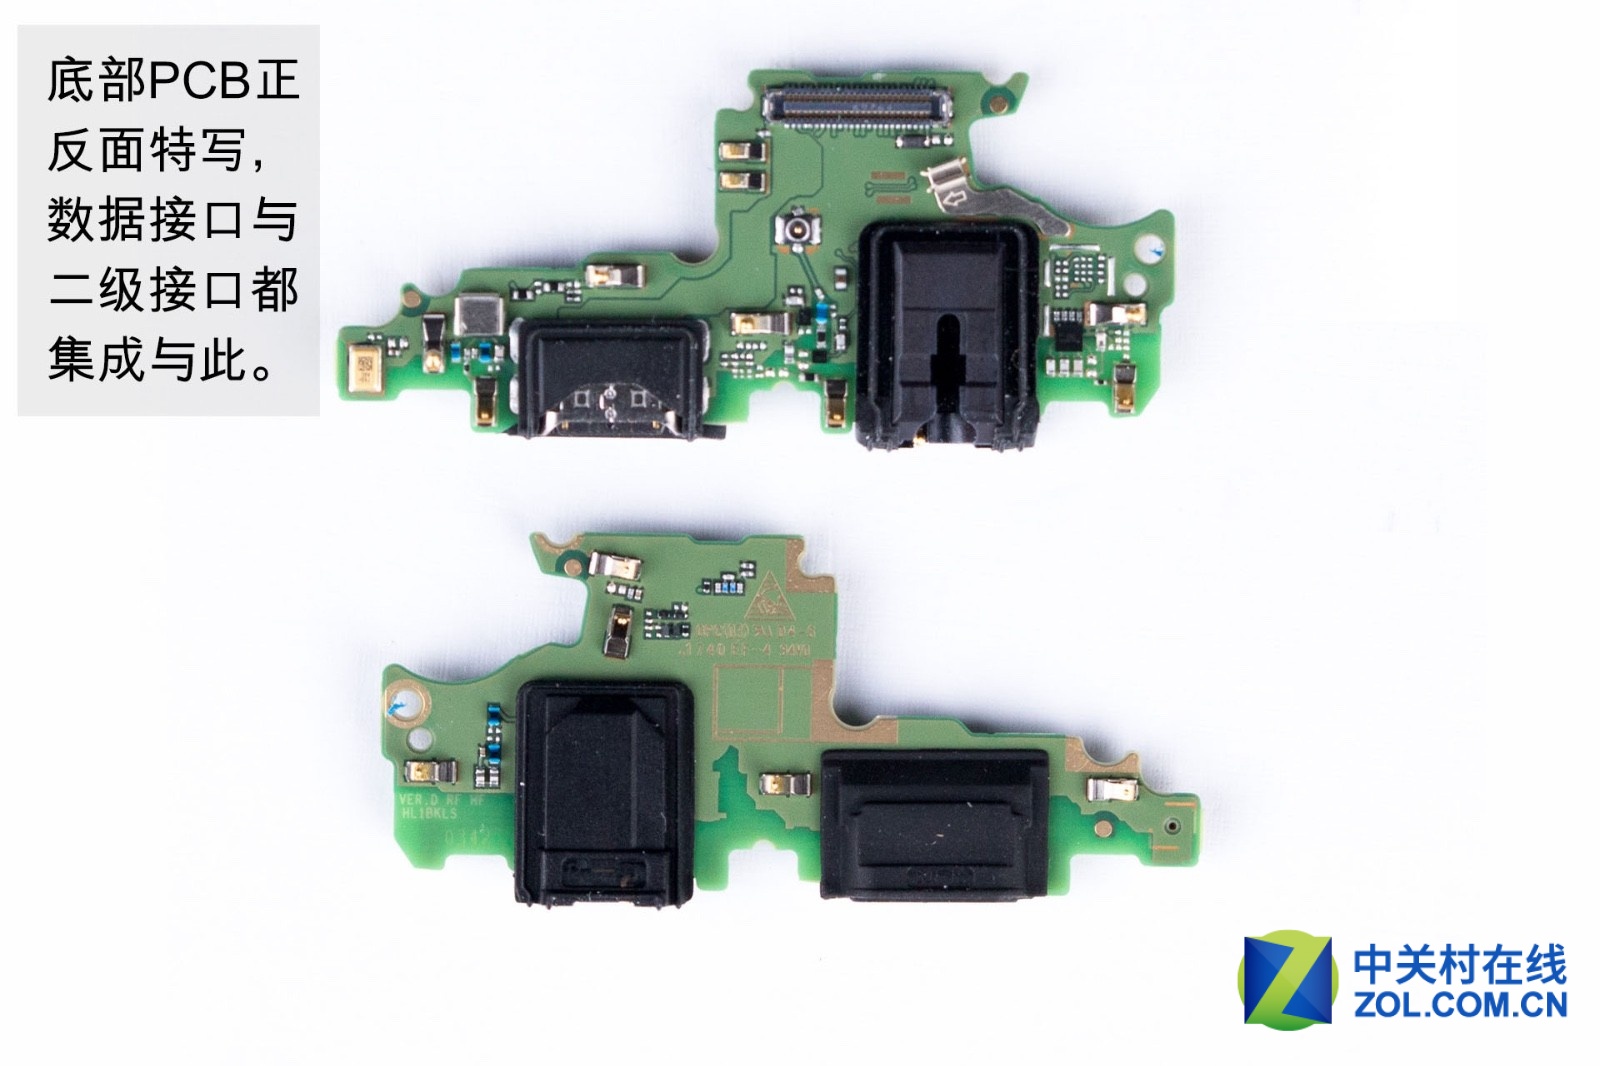
Close-up view of the front and back of the PCB at the bottom. Data port and level-2 port have been integrated here.
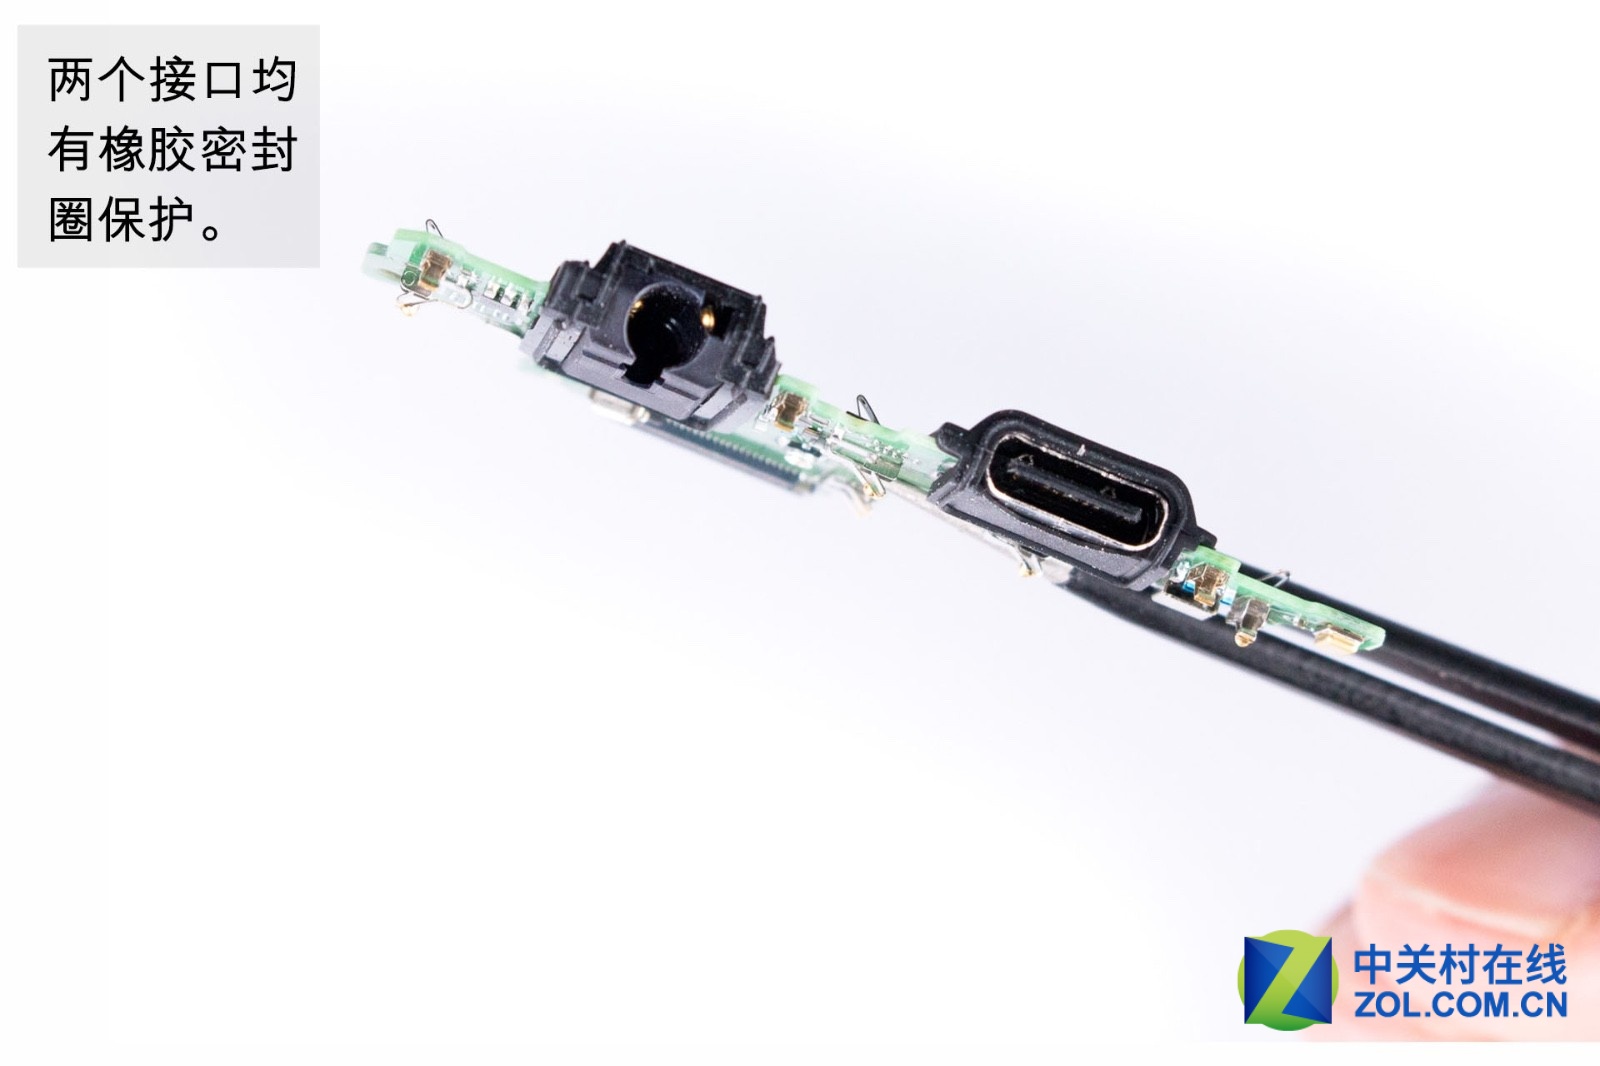
Both two ports have been protected by rubber sealing.
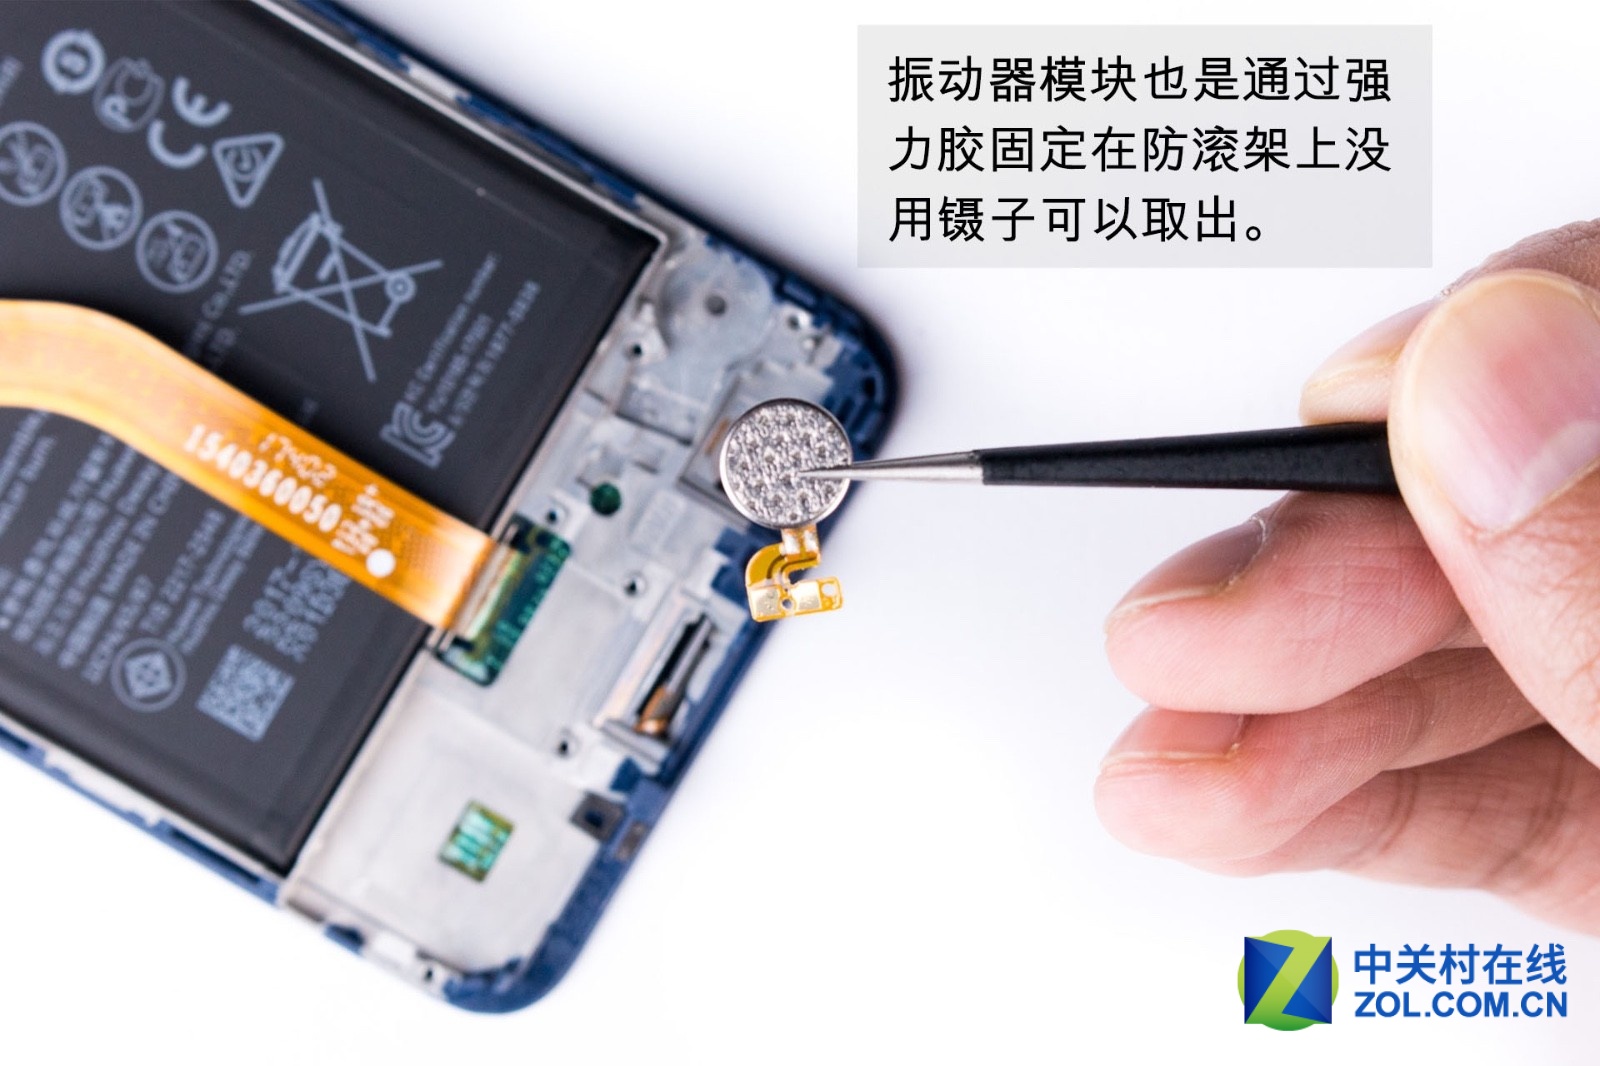
The vibrator module, fixed on roll cage by super glue, can be taken out by a clip.
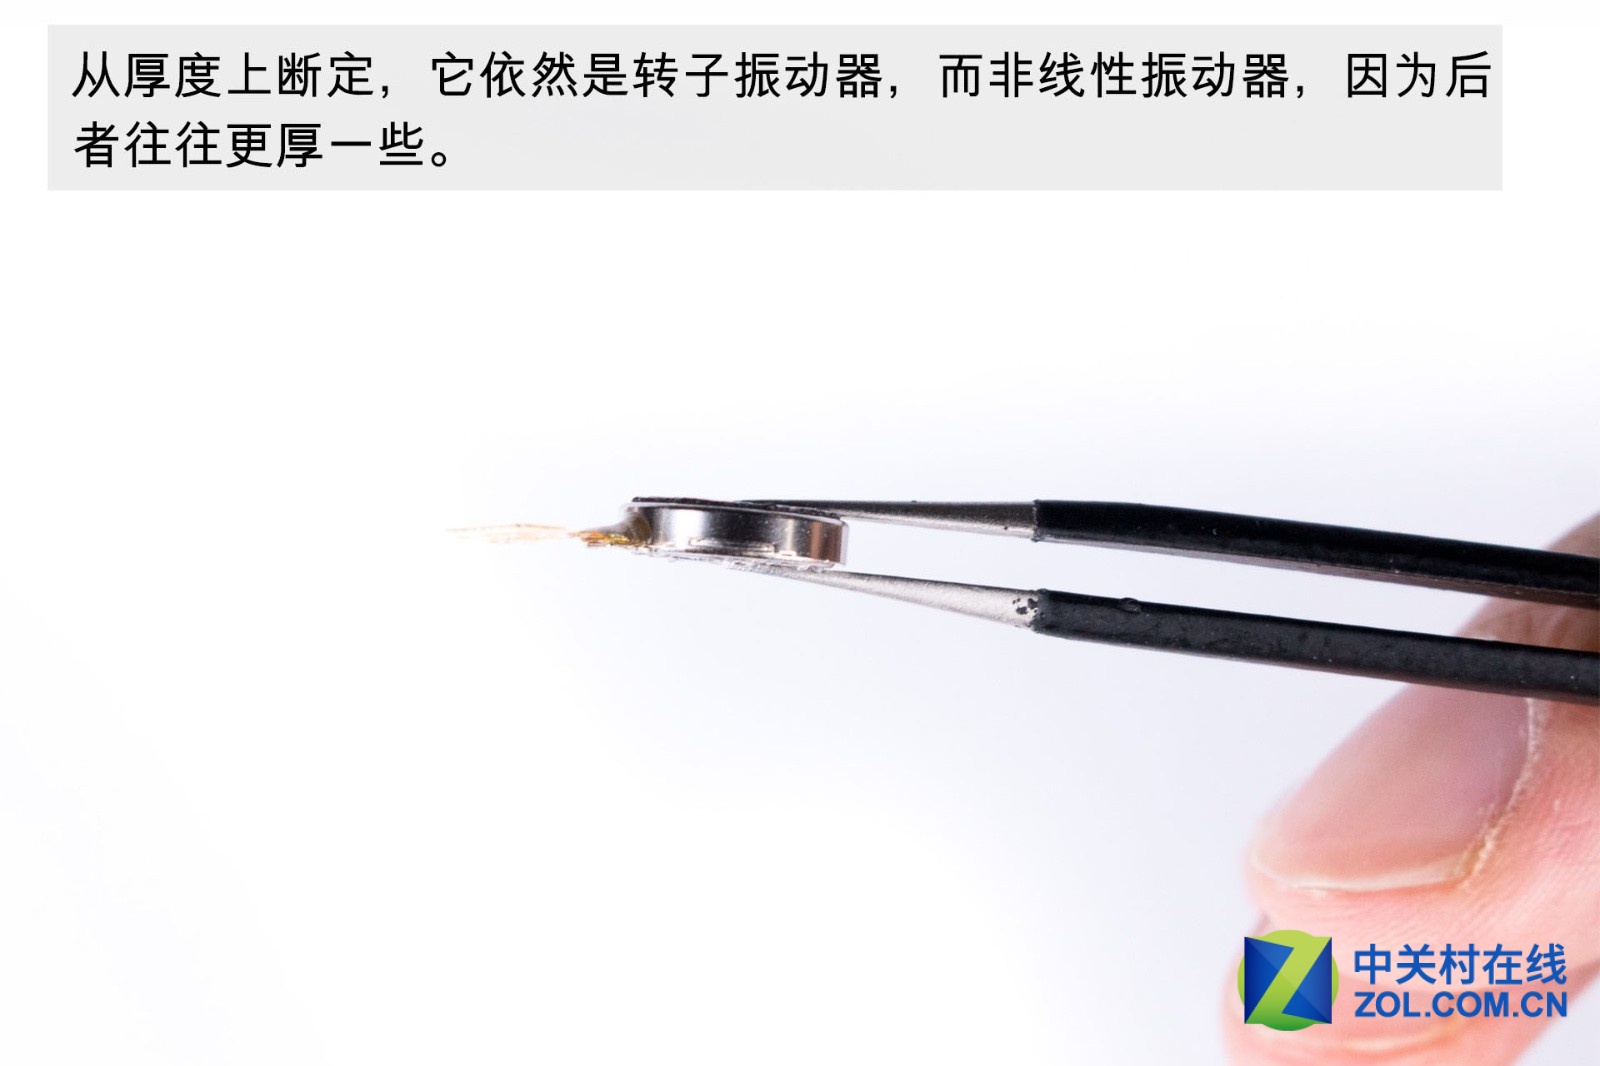
As far as thickness is concerned, the vibrator is rotor vibrator instead of non-linear vibrator because the latter is usually thicker than the former.
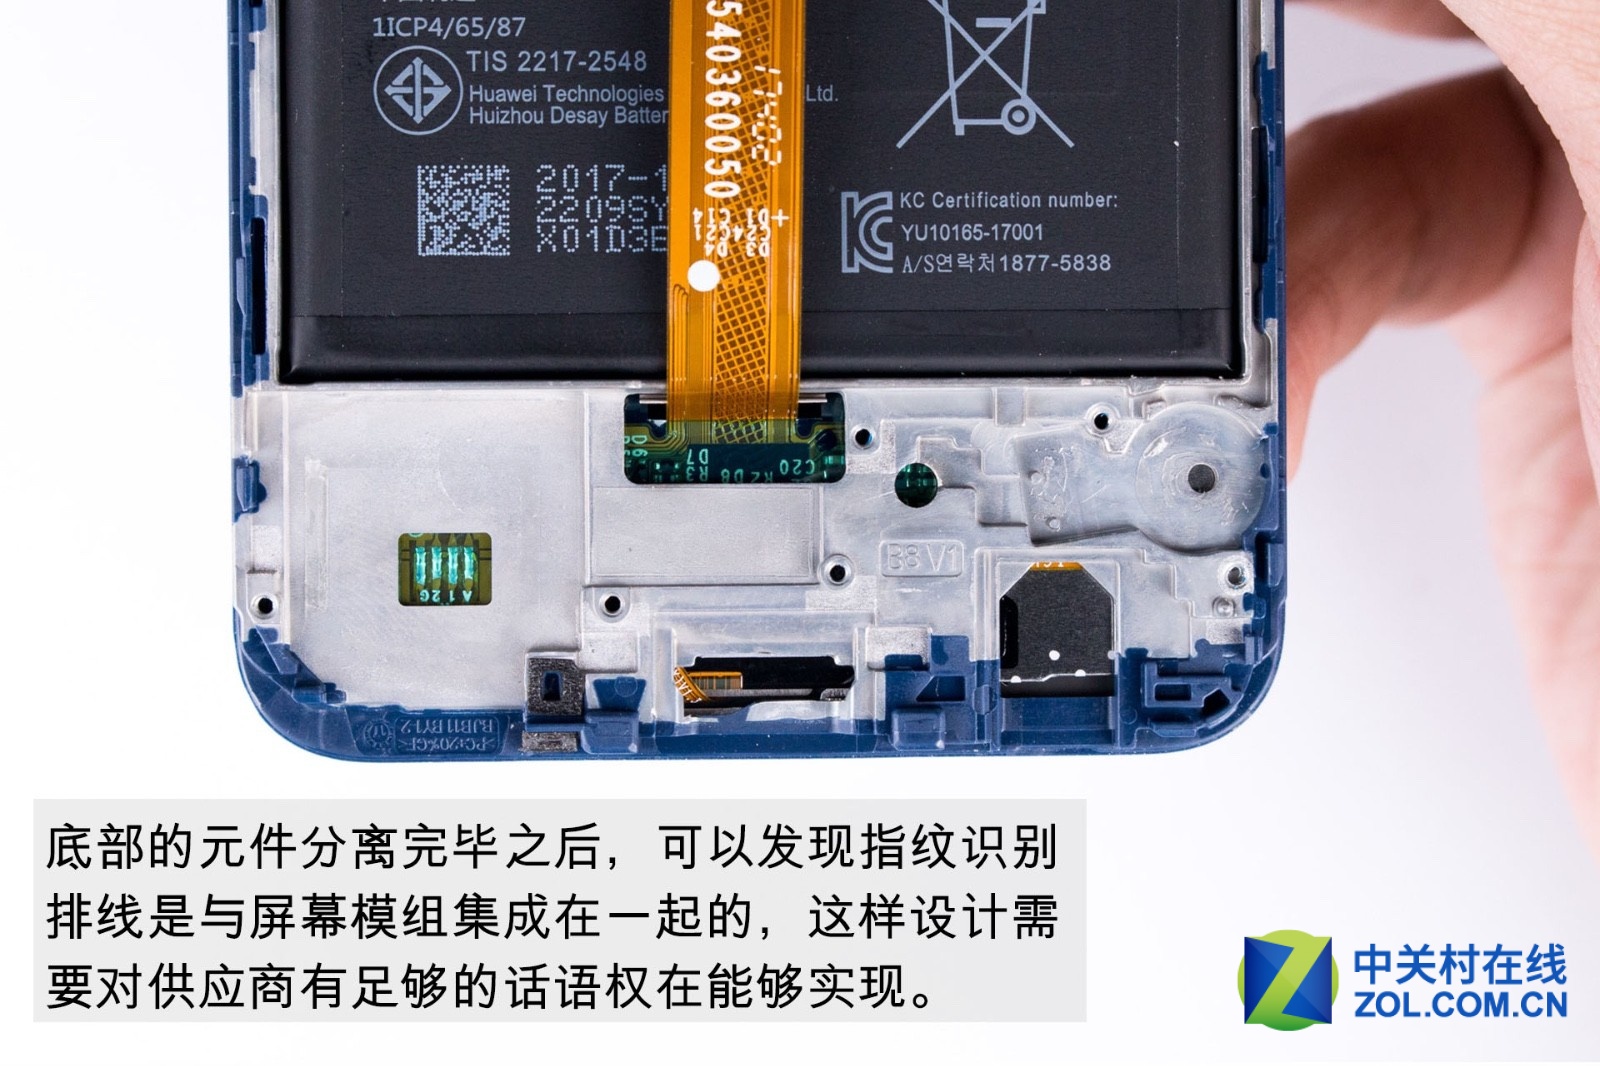
After the removal of components at the bottom, we can find that fingerprint reader wire ribbon is integrated into screen module.
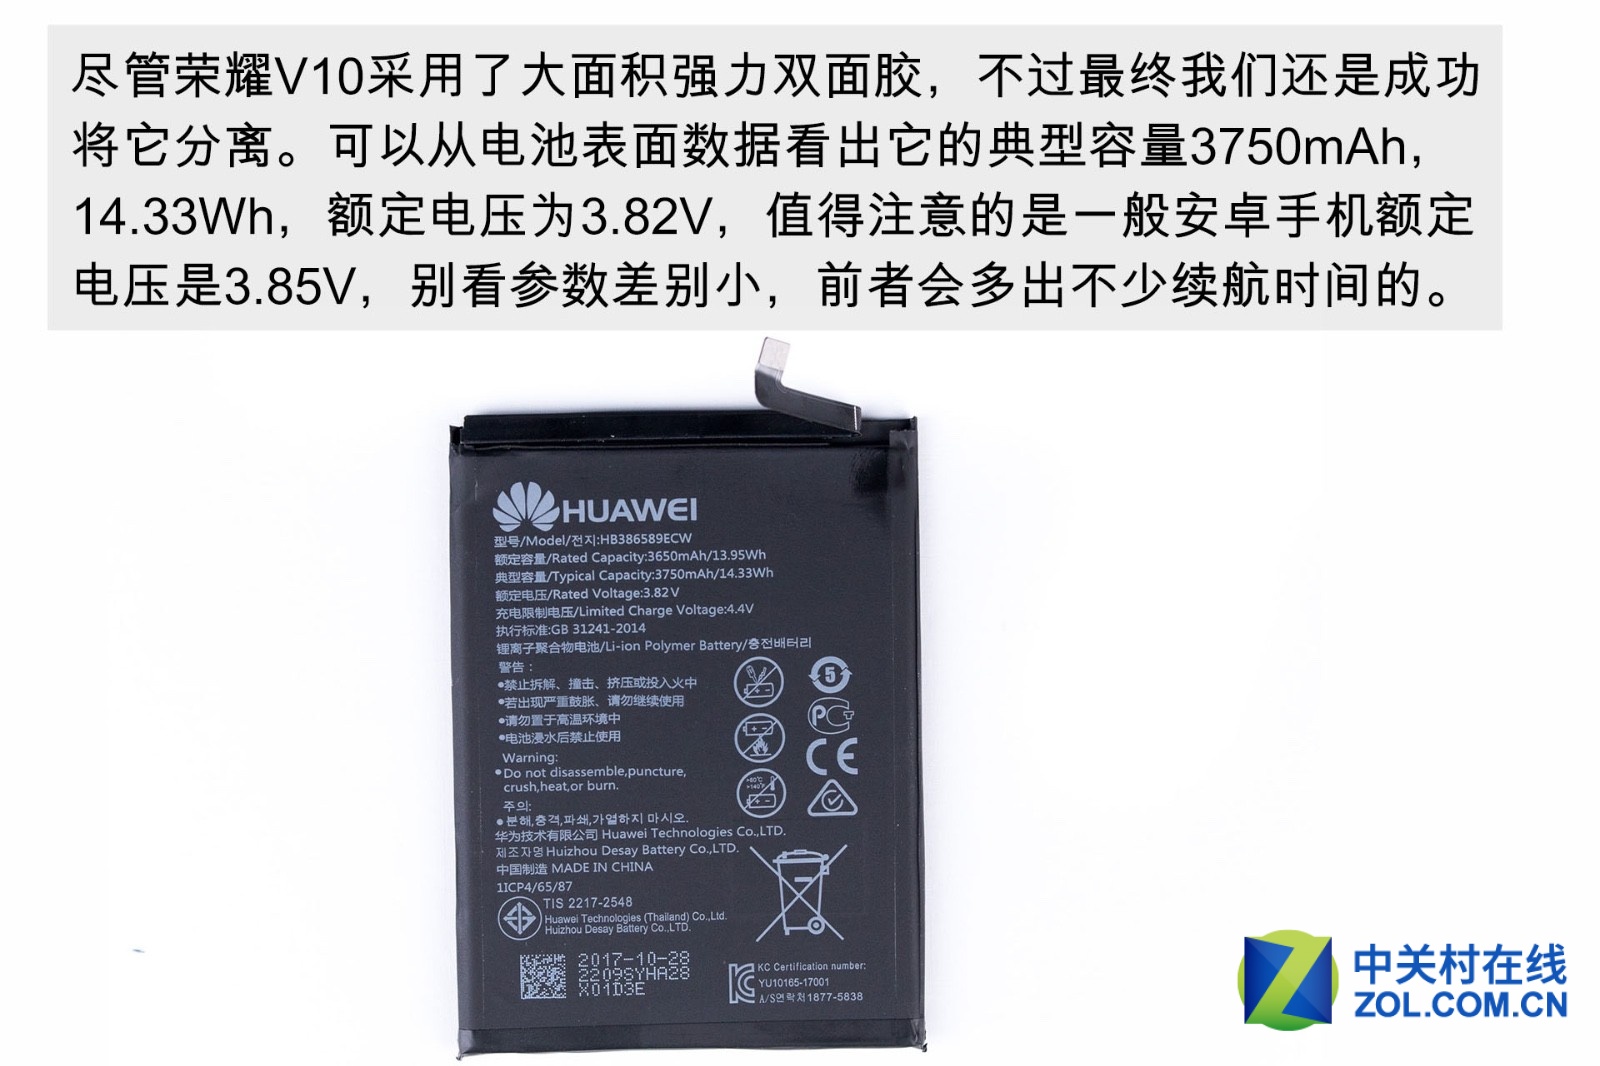
Although the Honor V10 adopts lots of double-side taps on battery, we finally successfully separate the battery. The data on its surface shows that the battery’s typical capacity is 3,750mAh, 14.33Wh and its rated voltage is 3.82V. Most Android phones’ rated voltage is 3.85V, but the V10’s rated voltage will expand battery’s life.
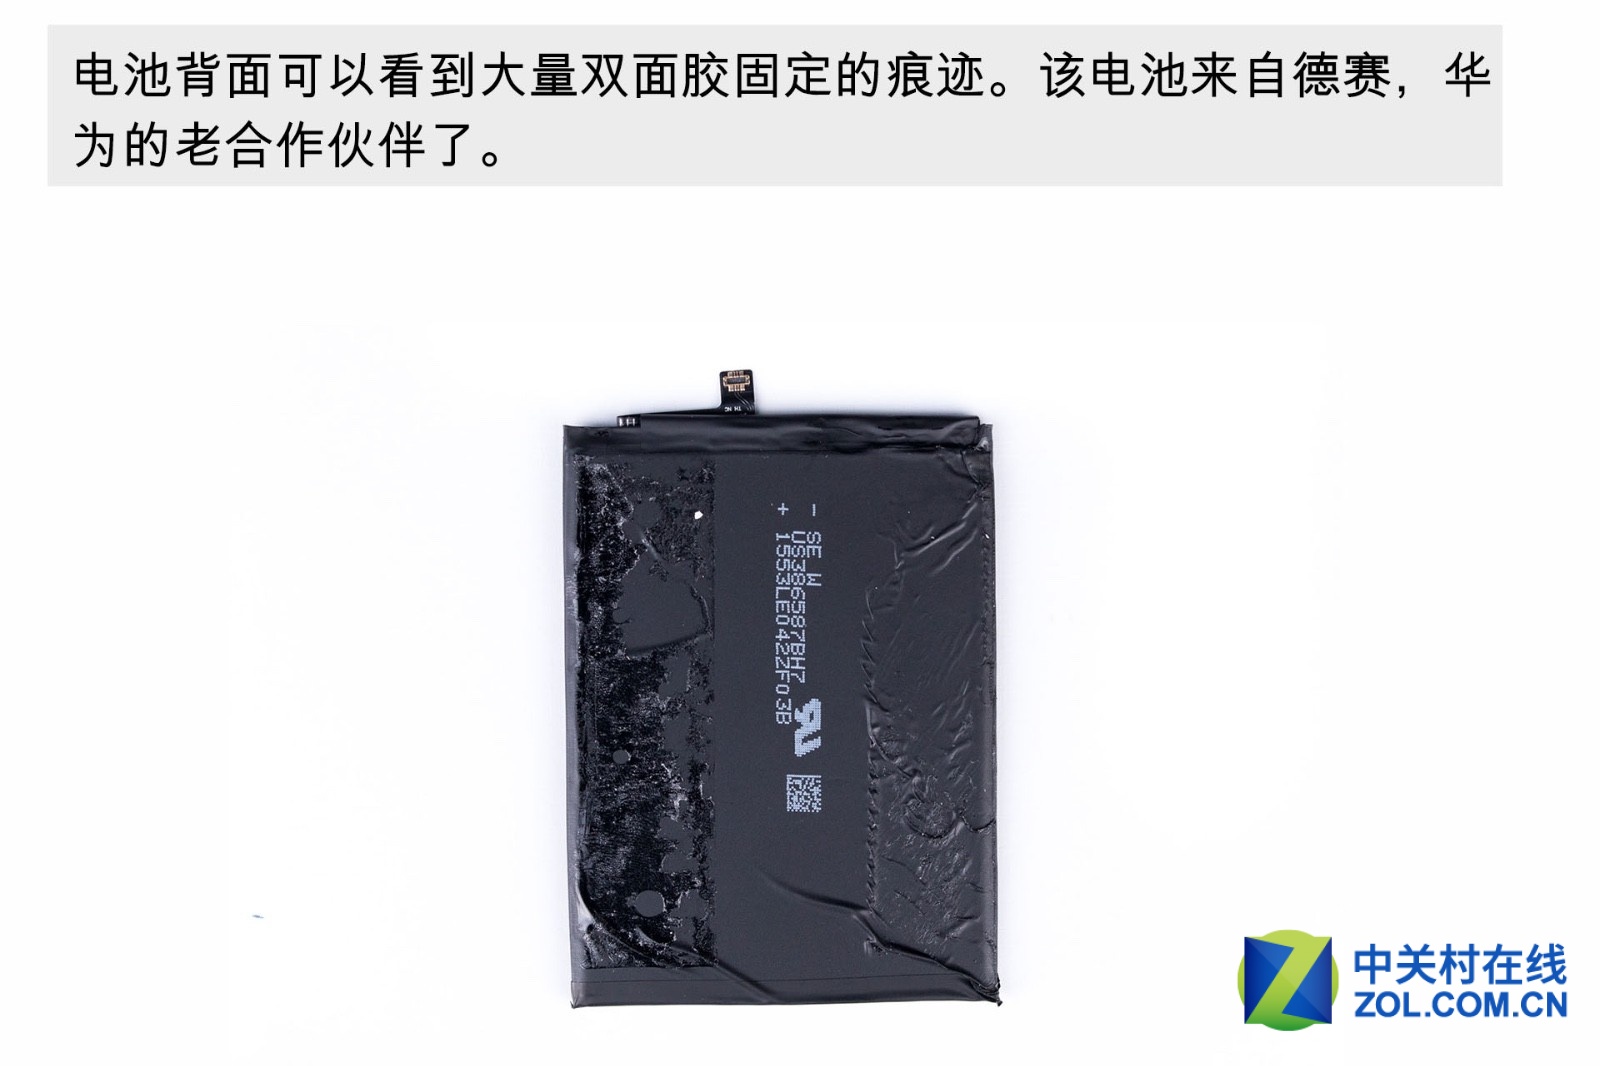
The sign of lots of double-sided tapes can be found on battery’s back. The Battery is from Desay which is Huawei’s long-cooperated partner.

Powered by Kirin 970 processor, undoubtedly the Honor V10 can bring good performance. After the teardown, we find the V10 has an excellent shatter-resistant function, and its connectors have been well protected. Besides, the phone has high space utilization.
Summary:
In general, the Honor V10 has excellent space utilization performance and good workmanship. The phone has an excellent sealing capability and good shatter-resistant performance.