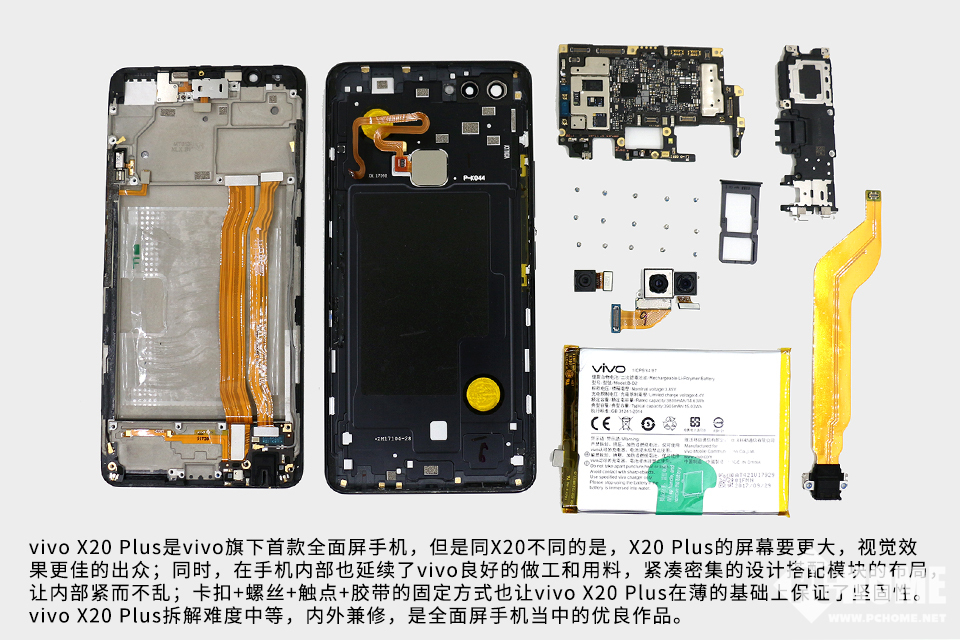
As Vivo’s first full-screen flagship, the Vivo X20 Plus has received much popularity with its excellent appearance design and high specification among young people. Now, let’s start the teardown to explore the phone’s internal design.
The phone adopts good material comprehensive protection on its components. The teardown on the Vivo X20 Plus is at a medium level of difficulty.
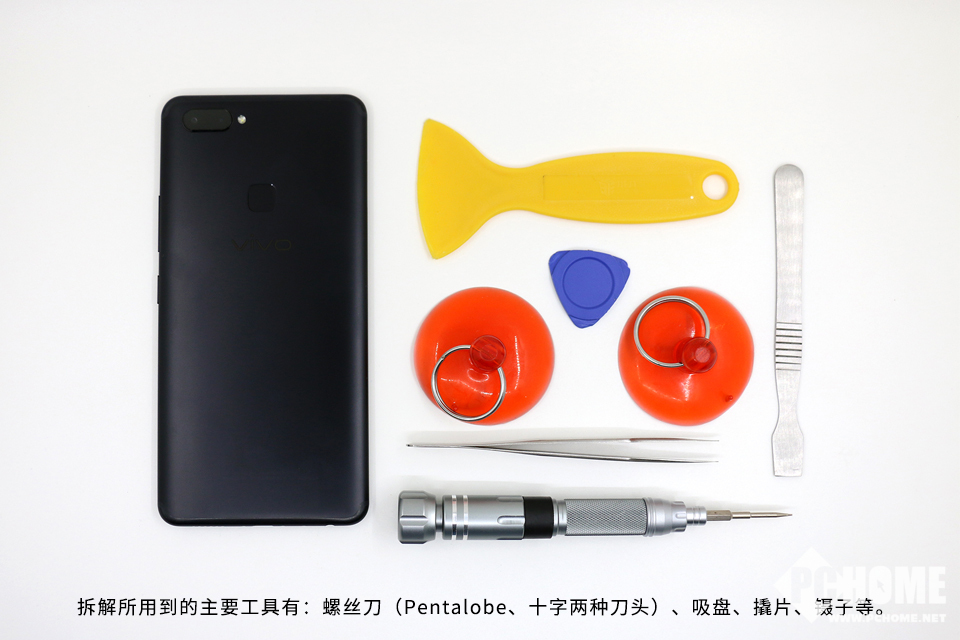
The main tools during the teardown process include screwdriver (Pentalobe and Phillips), suction cup, pry, clip and so on.
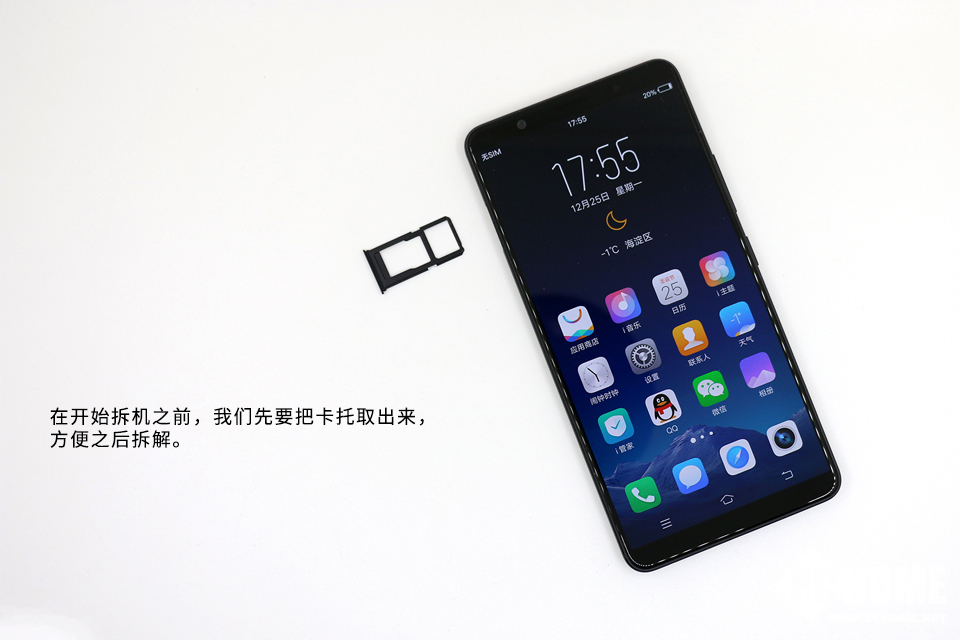
We need to remove the SIM card tray before the phone’s teardown.
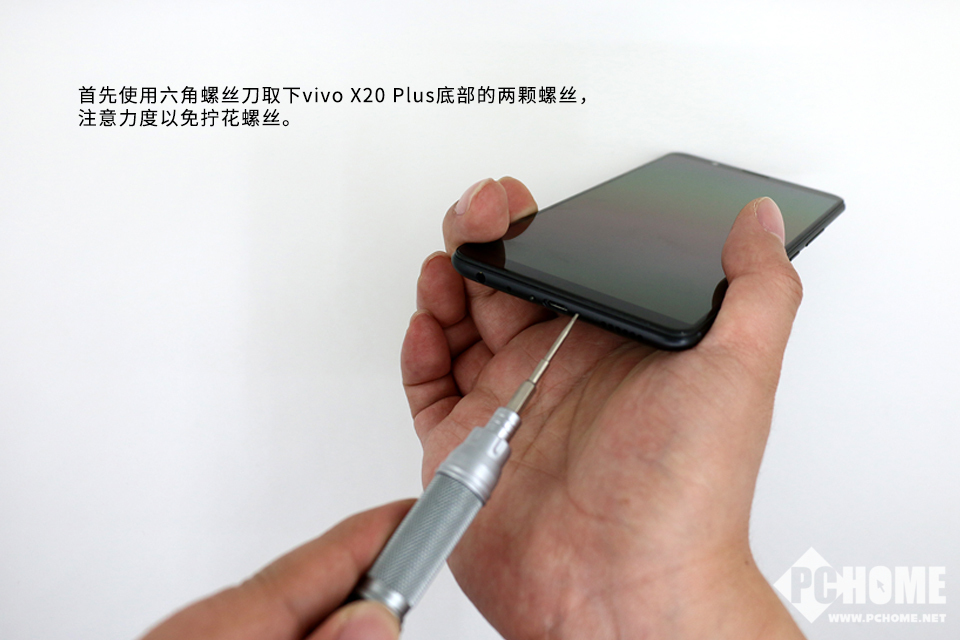
First of all, use a hexagonal screwdriver to remove two screws at the vivo X20 Plus’ bottom. Control your strength during this process to avoid breaking screw.
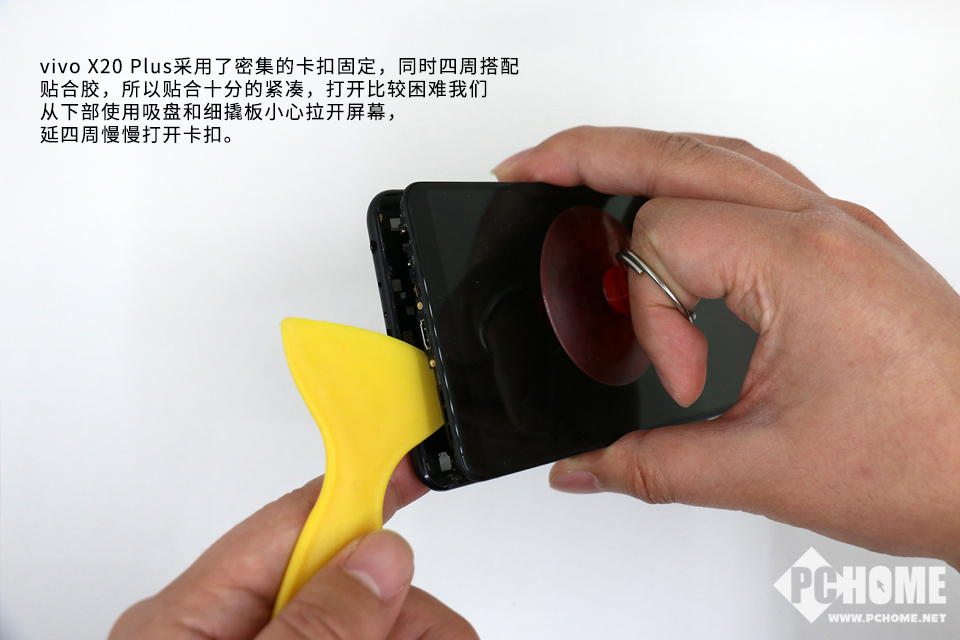
The phone has used dense clip fixing method combined with lamination glue on its surroundings, which make it difficult to open the smartphone. We utilize a suction cup and crow plate to remove the screen.
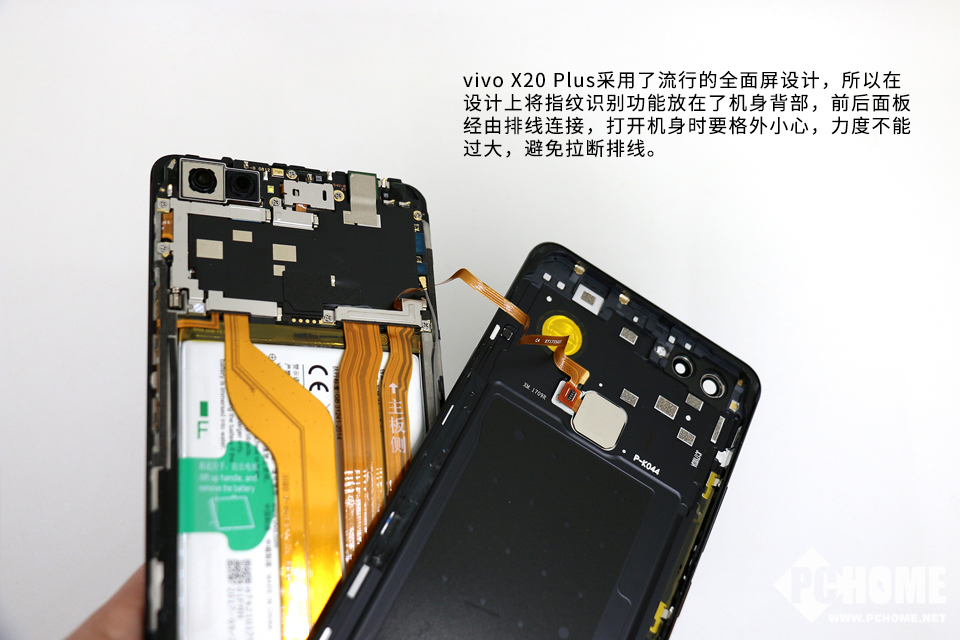
The phone adopts popular full-screen design, so its fingerprint reader module is designed on the back. The front plate and the back cover are connected via soft cable. Be careful and not to break the wire.
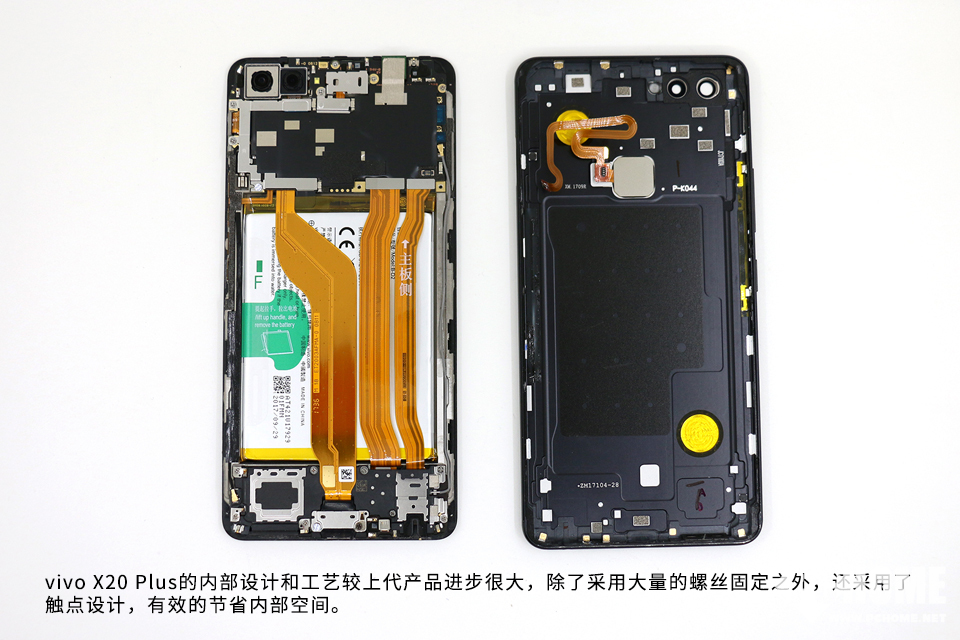
The phone has better internal design and workmanship compared with its predecessor. Except for screw fixation, the phone also adopts contact design to save internal space.

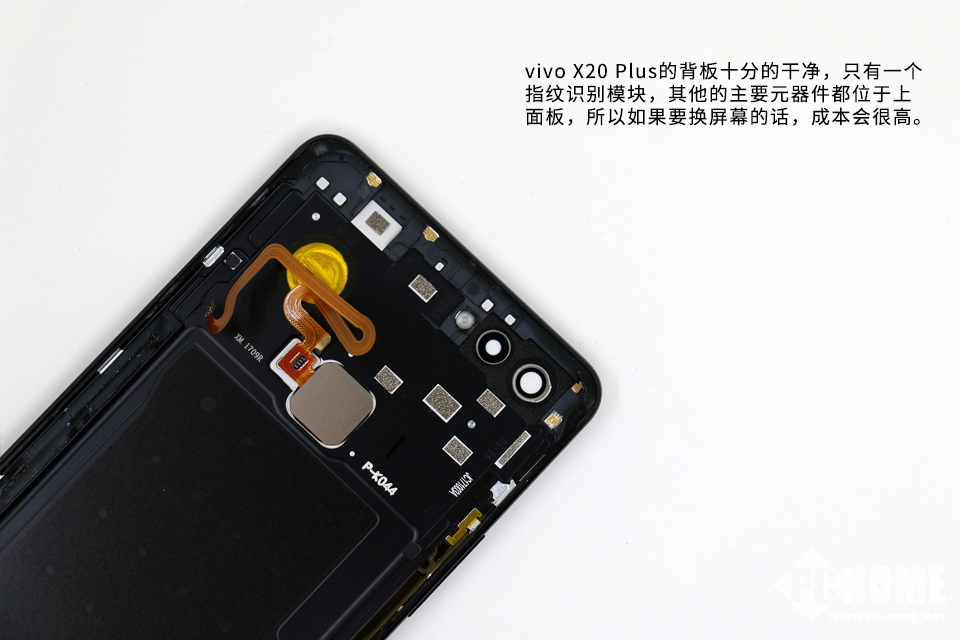
Only the fingerprint reader module is placed on the back. Other main components are on the screen. So the cost will be high if the user wants to change a new screen.
Many components have been densely placed on the screen. Basically, all the areas have been protected by the shield cover and graphite layer.
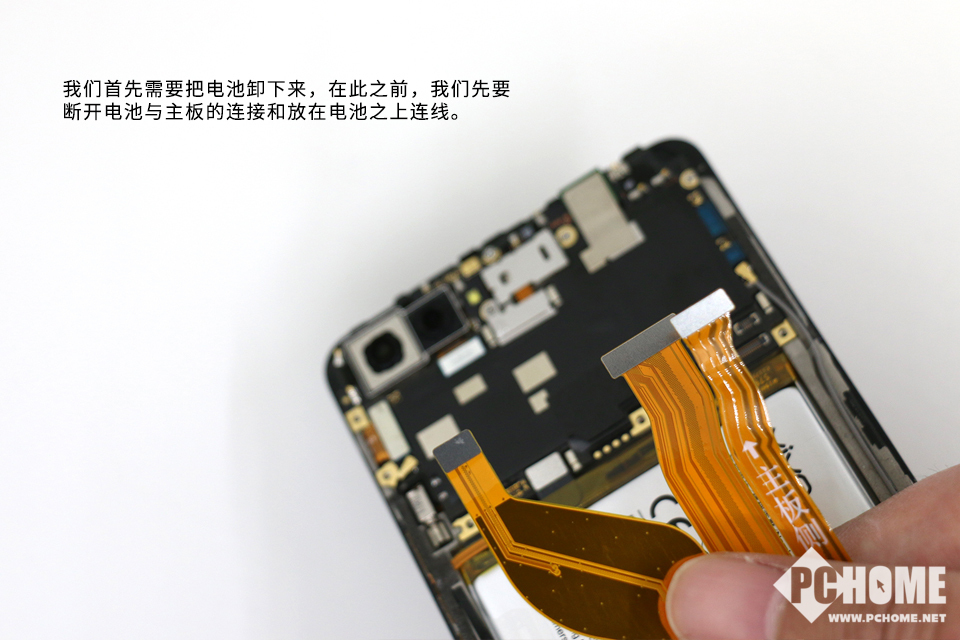
Before removing the battery, we need to disconnect the wire on the battery which connects the battery and motherboard.
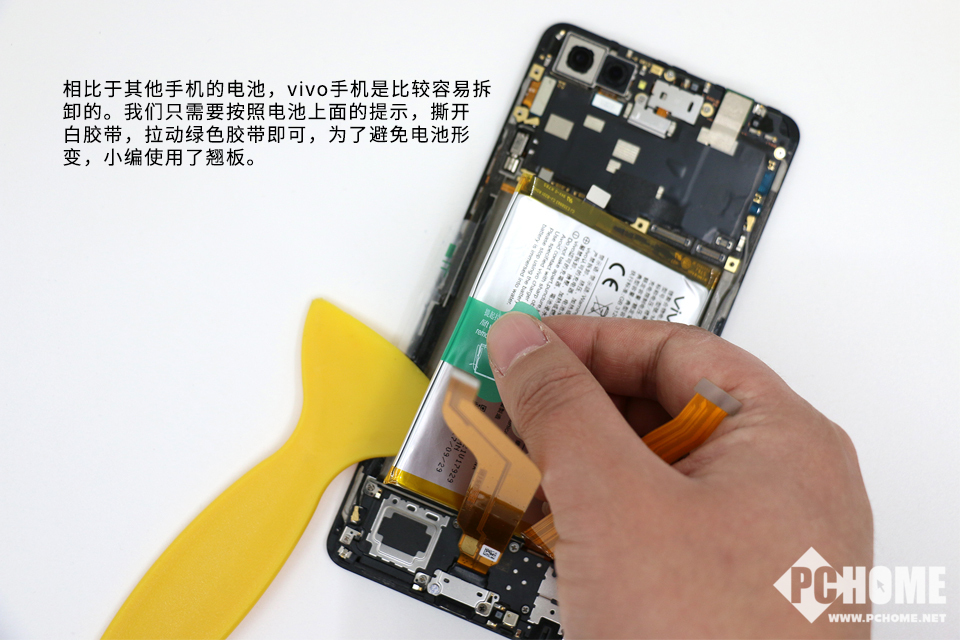
Compared with other smartphones, Vivo phone’ battery is easier to remove. All we want is to follow the tips on the battery. Tear the white tape and pull the green tape, then we can successfully remove the battery.

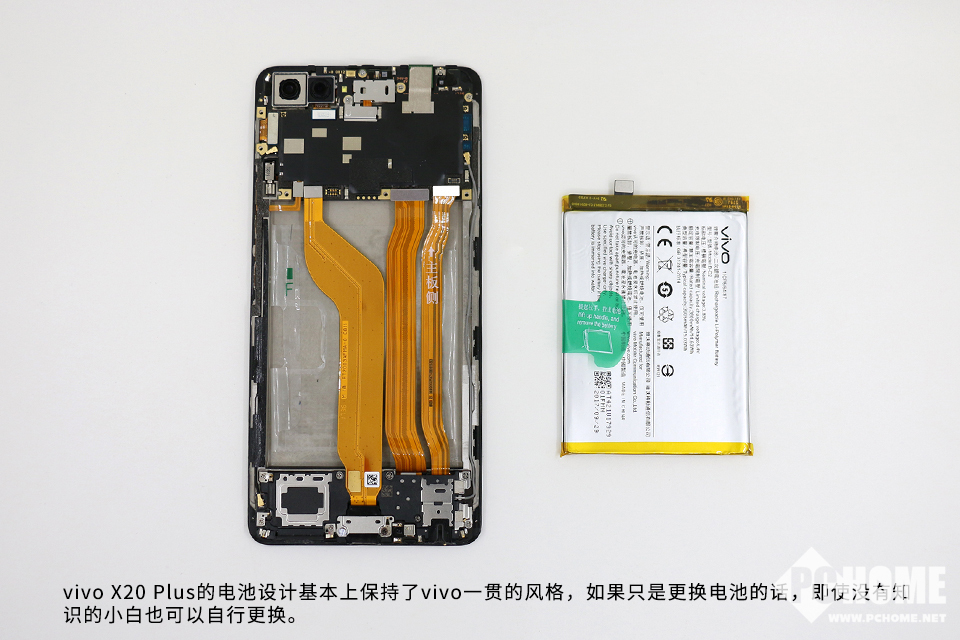
The battery design of the phone keeps Vivo’s style. To avoid the deformation of the battery, we have used the pry.
The phone sports a 3,905mAh Li-Polymer battery, which can perfectly match the 6.43-inch full screen. The battery supports 18W quick charge and has a long life.
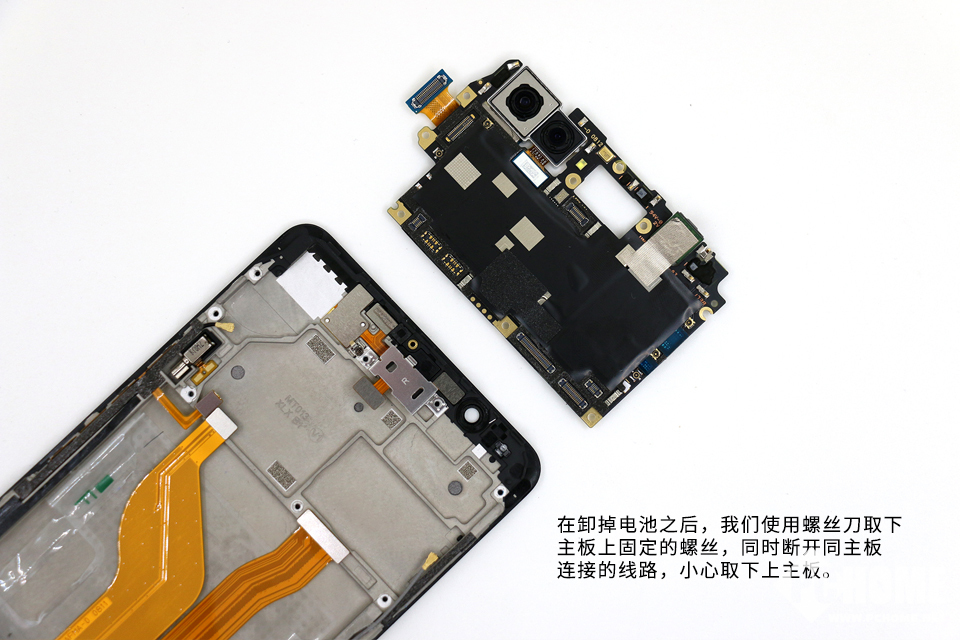
After removing the battery, we use the screwdriver to remove the fixed screws on the motherboard. In the meantime, disconnect the wire which connects the battery and the motherboard. Then remove the motherboard.
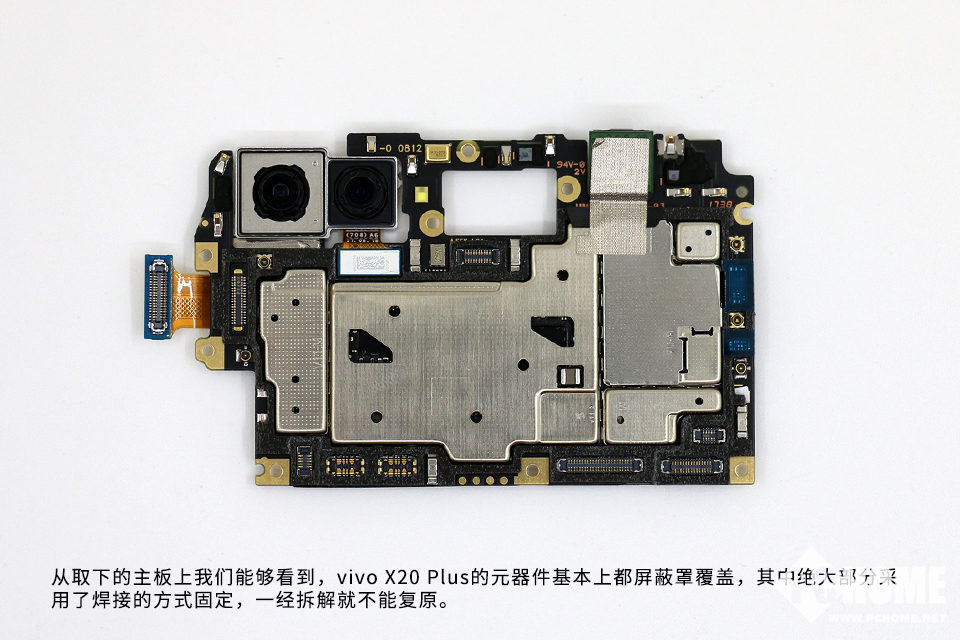
From the motherboard, we can see that the components are protected by shield cover. Most components are fixed by welding method, and these can’t be used again once removed.
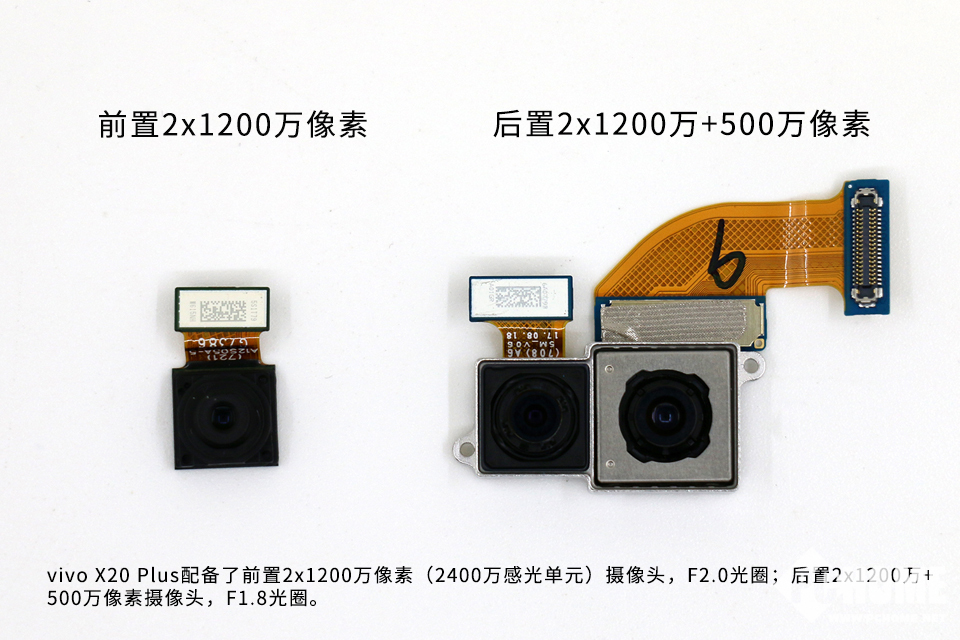
The phone features the 12MP and 12MP dual camera setup which has F/2.0 aperture on the front alongside the 12MP and 5MP dual-rear dual camera setup which has a F/1.8 aperture.
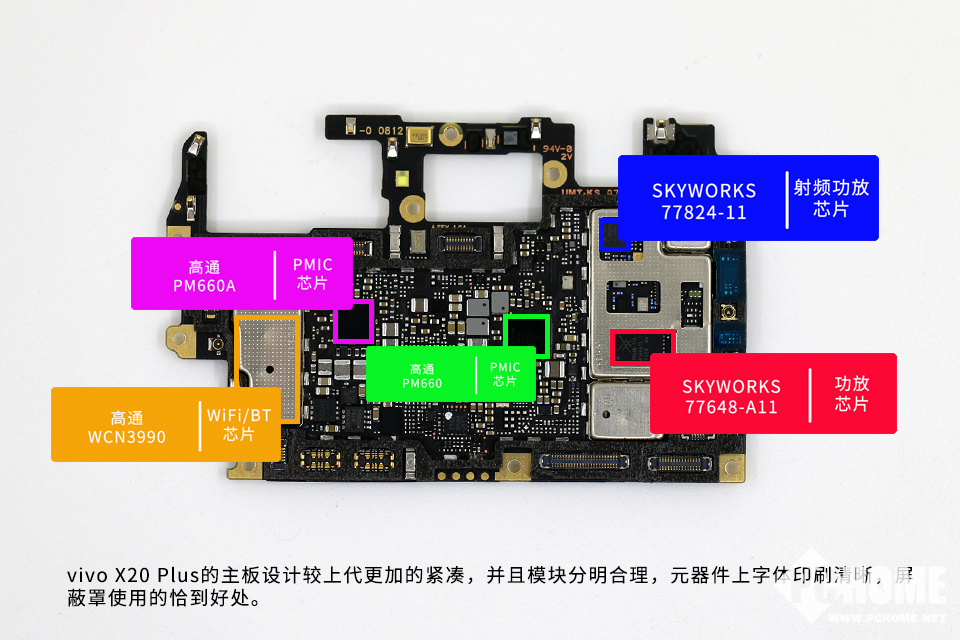
The motherboard of the Vivo X20 Plus has more compact design than its predecessor’. Words are clearly printed on the components.
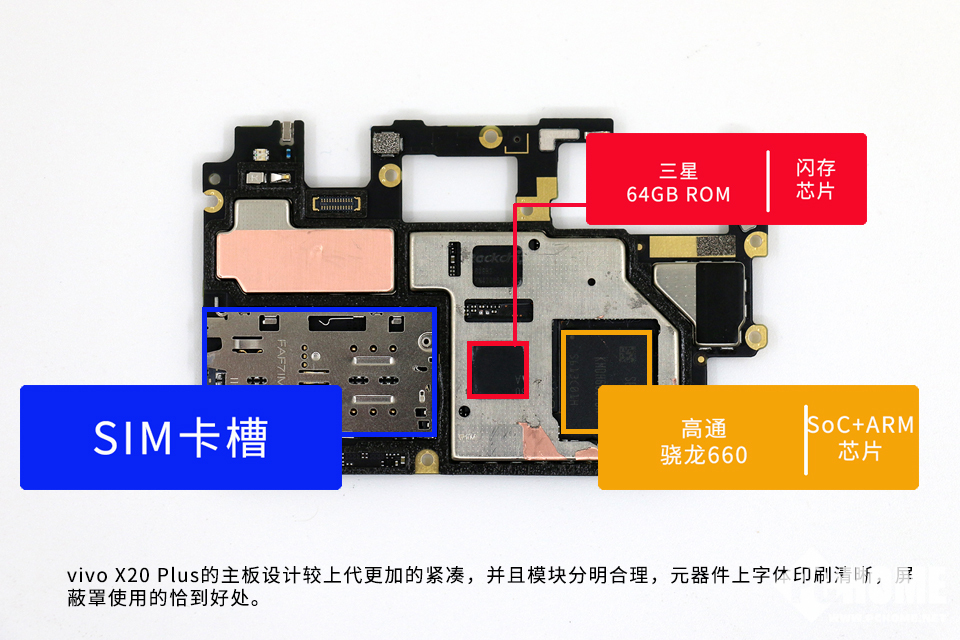
This area is the Qualcomm Snapdragon 660 chip. The 64GB ROM card is provided by Samsung.
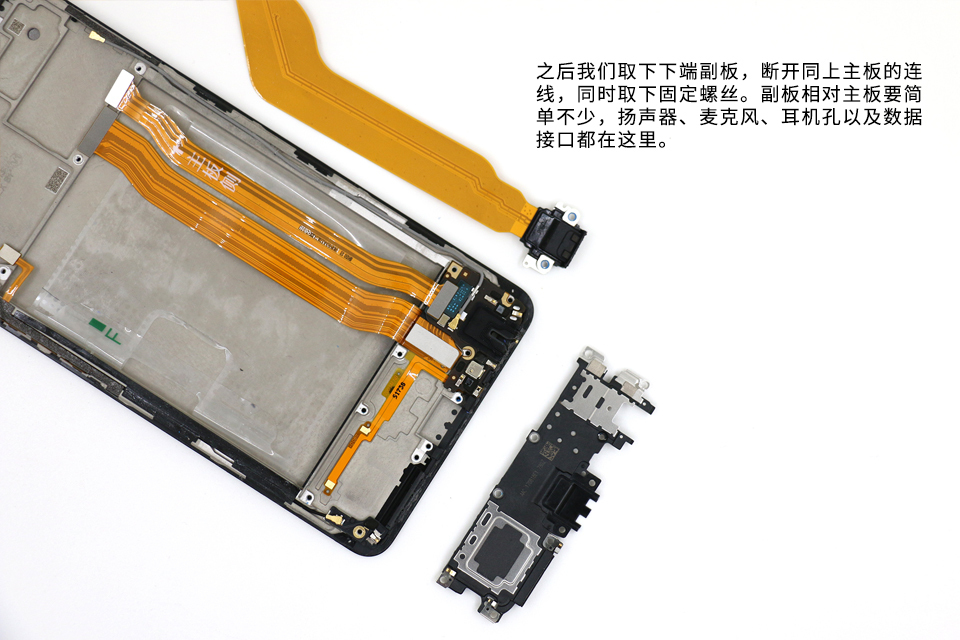
Then we remove the vice board. Disconnect the wire and fixed screws on it. The loudspeaker, microphone, and earphone port as well as data port are designed on the vice board.
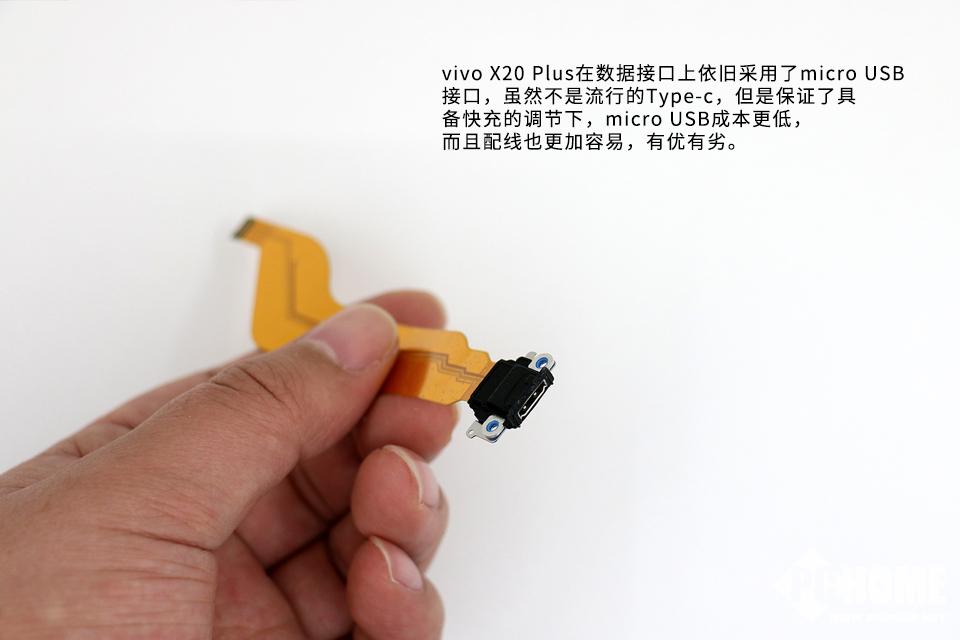
The phone still provides the micro USB port. Although the phone doesn’t provide the Type-C port, it still supports the quick charge. The micro USB’s cost is lower than the Type-C’.
Summary:
The Vivo X20 Plus is Vivo’s first full-screen smartphone. Compared with the X20, the X20 Plus features larger screen which can bring better visual effect. In the meantime, the phone’s internal design adopts good workmanship and material. It has the compact design. The X20 Plus, which has good appearance and internal layout, is an excellent full-screen smartphone.
Source