On December 21, Honor has officially launched its full-screen smartphone – the Honor 9 Lite. The Honor 9 Lite features four cameras and boosts of excellent appearance. Now, let’s start the phone’s teardown to explore its internal layout and workmanship performance.
Teardown is what we do! Follow us on Facebook for the latest repair news.
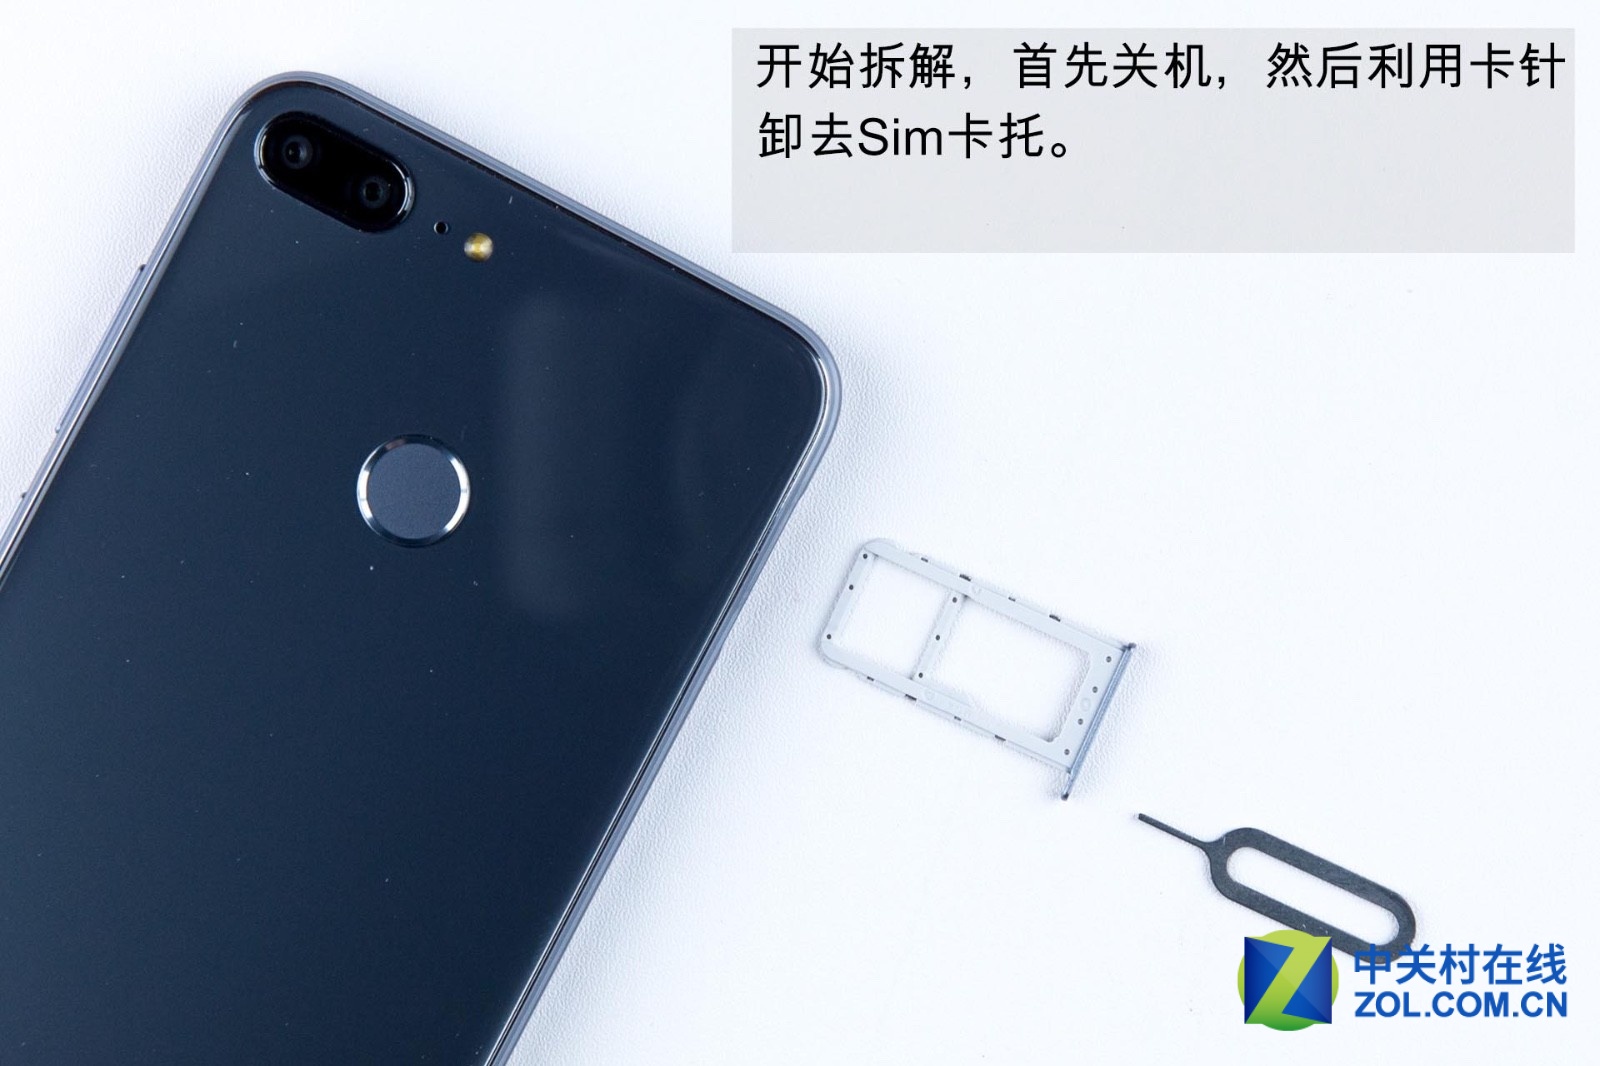
Let’s start the teardown. First of all, power off the phone. Then use the needle to remove the SIM card tray.
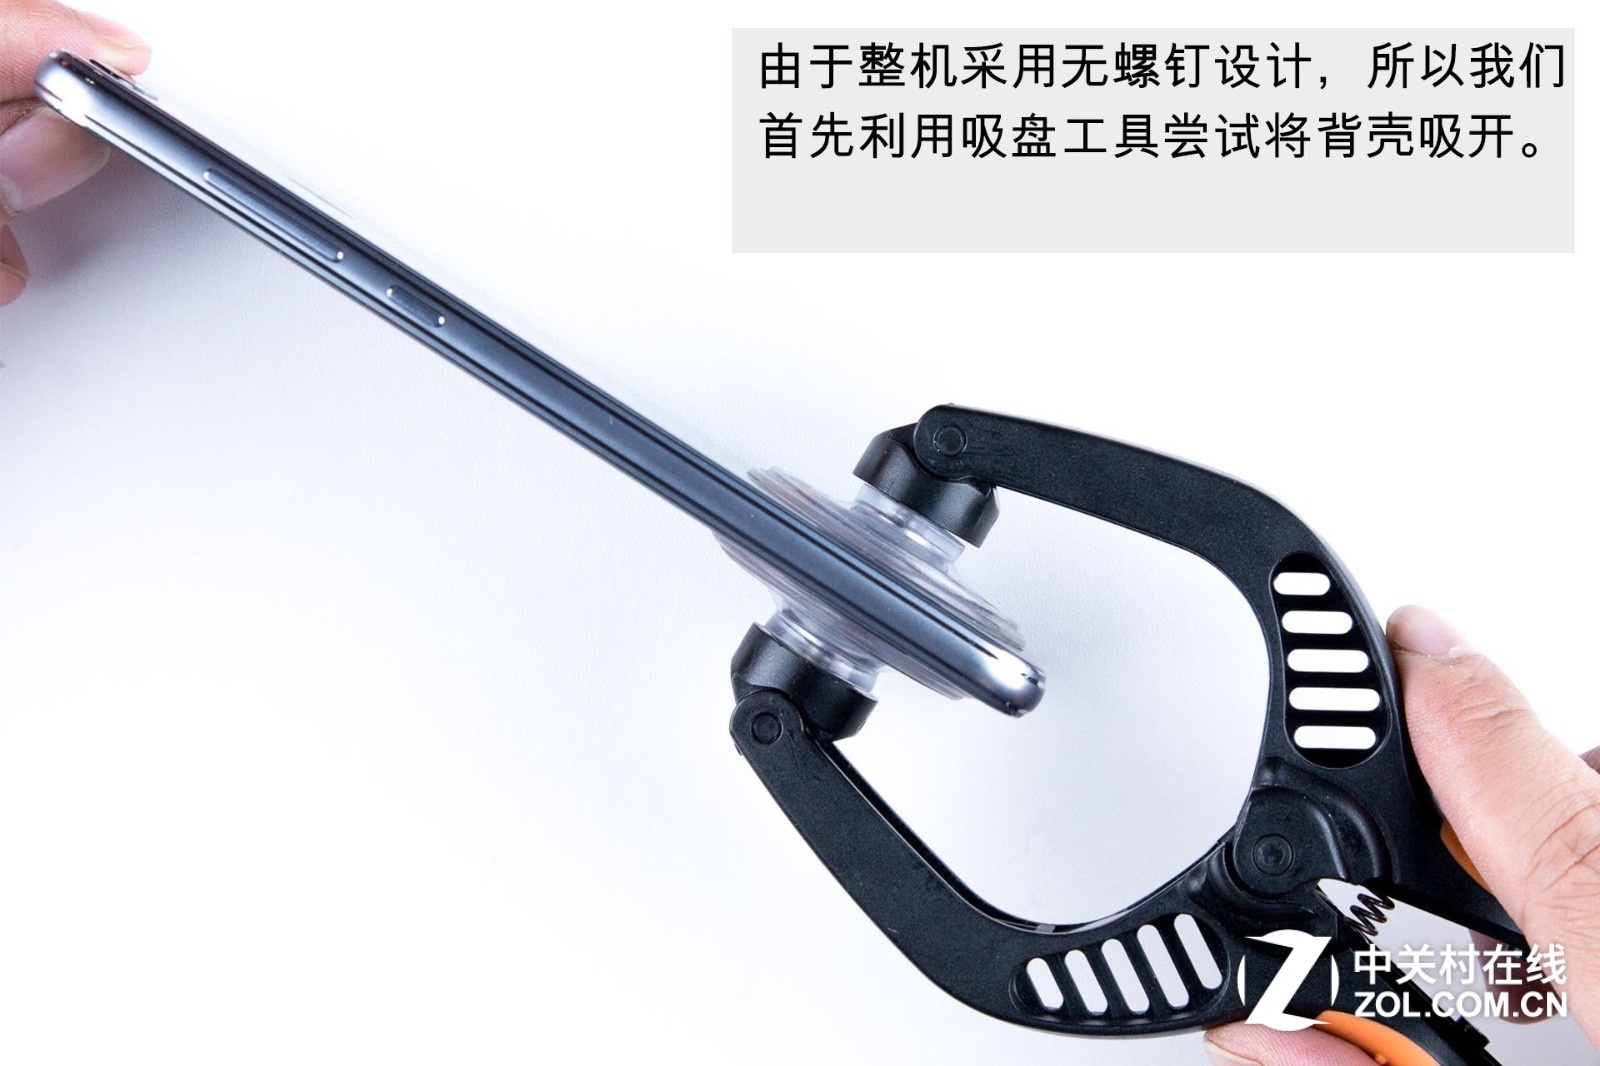
The whole smartphone adopts no screw design, so we will utilize the suction cup to remove the back cover.
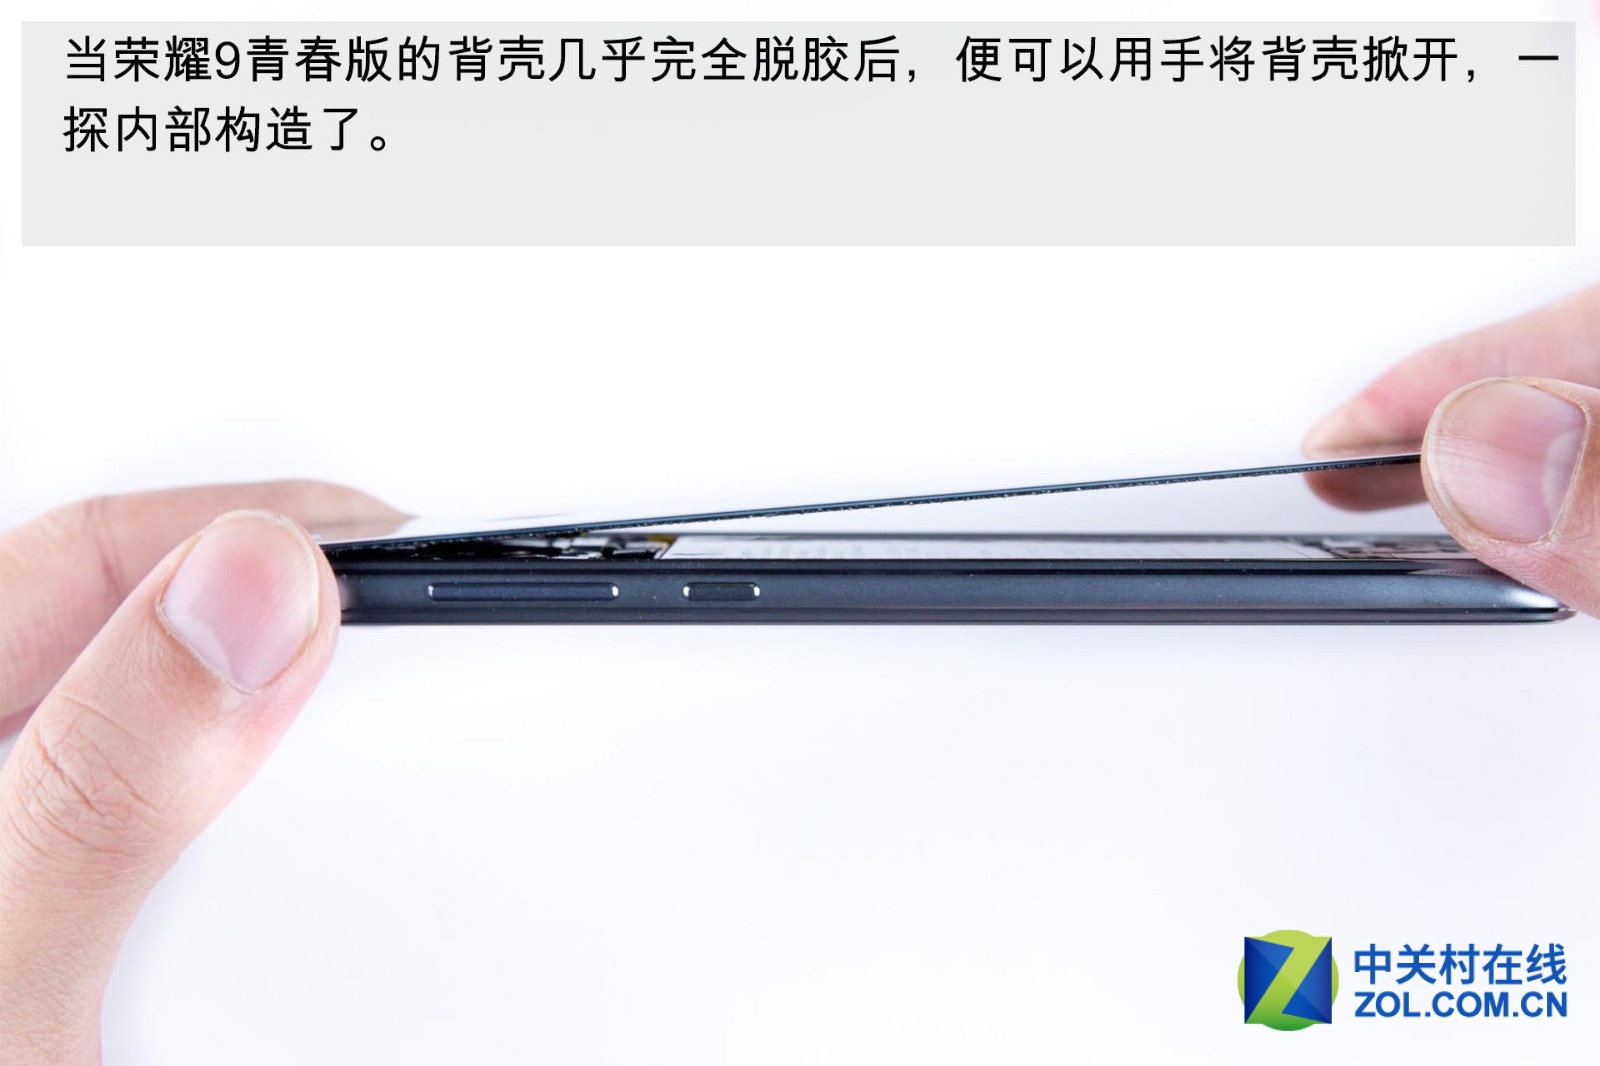
When the Honor 9 Lite’s back cover comes nearly unglued, we can remove the back cover and explore its internal structure.
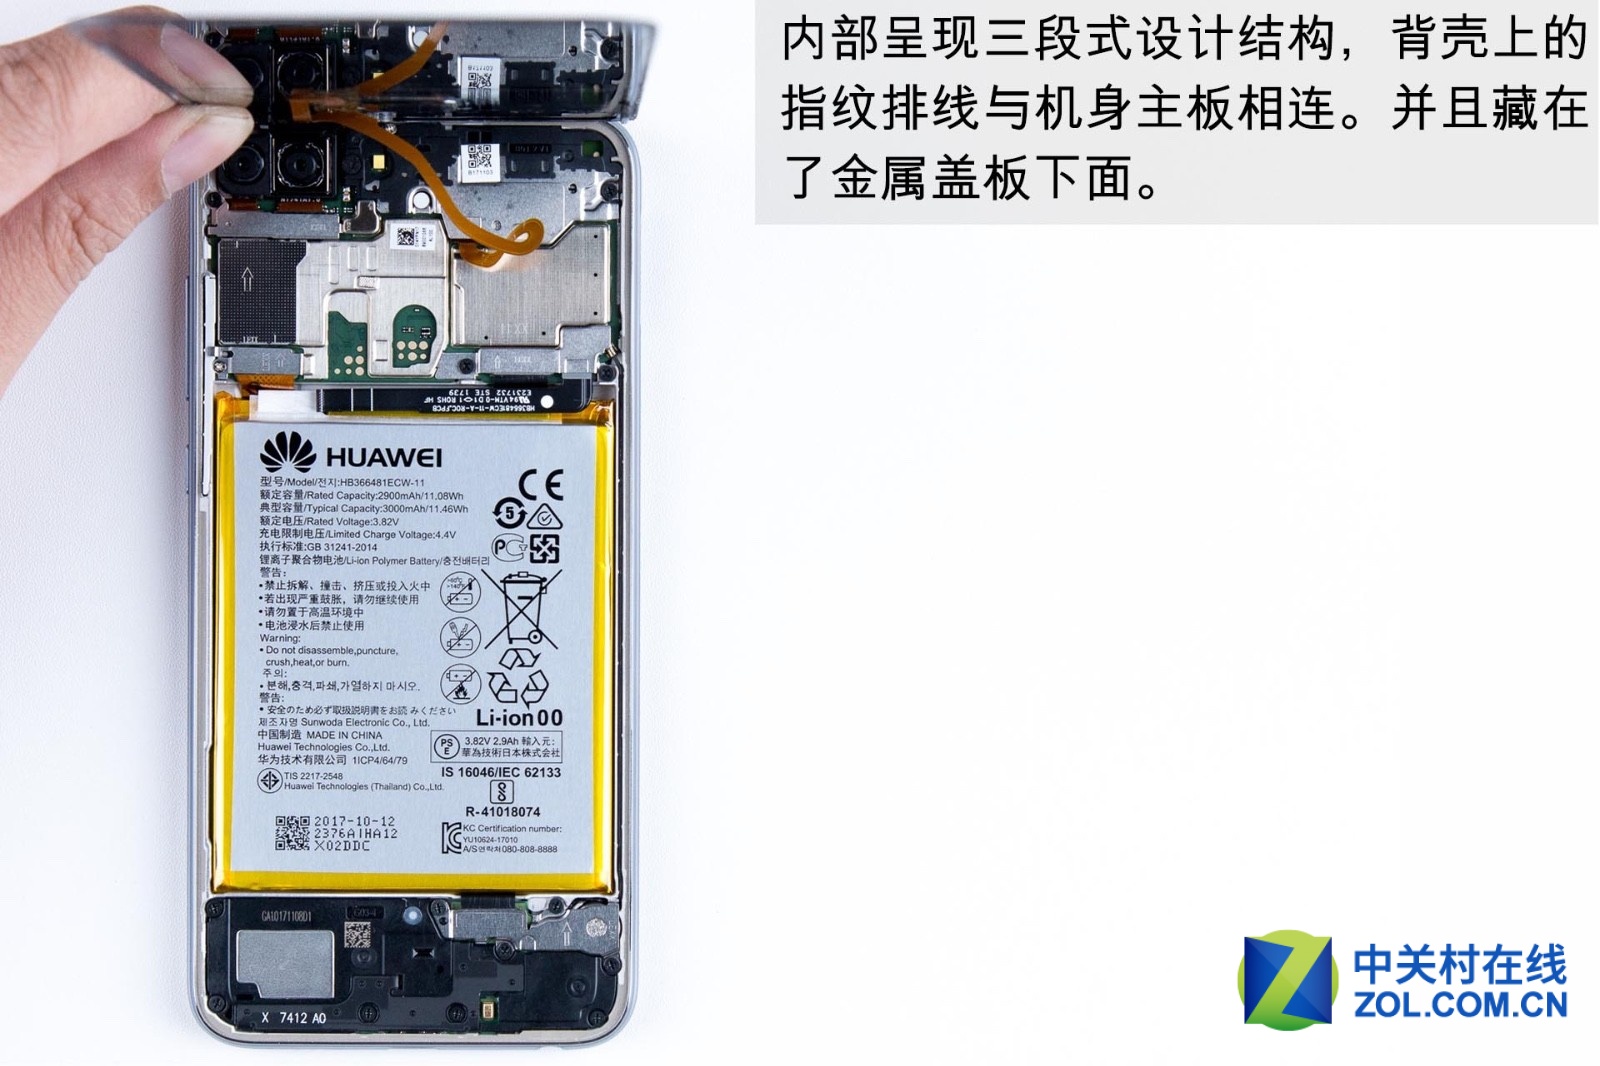
The phone’s internal structure adopts three-stage design. The fingerprint wire on the back cover is connected to the motherboard on the phone body. The fingerprint wire is hidden under the metal cover.
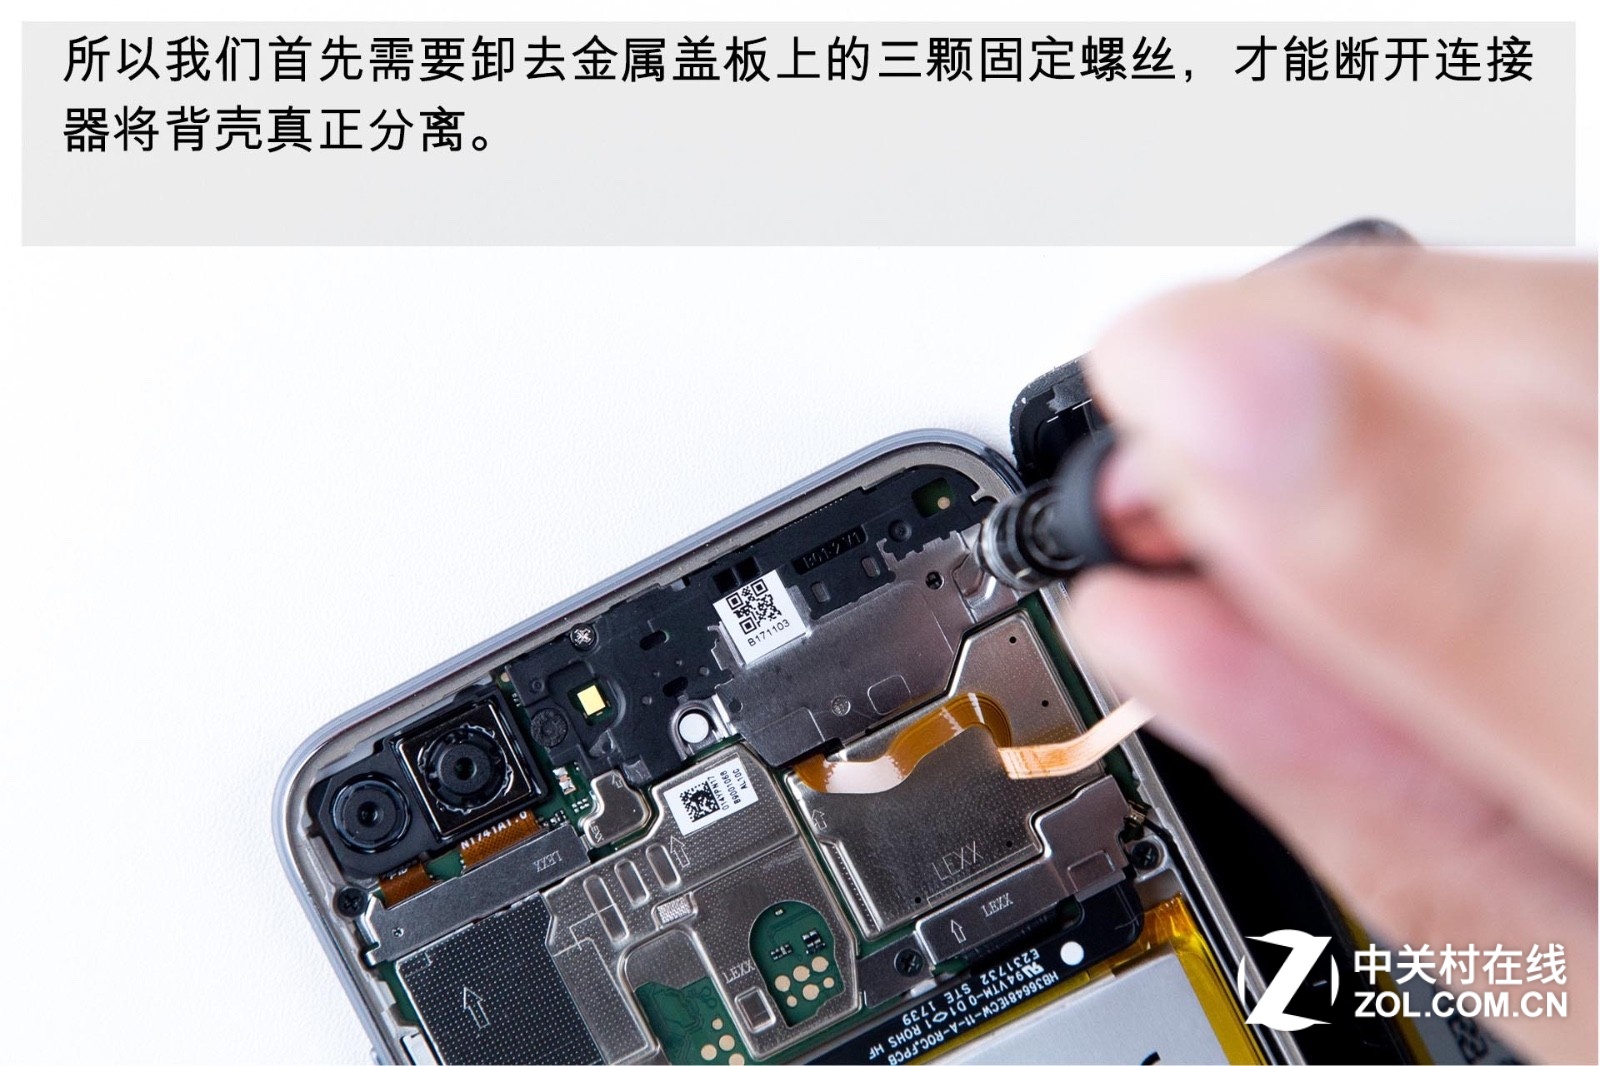
So we need to remove three fixed screws on the metal cover to disconnect the connector. Then the back cover can be removed entirely.
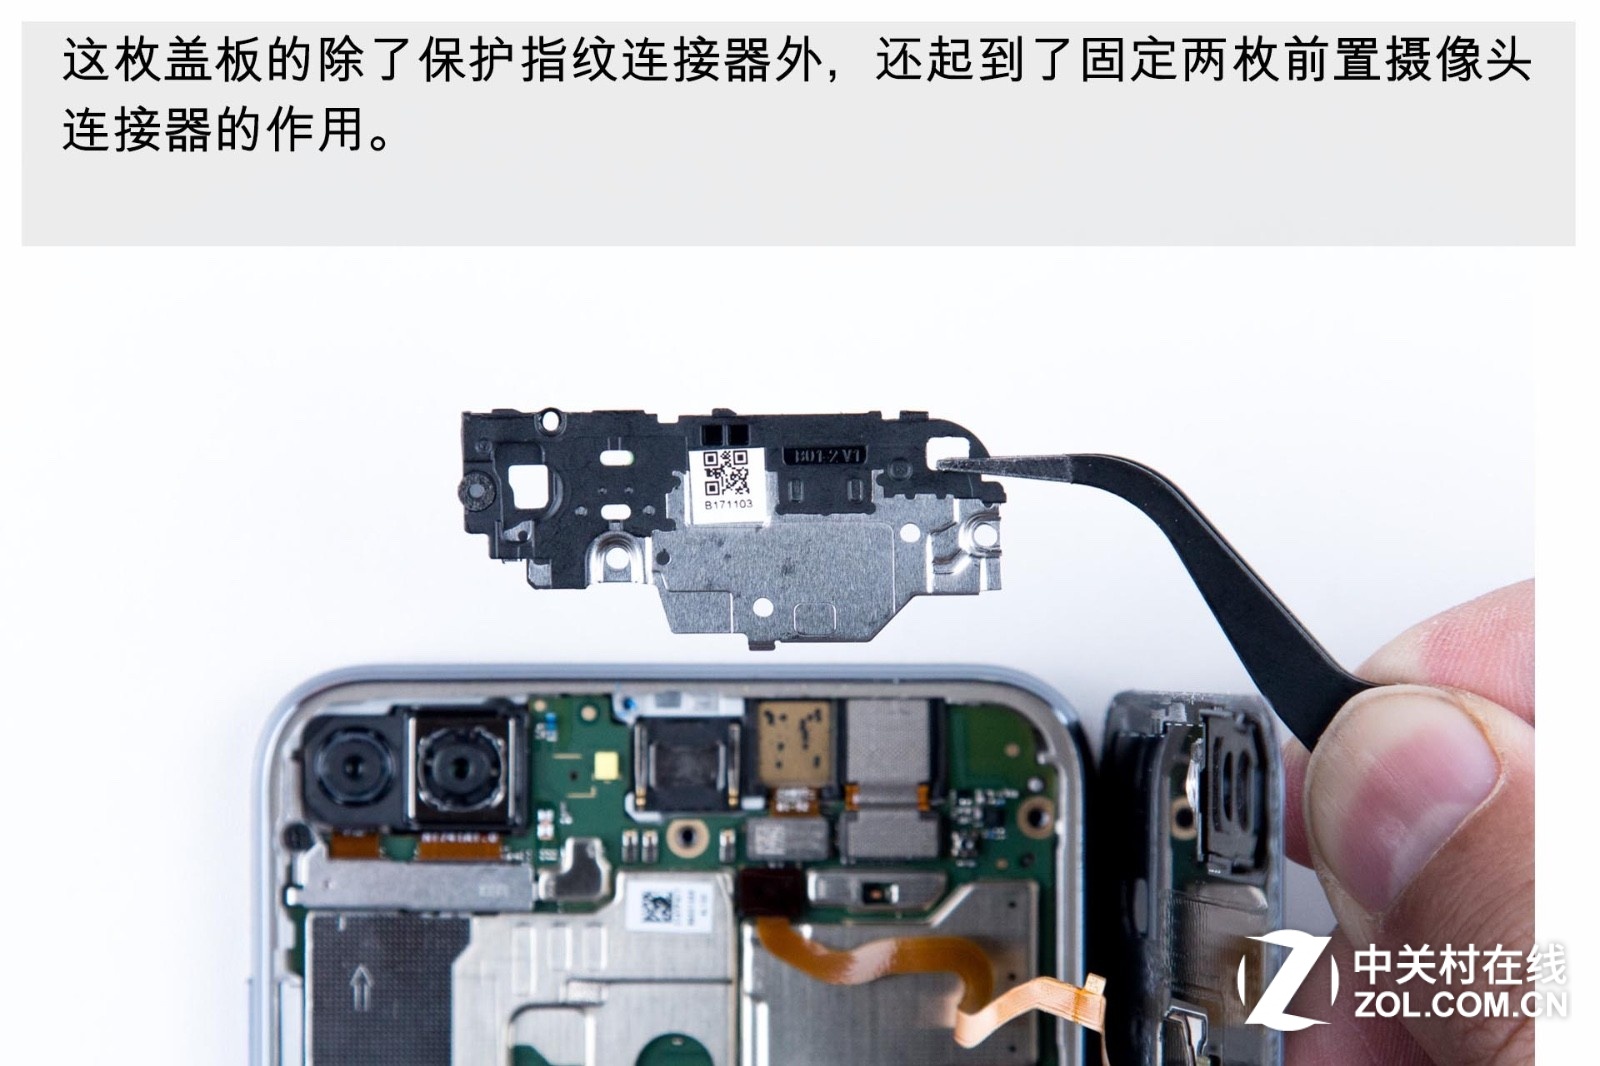
The cover can not only protect fingerprint connector but also fix two front cameras’ connectors.
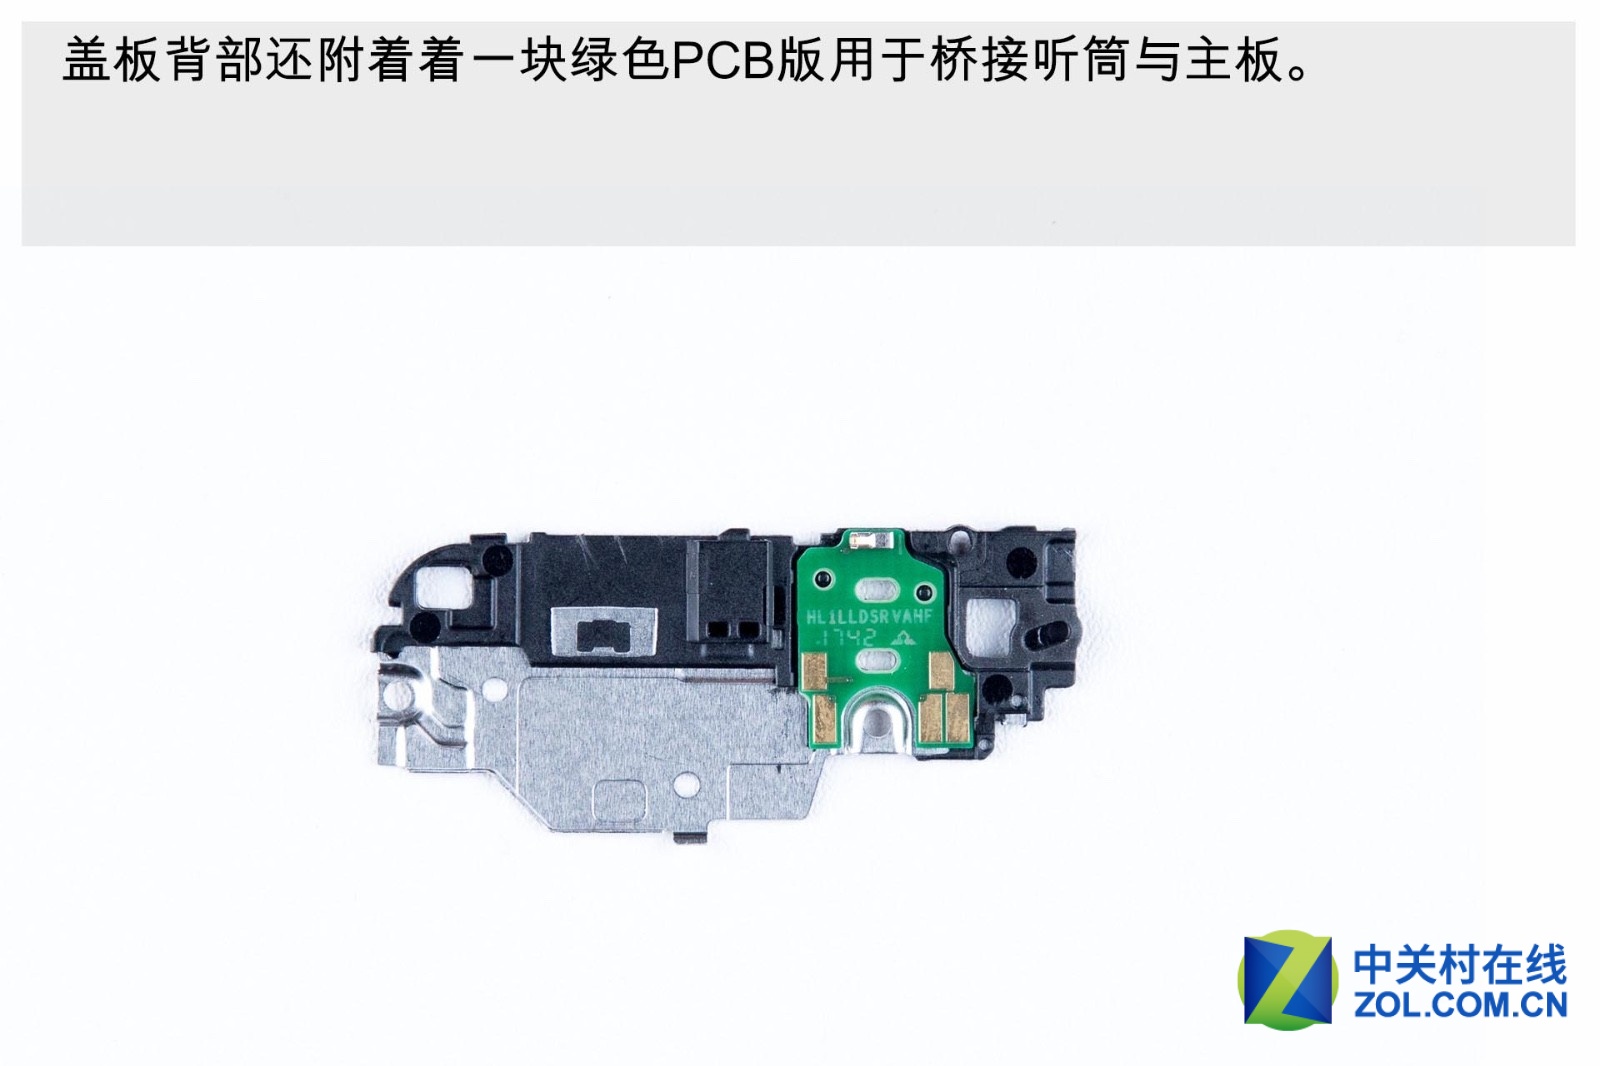
A green PCB on the cover’s back is used to connect earphone and motherboard.
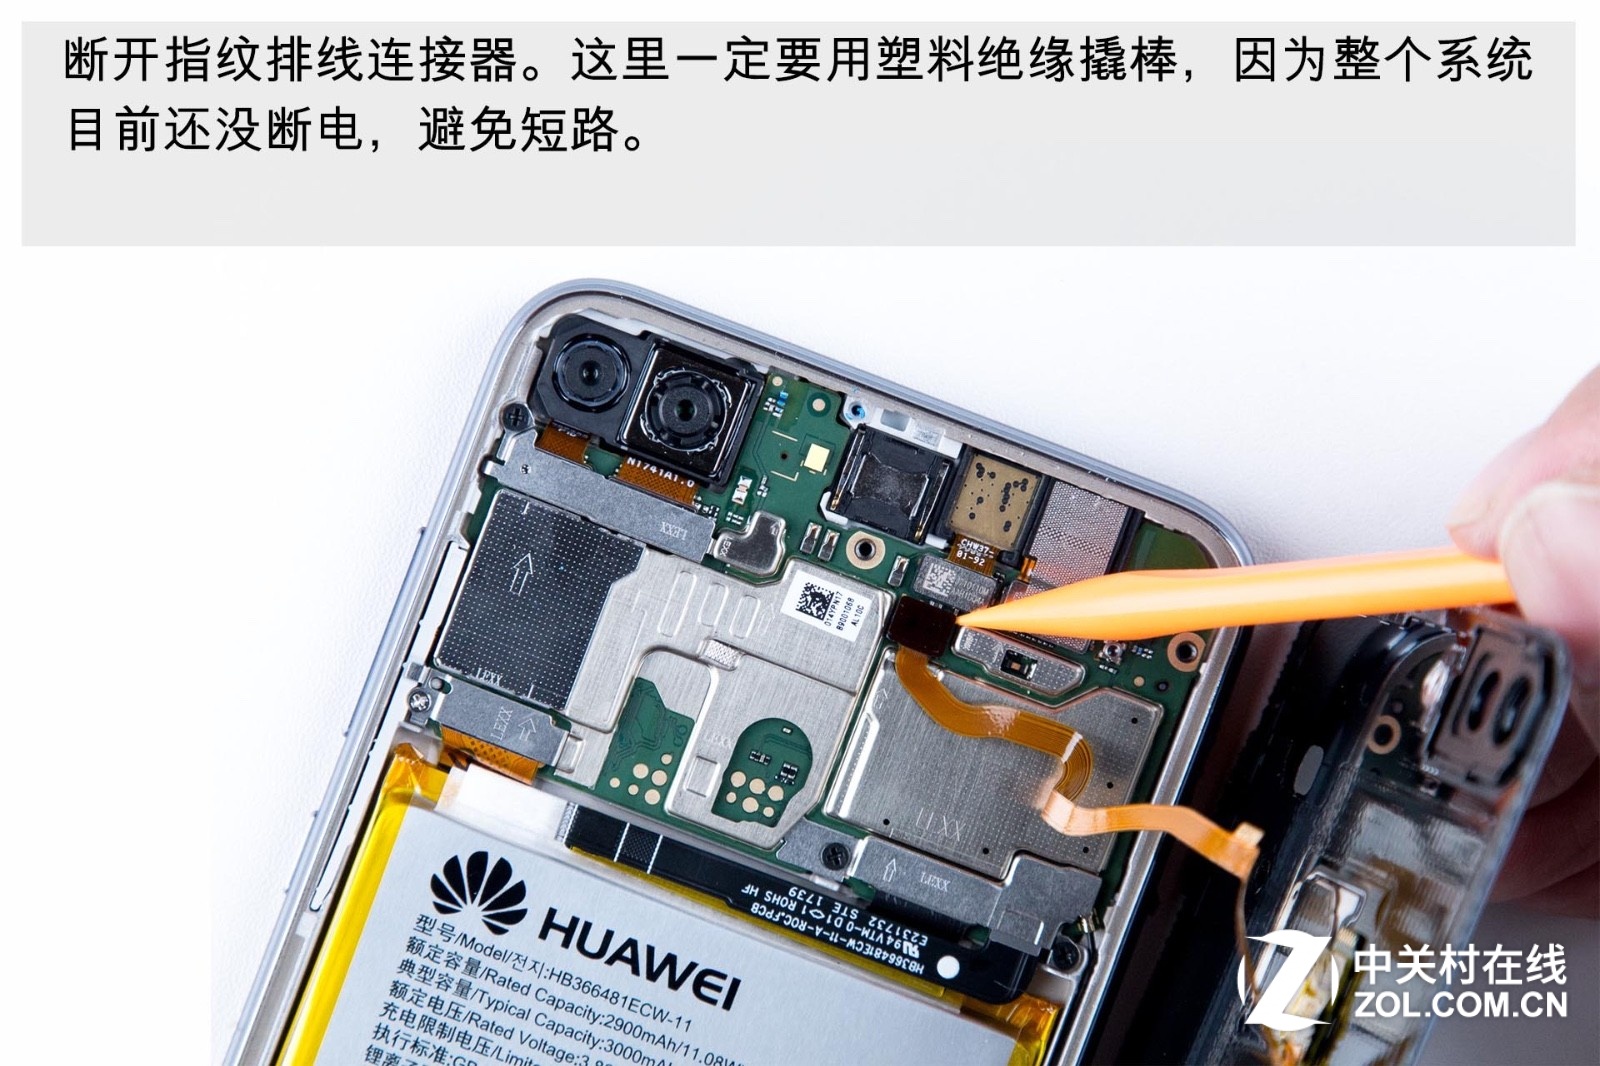
Disconnect the fingerprint wire. We must use the plastic insulated pry to avoid short-circuit because at present the whole system isn’t in power-off condition.
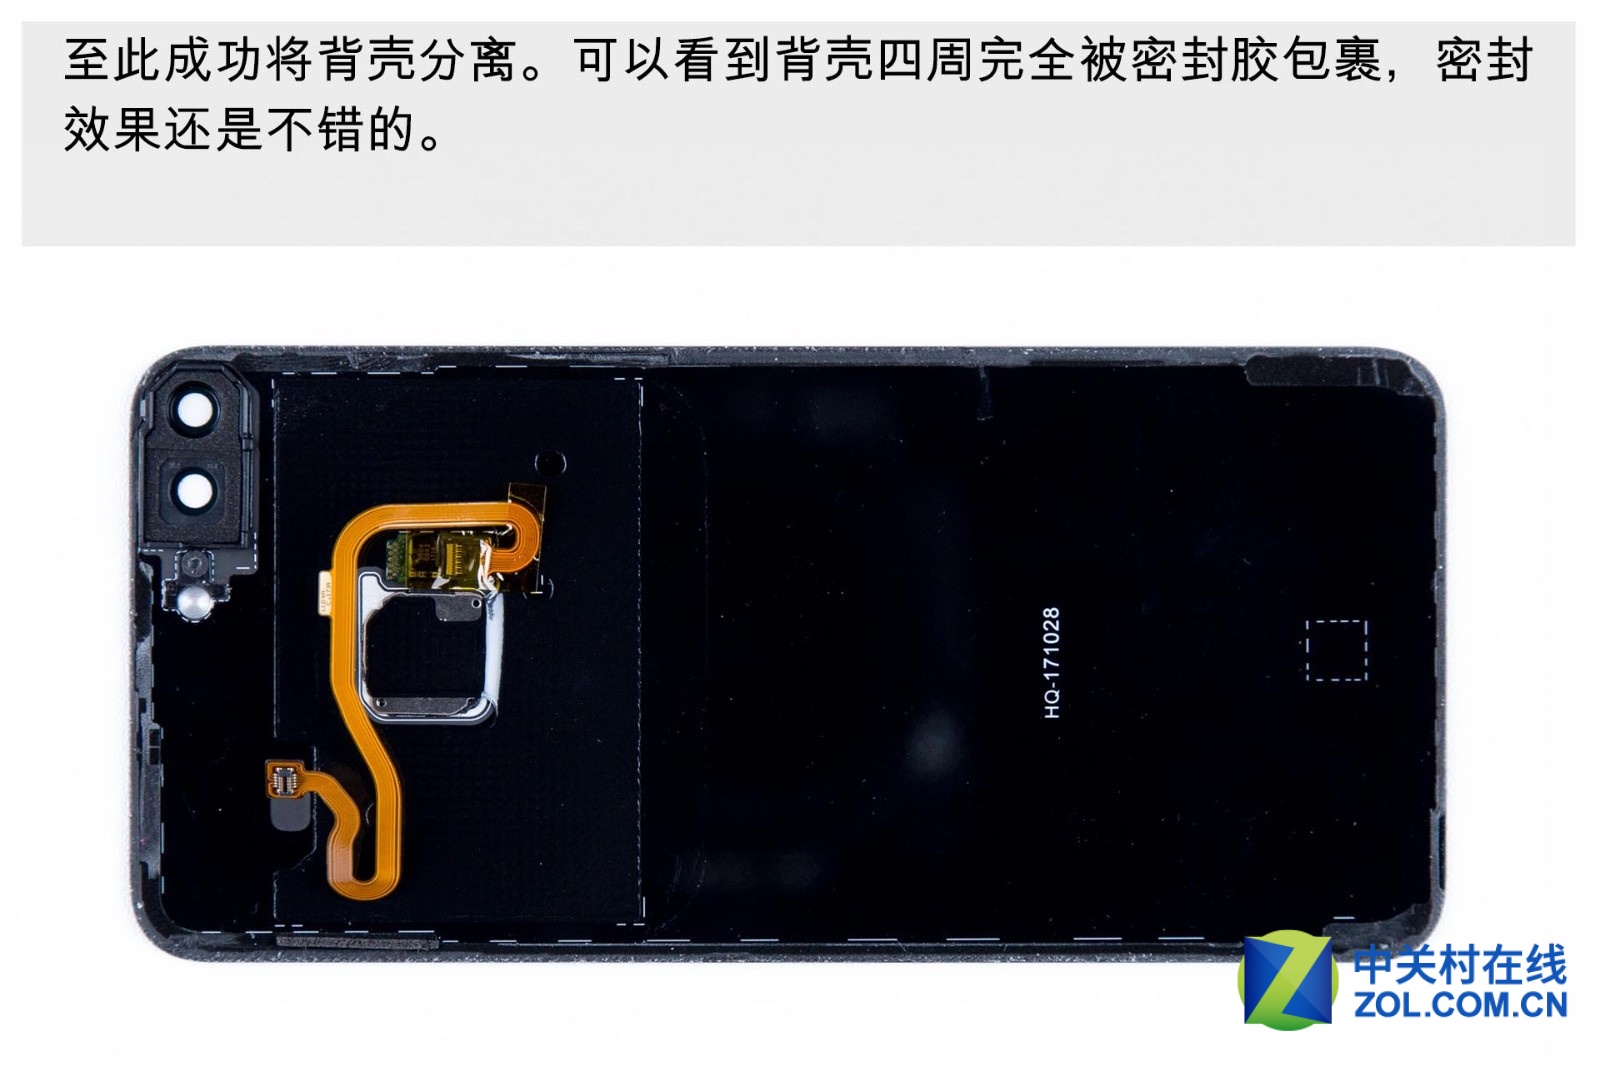
Until now, the back cover has been successfully removed. We can see that the back cover has been covered by sealing glue, which has a good sealing effect.
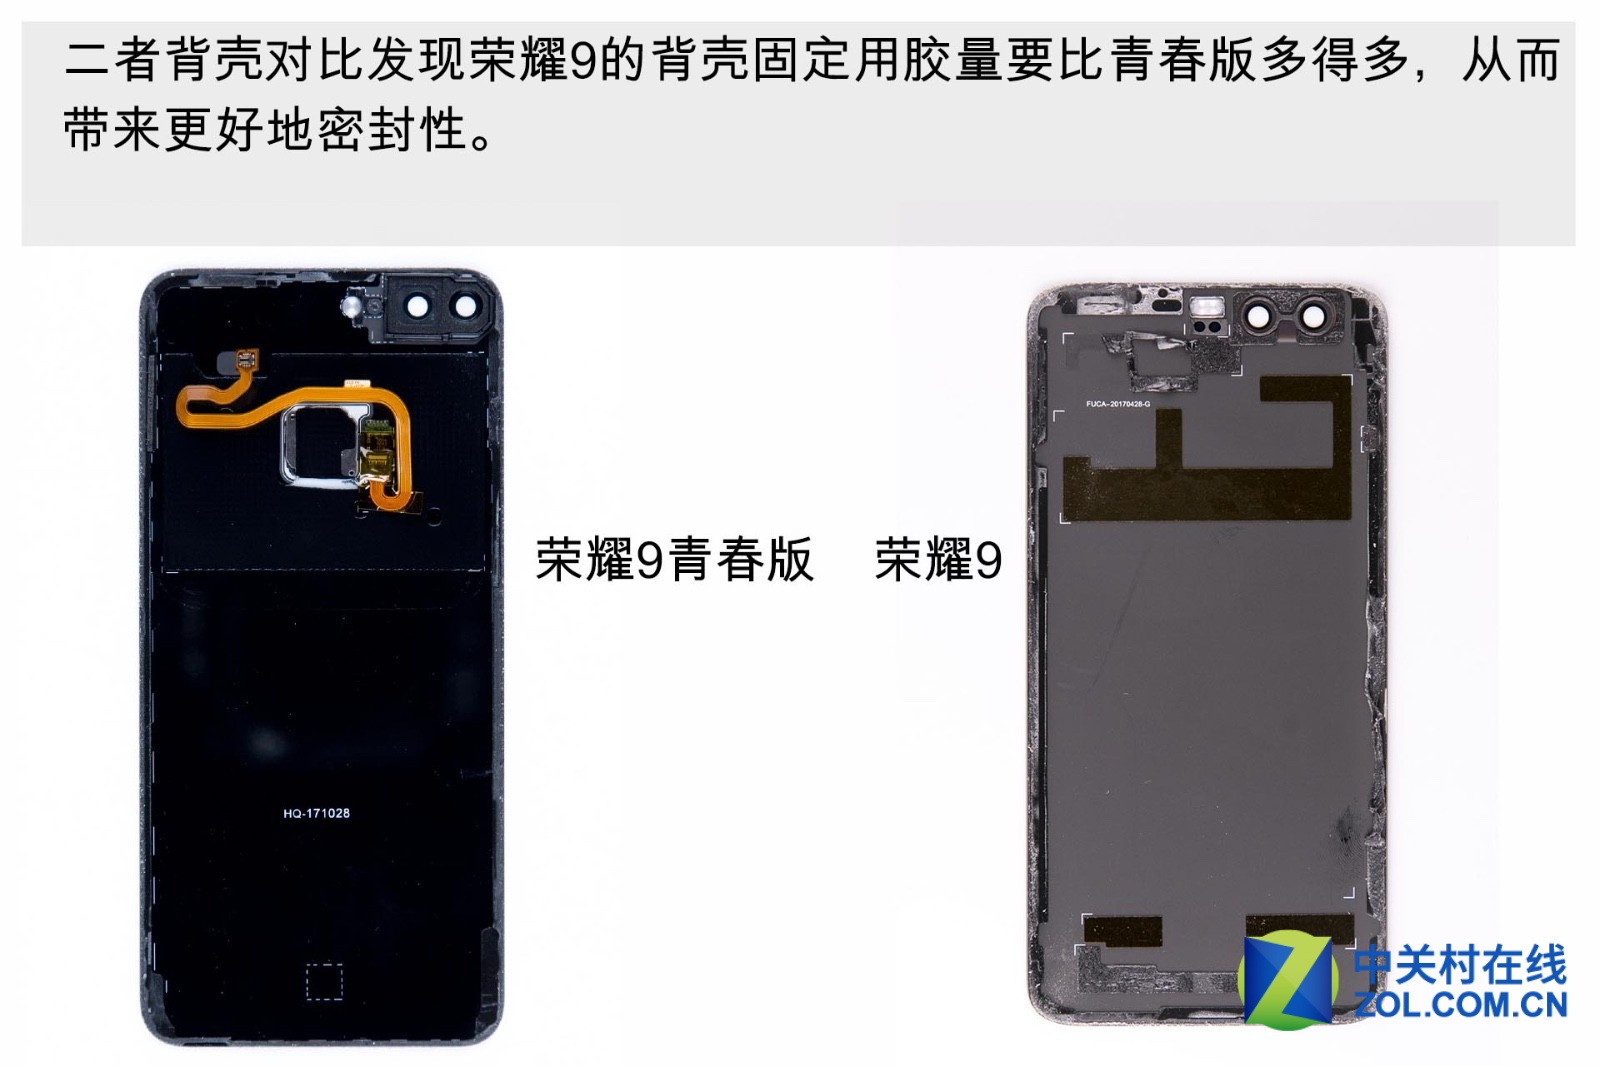
After the comparison between the Honor 9 Lite and the Honor 9, we find that the Honor 9 has used more glue to fix its back cover than the Honor 9 Lite. Obviously, the Honor 9 has better sealing performance.
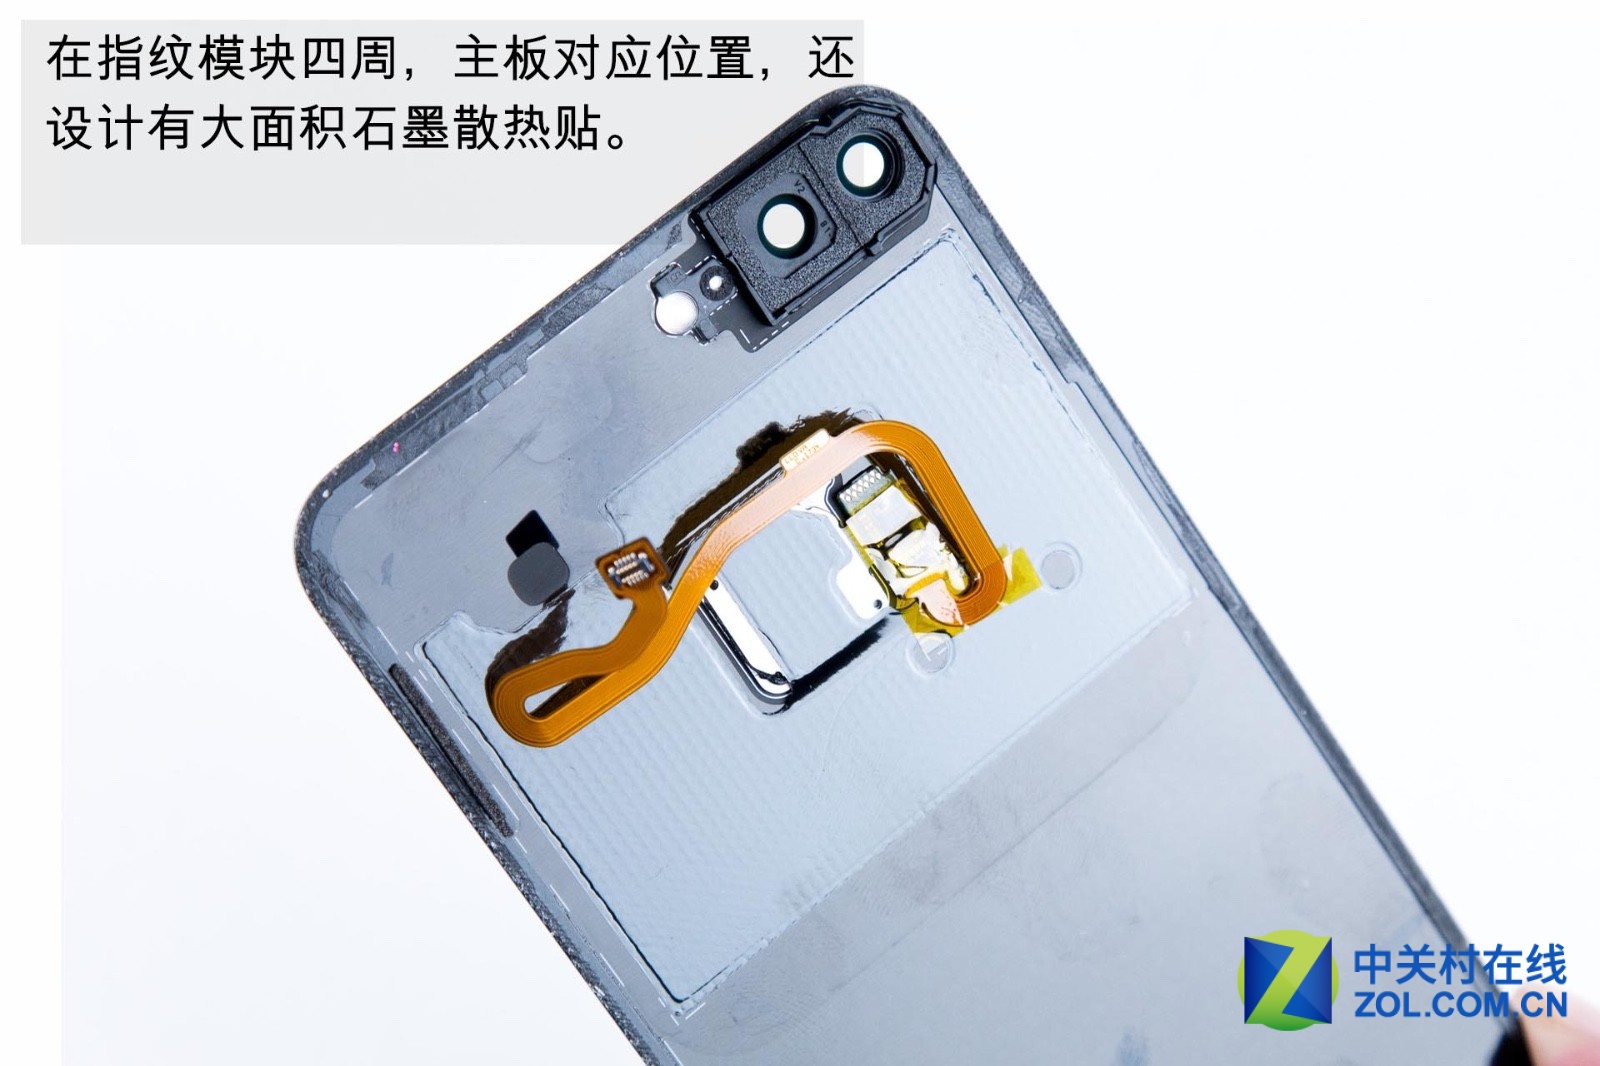
The graphite cooling paste has been applied to the motherboard and the fingerprint module’s surroundings.

Now, look at the phone body. The smartphone adopts three-stage design structure. The frame parts have been thickened to resist violent collision. The surface of the battery hasn’t been covered by the ribbon cable. The wire ribbon is estimated to be designed on the battery’s bottom, which will make it more difficult to operate the following teardown process.
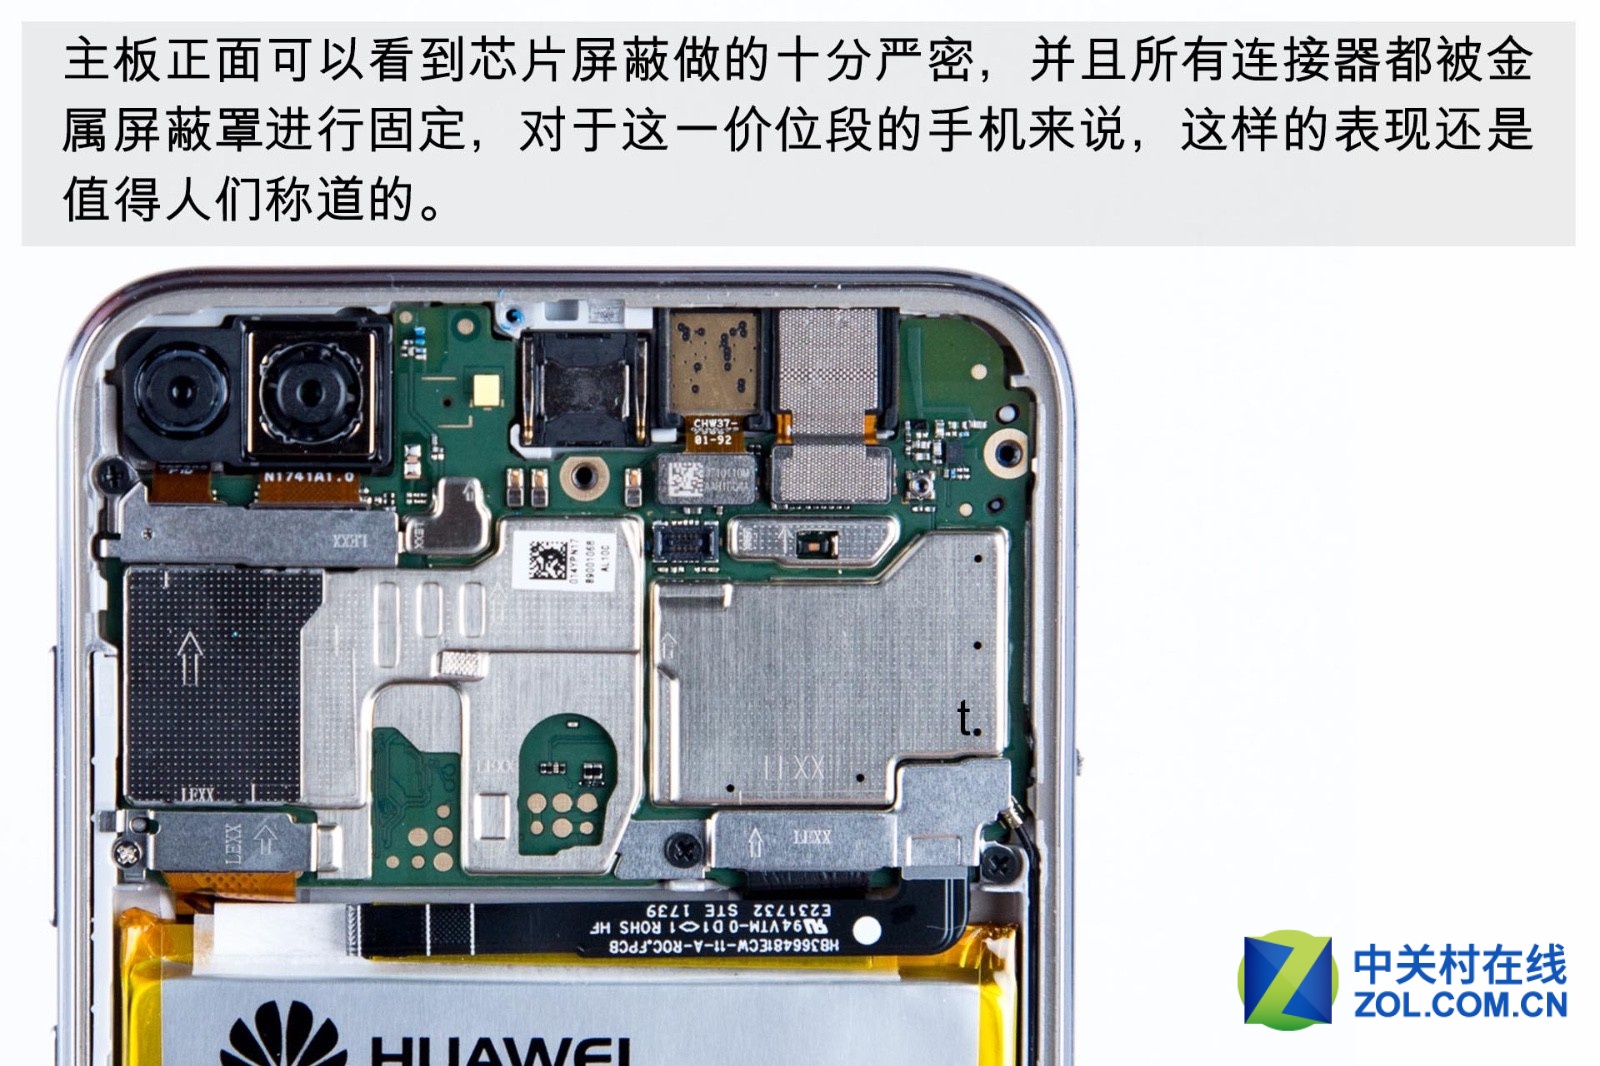
From the motherboard’s front part, we can see that the chip has been well protected and all connectors have been fixed by the metal shield.
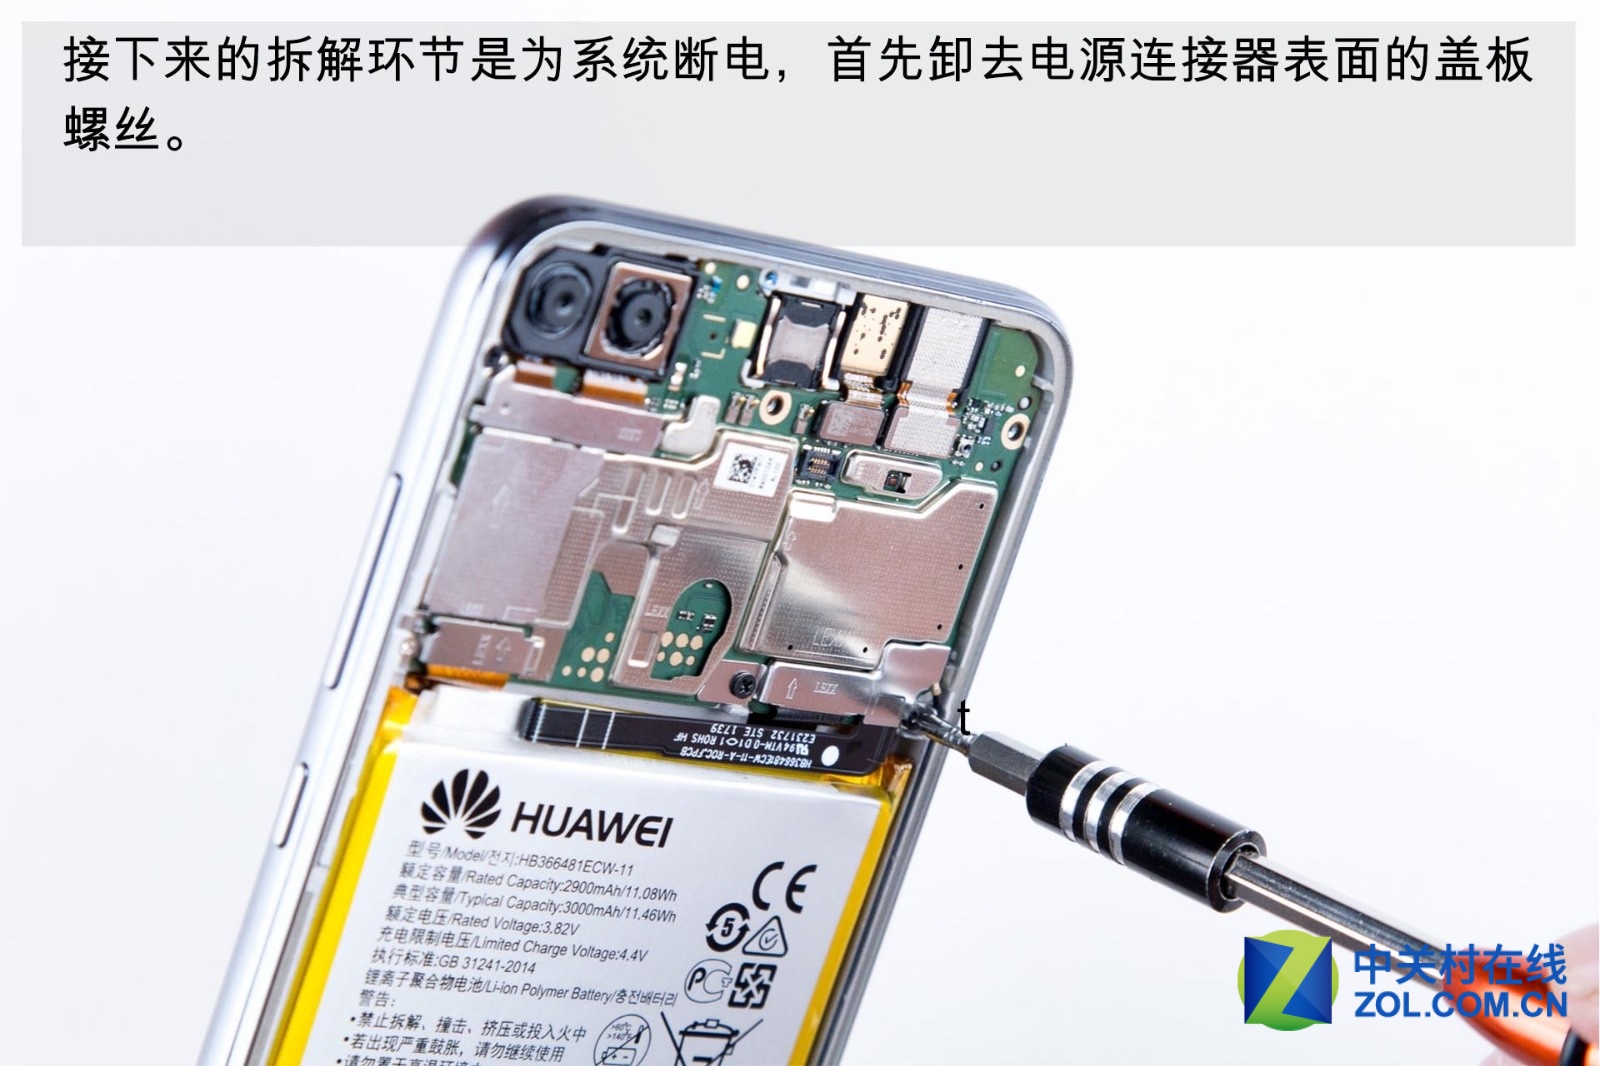
The next teardown step is to power off the system. First of all, remove all the screws on the surface of the power connector.
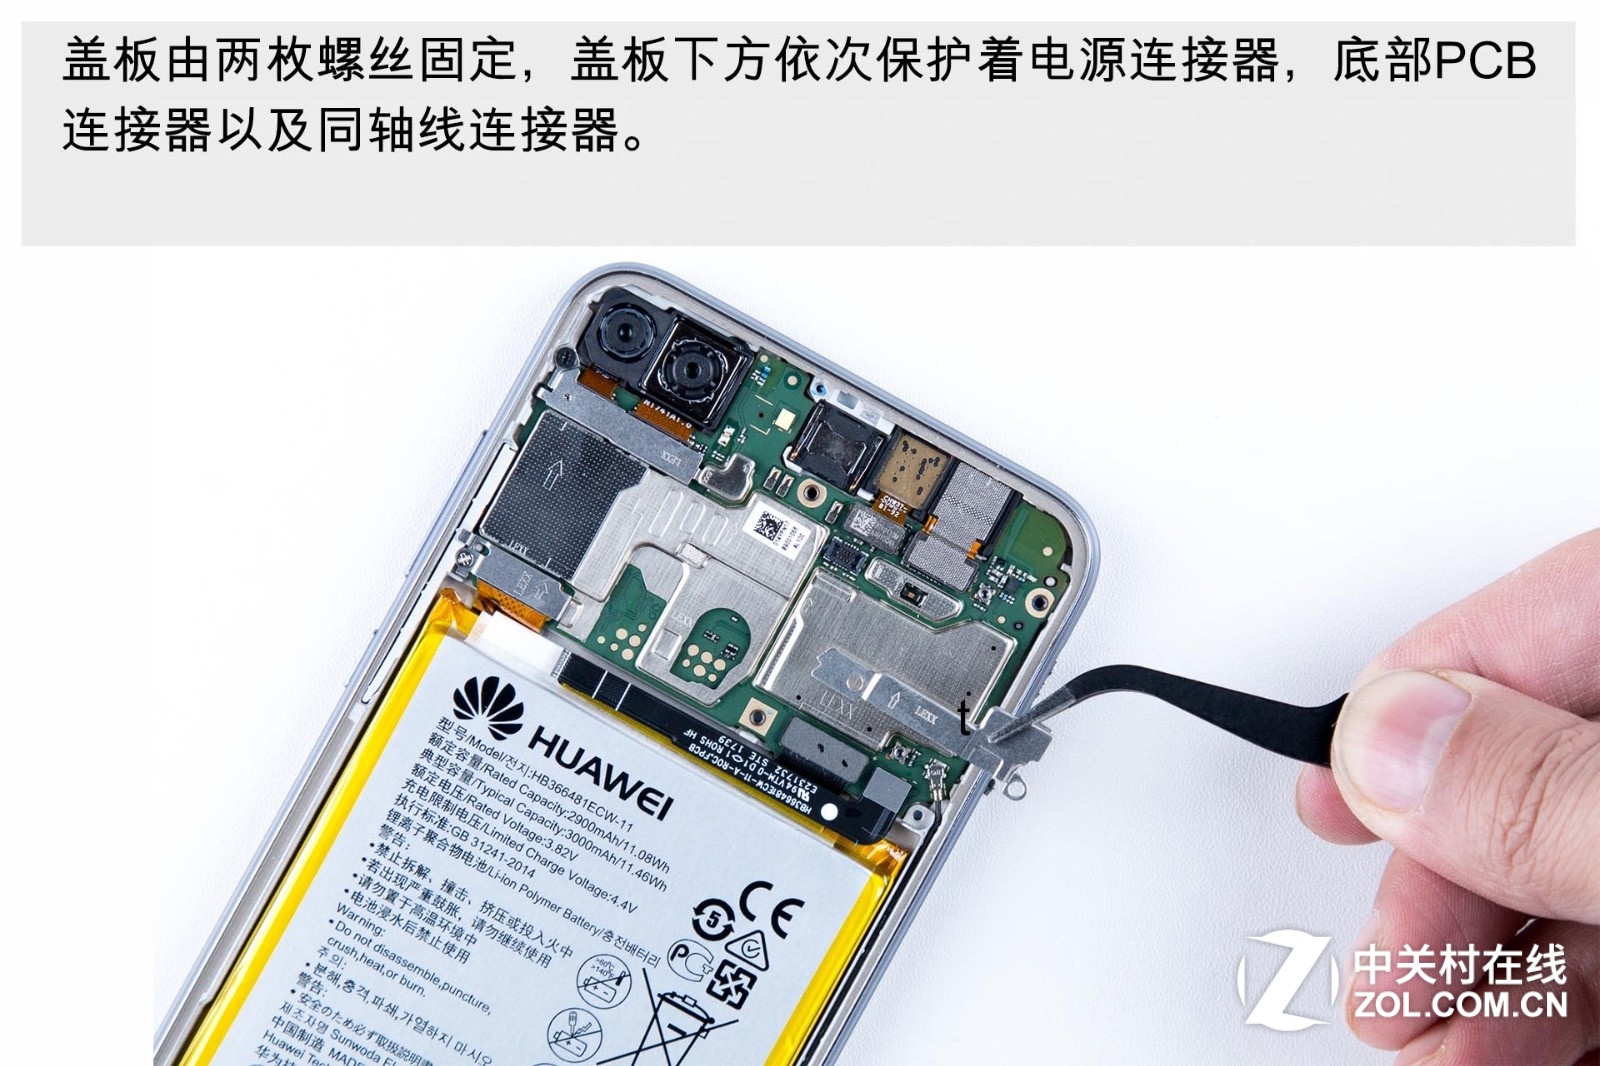
The cover is fixed by two screws. The cover is used to protect power connector, PCB connector at the bottom and coaxial-line connector.
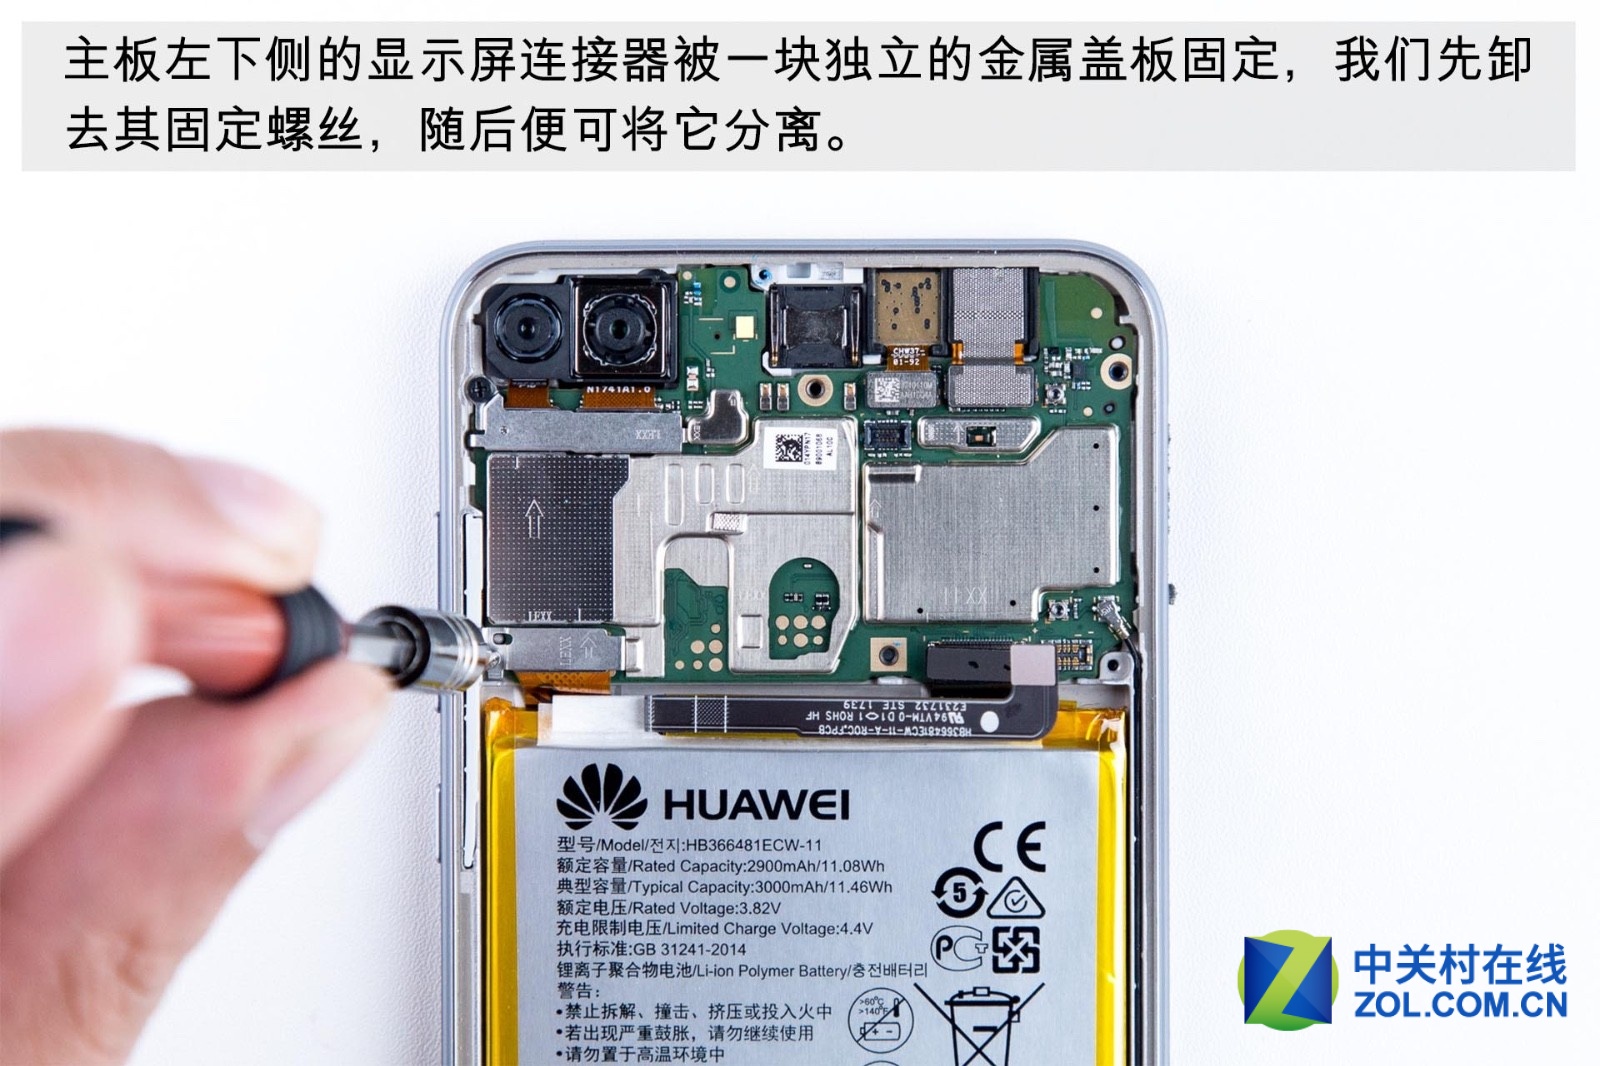
The display connector under the motherboard is fixed by a metal cover. We will first remove its fixed screws and then remove it.
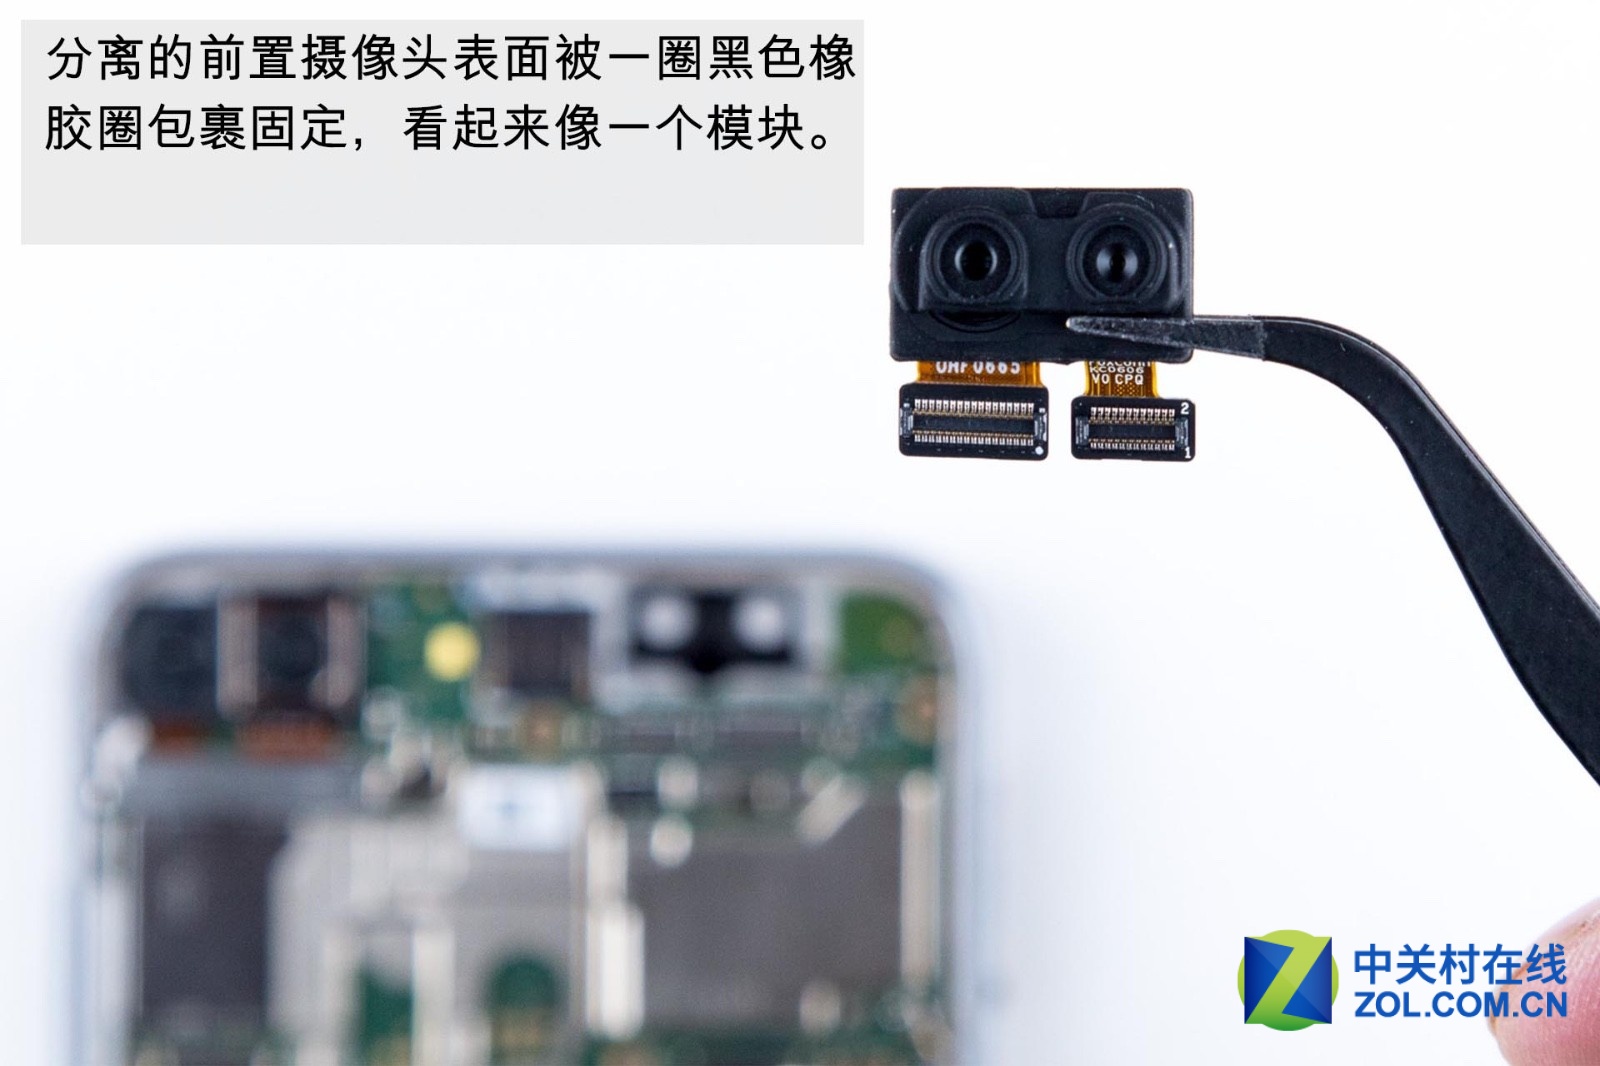
The surface of the detached camera is fixed by a circle of the black rubber ring, and it looks like a module.
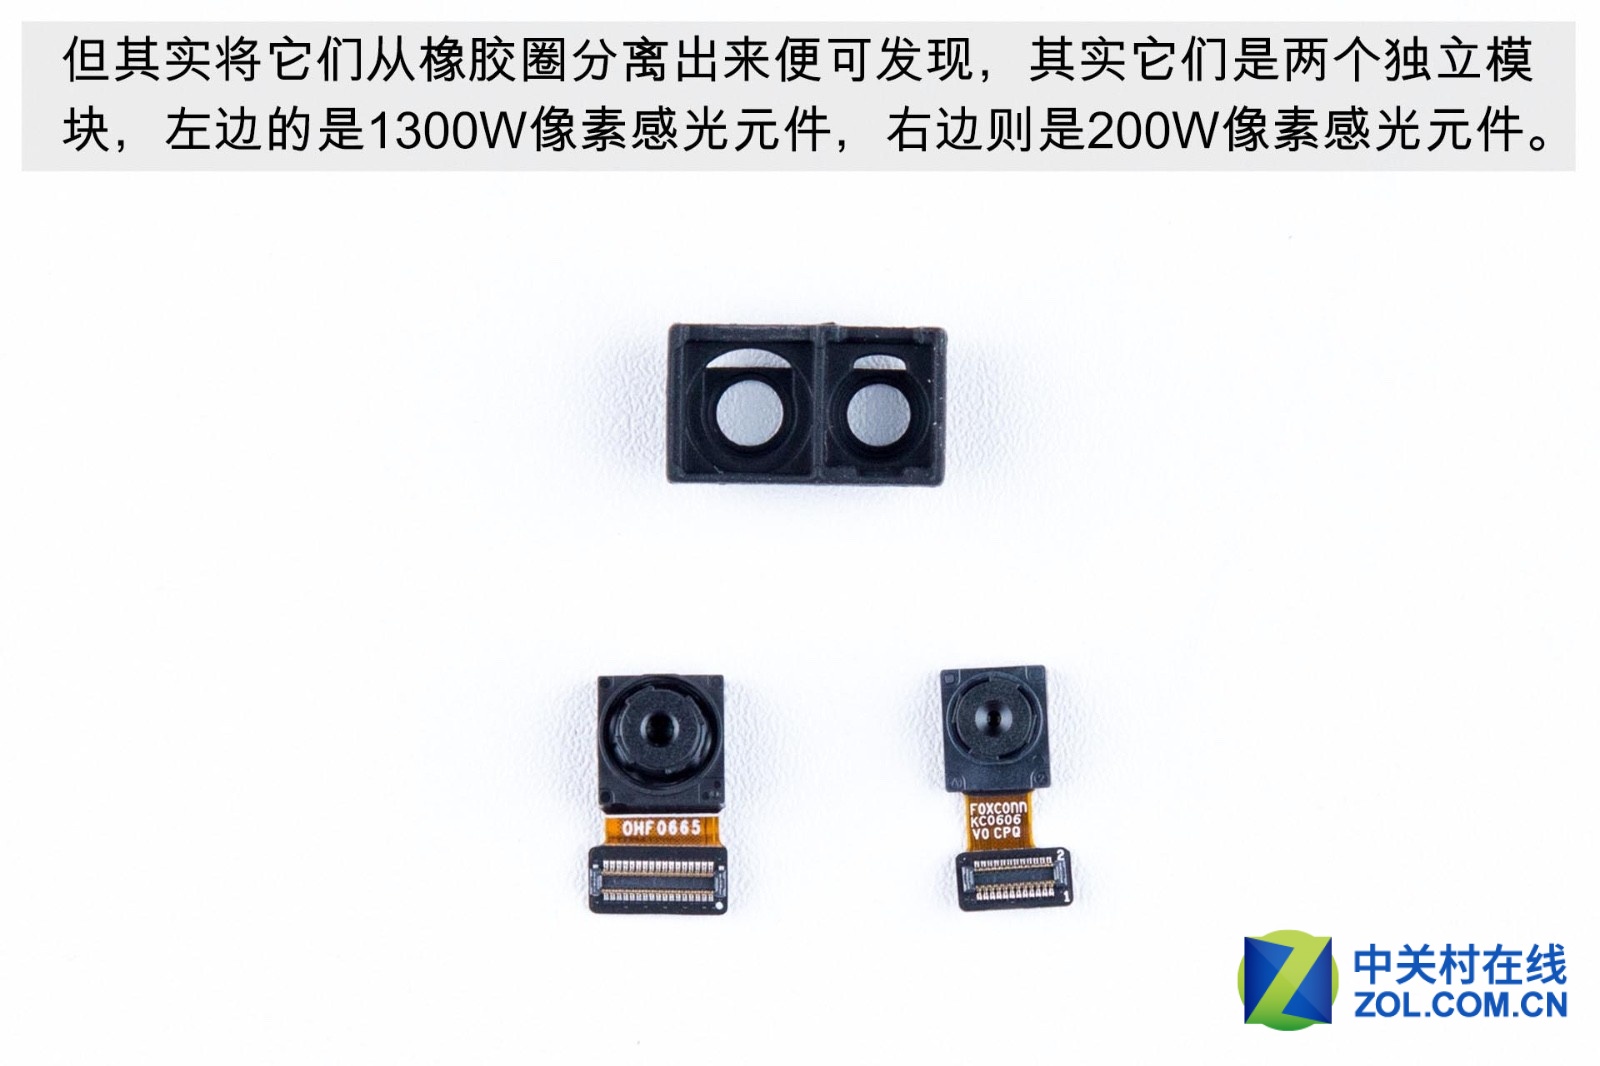
After removing two cameras from rubber ring, we find that they are two independent modules. The left part is the 13MP sensor unit, and the right part is the 20MP sensor unit.
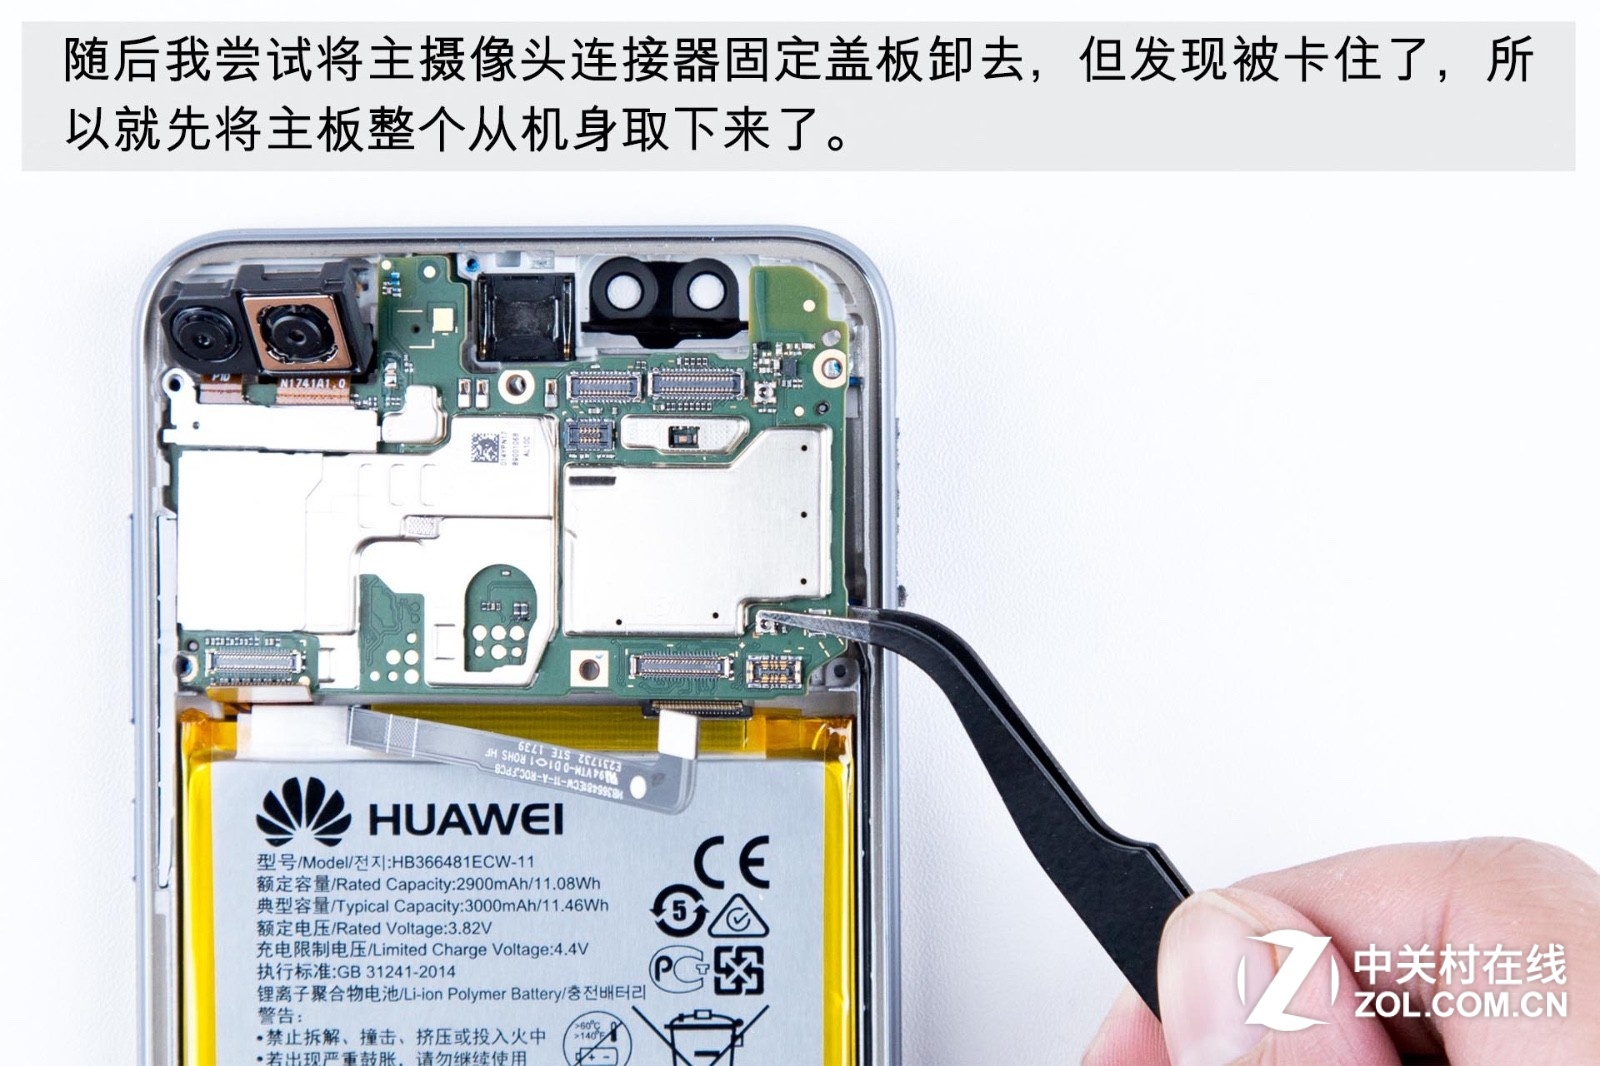
Later, I try removing the fixed cover on the primary camera but fail. So I remove the motherboard from the whole phone body.
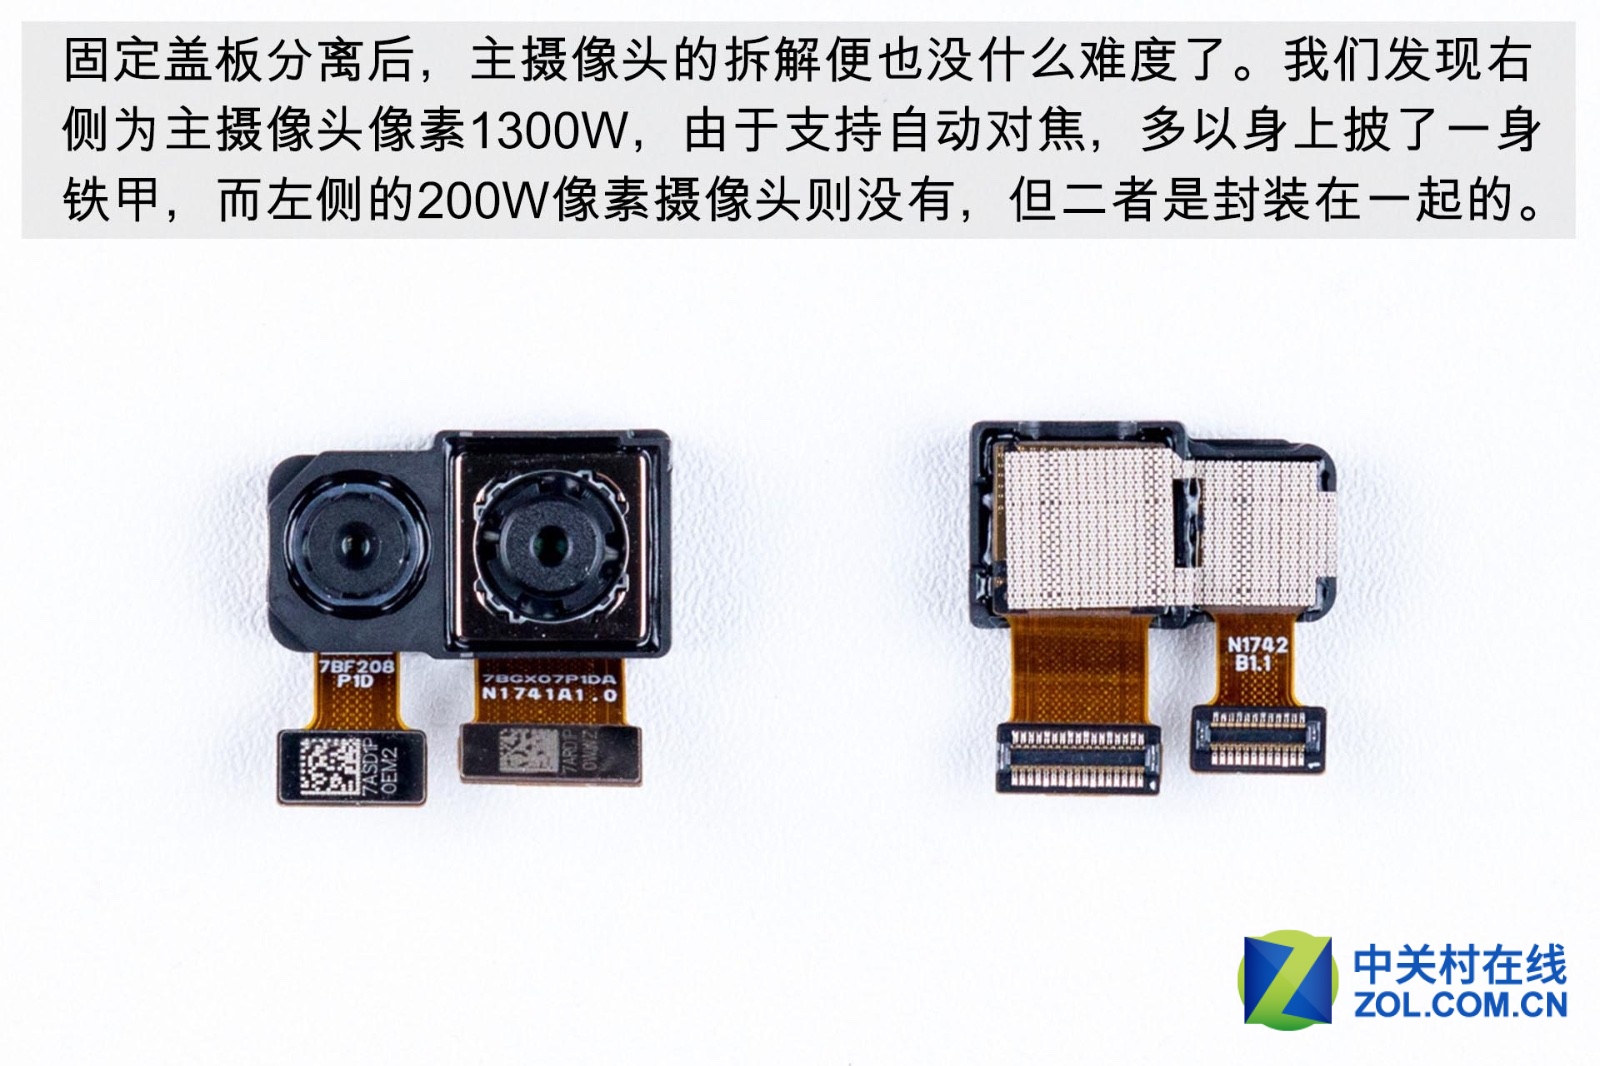
After removing the fixed cover, it is easy to dismantle the primary camera. We find that the 13MP primary camera on the right is covered by metal material to support autofocus, while the 2MP camera on the left is covered by nothing. But the two cameras are sealed together.
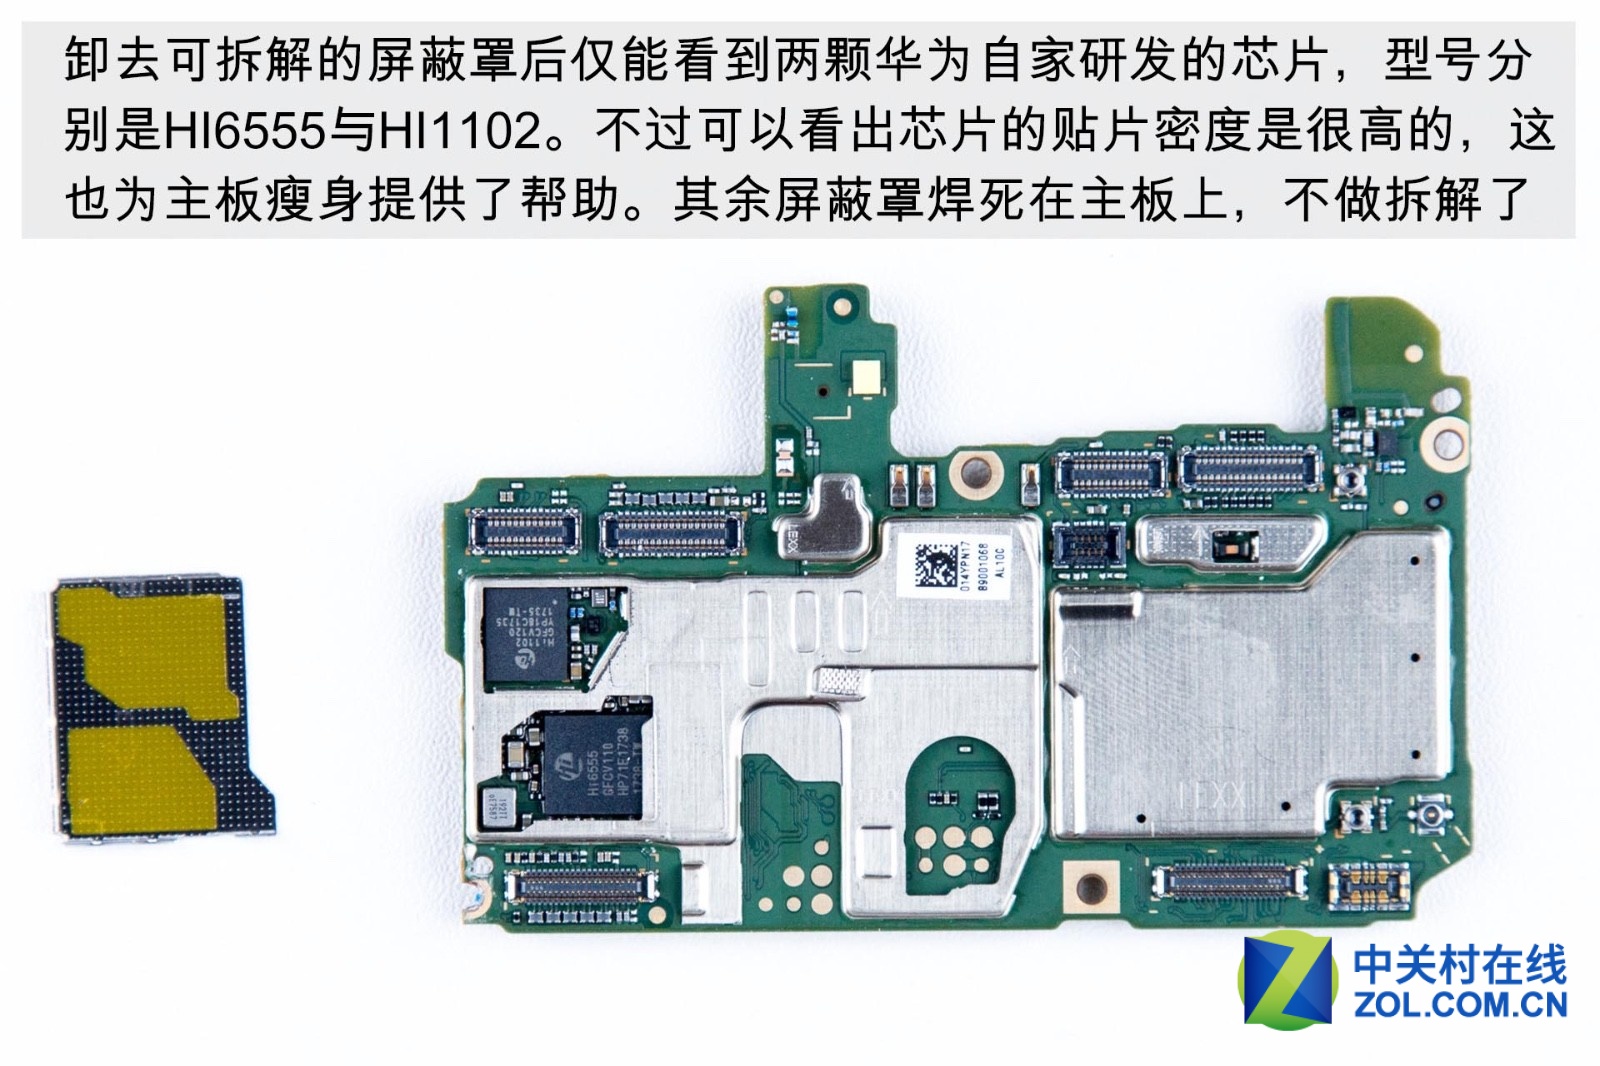
After removing the detachable shield covers, only Huawei’s two own chips including HI6555 and HI1102 can be seen. The rest shield covers weld on the motherboard can’t be removed.

Remove the shield cover. We find three components on the motherboard including the processor, memory card, and flash memory card haven’t adopted multi-stack package process. The memory is from Hynix, and the flash memory is from Samsung. Undoubtedly this area covered by the cooling material is Kirin 659 processor.
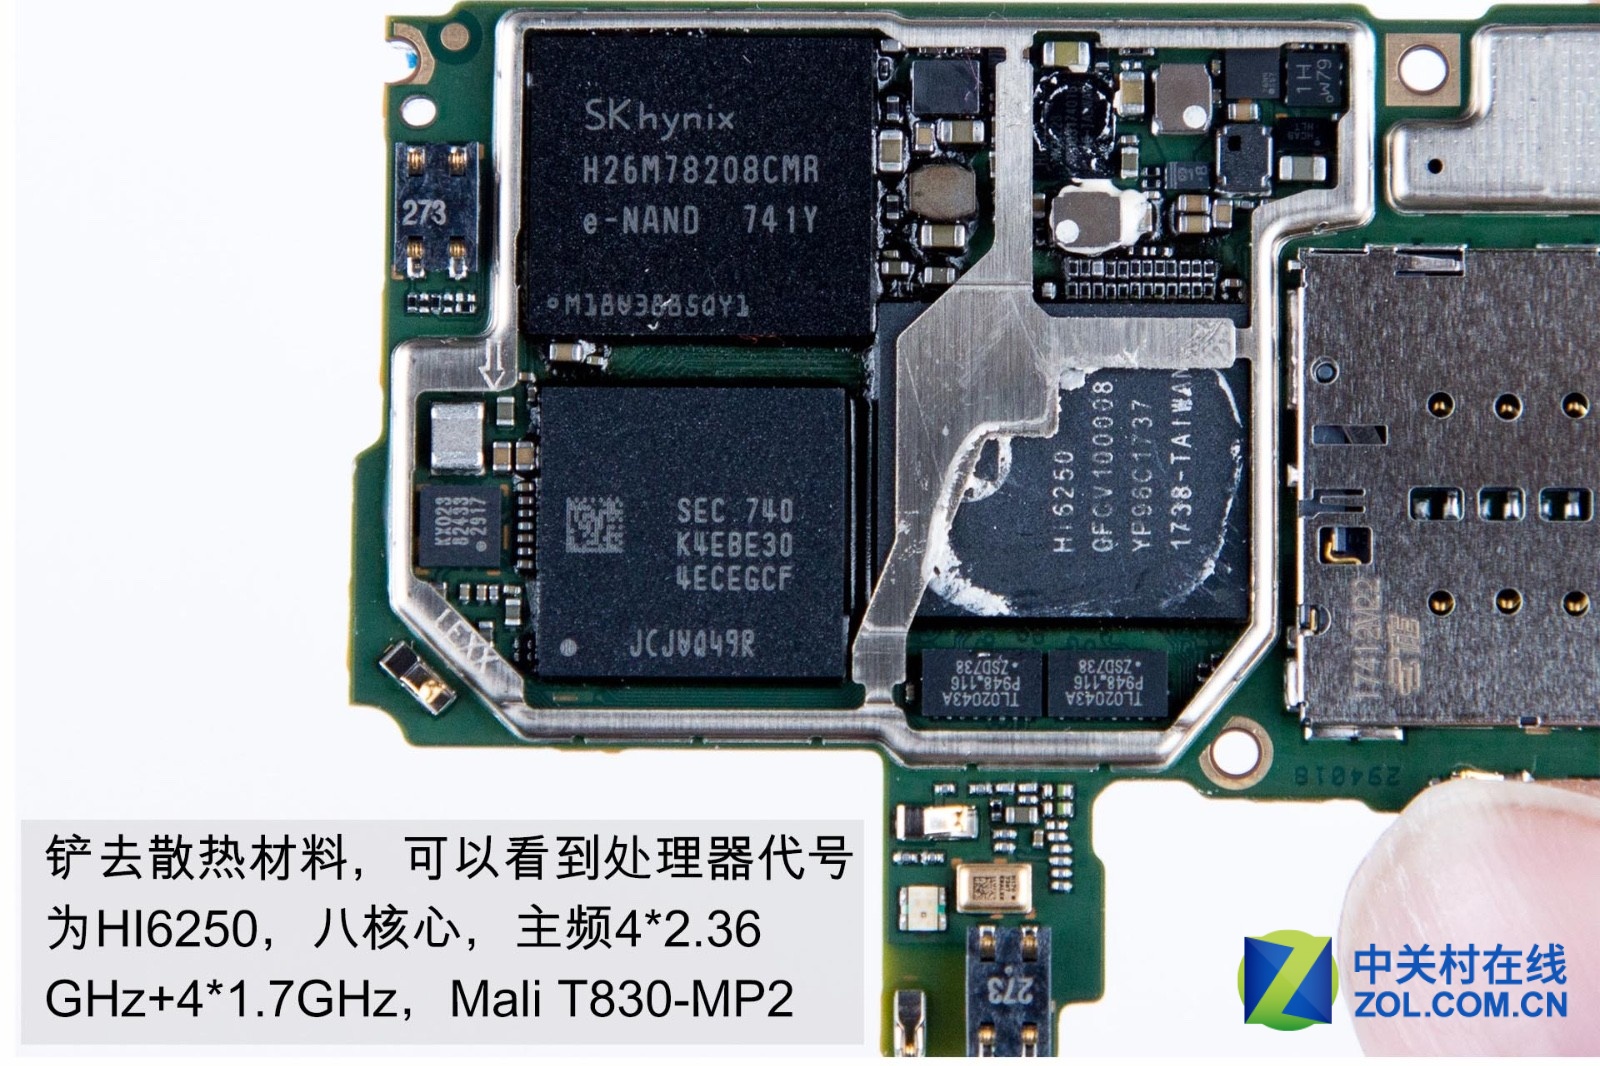
Remove cooling material. We can see that the processor’s code number is HI6250 with Mali T830-MP2. The chip consists of four cores up to 2.36GHz and four cores up to 1.7GHz.

Utilize the tweezers to remove the earphone. But this operation destroys sealing foam on the earphone’s bottom.
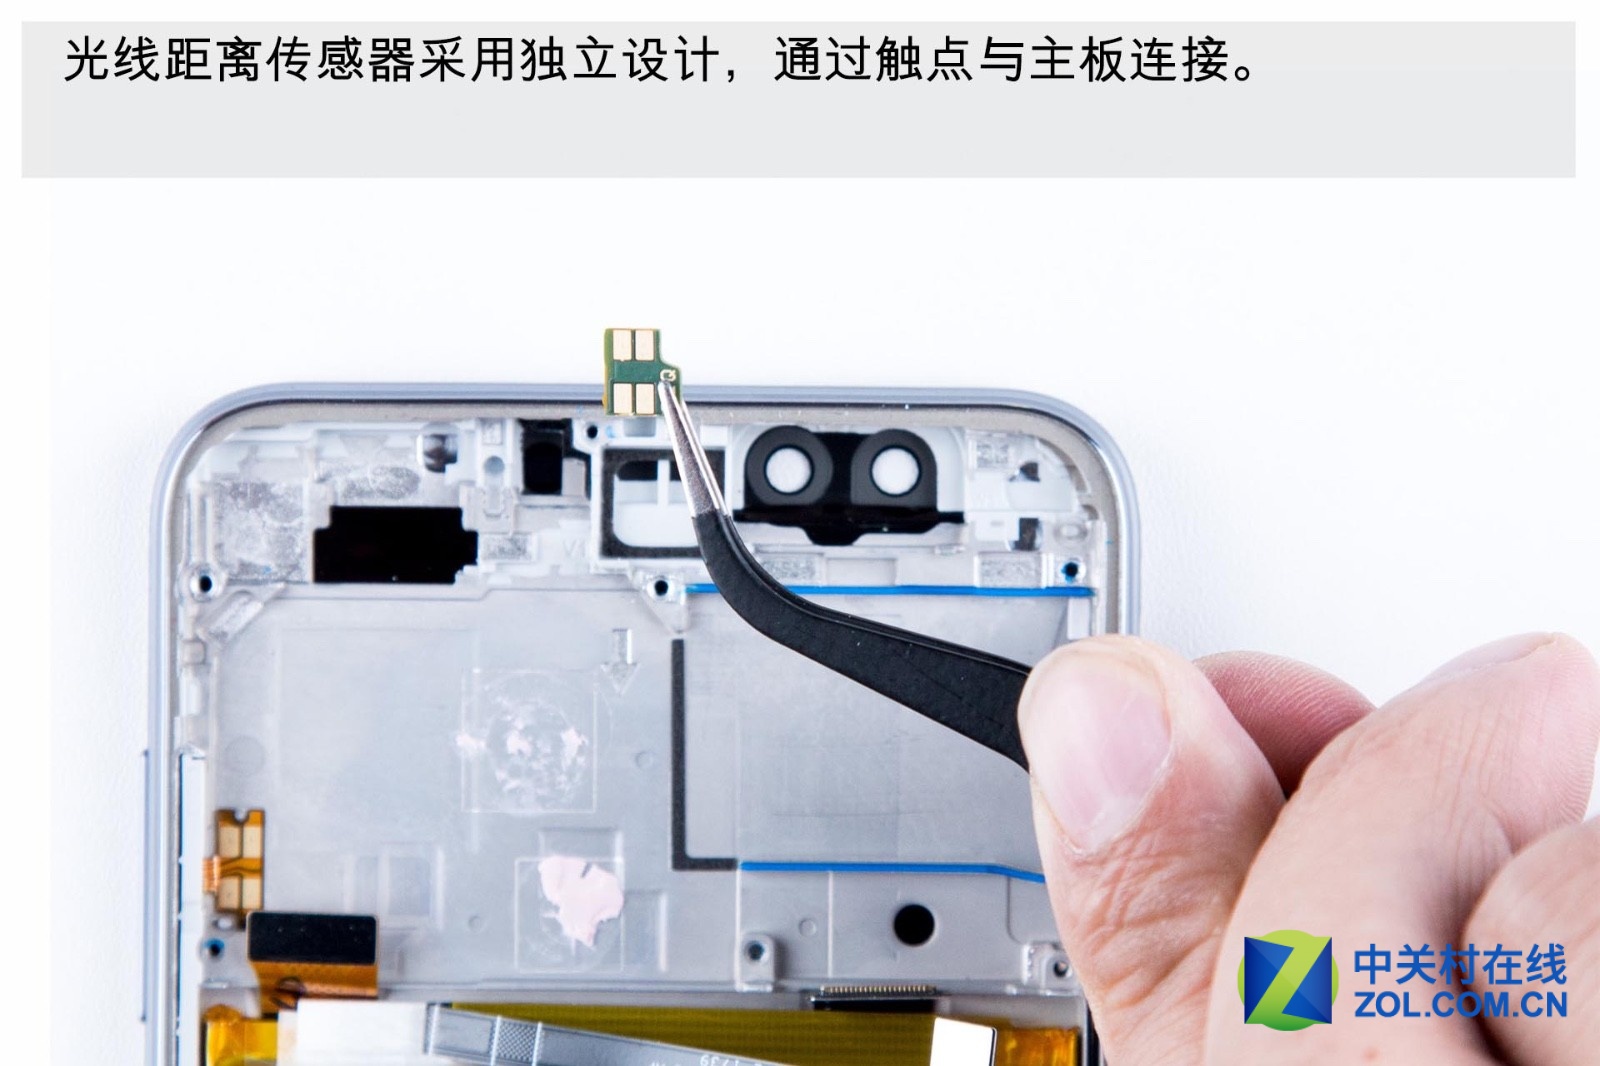
The light distance sensor connected to the motherboard via metal contacts.
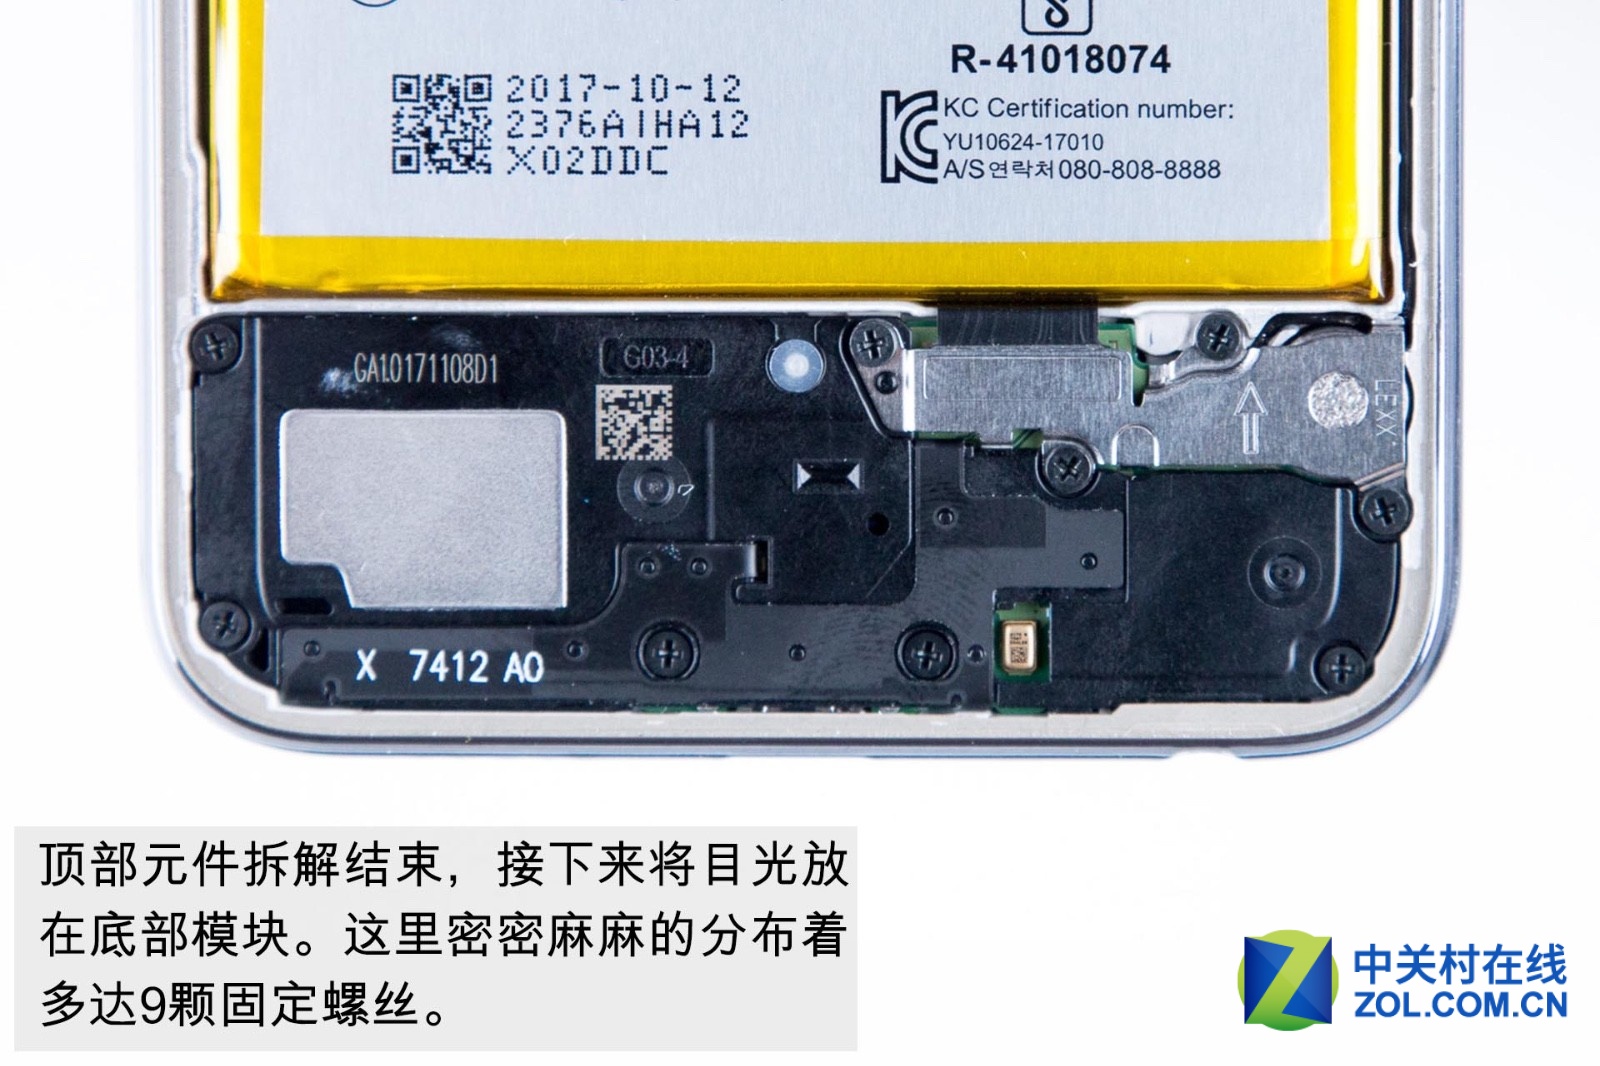
The teardown of components on the top is over. There are nine fixed screws on the bottom module.
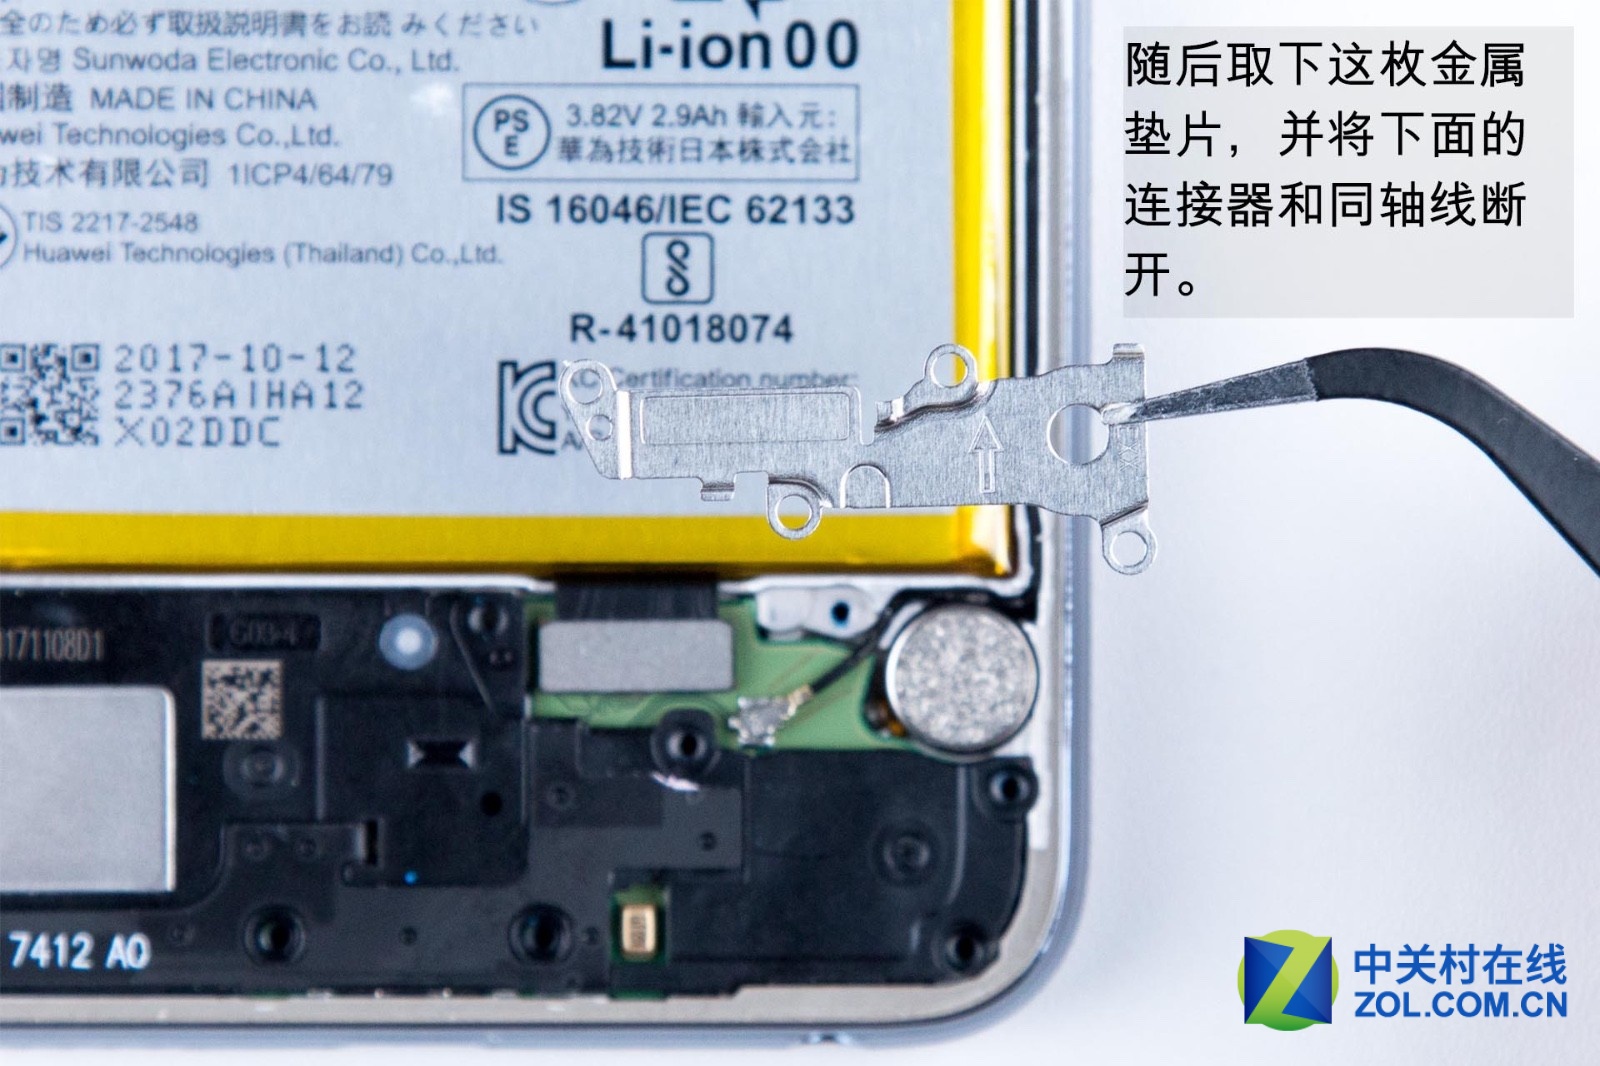
Next, take out the metallic gasket. Then disconnect the connector and coaxial line.
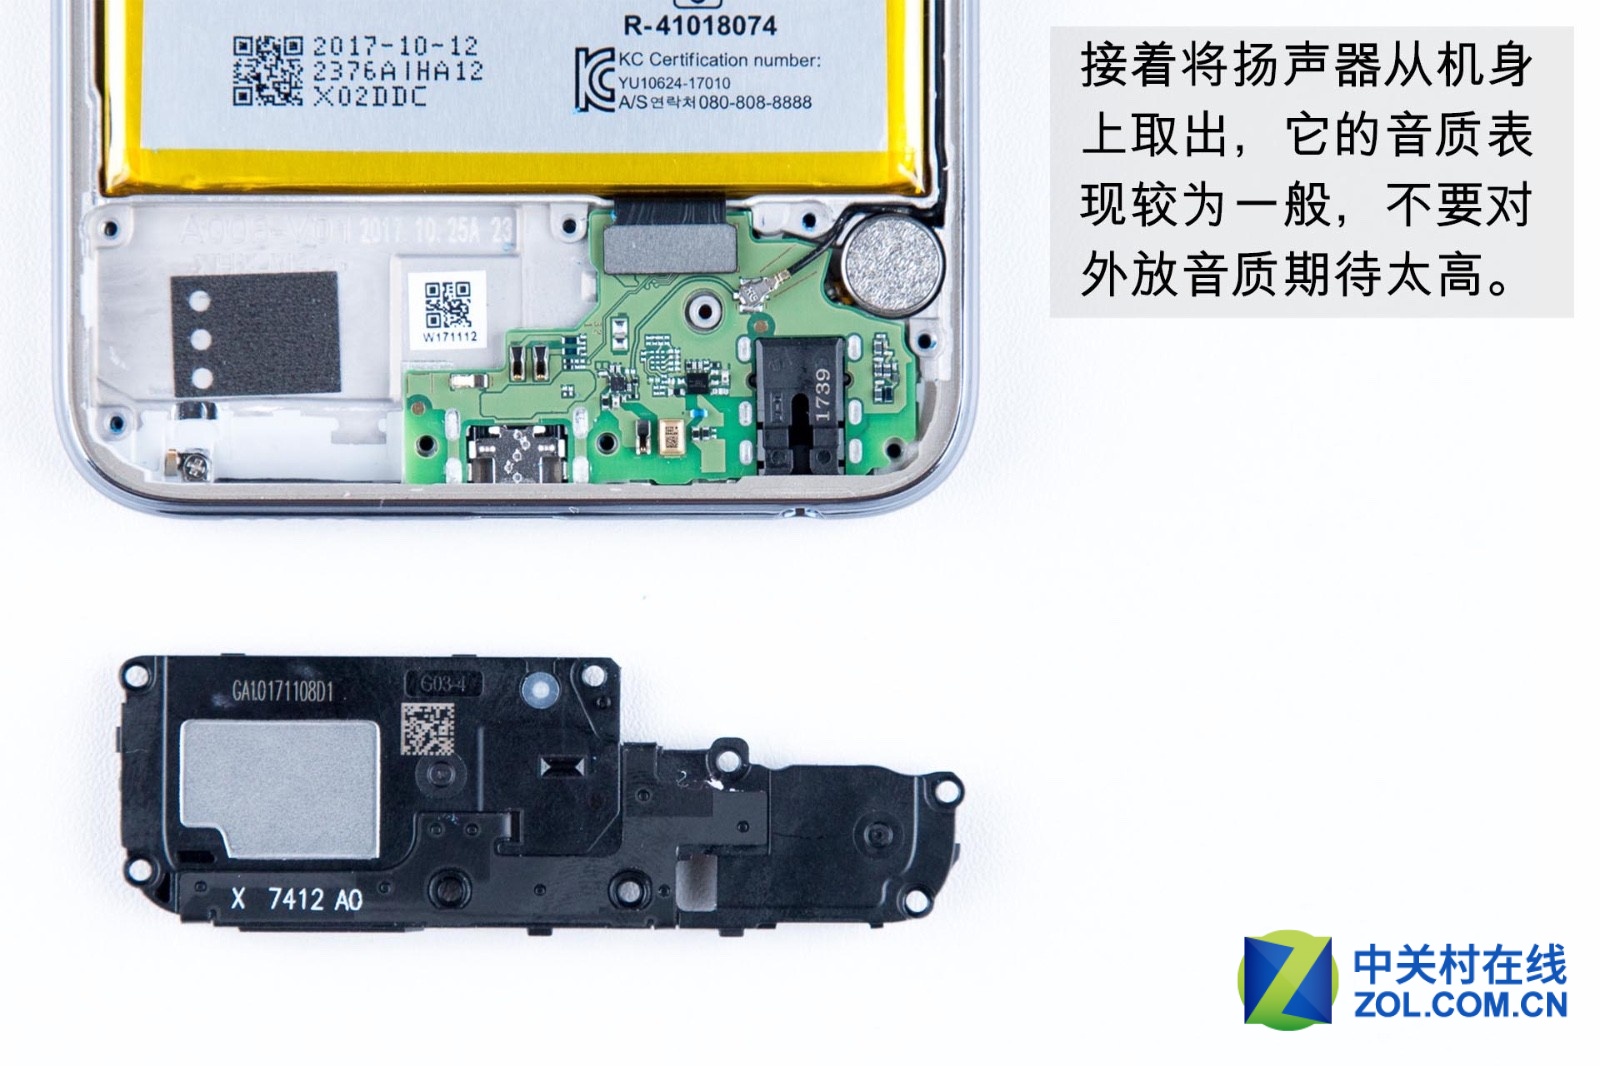
Remove the loudspeaker from the phone body. The loudspeaker has poor performance.
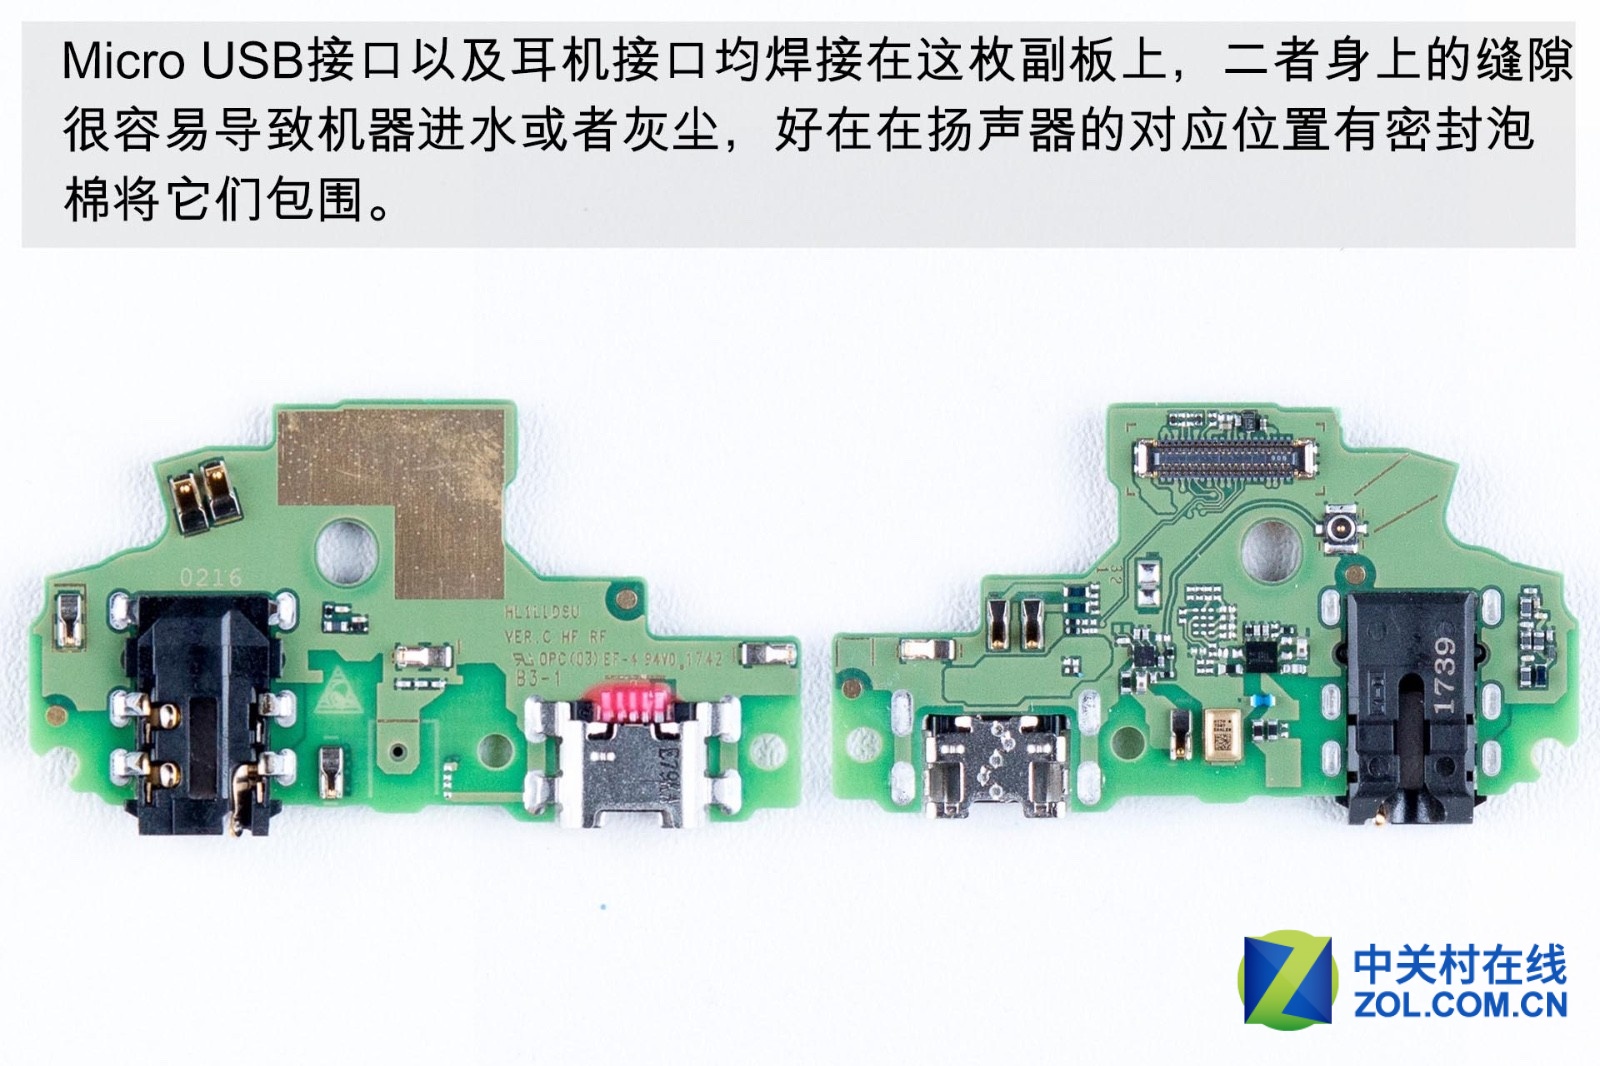
The micro USB port and the earphone port have been weld on the vice board. The seams on the two ports make the device easy to leak into water drop and dust.
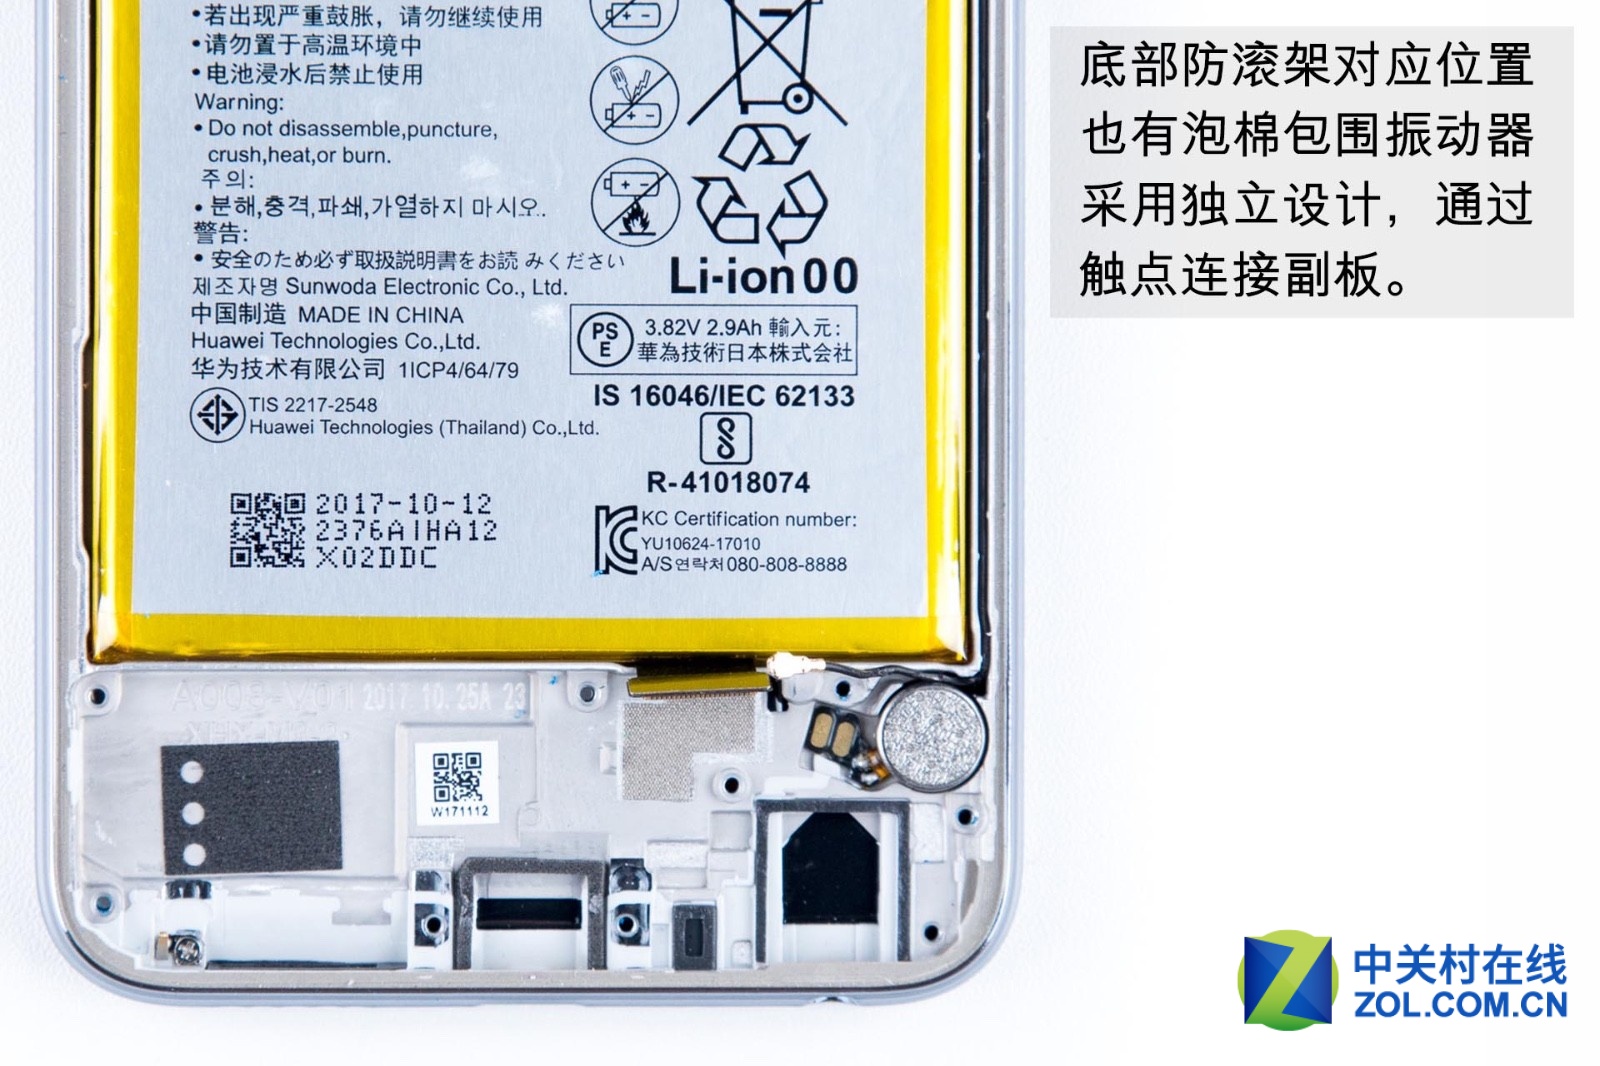
The roll cage has been surrounded by foam. The vibrator which is connected to the vice board through metal contact.
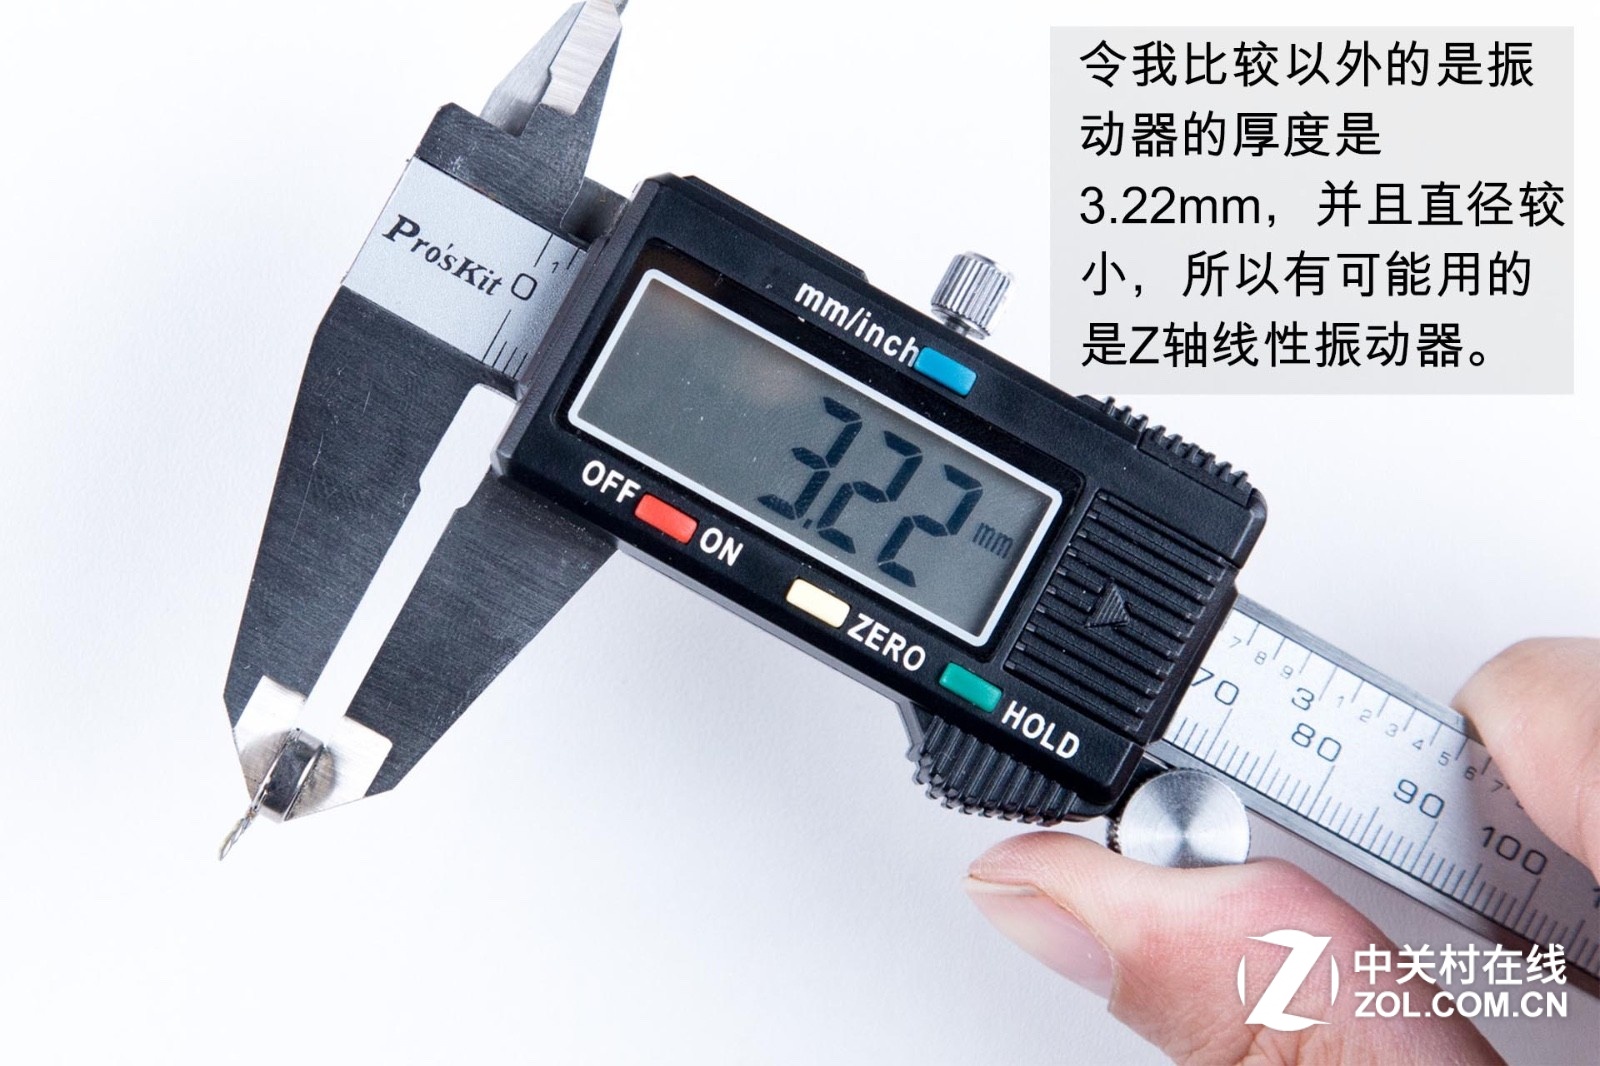
The vibrator’s thickness is 3.22mm, and its diameter is small. So the vibrator is likely to be the Z-linear vibrator.
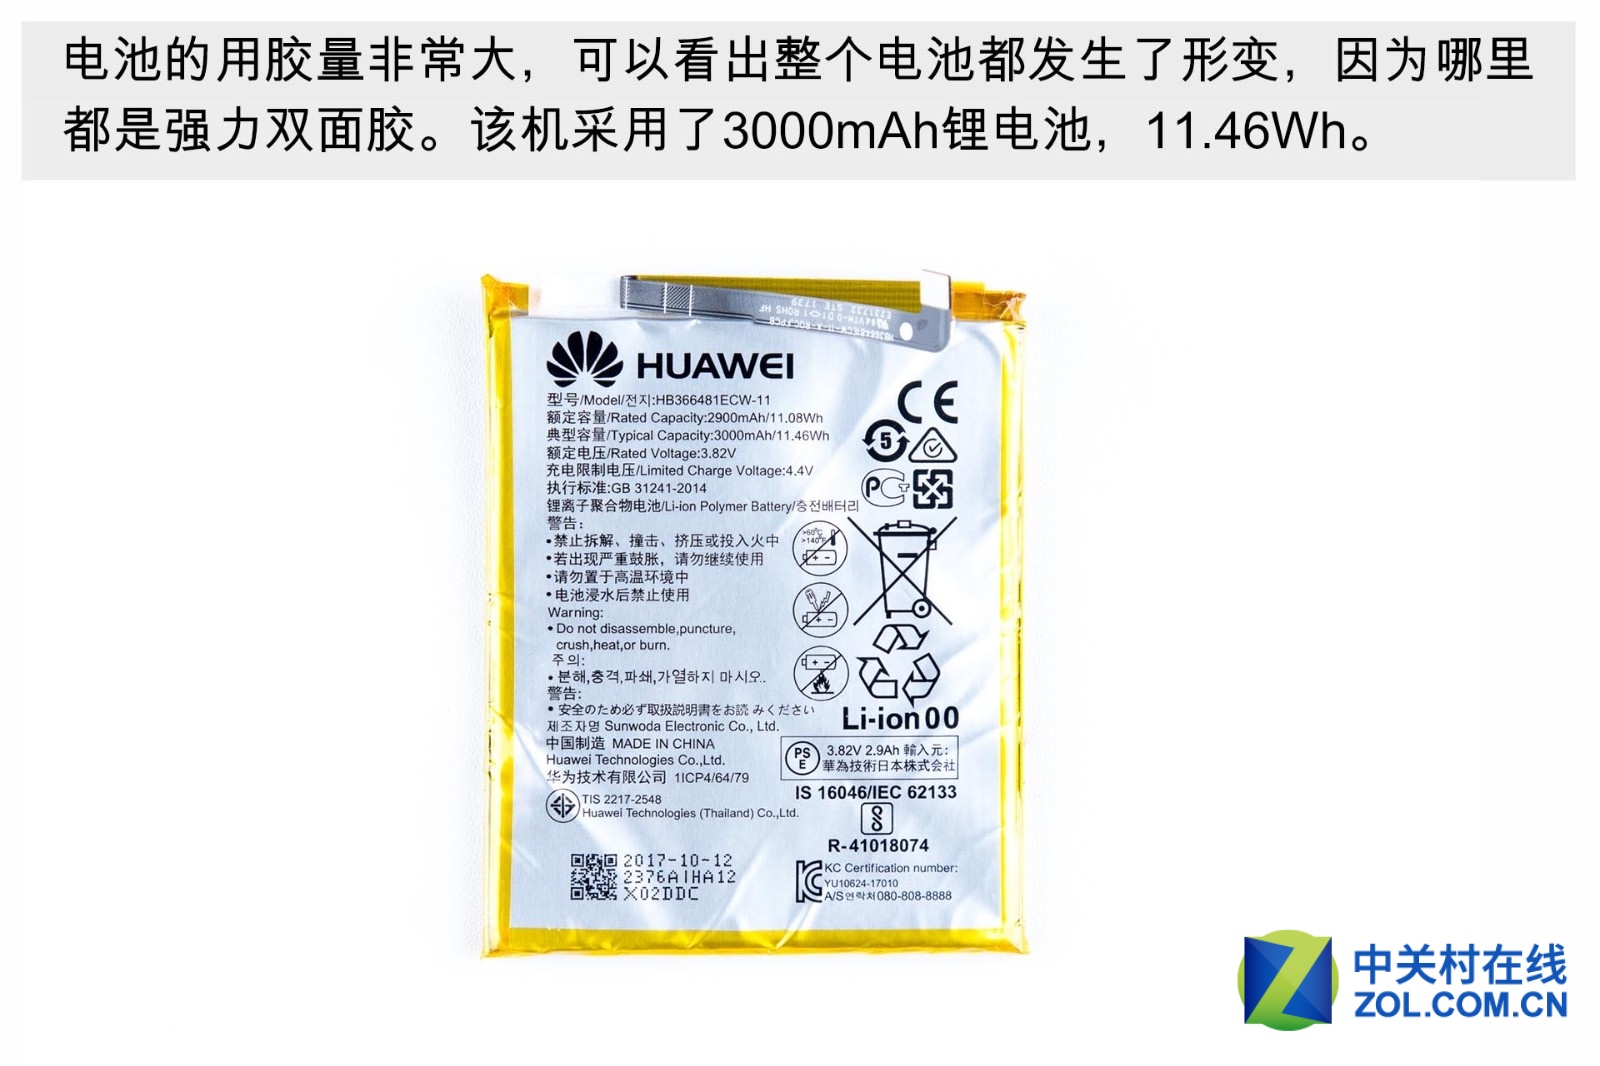
The battery has used a lot of glue. The whole battery becomes deformed because of plentiful super double-side glue. The smartphone sports a 3,000mAh battery.
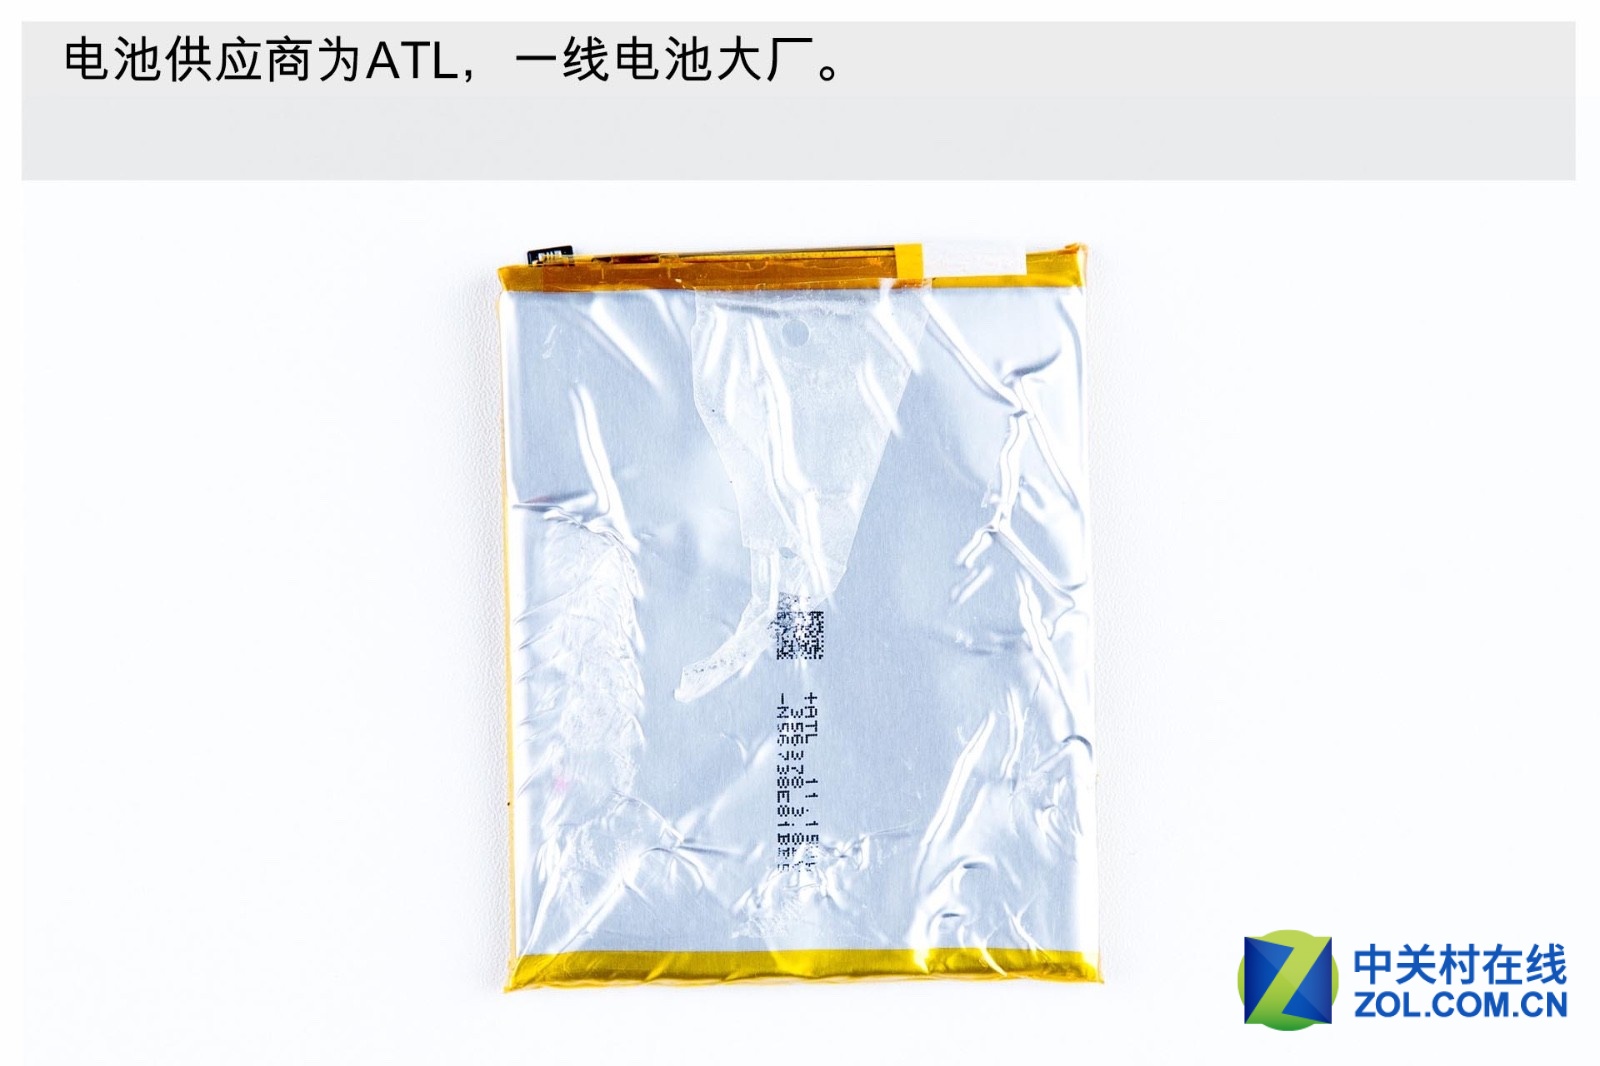
The battery is provided by ATL which is a top battery manufacturer.
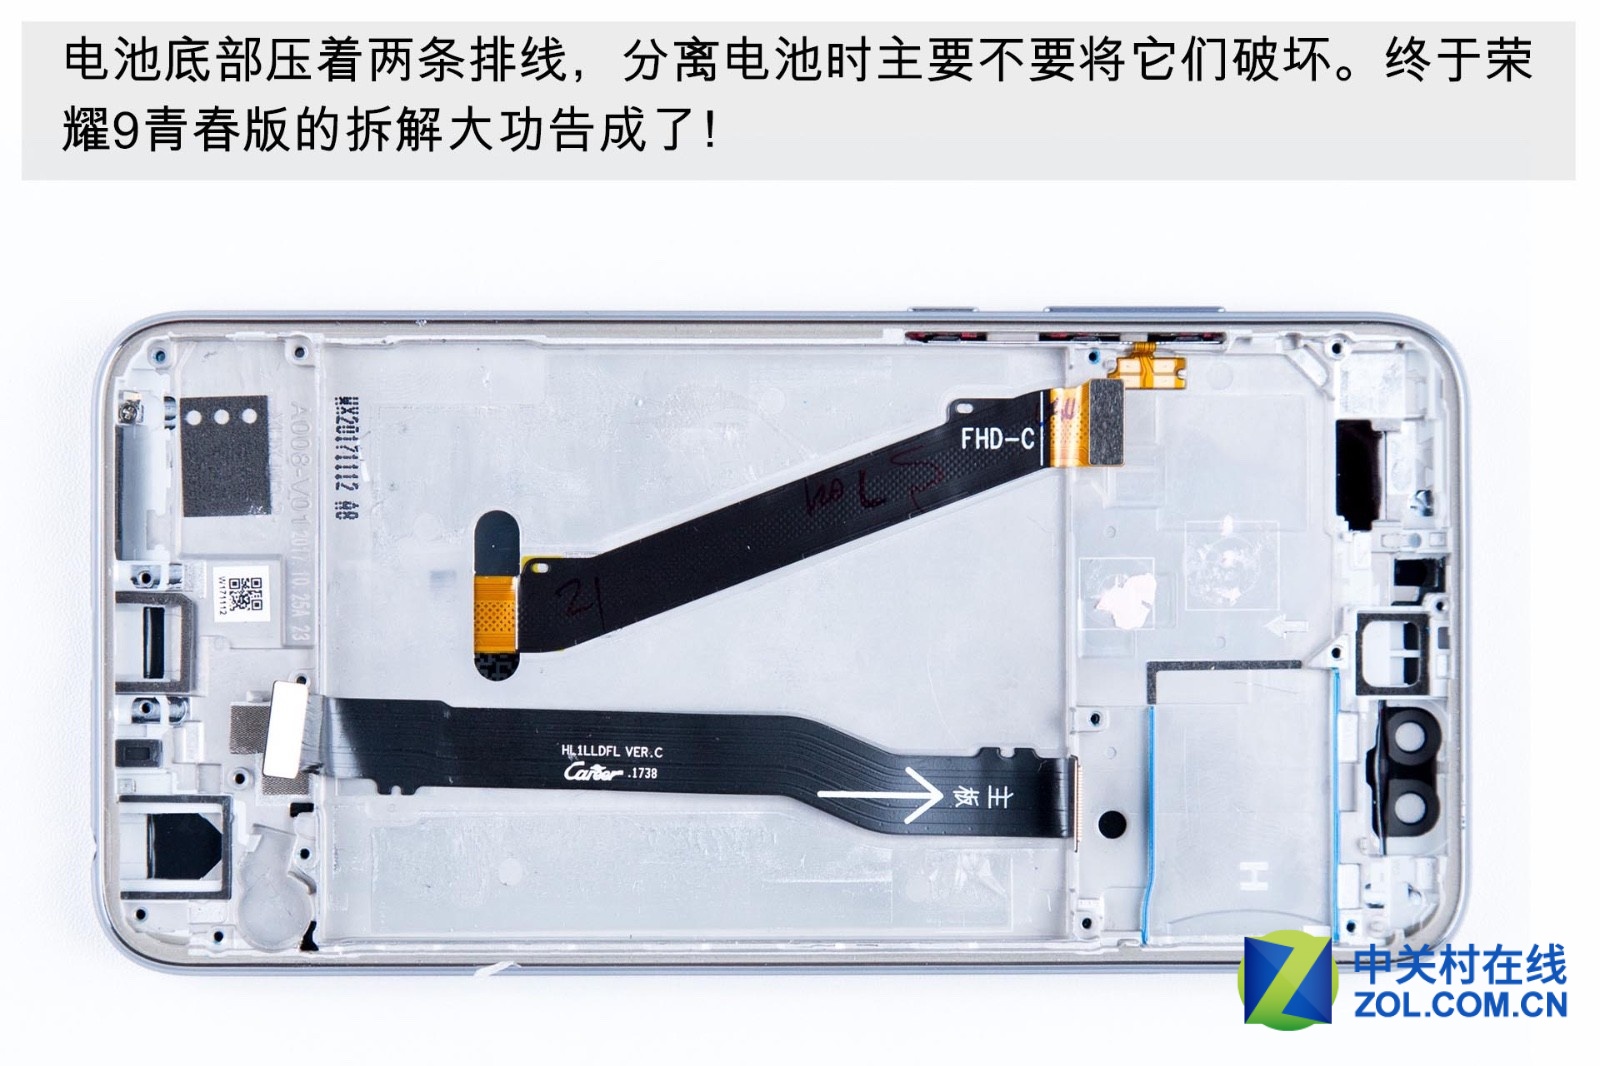
The battery’s bottom has two lines. Don’t destroy them when removing the battery. Finally, we have successfully finished the teardown of the Honor 9 Lite.
Summary:
In general, the Honor 9 Lite doesn’t have excellent internal layout or workmanship performance. The motherboard’s integration, chip protection, and connector fixation are satisfying.