
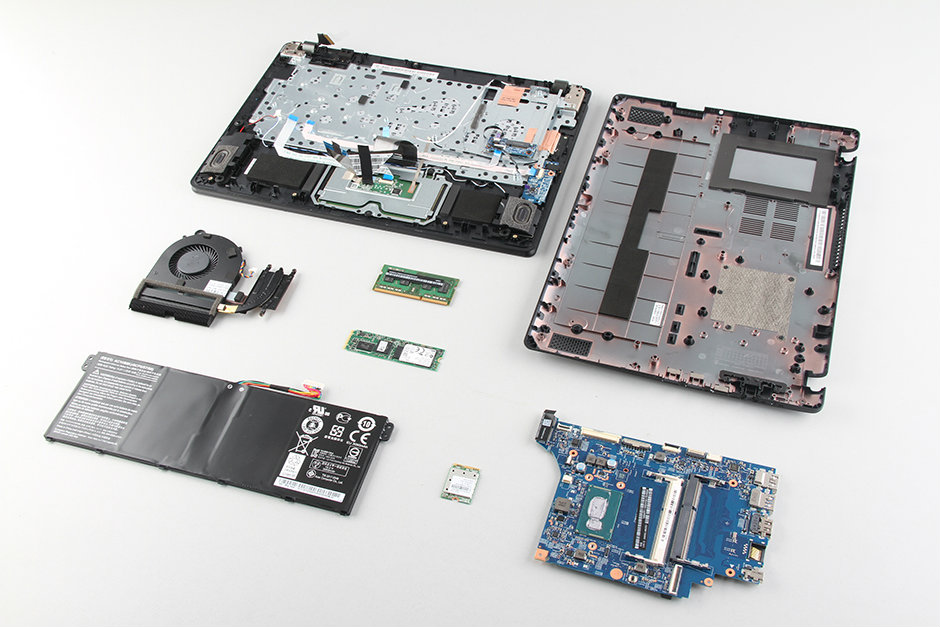
In this guide, I will explain how to disassemble the Acer Aspire V13 V3-371 to remove the bottom cover, battery, RAM, SSD, wireless card, heat sink, cooling fan, and motherboard.
Want to keep in touch with us? Follow us on Facebook for more repair news.
First, remove all screws from the bottom cover.
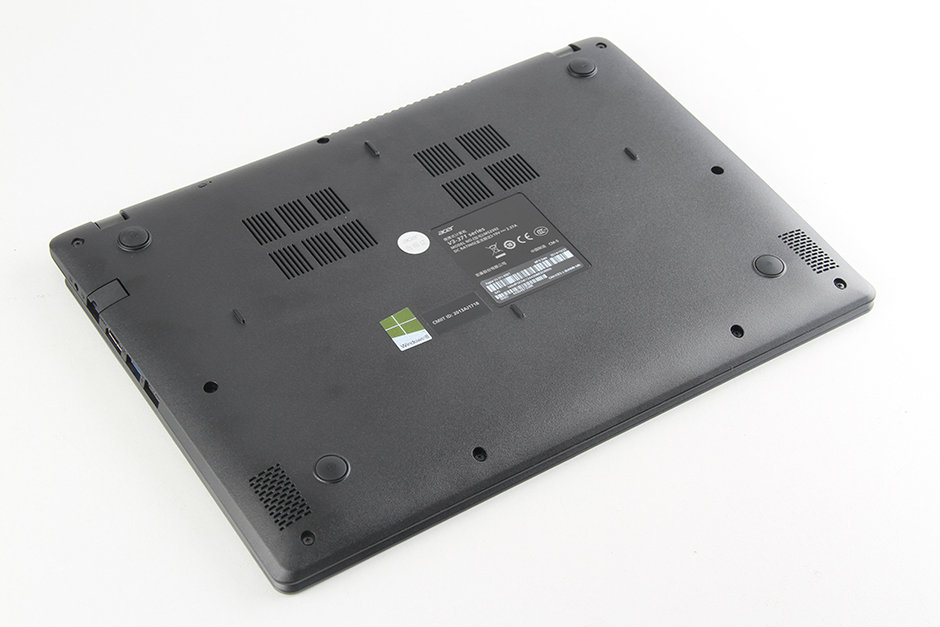
Insert a plastic pry tool between the bottom cover and the palm rest. There are several clips on the palm rest that secure it to the cover. Slide the pry tool to unlock all the clips before fully removing the bottom cover.
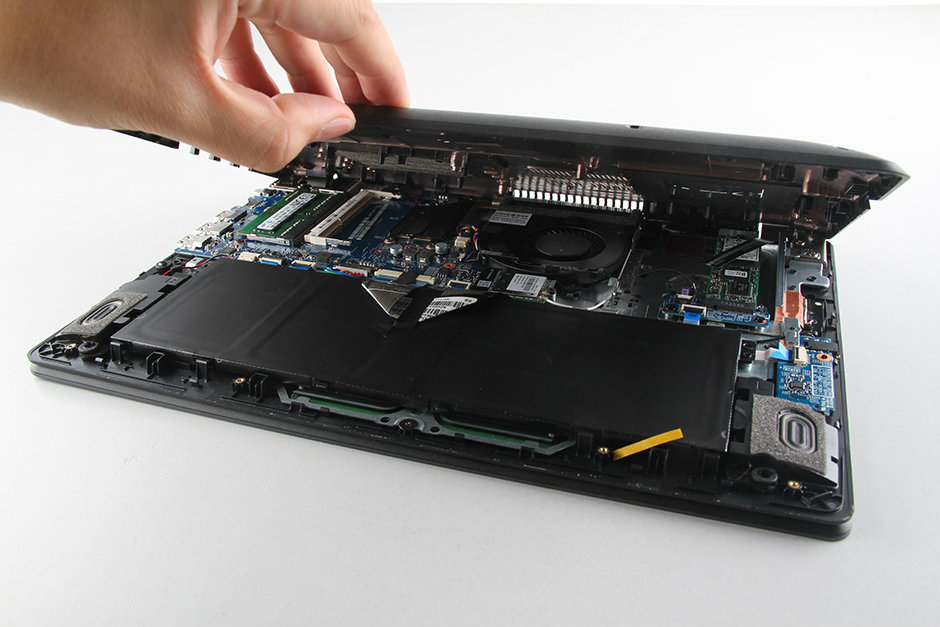
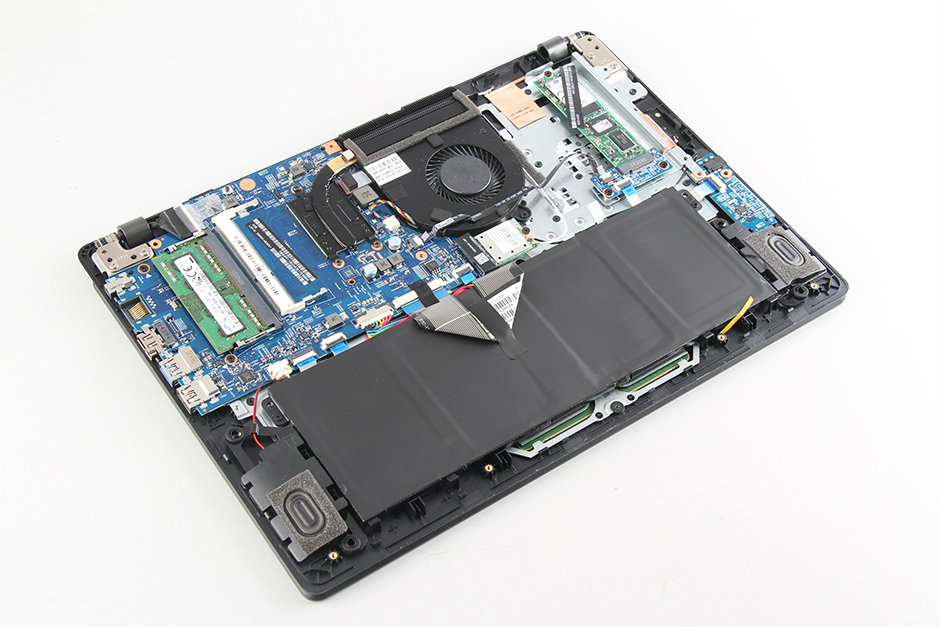
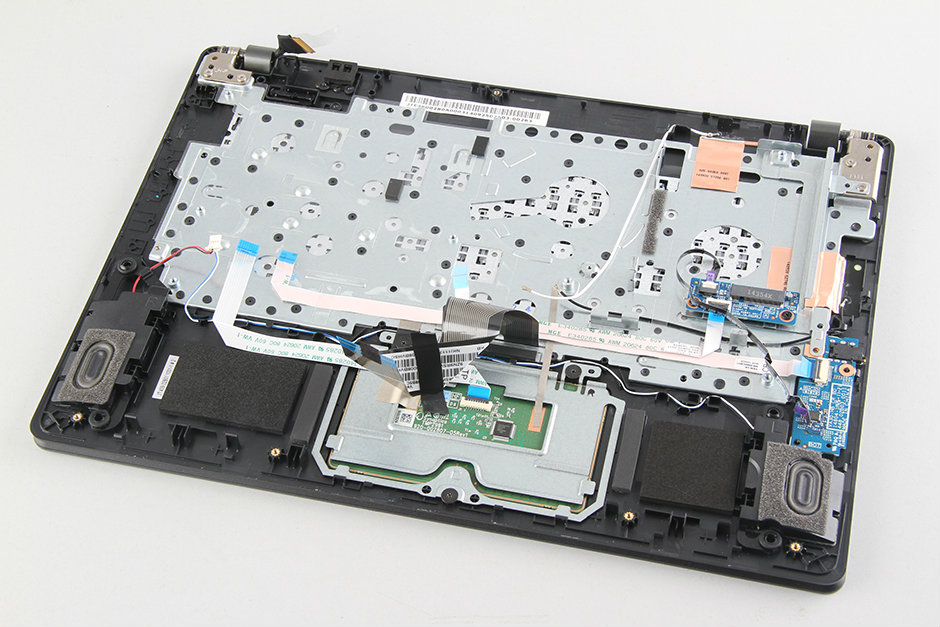
Once the bottom case is removed, you can get access to the internal components of the Aspire V13 V3-371.
There are some shock-absorbing sponges on the bottom cover to protect the battery and SSD.
The internal structure of the Aspire V3-371 is very tidy. The keyboard cable is secured to the battery with black tape.
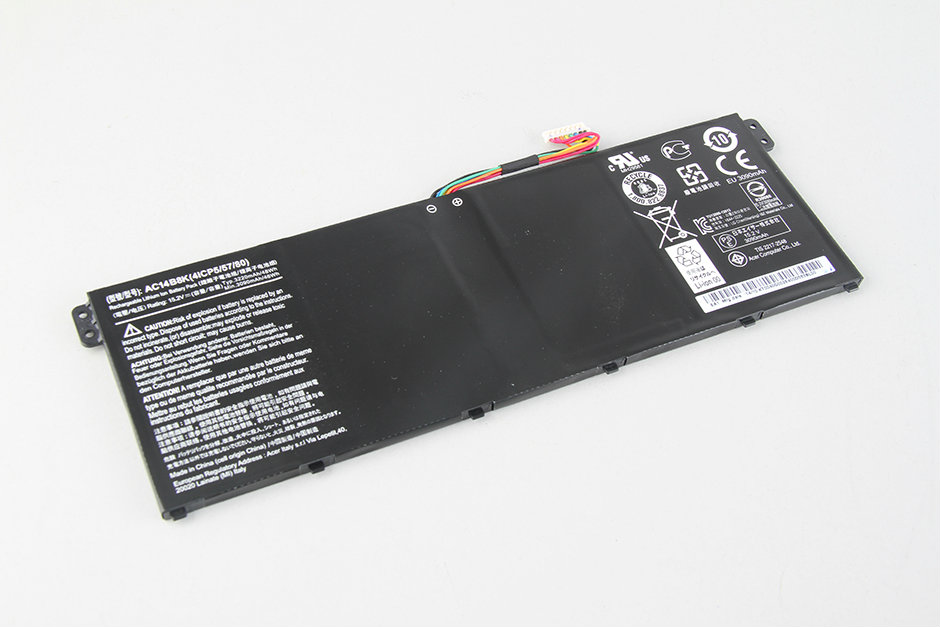
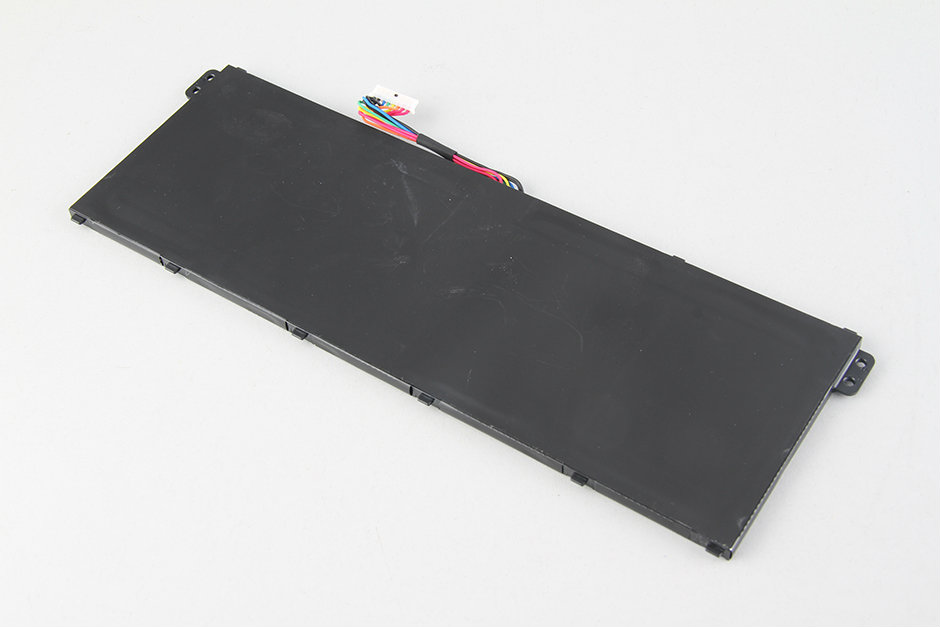
Remove the two screws securing the battery and disconnect the battery power cable. You can remove the battery.
The Acer Aspire V3-371 comes with a 15.6V, 3,200-3,090mAh, 48-46Wh Li-ion battery. The Acer part number is AC14B8K.
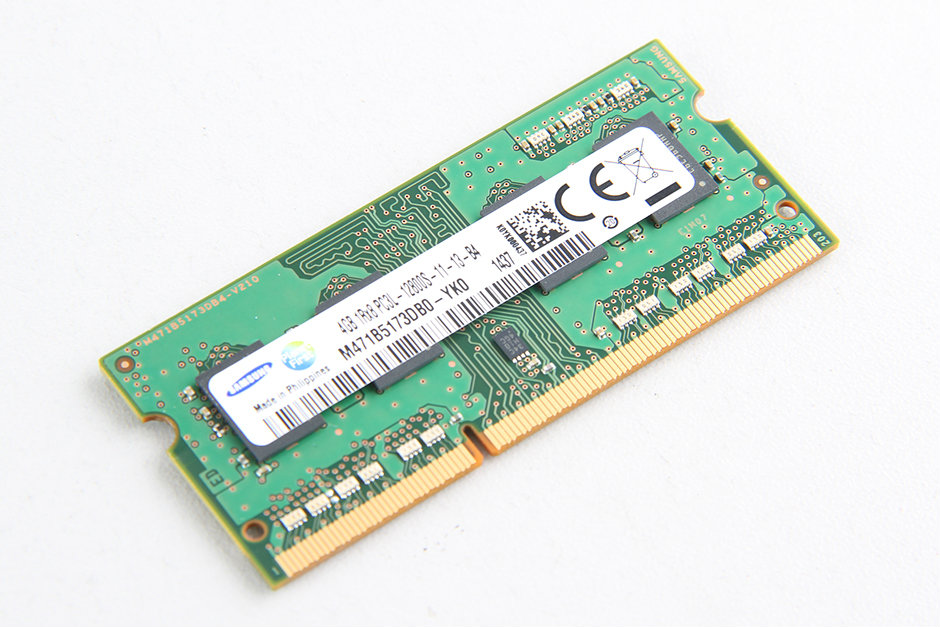
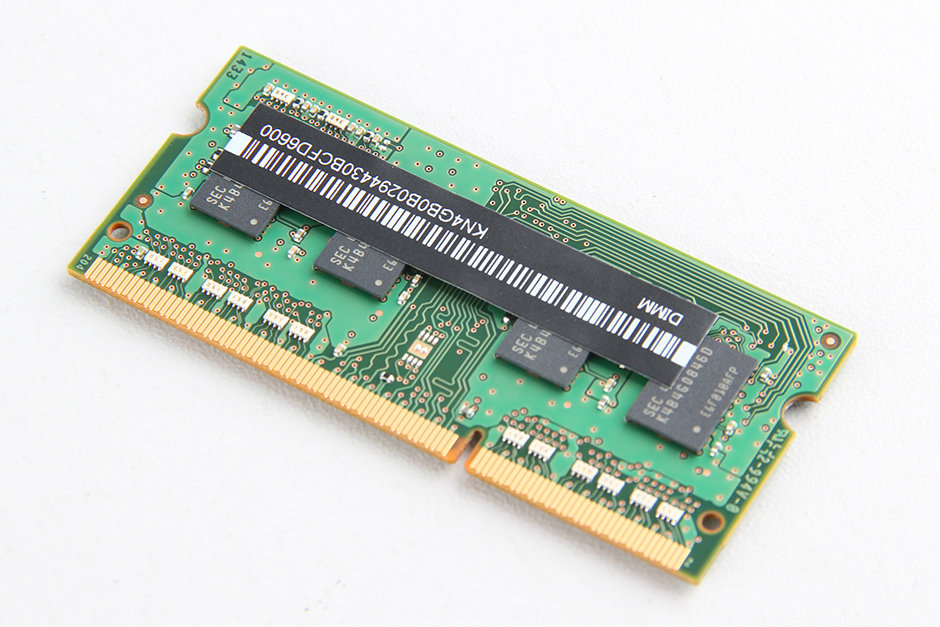
The Acer Aspire V3-371 has two memory slots, but only one memory module is installed, allowing you to add another module to upgrade the memory.
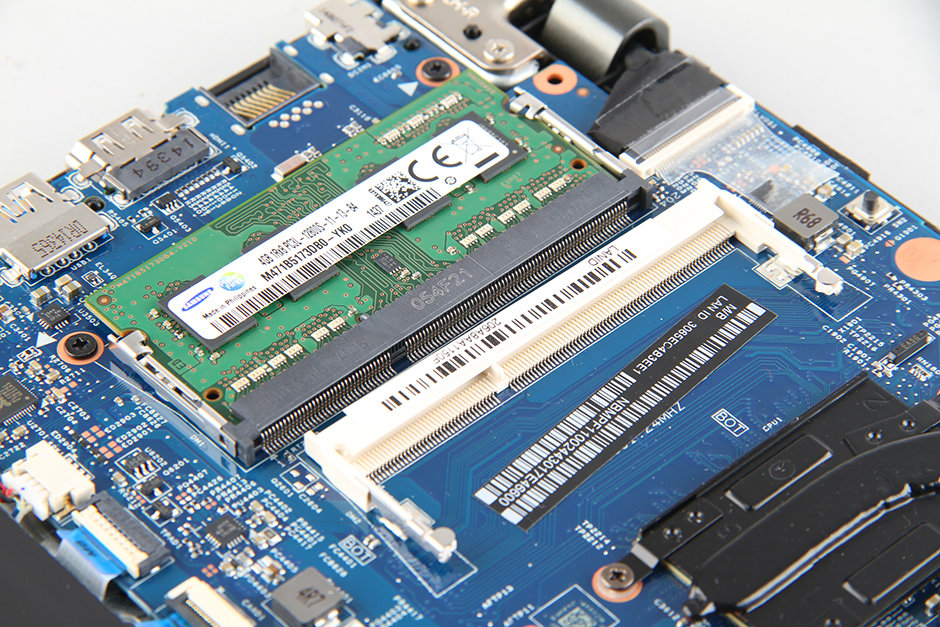
The laptop comes with a Samsung 4GB PC3L-12800S RAM module.
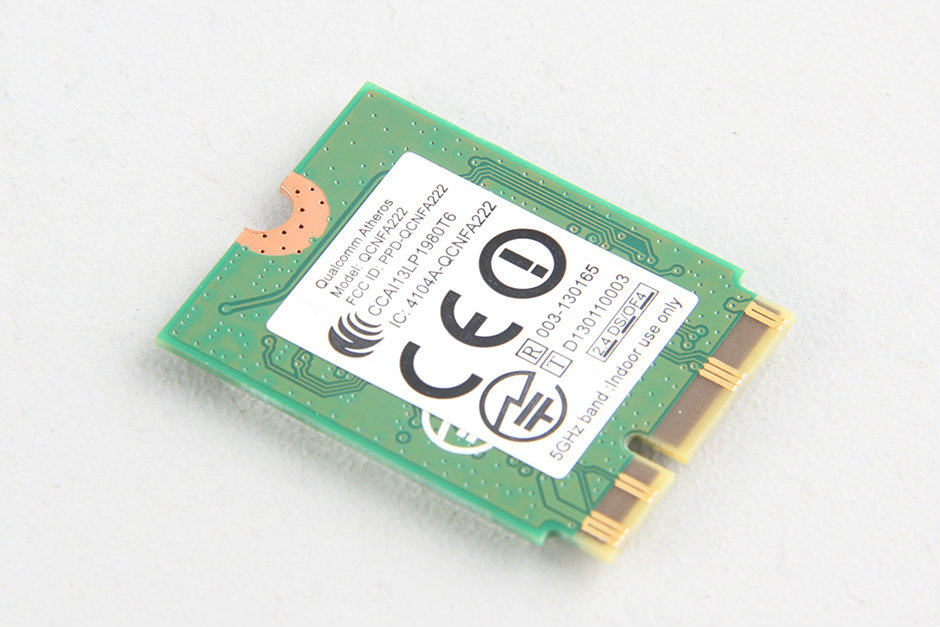
Disconnect the two antenna cables, remove the screw securing the wireless card, and then take it out of its slot.
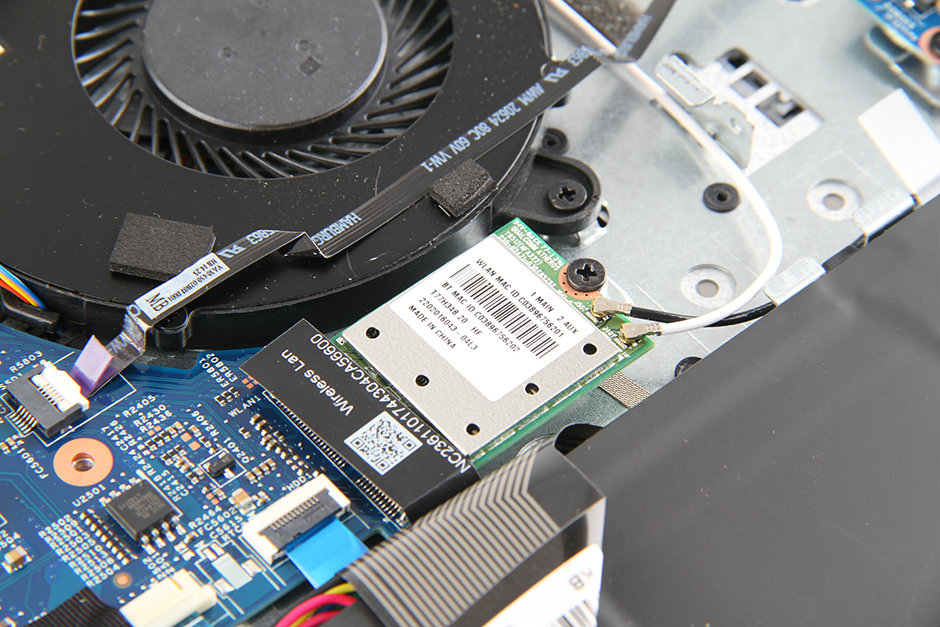
The laptop comes with a T77H348.20 wireless card.
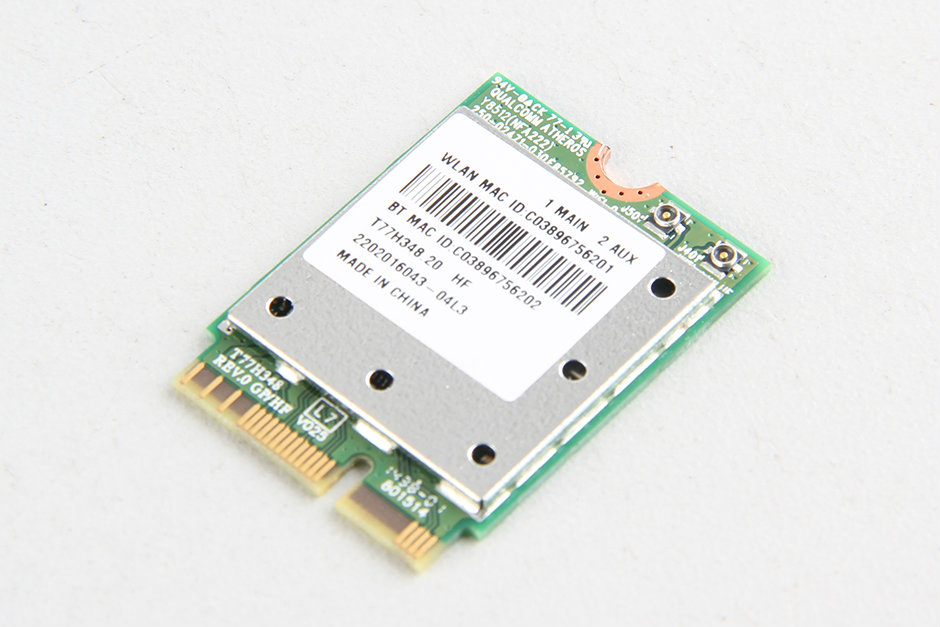
On the back, we find that the model of this wireless network card is Qualcomm Atheros QCNFA222.
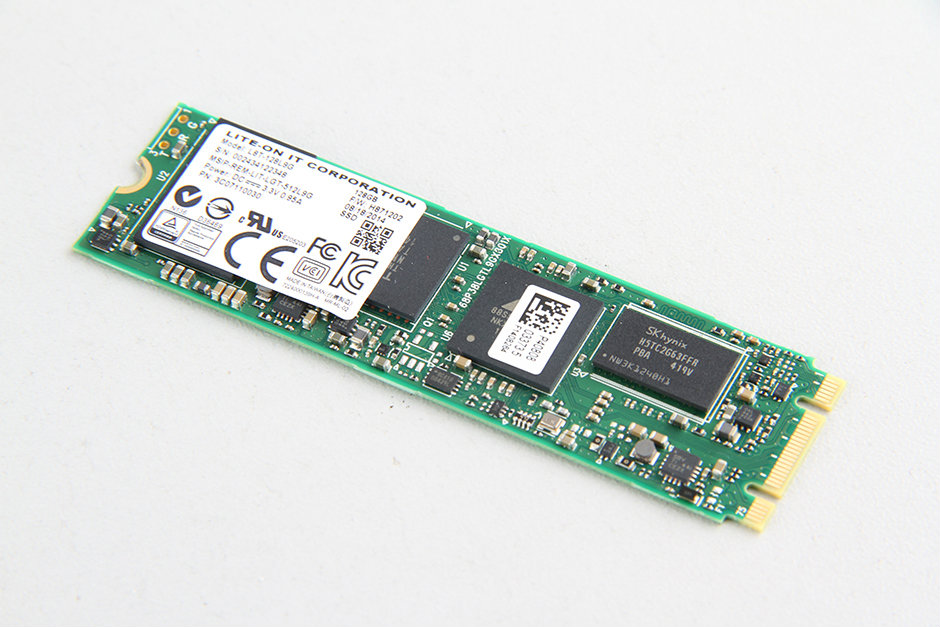
Remove the screws securing the SSD and take it out of the M.2 slot.
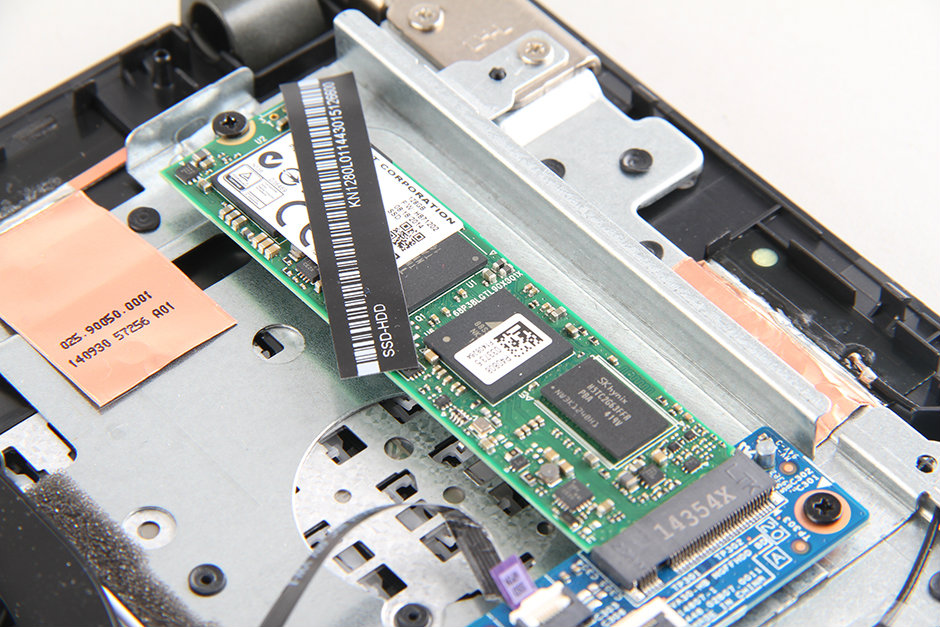
The Acer Aspire V13 V3-371 features a Lite-On 128GB M.2 SSD.
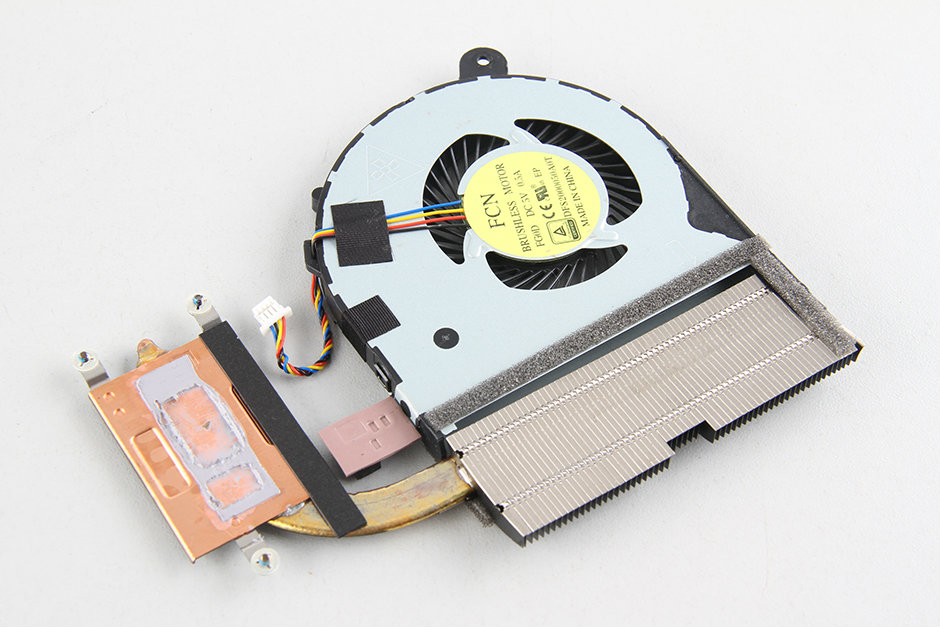
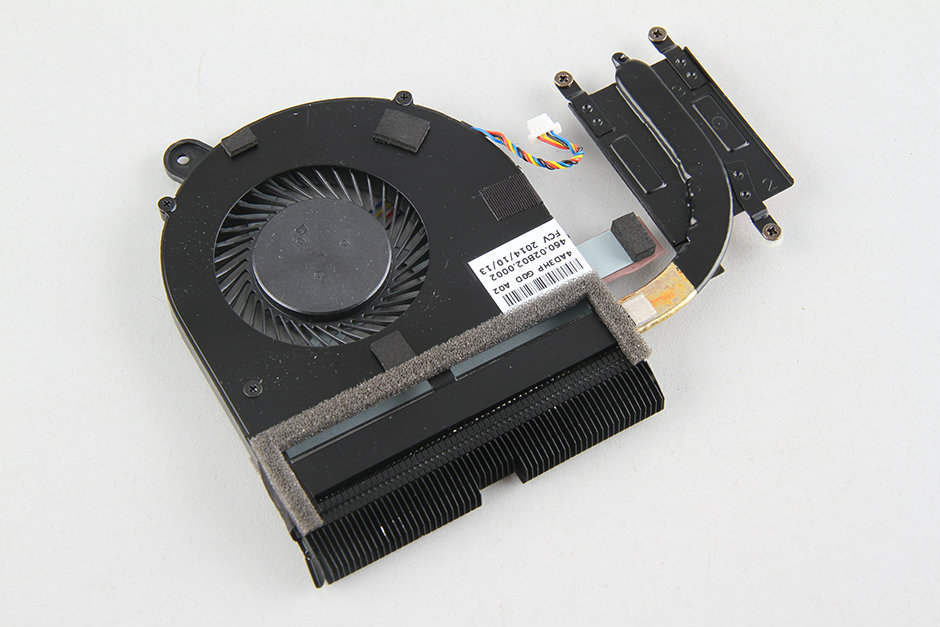
Loosen three screws securing the heat sink, and remove one screw securing the cooling fan.
Disconnect the cooling fan cable from the motherboard, then remove the heat sink and cooling fan assembly.
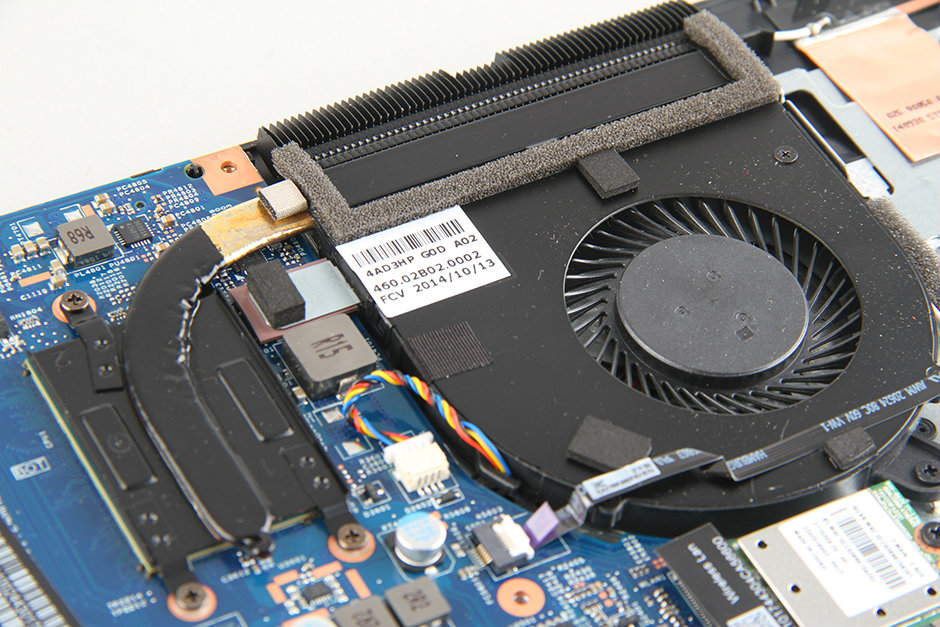
The cooling fan comes from Foxconn.
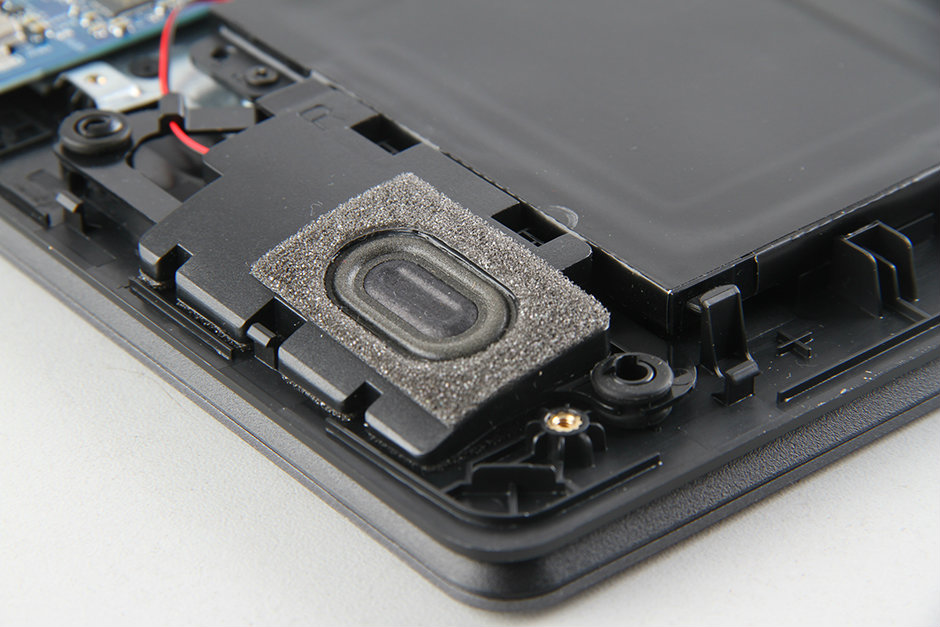
Left speaker module
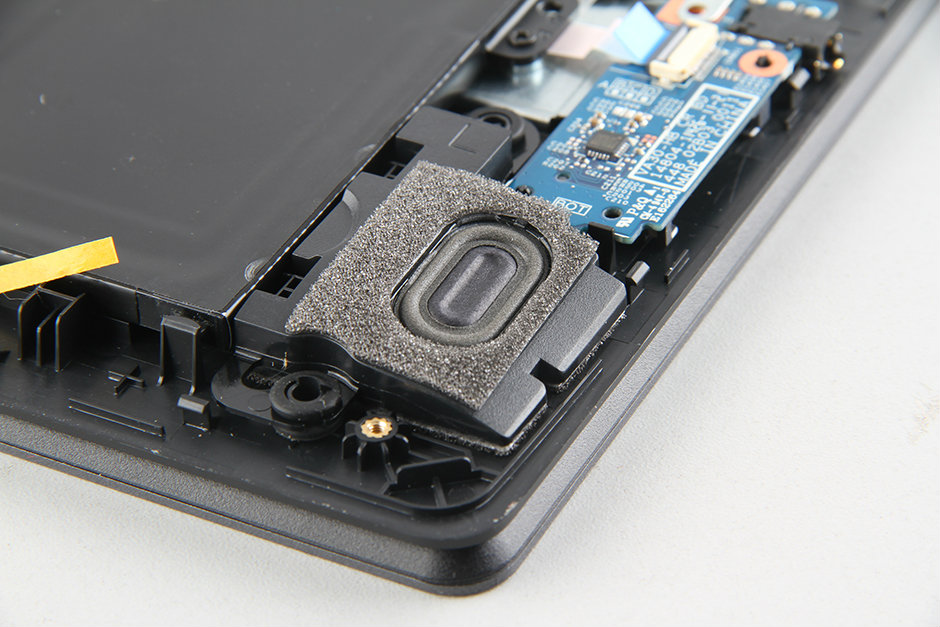
Right speaker module
Remove all the screws securing the motherboard and disconnect all the cables from the motherboard. Lift the motherboard from one side with your hand and wiggle it until it completely separates from the laptop.
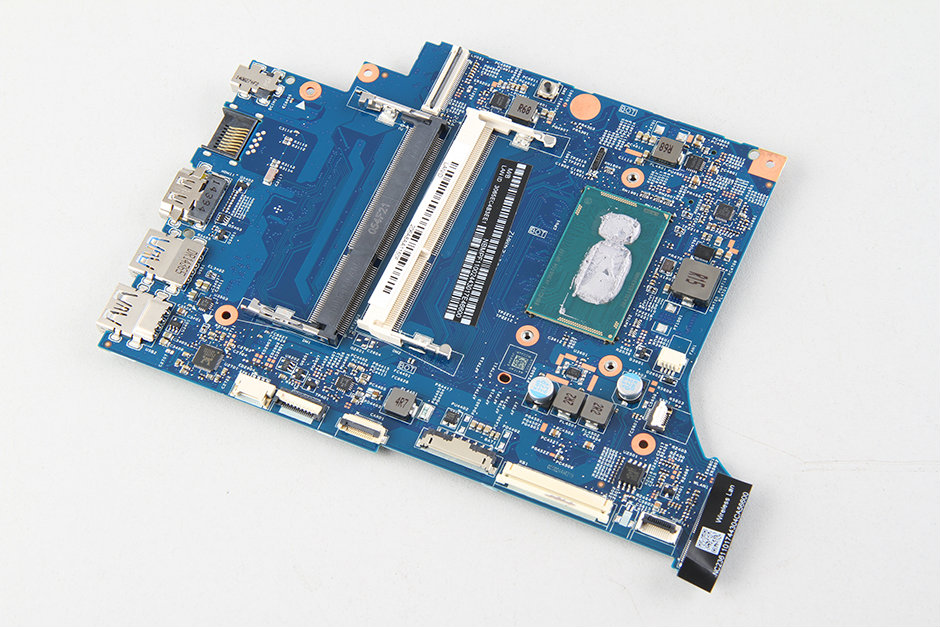
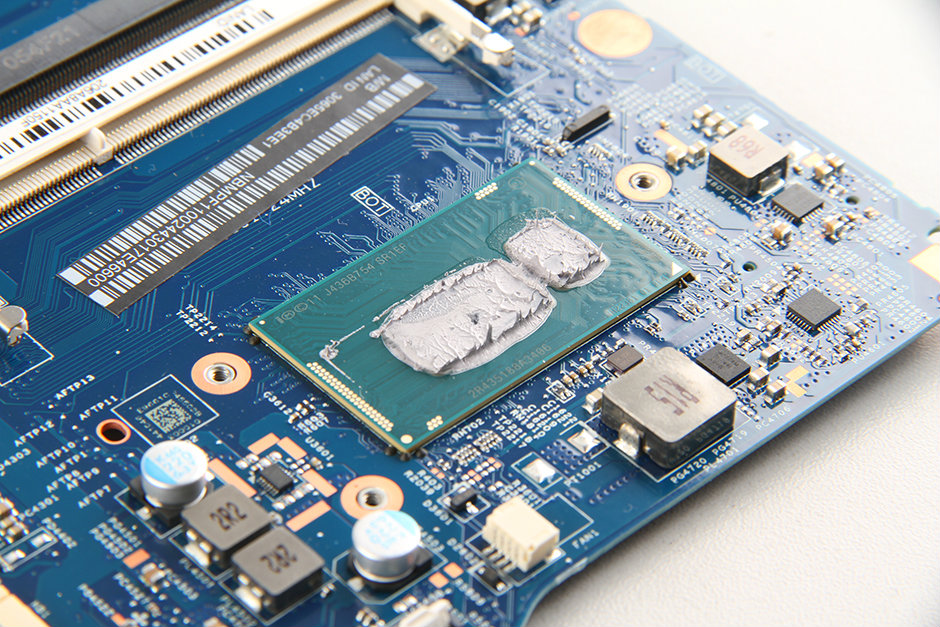
The processor of the Acer Aspire V13 V3-371 is soldered onto the motherboard, so its processor cannot be upgraded.
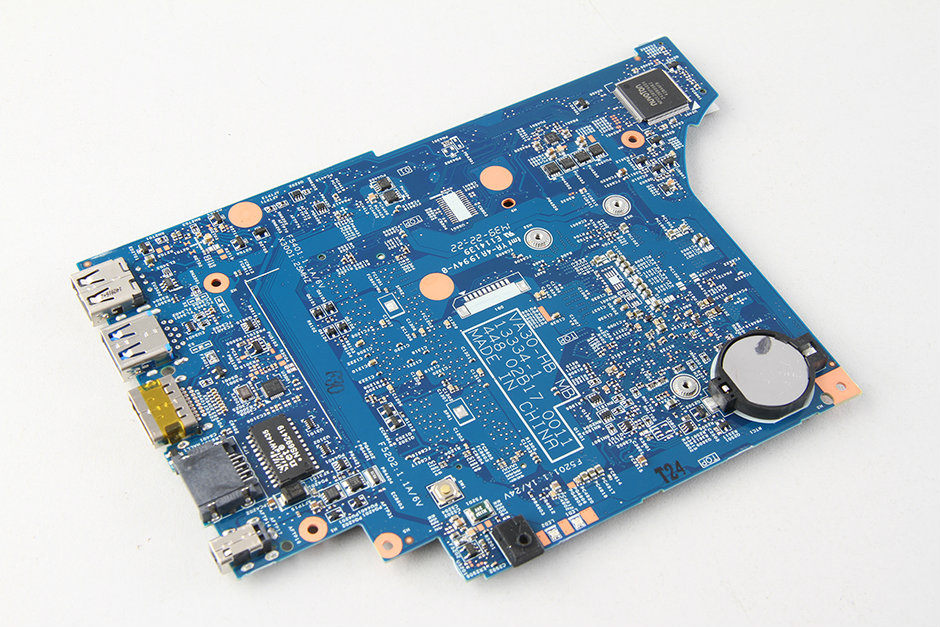
On the back of the motherboard, there is also a removable CMOS battery.
On the back of the motherboard, you can access the touchpad and keyboard. The keyboard is covered by a metal plate. You can use a soldering iron to melt the plastic anchors and remove the metal plate, and then you can access the keyboard.
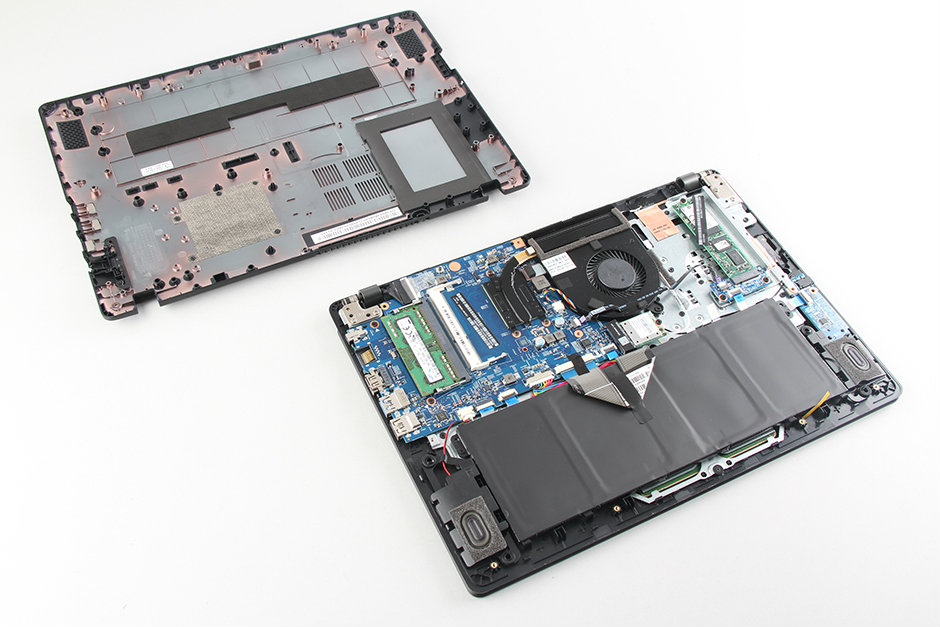
Acer Aspire V13 V3-371 internal parts

Thank you for this post. I wanted to install additional RAM, but couldn’t figure out how to open the chassis. Unfortunately, I first found a YouTube video that did everything the hard way. Luckily, I gave up before I did damage. Then I found your post. Much easier! Thanks again.
Good manual. But it misses the keyboard replacement for the Acer Aspire V3-371.
Could you let me know how to do that?
Thanks.
I was just in the store buying one of these. The sales person said that you can add another (second) hard drive to this laptop. I don’t see how this would be possible based on your pictures. Could you please advise?
Thank you,
Dimitri
I have checked it, and there is no way to add a second HDD.
What is the name of the card? Does it convert the signal from a SATA in this photo?
http://www.myfixguide.com/manual/wp-content/uploads/2014/12/Acer-Aspire-V3-371-Disassembly-14.jpg
Where can I buy it?
Thanks
This is an M.2 NGFF SSD, and the model is L8T-128L9G. You can buy it from newegg.com.
Thanks for your quick explanation,
but I refer to the interface connected to the SSD.
In this other photo
http://www.myfixguide.com/manual/wp-content/uploads/2014/12/Acer-Aspire-V3-371-Disassembly-25.jpg
You can clearly see the data that interests me and the cable that connects it to the mainboard.
The cable is passing over the fan in this photo.
http://www.myfixguide.com/manual/wp-content/uploads/2014/12/Acer-Aspire-V3-371-Disassembly-11.jpg
And I think it is all one with the interface, which I asked about.
I hope you can help me.
Thanks a lot
Did you find out?
I studied the photo above, which is captioned: The internal structure of the Aspire V3-371 is very neat, the keyboard cable is fixed on the battery with black tape.
Is it reasonably possible to replace the stock keyboard with a backlit keyboard? I’m evaluating the Acer Aspire V 13 V3-372T, and I’ve been told that Acer makes a similar model with a backlit keyboard.
Thanks.
Walter, have you received any response regarding the keyboard question? I have the V13 v3-372 and found out afterwards that another version has a backlit keyboard, so if possible, I’d like to swap out my keyboard for a backlit one.
Thank you so much! This is a really useful guide. Would it be easy to replace the CPU at all? I know it is soldered on, but I have downloaded the Adobe Premiere Pro suite to edit VR videos and would like to upgrade the CPU to an i7.
I have a soldering iron at home, but I am not very good at soldering if I am honest.
Are you out of your mind?
No, what you want to do is completely impossible.