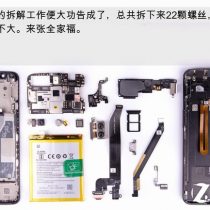
As a product that first adopts a dual-screen design, the Yota YotaPhone 3 has received much popularity due to its portability, appearance, and unique functionality. Today, we will start taking apart the Yota YotaPhone 3 to explore its internal structure.
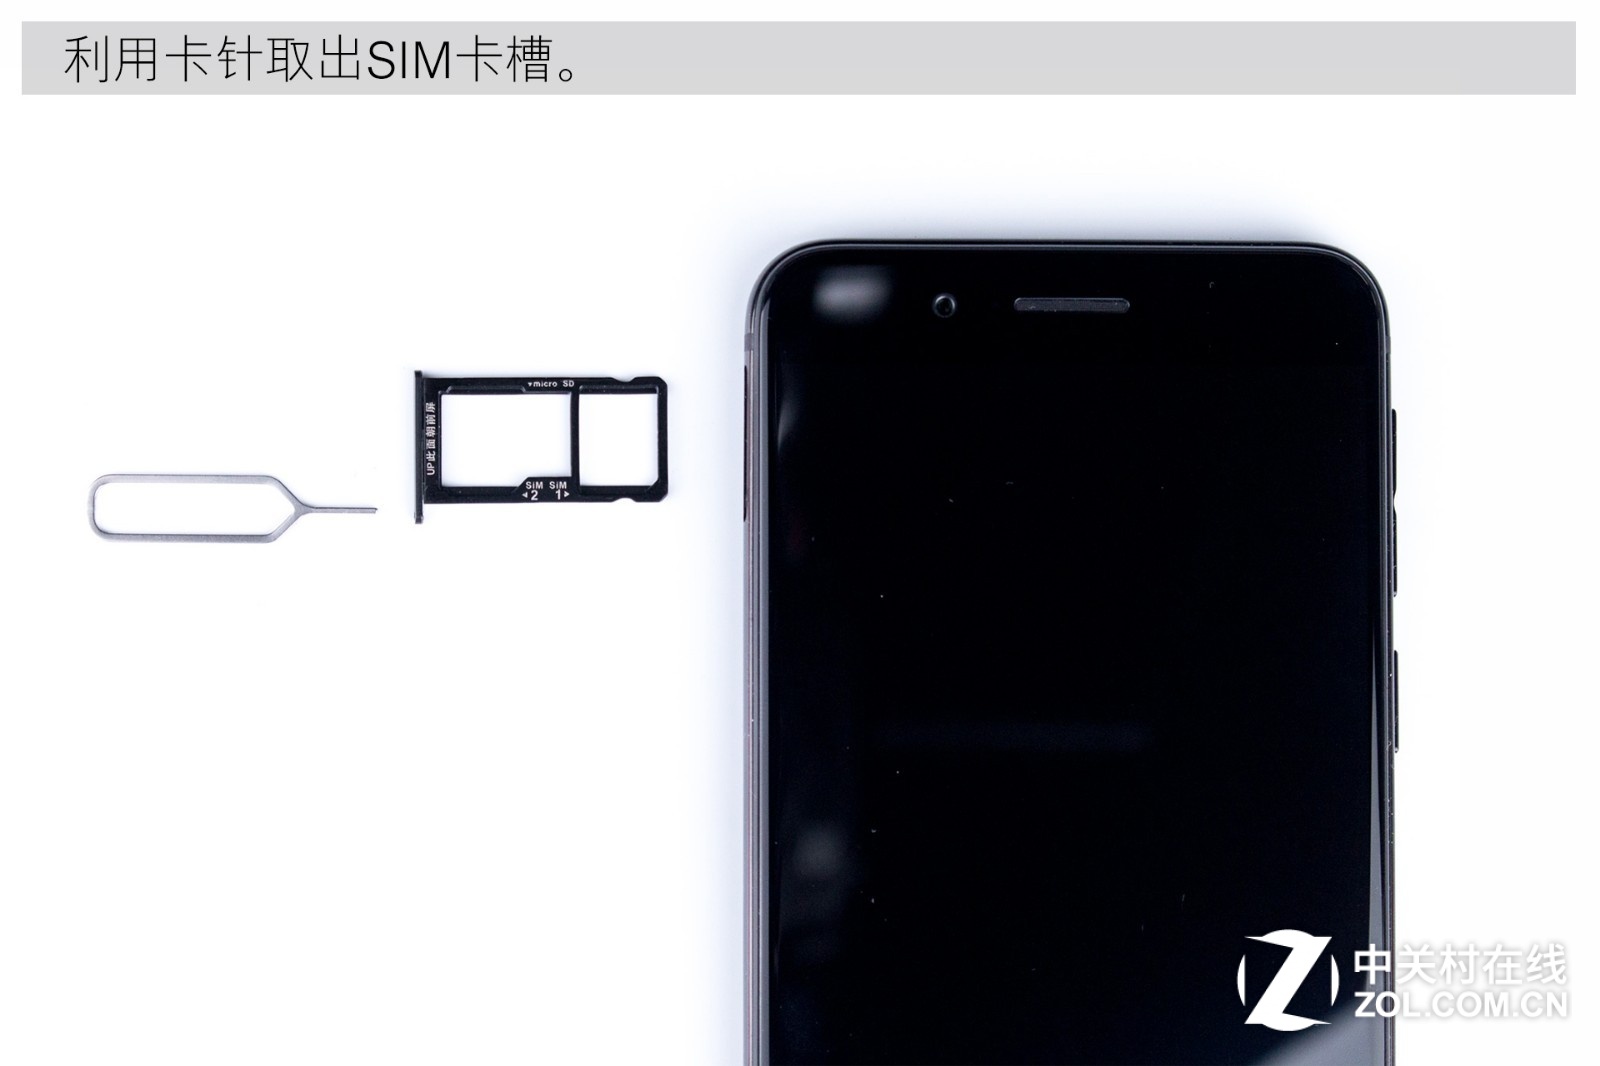
First, use a clip to remove the SIM card tray.
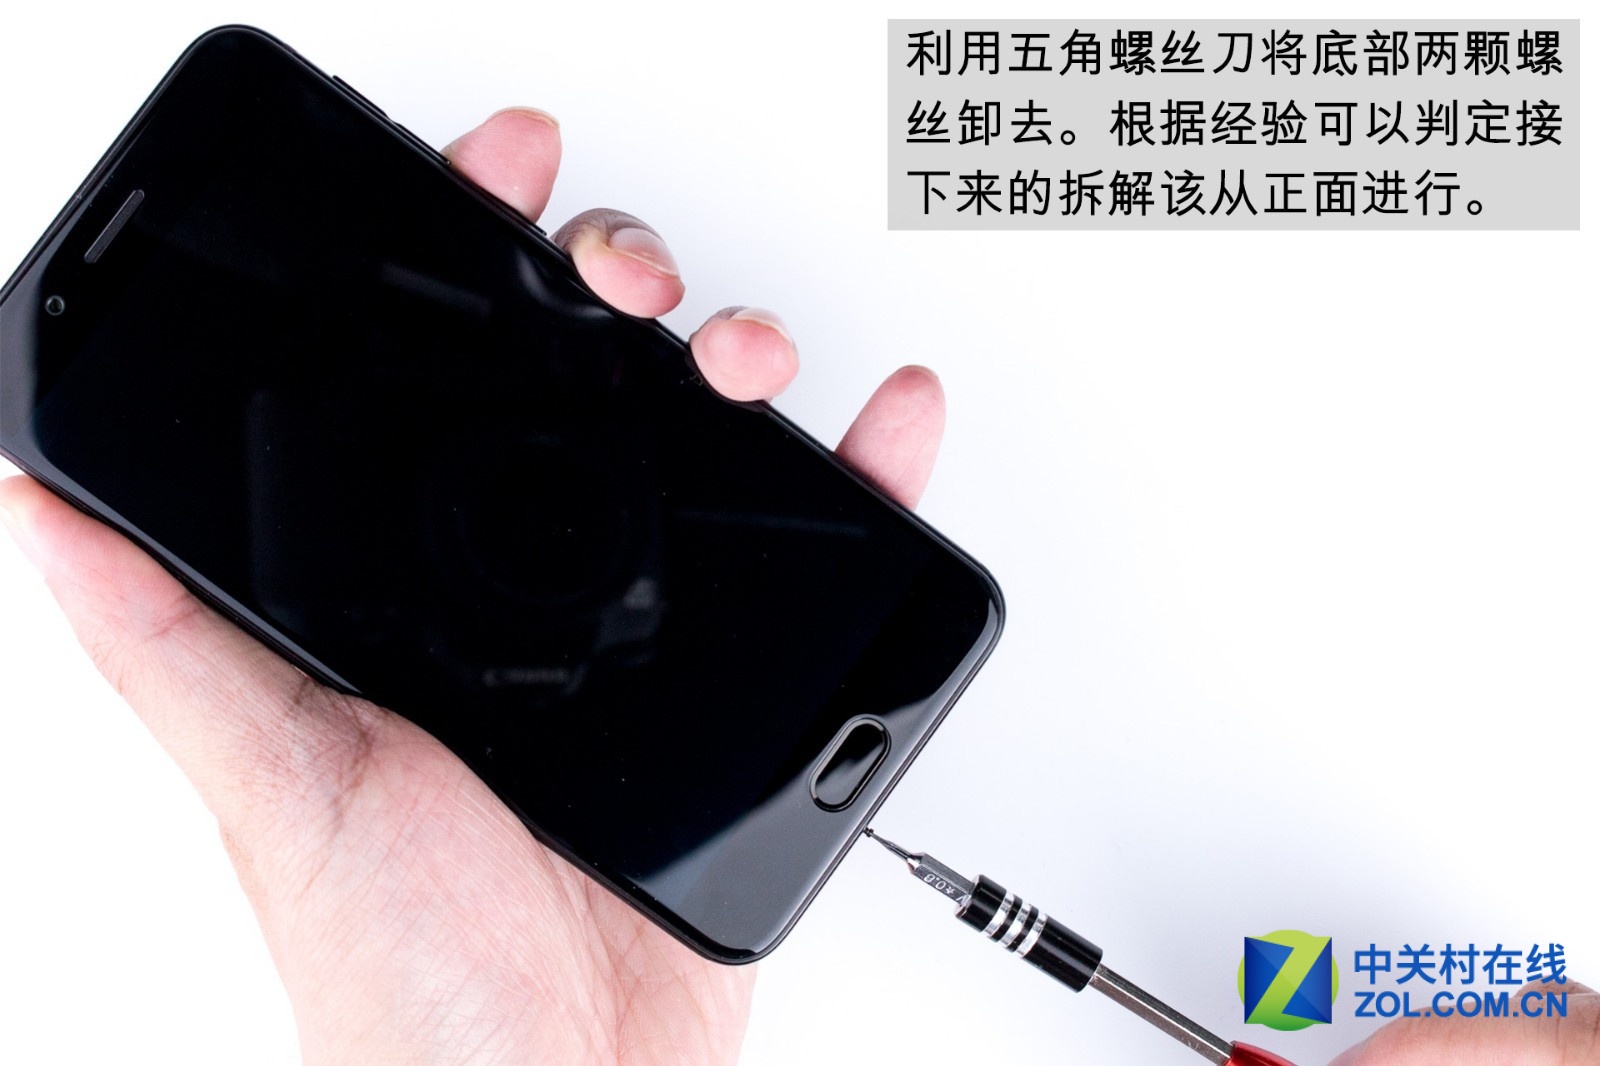
Then, use a screwdriver to remove the two screws at the bottom. Next, we will start the teardown on the front of the smartphone.
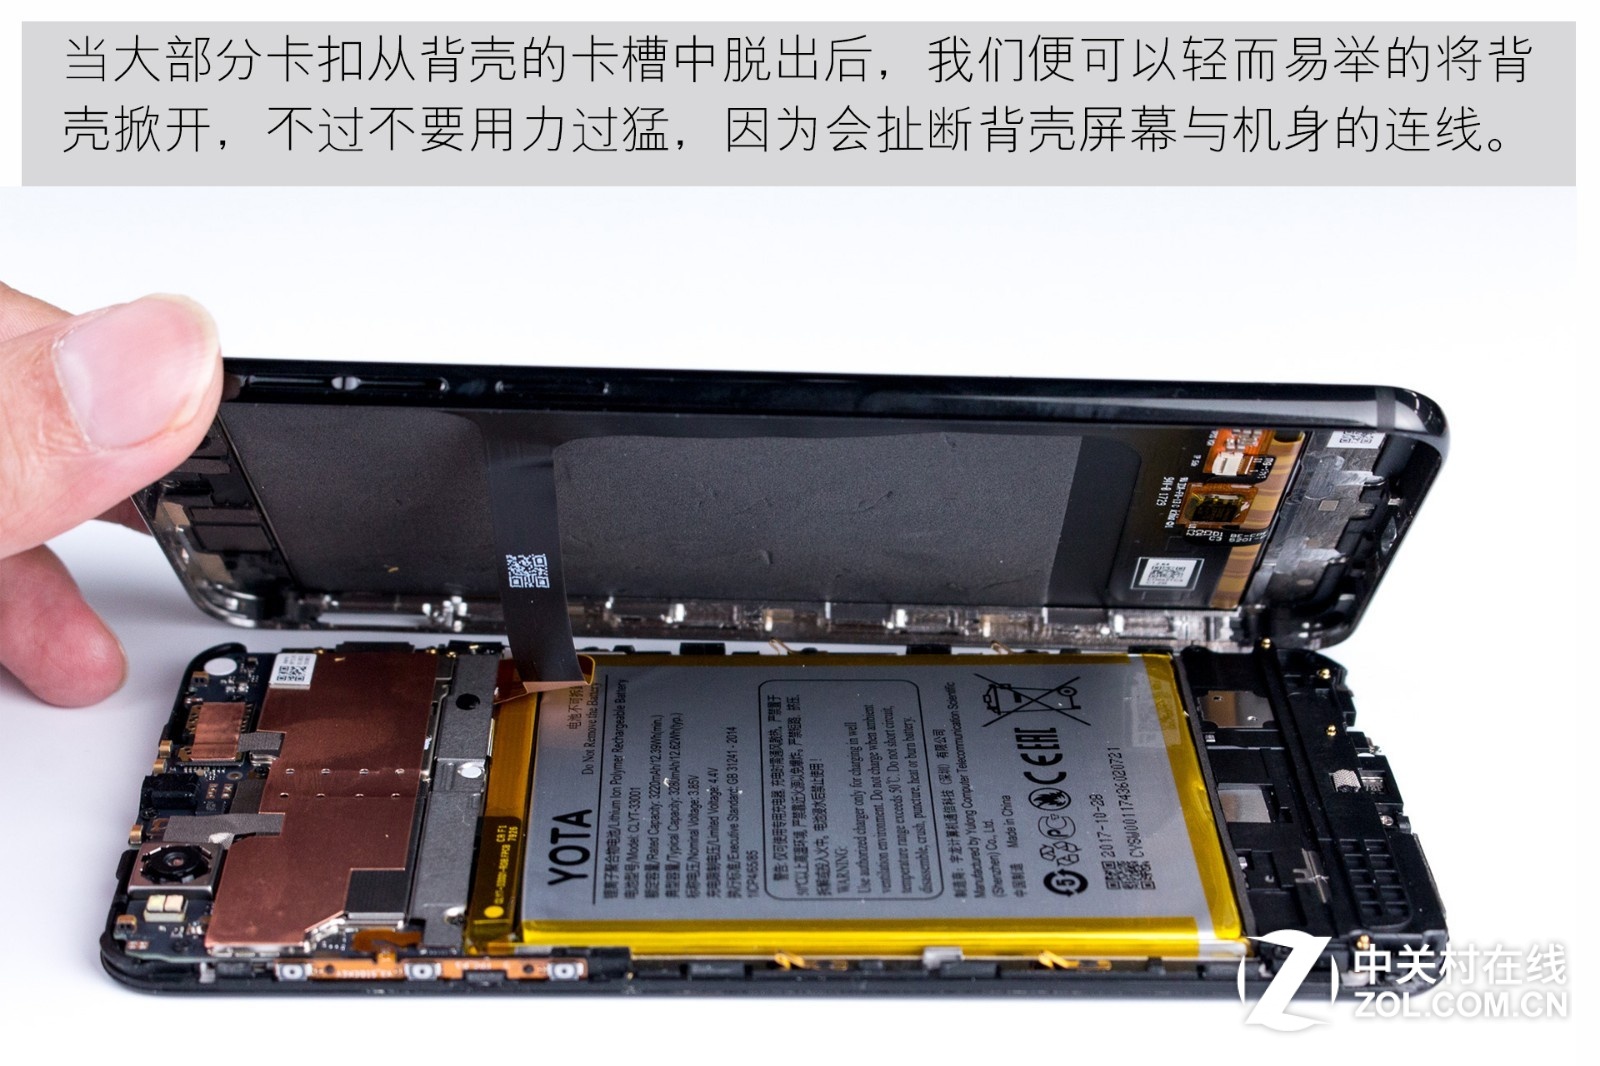
Insert a pry tool under the bottom cover. Slide the pry tool to unlock all clips, then remove the back cover. However, take care to separate the back cover from the main body gently to avoid tearing the ribbon cable connecting the secondary display to the main body.
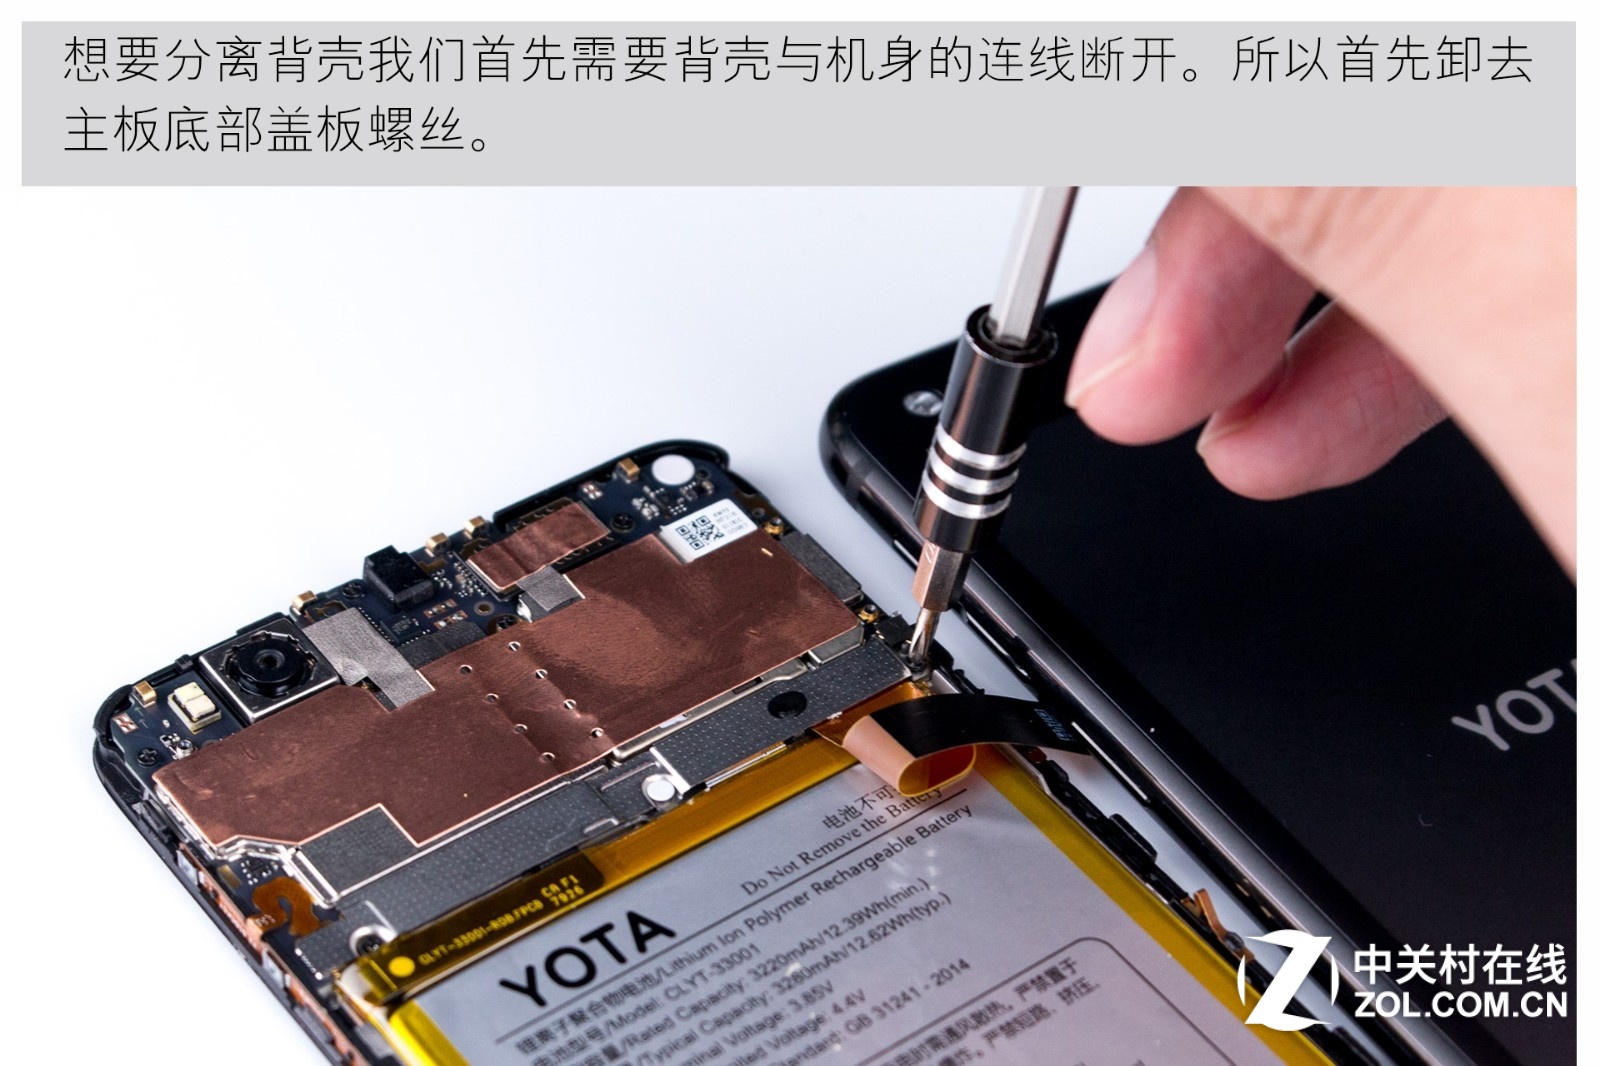
To remove the back cover, we need to disconnect the ribbon cable connecting it to the motherboard. Before that, we need to remove the screws that secure the metal plate.
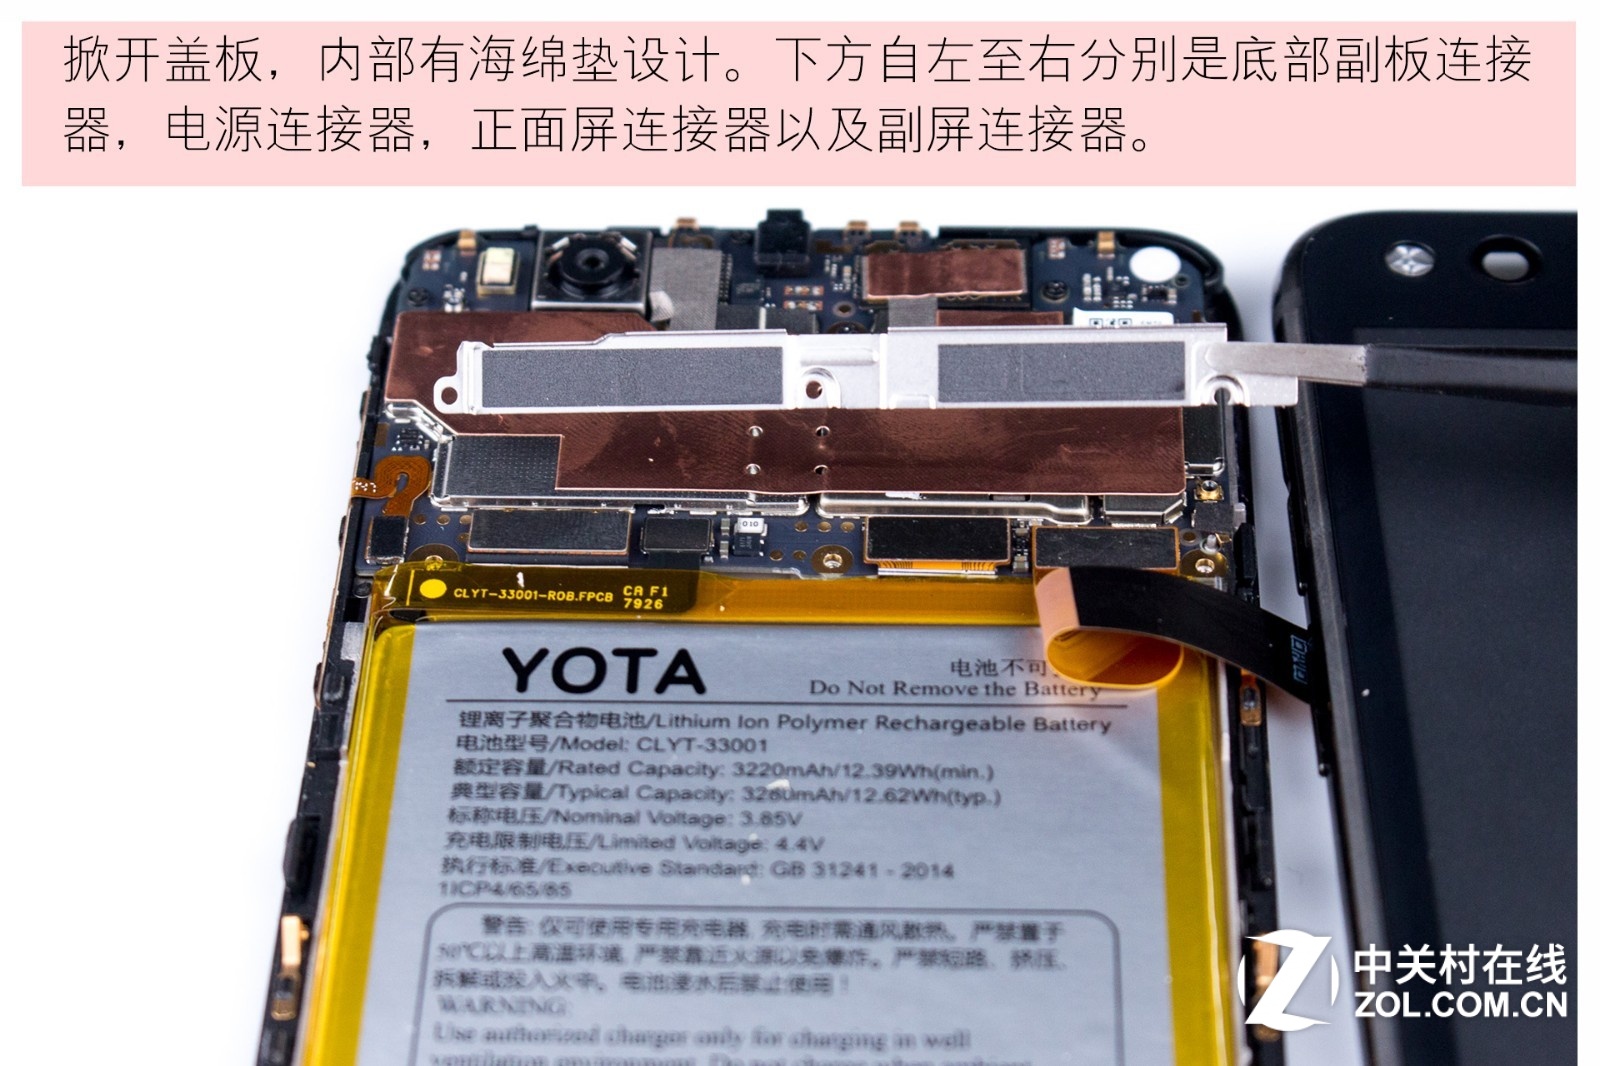
After removing the metal plate, we found that the back has a sponge pad. From left to right, there are the sub-board connector, the power connector, the main screen connector, and the secondary screen connector.
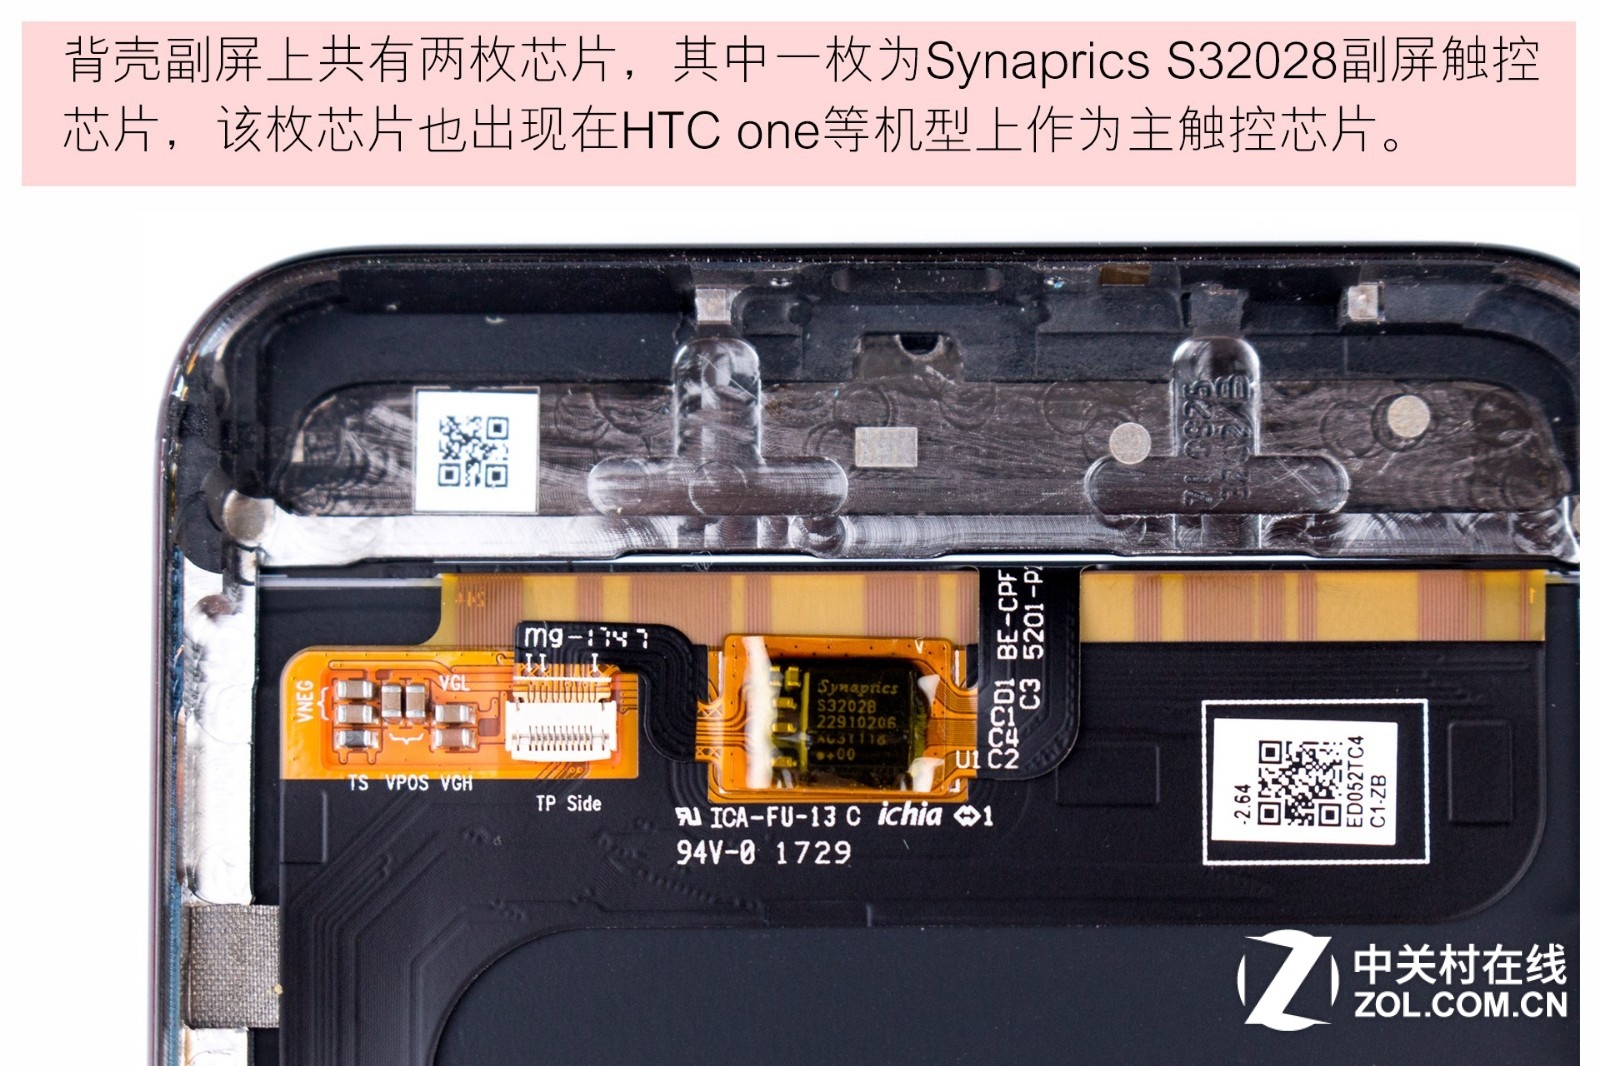
Two chips were found on the secondary screen on the back cover. One of them is the Synaptics S32028, which is the touch chip for the secondary screen. This chip is also used as the main touch chip in the HTC One and other phones.
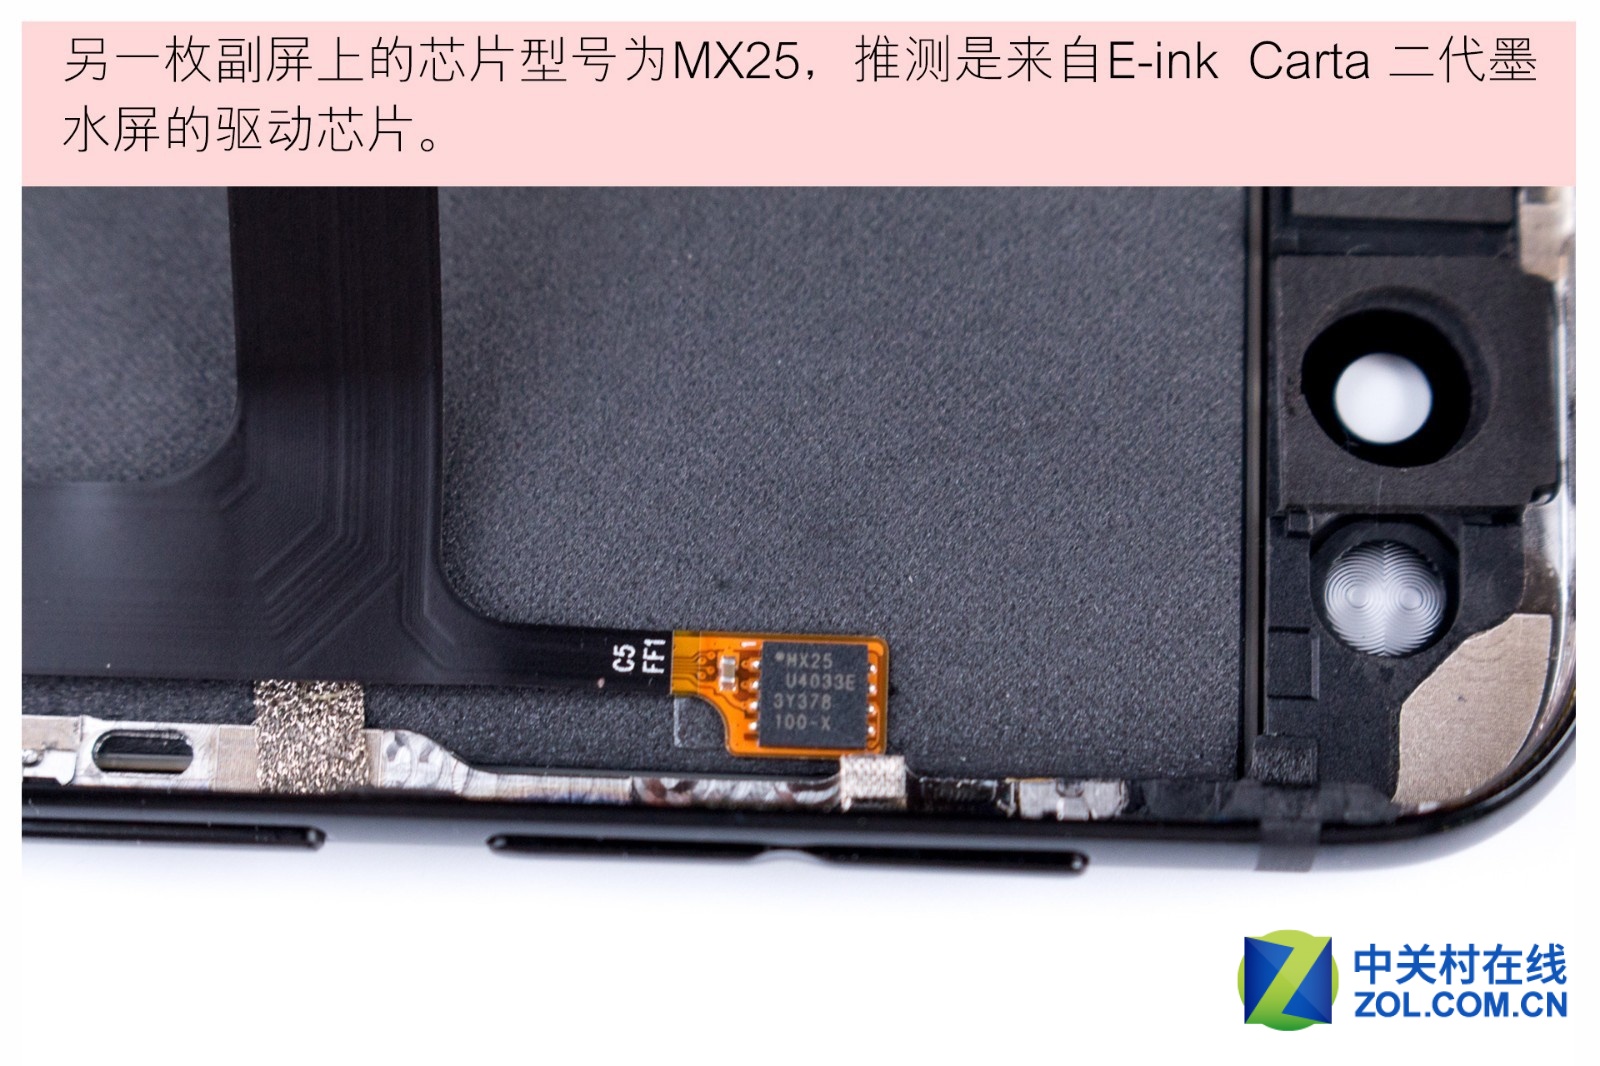
Another chip on the secondary screen is the MX25. We speculate that the MX25 is a driver chip for the second-generation E-ink Carta electronic ink screen.
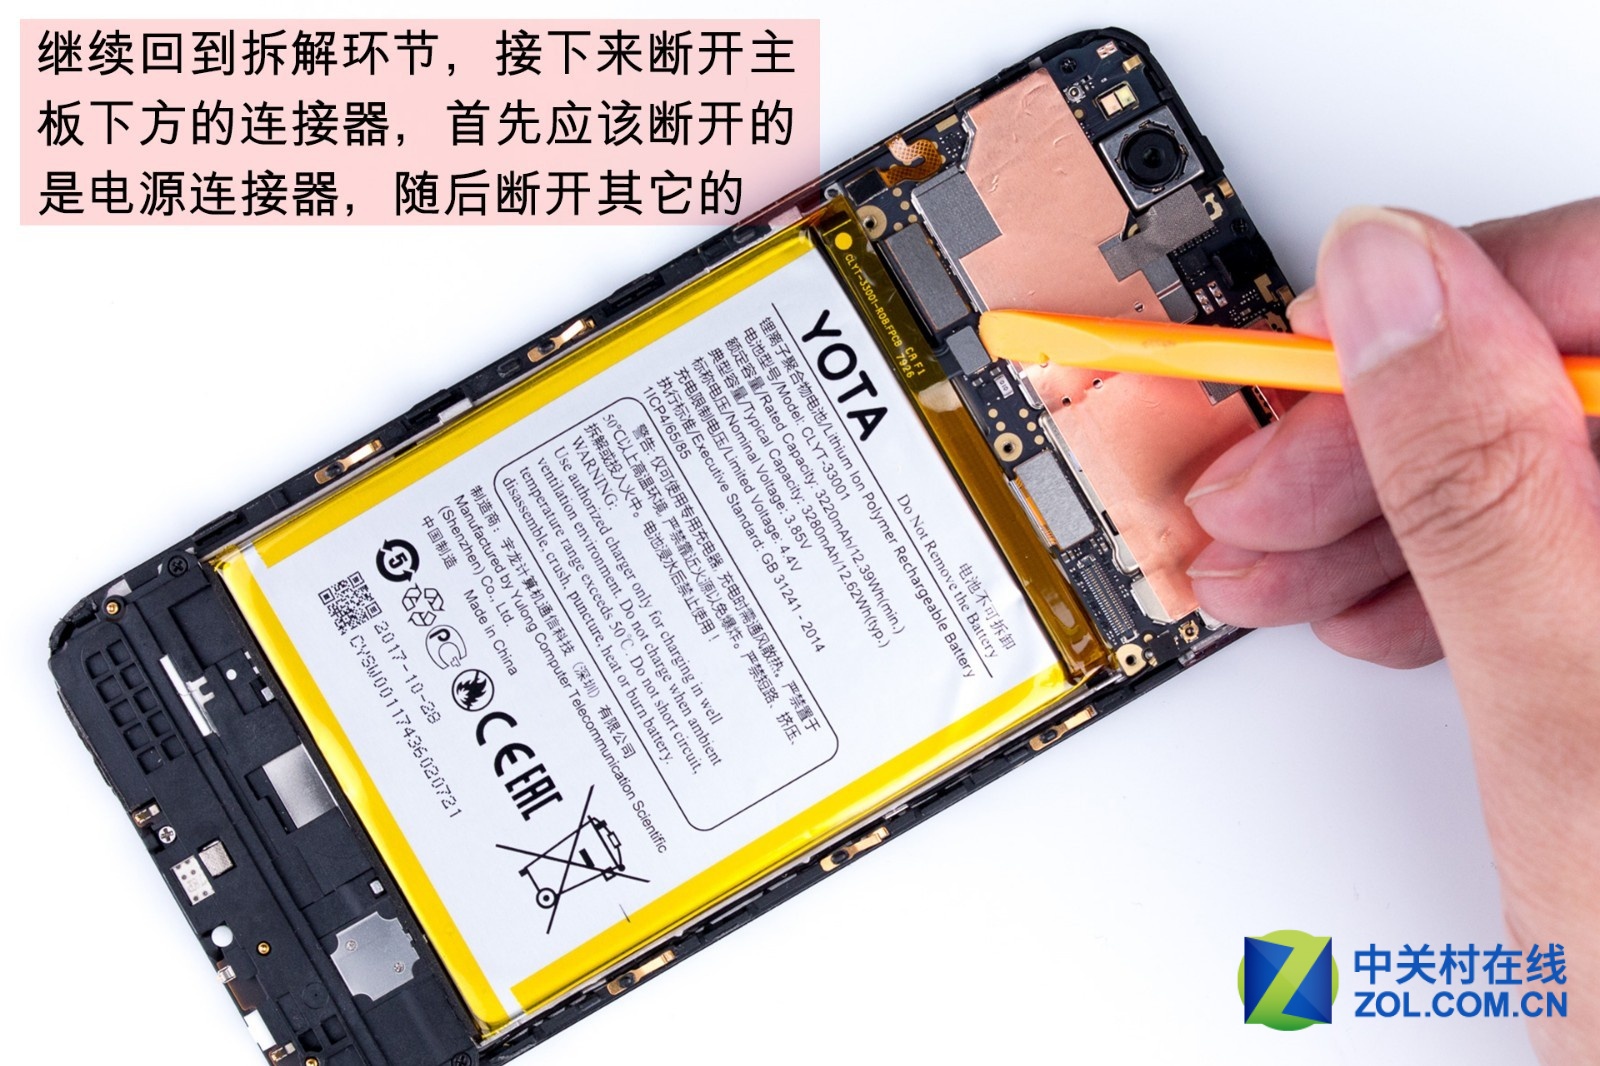
Now, we will continue the teardown. Disconnect the connector below the motherboard. We need to disconnect the battery connector first before removing other connectors.
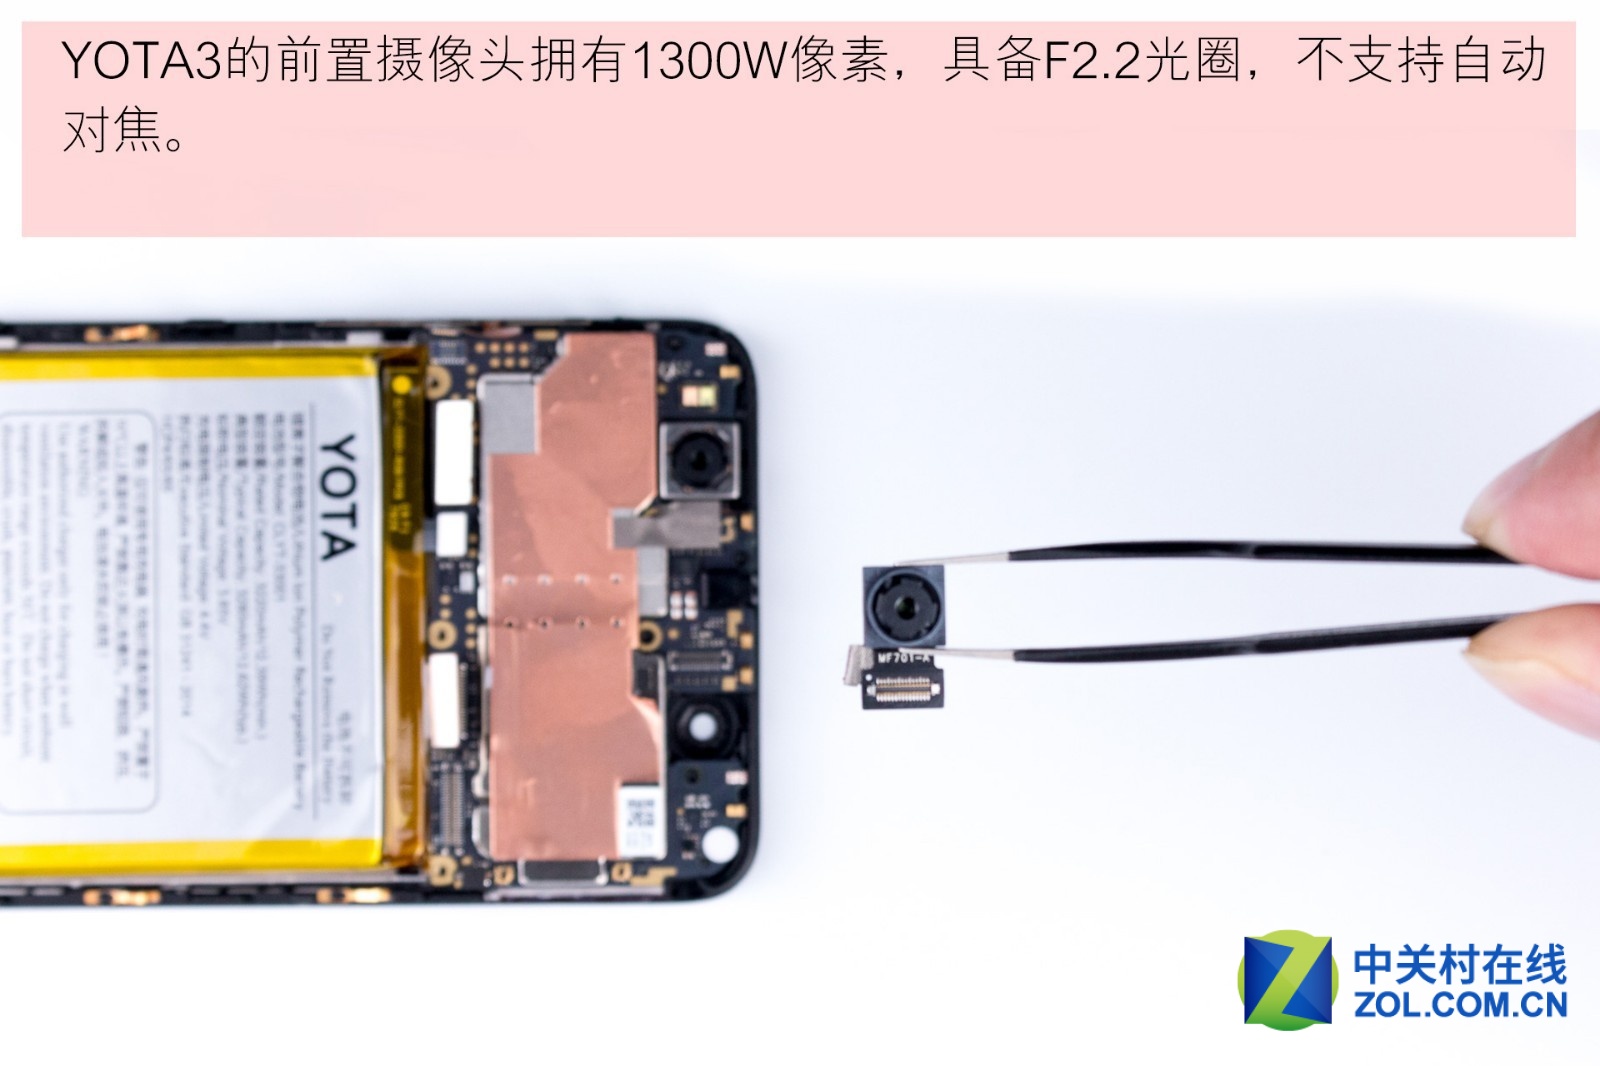
The YotaPhone 3 has a 13MP front camera with an F/2.2 aperture, but it does not support autofocus.
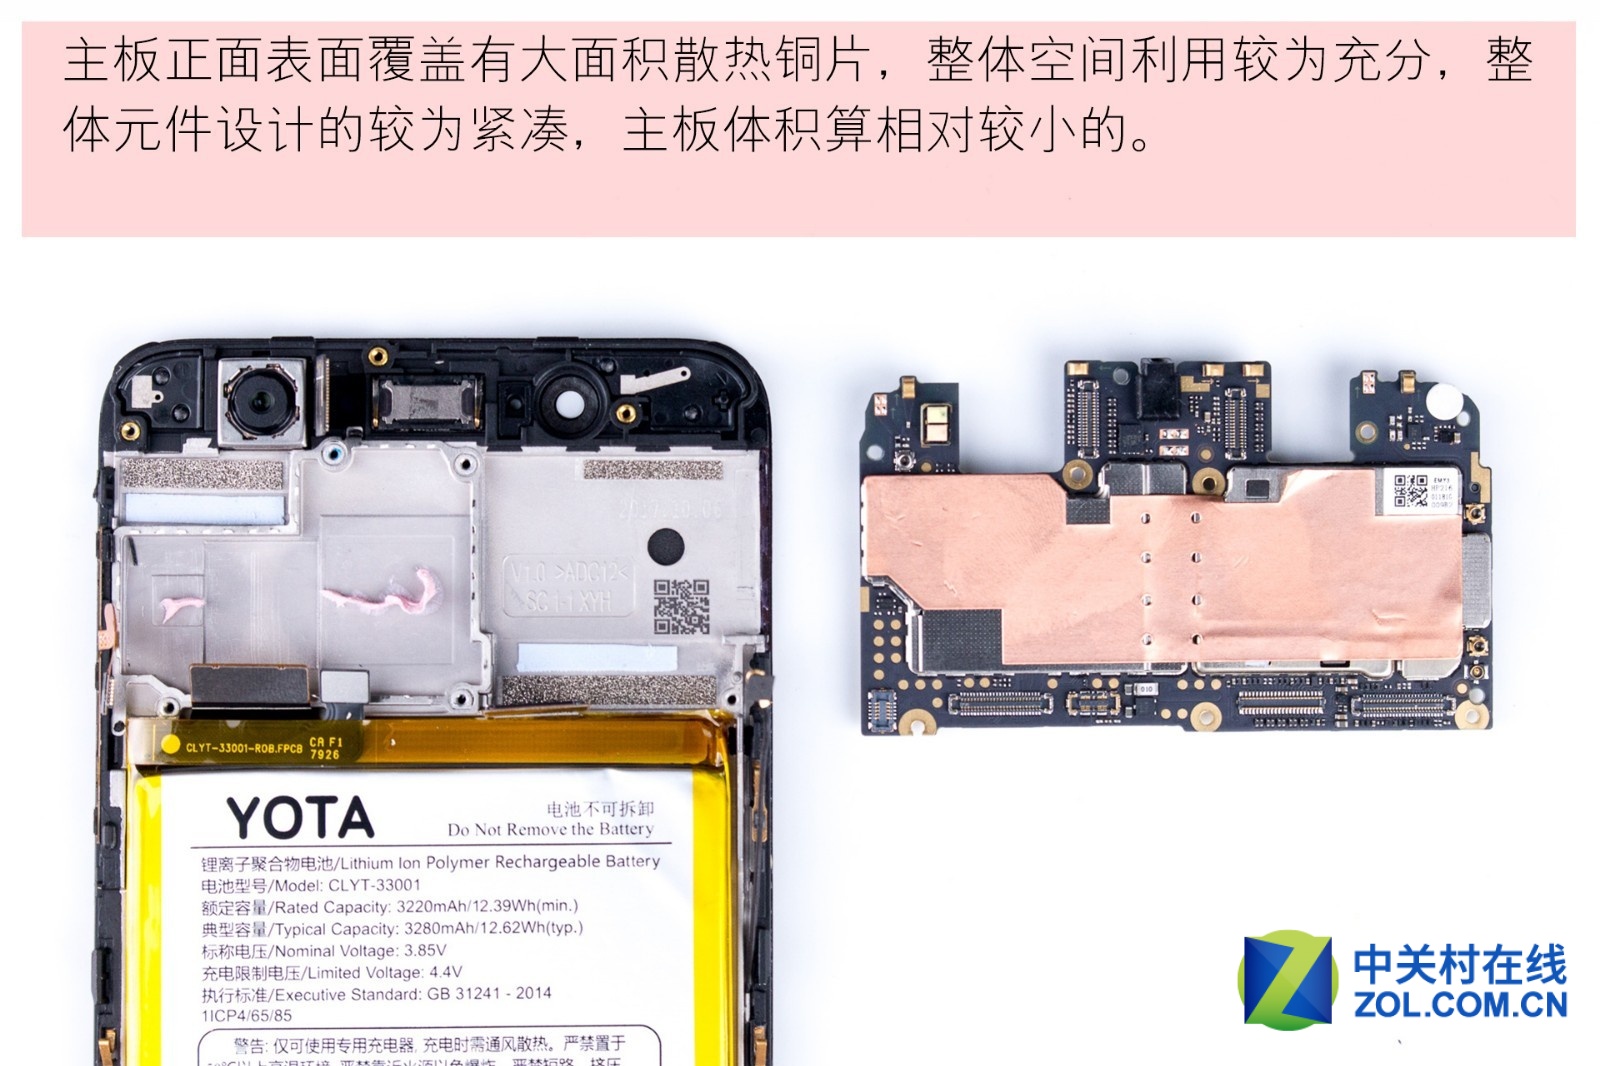
The front of the motherboard is covered with large areas of heat-dissipating copper foil to enhance cooling performance.
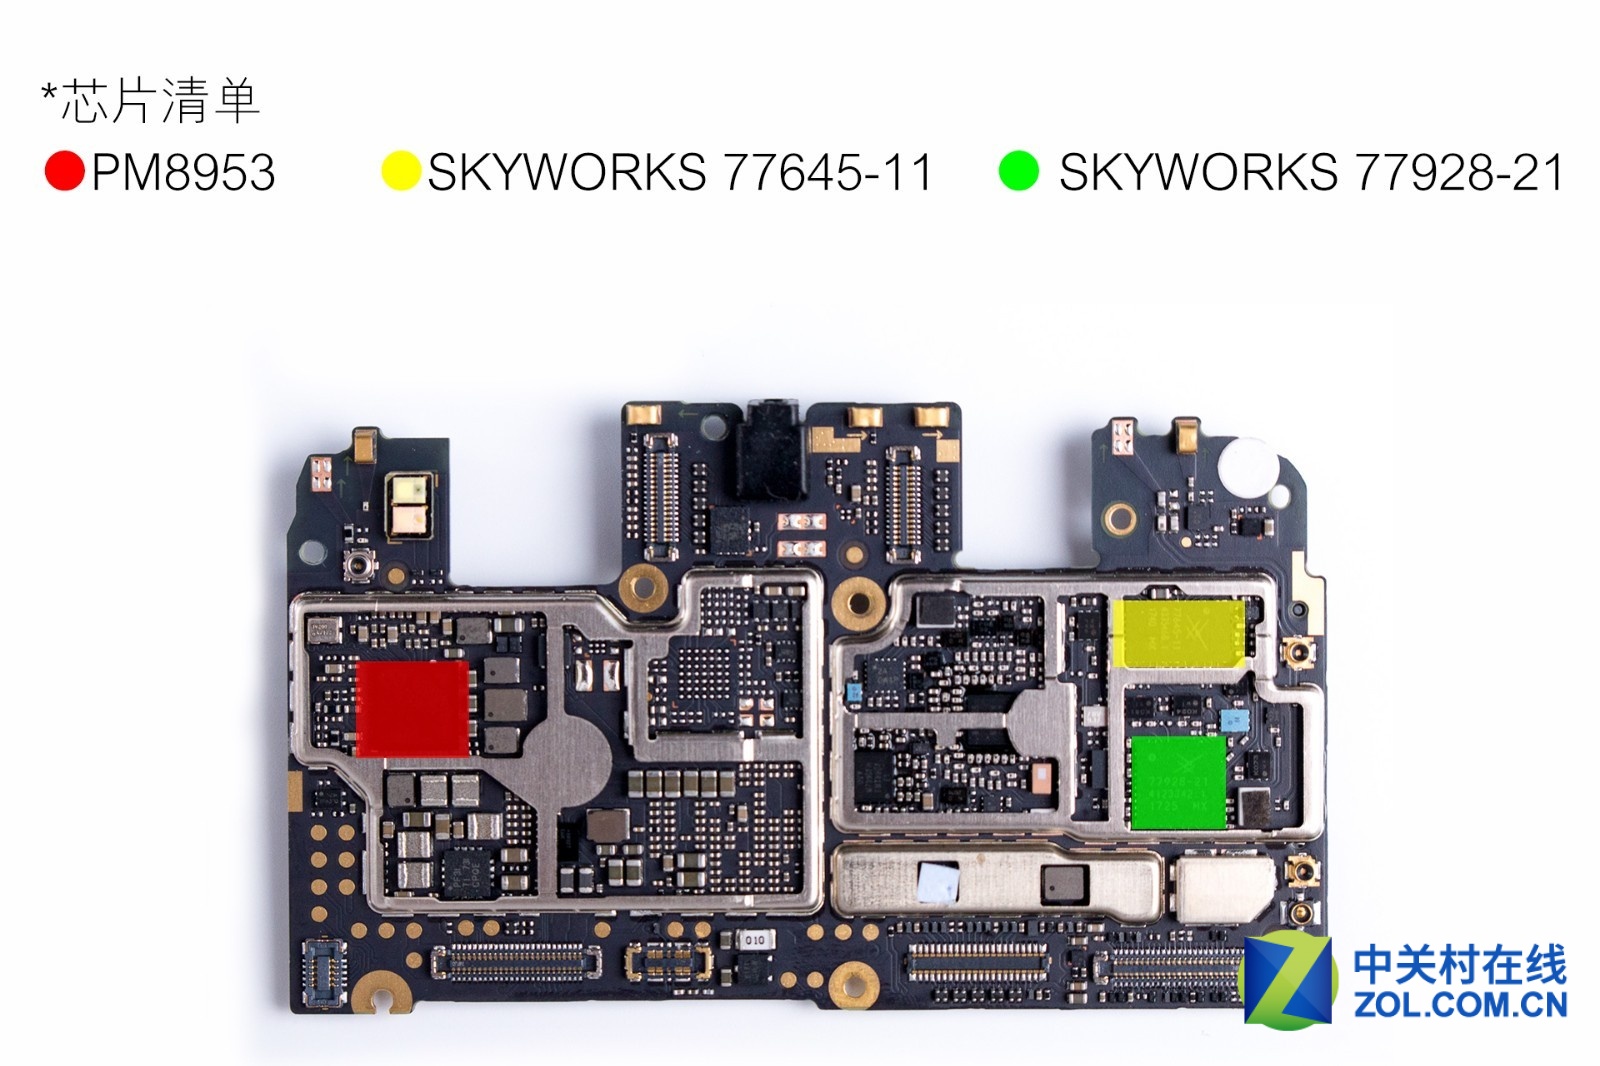
On the front of the motherboard, there are three chips, including PM8953, SKYWORKS 77645-11, and SKYWORKS 77928-21.
Although the chips on the back of the motherboard do not have metal shields, this does not mean that the core chips lack proper electromagnetic shielding. In fact, the roll cage of the mobile phone body adopts a frame structure design with shielding barriers.
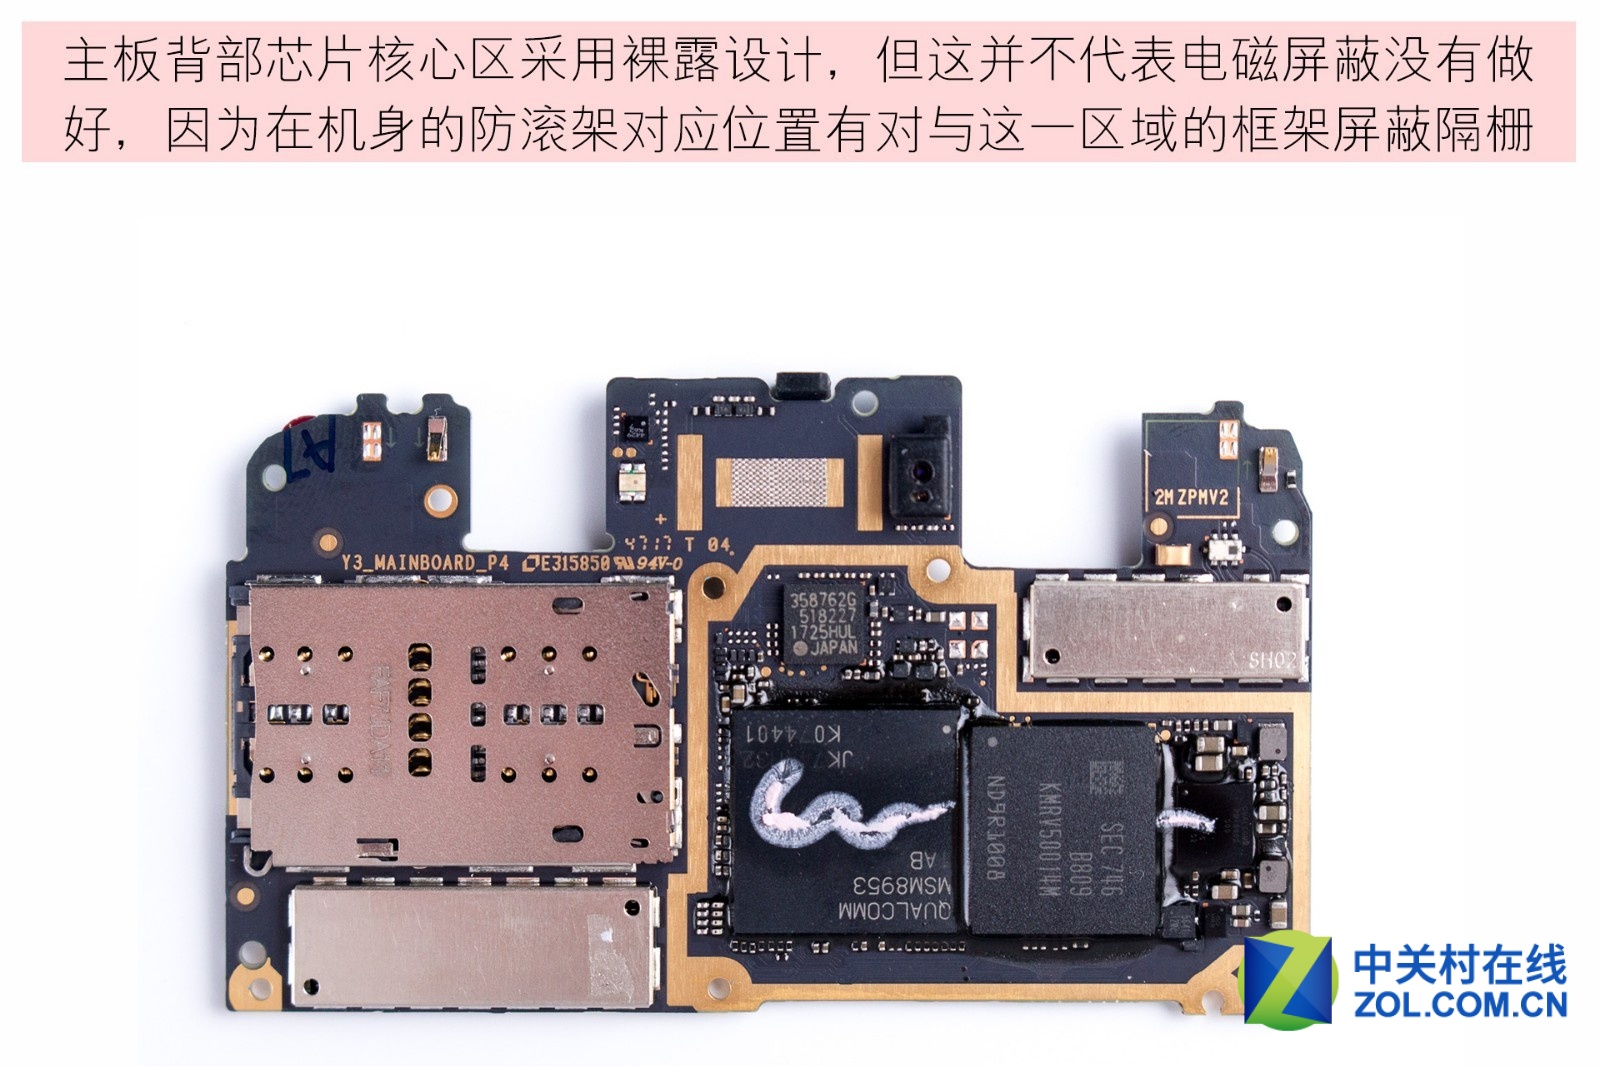
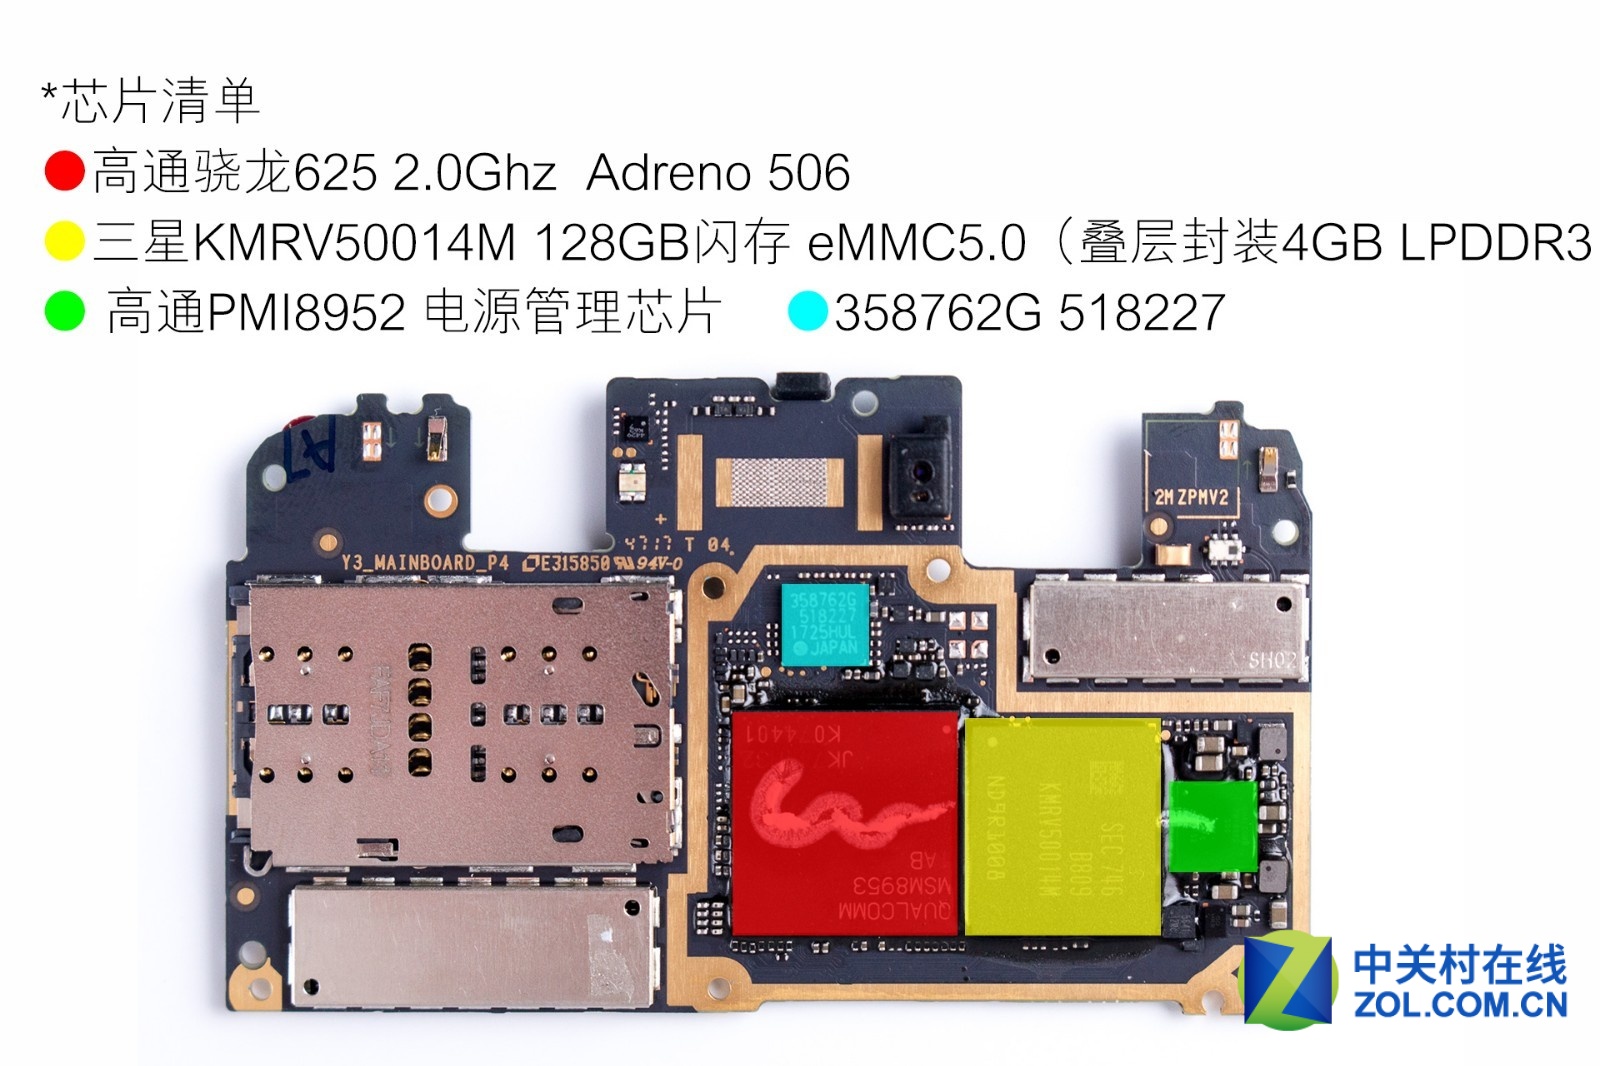
There are four chips on the front of the motherboard, including Qualcomm Snapdragon 625 2.0GHz Adreno 506, Samsung KMRV50014M 128GB flash eMMC 5.0 (4GB LPDDR3), Qualcomm PMI8952 power management chip, and 358762G 518227.
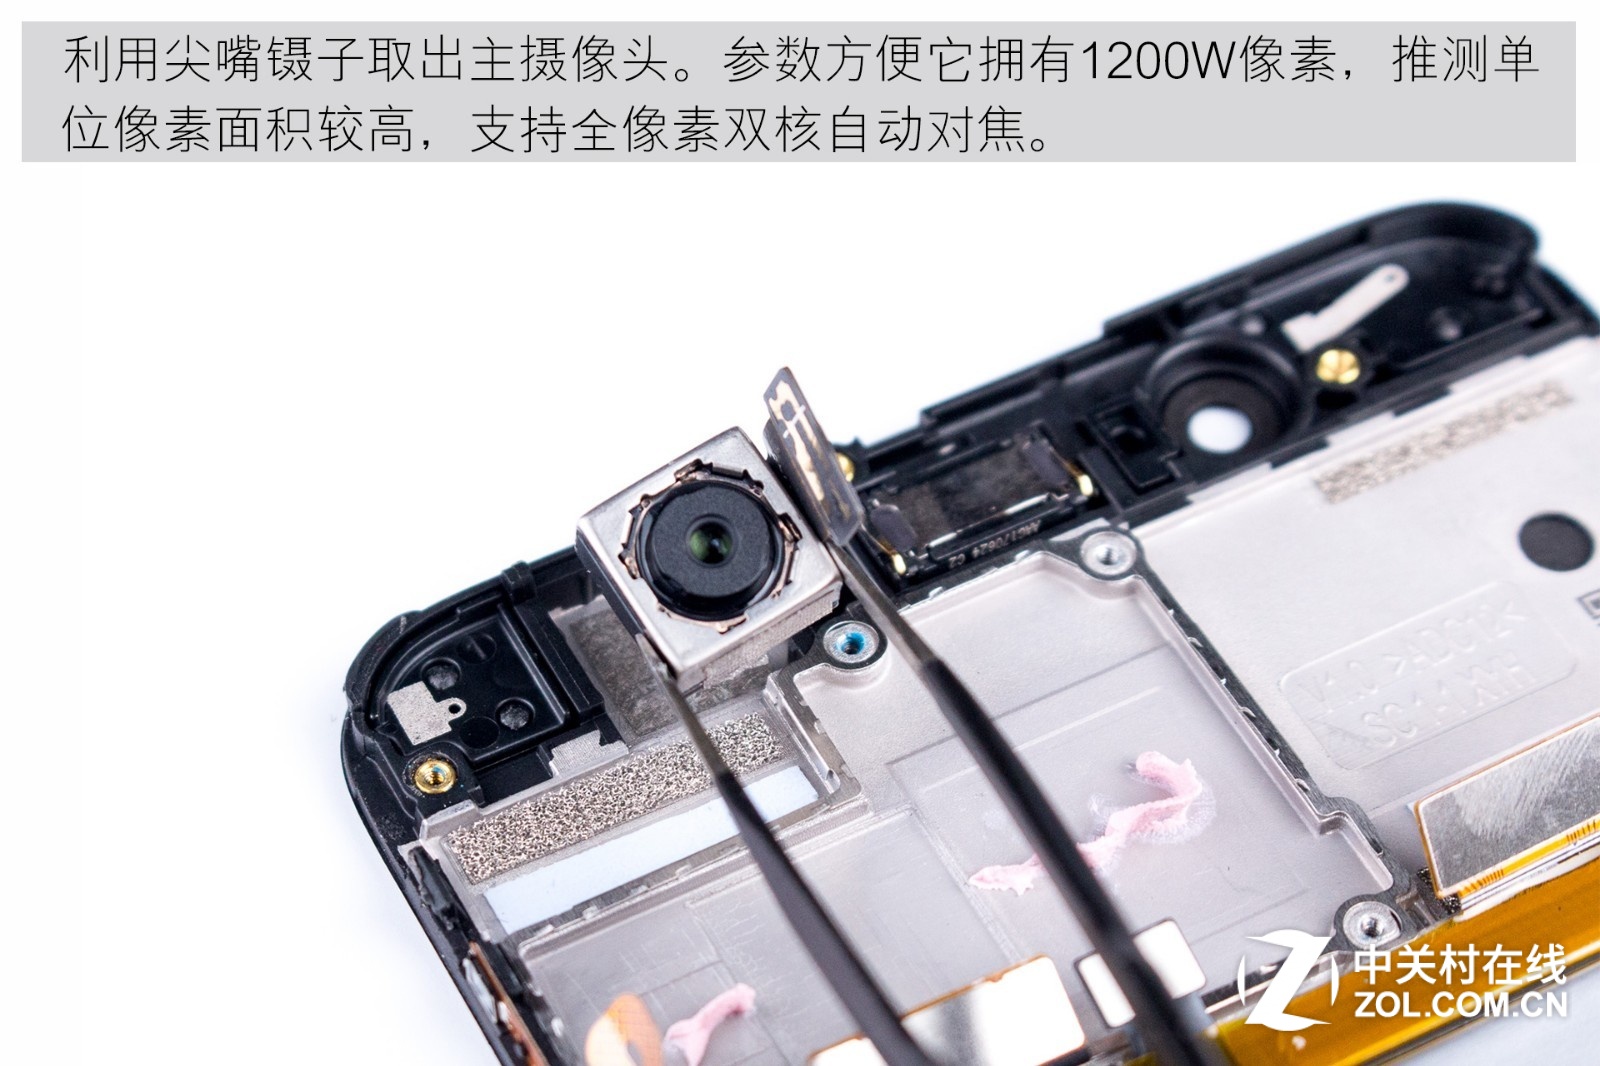
Use tweezers to remove the 12MP main camera, which supports autofocus technology.
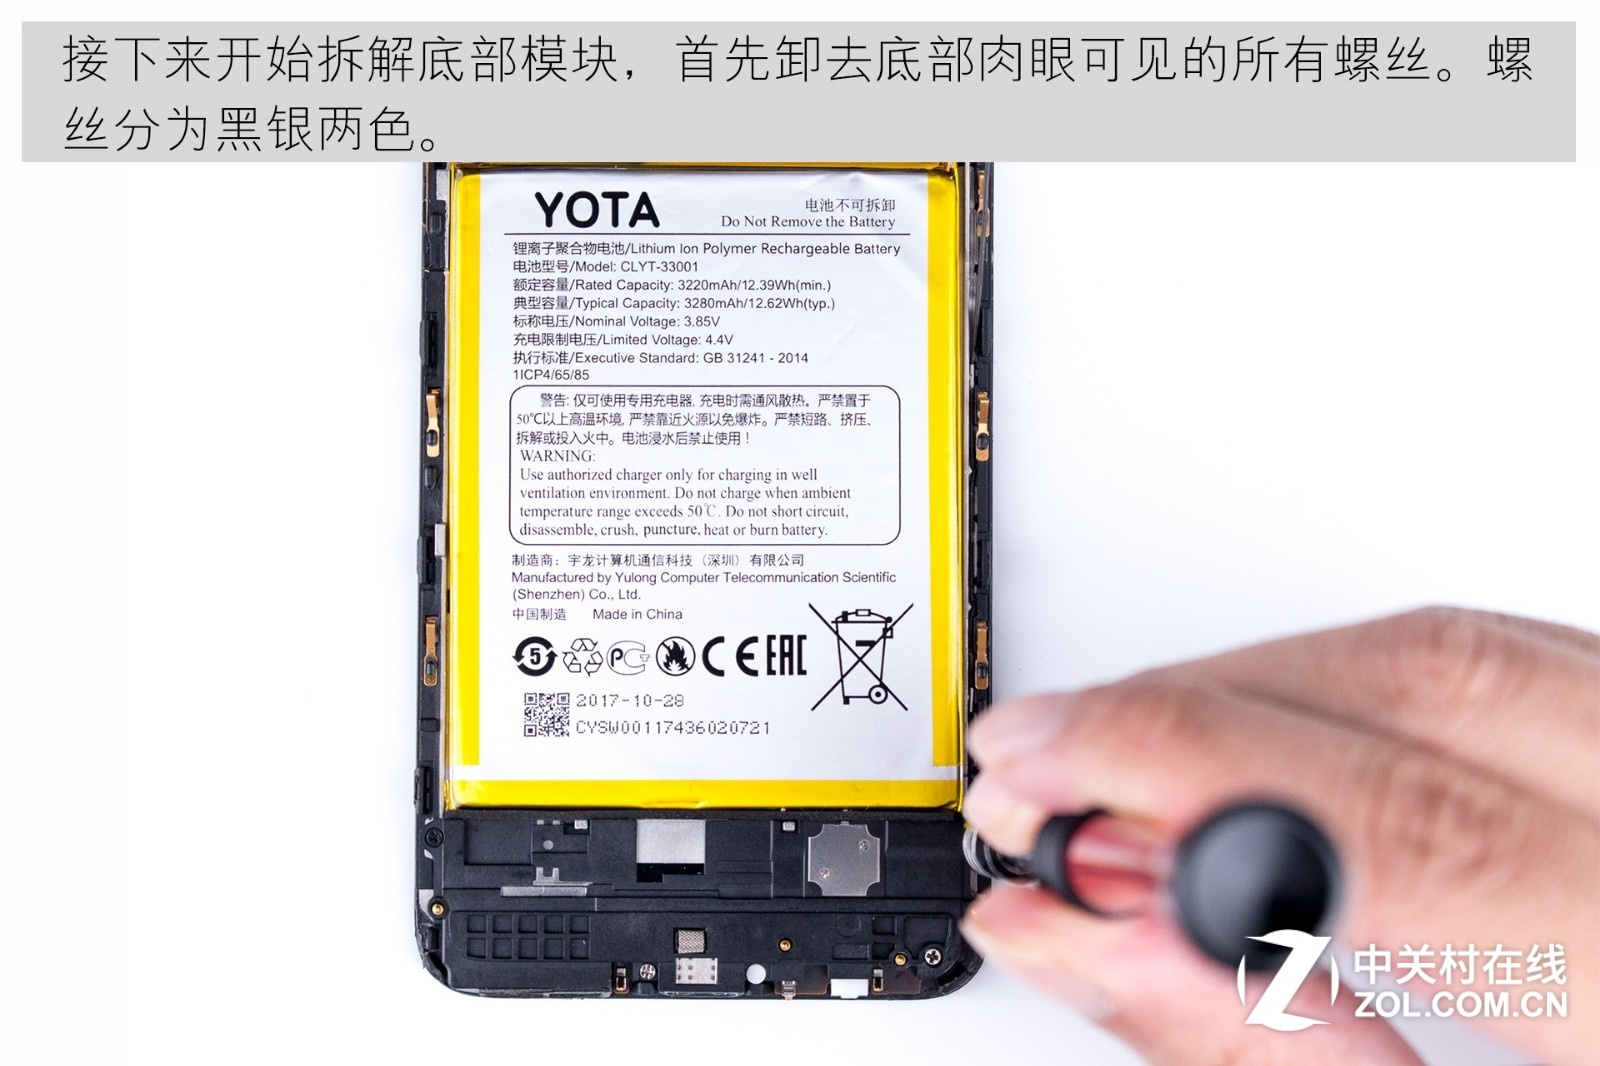
Then, remove the bottom module. Remove all visible screws, which are divided into black and silver.
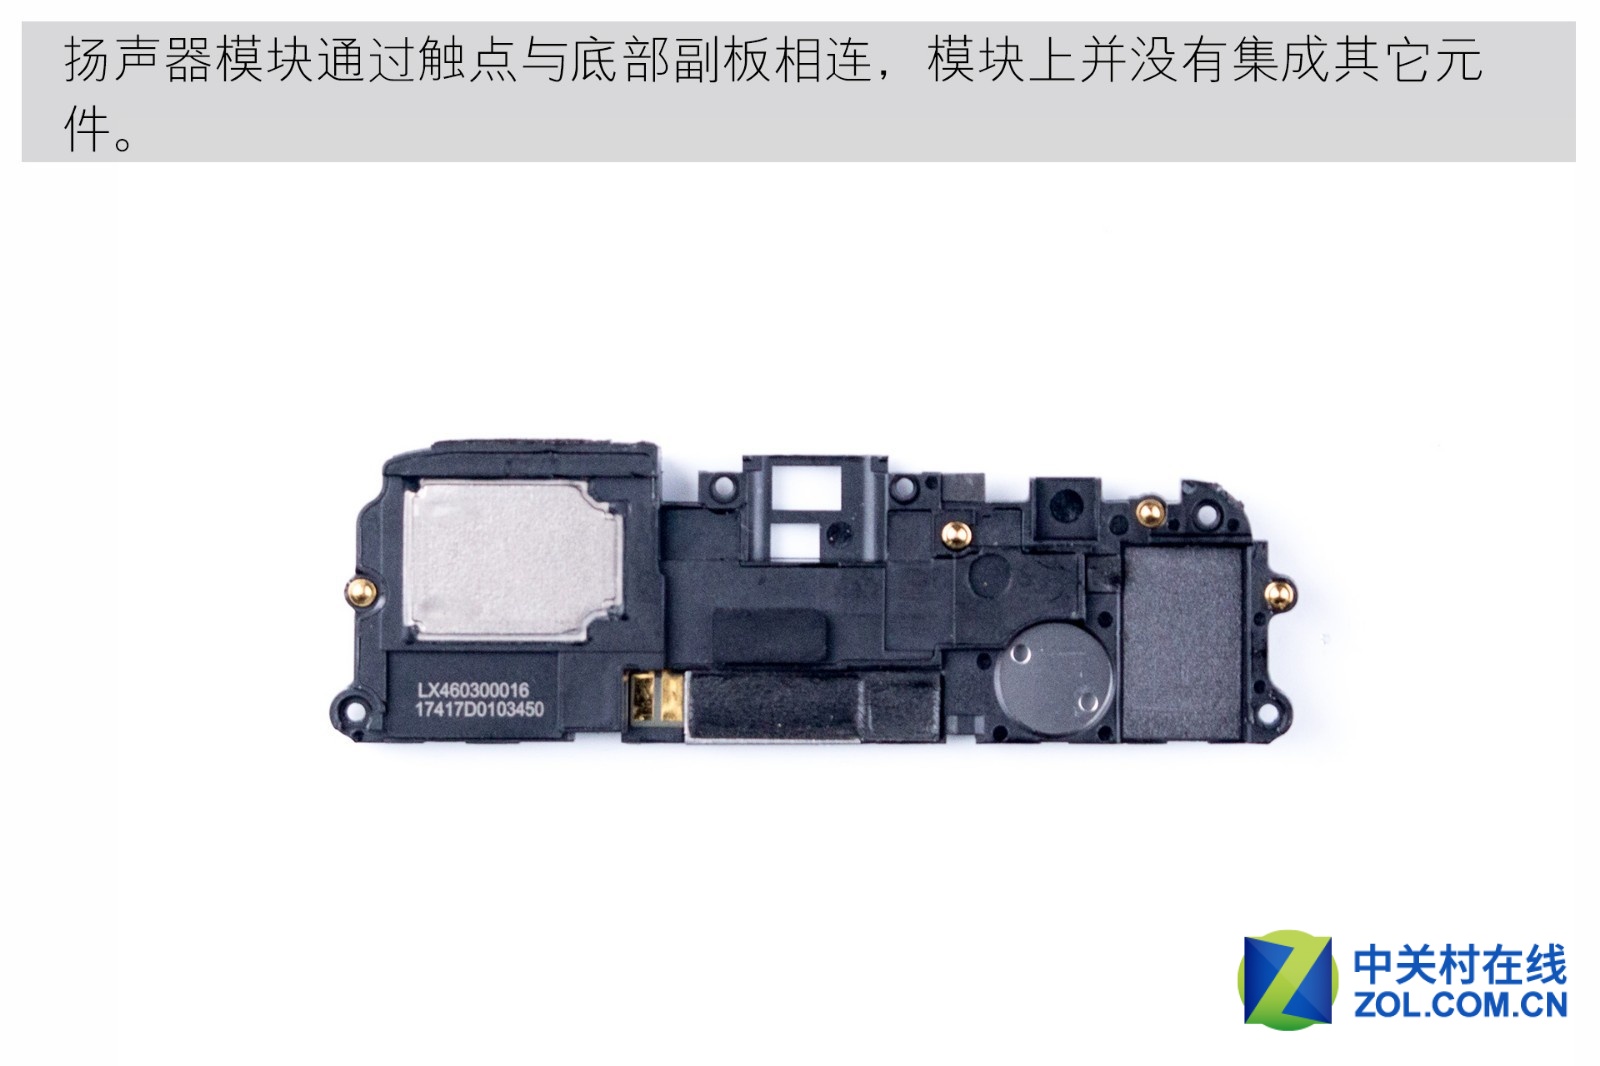
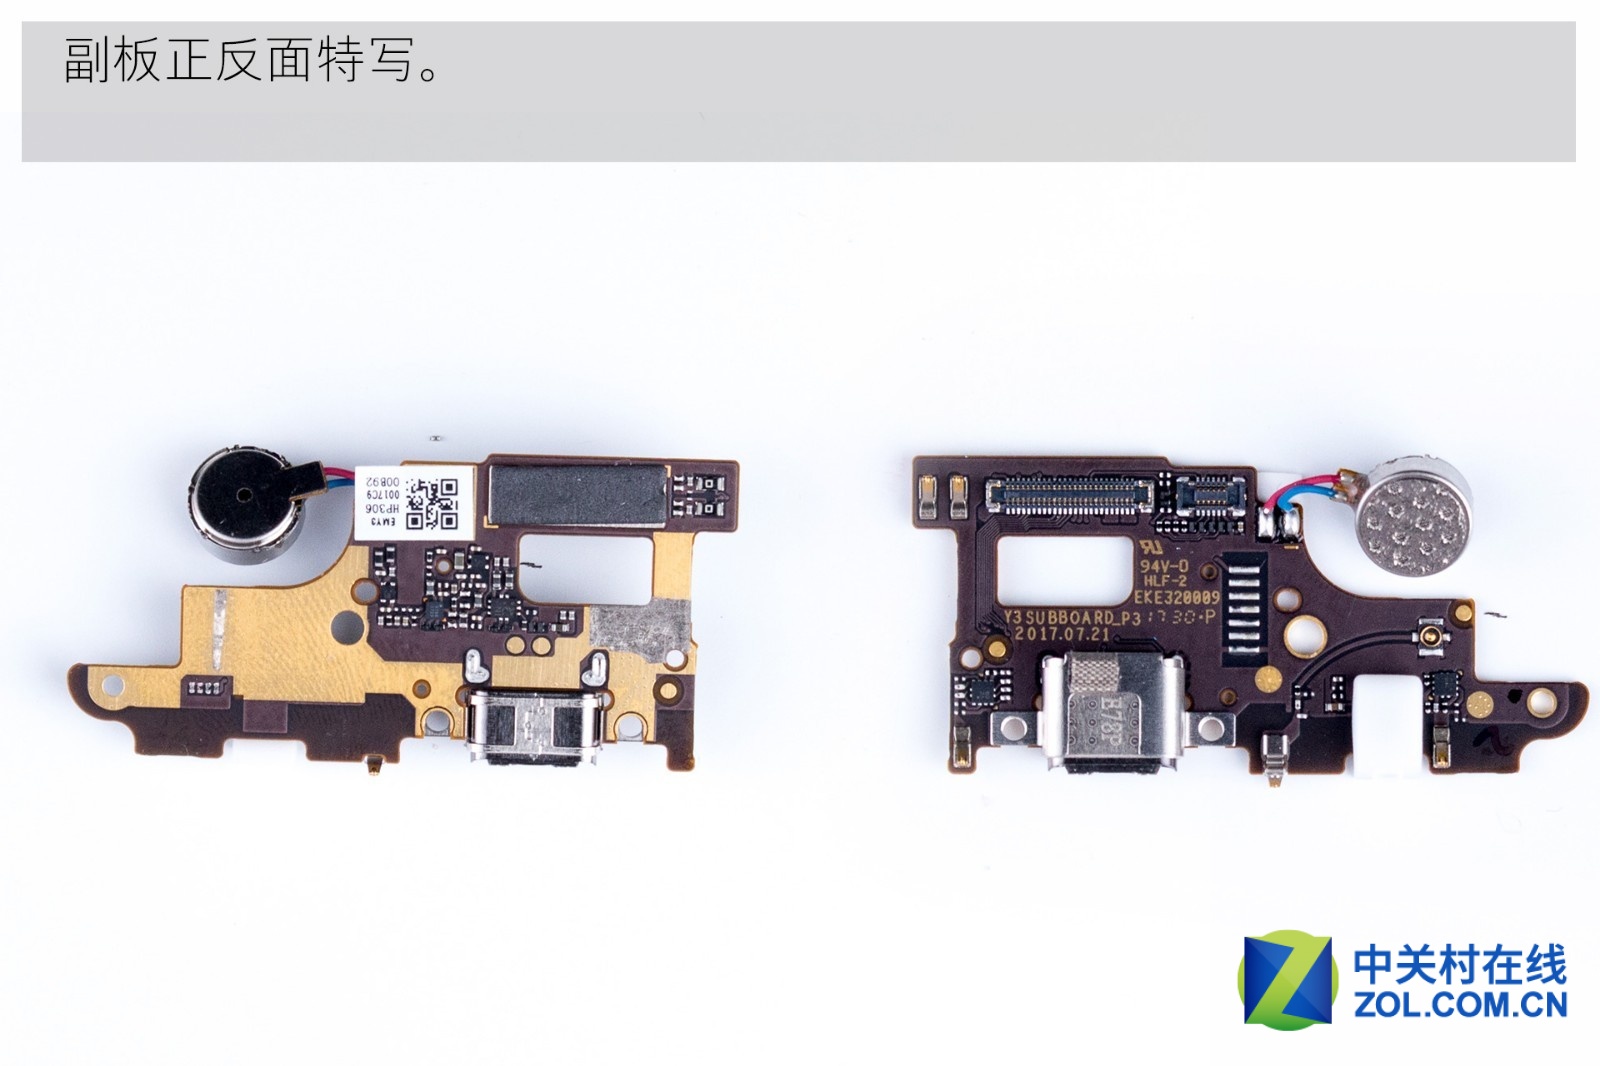
The loudspeaker module is connected to the vice board at the bottom via metal contacts. This module does not integrate any other components.
Close-up of the vice board
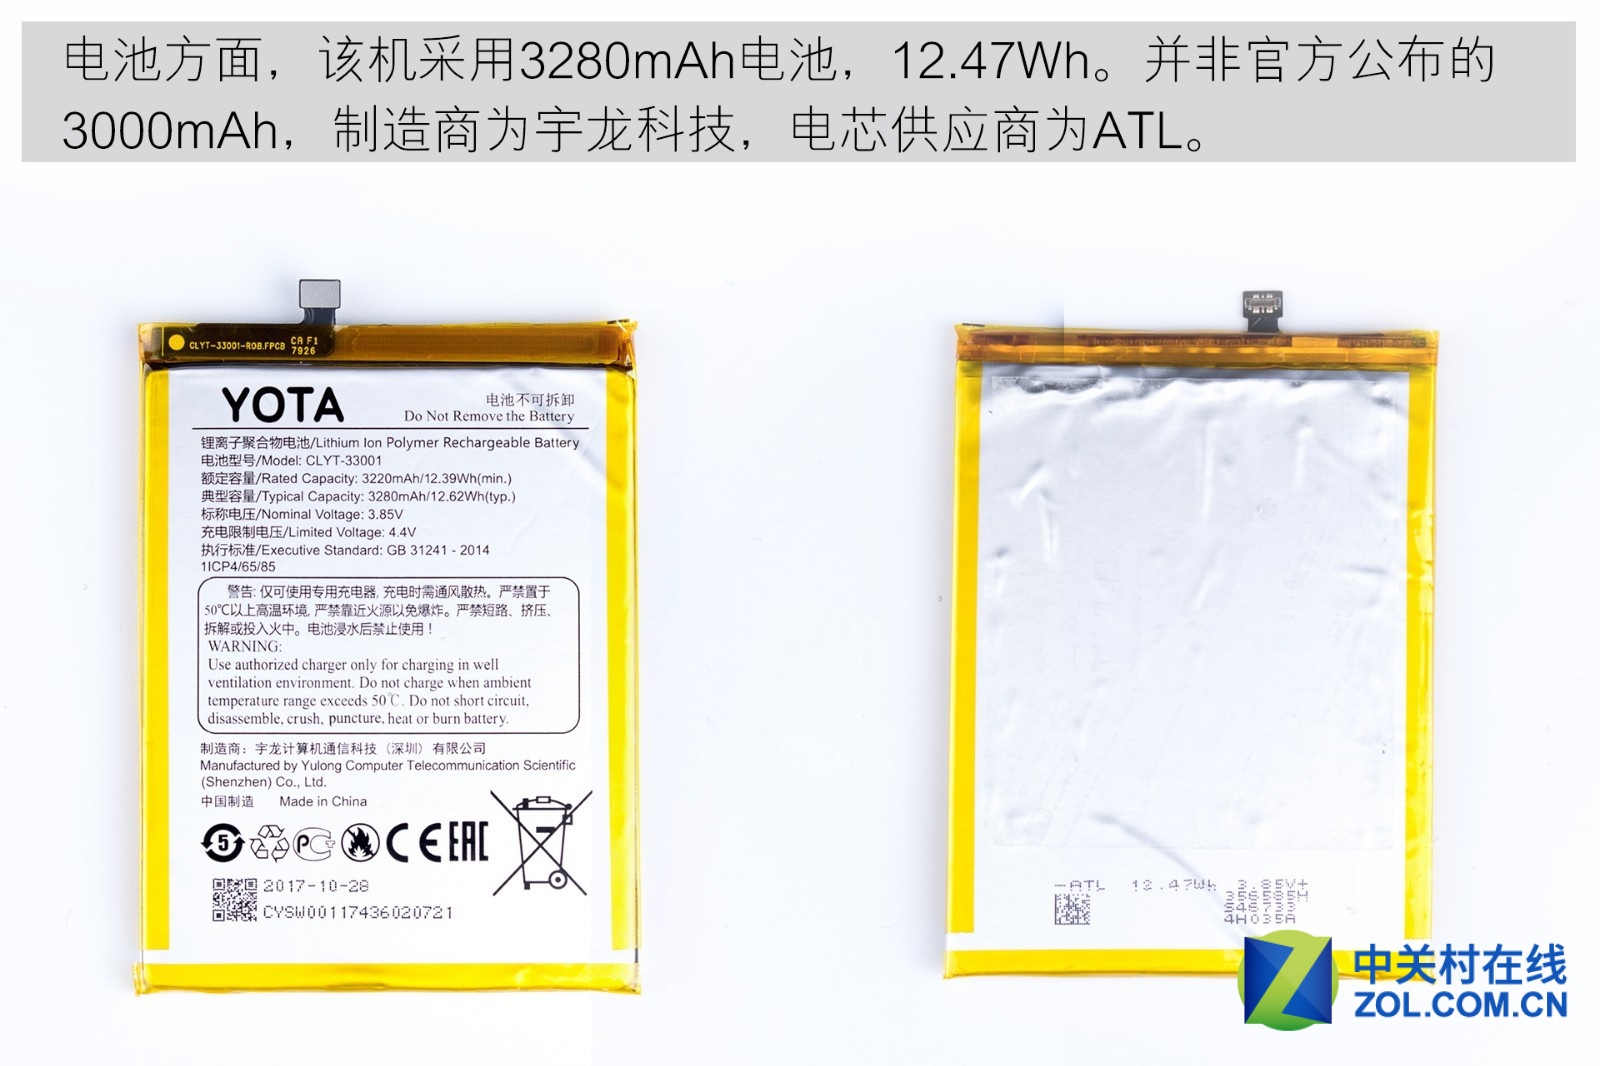
The smartphone comes with a 3,280mAh battery instead of the 3000mAh battery announced by the official party. The cell is provided by ATL.
Summary
This phone uses a small motherboard, which frees up more space for the battery. However, the internal craftsmanship of the YotaPhone 3 still needs further improvement. Overall, if you prefer a portable e-book reading experience, this phone is undoubtedly a more competitive choice.