A laptop fan is an important component of the laptop cooling system. When the temperature of the laptop rises, the fan will start to rotate. However, if the laptop does not run any software at all, and your laptop fan is always on, that may be caused by the system setup. Here’s how to fix a laptop fan constantly running all the time.
Method 1. Change system settings
Below I take win10 as an example to set up a laptop power management plan to reduce cooling fan speed and noise.
1. Windows 10 : Go to Start > Settings > System > Power & Sleep > Additional power settings 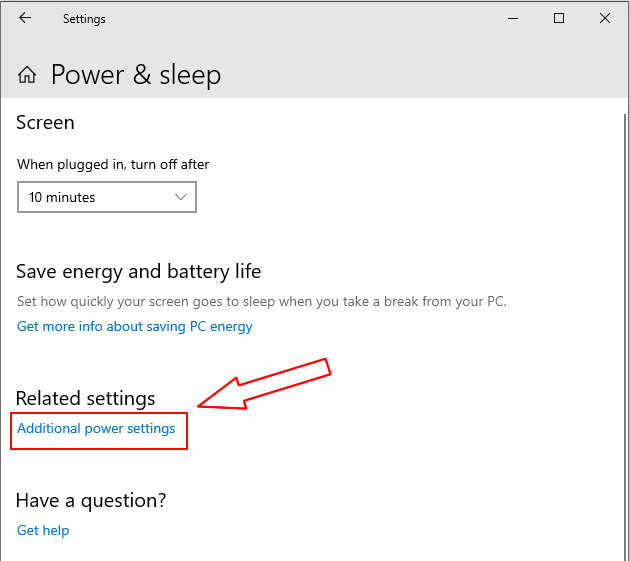
2. Click “Change plan settings” in the pop-up window.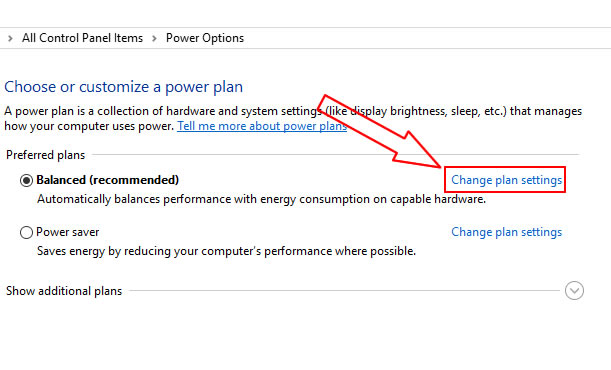
3. Click “Change advanced power settings” in the pop-up window.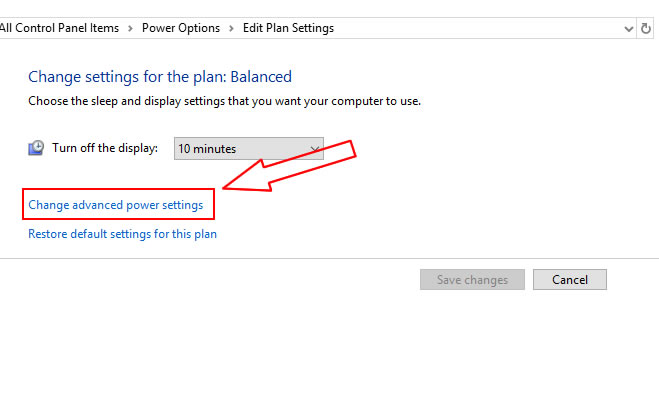
4. Click “processor power management”, and click “System cooling policy” in the drop-down menu, then click “Active”, change the “active” to “Passive”, and Click OK.

The setup is complete now. Then the fan will run as needed instead of running all the time.
Also Read: How to Clean a Laptop Fan and Heatsink
Also Read: How to Fix Laptop Fan Making Loud Noise
Method 2. Clean the laptop fan
If your “system cooling policy” has been changed to passive and you have not run large software, and the laptop fan constantly running all the time, you may need to clean the laptop fan because the fan and heat sink are dusty, and its heat dissipation performance is reduced.
At this point, you will need to remove the bottom cover of the laptop, remove the laptop fan and heat sink, and use a brush to clean the dust on the fan and heatsink fins. You need to remove the old thermal grease from the CPU, GPU, and heatsink, then apply the new thermal grease to the CPU and GPU to improve thermal conductivity. Visit laptop fan cleaning guidelines to learn how to clean your cooling fan, and you can also get a new CPU fan from the parts store.