After using the laptop for a while, you will notice that the fan’s cooling performance has reduced. At this time, we should clean the fan and heatsink and replace the thermal grease to maintain heat dissipation performance and extend the life of internal components.
Therefore, it is necessary to clean the fan and heat sink for your laptop in time. If you feel that the temperature of the palm rest is greatly increased, or if the fan frequently spins faster and makes abnormal noises, you should clean the laptop fan to prevent the laptop from overheating.
Usually, cleaning a laptop fan requires opening the laptop (removing the bottom cover, keyboard, etc.). This article will introduce the specific process of disassembling the laptop, cleaning the fan, and replacing the thermal grease.
Before opening the laptop, you need to make some preparations. First, you need to know how to open the laptop. If you are not experienced in laptop repair, opening your laptop blindly may damage it. Unfortunately, every laptop is opened differently.
The easiest way is to download the maintenance manual for your laptop from the official website. This manual already contains the steps to disassemble each component of the laptop. However, as far as I know, only HP, Lenovo, and Dell provide maintenance manuals.
https://www.dell.com/support/home/us/en/04/products?app=manuals
https://support.hp.com/us-en/products/laptops
https://support.lenovo.com/us/en/solutions/ht077589
6 steps to clean a laptop fan and heatsink
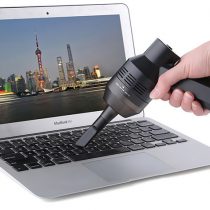
Tools need:
1. Screwdriver (check the types of screws on the bottom cover to determine which type/size)
2. Soft brush
3. Duster cloth
4. thermal grease
5. Lubricating oil
6. Cotton swab
There are many users leaving me messages asking about the types of screwdrivers. Usually, it’s difficult to decide which type of screwdriver to use to open your laptop, so I suggest you prepare a screwdriver set with various types. Fortunately, most ultrabooks can be opened with a Torx T5 screwdriver.
Note: Before you start taking your laptop apart, make sure it is turned off and wash your hands to eliminate static electricity and avoid irreversible damage to your laptop.
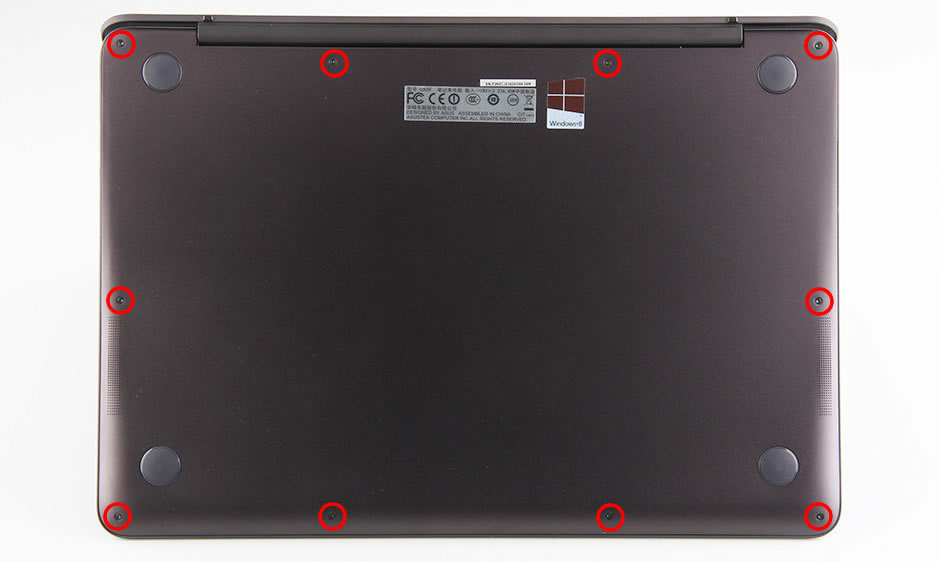
1. Remove the bottom cover
Please use an old card or a thin plastic tool to separate the bottom cover from the palm rest assembly. The bottom cover has many hidden latches that hold it to the palm rest (only a few laptops have some latches on the bottom cover, such as the XPS 13, XPS 15, EliteBook 1020 G1, Asus UX501, UX 305, Spectre x360 13, etc.). You need to move the thin plastic tool along the side to release all the latches.
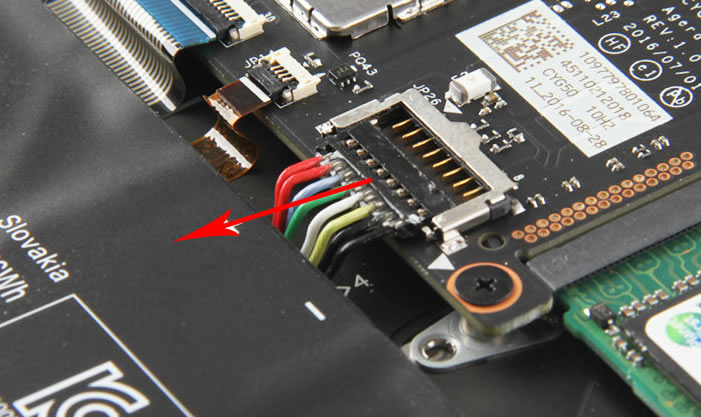
2. Disconnect the battery cable from the motherboard
For security reasons, you must disconnect the battery cable from the motherboard before you touch the internal components.
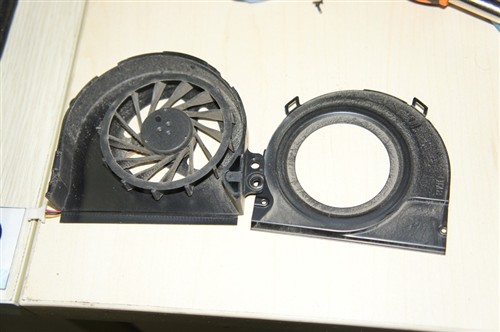
3. Remove the cooling fan and heat sink
Remove all screws securing the cooling fan and heatsink, and disconnect the fan cable from the motherboard. Then, you can take out the cooling fan and heatsink.

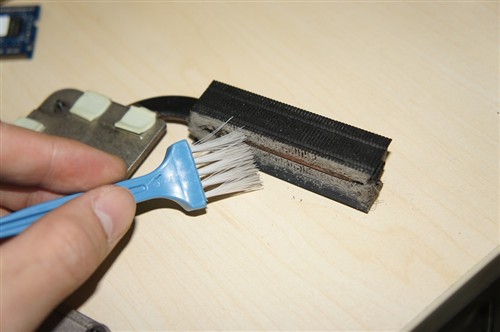
4. Clean the fan and heat sink
You will find some screws to secure the fan cover. After removing the screws, you can remove the cover and use a brush to clean the dust off the fan. If the brush is not clean enough, you can wipe the fan blades with a wet cloth.
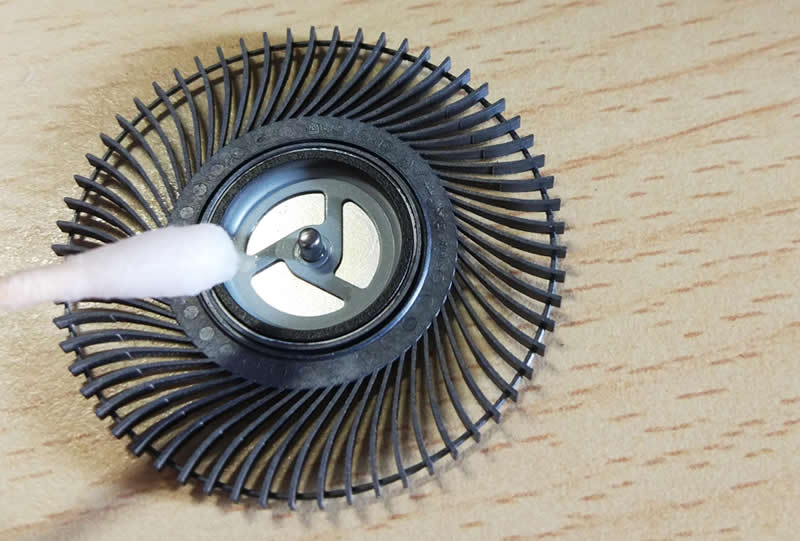
To reduce the noise of your laptop fan, you can pull out the fan blades with a little force.
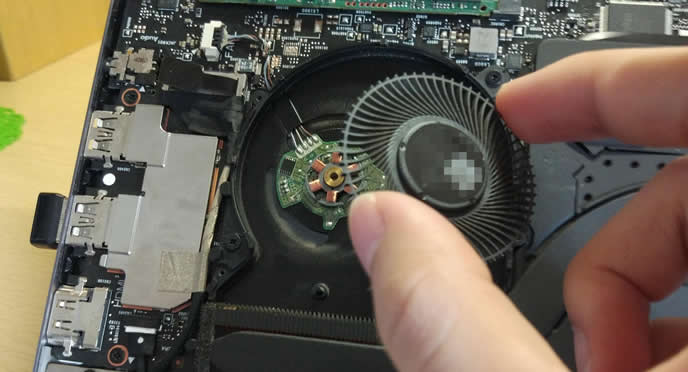
Use a cotton swab to dampen the lubricant and apply it to the fan shaft. Also, apply a little to the fan base, especially the contact area.
Clean the heatsink with a soft brush.
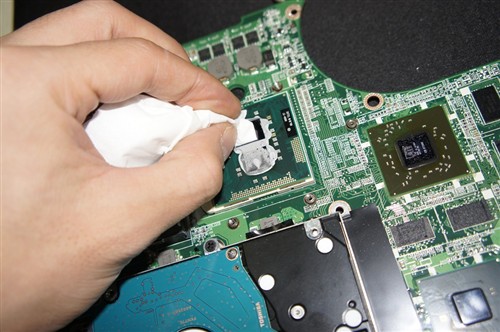
5. Remove thermal grease from the CPU and GPU
Use a duster cloth to remove old thermal grease from the CPU, GPU, and heatsink.
6. Apply thermal grease to the CPU and GPU
Now, apply the new thermal grease to the CPU and GPU and install the fan and heatsink on the motherboard.
Then reconnect the battery cable and install the bottom cover.
If you think cleaning the old fan is too much trouble, replacing it with a new one is a better idea. You can visit the MyFixGuide parts store to buy a new CPU fan for your laptop.