
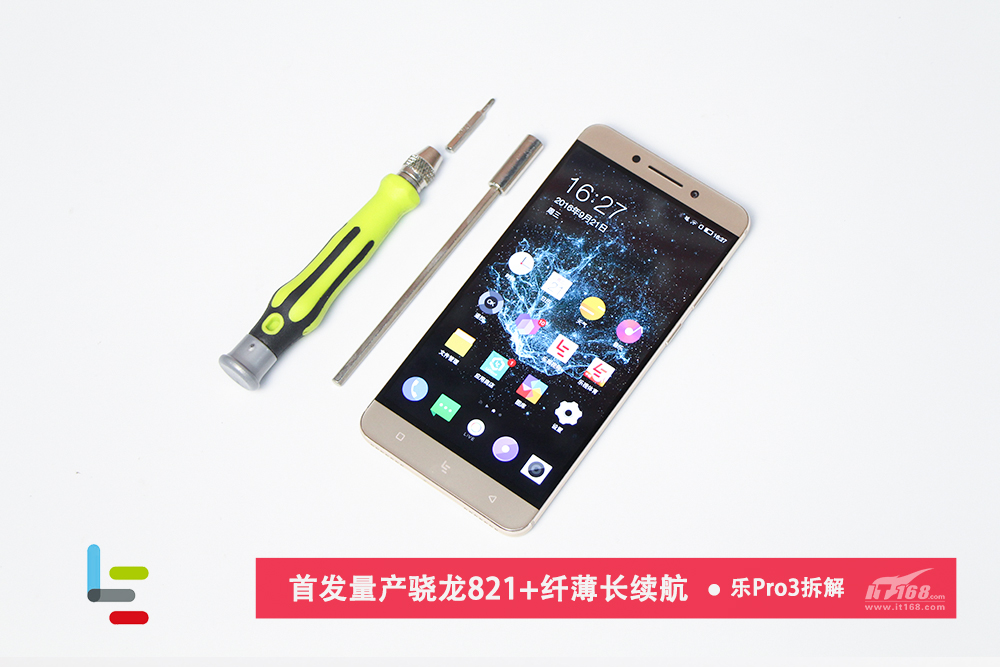
The Le Pro 3 features a 5.5-inch full HD (1080p) display covered with a 2.5D glass panel and is powered by Qualcomm’s Snapdragon 821 quad-core processor, paired with 4 GB or 6 GB of RAM. It comes with 32GB and 64GB of onboard storage options. The phone comes with a 16MP rear camera and an 8MP selfie camera. Other connectivity options include dual-SIM card slots, 4G LTE support, Wi-Fi, GPS, and Bluetooth. It runs on Android 6.0.1 Marshmallow with EUI 5.8 custom UI.
Teardown is what we do! Follow us on Facebook for the latest repair news.
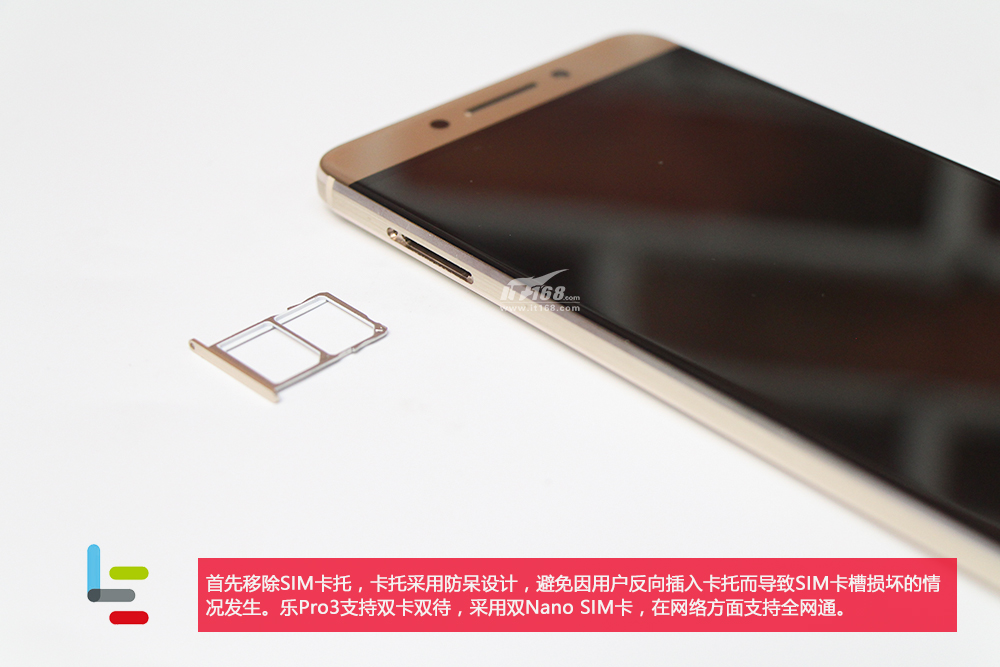
Remove the SIM card tray.
The SIM card tray can install two Nano SIM cards.
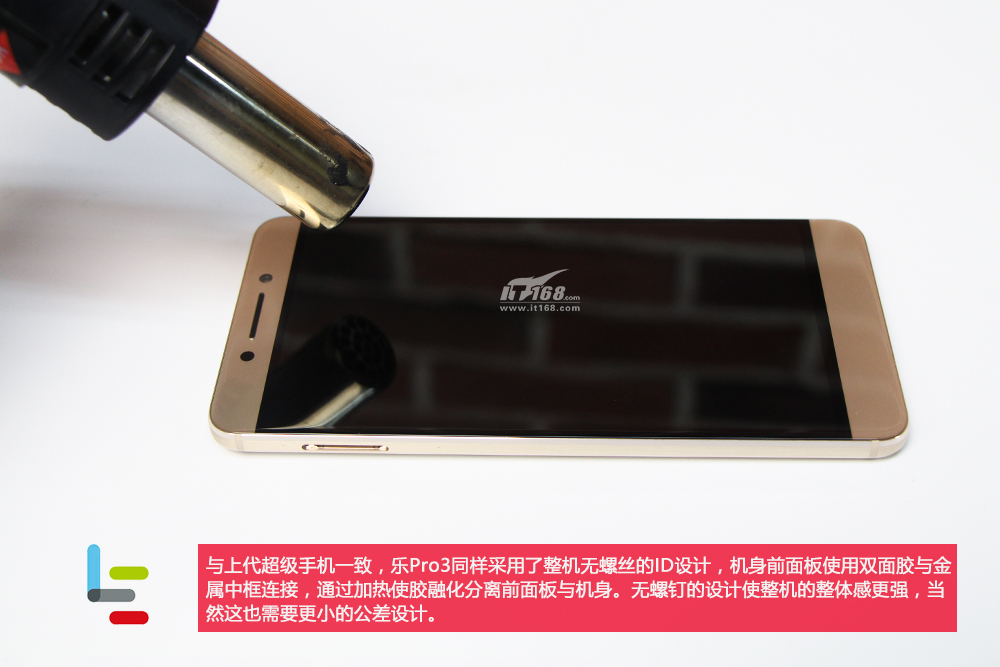
To remove the display assembly, we need to heat the display edges with a heat gun.
Open the display assembly a bit with a suction cup. At the same time, insert a guitar pick and slide it along the edges to remove the display.
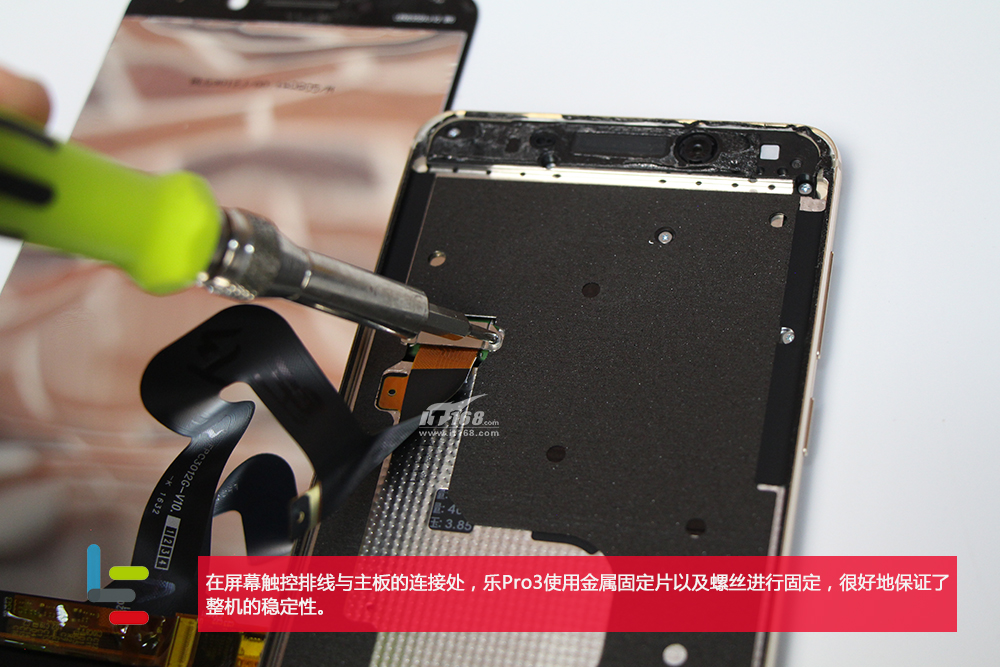
Be careful. The touch cable is still connected to the motherboard.
Remove the two screws securing the metal plate. You will be able to disconnect the cable.
The LeEco Le Pro3 features a 5.5-inch full HD (1080p) display. The touch chip is from Synaptics, and the model number is S3320A.

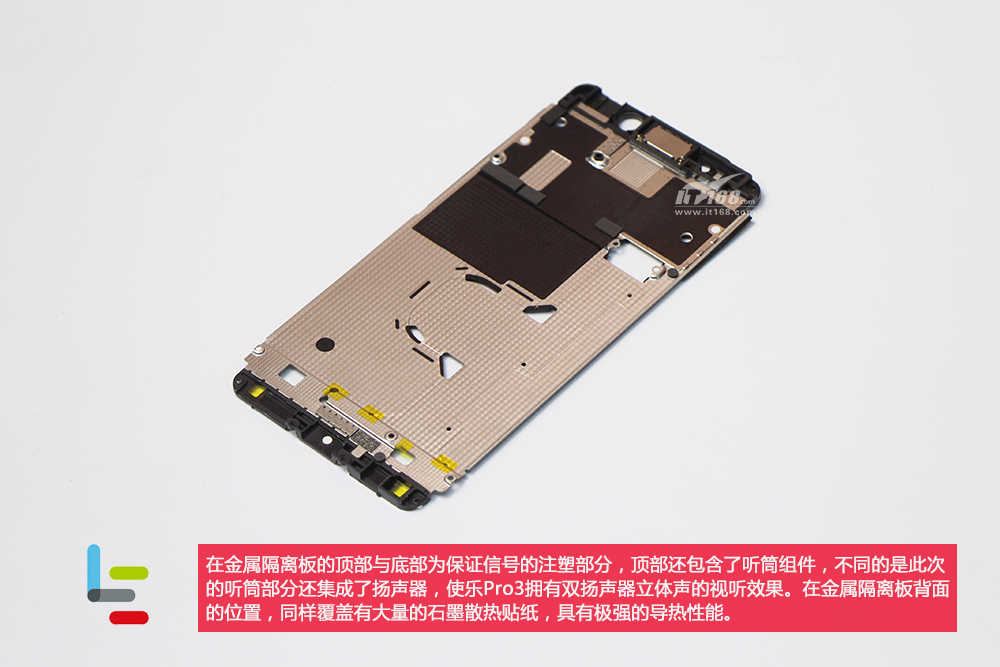
Under the screen, there is a metal plate used to isolate the screen from the body. This metal plate is covered with a layer of thermal insulation foam designed to minimize the impact of internal temperatures on display performance.

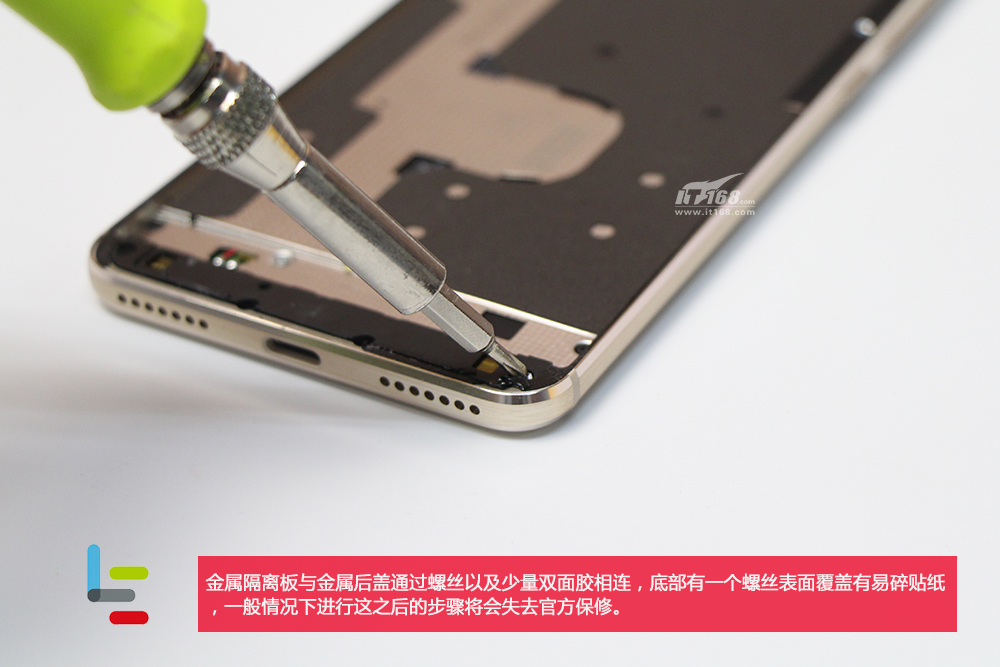
Remove all screws securing the metal plate.
There is a screw covered with a fragile sticker. If you damage it, you will void the warranty.
Close-up of the metal plate.
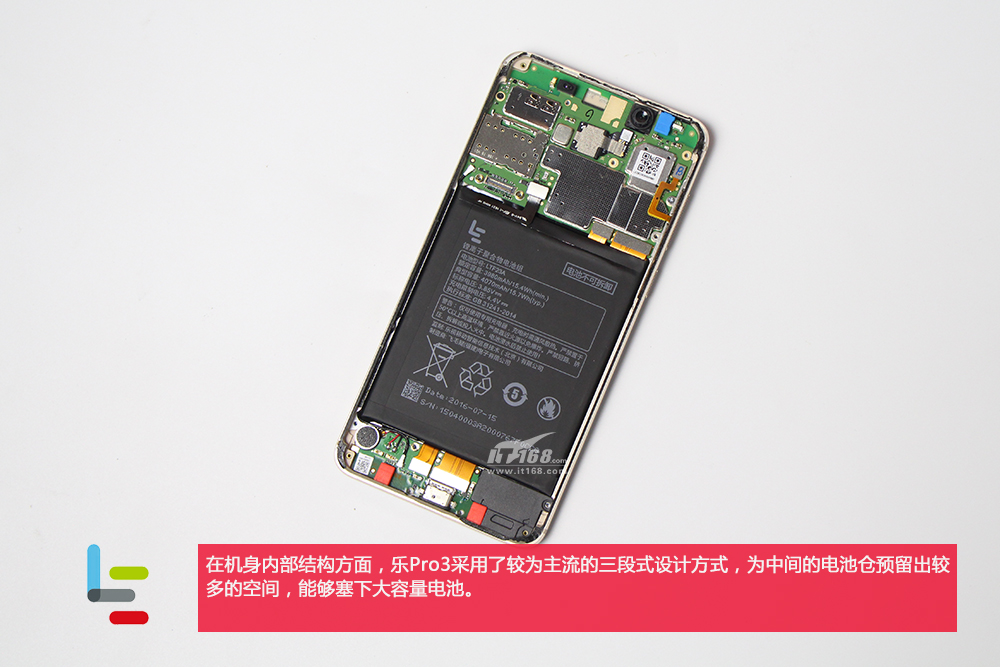
With the metal plate removed, you can access the battery, camera, speaker, and motherboard.
Disconnect the battery connector from the motherboard.
Pull out two adhesive tapes and remove the battery.
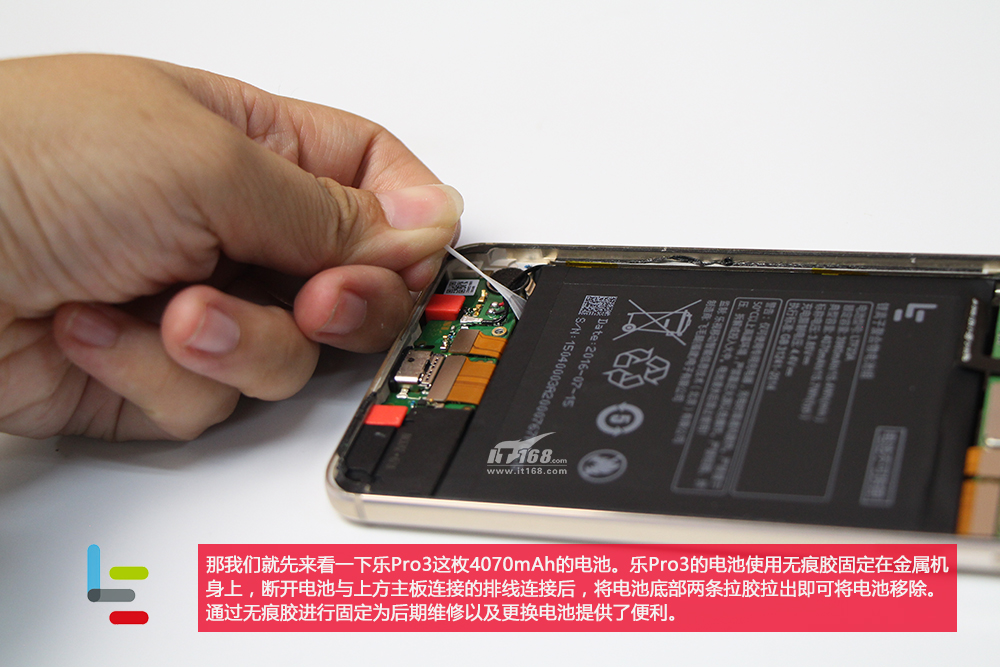
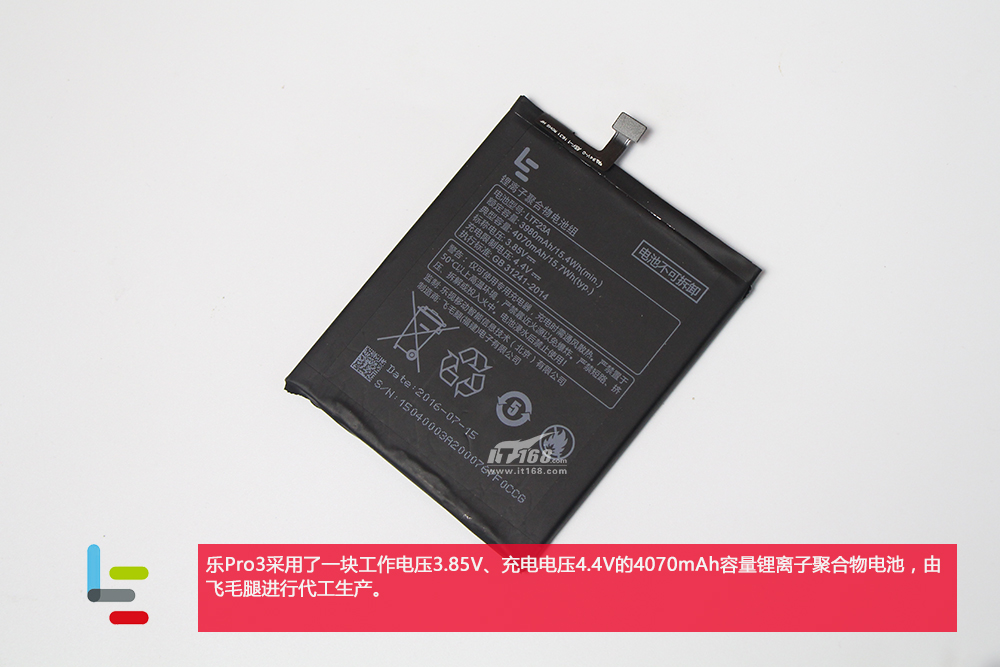
The LeEco Le Pro 3 comes with a 3.85V, 4070mAh Li-polymer battery.
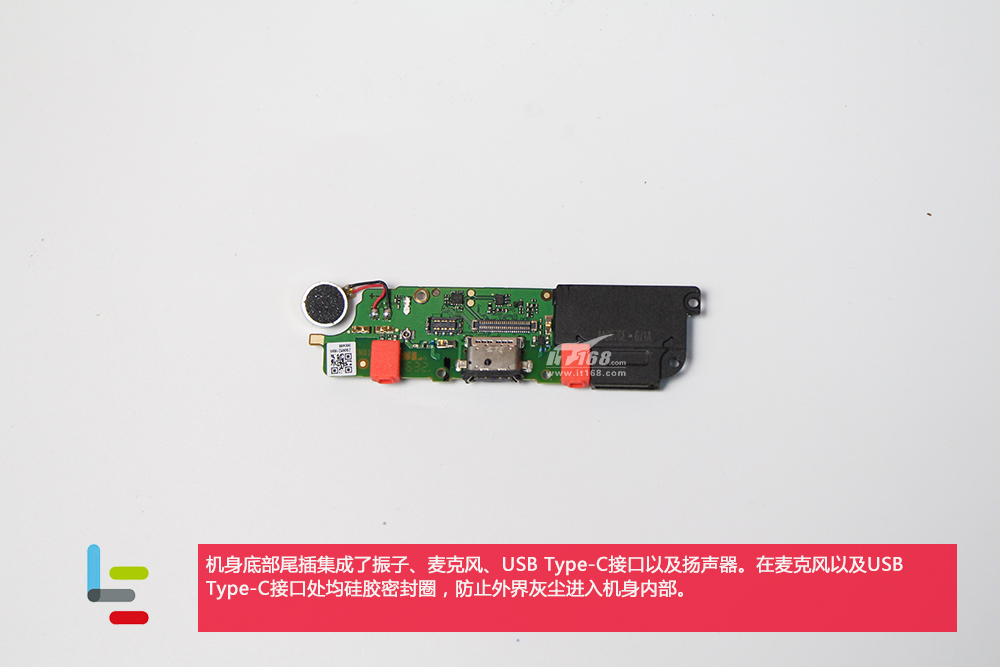
The bottom board integrates a vibration motor, a microphone, a USB Type-C port, and a speaker. The microphone and USB Type-C port are around the silicone seal to prevent dust from entering the fuselage.
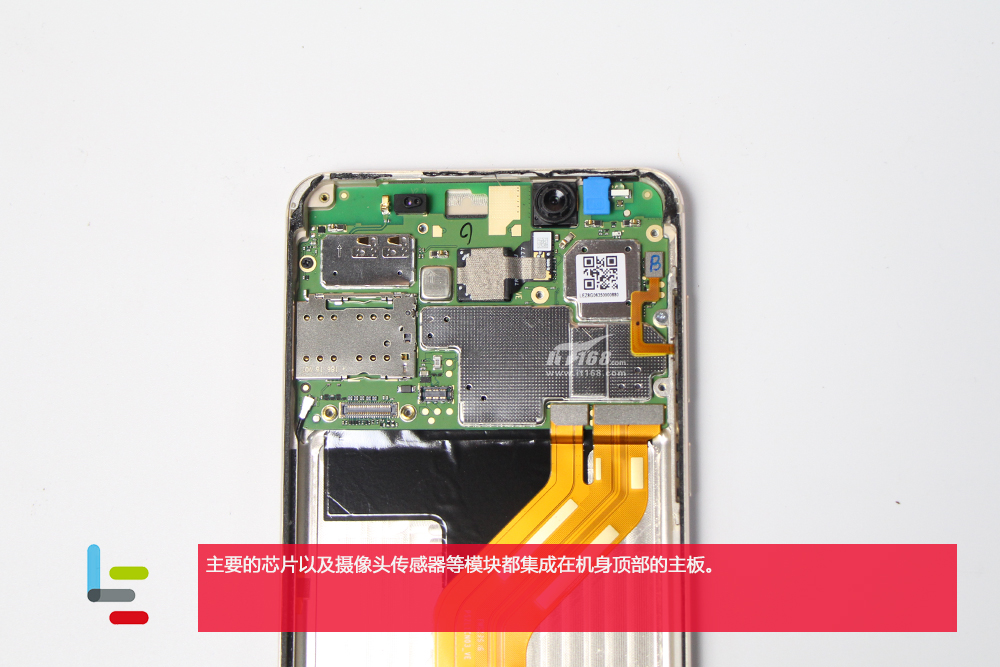
From this picture, we can see that most of the main chips are covered with metal shields.
Remove all screws securing the motherboard.
Disconnect the button module cable.
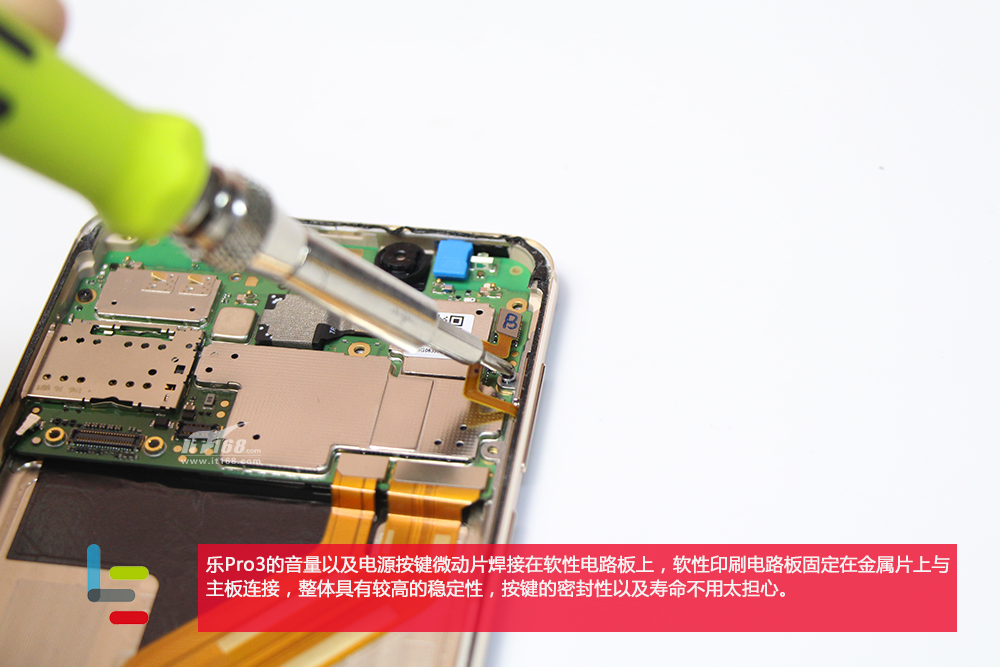
Close-up of the button module.

Remove the motherboard.
On the back side of the motherboard, the fingerprint module cable is still connected to the motherboard.

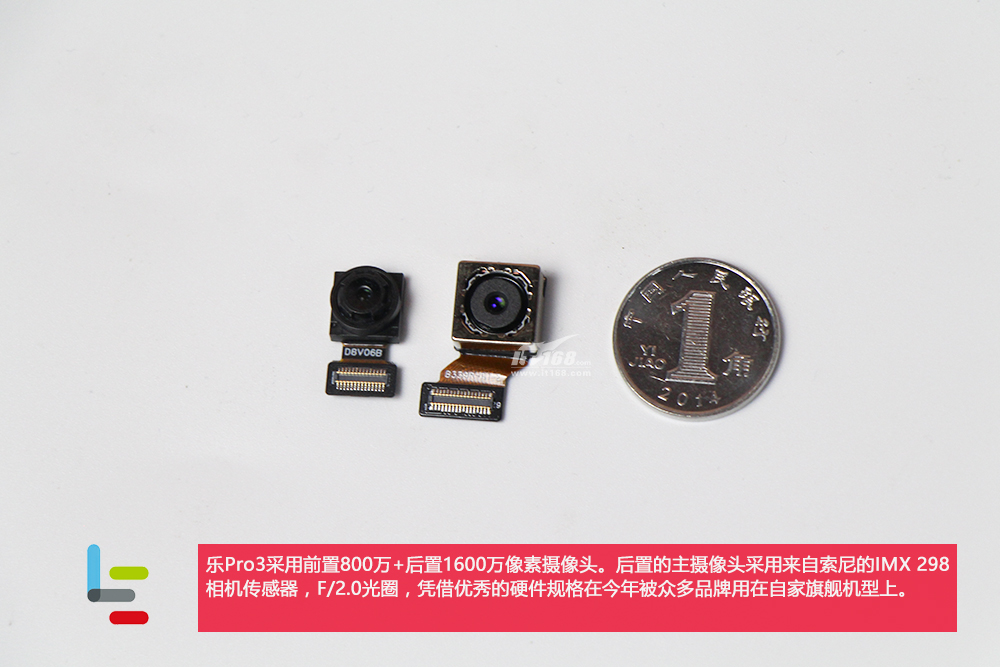
8MP front camera and 16MP rear camera.
The rear camera features a Sony IMX298 image sensor with an aperture of F/2.0.
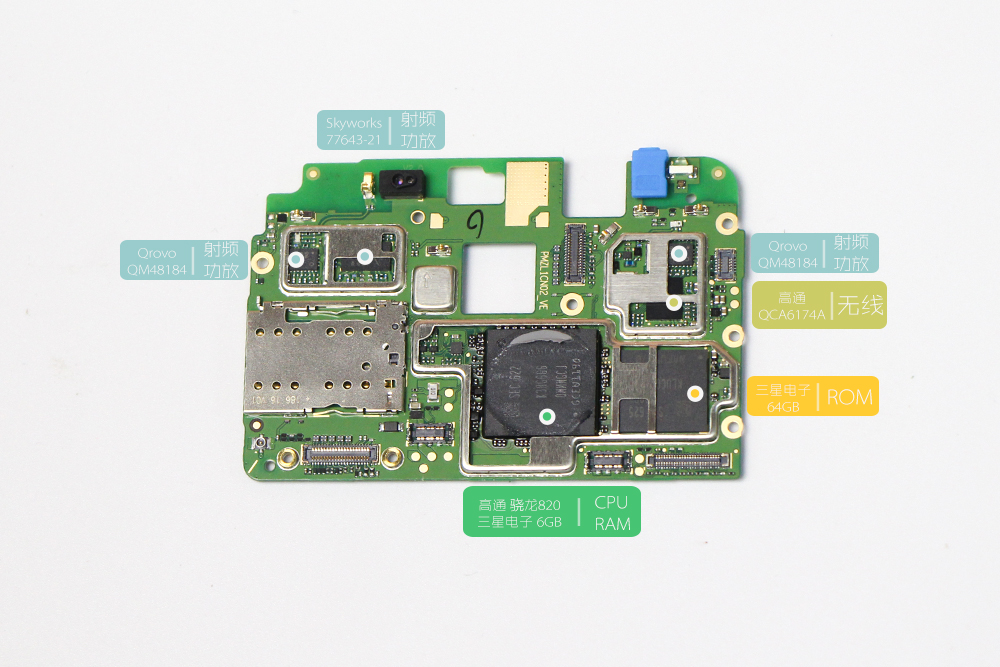
Qualcomm Snapdragon 820 CPU + Samsung 6GB RAM
Qrovo QM48184 RF chip
Skyworks 77643-21 RF chip
Qualcomm QCA6174A Wi-Fi
Samsung 64GB ROM
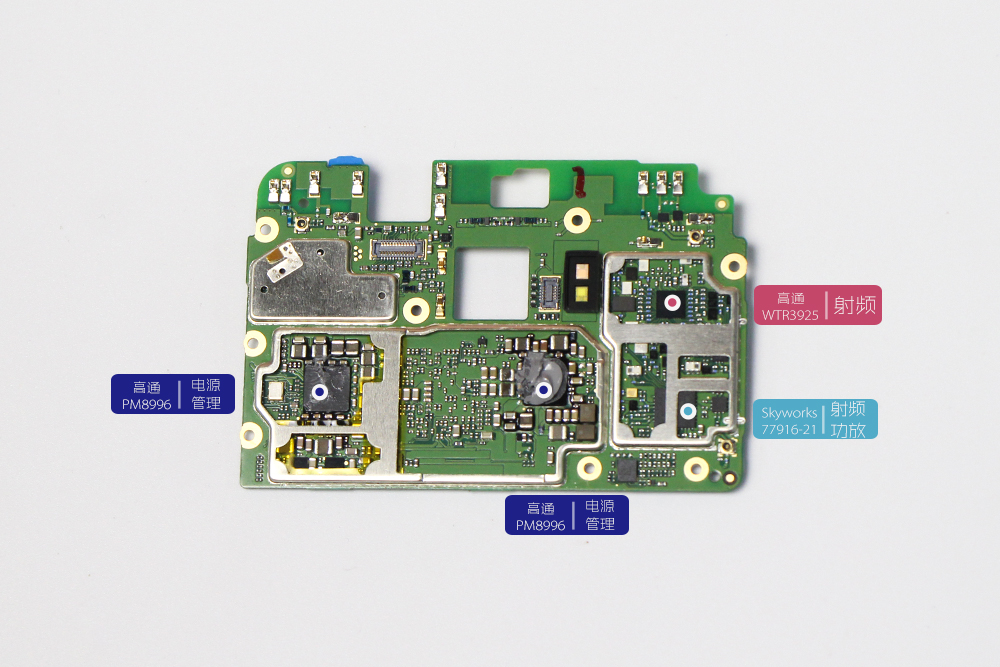
Qualcomm PM8996 power management chip
Qualcomm WTR3925 RF chip
Skyworks 77916-21 RF chip
Source: it168
Hello, my screen cracked. Do you think it is possible to remove the screen from the LCD? Or is it better to buy a full LCD replacement? Thank you
The display’s digitizer glass is fully laminated to the LED display. You will need to try to fully remove the UV bonding glue from the LED (which can be done much more easily and safely with a chemical glue removal formula specifically designed for this purpose) and get fresh UV-activated glue for the rebonding process. It would really be easier to get the pre-bonded assembly and just reinstall it that way. Just because it can be done doesn’t mean it will be easy, or free from flaws or damages in the UV glue removal or rebonding process.
I am living with the one crack running diagonally across my display, as it doesn’t prevent the touch function or straight-on viewing. I bought the glue and was going to buy the digitizer, but seeing the result of another inexperienced repair tech’s efforts, I decided to wait until I was desperate.
What kind of solvent would I need to use to separate them?
Hello,
I have the same Question. My screen is cracked as well.
I just want to change the front screen.
Is it enough to disconnect the touch cable from the motherboard after removing the two screws that secure the metal plate?
My Screen also cracked. Does anyone know where I can get it repaired or where to get a net display unit?
I have the LeEco Max 2 phone, which comes with a 3000mAh battery. I really want to try and put an S3 Pro 4000mAh battery in it. Everyone says it can’t be done, but the LeEco S3 is identical in every way to the S3 Pro. I want to know if they’ve installed a larger battery in the S3 Pro or if it’s just a higher-quality battery. I really just wanted to order both and check the size, but I can’t find them anywhere. Help!
If the output voltage is the same, you can try to install it.
I unplugged my LeEco 3 from the charger, and it will not turn on. I have never had this problem before. What do you suggest I do?
My virtual buttons have been damaged and are now unresponsive, and the LED lights are defective. I wanna fix this problem. Can I replace the part myself?
If so, where can I get the parts?
You won’t be able to. I tried it. The connector for the battery in the Leeco Pro 3 is bigger, and it won’t connect with the S3.
Hi David, my LeEco Le Pro 3 phone has lost its GSM signal. I have tried a new SIM card. But nothing seems to work. Can you shed some light on it?
Thanks
Please, how do I fix the screen overlay issue with my Leeco Pro 3 AI phone?
I have tried all I know and failed. I installed a button unlocker app, and it didn’t work. Please help.
Where can I purchase a replacement selfie camera module? How do I remove the IR filter?