
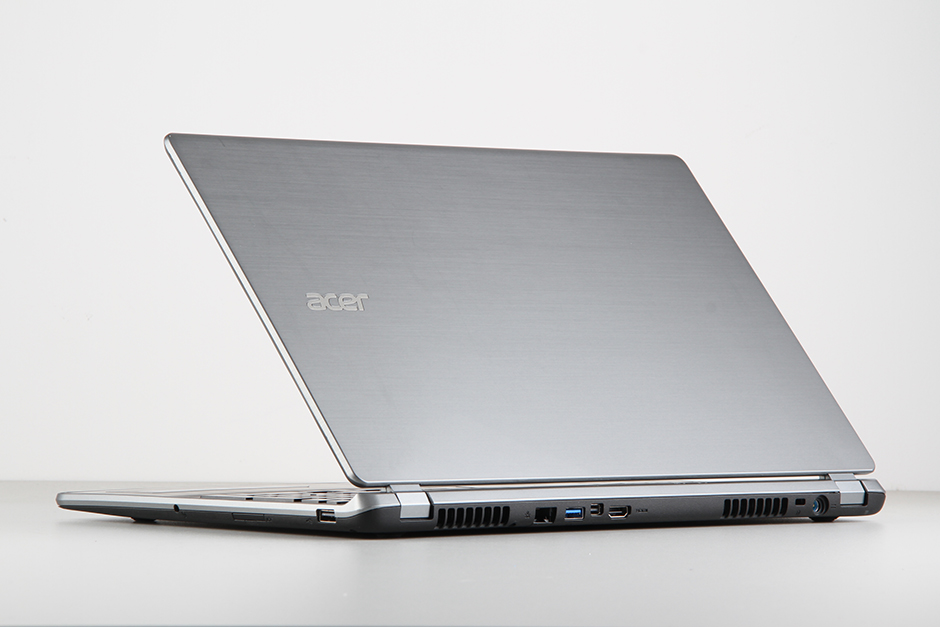
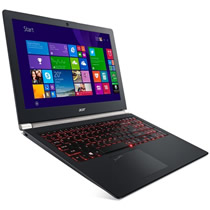
Acer Aspire V5-573GAcer Laptop
Acer Aspire V5-573G Disassembly
In this guide, I’ll explain how to disassemble Acer Aspire V5-573G to remove and replace the hard drive, keyboard, palm rest, Wireless LAN card, RAM, heat sink, cooling fan, speaker and motherboard.
Join us on the social network! Follow us on Facebook for all the latest repair news.
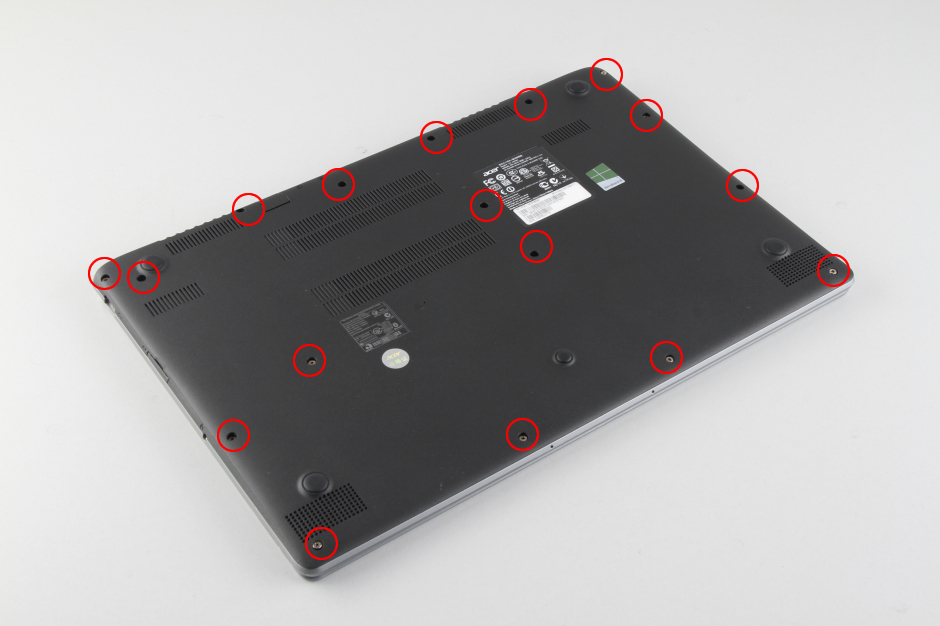
Remove all screws from the bottom case.
Open the bottom case.
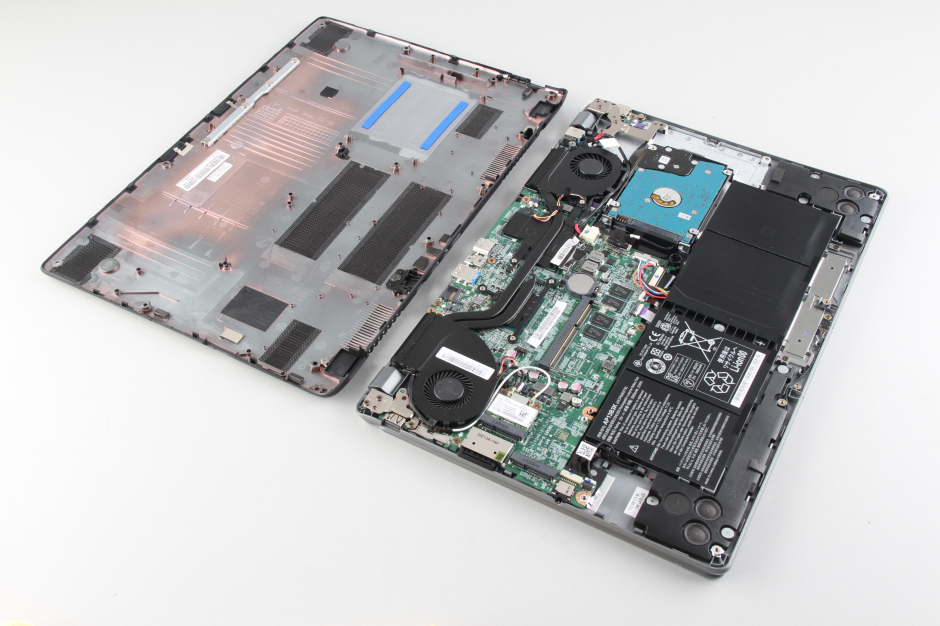
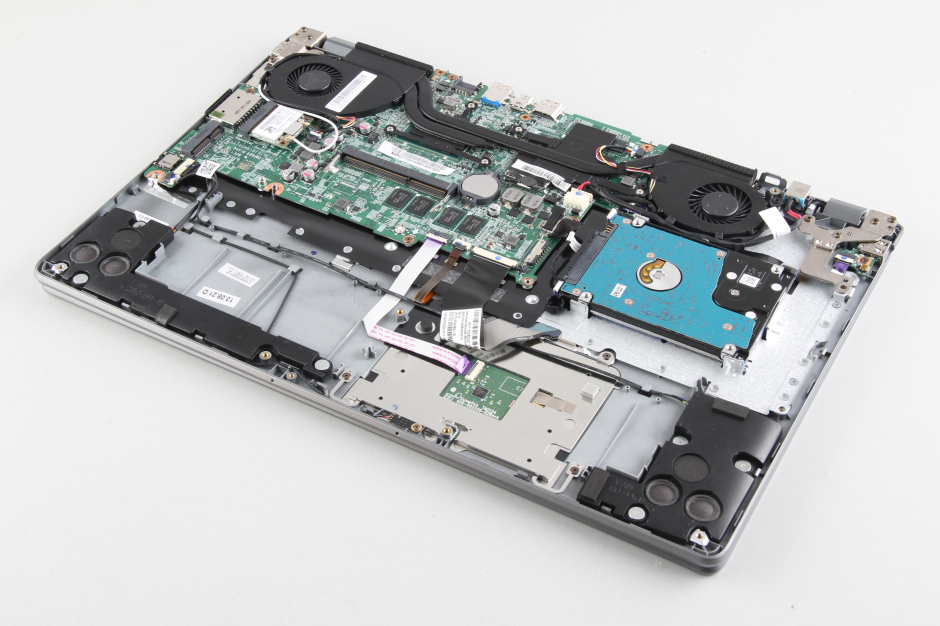
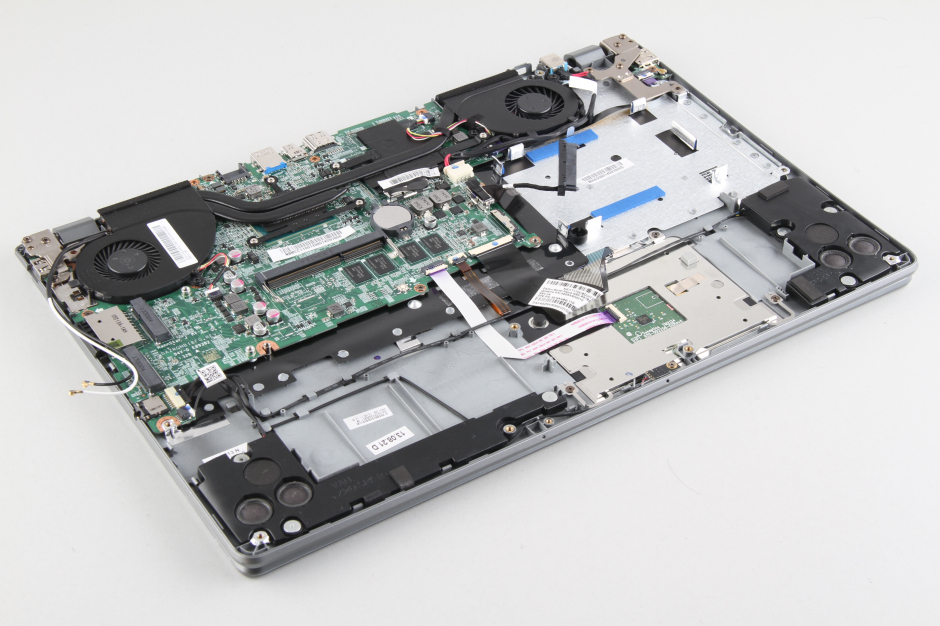
Under the bottom case, you can get access to the battery, hard drive, wireless card, speakers, heat sink and cooling fan.
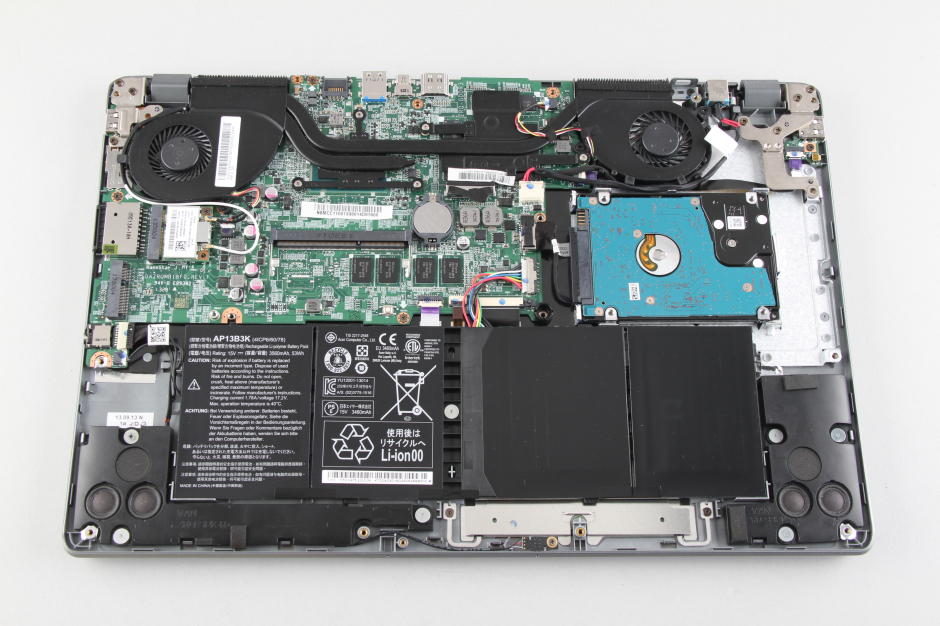
Disconnect the battery power cable from the motherboard. You can remove the battery.
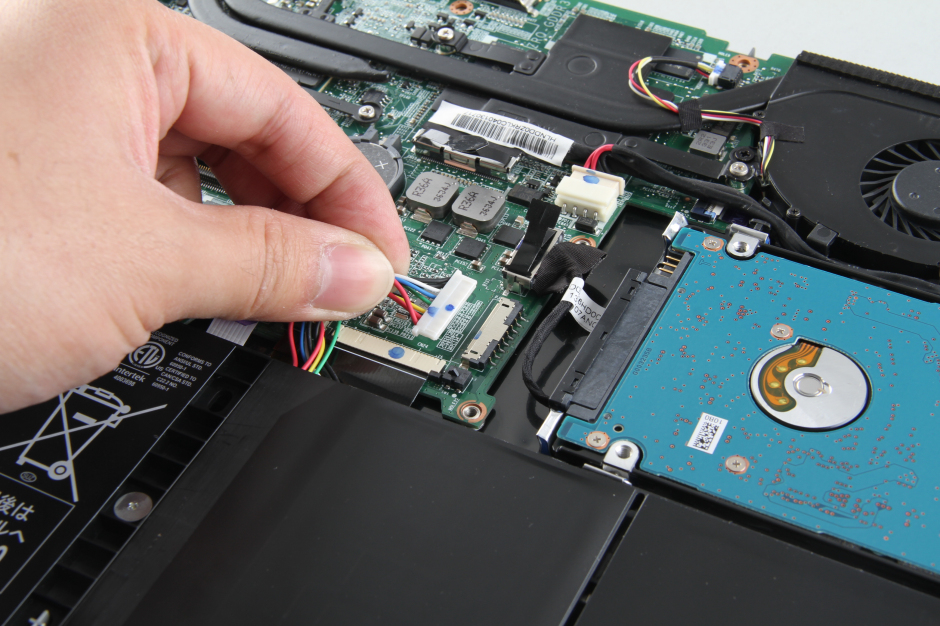
Acer Aspire V5-573G using a 15v, 53wh Li-polymer battery. Acer part number: AP13B3K.
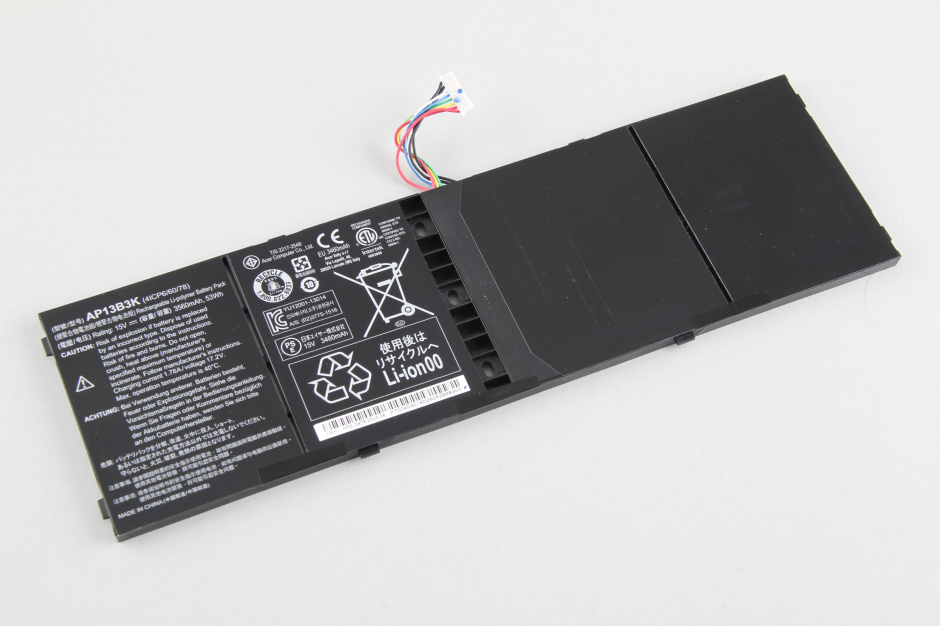
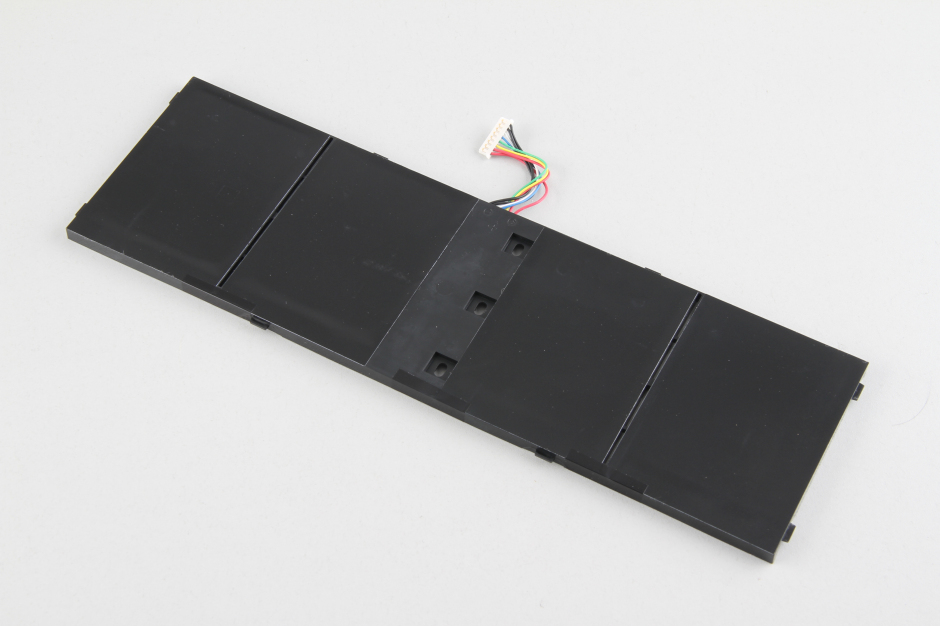
The battery has been removed. In the next step will remove the hard drive module.
Disconnect the SATA cable. You can remove the hard drive module.
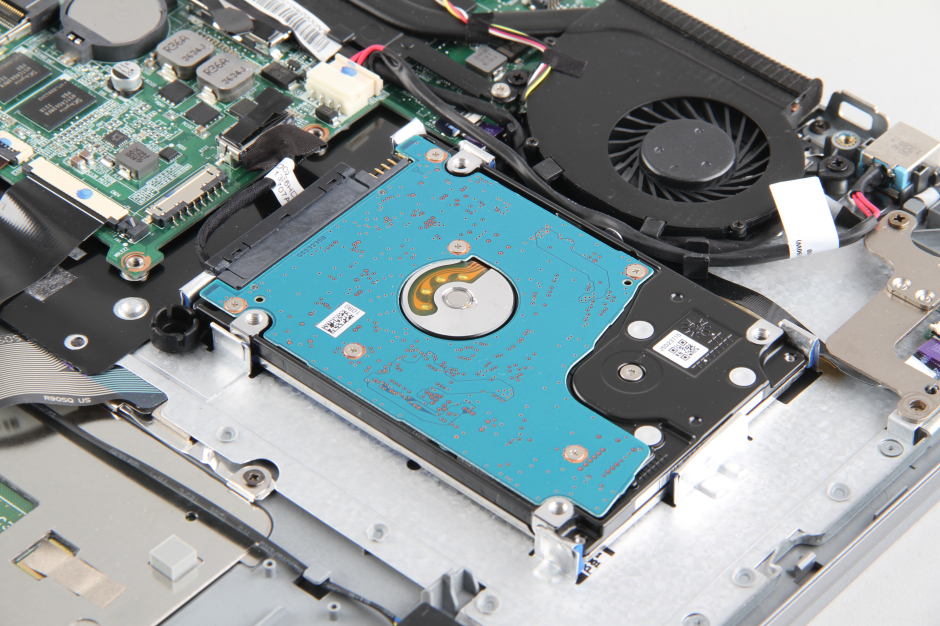
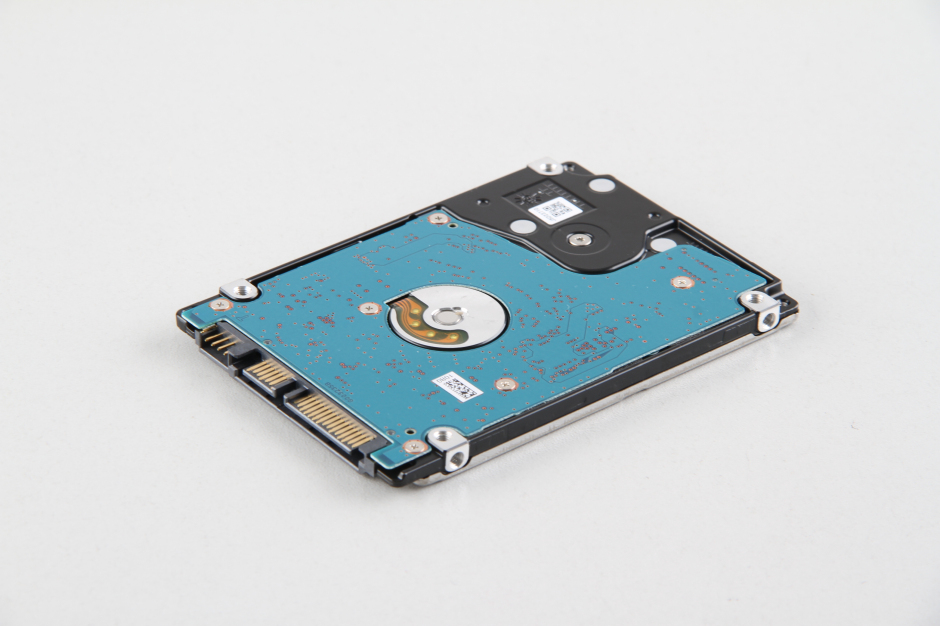
The Acer Aspire V5-573G using a Toshiba 500GB hard drive.

Disconnect two antenna cables, remove one screw securing the wireless card, you can remove it.
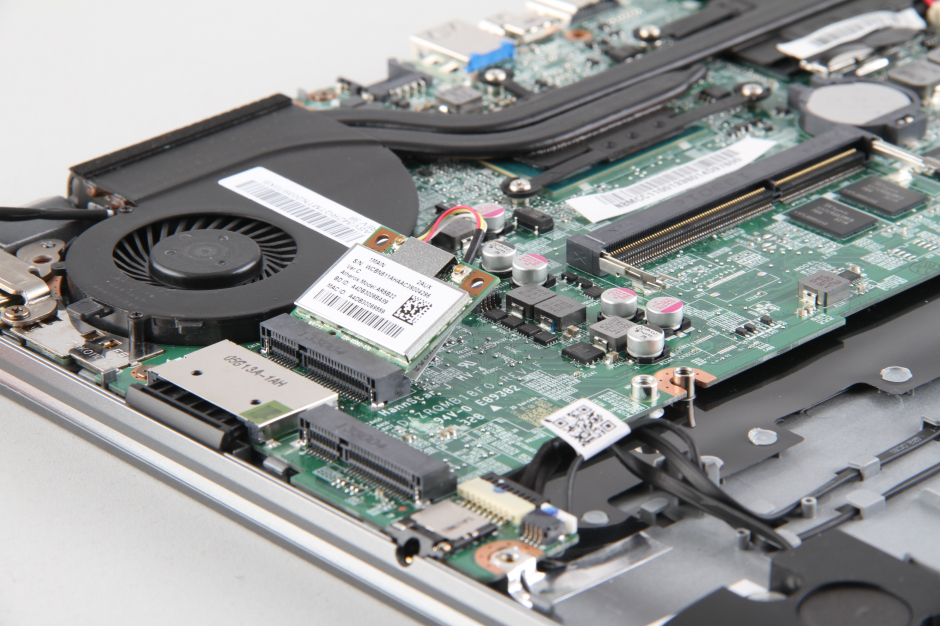
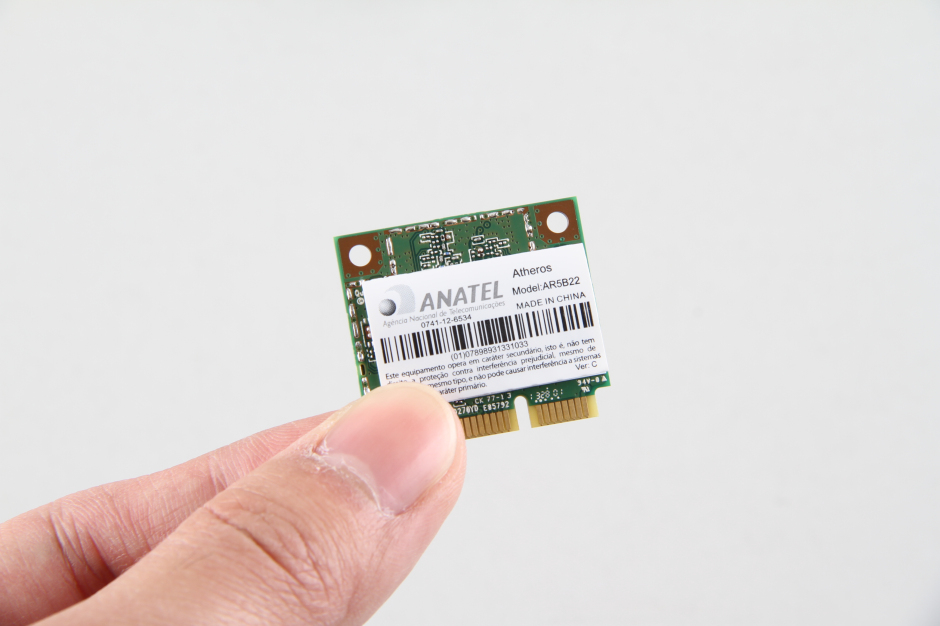
The Acer Aspire V5-573G comes with an Atheros AR5B22 wireless card.
4GB built-in memory chips. Acer Aspire V5-573G also have a spare memory slot for user upgraded memory.

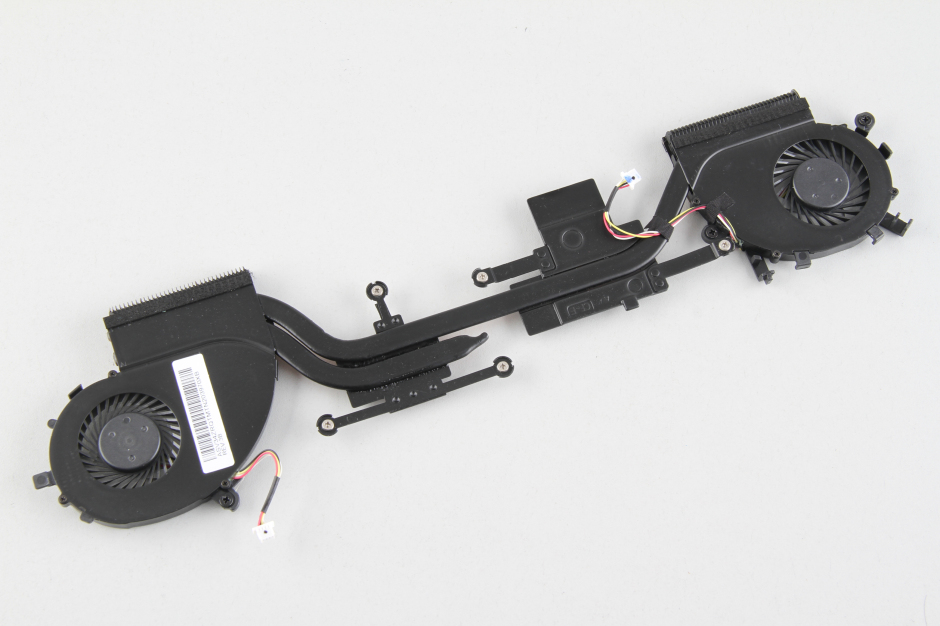
Loosen all screws securing the heat sink and cooling fan, disconnect two cooling fan cable, you can remove the cooling module.
Acer Aspire V5-573G’s heat sink and cooling fan
Disconnect the LCD cable, dc power jack, touchpad cable, keyboard cable and backlit cable from the motherboard,
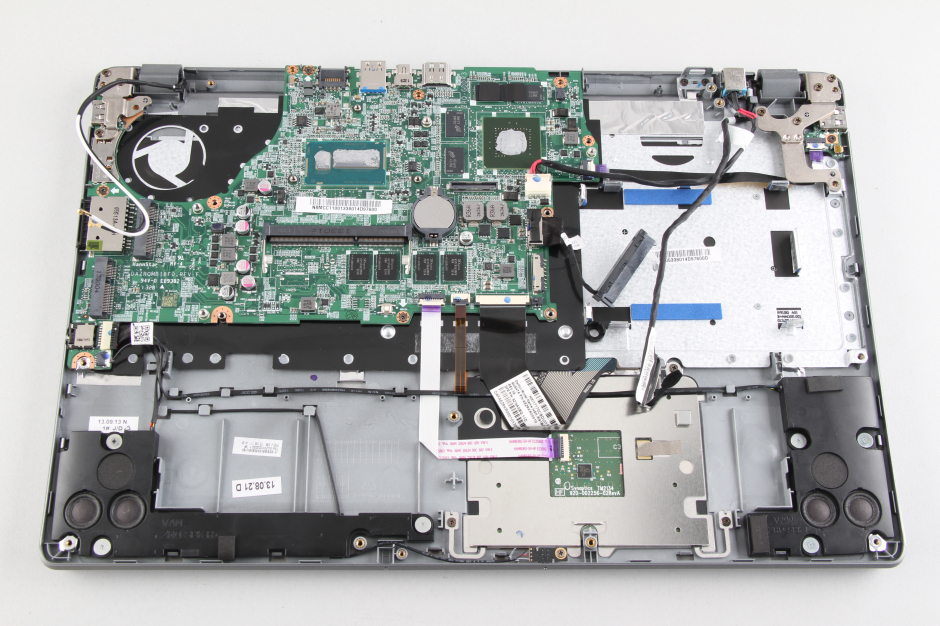
In order to remove the motherboard, we need to remove the screws securing the LCD hinges.
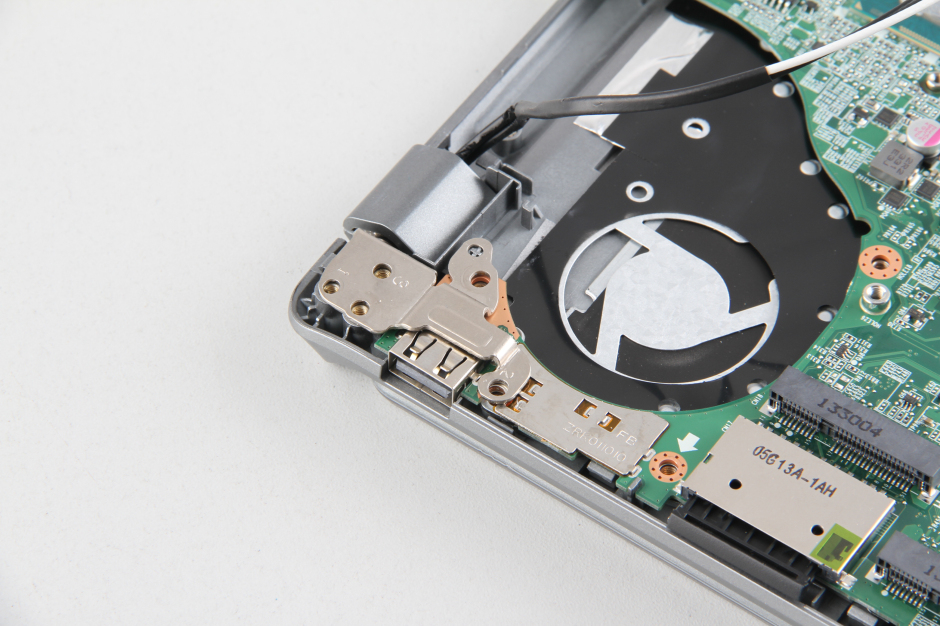
Remove the LCD hinges.
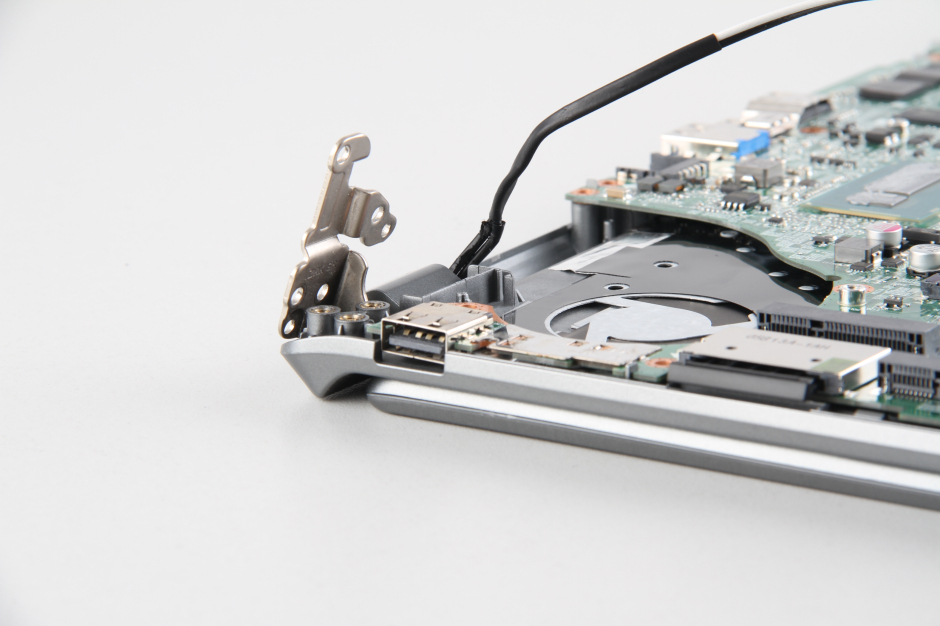
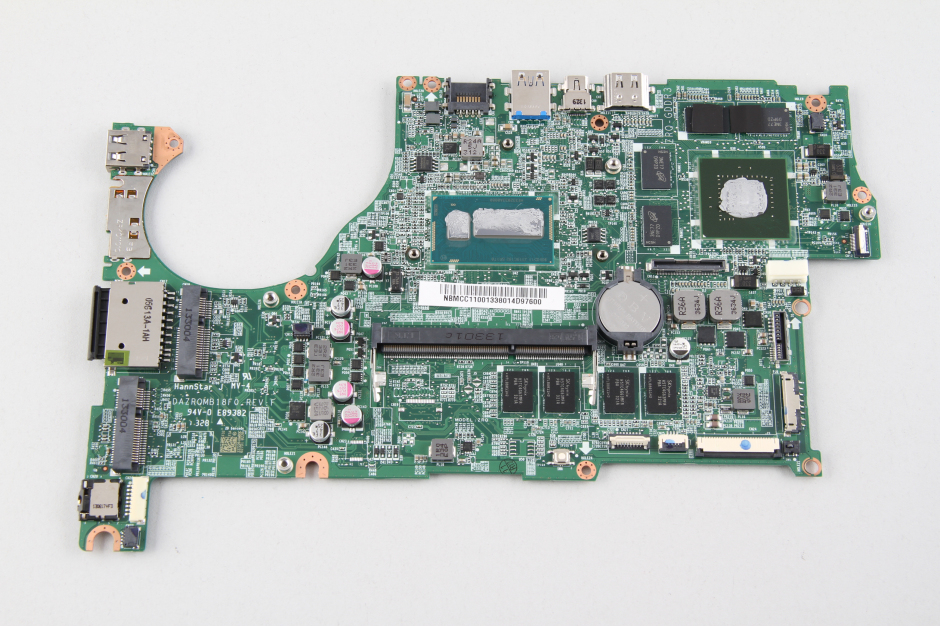
Now the motherboard has been removed.
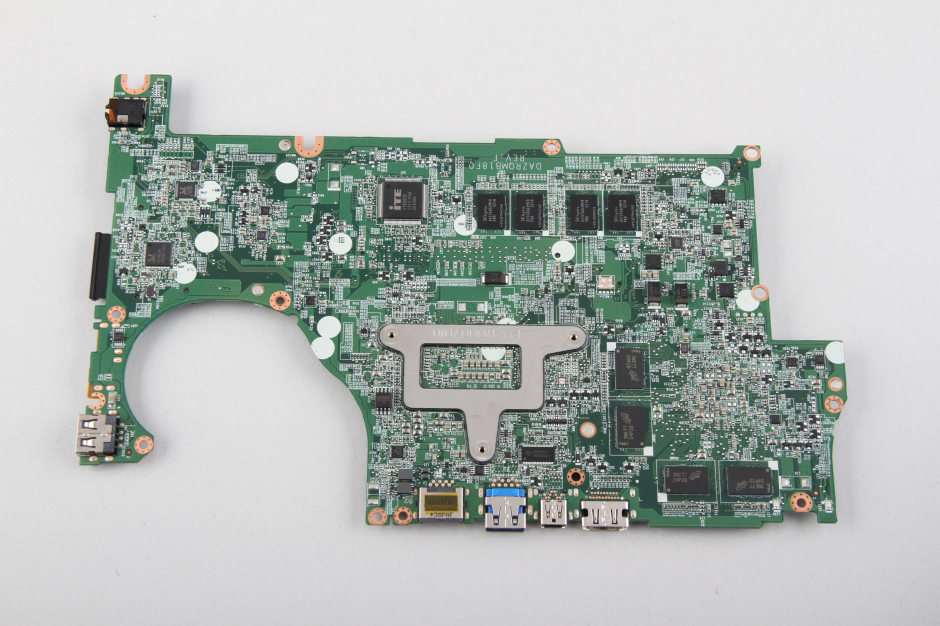
The back of the motherboard
Acer Aspire V5-573G’s USB port and card reader

is it possible to take that black plate off to replace keyboard and is it easy?
Hi Harry, take a look a my reply to Kevin down below. I did it yesterday and it wasn’t too hard, but would have been a lot easier if it were screws instead of plastic melt rivets. And FYI this was on a V5-573p-9899 with the US backlit keyboard
Great guide, but if you have any information on removing the keyboard that would be very useful!
Hello, i have one question. Where screen cable was conected on motherboard? I rewatched pictures 5 times and still dont get it.
please check acer-aspire-v5-573g-disassembly-6.jpg, under the white label, beside the heatsink, you can find the lcd cable connector
Never mid found it 😀 it was under sticker
Mate can you post pics how to remove keyboard please?
Hey Harry & Kevin, about the keyboard, I did this yesterday:
Look at the 2nd to last picture, the closeup of the top half of the case after the motherboard is removed. The black plastic has a sticky backing, peel off the top and left side where it is stuck to the plastic chassis starting at the two foil tape pieces at the top. Once that’s peeled back you should have access to all the plastic melt rivets that hold the metal tray to the chassis. I snipped them off using some flat head pliers, and you won’t need to snip all of them – there’s some that connect the metal tray to little brackets along the left and right sides. You only need to snip the ones holding the metal tray onto the plastic chassis. Once you have all the rivets broken you can pull off the metal tray and then remove/reinstall the keyboard. I then used electrical tape and some finesse to reassemble the top half and secure the metal tray to it as best as possible. The motherboard screws and hinge screws hold the assembly and black plastic layers in place, but the tape helped hold the keyboard in place at the edges. It’s not 100% but very very close and much better that paying for the $150+ full top tray assembly. I hope this helps!
Hey! In terms of replacing the keyboard, was that with the backlight keyboard?? Because that is what I have and would that be the same process as what you have stated above?? Thanks!
How is the LCD module removed? Is it just a matter of unscrewing the hinges?
Yeah, i have a V5-573G-54208G75aii and i’m trying to replace the LCD screen unit, could you expand upon that process??
you can try to replce the screen and write a replace guide, i can give you a contributor account, you can publish the your guide on our website, thank you very much!
I cant open bottom case? I tried but it doest open. Which side i must pull first? I dont wont to break anything there. Maybe you have video. Thx
I would also like to know this? idk how to remove the bottom without breaking anything
On that motherboard is that an mSATA port just below the WLAN card. Also, how many memory slots are there. Is it a pair or just one. Not clear enough from photos.
Acer Aspire V5-573G only have one spare ram slot
Is acer aspire v5 573g – 74508G1Taii has free msata port ?
Is there a rundown for hinge replacement?
sorry! there is no guide for replace lcd hinges, if you interested, please publish your guide on our website, i’m very appreciated