
In this guide, I will explain how to disassemble the Acer Predator 17 G9-791 to remove the bottom cover, SSD, DVD drive, cooling fan, hard drive, RAM, and motherboard.
Want to be the first to see inside the latest gadgets? Follow us on Facebook for the latest news from MyFixGuide.com.
Specifications:
Windows 10 Home
Intel Core i7-6700HQ Quad Core Processor 2.6GHz
17.3″ Full HD (1920 x 1080) widescreen LED-backlit IPS display
NVIDIA GeForce GTX 980M with 4 GB of dedicated GDDR5 VRAM
16GB DDR4 Dual Channel Memory
256GB SSD + 1TB 7200RPM SATA Hard Drive
6X Blu-ray Writer
Remove the two screws securing the service cover.
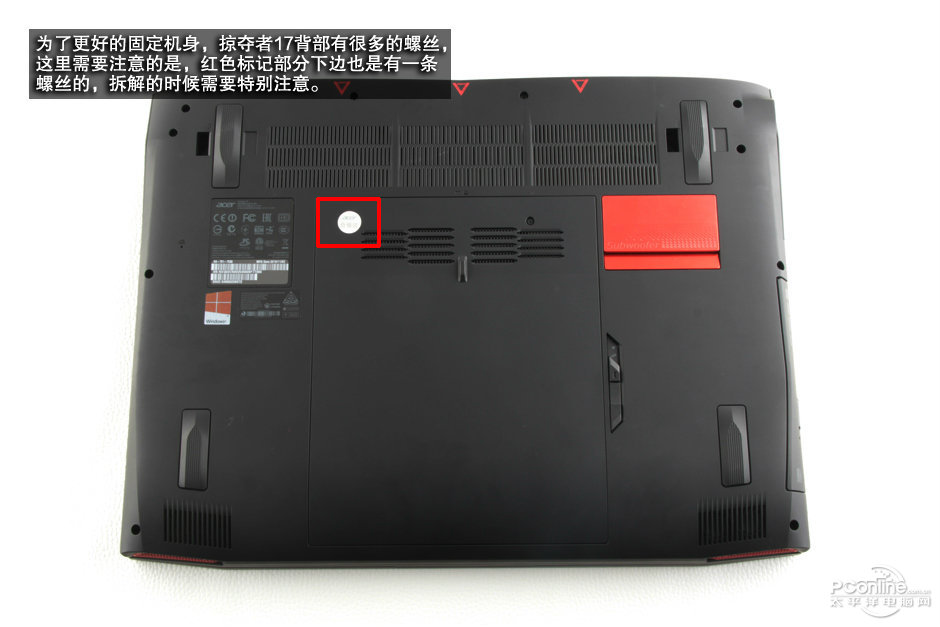
Remove all screws securing the bottom cover. Please note that one screw is covered by a warranty sticker. If you damage it, you will void the warranty.
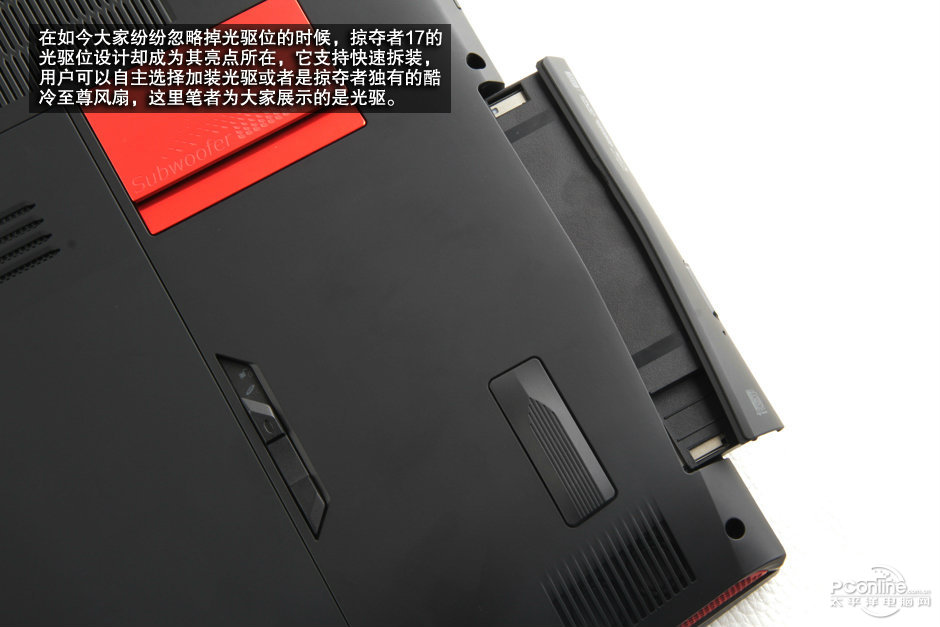
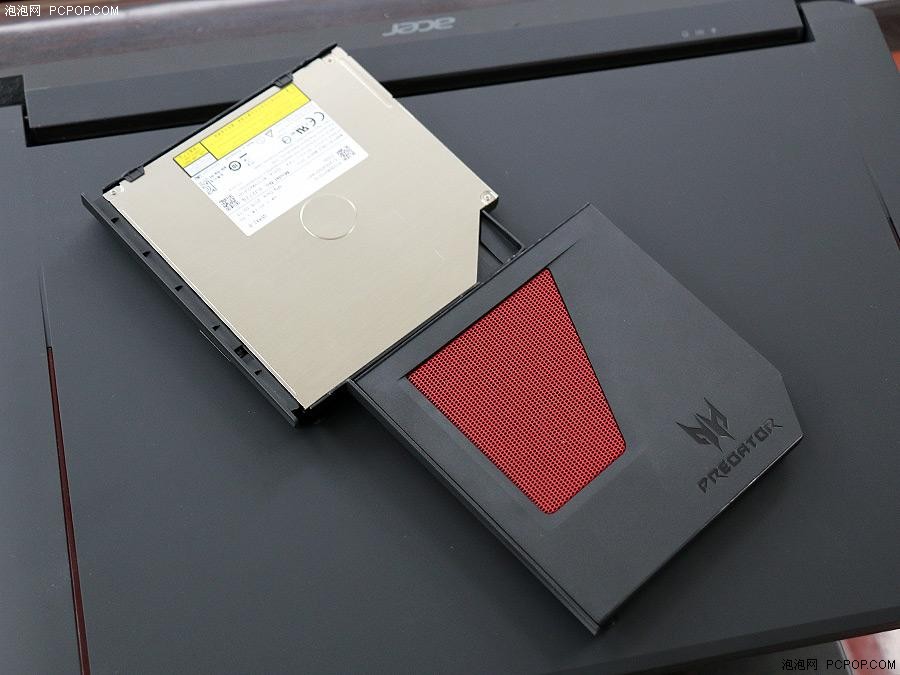
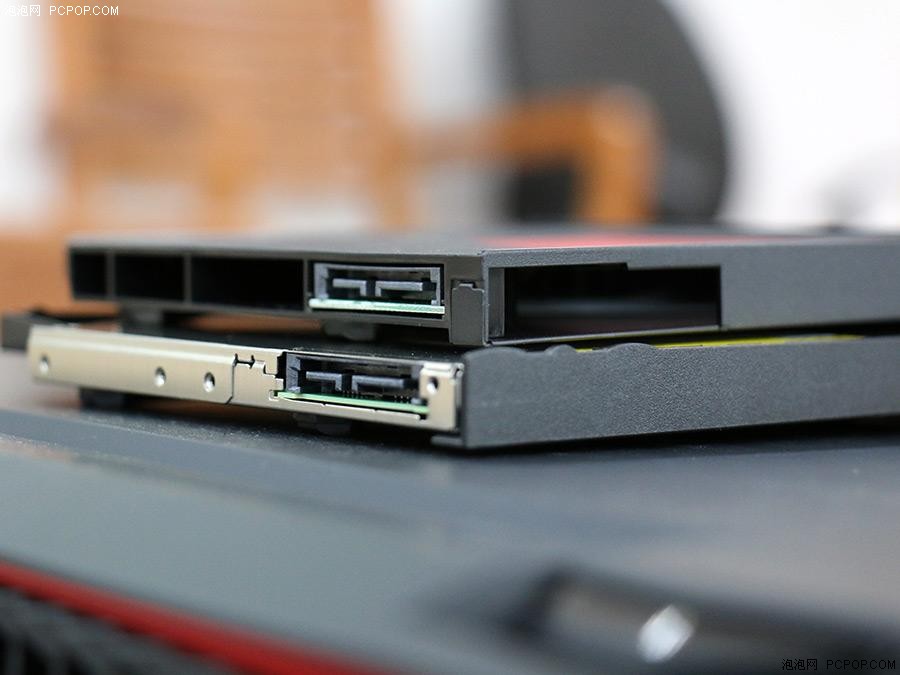
Slide the latch to the left. Pull the optical drive to the right and remove it from the laptop.
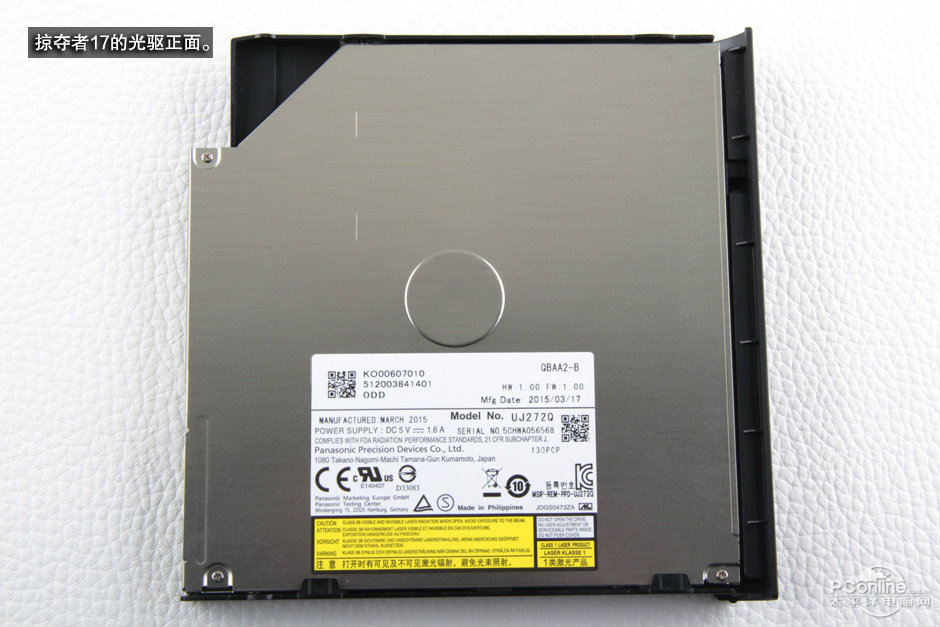
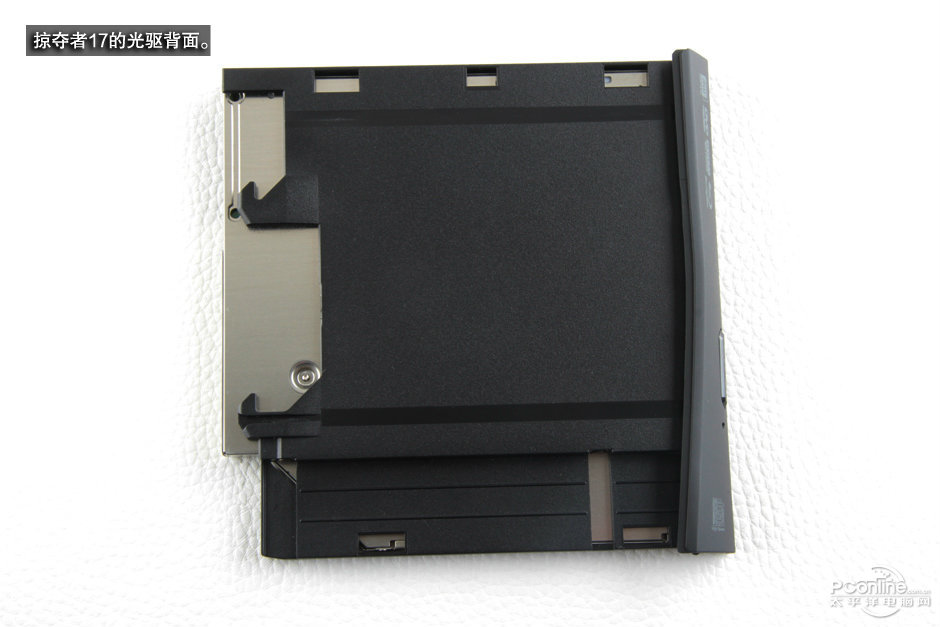
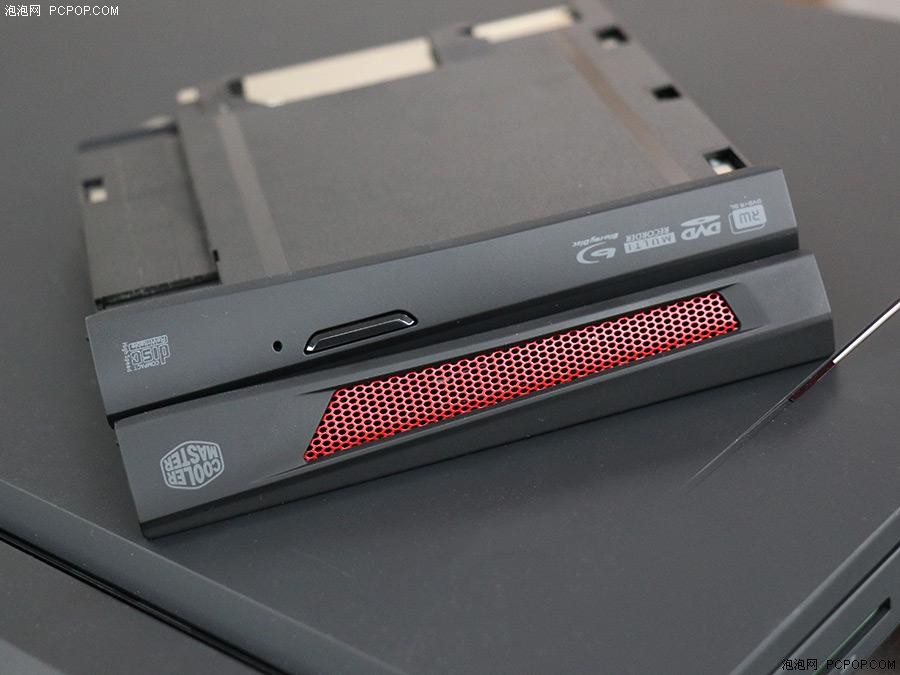
The Acer Predator 17 G9-791 comes with a Panasonic Matshita UJ272Q 9.5mm SATA 6X 3D Blu-ray burner.
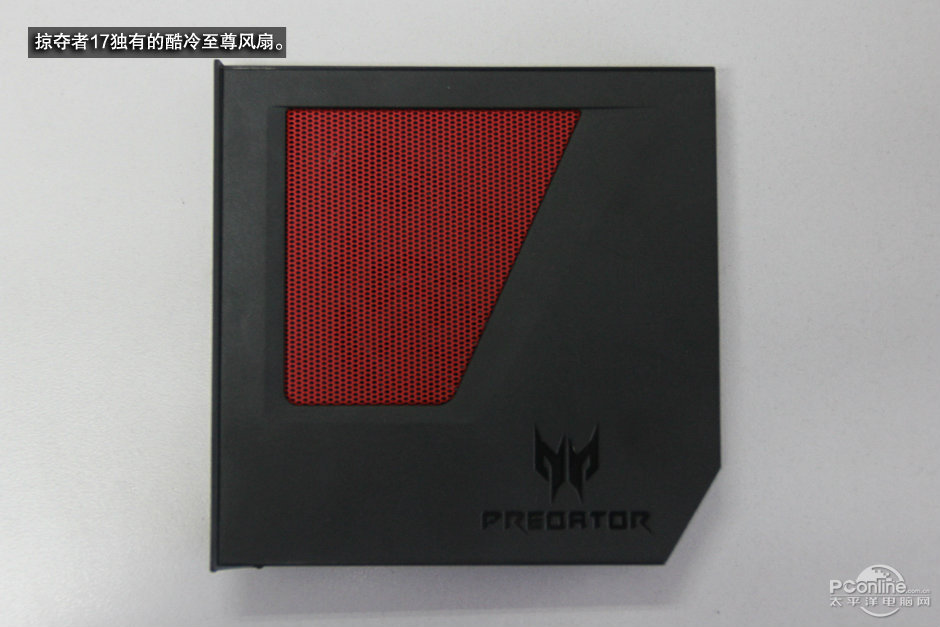
The optical drive slot design of the Predator 17 G9-791 is exciting. It not only supports tool-free quick release but also comes with a factory-installed cooling module, which means the optical drive can be replaced with a separate cooling module. The working principle of the cooling module is relatively simple. It has a slender fan inside, and the red mesh is the air intake, from which it draws in cold air and flows throughout the interior of the chassis, assisting the two main cooling fans to improve internal air circulation and enhance heat dissipation.
Close-up of the cooling module
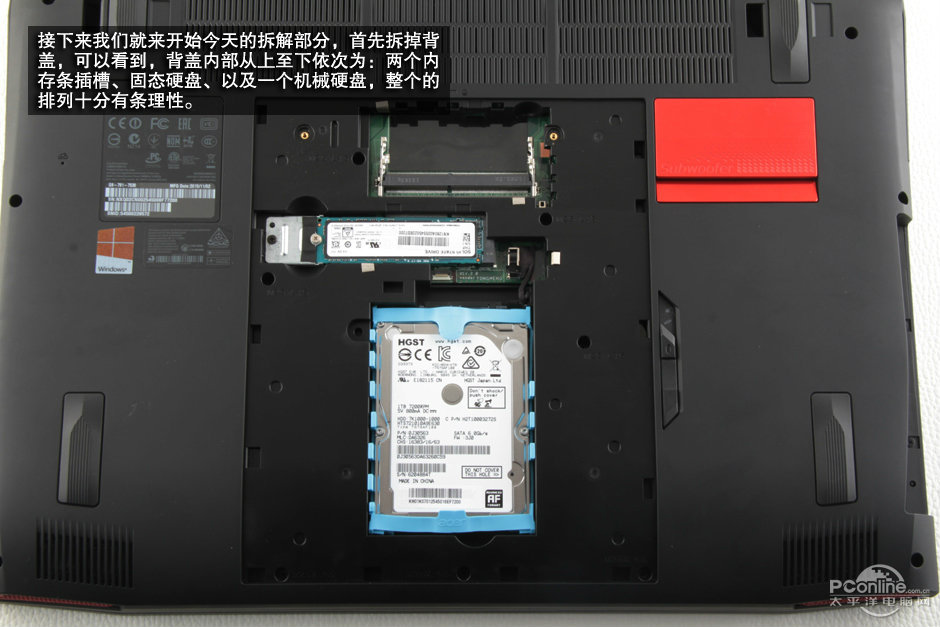
Sliding down the service cover and removing it.
Under the cover, you can access two SSDs, a hard drive, and two spare RAM slots.
Remove the screw securing the M.2 SSD and carefully remove it from its slots.
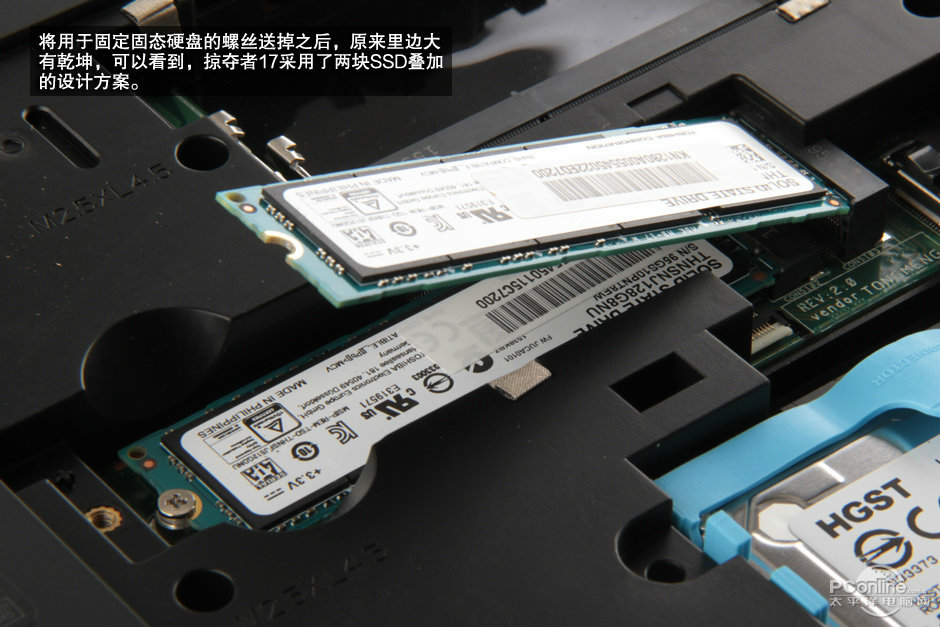
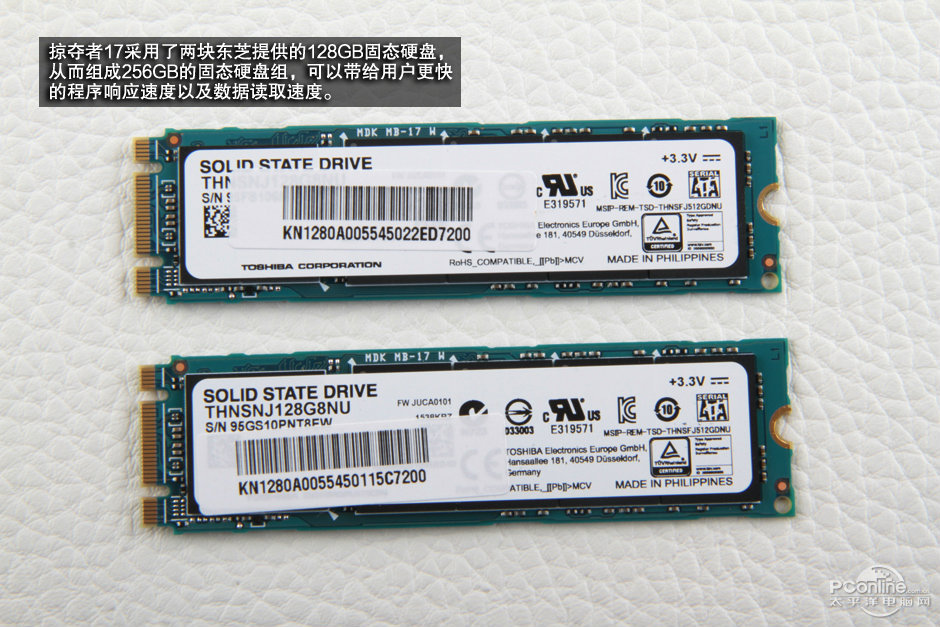
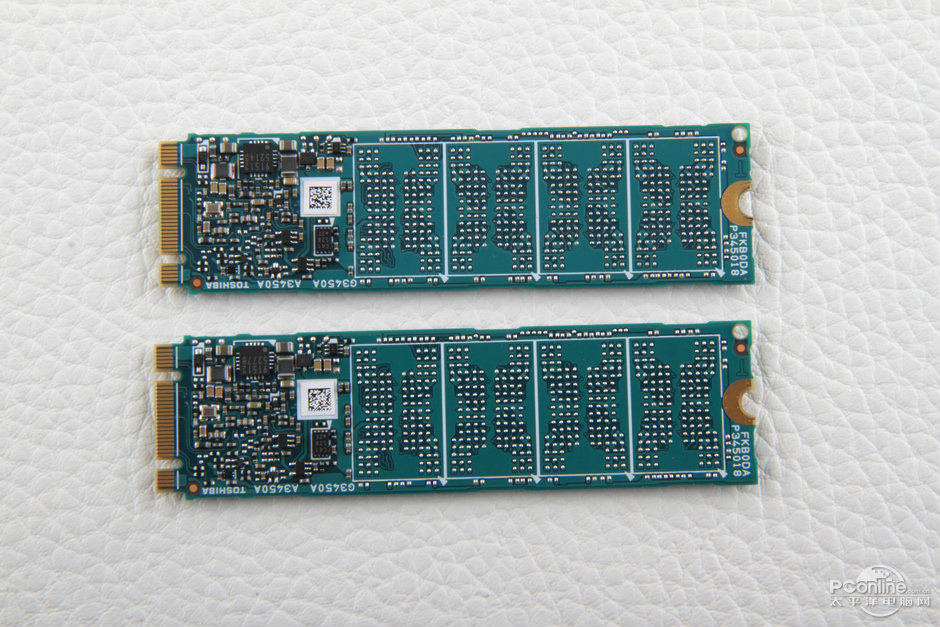
The Acer Predator 17 G9-791 features two Toshiba 128GB M.2 SSDs. They are configured in a RAID 0 array, providing users with faster application response times and data read speeds.
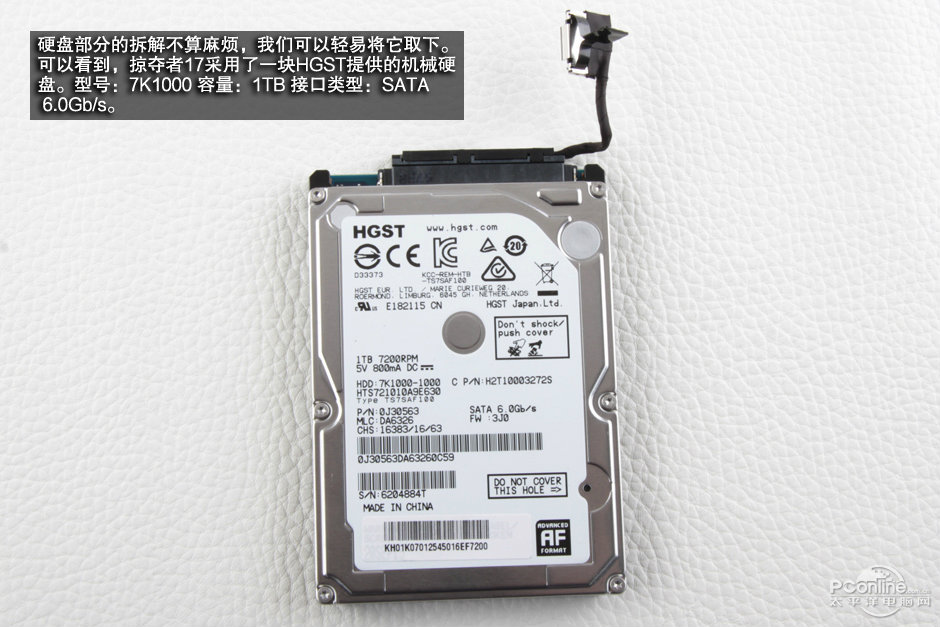
The Predator G9-791 features an HGST 1TB 7200 RPM hard drive.
Insert a plastic pry tool under the bottom cover. There are clips on the bottom cover that secure it to the laptop. Slide the pry tool to release all the clips, then remove the bottom cover. Be careful not to damage the clips.
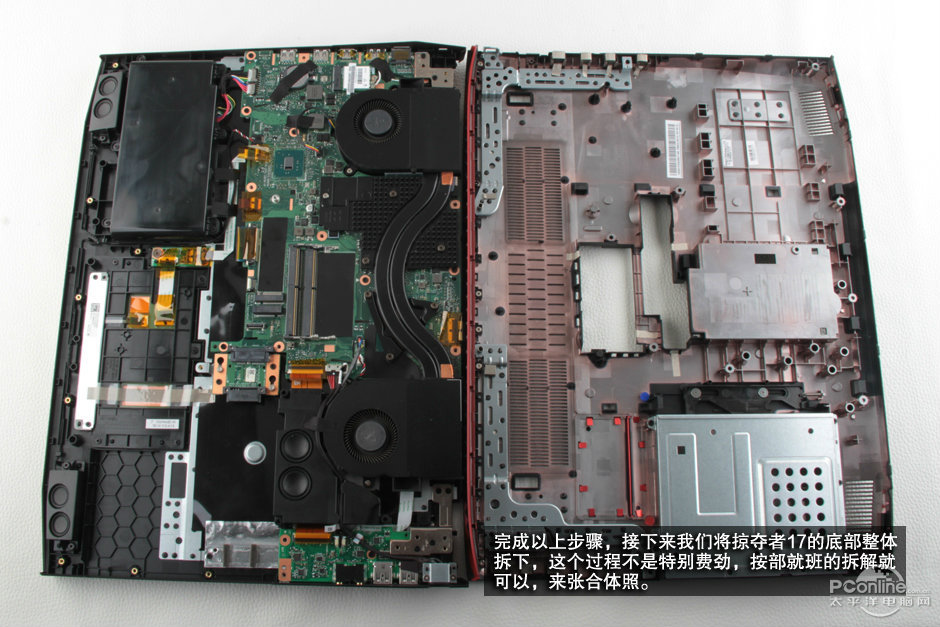
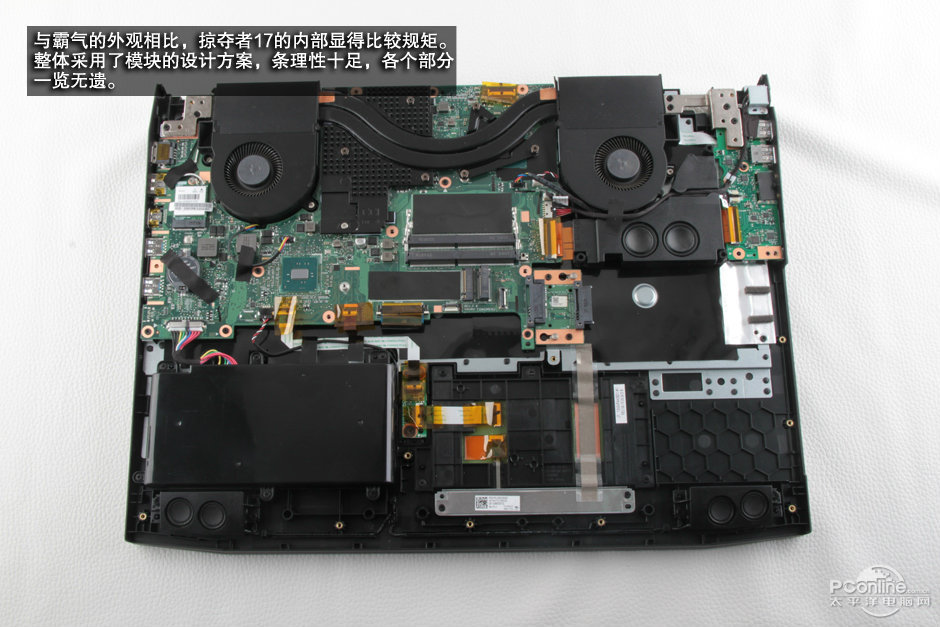
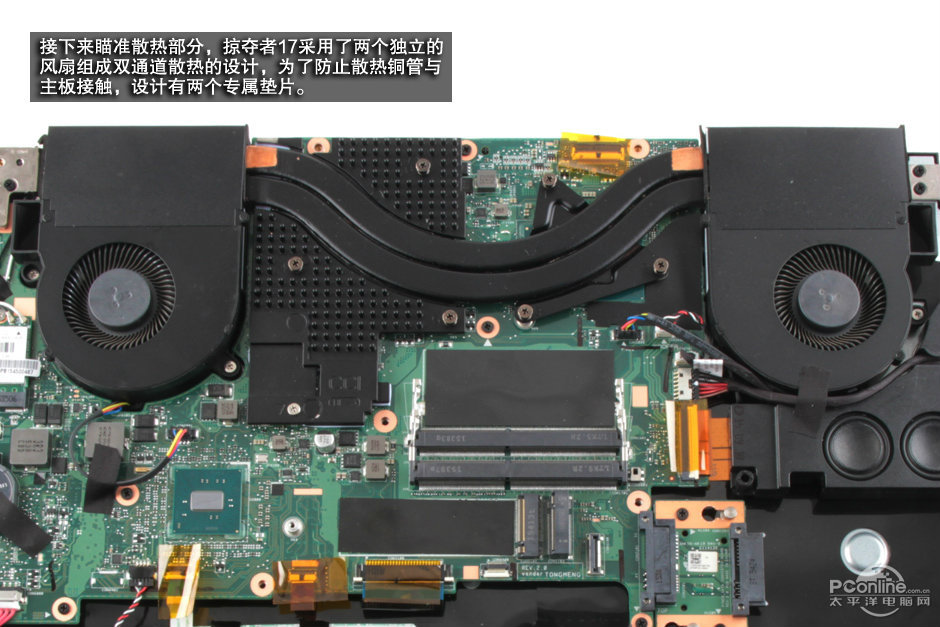
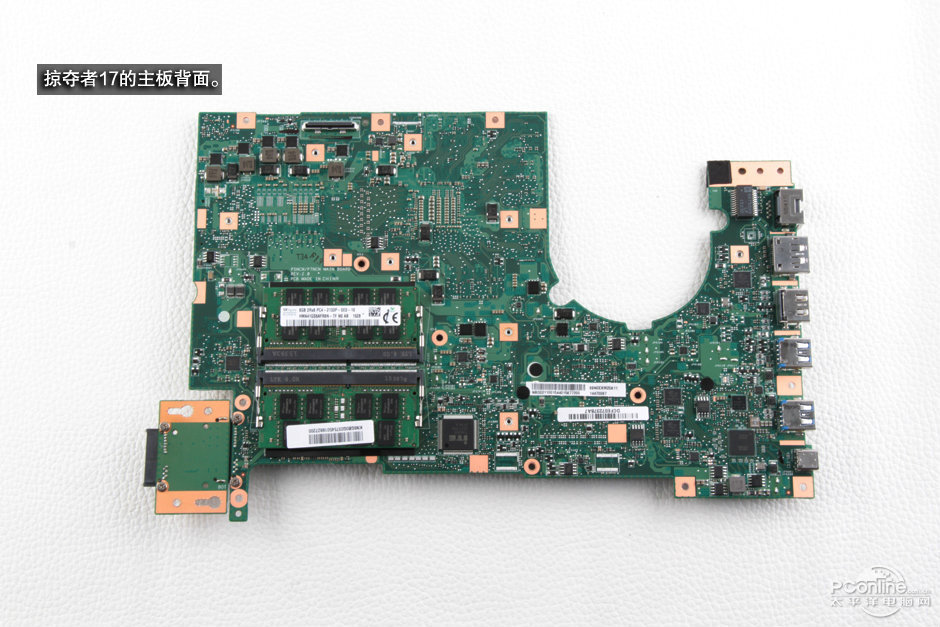
Under the bottom cover, you can access the battery, wireless card, speakers, heatsink, CPU fan, and motherboard.
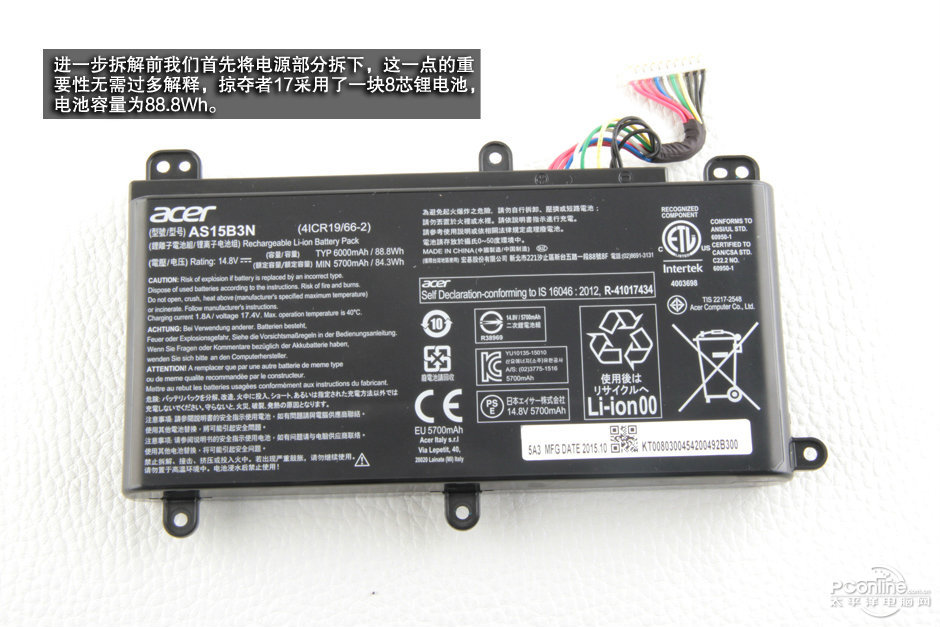
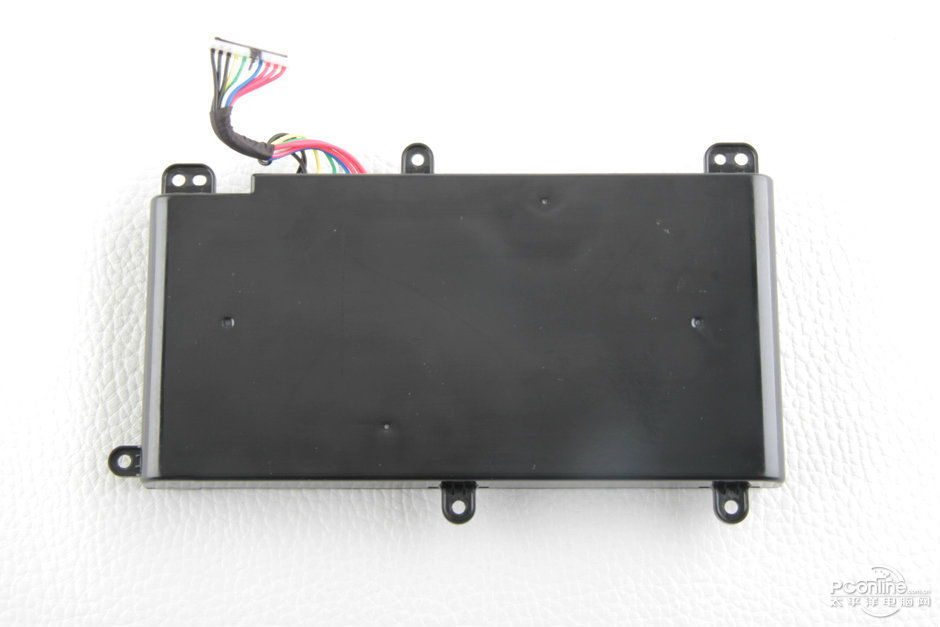
The Predator 17 G9-791 comes with a 6000mAh, 88.8Wh Li-ion battery, and the Acer part number is AS15B3N.
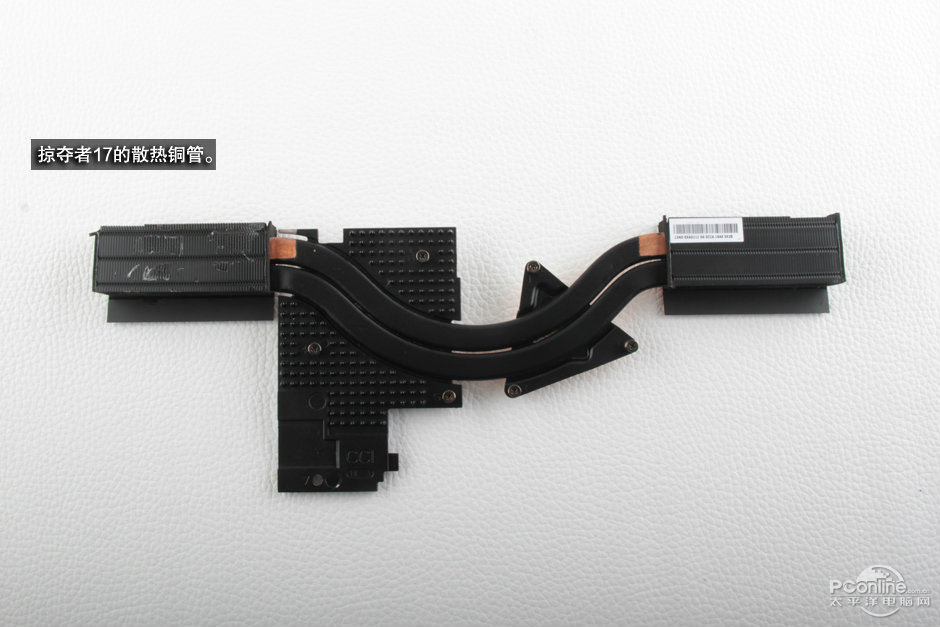
Remove the four screws securing the cooling fan and loosen the six screws securing the heat sink.
Disconnect the two cooling fan cables from the motherboard.
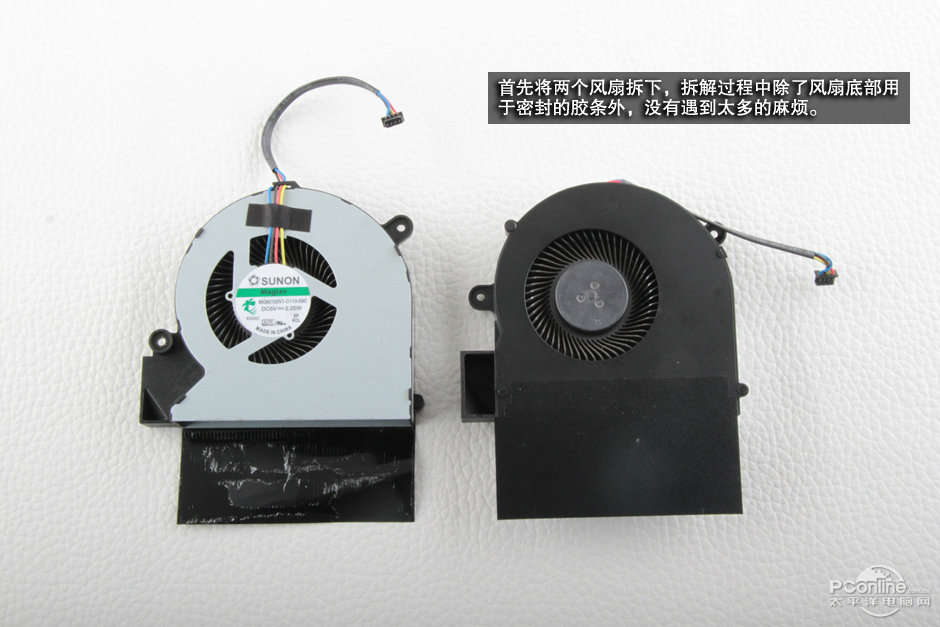
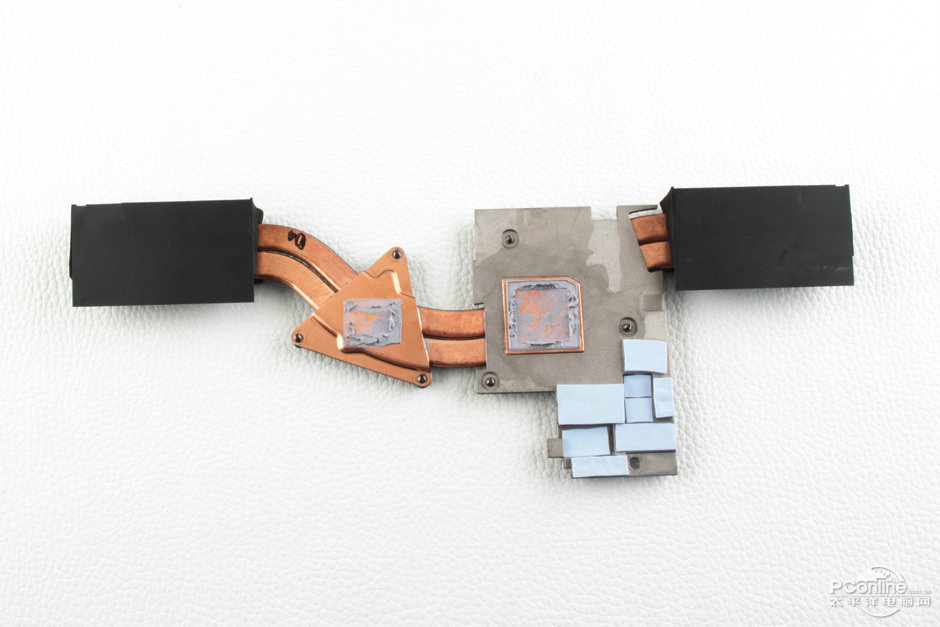
Close-up of the CPU fan and GPU fan
The cooling system of the Acer Predator 17 G9-791 consists of two fans and two copper pipes. Its heat sink not only covers the processor and the graphics card but also the memory chips of the graphics card.
Lift the motherboard from one side with your hand, then wiggle it to separate it from the bottom cover.

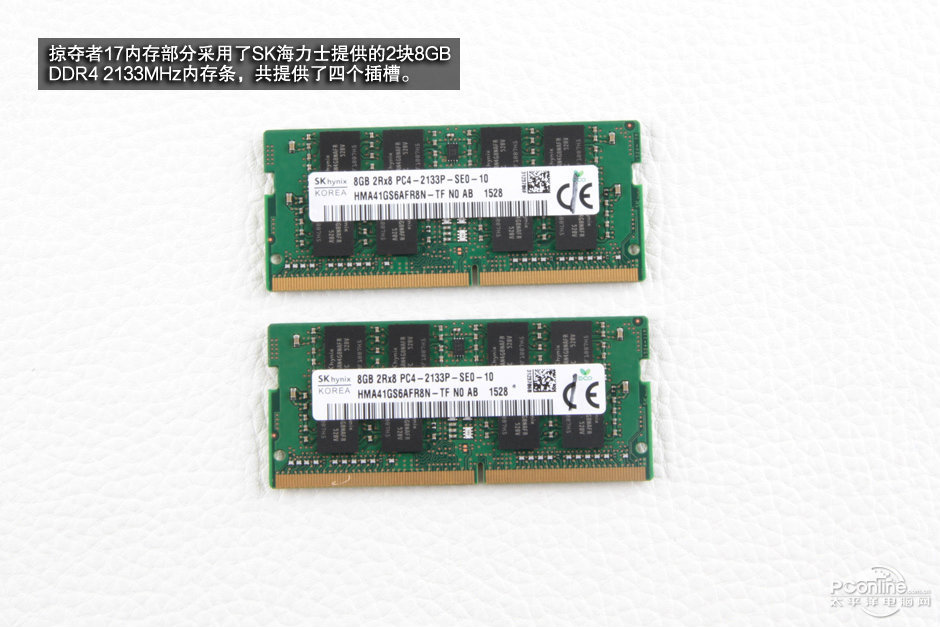
There are two RAM slots on the back side of the motherboard, and it comes with two SK Hynix 8GB DDR4-2133MHz RAM modules.
The Acer Predator 17 G9-791 has four RAM slots and supports up to 32GB of RAM.
Close-up of the SK Hynix 8GB DDR4-2133MHz RAM modules
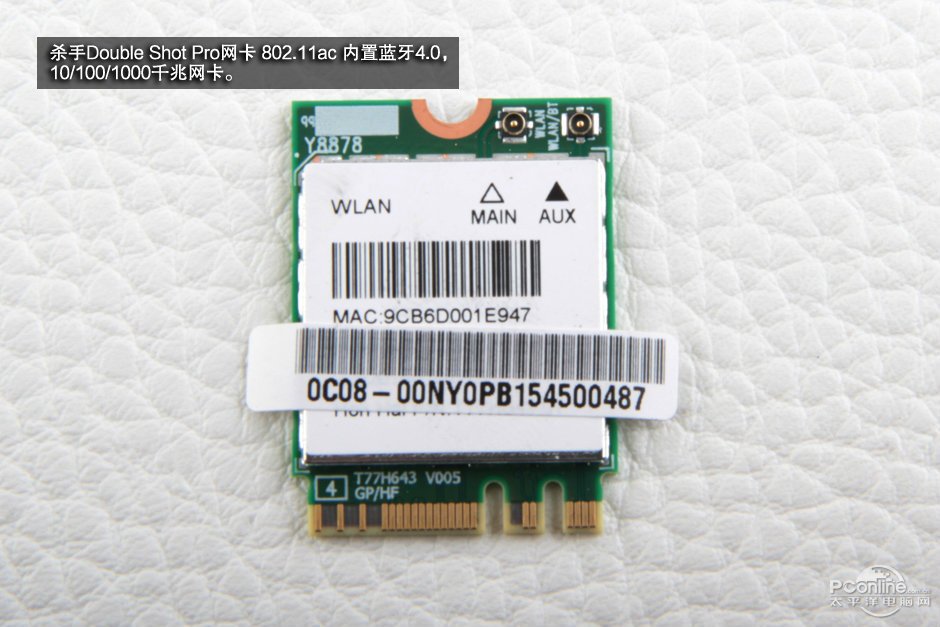
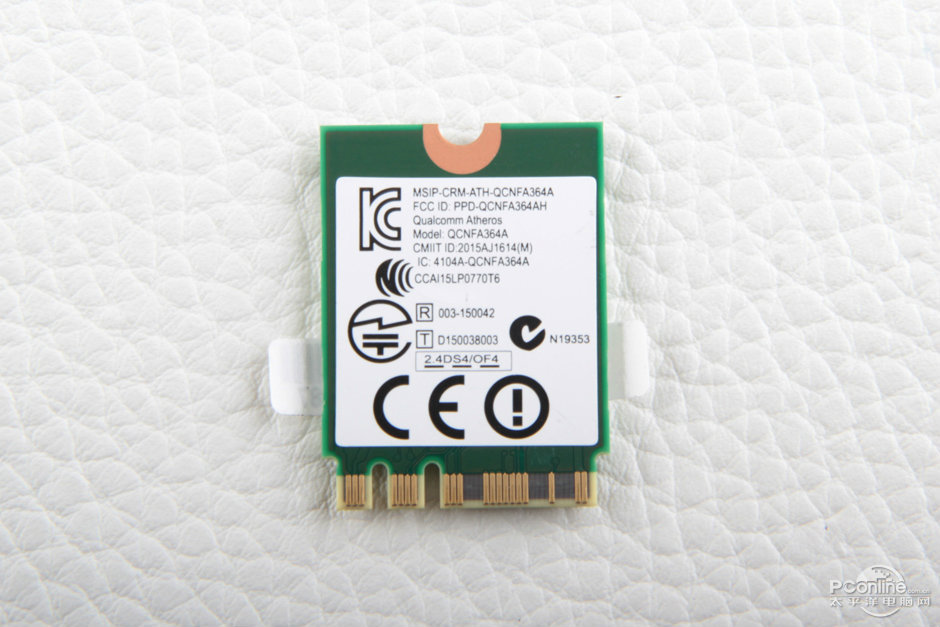
The Qualcomm Atheros QCNFA364A wireless card supports 802.11ac Wi-Fi and Bluetooth 4.0.
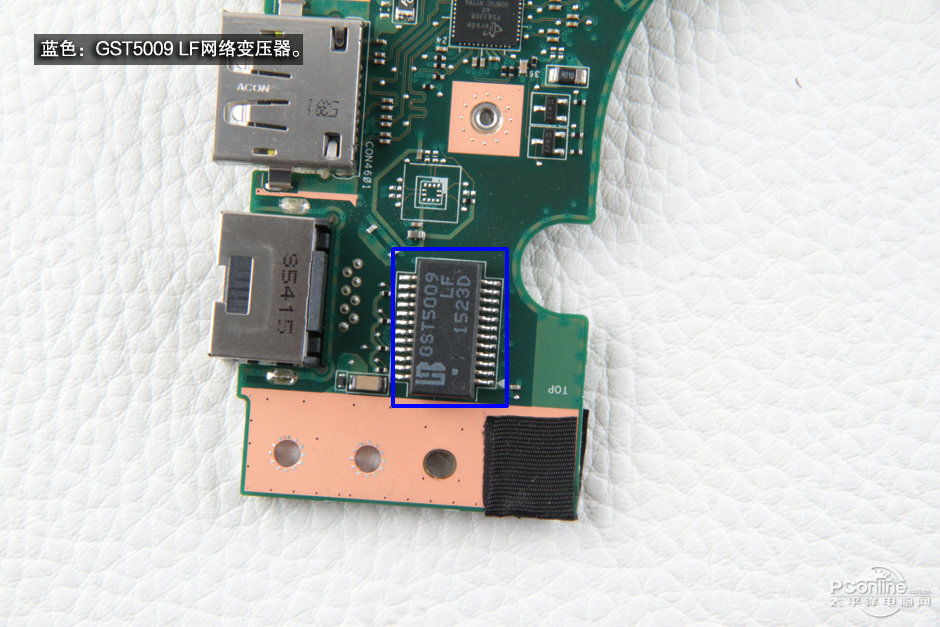
Blue: GST5009 LF Network Transformer.
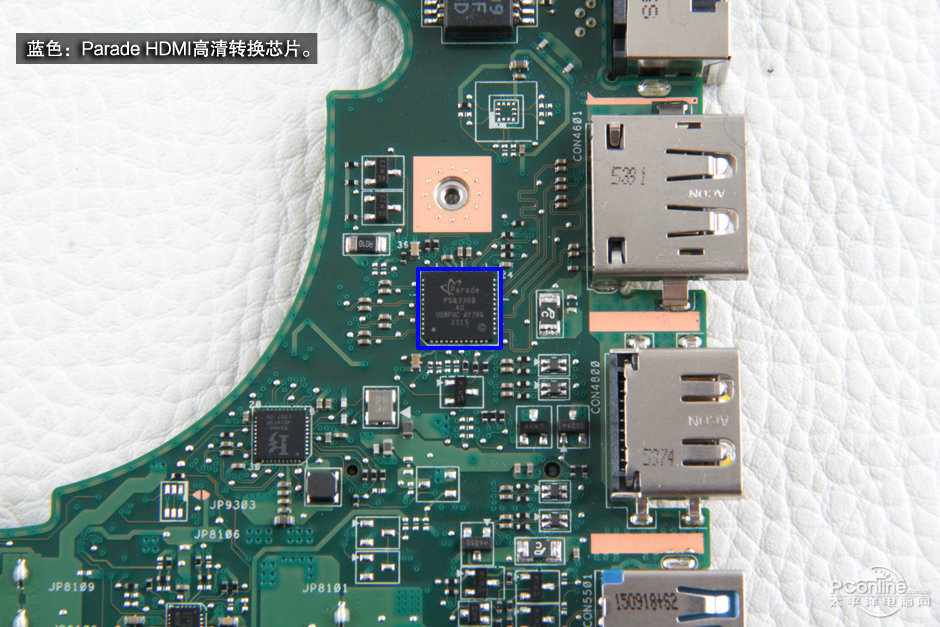
Blue: Parade HDMI HD converter chip.
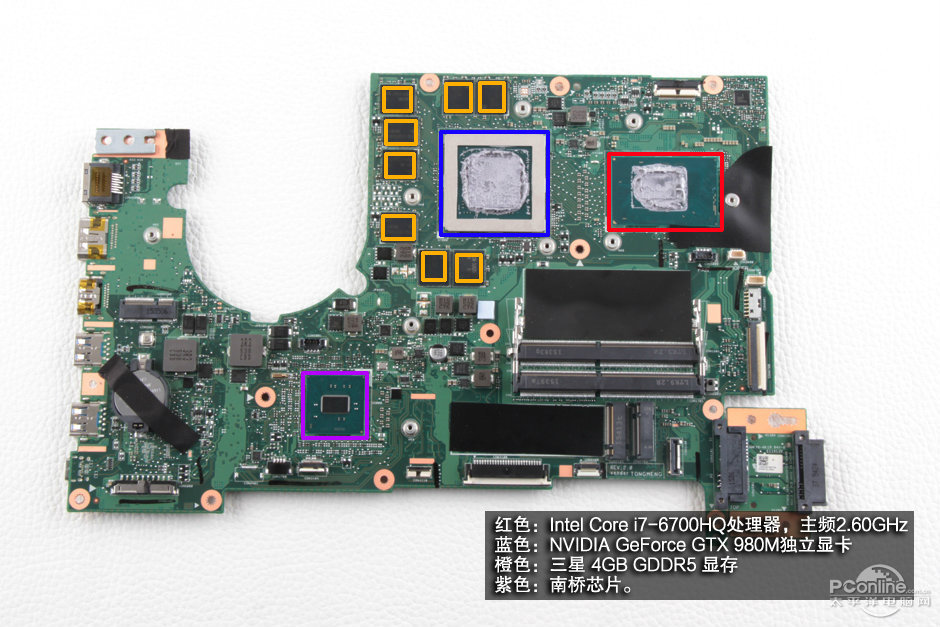
Red: Intel Core i7-6700HQ Quad Core Processor 2.6GHz.
Blue: NVIDIA GeForce GTX 980M with 4 GB of dedicated GDDR5 VRAM.
Orange: Samsung 4GB GDDR5 graphics memory.
Purple: South Bridge chip.
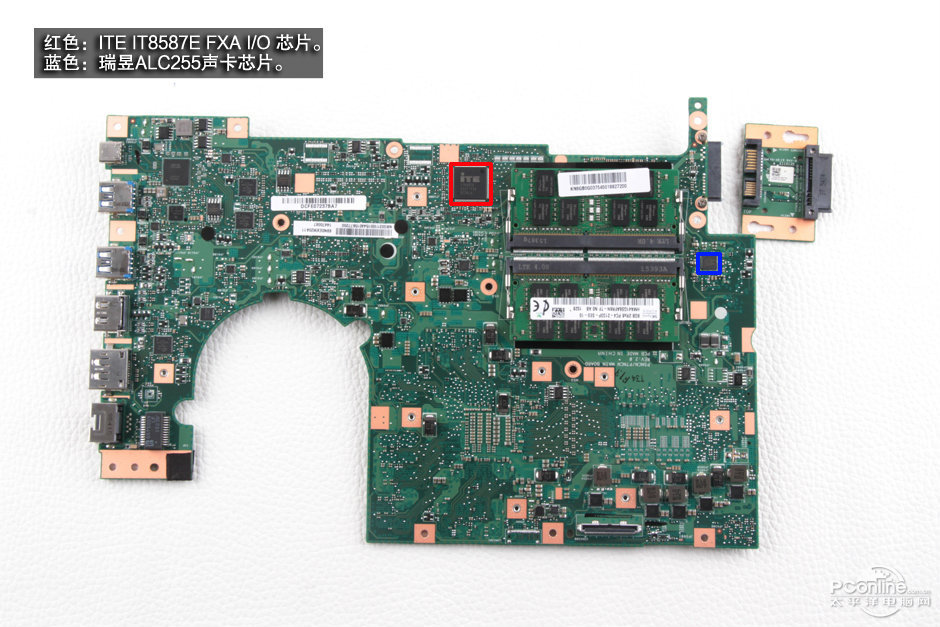
Red: ITE IT8587E FXA I/O chip.
Blue: Realtek ALC255 sound card chip.
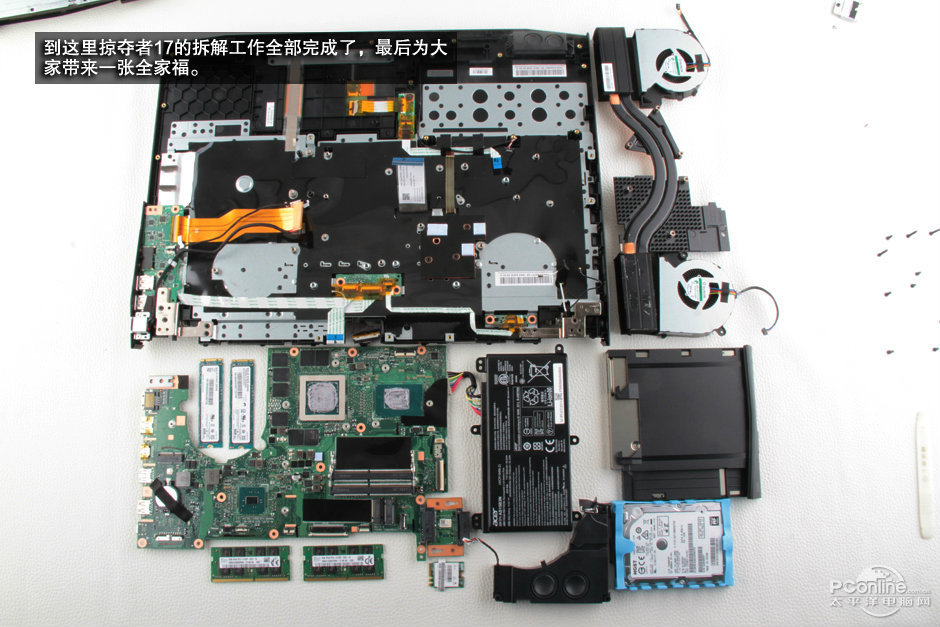
Acer Predator 17 G9-791 internal parts


Thank you for this guide. Could you check with HWINFO to determine which screen is inside this model? If possible, I’d also like info about the screen in the 15.6″ Acer Predator G9-591. Thanks!
Sorry! We do not have the Predator G9-591.
That’s alright, but how about the screen inside the Predator G9-791? Thank you.
I did not disassemble it. It has a 1920×1080 IPS screen. I think it should be LG LP173WF4 (SP)(F1) or LP173WF3.
Hi, I got it. It is AU Optronics AUO109B (B173ZAN01.0), a 17.3-inch IPS display with an Ultra HD 3840 x 2160 px resolution, matte, and non-touch.
There are 1080p and 4K screens.
Can we have the higher resolution of those images? Thanks.
I can’t find the blueish HD encasing anywhere, and even Acer support seems not to have IT as a spare part. Does anyone have info or an idea of a replacement?
Can anyone help with the part number or a replacement for the blueish HDD casing? Acer support doesn’t have it as a loose part.
Hello, I have an Acer Predator 17, and my W key is not working properly. It also makes a loud noise when released. Could you please give me a tip? Should I remove the keyboard or just that one key? And also, how do I even do that? I would appreciate it a lot. I am desperate. Thanks!
You’d better replace the entire keyboard.
Ok, thanks. How can I remove the keyboard from the laptop? Also, where can I find a replacement?
The keyboard is available on eBay.com.
Where’s the memory slot? I’m trying to upgrade to a new 4GB stick, but when I open it up, I can’t find it.
Do I have to disassemble the whole laptop?
Will I be allowed to replace my M.2 SATA SSD with a Samsung 960 Pro SSD?
Or only the SATA Samsung 850 Evo.
Can I keep the powerful cooler logged in all the time or just when playing high-quality games? Thanks in advance.
Is it possible to change the display from Full HD to UHD? The model exists with both, so that might work.
The FHD and UHD have different connectors. To replace the FHD screen with a UHD screen, you need to buy a UHD video cable.
Yes, if you have the correct LCD cable, the UHD screen will work on your laptop.
This situation may be a motherboard failure. I recommend that you take it to the repair shop to have it tested.
I have an Acer Predator G9-593, and this laptop has 2 SSD slots, but the above slot doesn’t have a screw to keep the SSD.
I want to use two SSDs, but I can’t put two SSDs in this slot. Please help me.
Hi, does anyone have the schematics or measurements of the DVD drive caddy that comes with the laptop? can’t buy it where I am, but I have access to 3d printing.