Last month, DJI released its new consumer drones, the Mavic 2 Pro and the Mavic 2 Zoom, which were probably the most advanced drones the company has ever released. The Mavic 2 Pro features the Hasselblad L1D-20c camera, which can capture iconic image quality. It has a maximum flight time of 31 minutes and a maximum speed of 72 km/h. Today, I’ll show the teardown process of the DJI Mavic 2 Pro.
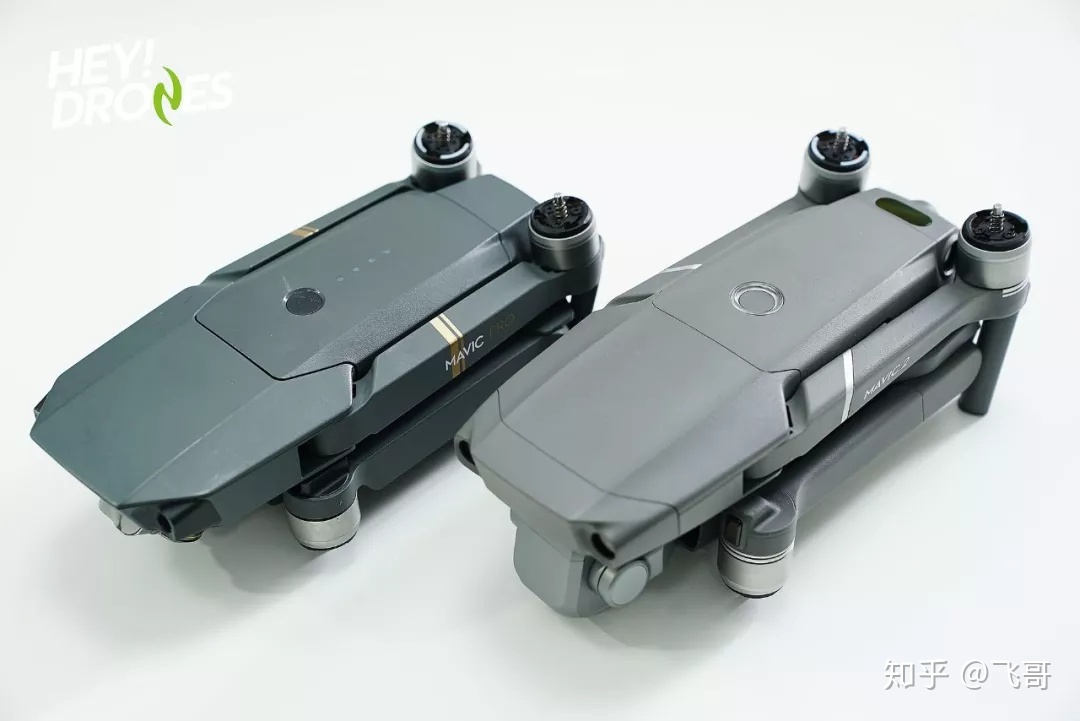
This is the picture of the Mavic 2 Pro (right) and the Mavic Pro (left). Do you know why I want to tear down the Mavic 2 Pro? The Mavic 2 Pro has upgraded some hardware. This drone has six visual sensors, while the Mavic Pro features four; it uses the 4S battery, while the latter uses the 3S battery. In addition, its CMOS sensor has an active sensing area that is four times more effective than the original Mavic Pro. Compared to the Mavic Pro, the Mavic 2 Pro is slightly larger. First, start from the bottom.
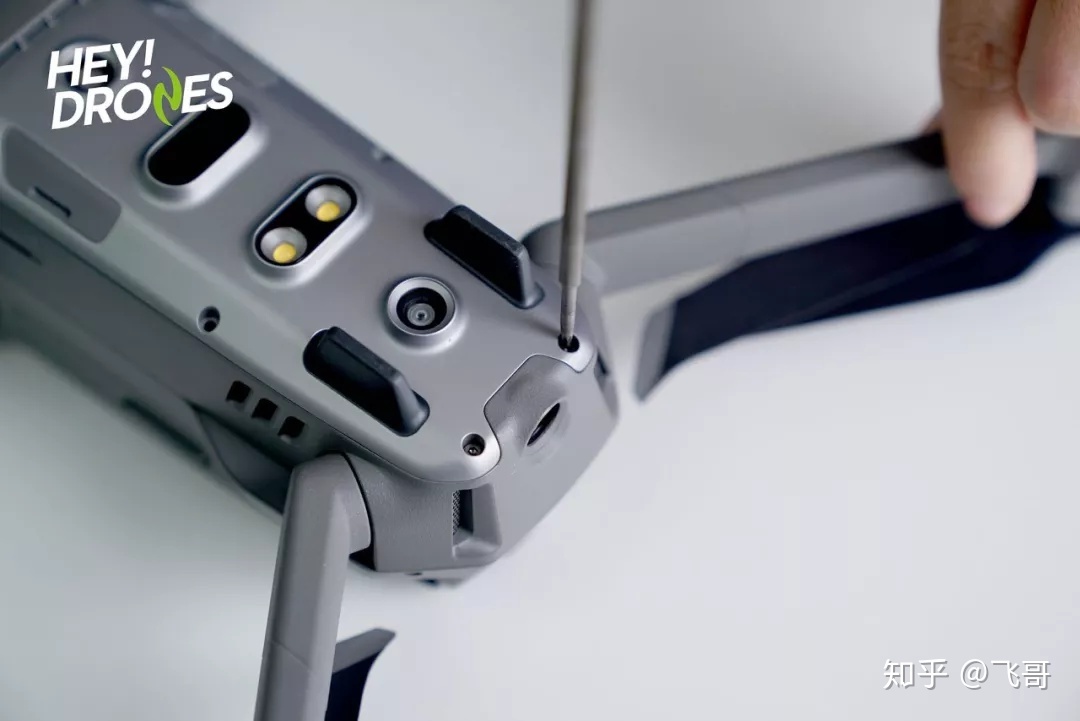
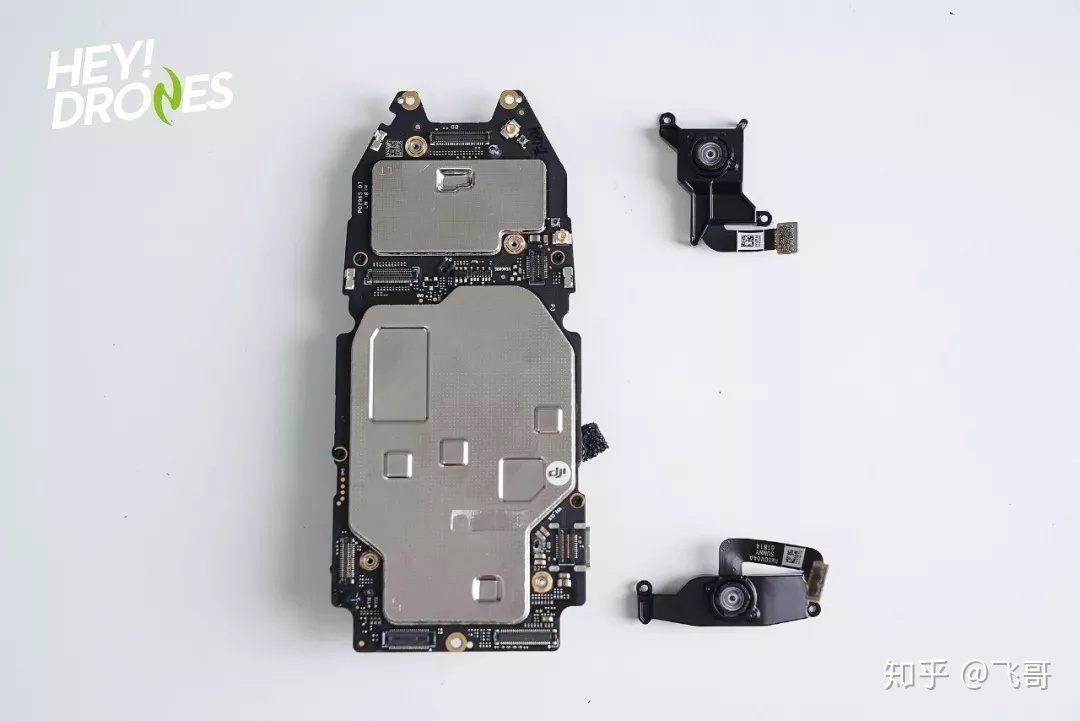
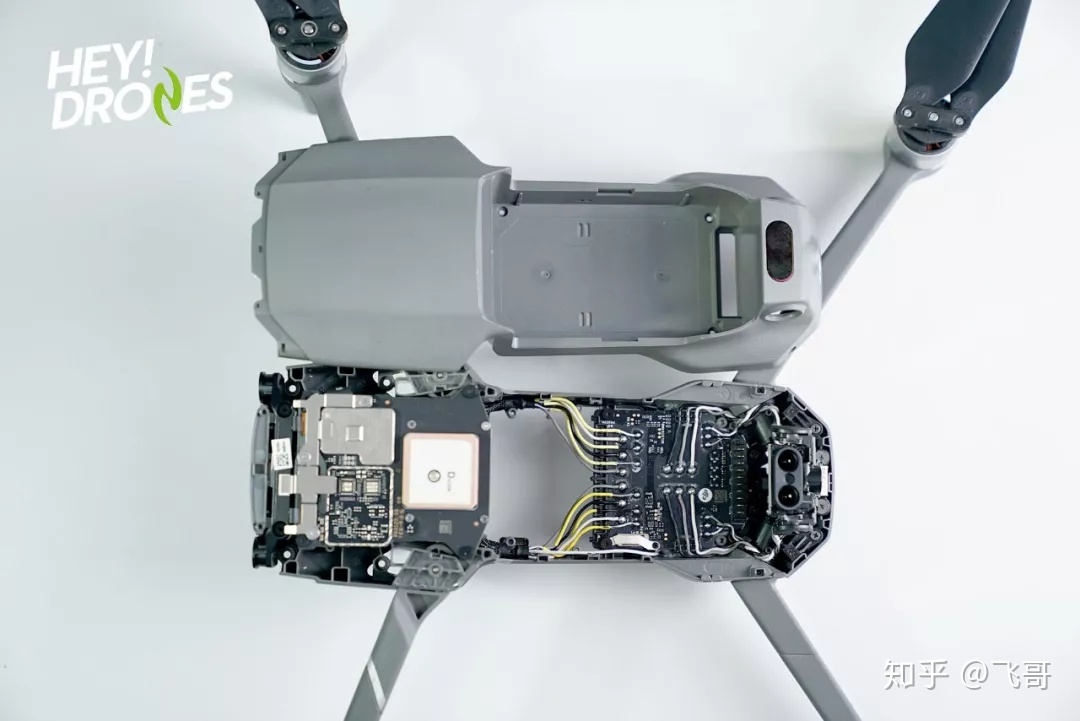
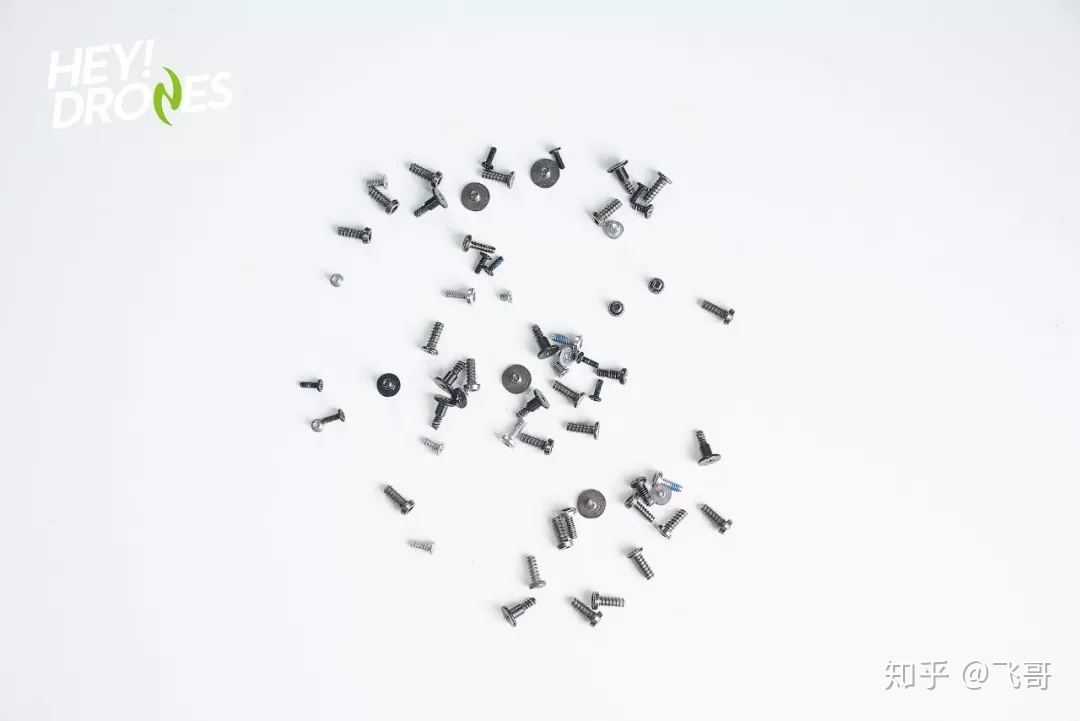
The screws at the bottom are very small and installed very tightly. After removing the eight screws, take off the cover. We can see that its internal structure is compact and complex, indicating that this drone is difficult to disassemble. A large number of screws need to be removed. The wireless connector is located on the back of the body. The internal structure is securely locked in place by screws. Then, after removing another eight screws and taking out the top chip, a large circuit board is revealed below. This main board consists of two tightly arranged circuit boards.
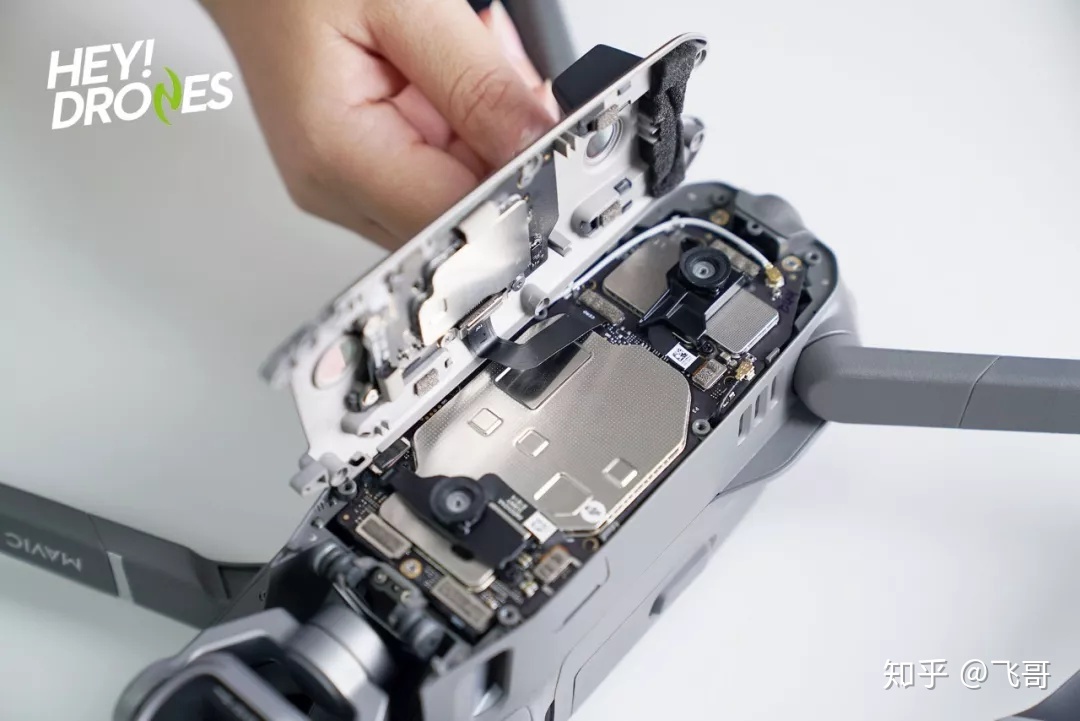
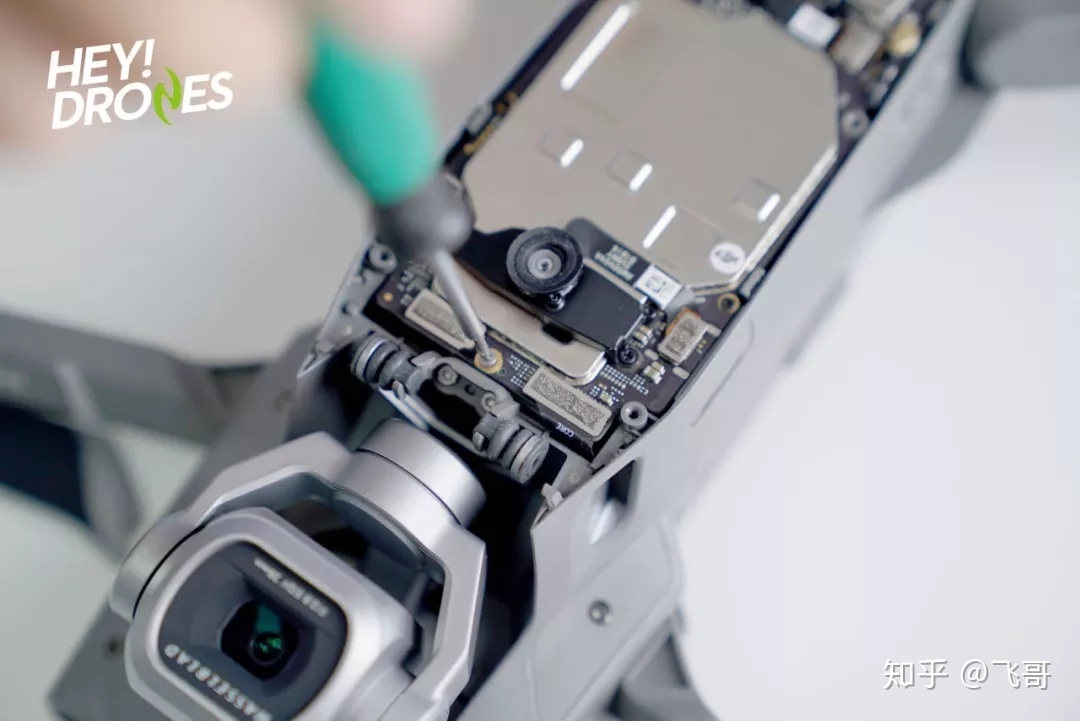
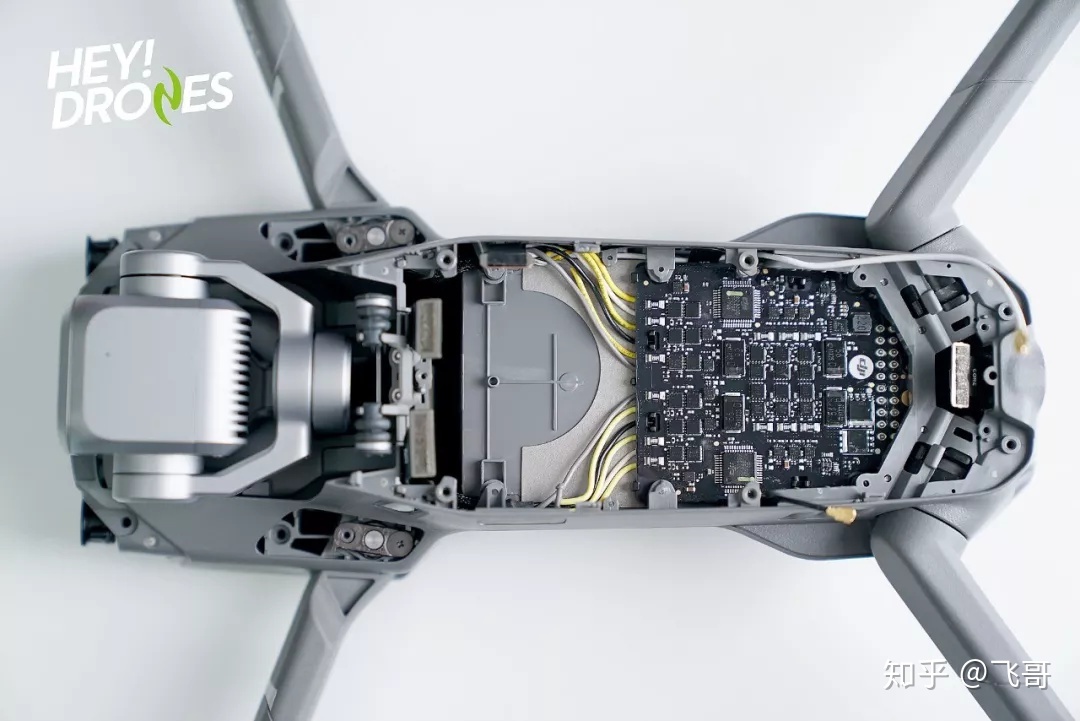
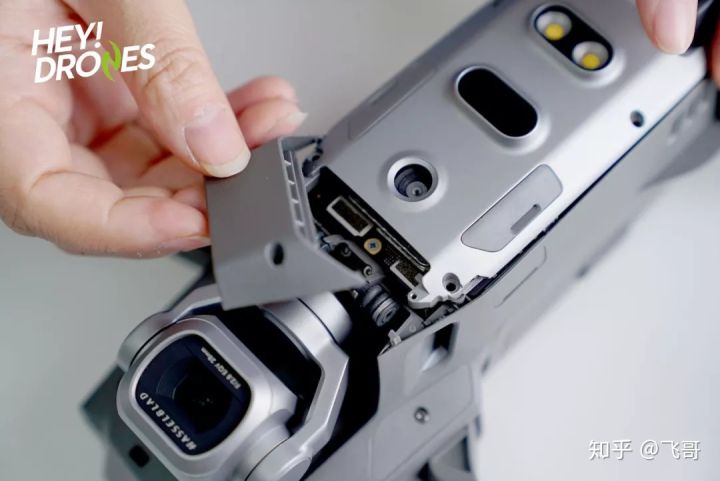
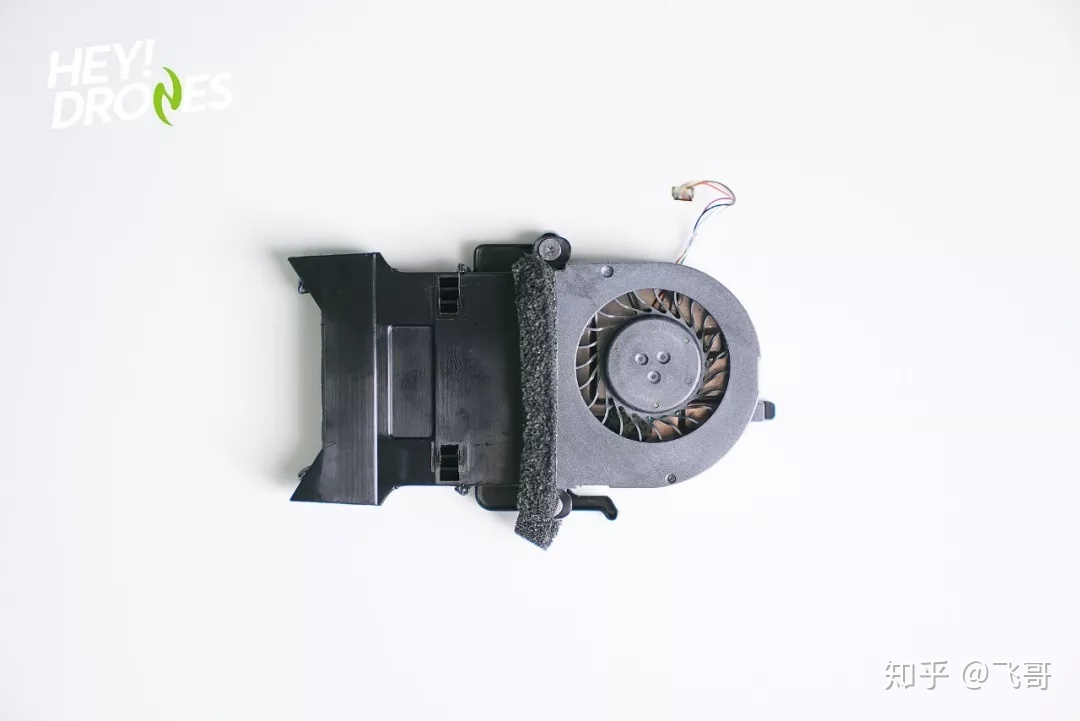
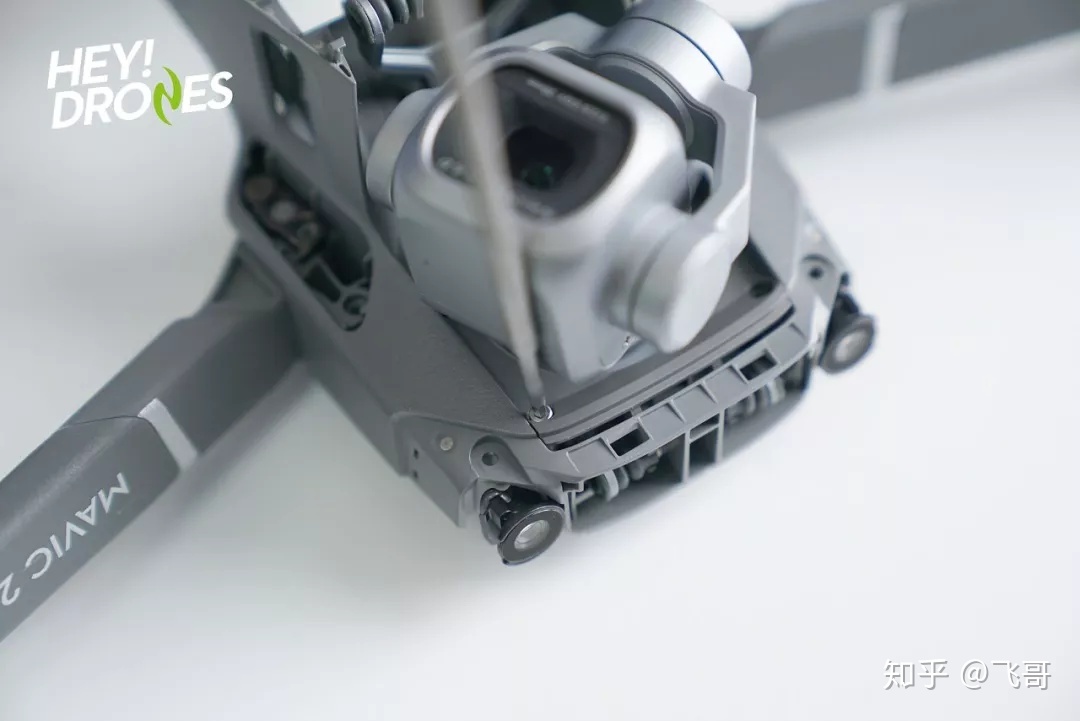
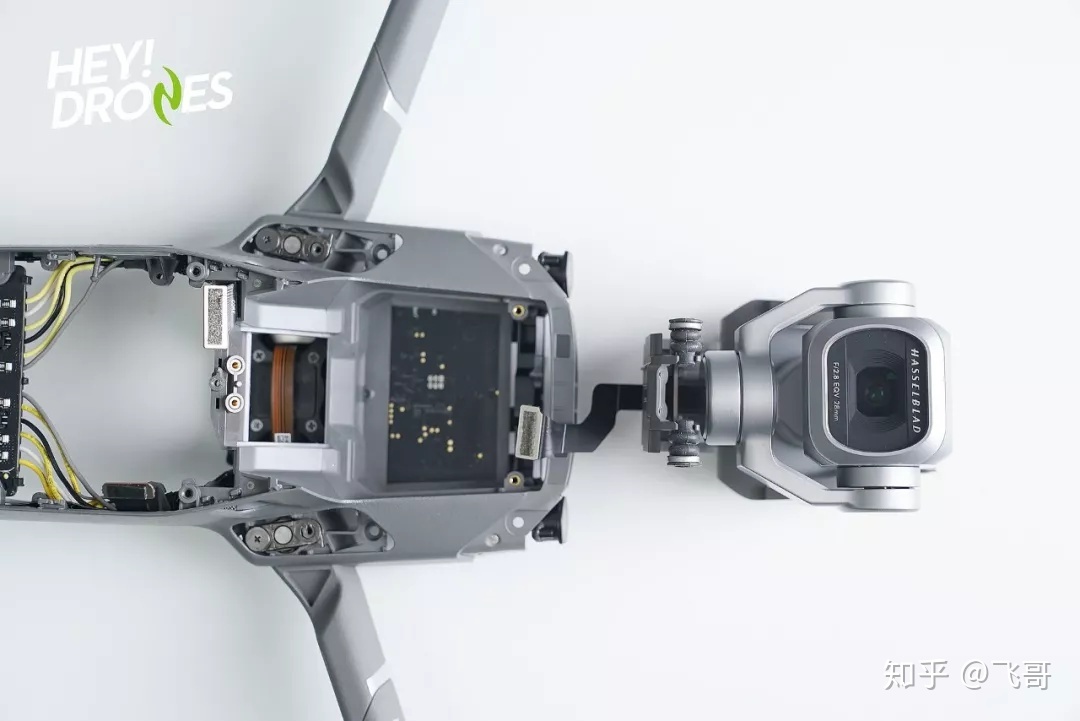
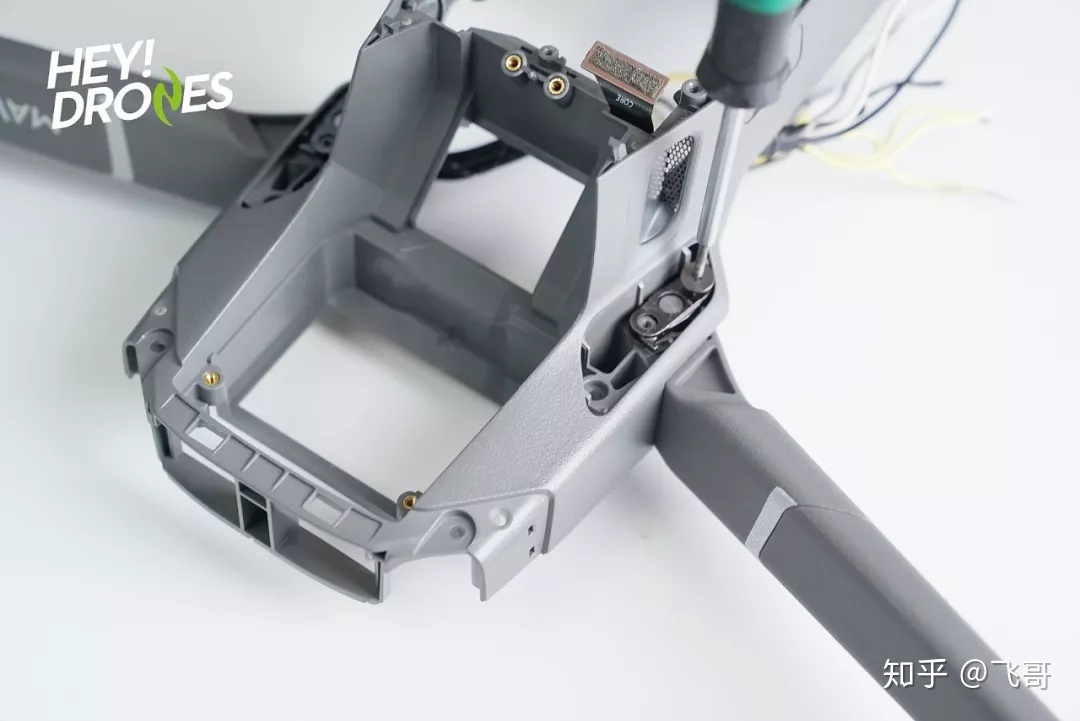
To avoid making the drone out of work, I did not remove the cover of the chip module. The cooling fan looks exquisite and is placed above the chip module. Next, I will remove the camera and visual sensors, which require many screws to be removed. It is worth noting that the footage design is unique. The entire footage and the shock ball are embedded into the top structure, which is rigid and saves space. Only in this way can it carry the Hasselblad L1D-20c camera.
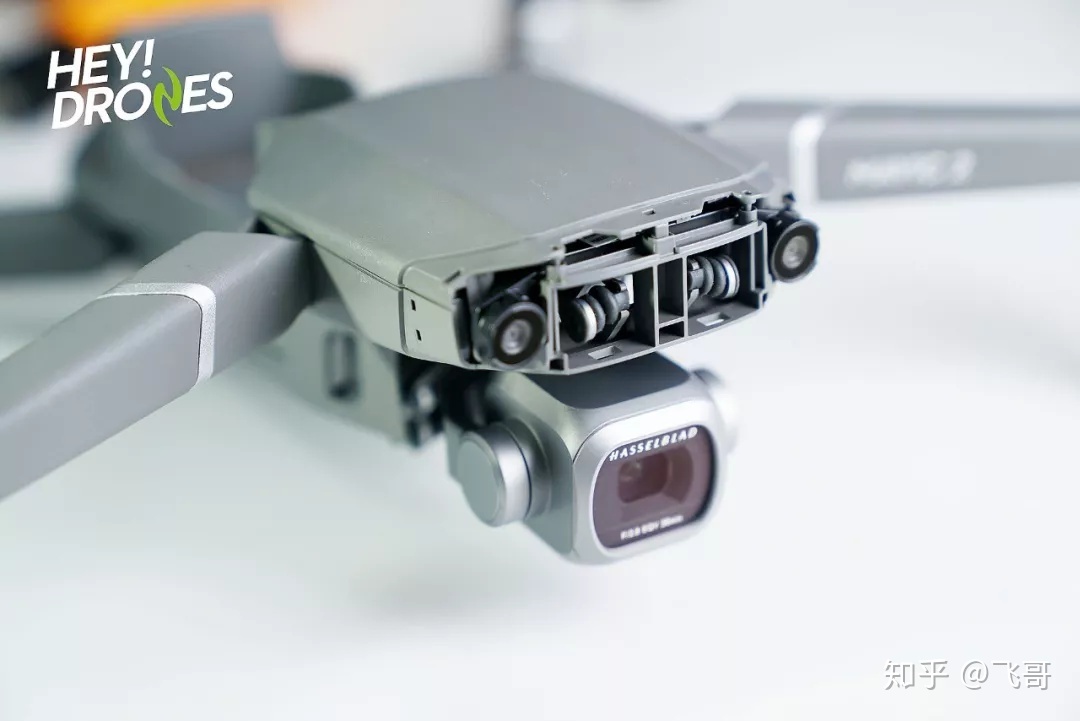
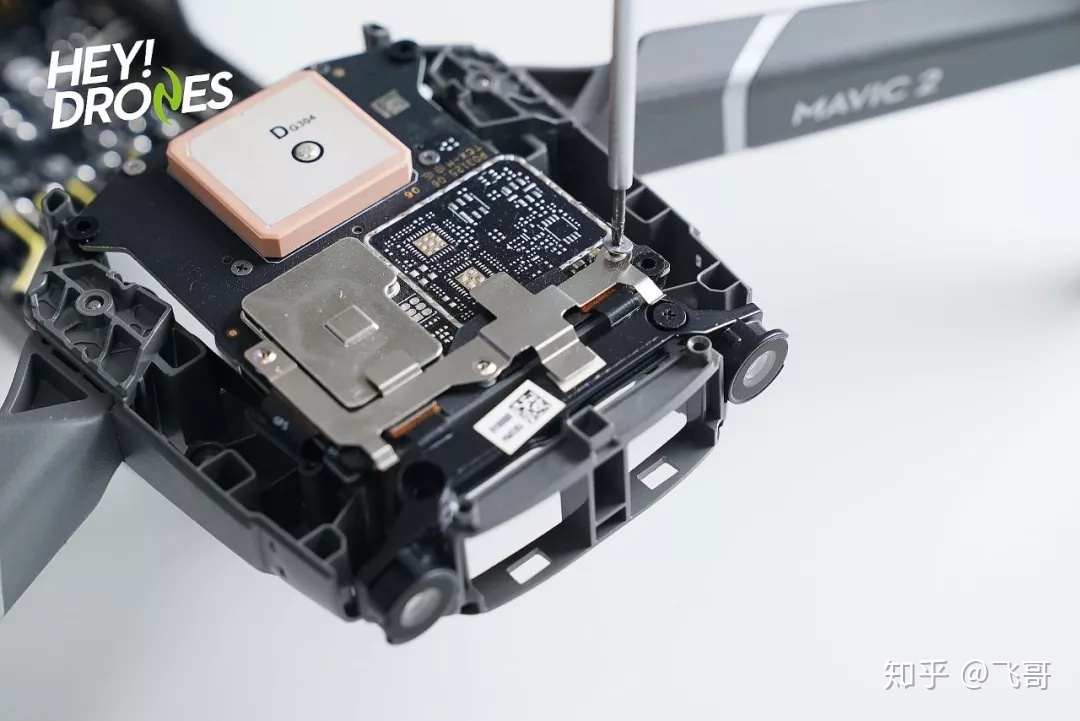
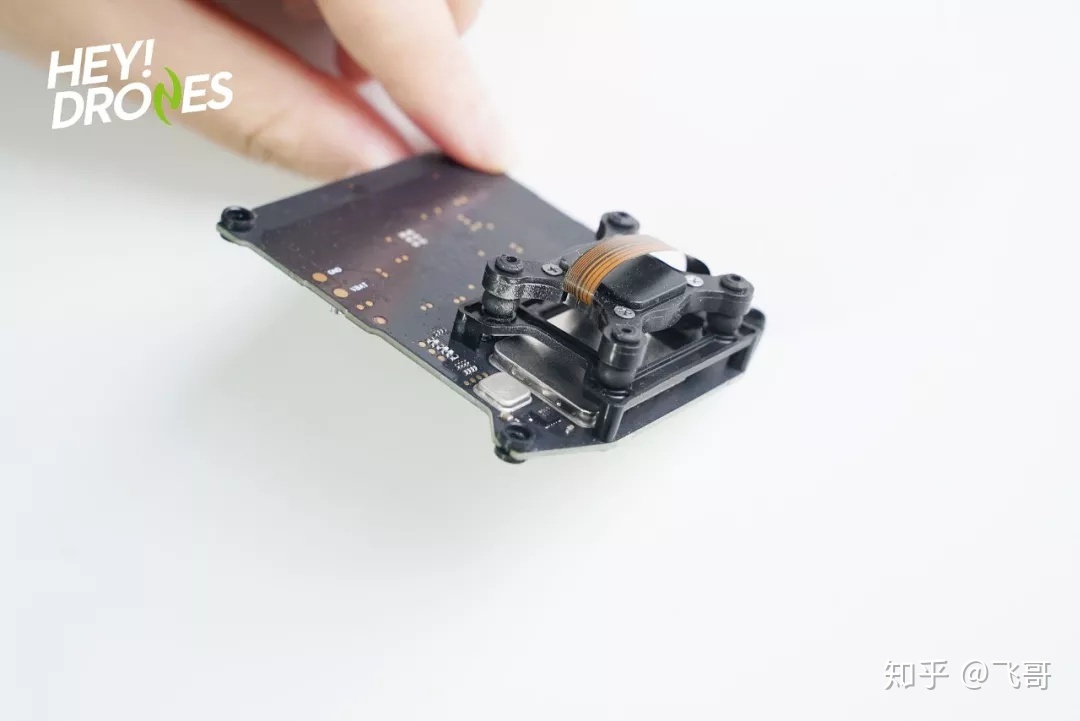
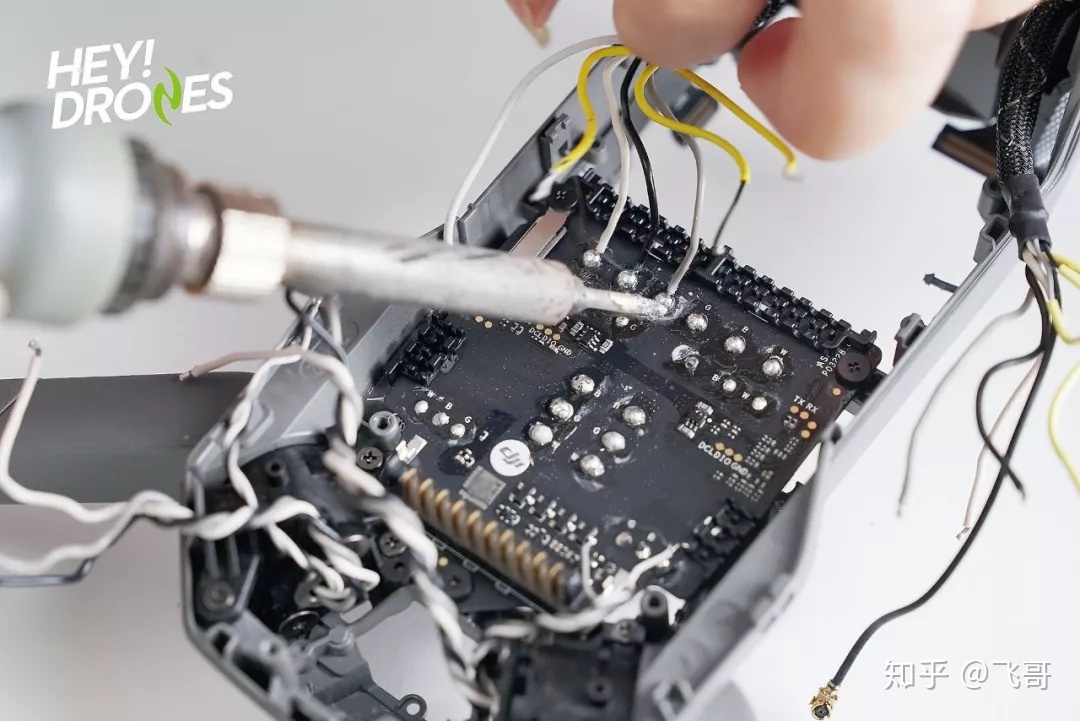
Since the top cover was secured tightly, I had to pry it open forcefully. Although the process was difficult, I finally removed the top cover. However, more serious problems come. A soldering iron is needed for further teardown. The GPS module is placed on top. This design not only enhances the module’s signal reception but also reduces interference from other electronic components to the GPS signal. The inertial measurement unit (IMU) is connected to the shock ball, which prevents the IMU from interfering with rotor resonance.

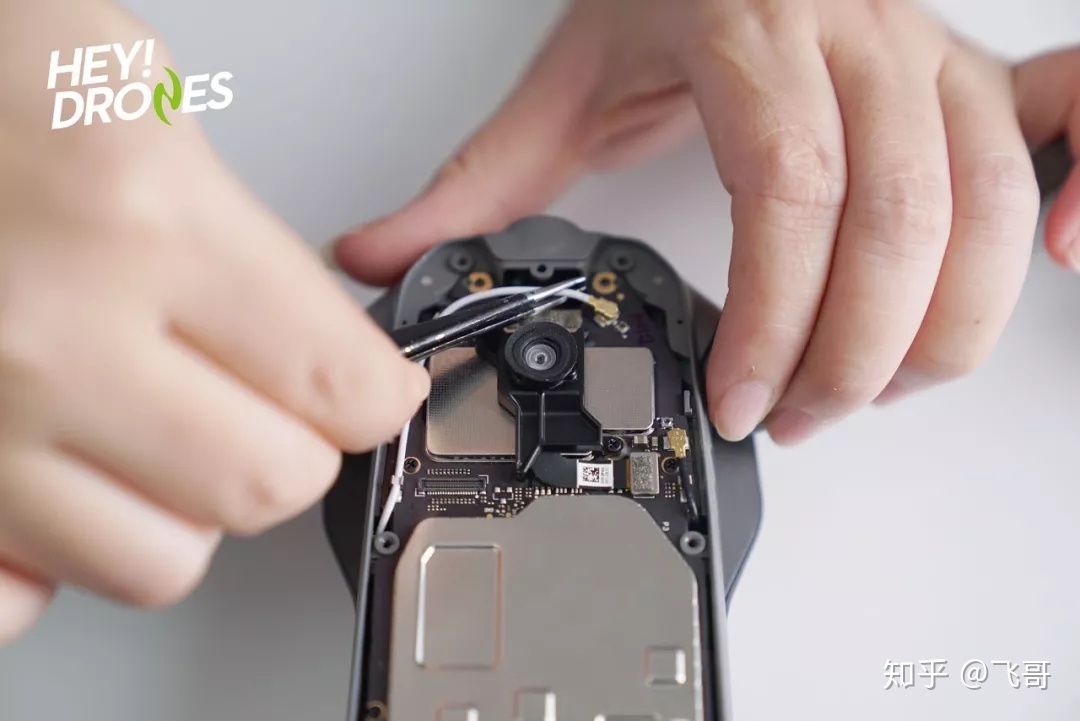
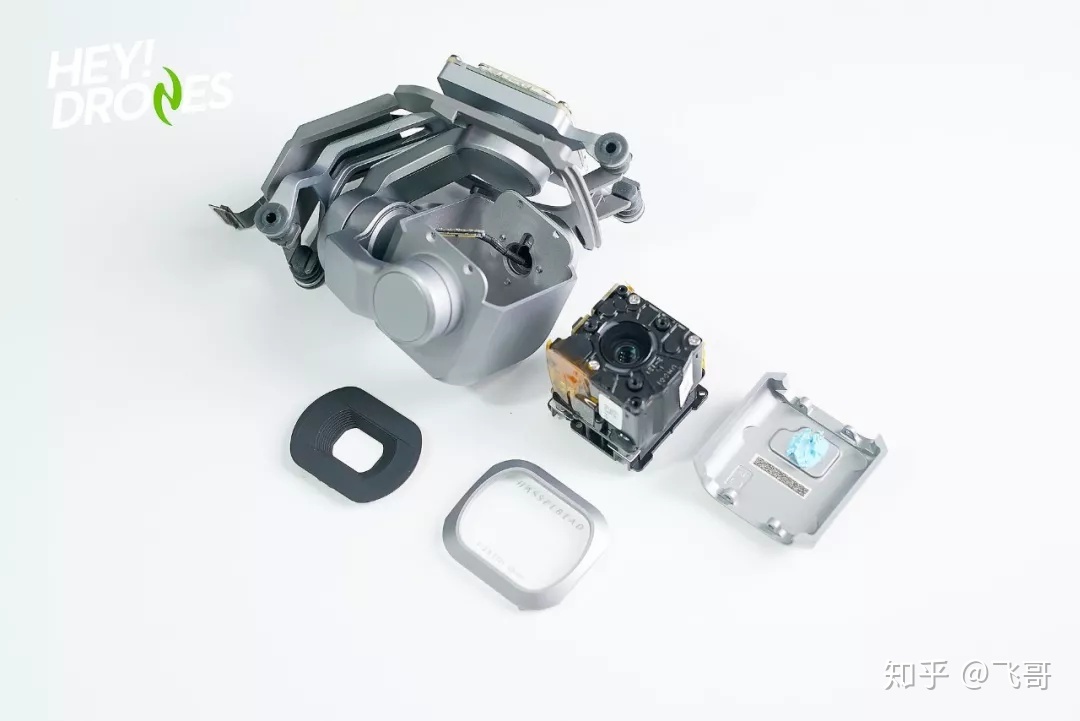
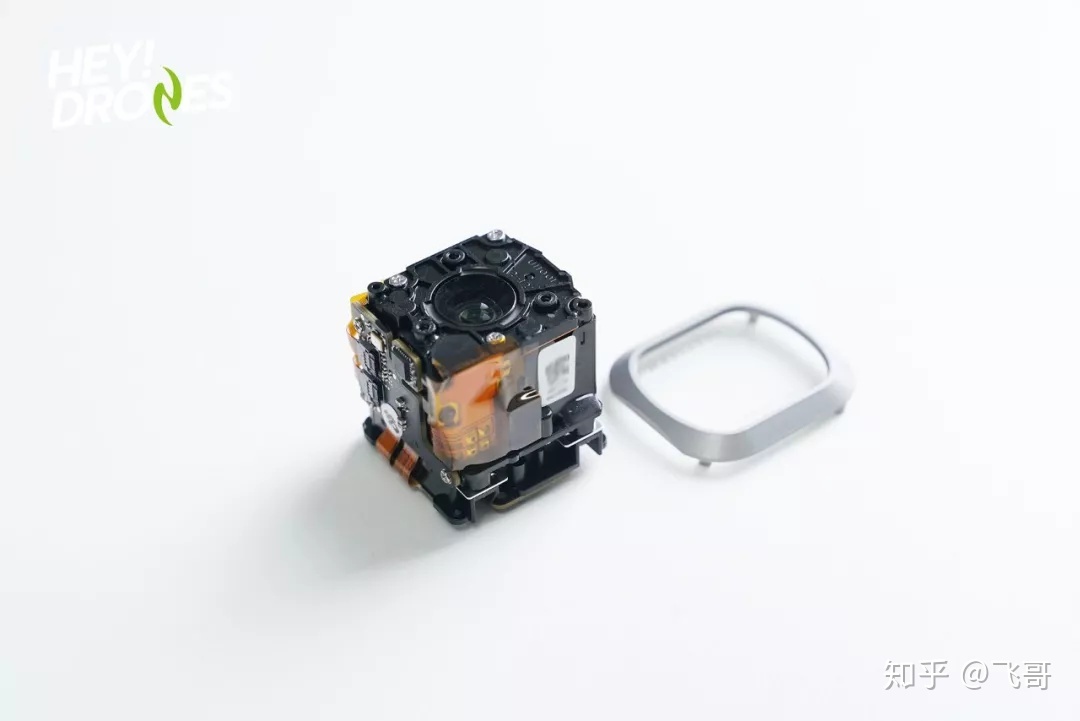
This is the small visual sensing module at the tail. It integrates a set of binocular cameras, two monocular cameras, and a set of infrared TOF transmitters and receivers. In fact, a camera lens always comes with a CMOS and an ISP. This is the Hasselblad L1D-20c camera. The extremely compact body houses a 1-inch CMOS camera. There is no screw found in the footage.
As it is rumored that glue has been applied to the footage, I tried to open it with a screwdriver but failed. It is amazing to see a COMS camera in such a small size. I was impatient to explore its internal structure, but since disassembly would damage the components, I stopped further operations. Until now, the disassembly of its camera is complete.

I used a soldering iron to remove the PMU module, then removed the front axis. According to Mavic Pro engineers, this axis can withstand over 5,000 folds. After disassembly, I believe the engineer was right about the axle’s folding durability. Additionally, the rear axle also demonstrates excellent durability.

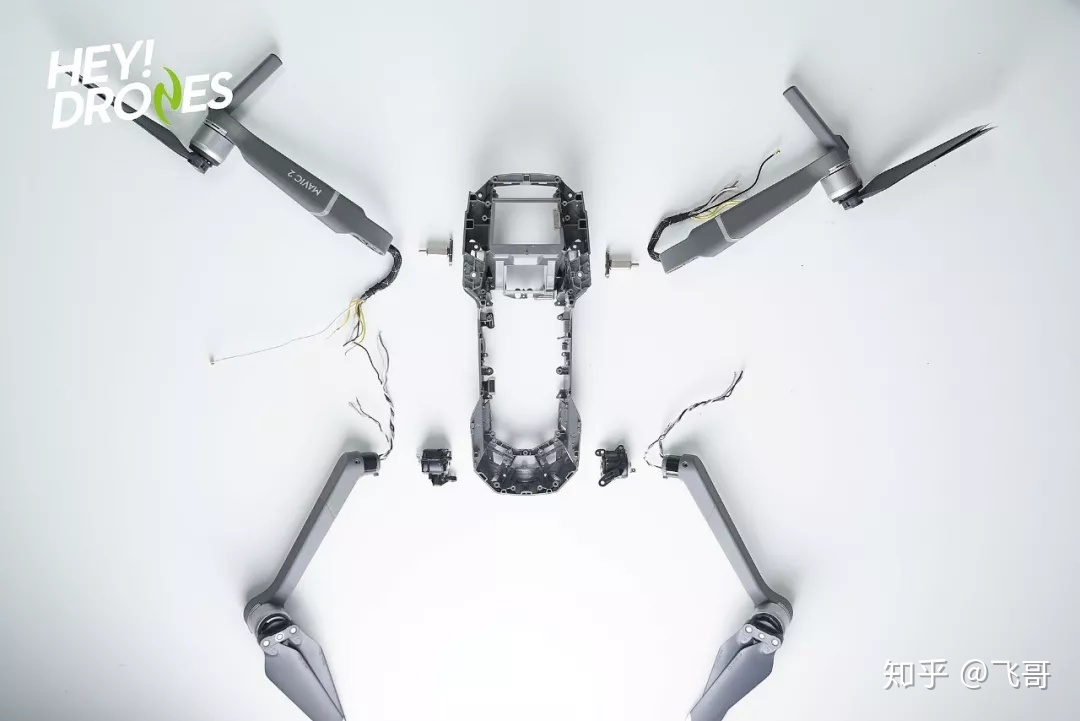
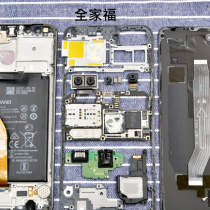
The appearance of this drone has not changed much. However, as it becomes bigger, heavier, and more powerful, its internal design should be more compact and complicated. I spent three hours finishing the teardown of the DJI Mavic 2 Pro.


Hi, were you able to confirm which SOC it actually is? Amberella H3 rumors have been circulating.
TIA
I would love to see how the camera comes out of the box. Do you have a YouTube video of the disassembly of the gimbal?
We have no video on YouTube.
Thx David.
Do you have some pics I can use to put in the camera in the Y fork of the gimbal? Mine has popped out after the crash. And can’t put it back in.
I can send a picture to show you how it is now.
We don’t have any more pictures because the drone is no longer in our office.
Hello folks, I’m wondering when DJI will start releasing parts for the Mavic Pro 2.
I need the right rear arm, and most importantly, the part that holds the arm in place within the body.
It’s showing in your teardown.
I have been all over the place with no such luck.
I can find the part for a Mavic Pro but not a Mavic Pro 2.
Thanks! Robert C
Is it possible to remove the internal storage, and if so, how would I be able to get the data from it? I crashed mine, and it’s totally ruined and rusted, but I’m keen to see if footage saved on internal memory can be salvaged. Thanks.
Yes, send it to a board repair specialist. They can read the flash memory