As Vivo’s first full-screen phone, the Vivo X20 Plus has become very popular among young people due to its excellent appearance design and high specifications. Now, let’s start the teardown to explore the design secrets inside the phone.
The phone is fully protected, and its components are made of good materials. The Vivo X20 Plus teardown is moderately difficult.
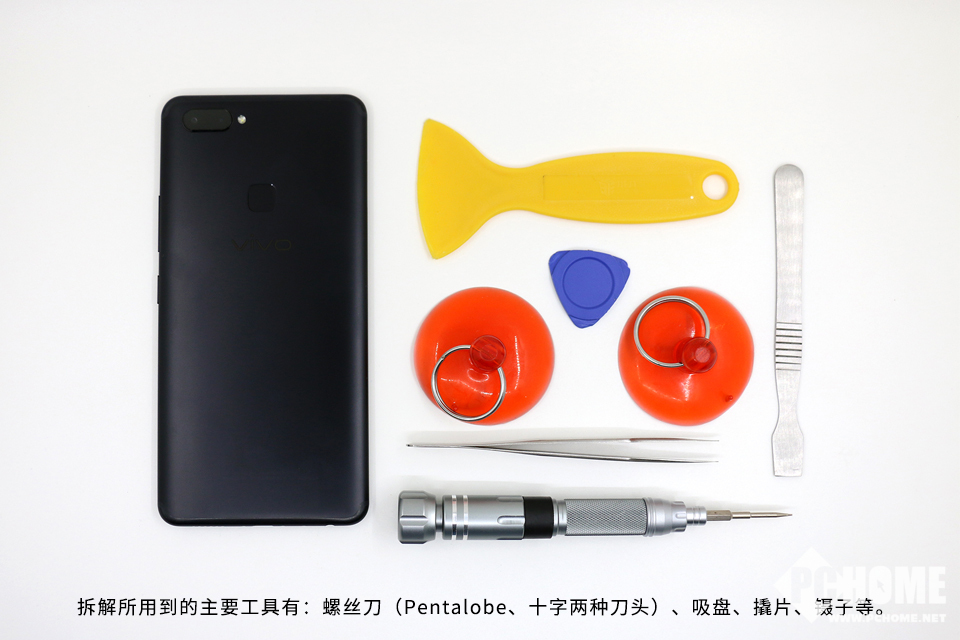
The main tools used during the teardown process include the screwdriver (Pentalobe and Phillips), suction cup, pry tool, and pick.
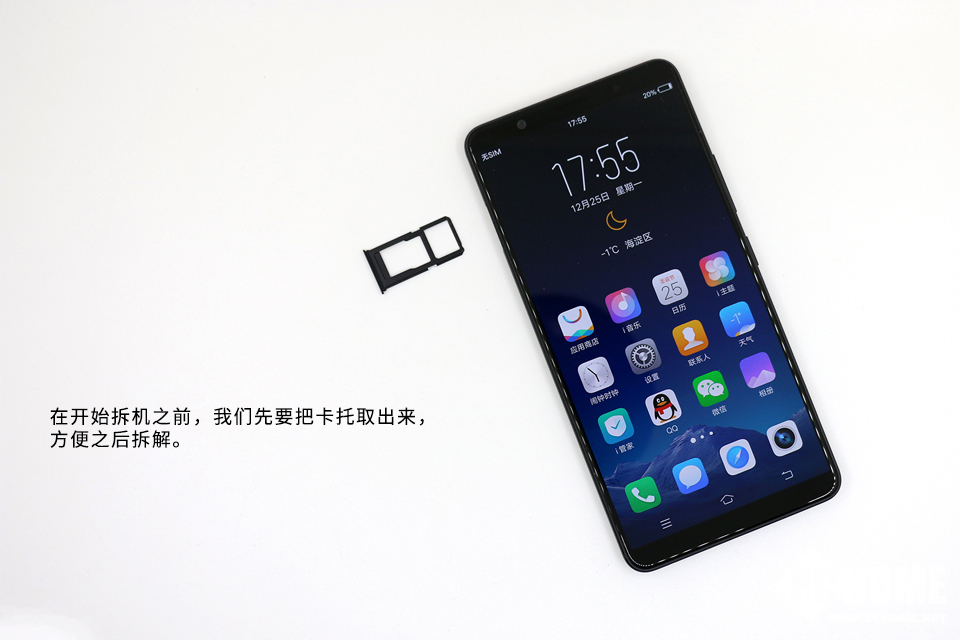
Before taking apart the phone, we need to remove the SIM card tray.
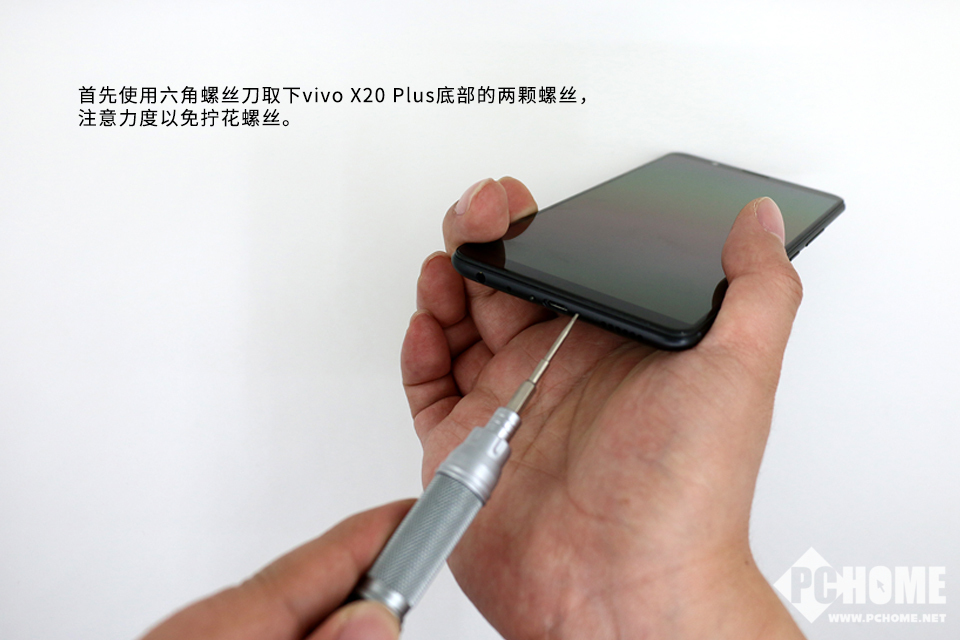
First, use a hex screwdriver to remove the two screws at the bottom of the vivo X20 Plus. Please control the force during the process to avoid damaging the screws.
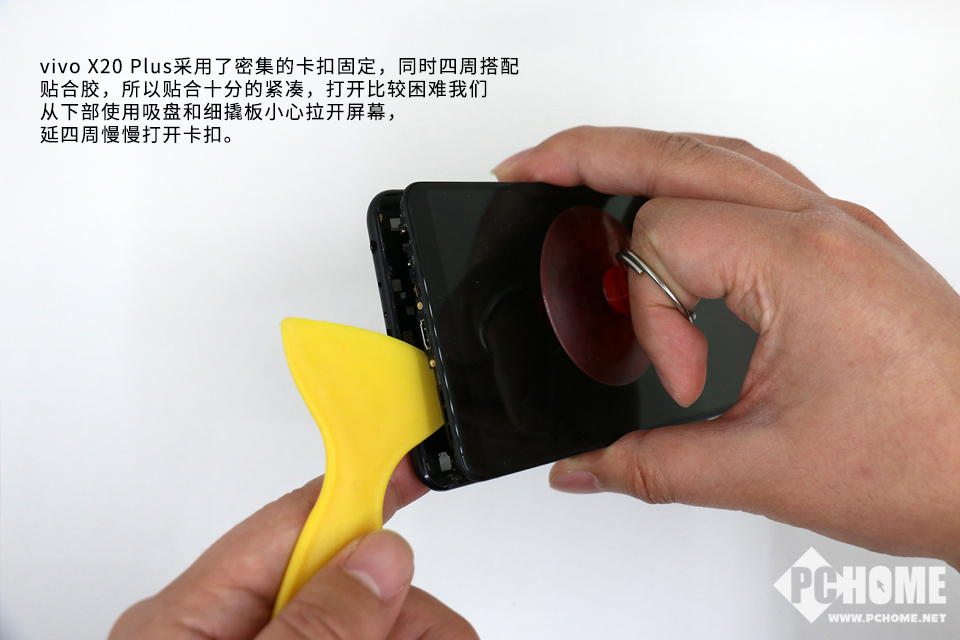
There are some clips on the back cover, along with glue on the edges, which make the removal process very difficult. We use a suction cup and a pick to remove the back cover.
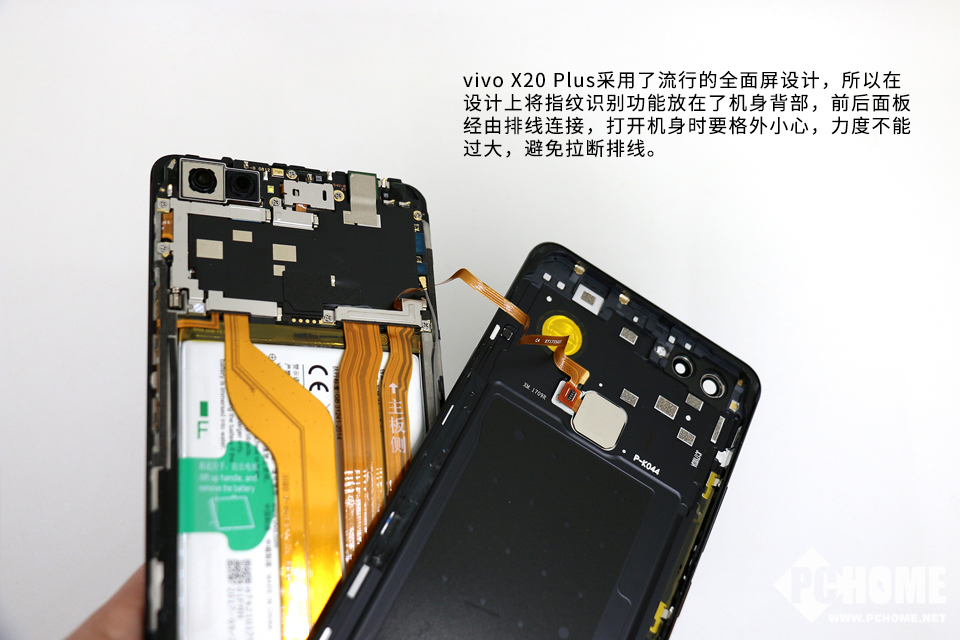
This phone features a popular full-screen design, so the fingerprint sensor is located on the back cover. After opening the back cover, the fingerprint cable is still connected to the motherboard. Please be careful not to damage the cable.
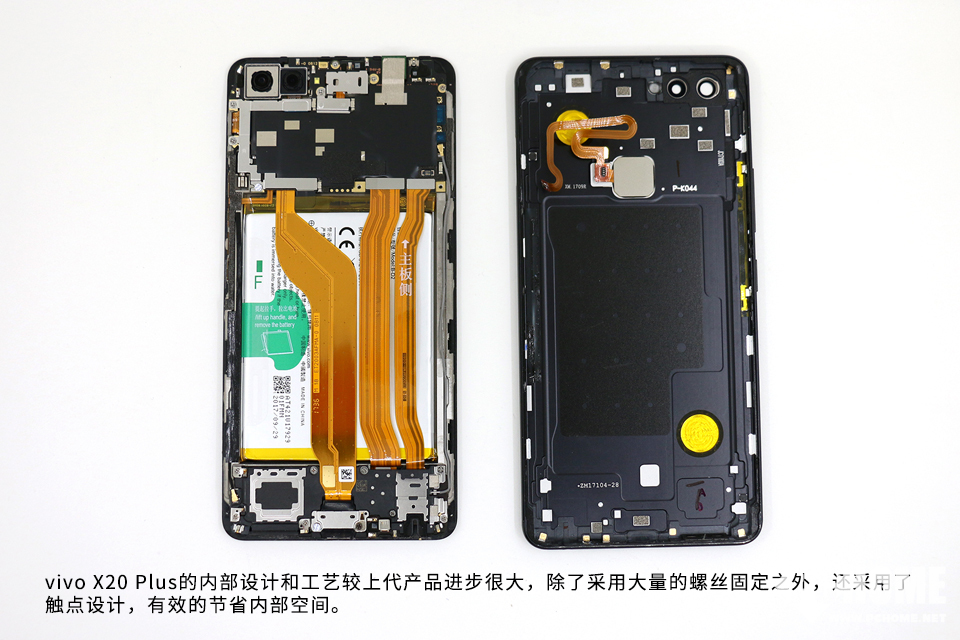
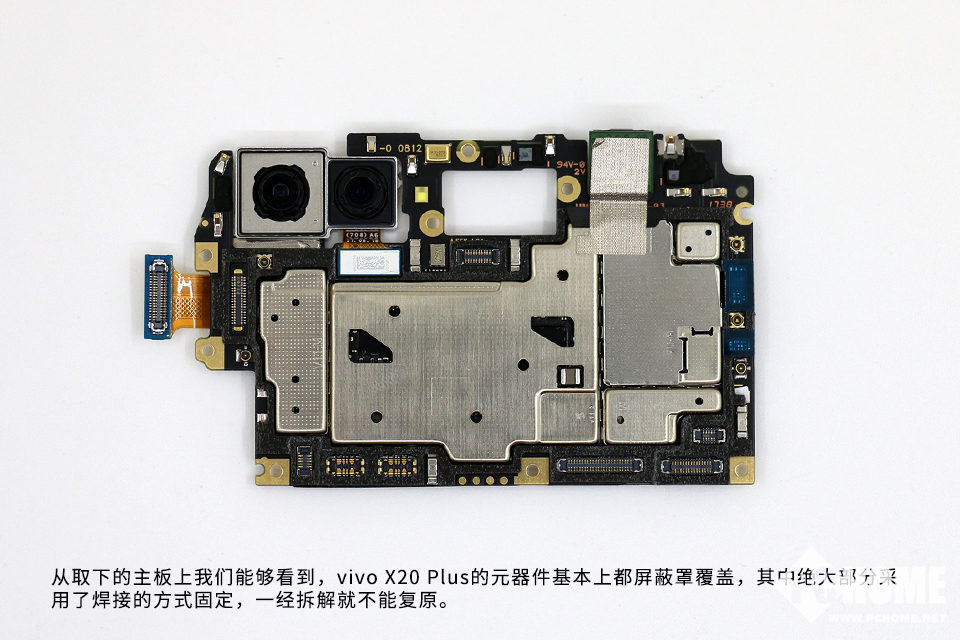
The phone has a better internal design and workmanship compared with its predecessor. In addition to screw fastening, it also uses metal contacts to save internal space.

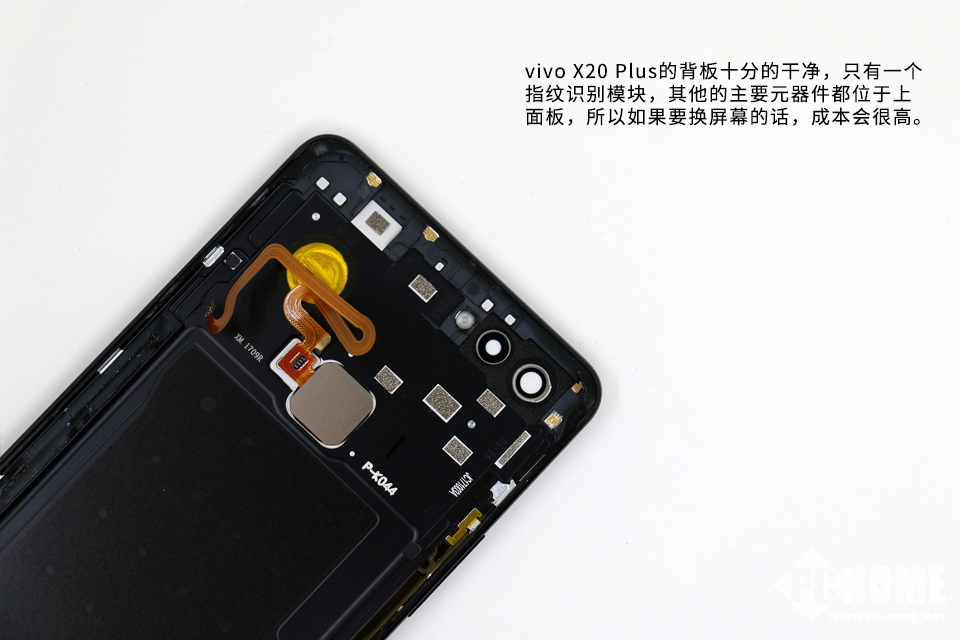
Only the fingerprint recognition module is located on the back cover, while the other main components are all distributed on the screen assembly. Therefore, if the user needs to replace the screen, the cost will increase significantly.
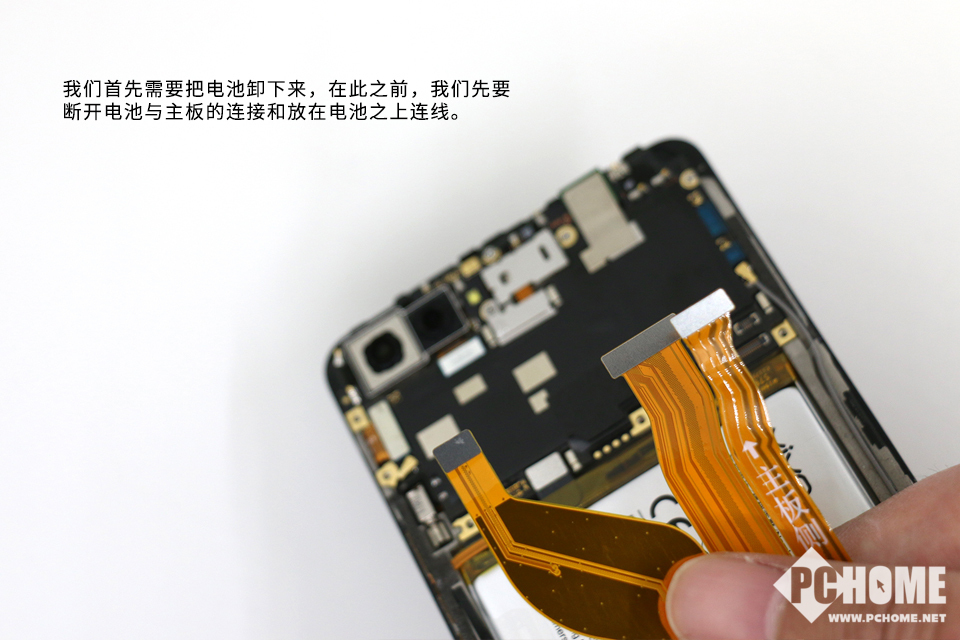
Before removing the battery, we need to disconnect the battery flex cable from the motherboard.
Lift the green tab to remove the battery.
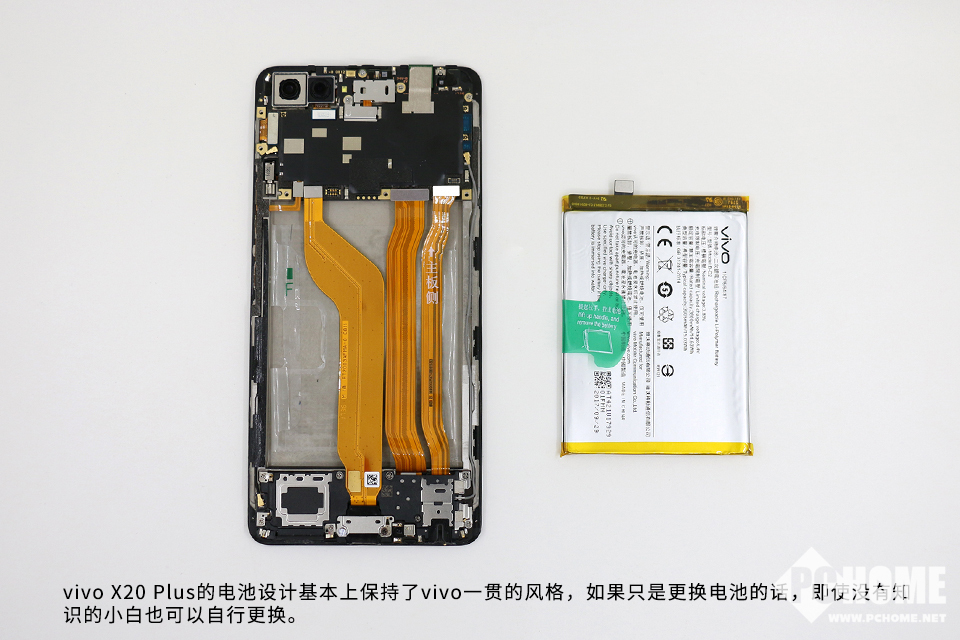
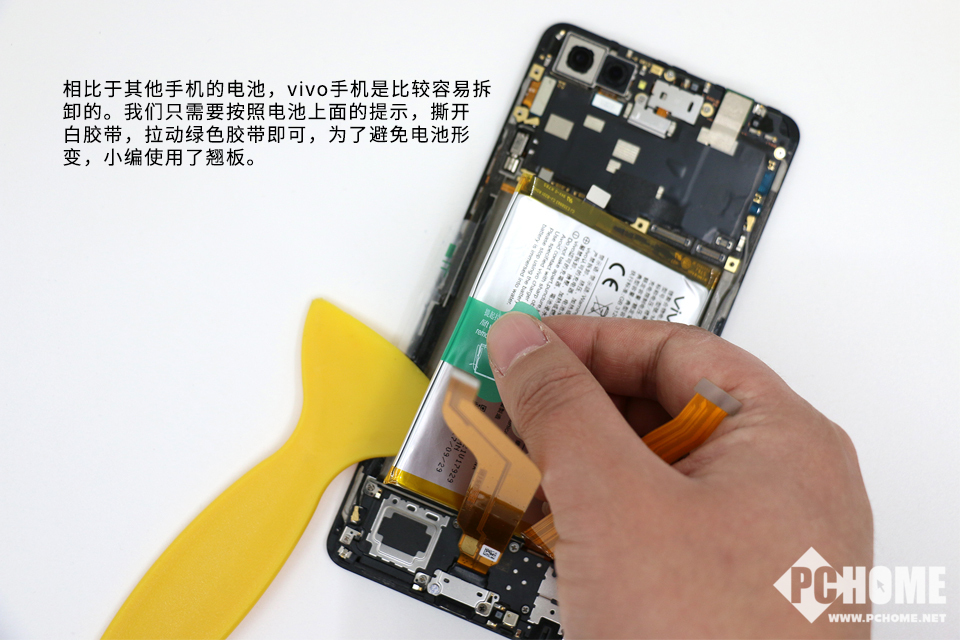
Compared to other smartphones, the battery is easier to remove. You just need to follow the battery removal guide: tear off the white tape, pull the green tape, and you can successfully remove the battery.

The battery design of this phone continues vivo’s style. To prevent the battery deformation, we used a prying tool.
The phone features a 3,905mAh Li-Polymer battery, which can perfectly match the 6.43-inch screen. The battery supports 18W fast charging and provides a longer battery life.
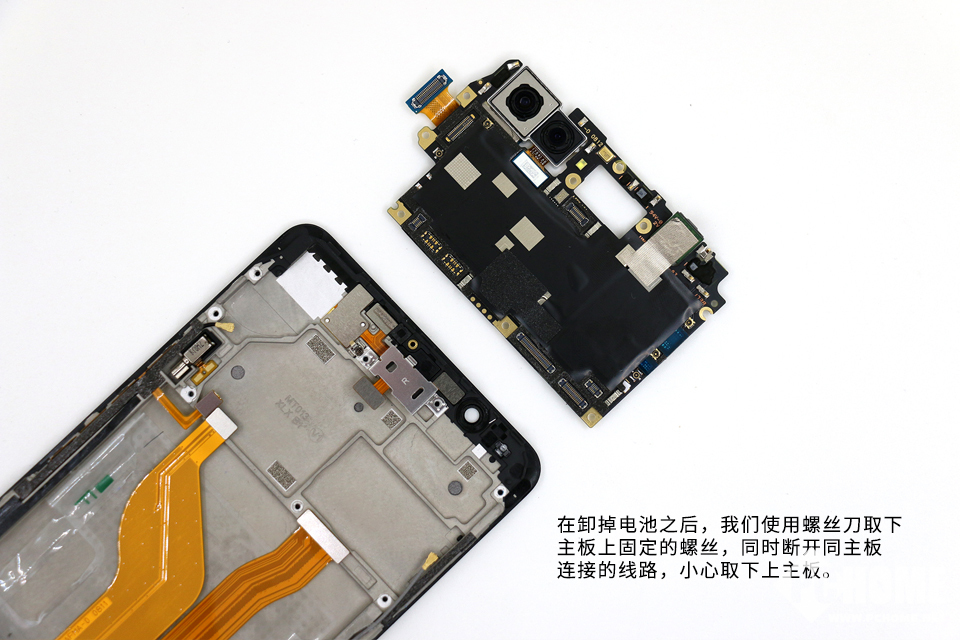
After removing the battery, we used a screwdriver to remove the screws securing the motherboard. At the same time, disconnect all the cables from the motherboard. Then, remove the motherboard.
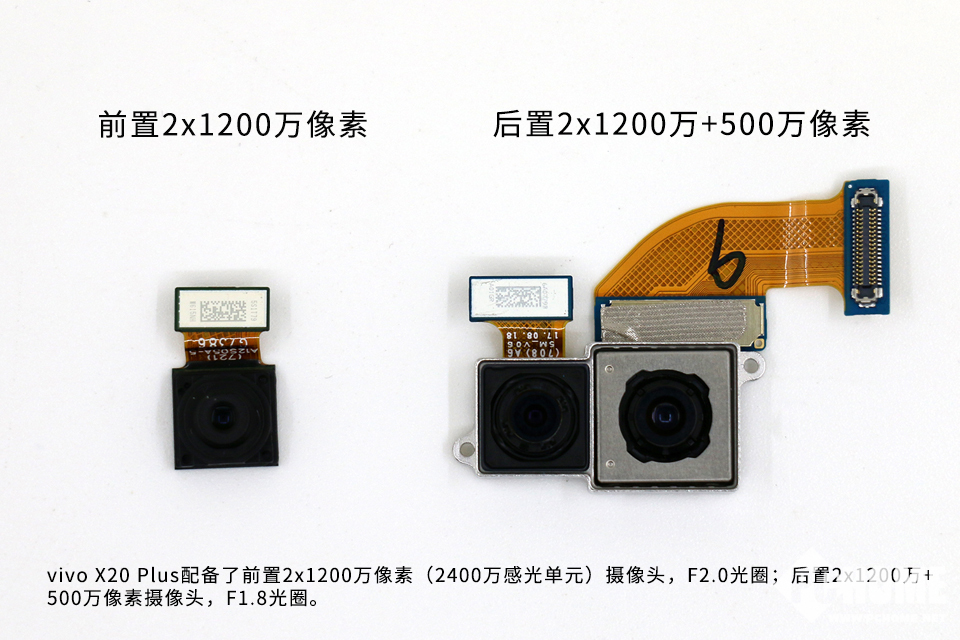
The phone features a dual camera setup with two 12MP lenses on the front and a dual camera setup with a 12MP lens and a 5MP lens on the rear.
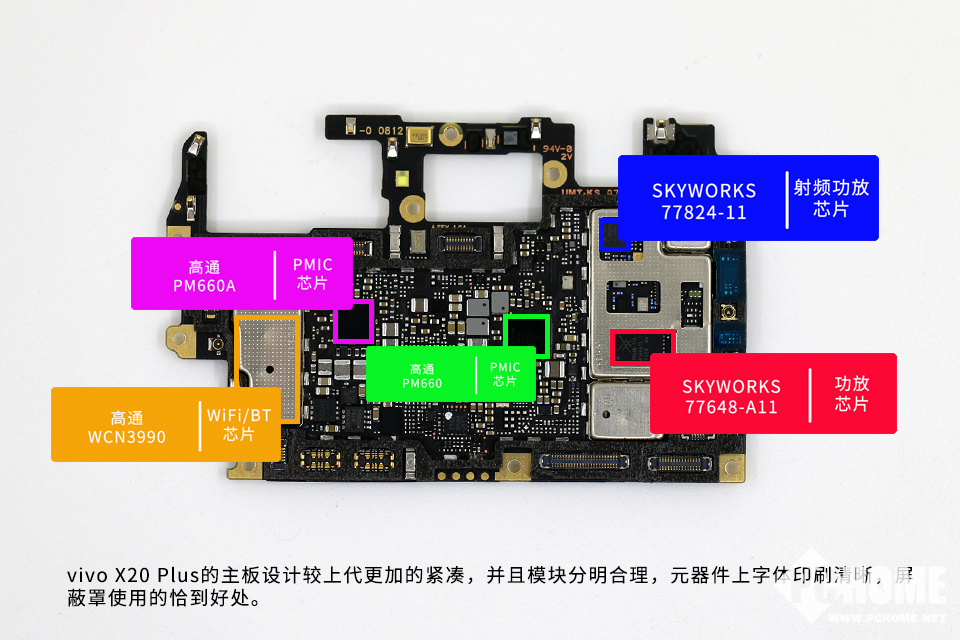
The motherboard of the Vivo X20 Plus is more compact than its predecessor. The text markings on the components are clearly readable.
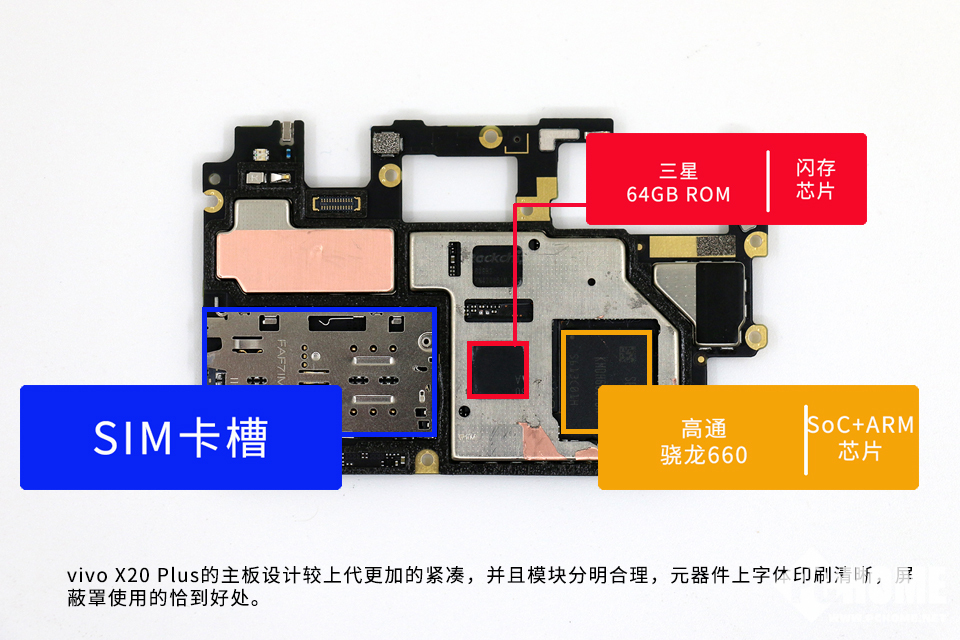
The red box indicates the Samsung 64GB ROM, while the yellow box indicates the Qualcomm Snapdragon 660 processor.
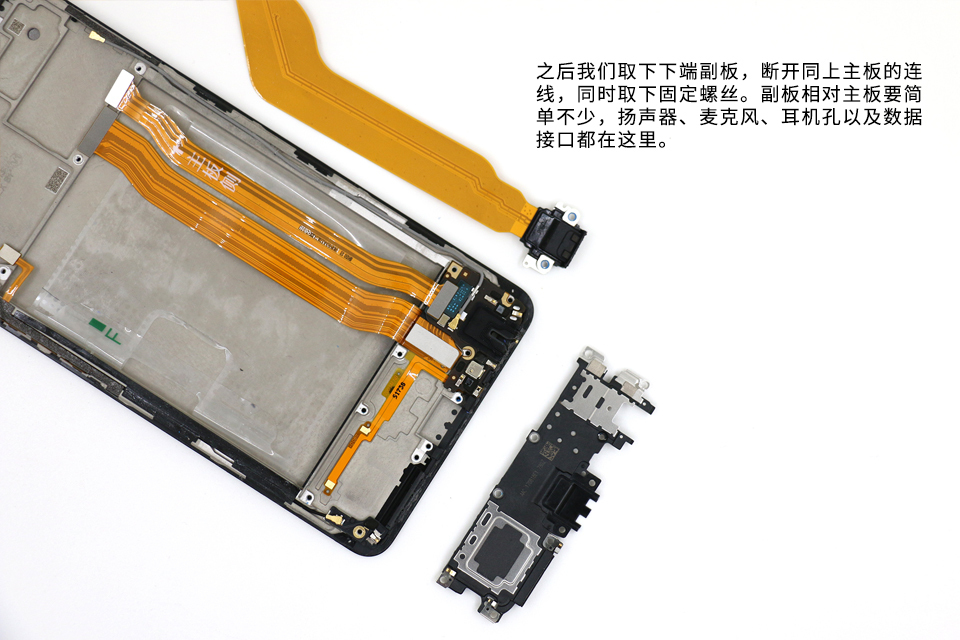
Disconnect the ribbon cable from the sub-board, remove the screws, and then remove the sub-board. The speaker, microphone, headphone jack, and Micro USB port are all integrated onto the sub-board.
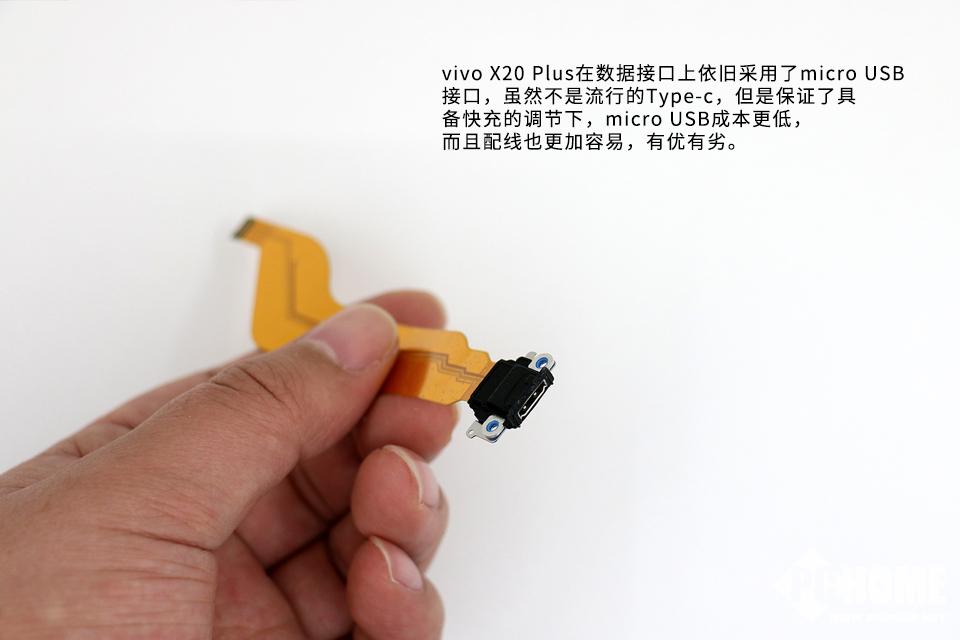
This phone still comes with a micro USB port. Although it does not offer a Type-C port, it still supports fast charging.
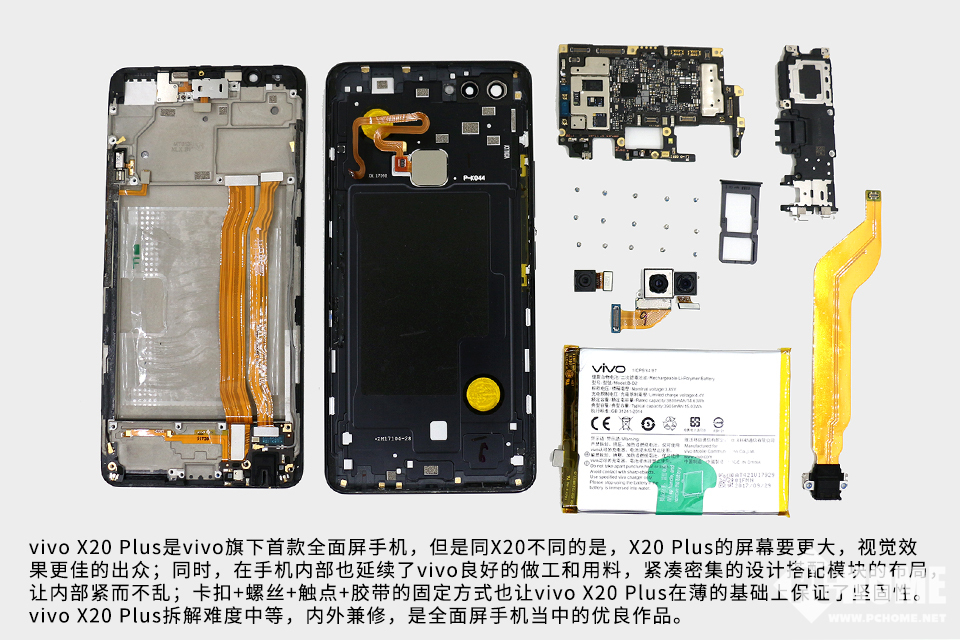
Summary:
The vivo X20 Plus is vivo’s first full-screen smartphone. Compared to the X20, the X20 Plus features a larger display for enhanced visual experiences. Its internal design employs exquisite craftsmanship and high-quality materials. The X20 Plus has a good appearance and internal layout, making it an excellent full-screen smartphone.