
What tools are required?
- Micro Bit Flathead Screwdriver
- Micro Bit Phillips Head Screwdriver
- Thermal paste
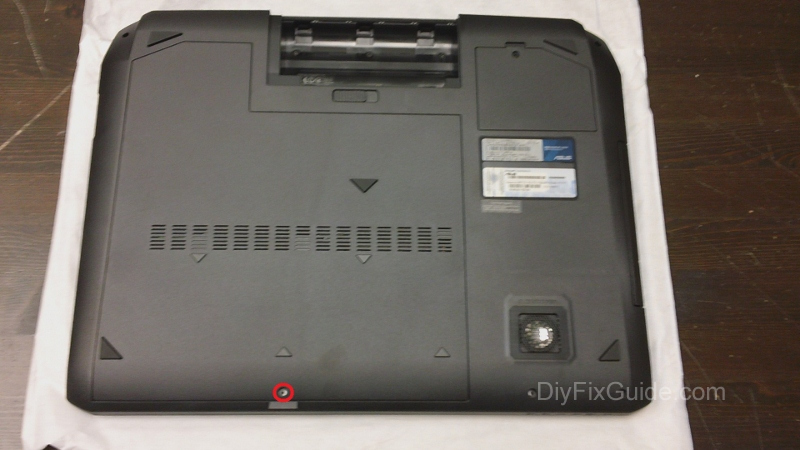
Step 1
Remove one screw with the red outline below.
Remove the back cover by pulling it towards you (away from the battery).
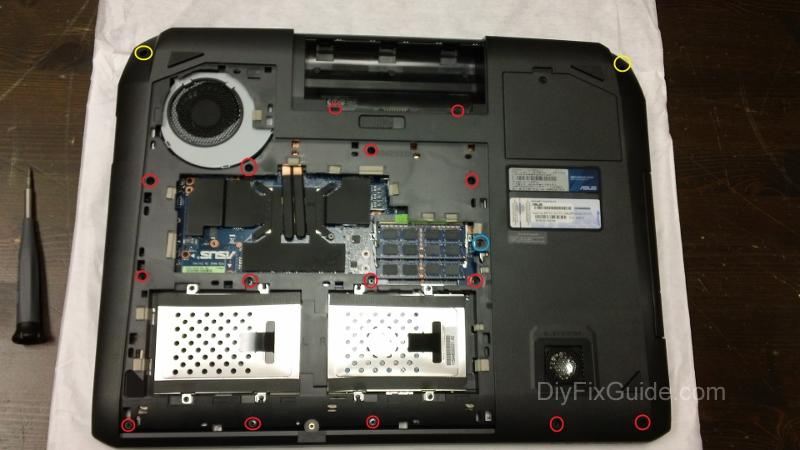
Step 2
Remove all screws from the bottom case.
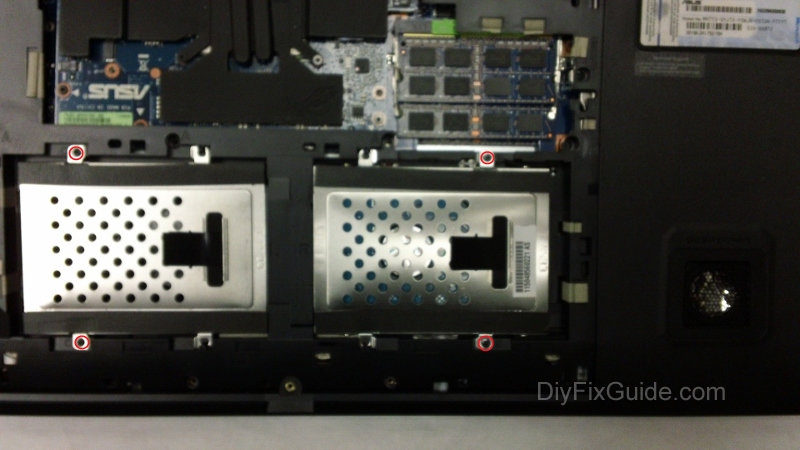
Step 3
Remove the two screws that secure the hard drive. You can remove it.
Do the same for another drive.
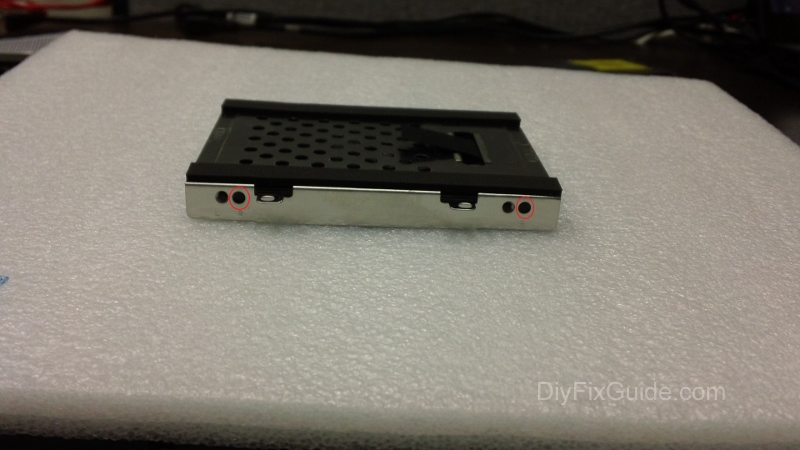
Step 4
To remove the drive from the caddy, remove the screws on both sides of the caddy. The drive will slide out without resistance.
Step 5
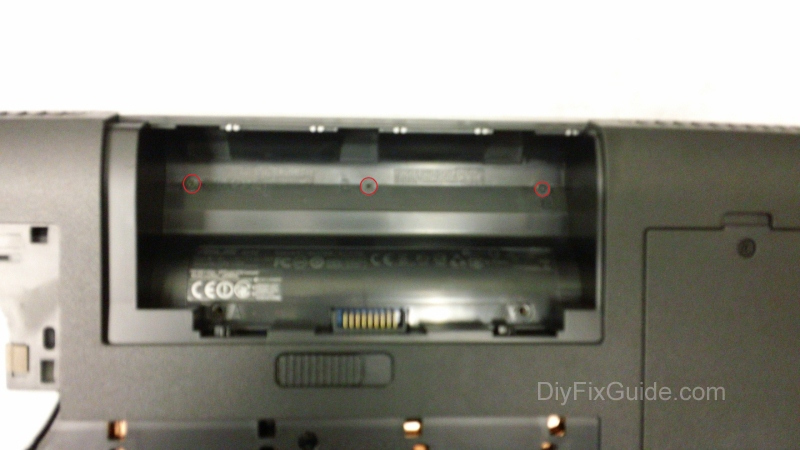
Remove the three screws in the battery bay.
Remove the three screws in the optical bay.
Step 6
At this point, flip the right side of the laptop up and pay attention to the hinge (located on the back) that holds the screen to the frame. Then, remove the case (it should pop out easily).
Step 7
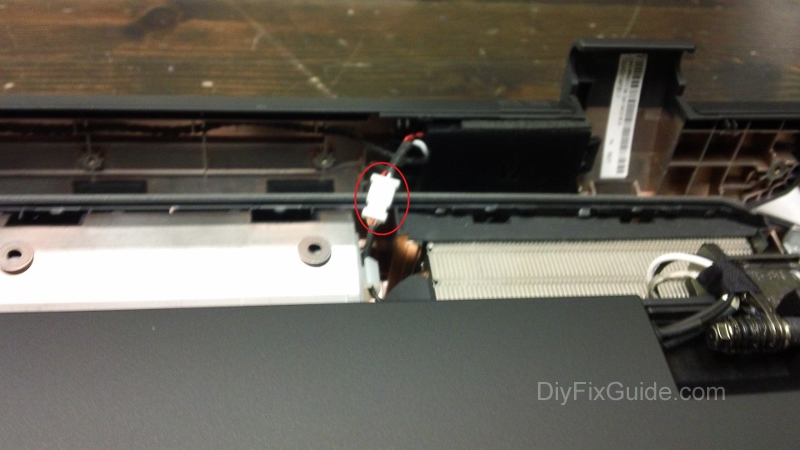
Remove the wires slightly offset from the screen.
Step 8
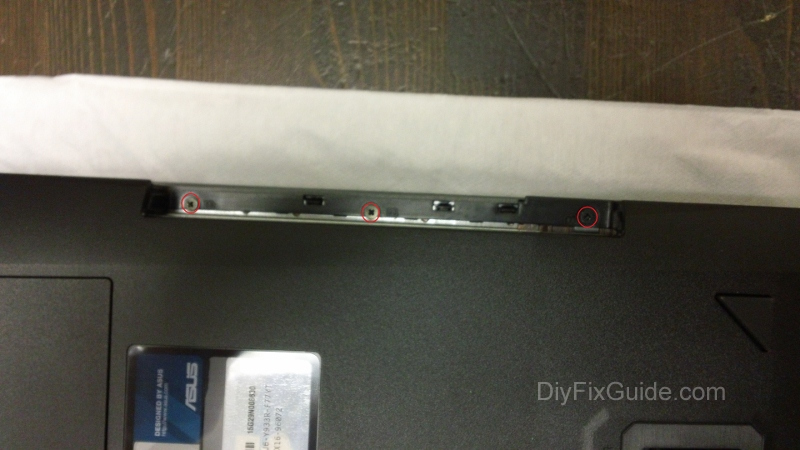
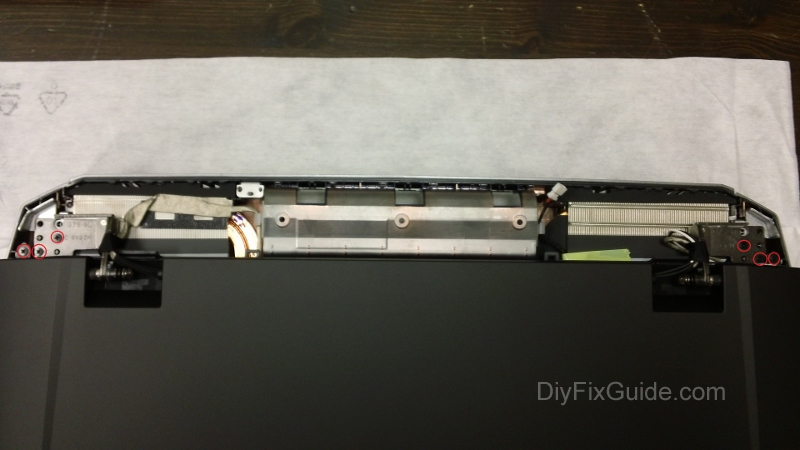
Remove the screws that hold the LCD hinges in place.
Step 9
Separate the screen from the frame (should be easily placed parallel).

Step 10
Disconnect all cables from the motherboard.
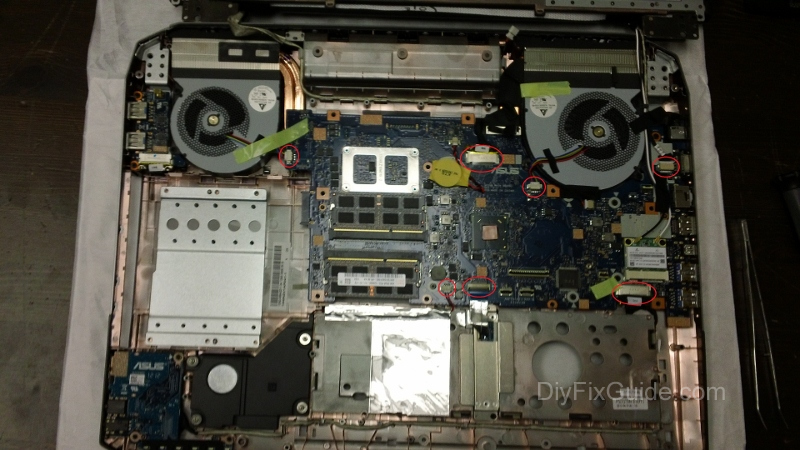
Step 11
Remove the three screws that hold the left fan.
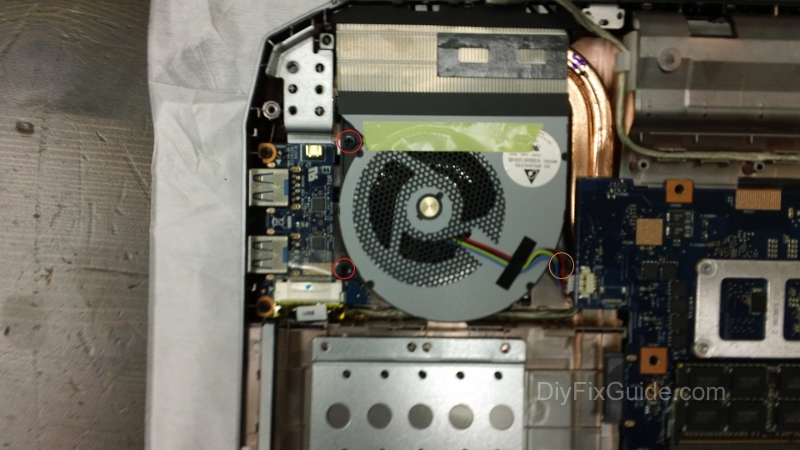
Step 12
Remove the three screws that hold the right fan.
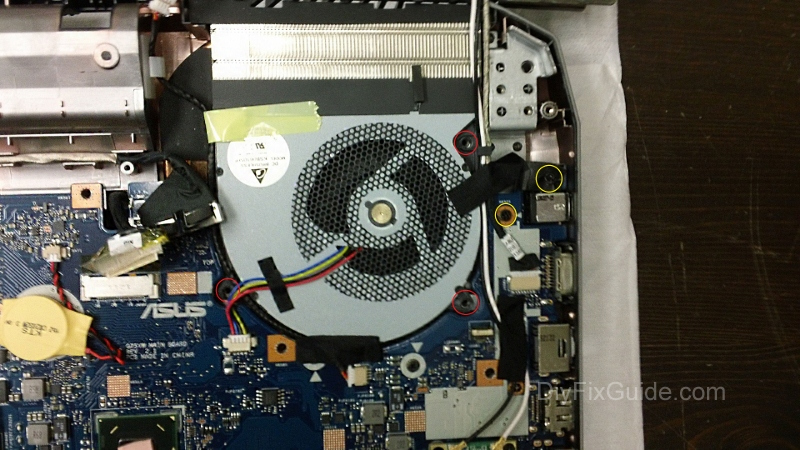
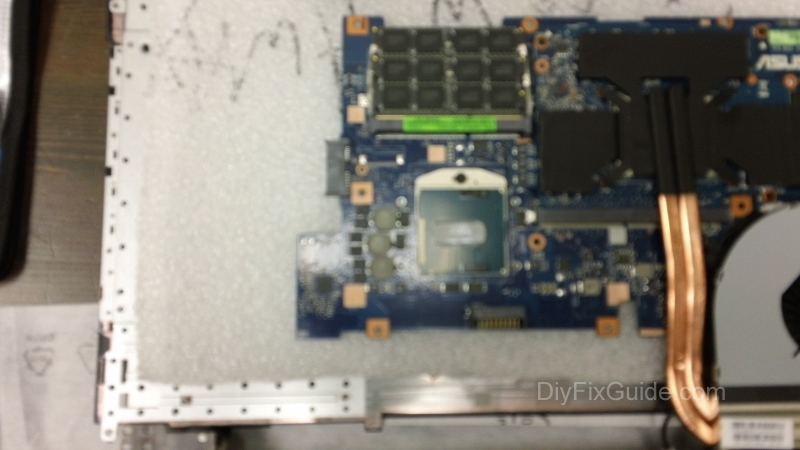
Step 13
Remove all screws securing the heat sink.
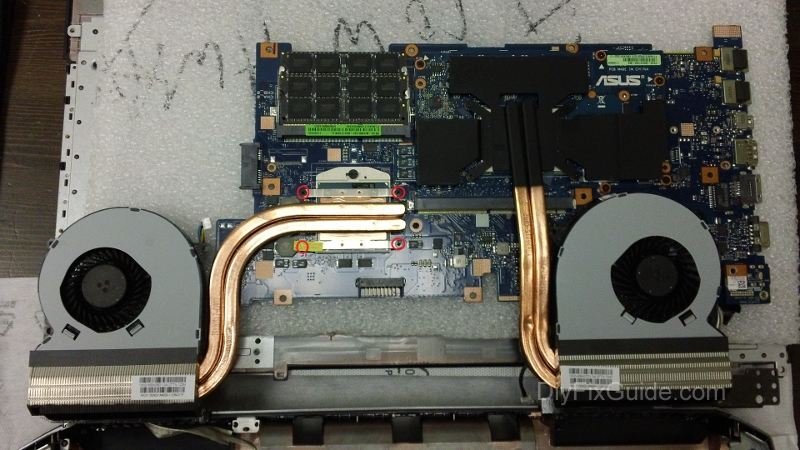
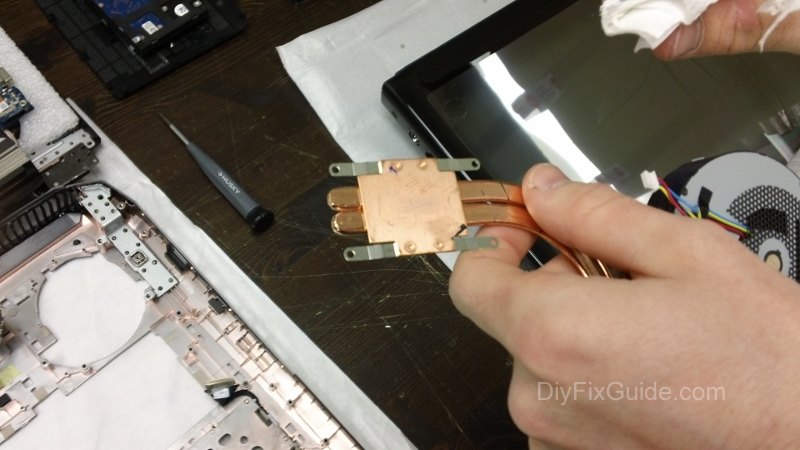
Step 14
Remove the heat sink.
For more guides, check out the Asus G75VW device page.
This was very helpful, thank you! I have a G75VW that was losing the connection to the hard drives frequently. Using these instructions, I dismantled the laptop and re-seated the ZIF connectors on the SATA daughterboard.
Hello! Do you know the size of the thermal pads?
The keyboard must be removed too.
No need to disassemble your keyboard. Follow these pictures.
My G75vw stopped charging.
What are the most likely causes and solutions to this issue?
Still runs perfectly on battery.
Did you find the solution? I just had the same problem. It’s not the adapter; maybe it’s a new CMOS battery.