As we all know, the vivo X21 with the under-display fingerprint scanner will start pre-orders on March 28. In addition to under-display fingerprint technology, the X21 also adopts Face Wake. Today, we will start the teardown of this phone to explore its internal structure and the secret of the under-display fingerprint reader.
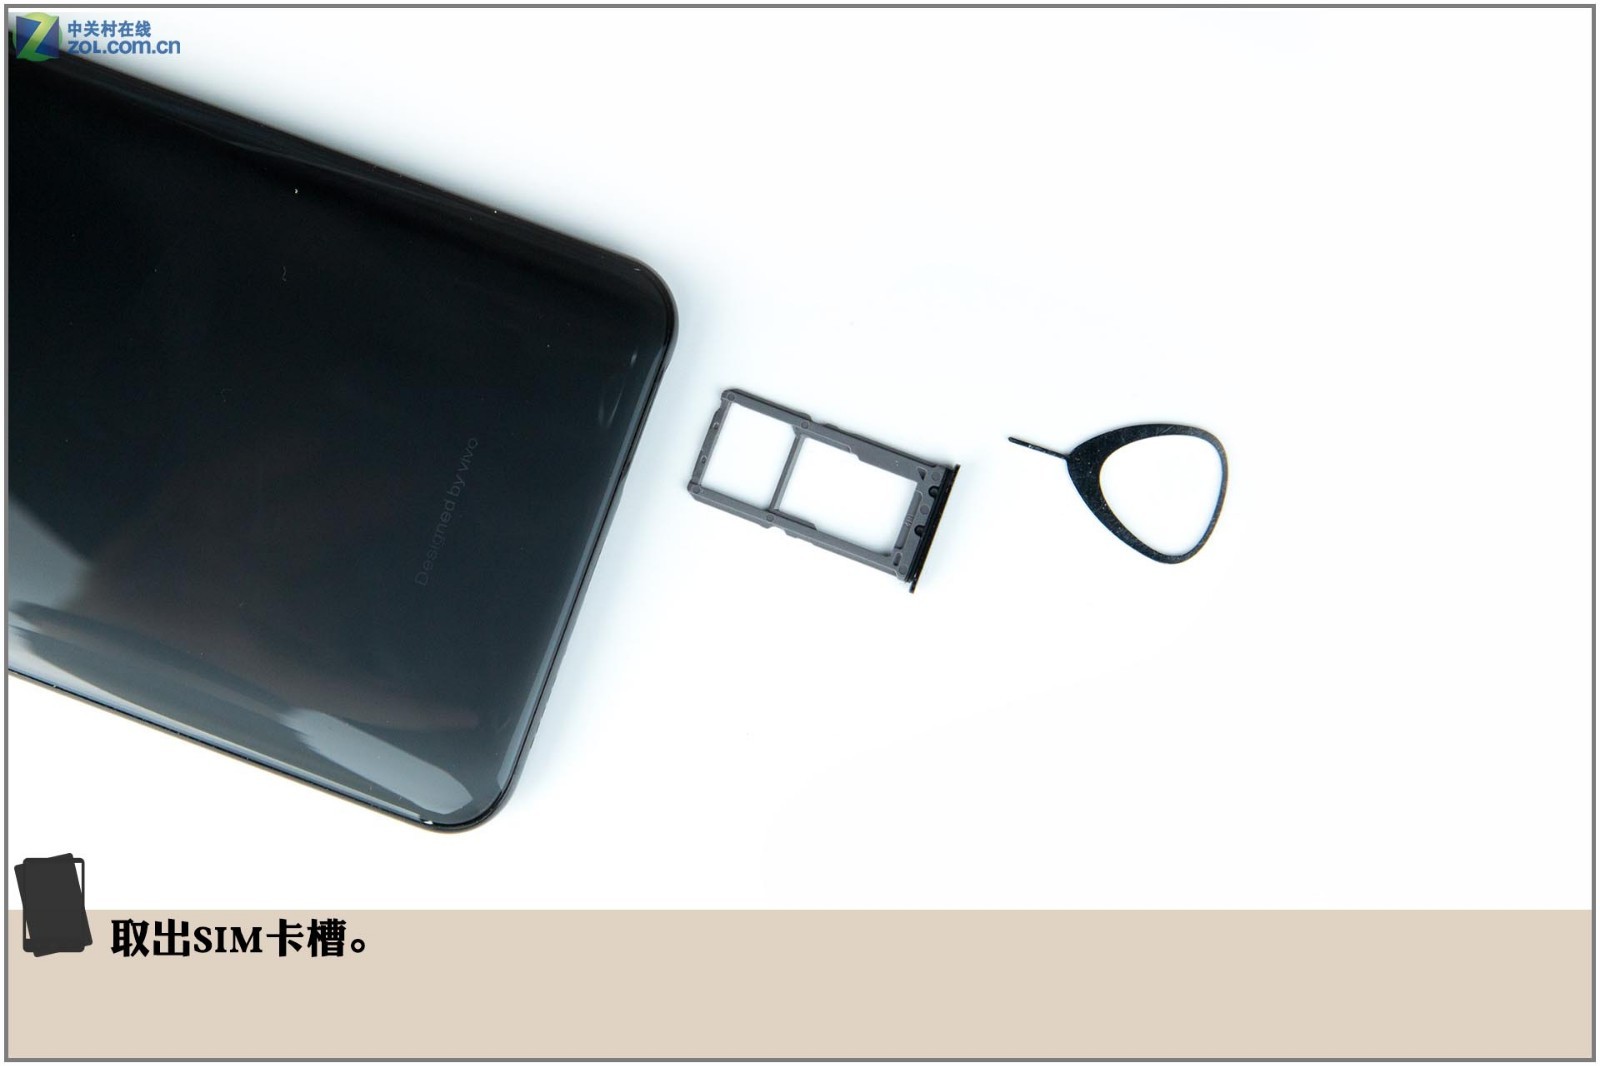
First, remove the SIM card tray.
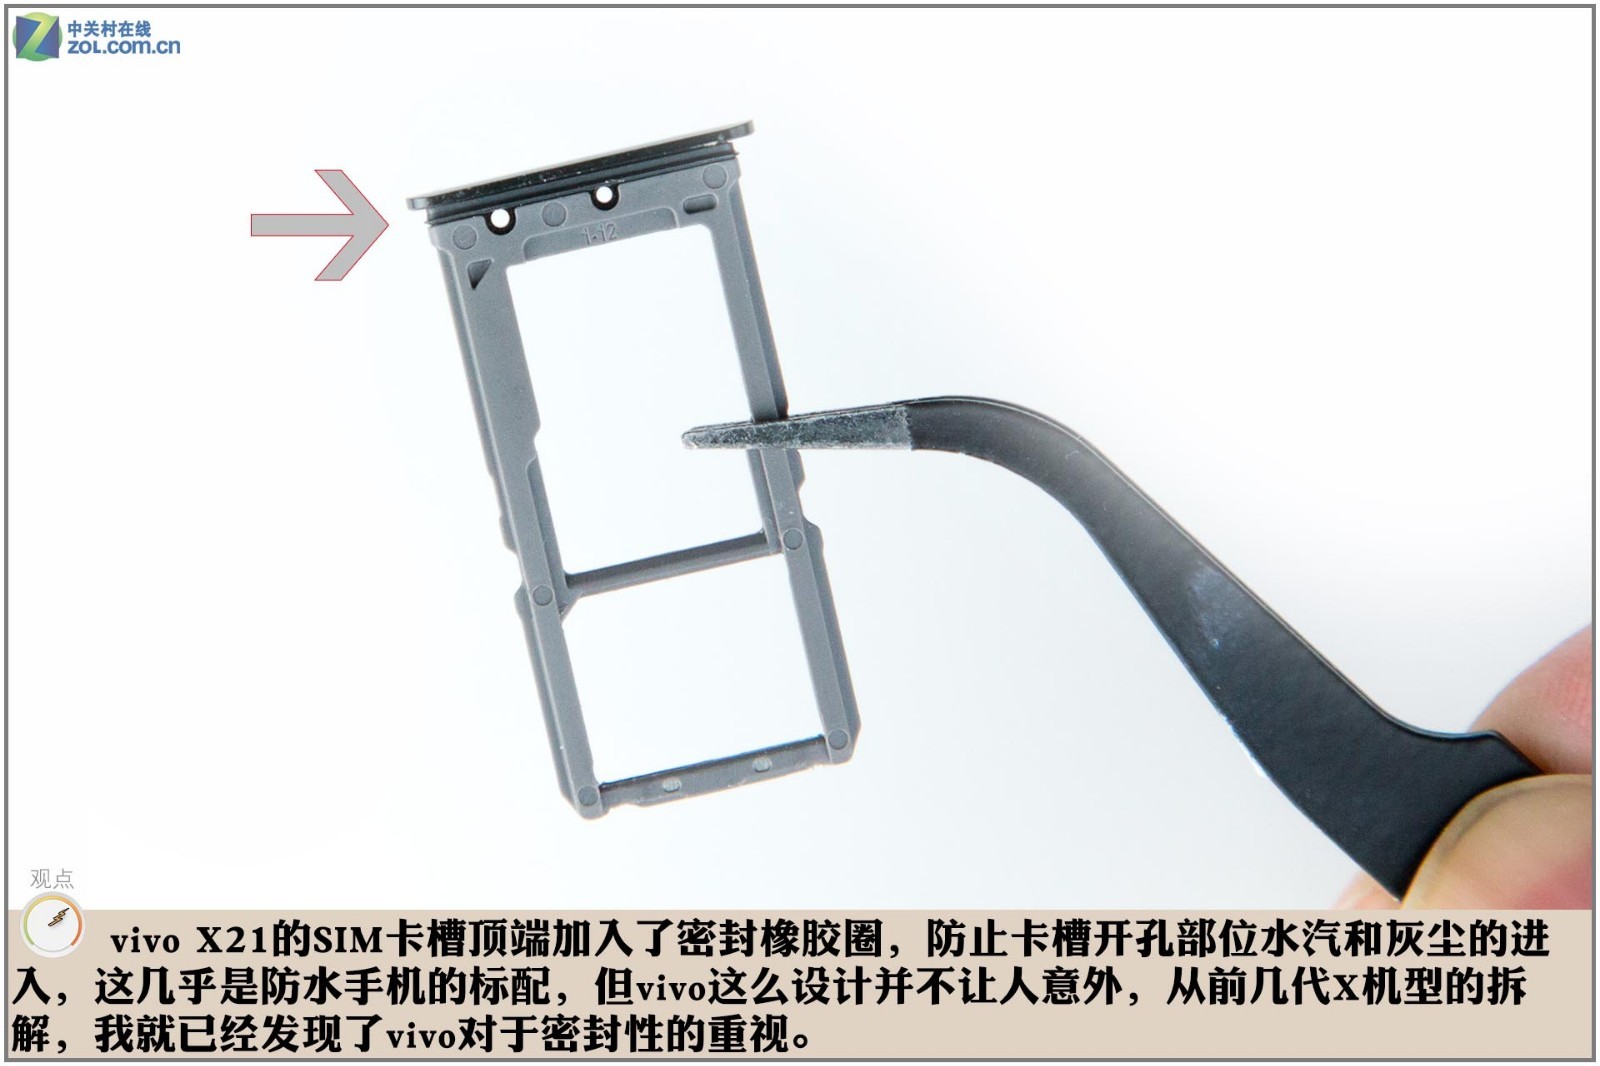
The top of the SIM card tray has a rubber ring to prevent water and dust from entering the phone, which is a solution used by most waterproof phones. It is not surprising to see the X21 adopt this design, as we have found that vivo places great importance on sealing.
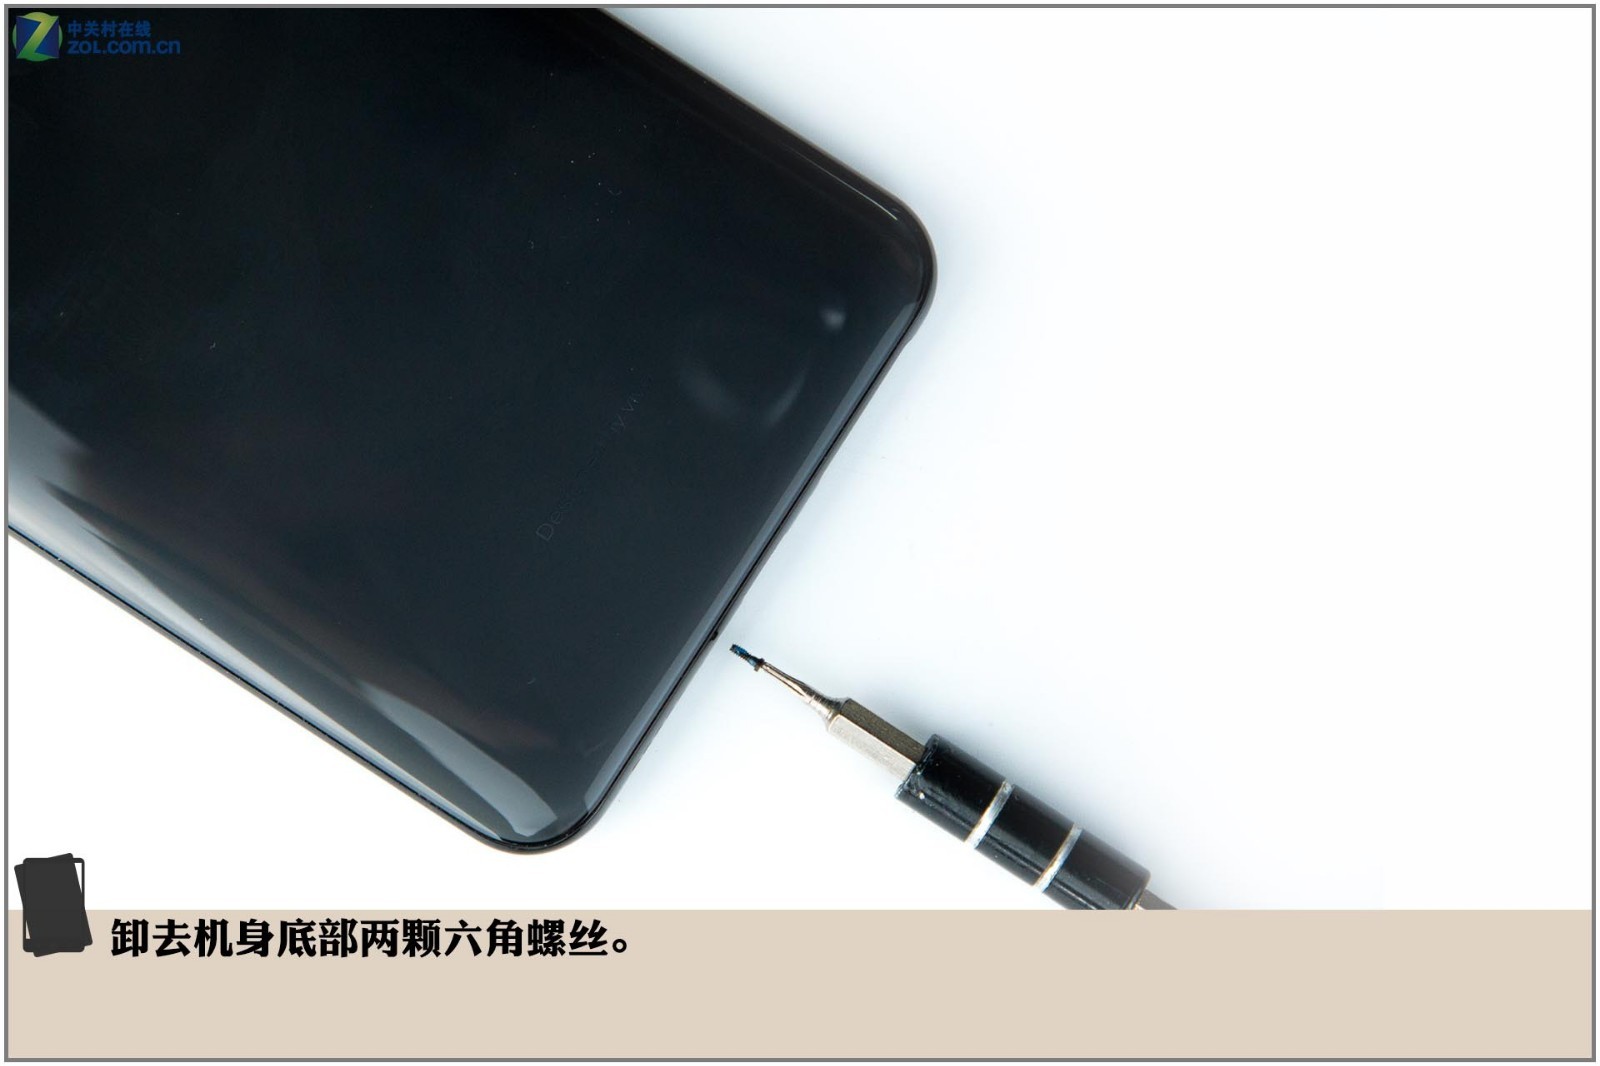
Remove the two screws at the bottom of the phone.
The back cover has multiple graphite stickers and is covered with a sponge framework.

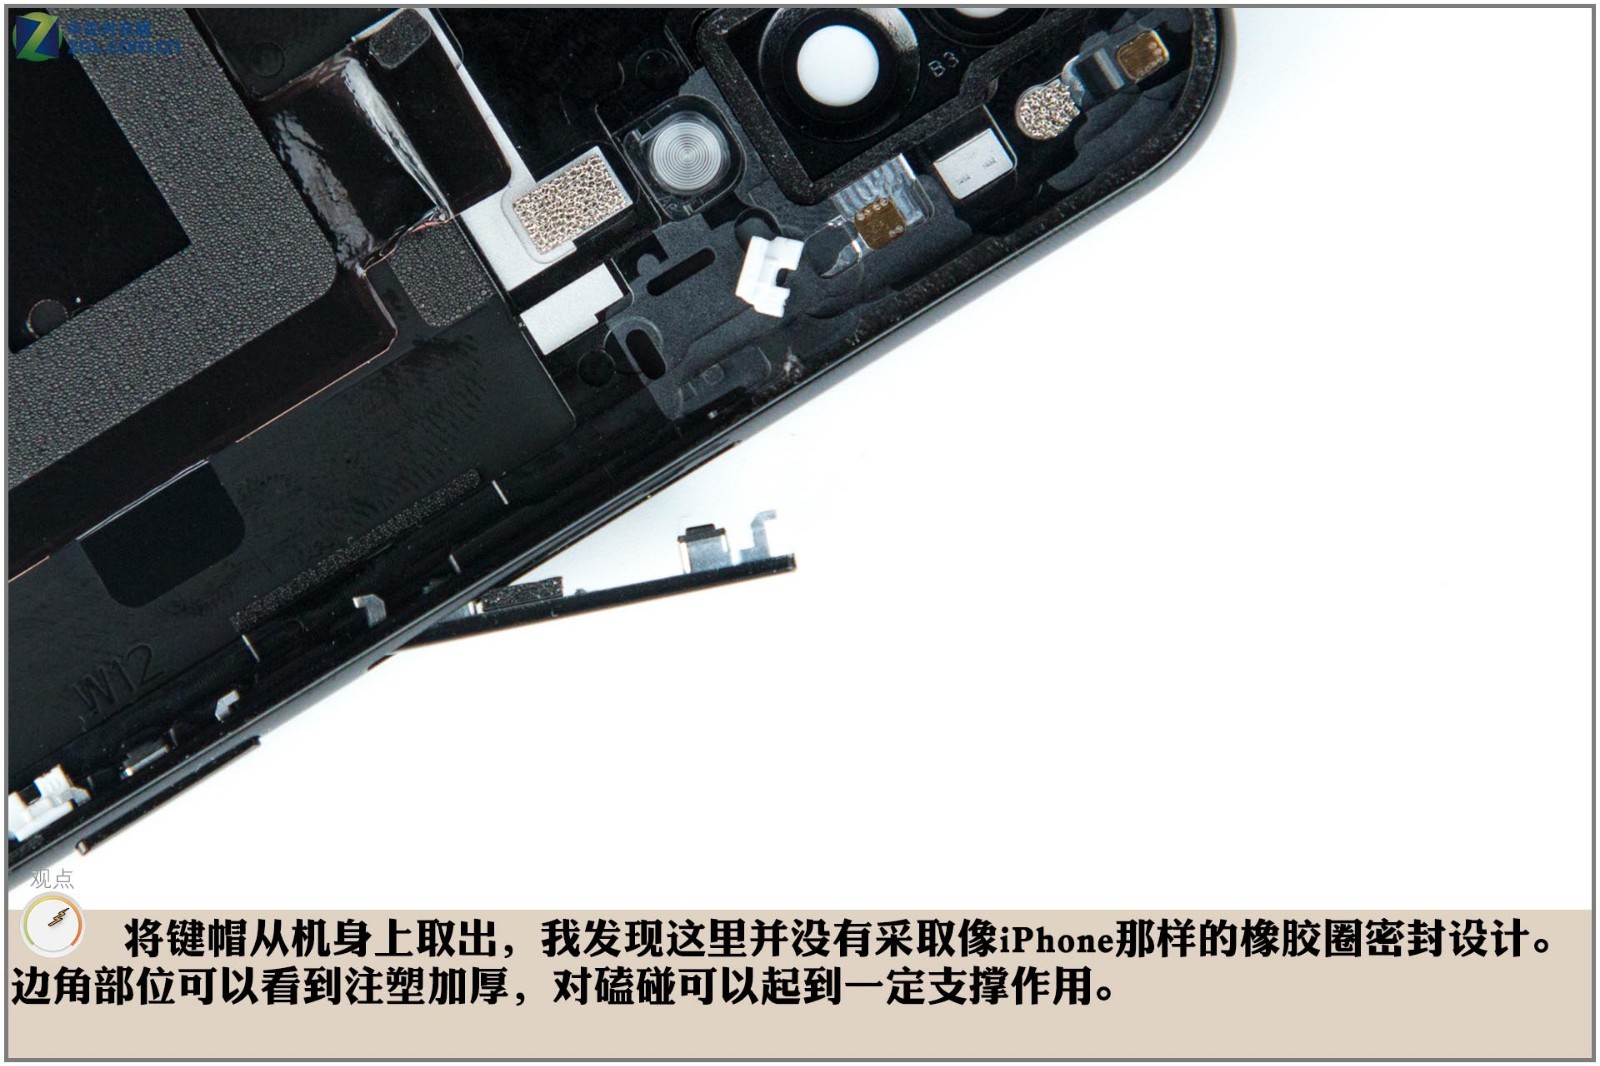
After removing the button on the right side of the body, we found that the button did not have a rubber sealing ring.
The internal design of the vivo X21 is quietly different from its predecessors. The motherboard occupies less space, while the area taken up by the bottom module has increased, due to the design adjustment of moving the SIM card tray from the top to the bottom.

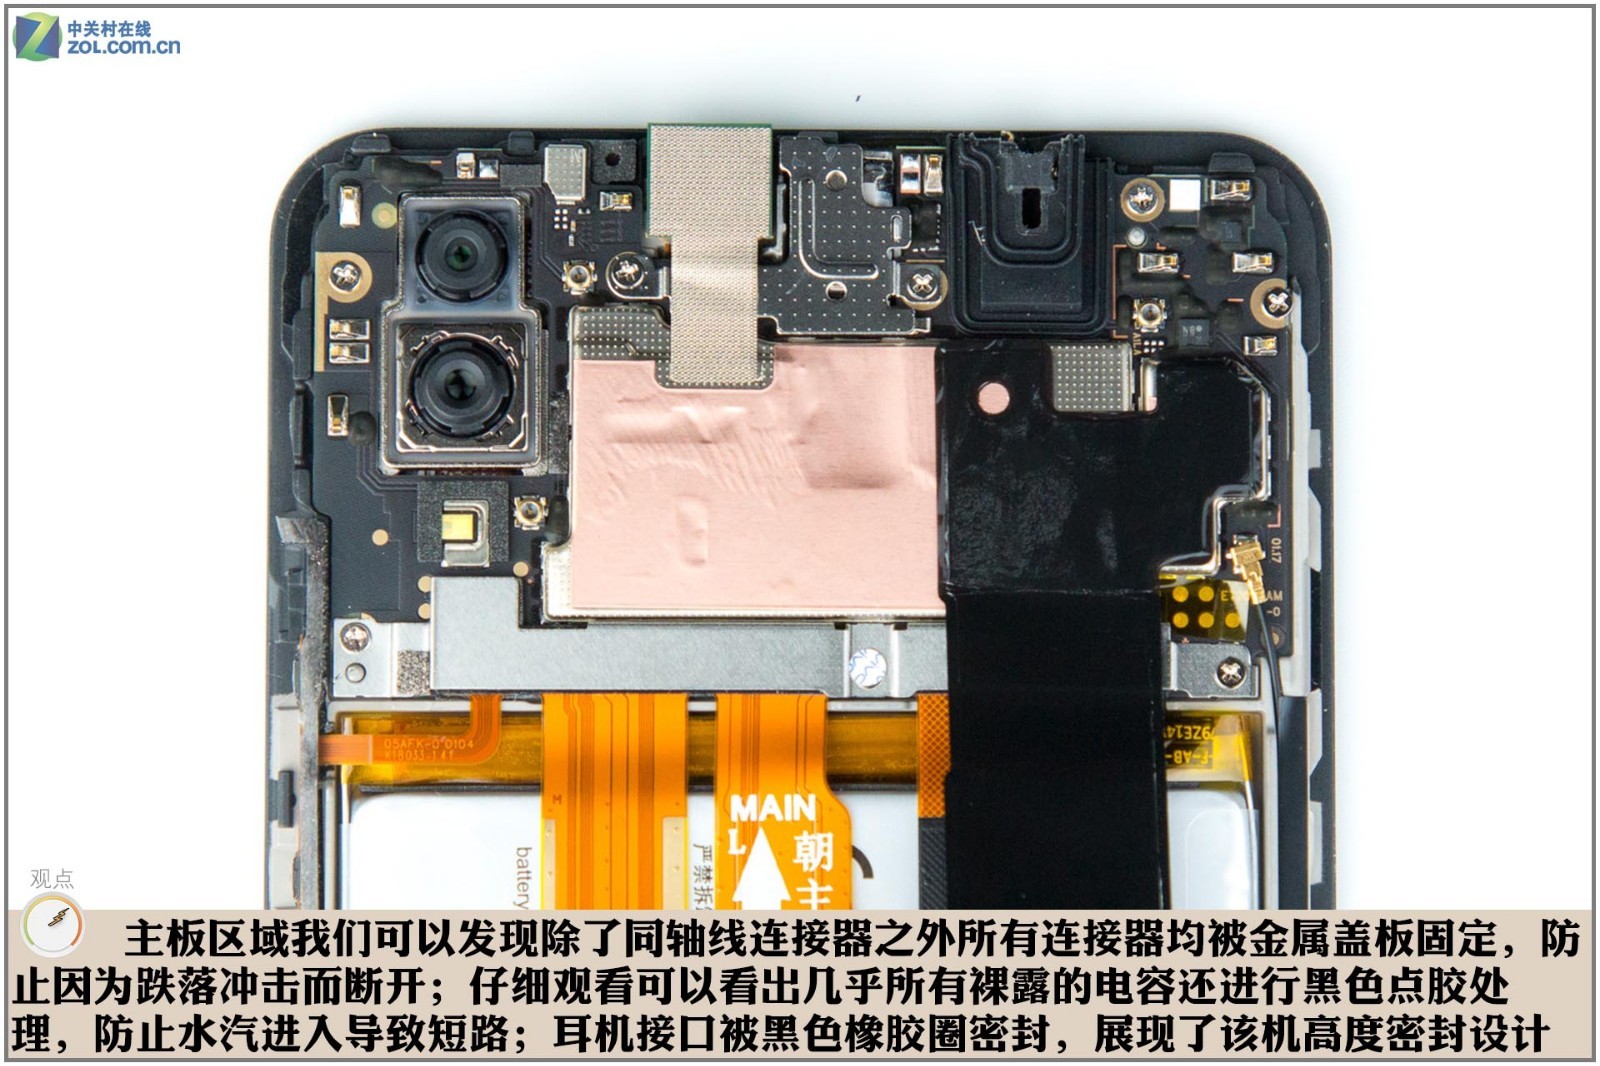
We found that all connectors on the motherboard are secured with metal plates to prevent them from falling off, except for the coaxial cable. In addition, all visible capacitors are coated with black glue to prevent short circuits caused by moisture. The headphone jack is sealed with a black rubber ring, highlighting the phone’s excellent sealing performance.
Next, we need to disconnect the ribbon cables from the motherboard. Firstly, we need to uncover the graphite sticker on the metal shield. There is a heat-dissipating copper sheet under the graphite sticker. Such a heat dissipation design is not common since most phones usually choose either a graphite sticker or a heat dissipation copper pipe.

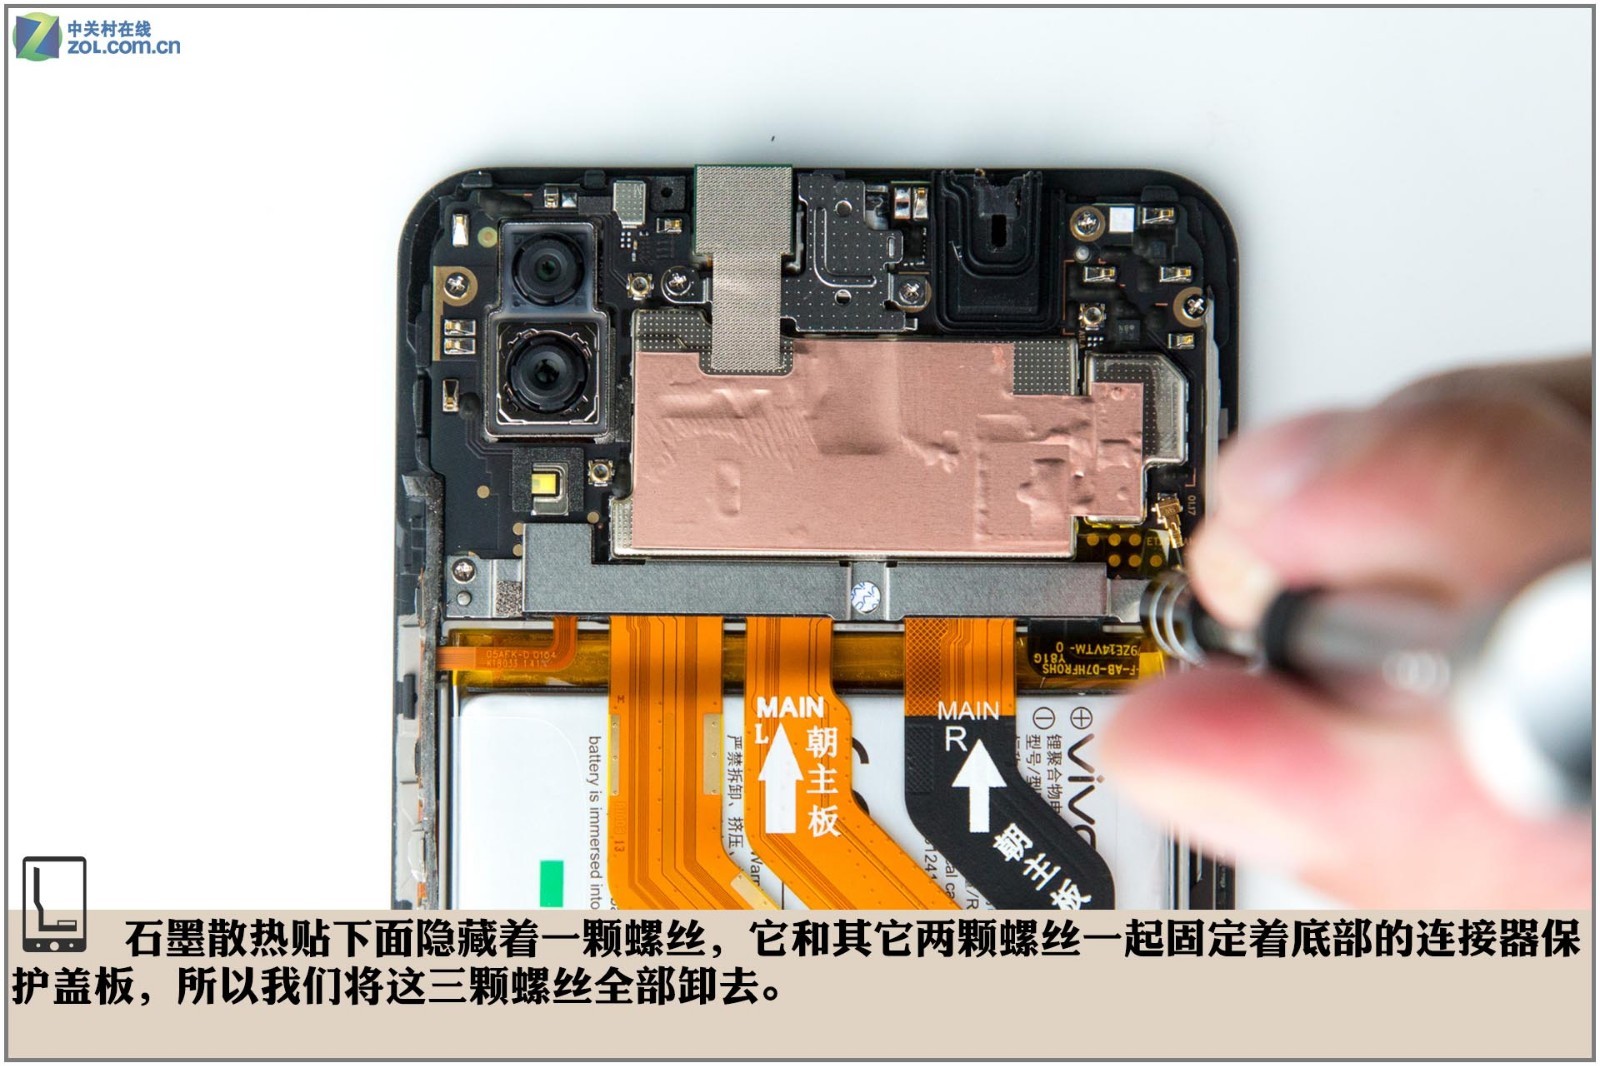
There is a screw hidden under the graphite sticker. This screw and the other two screws are used to secure the metal plate at the bottom. We removed these screws.
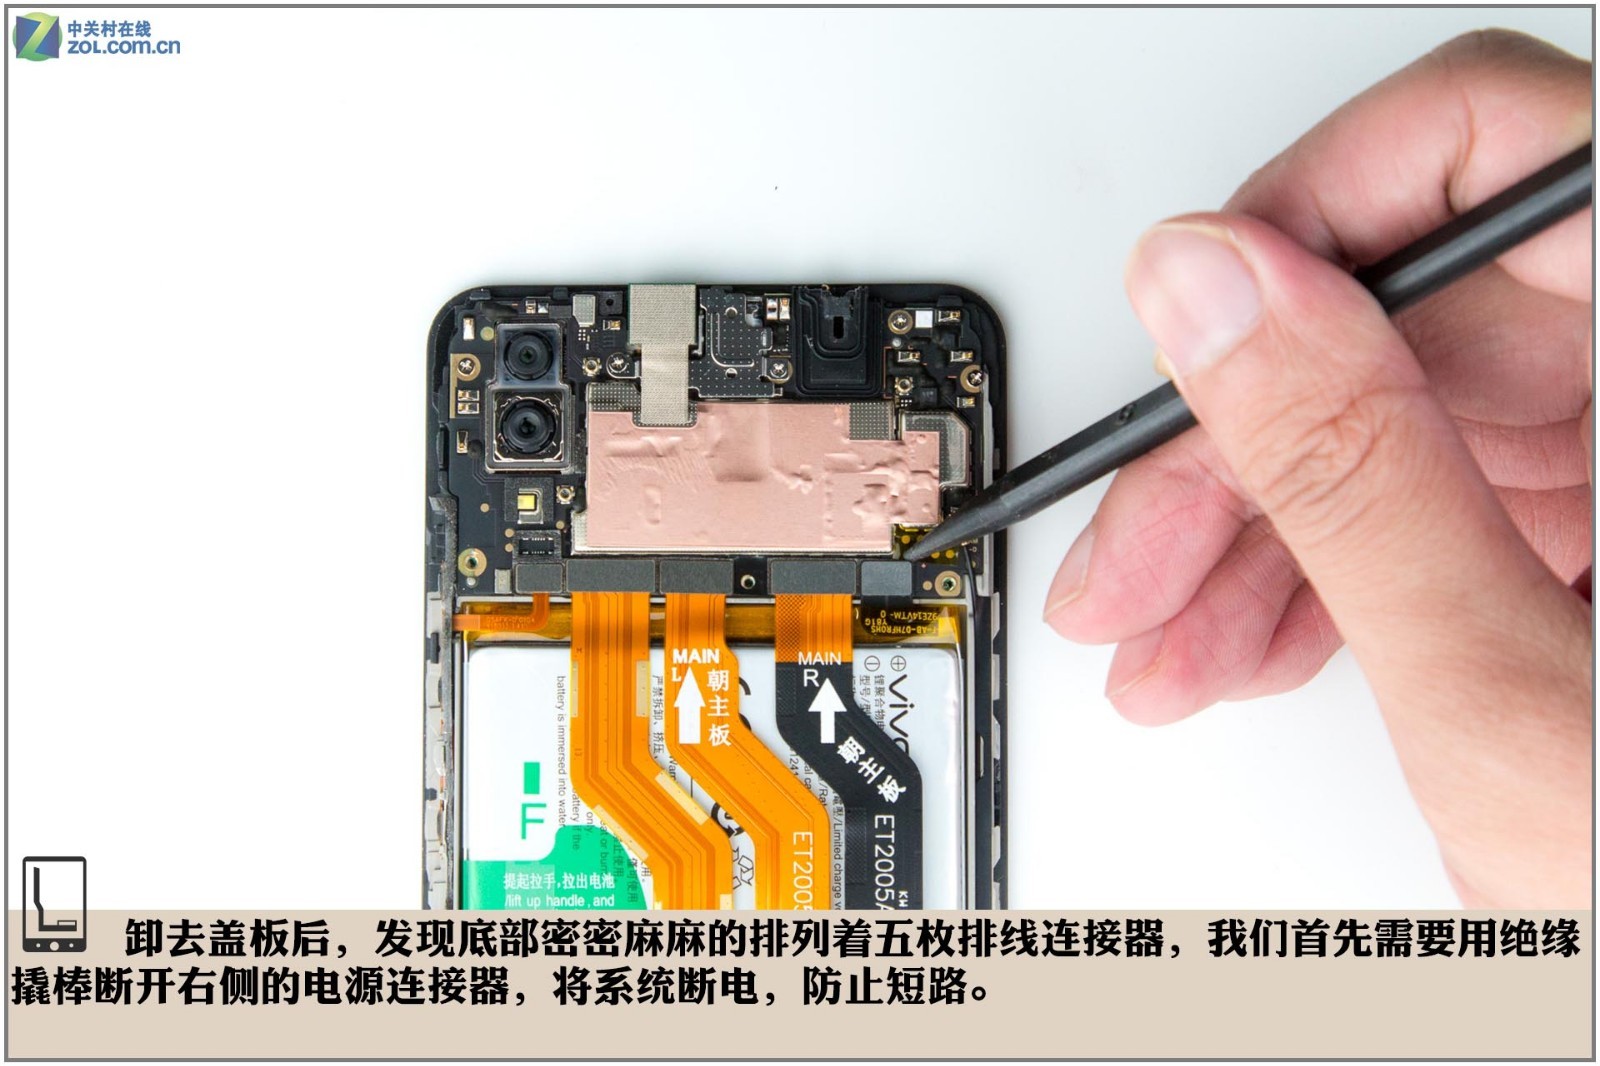
After removing the metal plate, we found five ribbon cables. So, we need to use an insulating pry to disconnect the battery connector on the right to cut off the system power and prevent a short circuit.
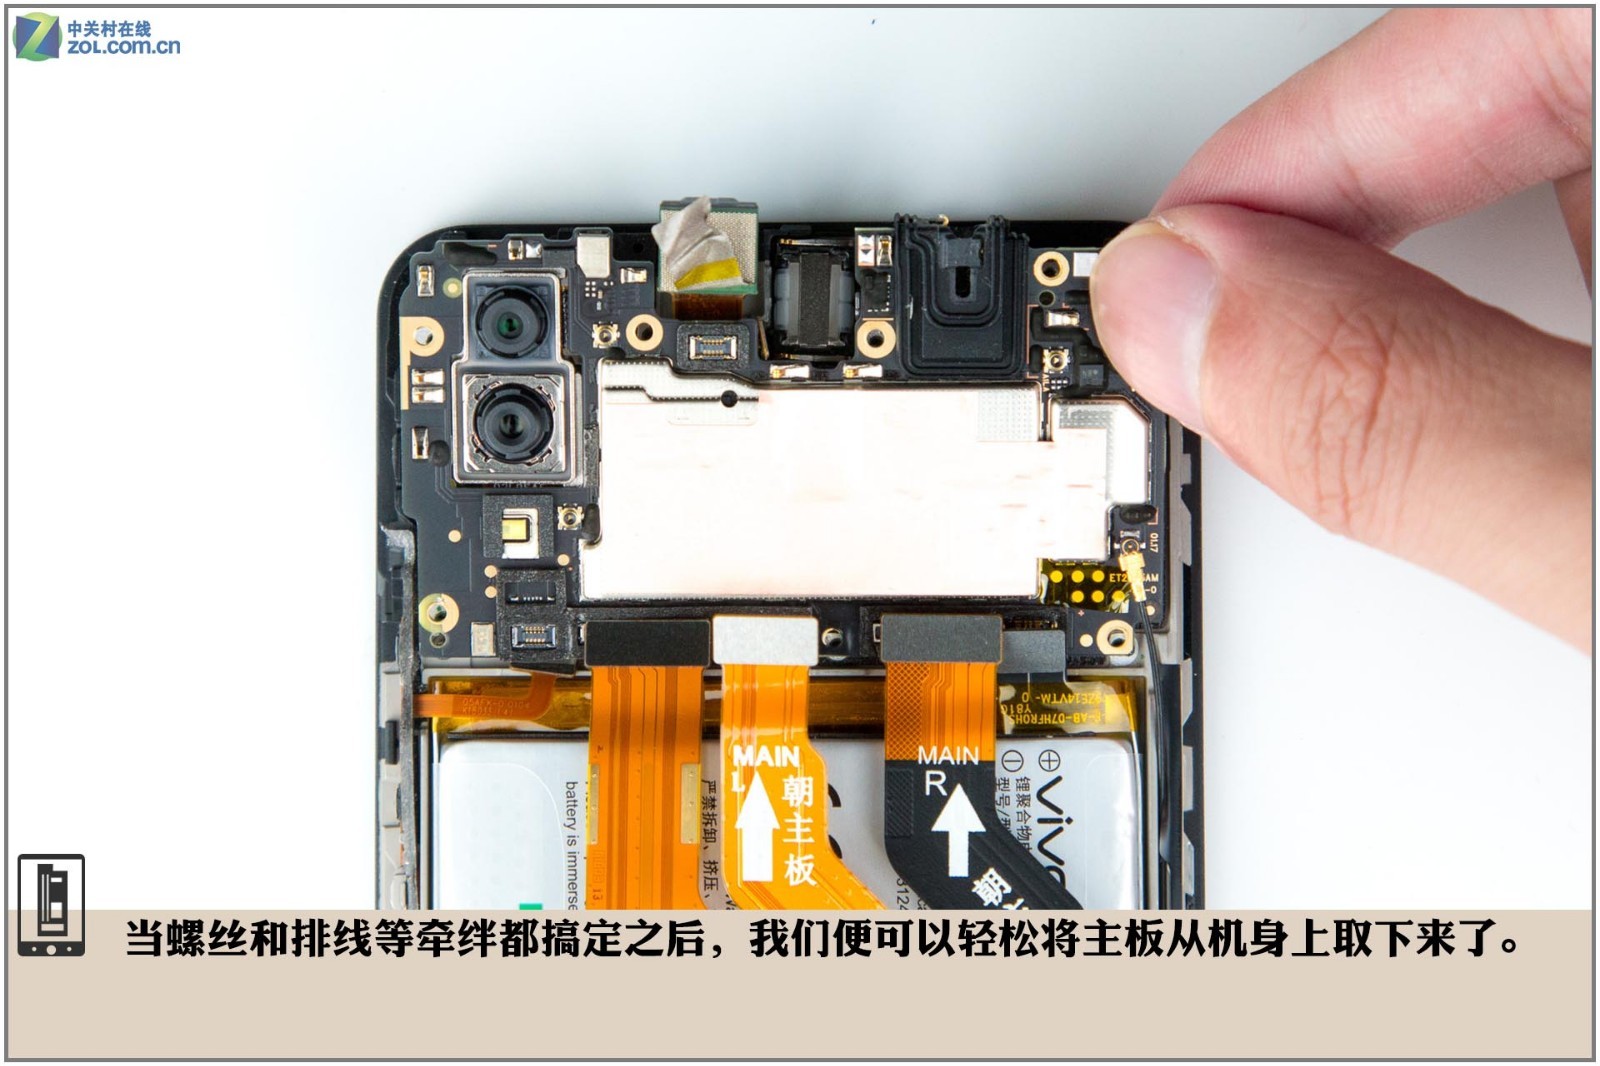
Remove the screws securing the motherboard and disconnect all connectors on the motherboard, and we can easily take out the motherboard.
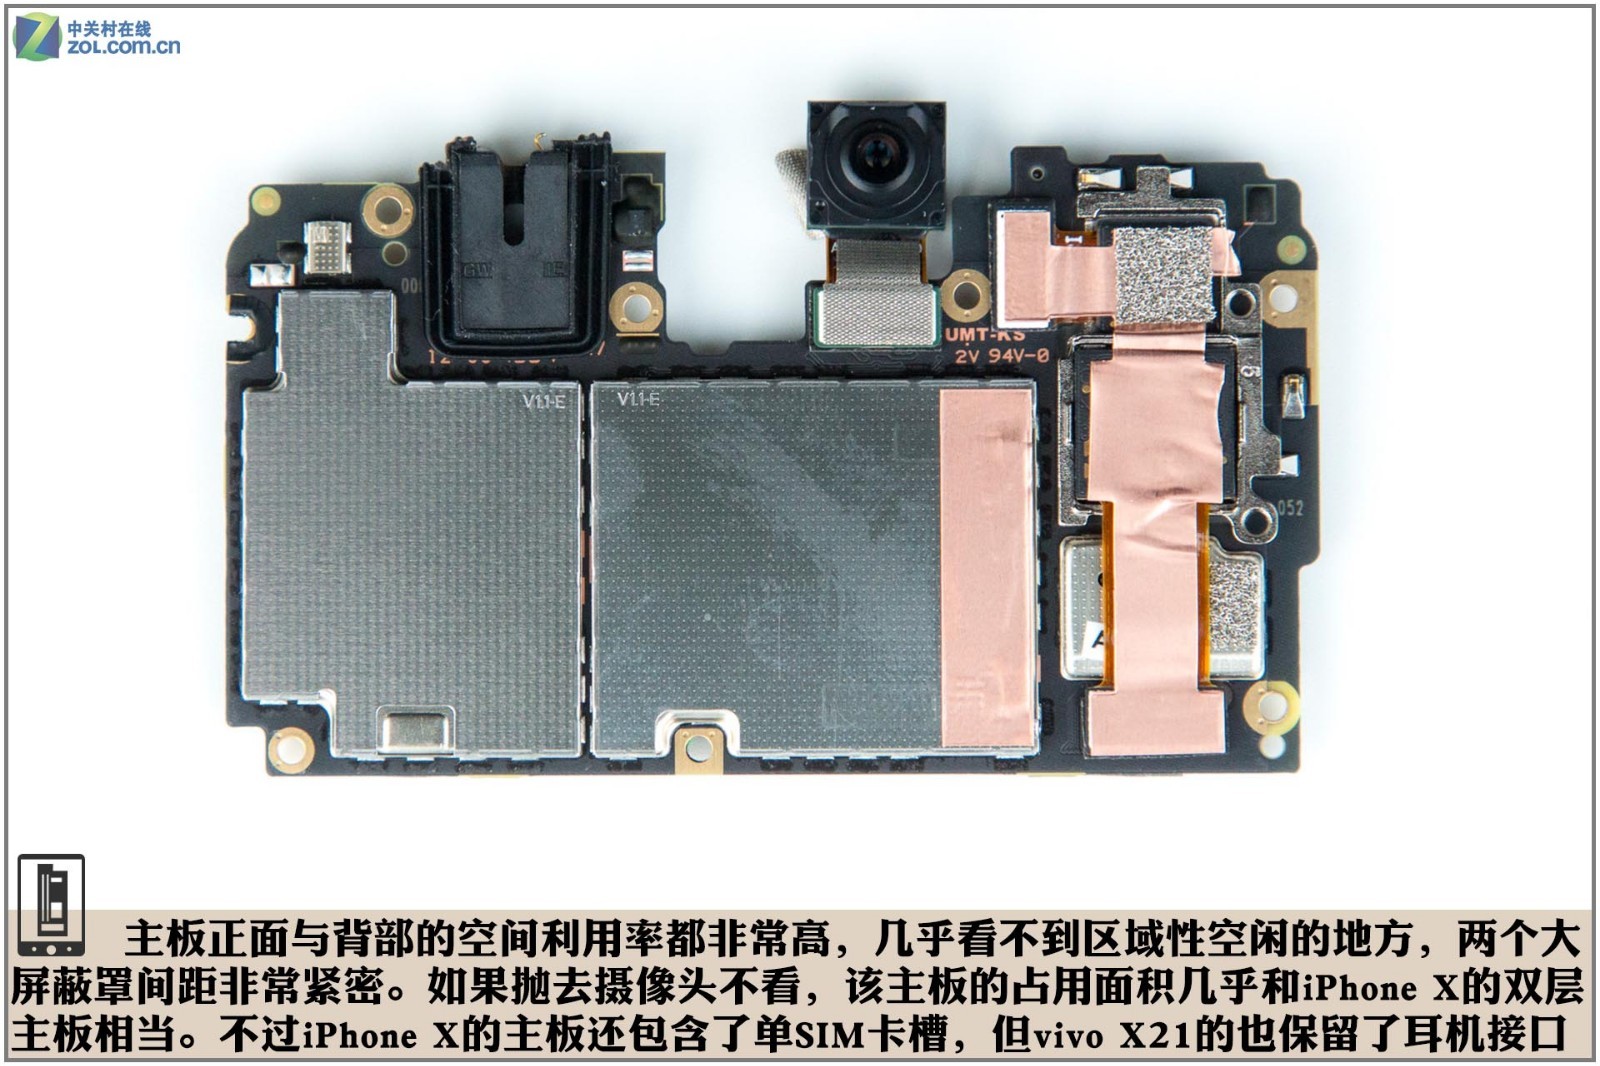
The spacing between the two metal shields is extremely compact. Excluding the camera module, the area occupied by the motherboard is roughly equivalent to the dual-layer motherboard of the iPhone X. However, the iPhone X motherboard only has one SIM card slot, while the vivo X21 motherboard still retains the 3.5mm headphone jack.
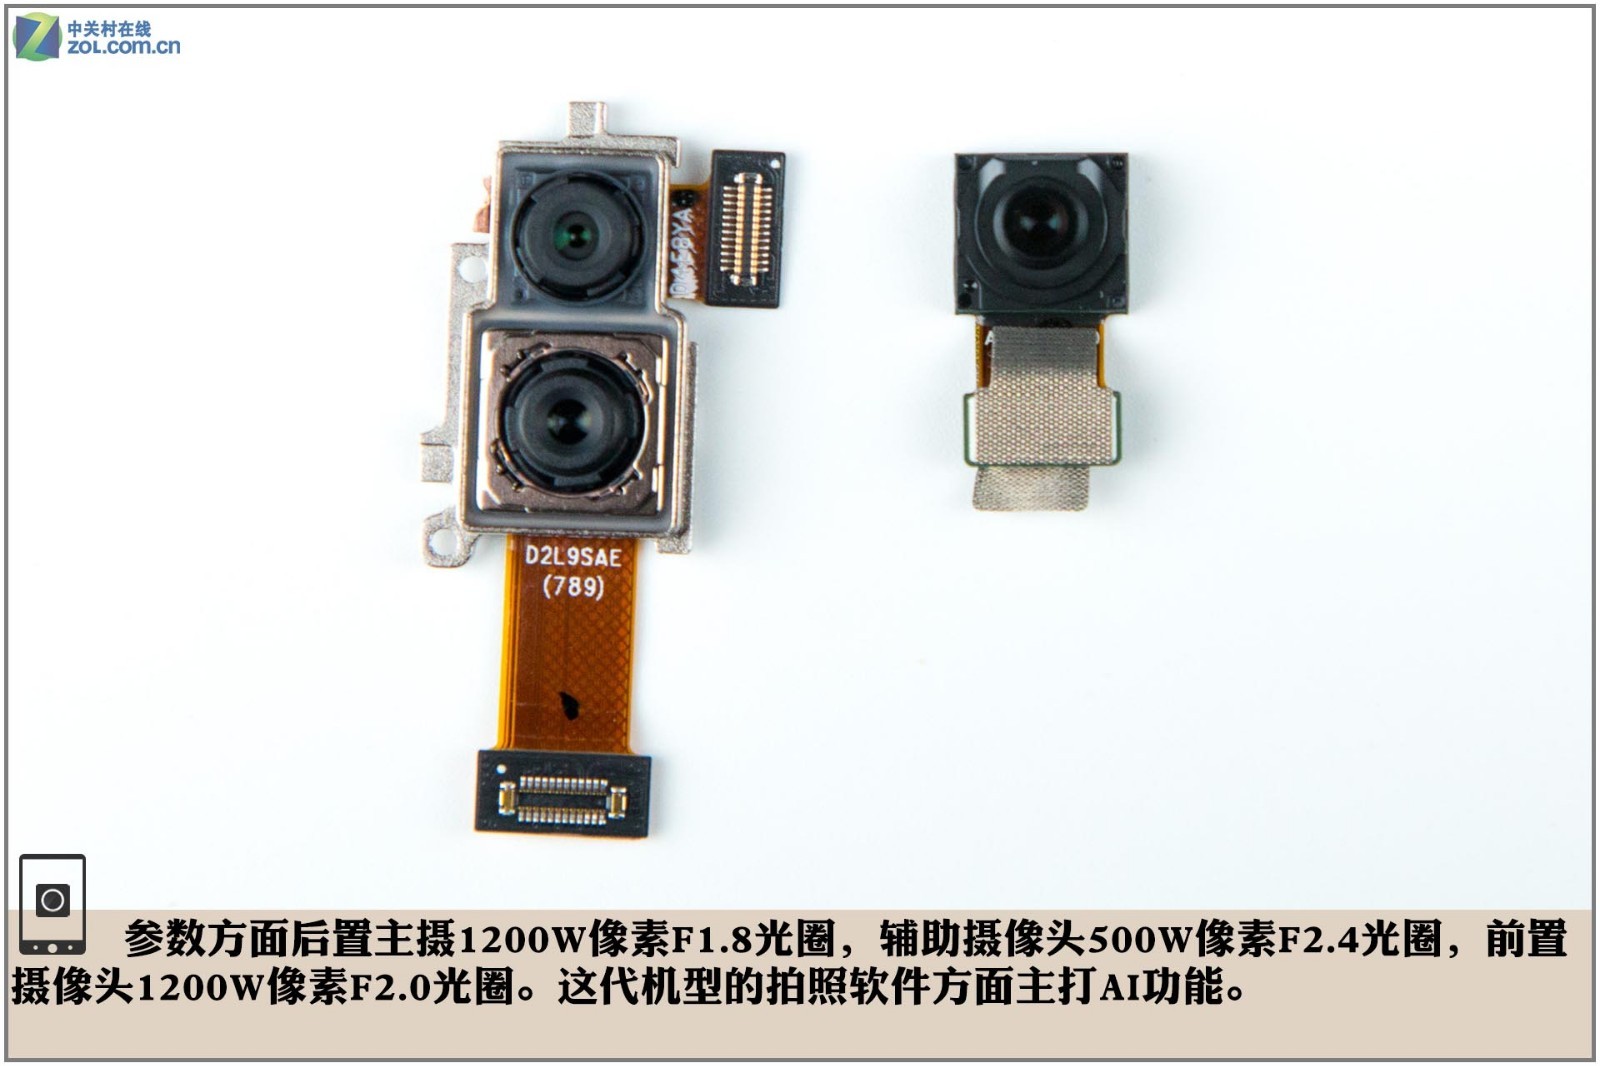
The phone has a 12MP rear camera with an F/1.8 aperture and a secondary 5MP rear camera with an F/2.4 aperture. It also features a 12MP camera with an F/2.0 aperture on the front.
The orange part is an octa-core Qualcomm Snapdragon 660AIE processor, which has four Cortex-A73 cores at 2.2GHz and four Cortex-A53 cores at 1.8GHz. The memory and flash storage are located in the green area. There is no information on them, but the manufacturer has confirmed that it comes with 6GB of RAM and 128GB of storage. The blue area is a Skyworks 77643-31 chip, and the red part is a Qualcomm SDR660 RF transceiver.

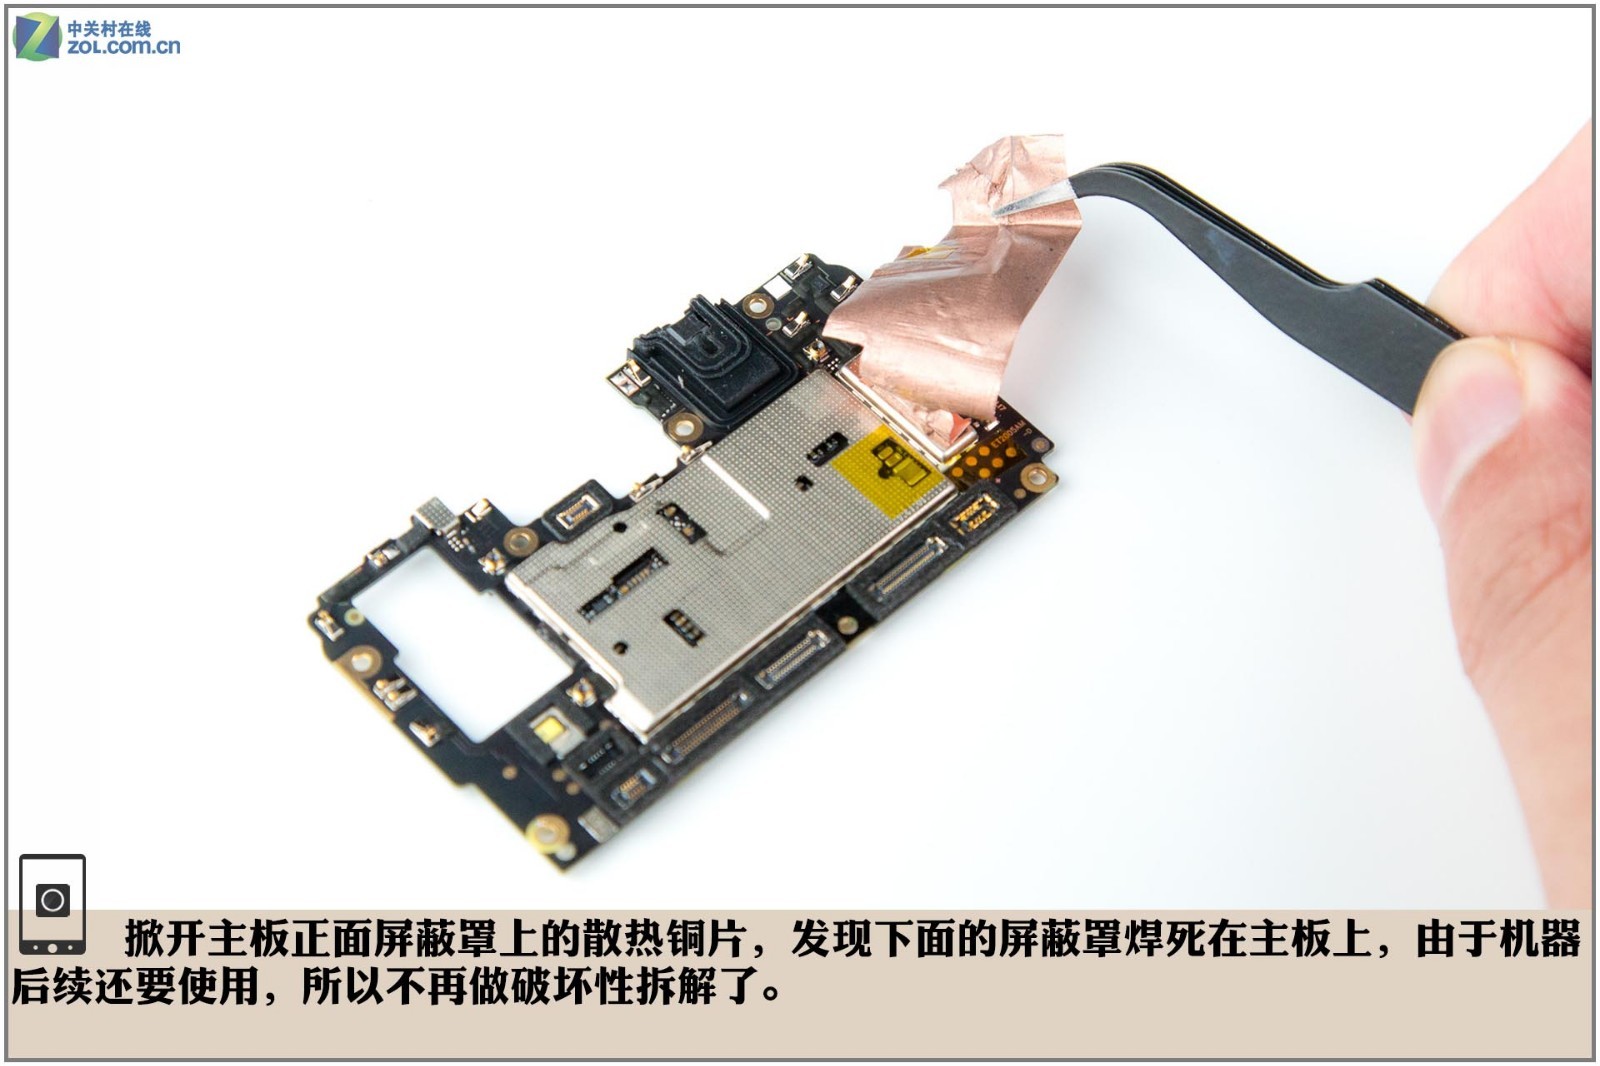
Remove the heat-dissipating copper sheet of the metal shield on the front of the motherboard. We found that the metal shield is soldered to the motherboard and cannot be removed. Considering that internal components of the device should not be damaged, we stopped the operation of removing the metal shield.
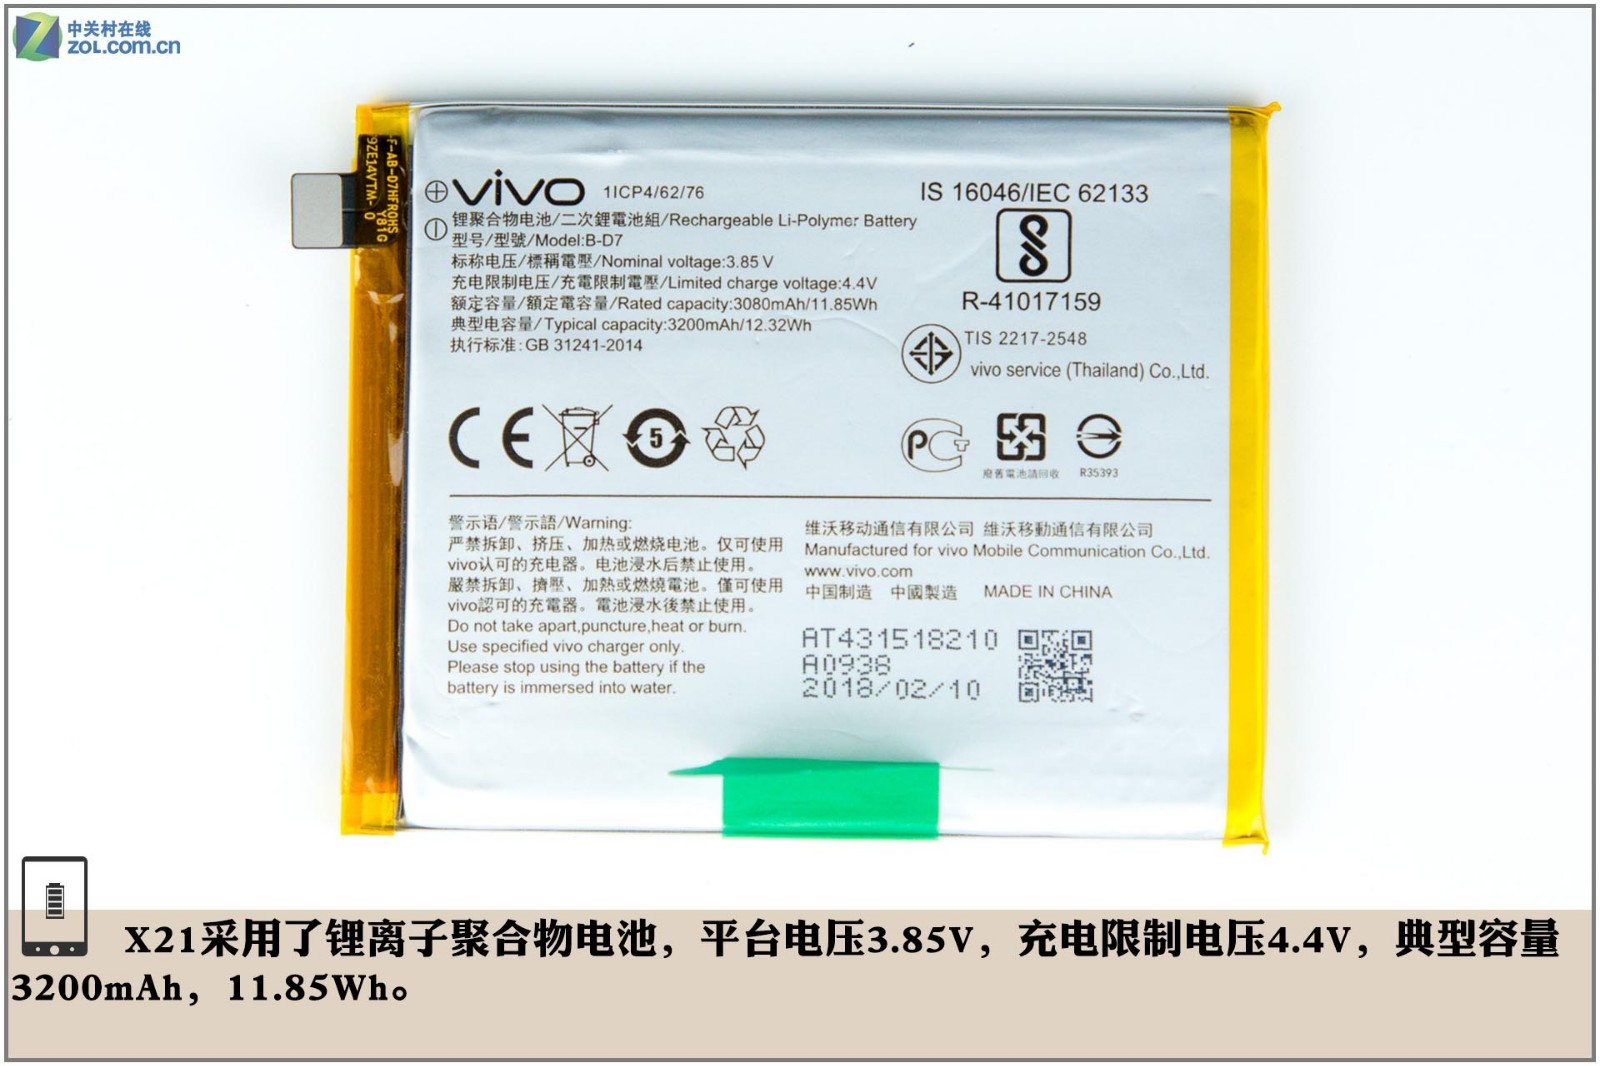
The X21 comes with a Li-Polymer battery. Its normal voltage is 3.85V, and the maximum charging voltage is 4.4V. The battery capacity is 3200mAh, which is 11.85Wh.
Then, remove the speaker module. We know this speaker comes from ACC. Therefore, we can infer that this is a new patent from ACC Technology, aimed at achieving clearer sound quality.

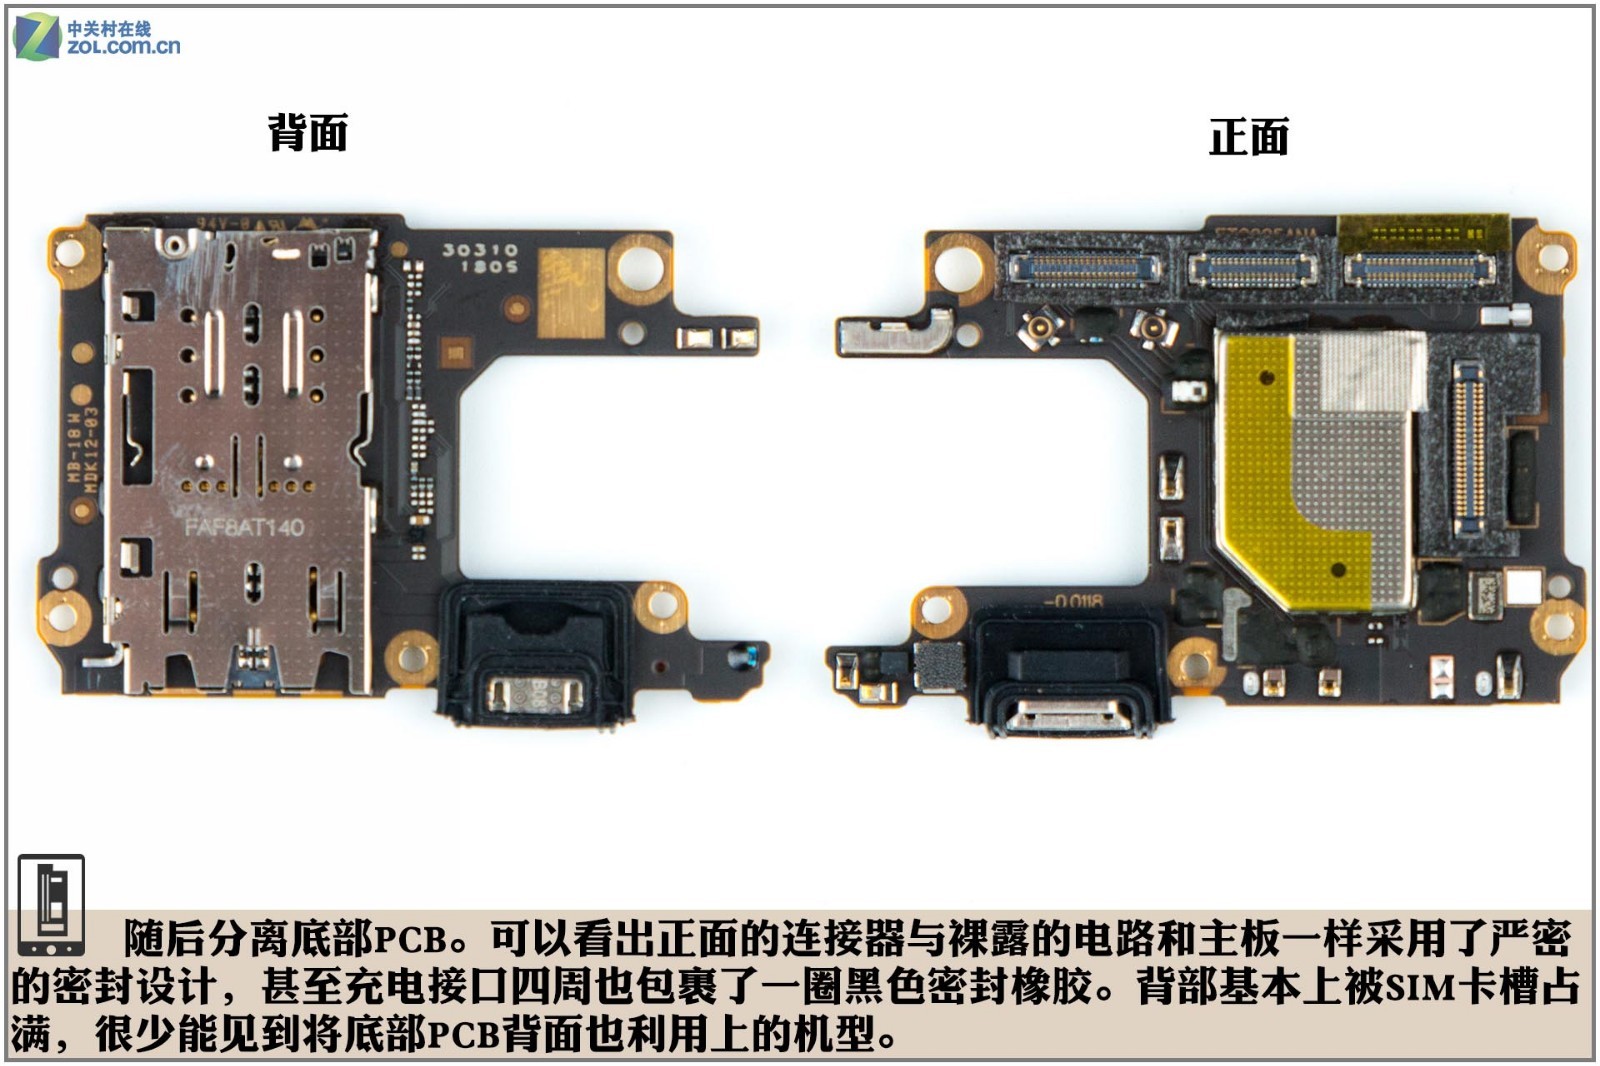
Remove the PCB board. The front connector and visible circuit adopt a rigid sealing design as the motherboard, while the charge port is protected by a black rubber ring. The back of the PCB is basically occupied by a SIM card slot.
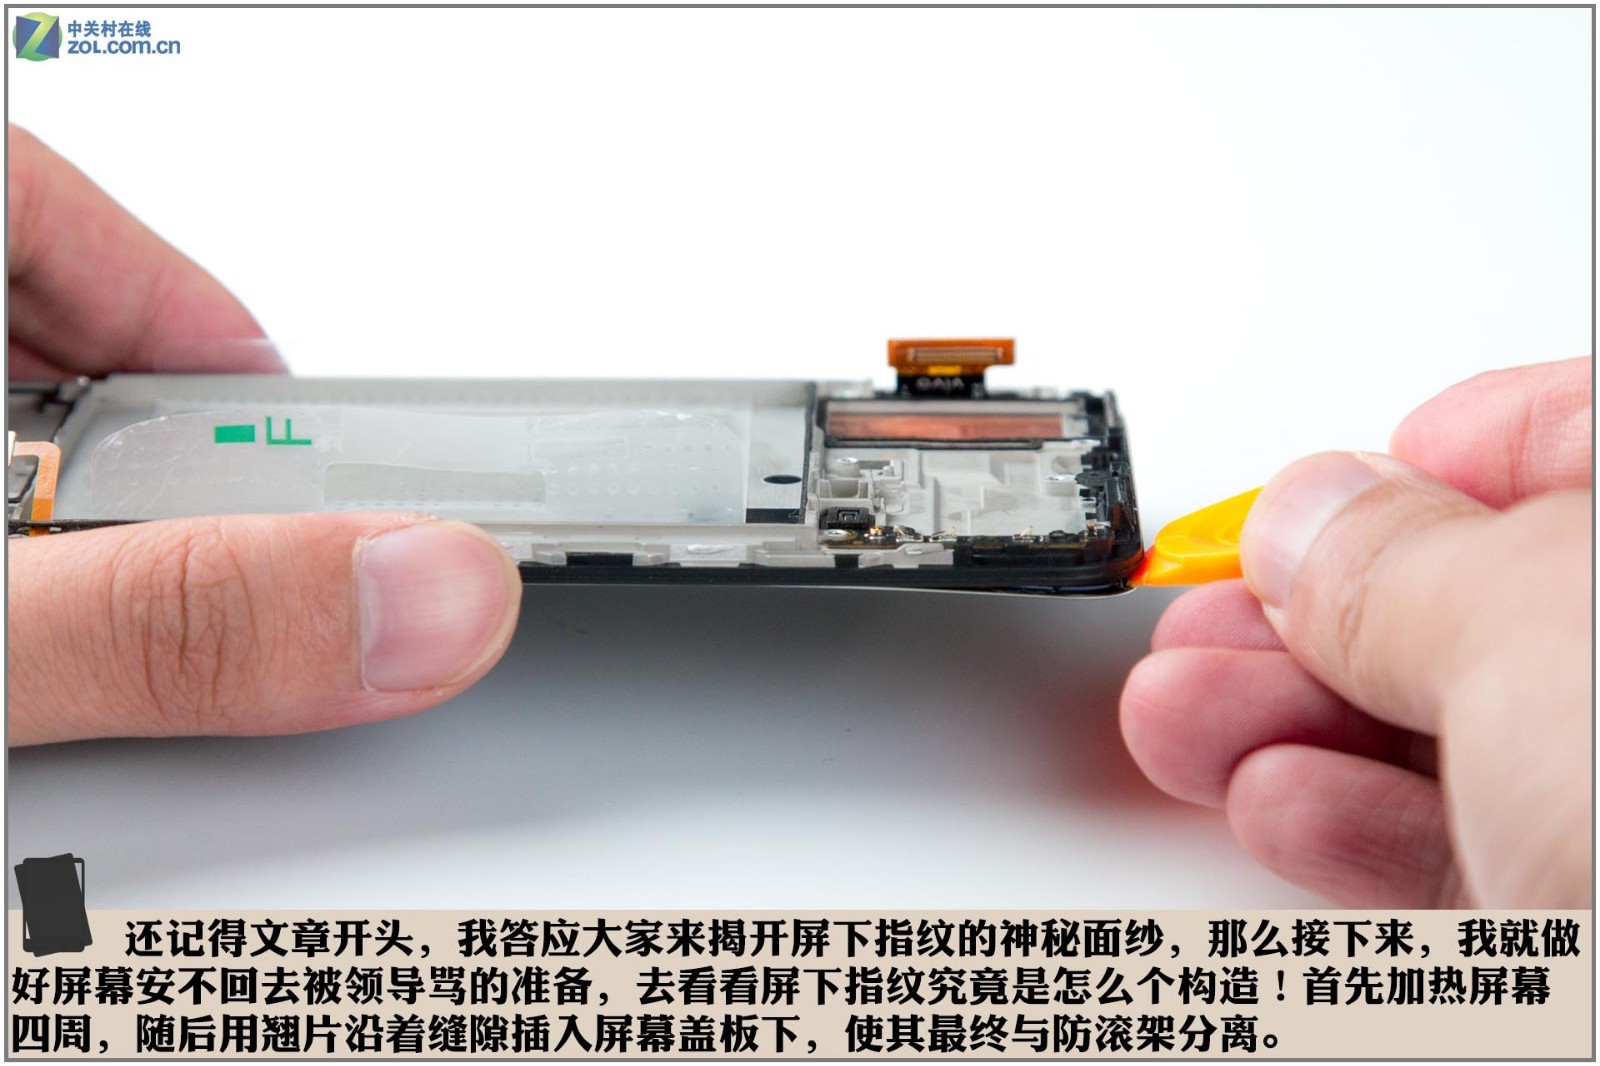
Now, we will reveal the secrets of the under-screen fingerprint scanner. Heat the screen edges, then insert a pick into the gap to separate the screen from the roll cage.
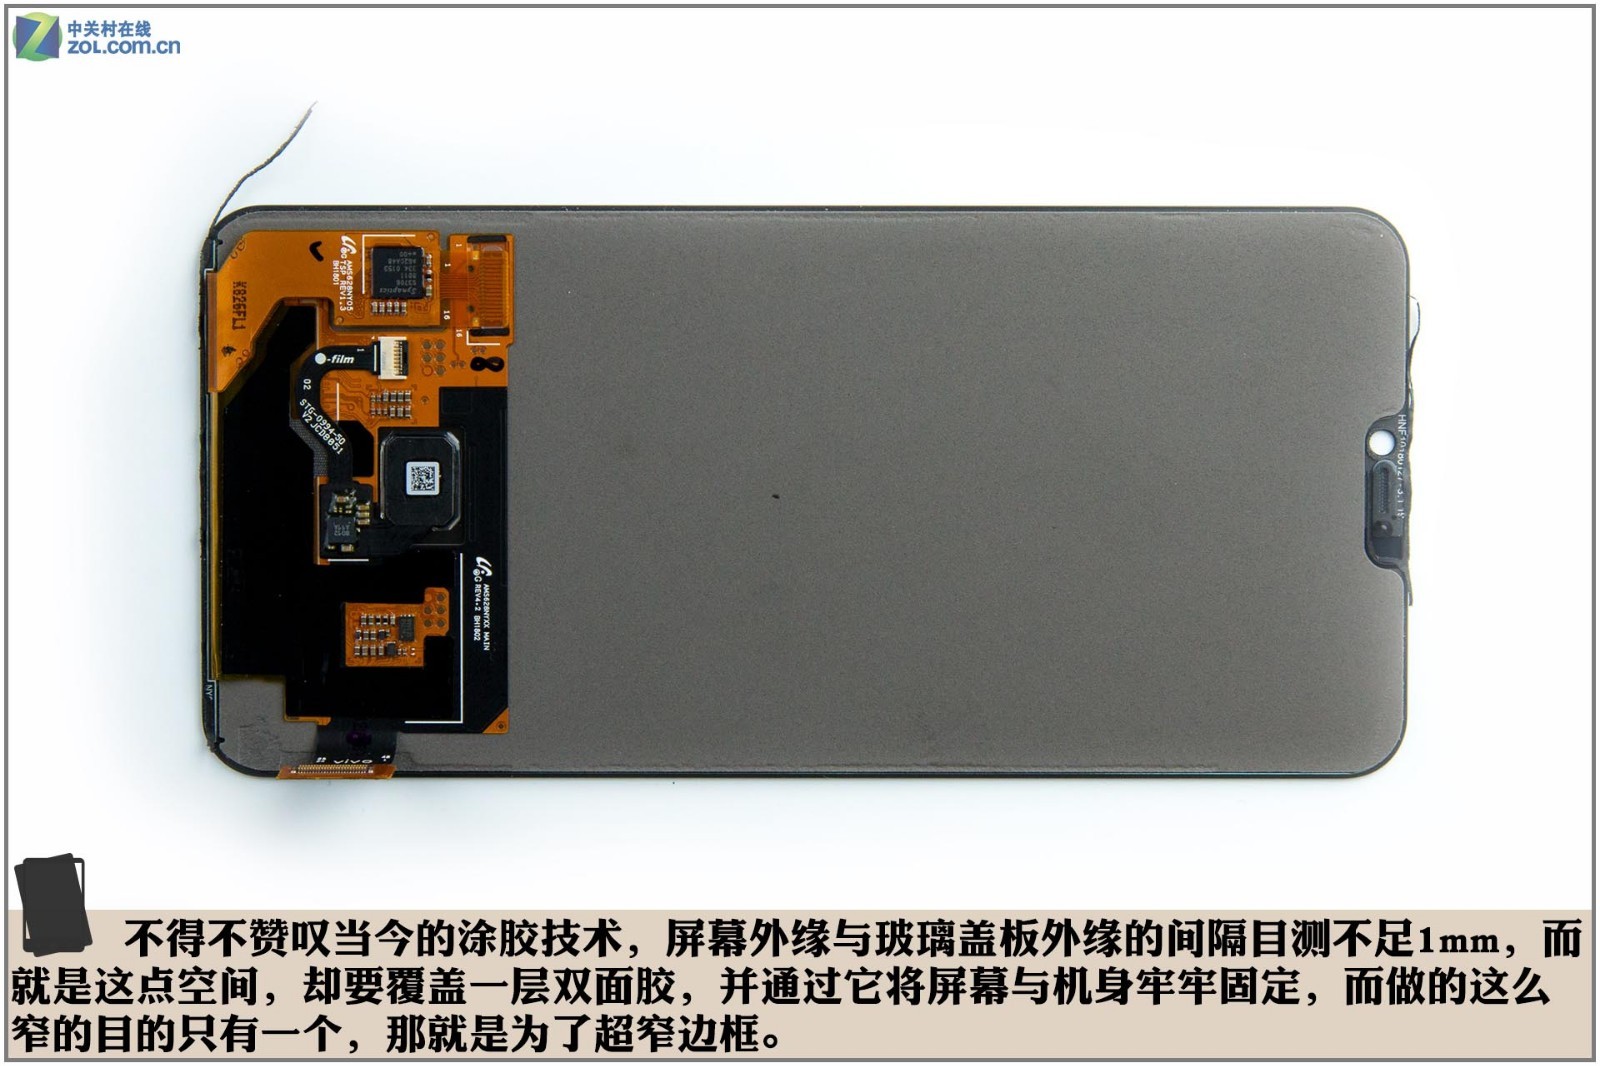
The edge of the screen is less than 1 mm away from the edge of the glass panel. This narrow gap needs to be covered with double-sided tape to secure the screen to the phone body. This extremely narrow bezel design is precisely reserved for this purpose.
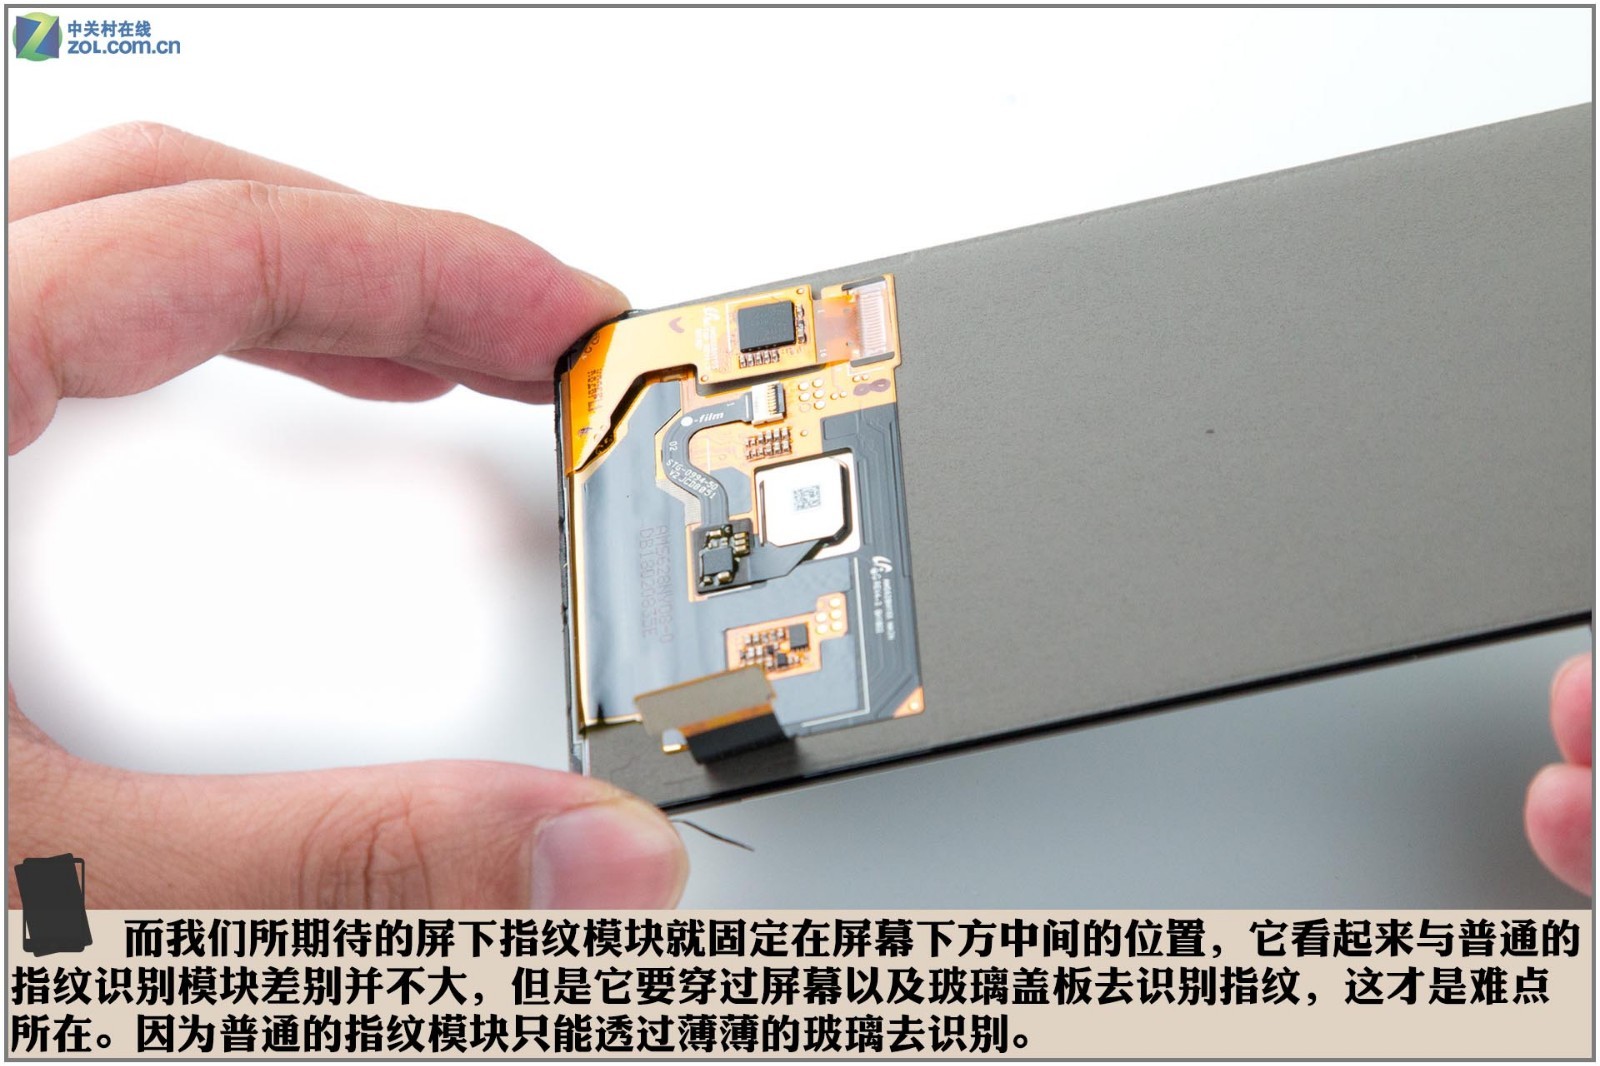
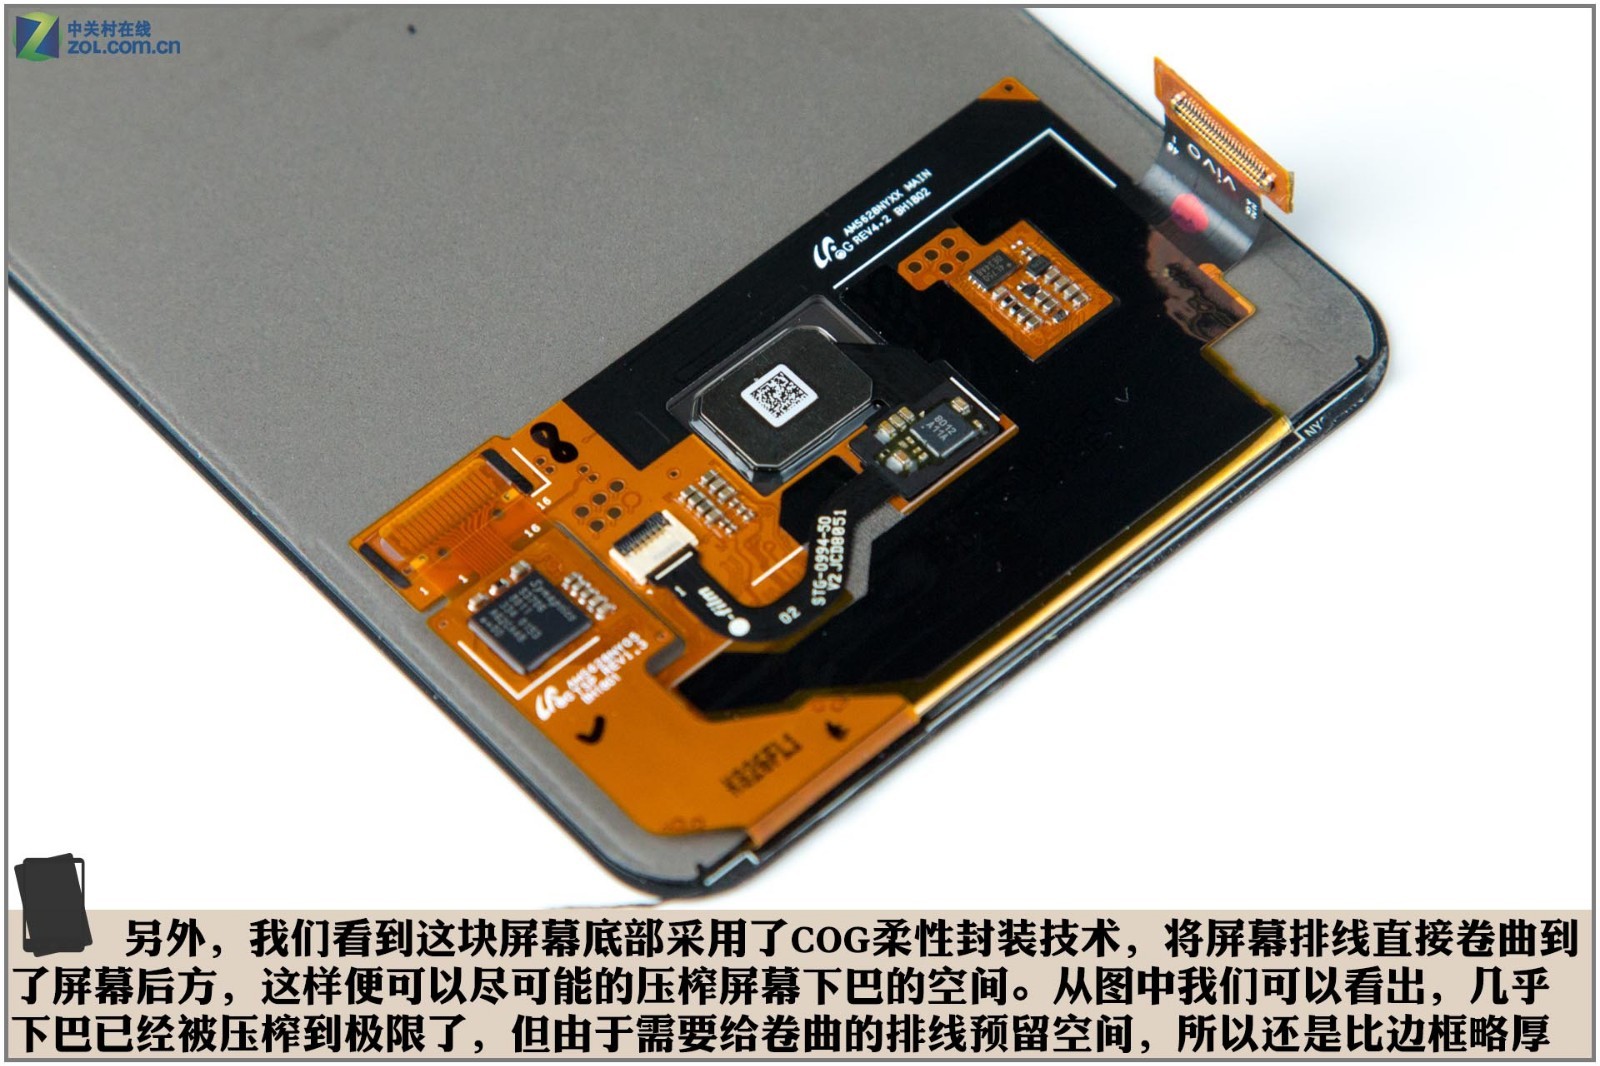
The under-display fingerprint reader is placed right in the middle of the screen. This fingerprint reader looks no different from other fingerprint readers, but it needs to be recognized through the screen and the glass panel. That is the difference between it and other fingerprint readers, since the common fingerprint reader can only identify fingerprints through a single layer of glass.
In addition, we found that the phone uses COG packaging technology at the bottom of the screen. This technology allows the screen’s flex cable to be coiled and stored under the screen, making it easier to reduce space at the bottom of the screen. The picture shows that the bottom area is extremely narrow but still thicker than the bezels on two sides, since it needs to leave space for the ribbon cable.
Summary
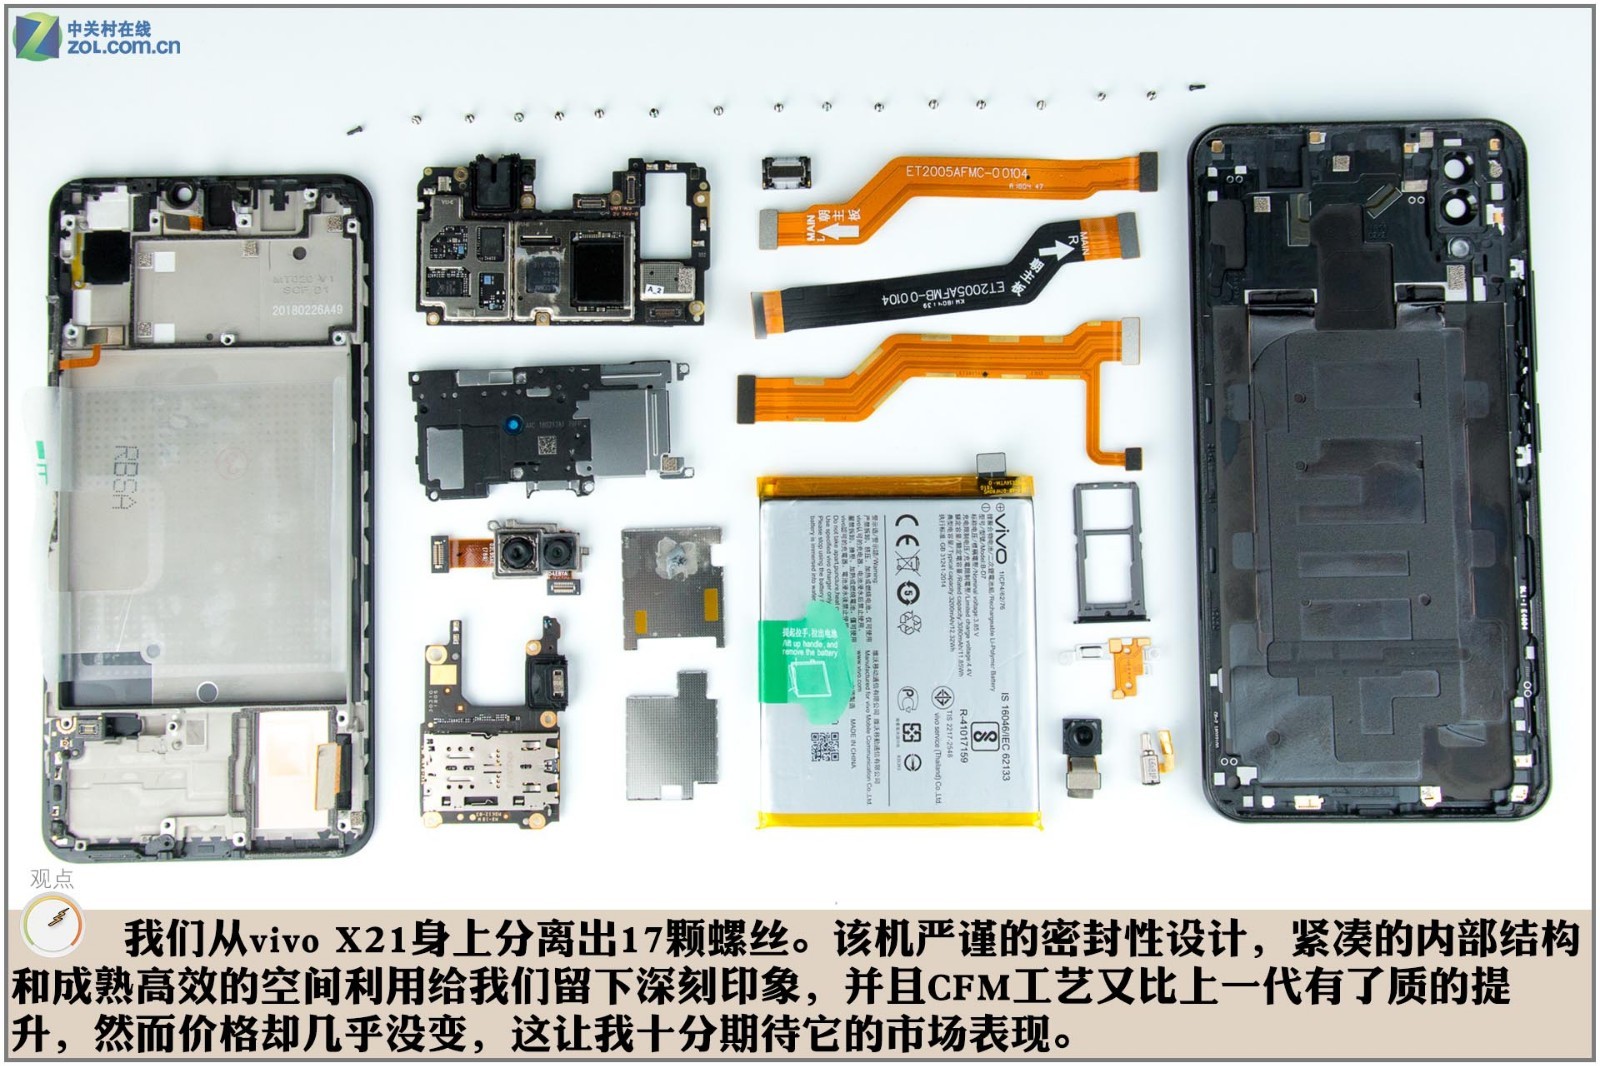
We have removed 17 screws from the phone body in total. The vivo X21 has left a deep impression on me with its tight sealing design, compact internal structure, and high space utilization. In addition, the CFM process has improved a lot compared with its predecessor. We are looking forward to seeing its performance in the market.