As one of the best-selling smartphones on the market, the Xiaomi Mi MIX 2 has made many improvements in its internal design and materials. Now, let’s start taking apart the Xiaomi MIX 2.
Teardown is what we do! Follow us on Facebook for the latest repair news.
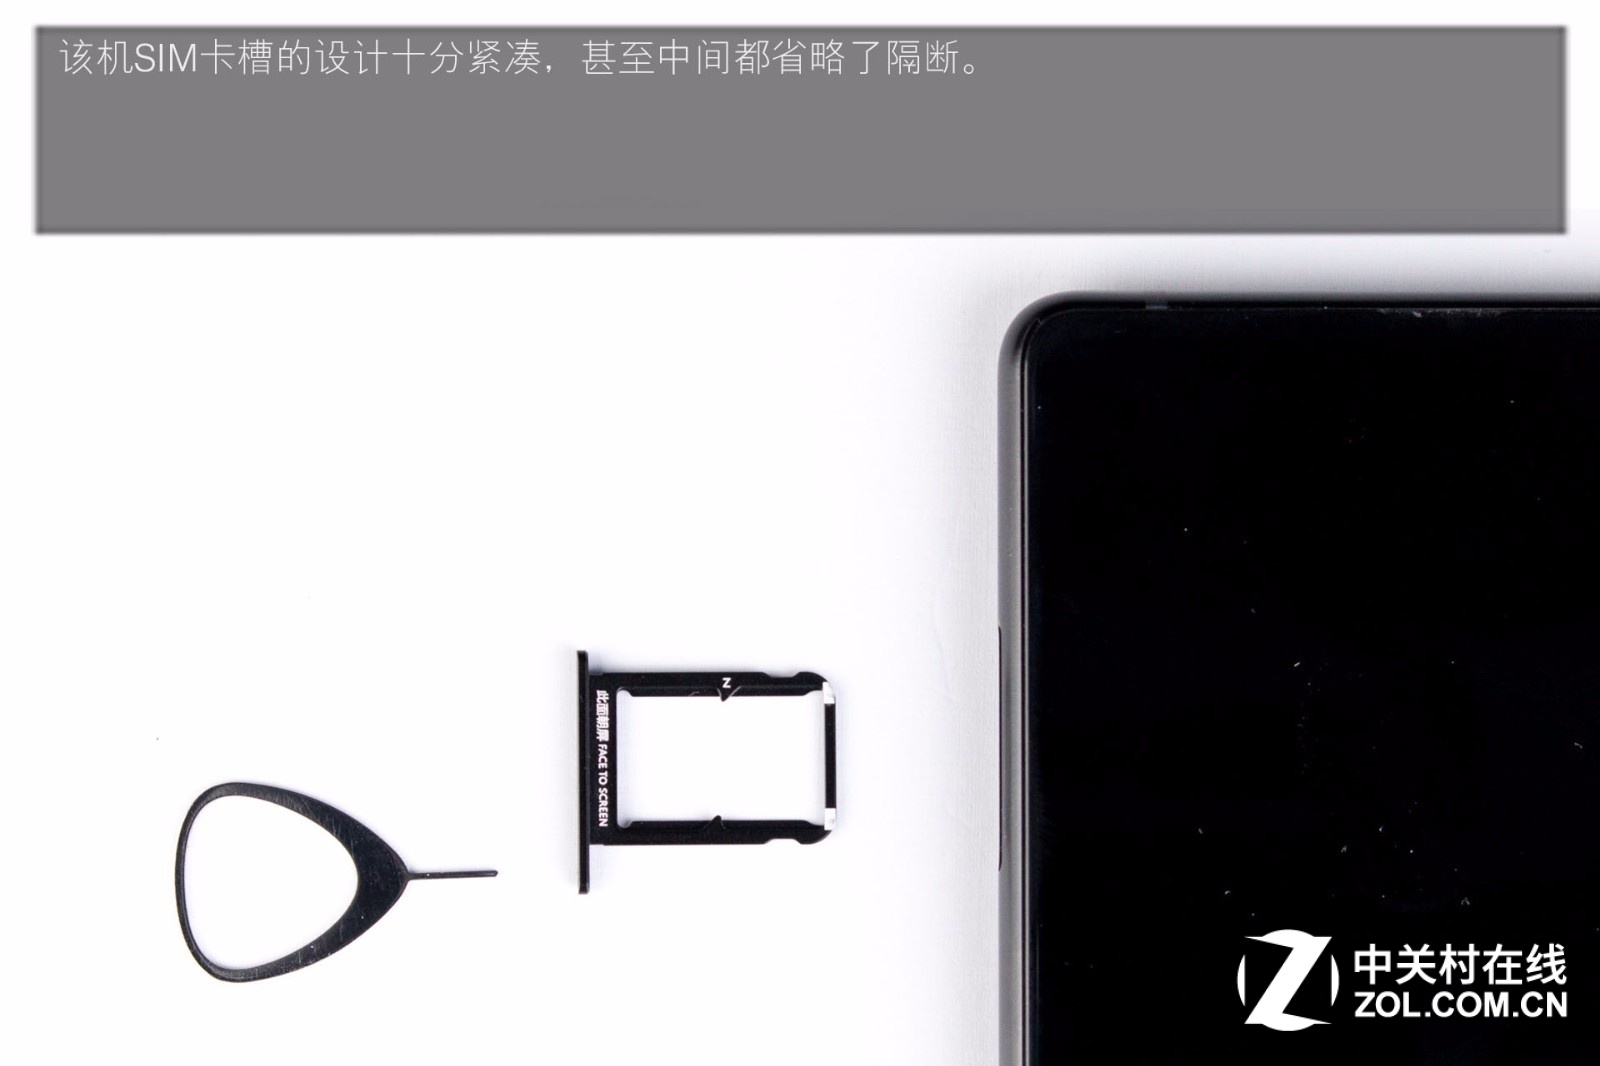
The SIM card tray of this phone features a highly compact design layout.
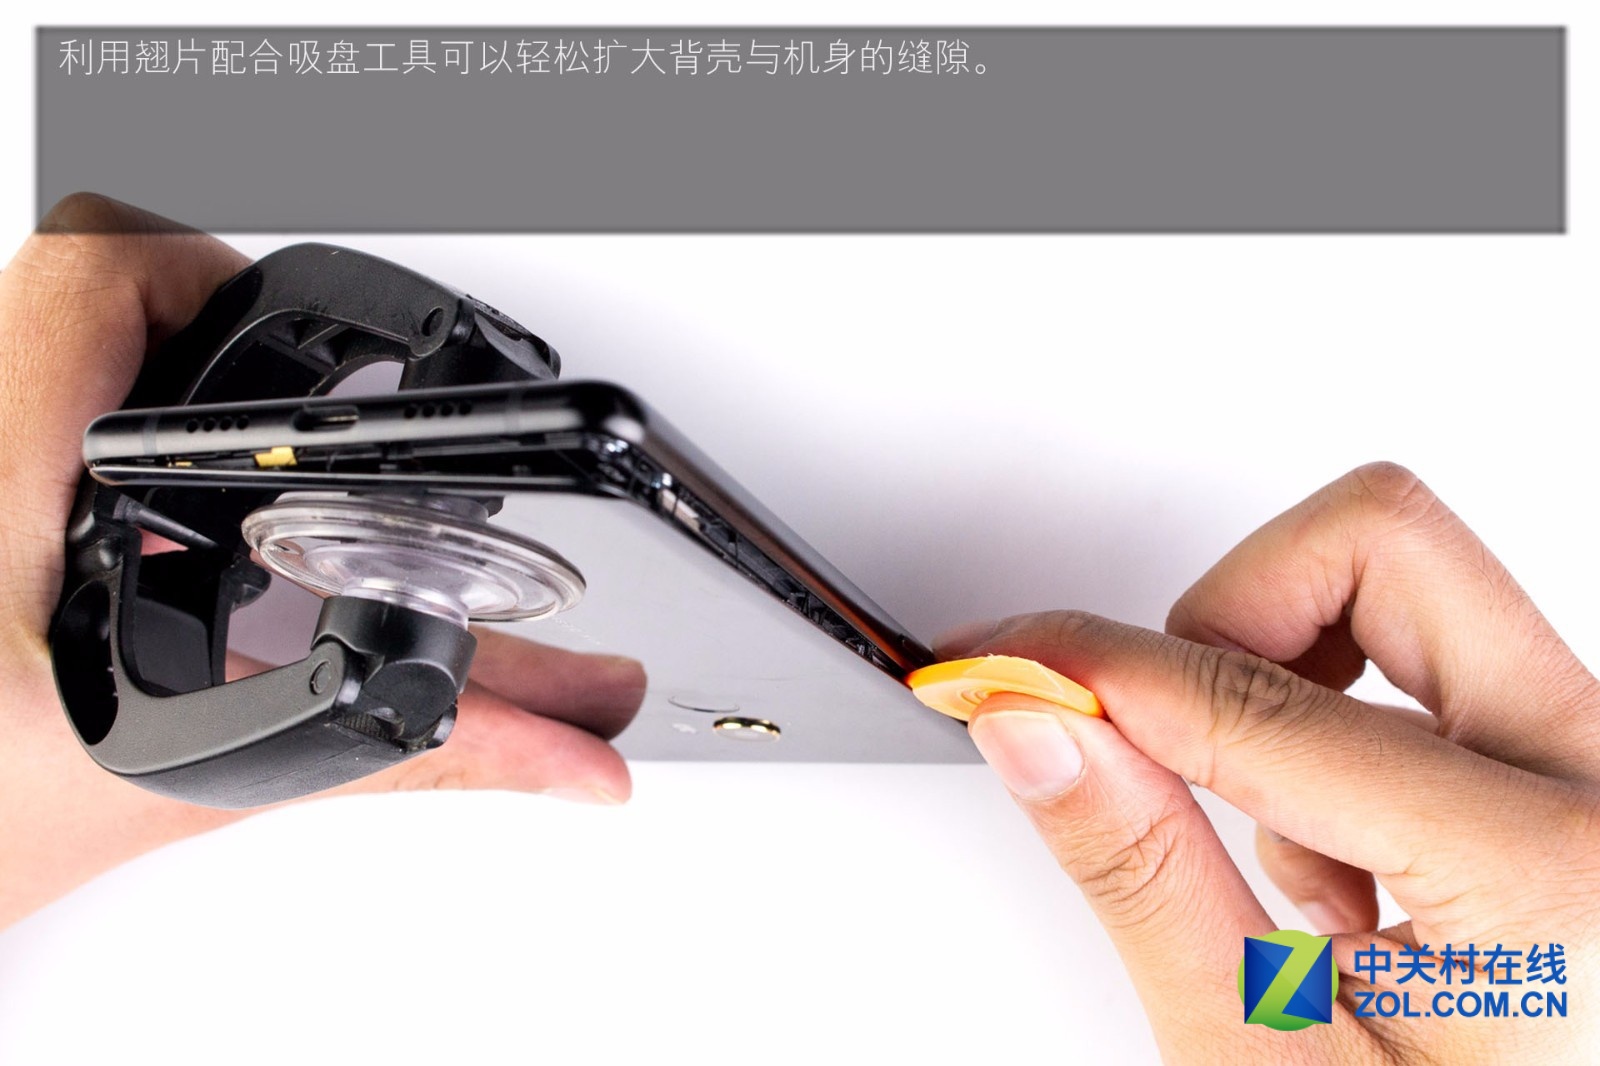
Use a pick and a suction cup to pry open the seam between the back cover and the body.
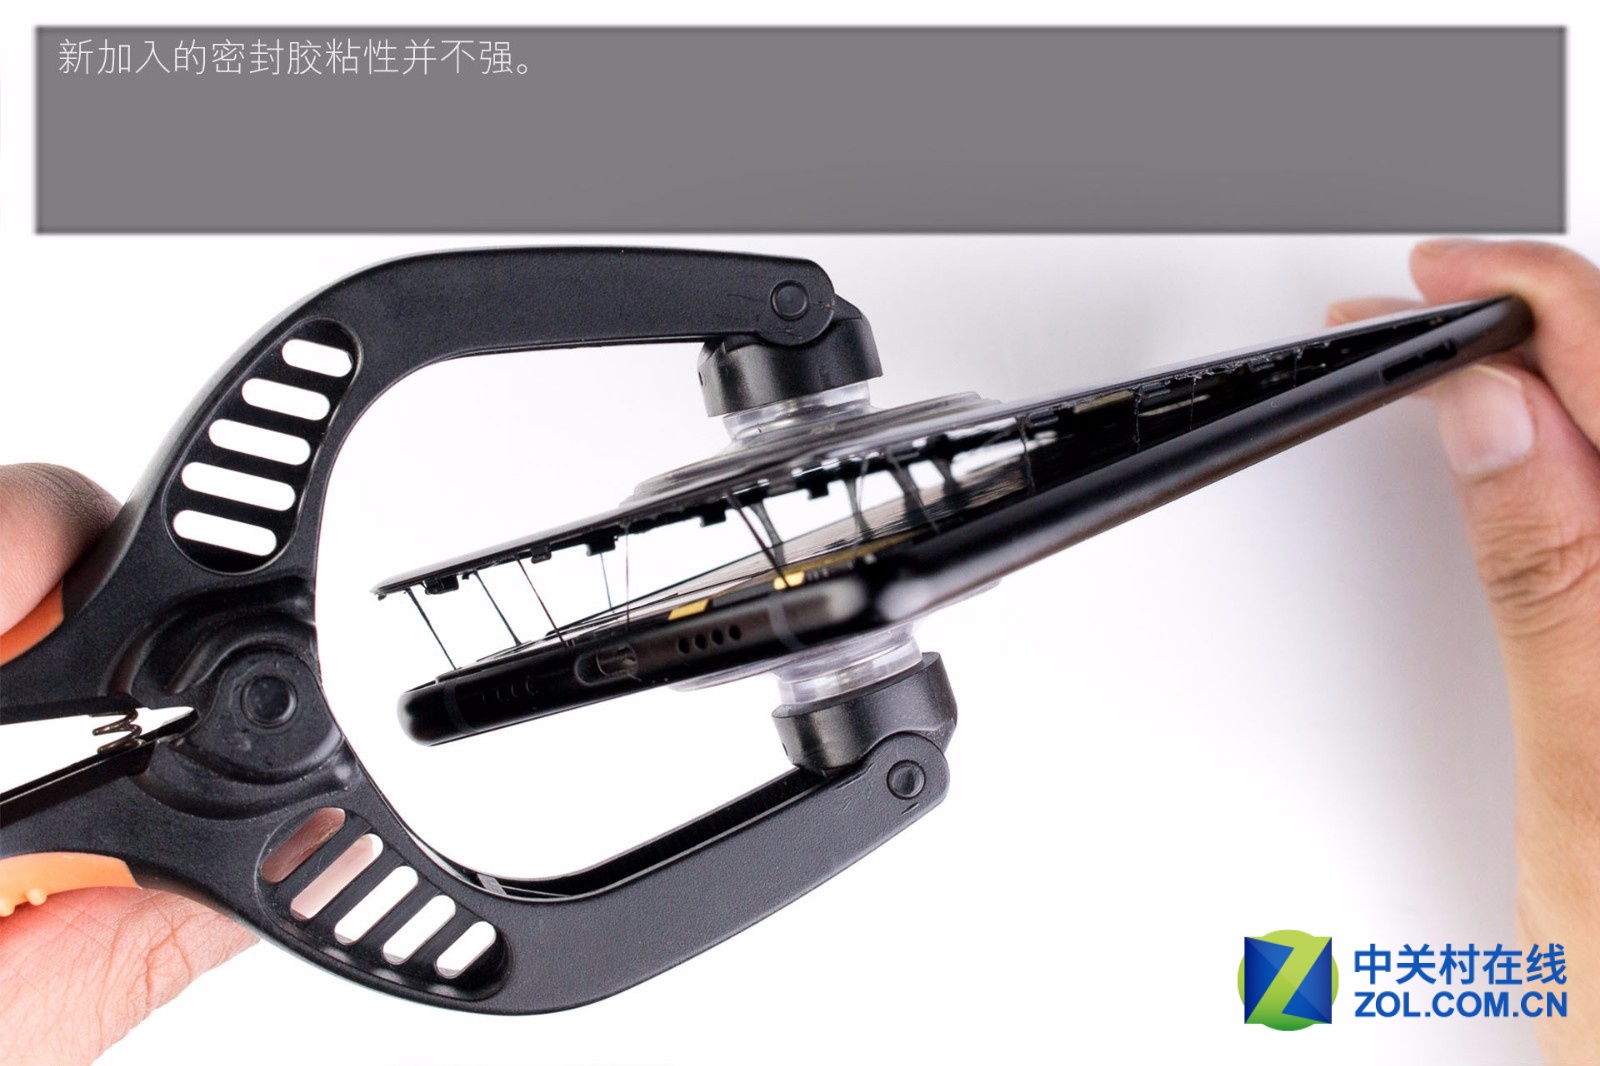
The newly added sealant does not have sufficient viscosity.
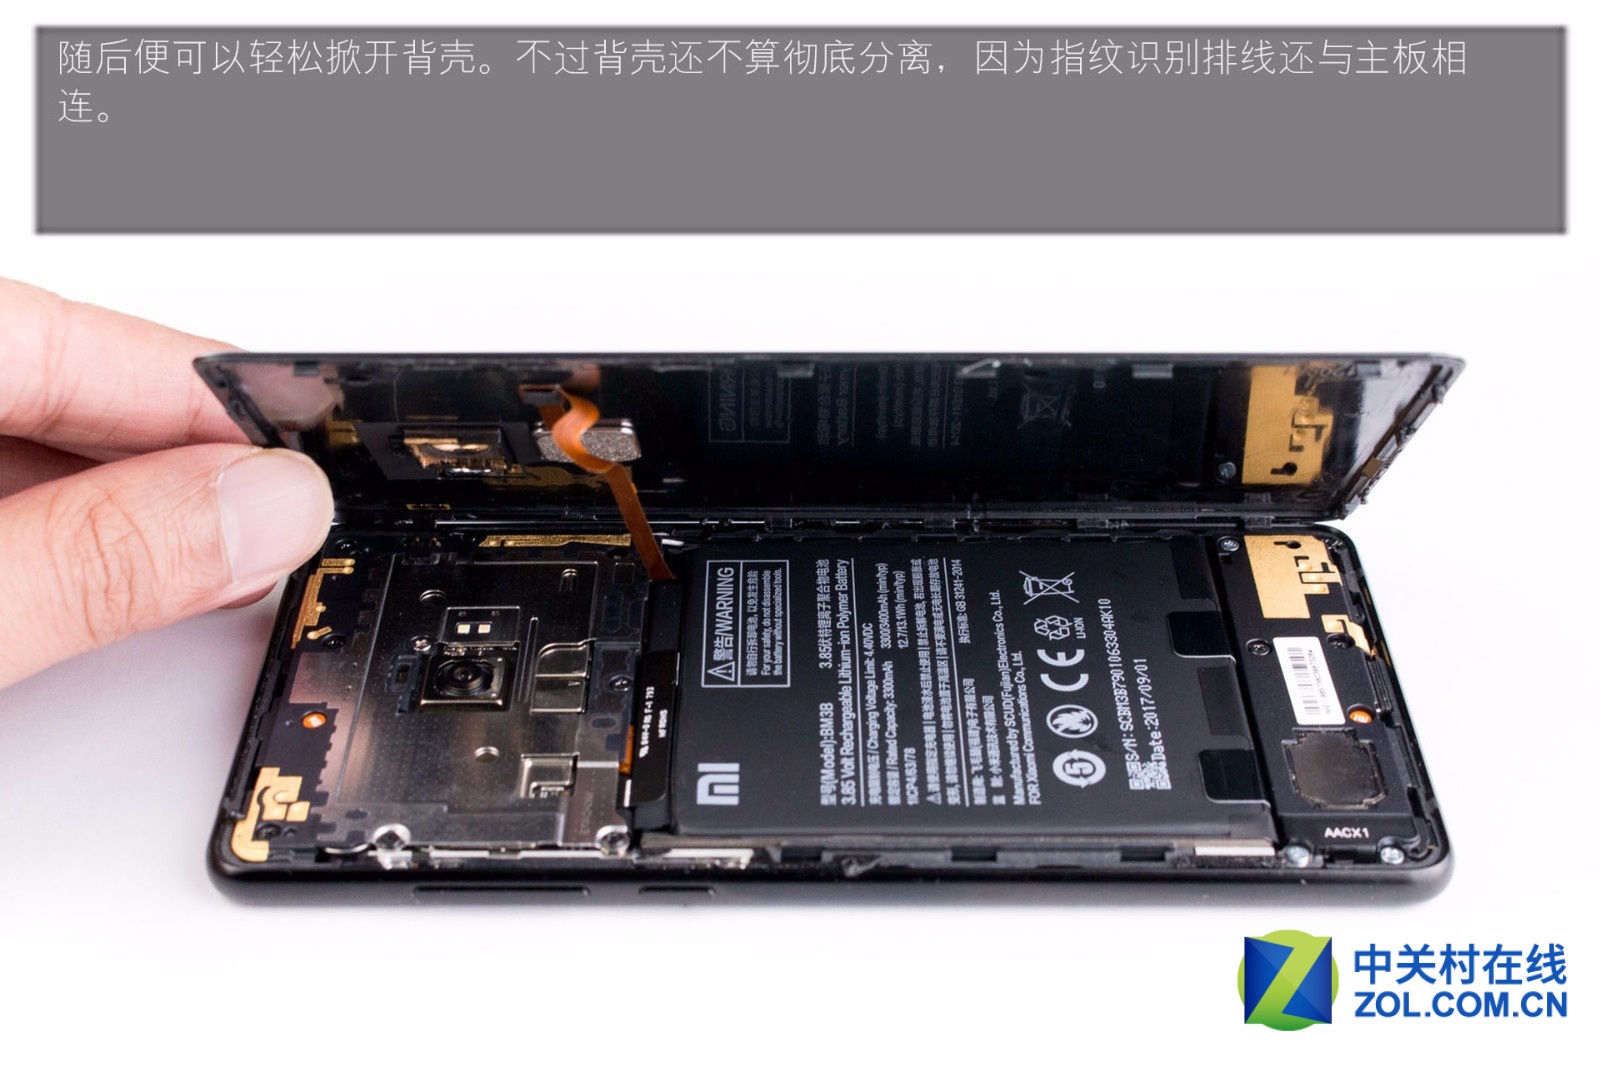
Then open the back cover. But the back cover cannot be separated because the fingerprint reader cable is still connected to the motherboard.
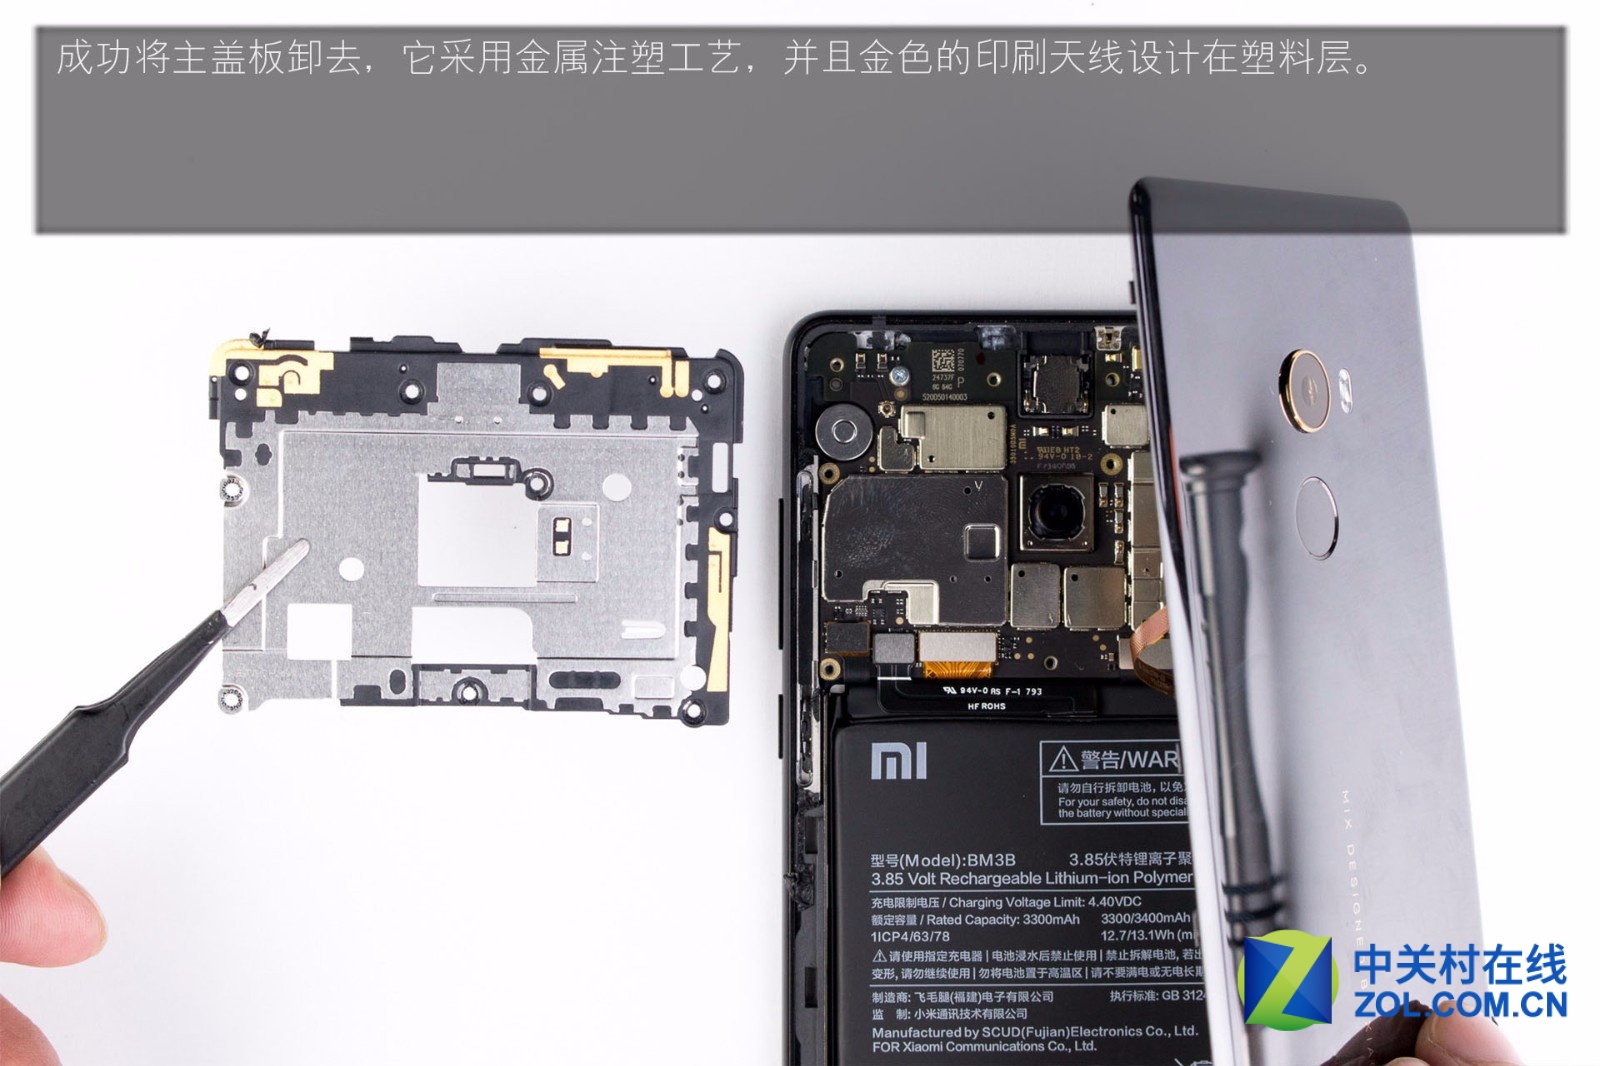
The cover on the motherboard has been successfully removed. It is manufactured using a metal injection molding process, and the gold foil printed antenna is integrated into the plastic layer.
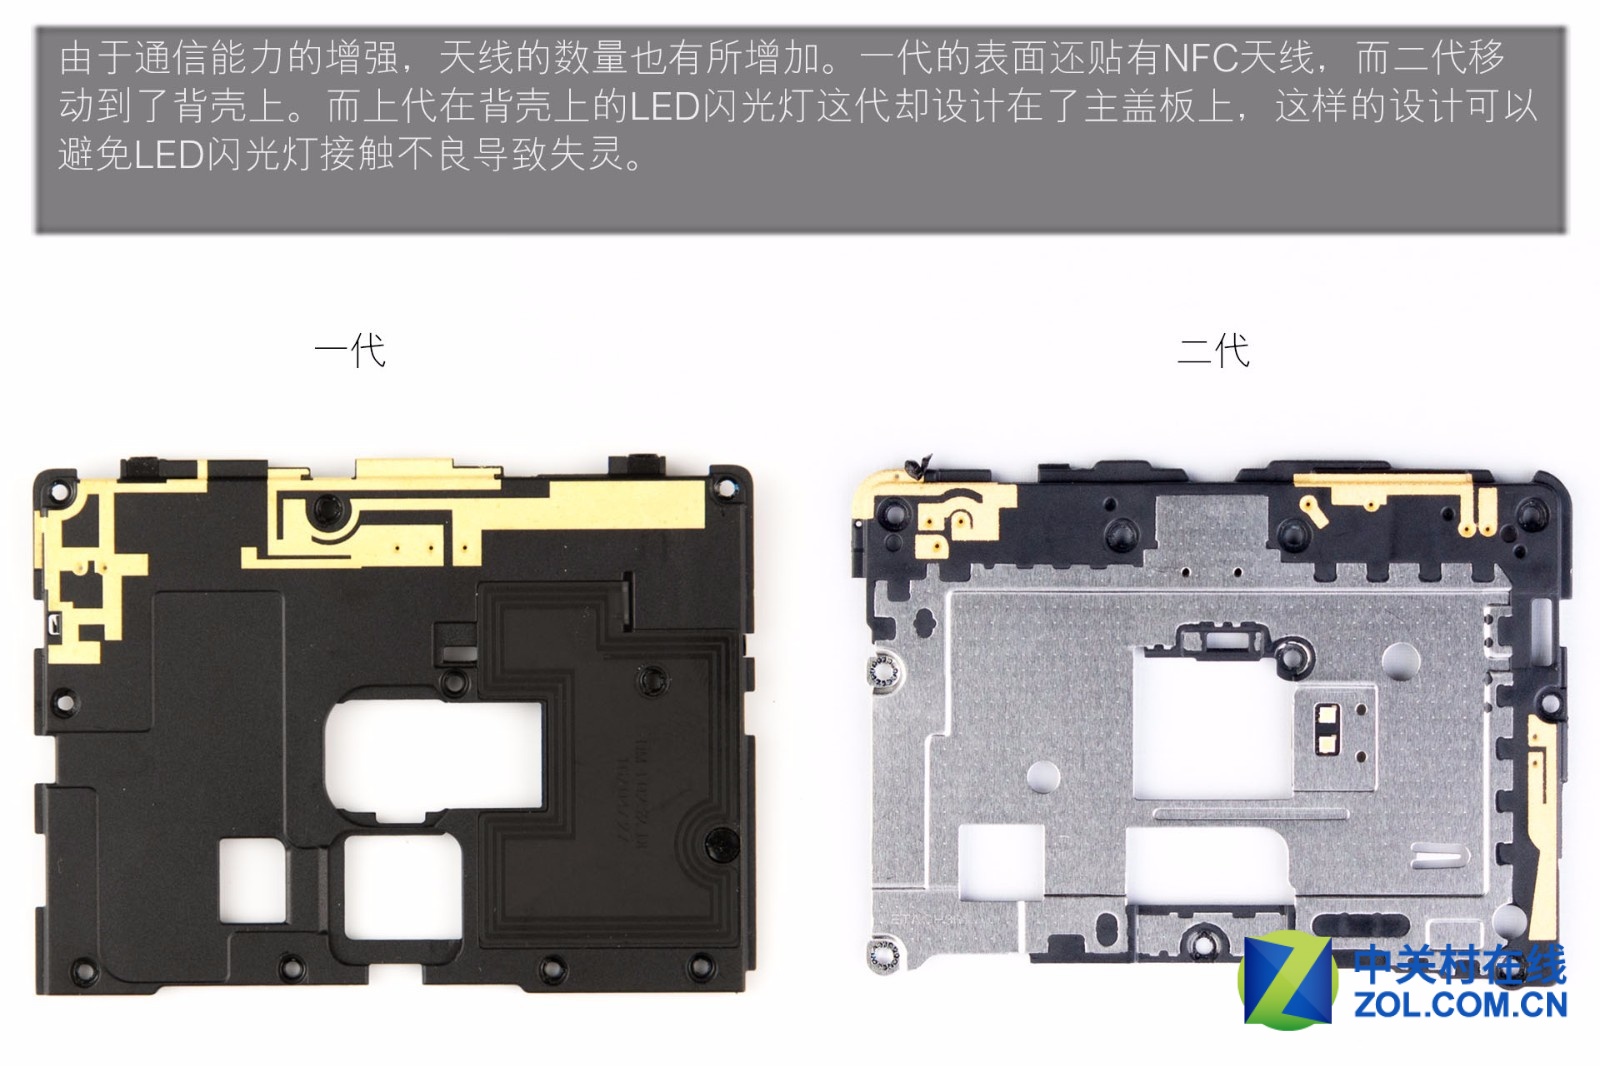
Due to enhanced communication capabilities, the number of antennas has increased. The surface of the Xiaomi MIX is covered with NFC antennas, while the NFC antenna has been removed from the back cover. The rear LED flash has been designed into the cover of the MIX 2 motherboard, which helps prevent LED flash malfunctions caused by poor contact.
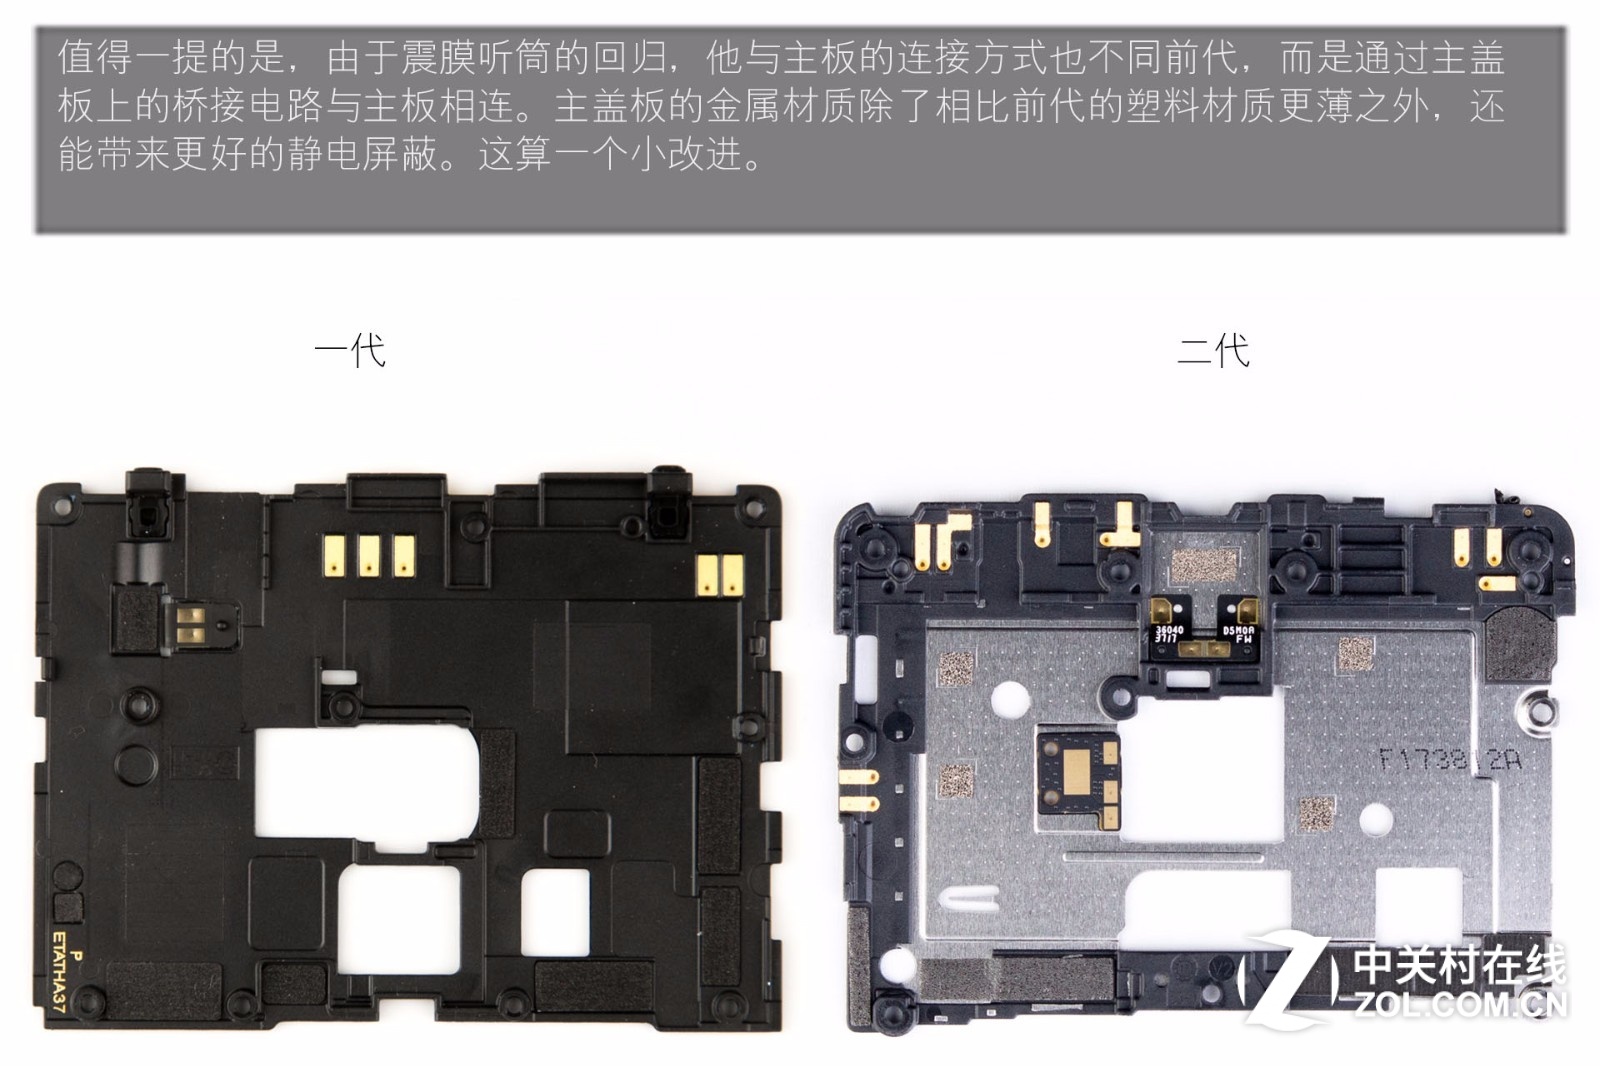
The Xiaomi MIX 2 uses a vibrating earpiece, which connects to the mainboard differently from its predecessor. It connects to the motherboard through a bridging circuit on the cover plate. The metal material used in the MIX 2 is thinner than the plastic material used in the MIX, and this design provides superior electrostatic shielding for the phone.
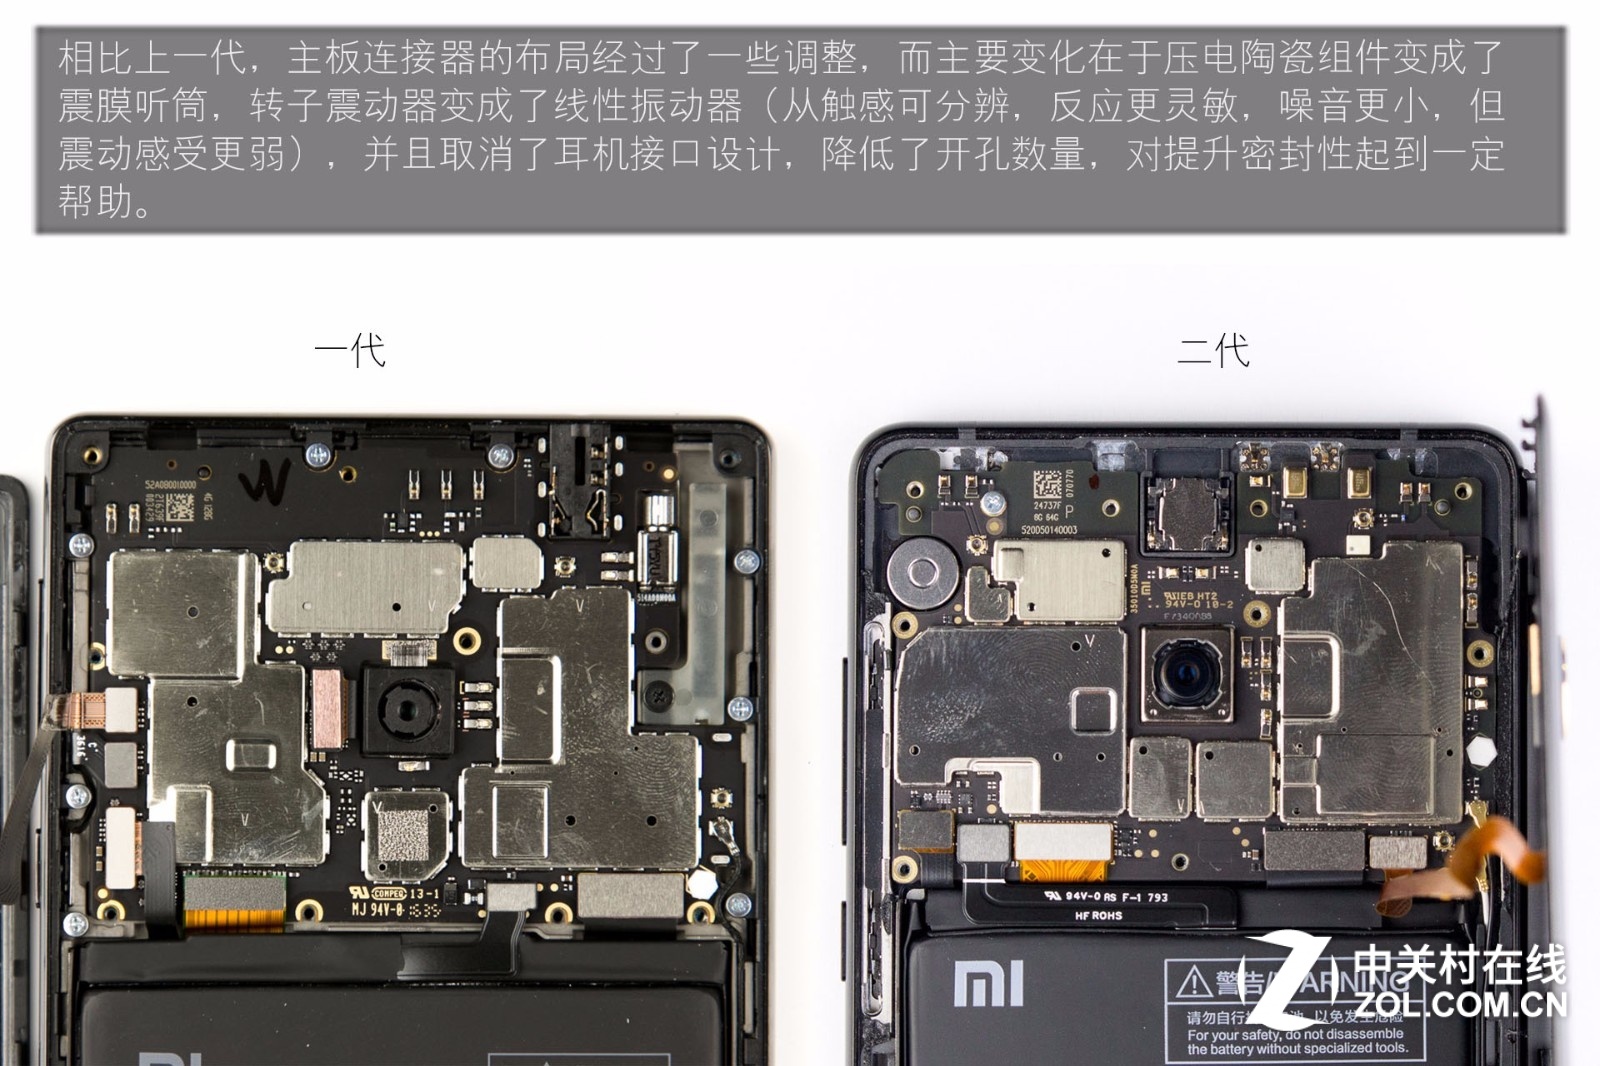
Compared to its predecessor, the MIX 2 has adjusted the motherboard connector layout. The main changes include replacing the piezoelectric ceramic component with a vibrating earphone and substituting the rotor motor with a linear motor. Compared to the rotor motor, the linear motor responds more quickly and produces less noise. The phone has a cancelled earphone port, which can improve the sealing effect.
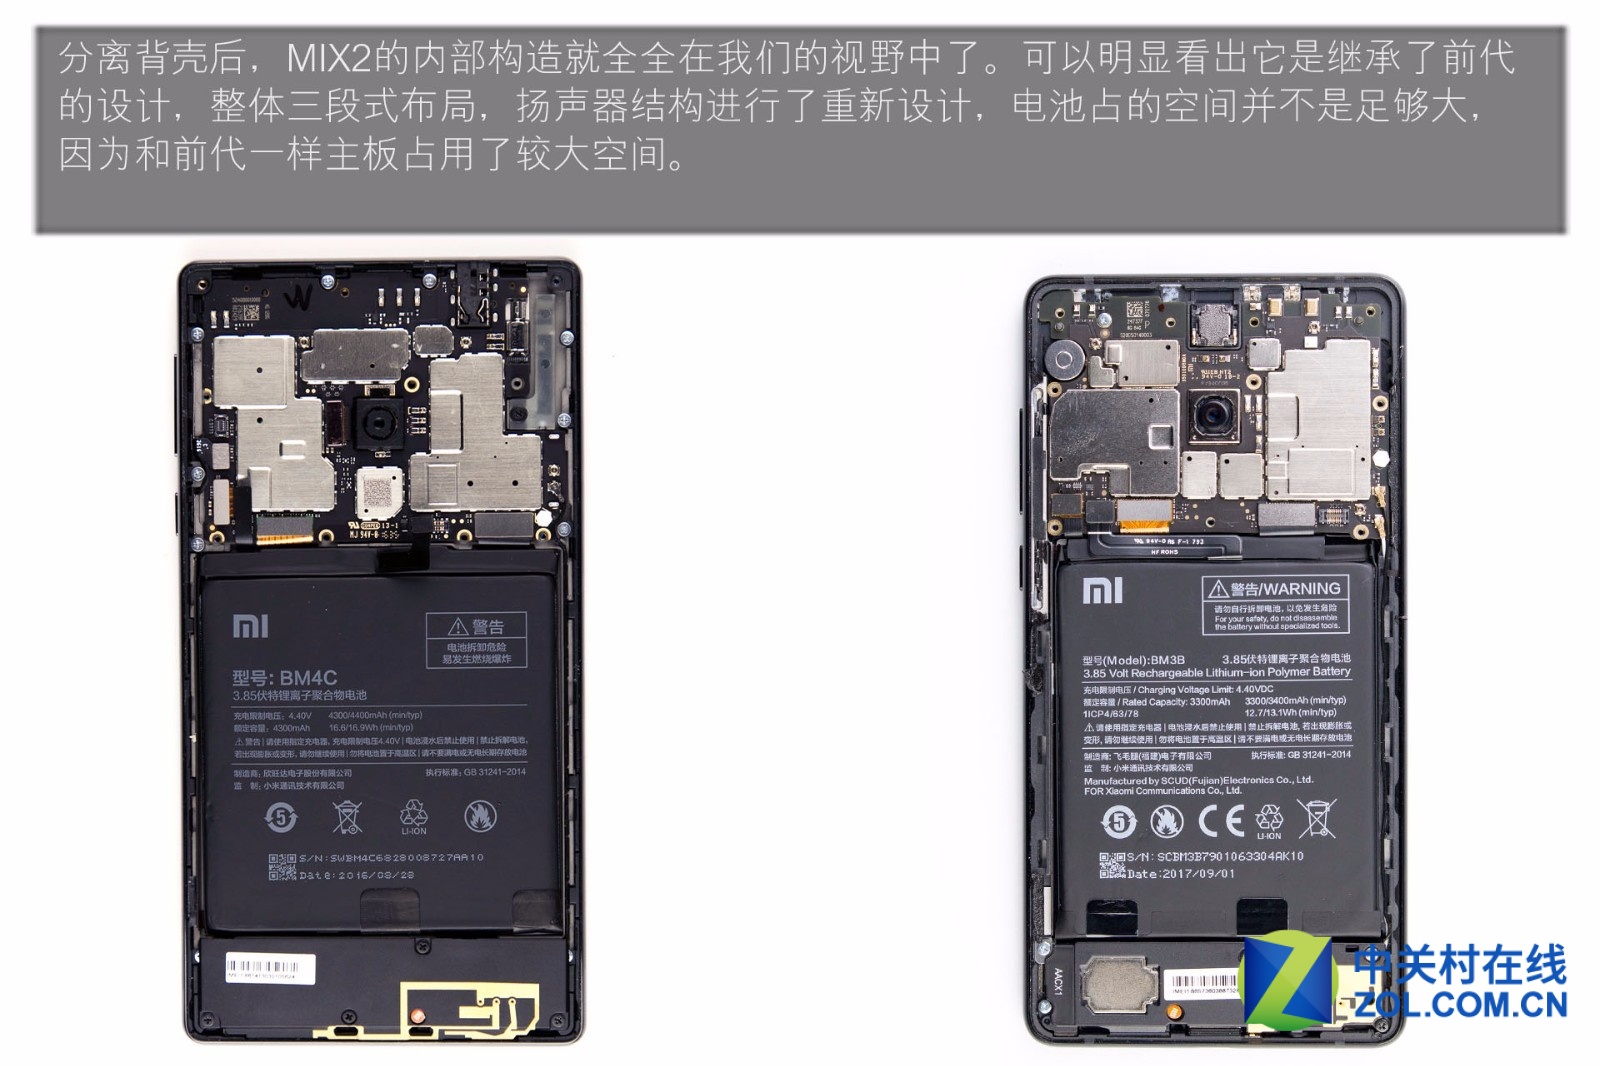
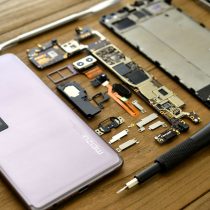
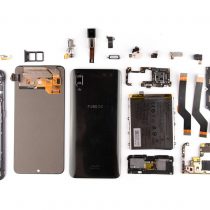
After removing the back cover, the internal structure of the MIX 2 is fully exposed. The phone continues the design of the Xiaomi MIX and adopts a three-stage layout. It has a new design for the speaker structure. The battery does not take up much space, unlike the motherboard.
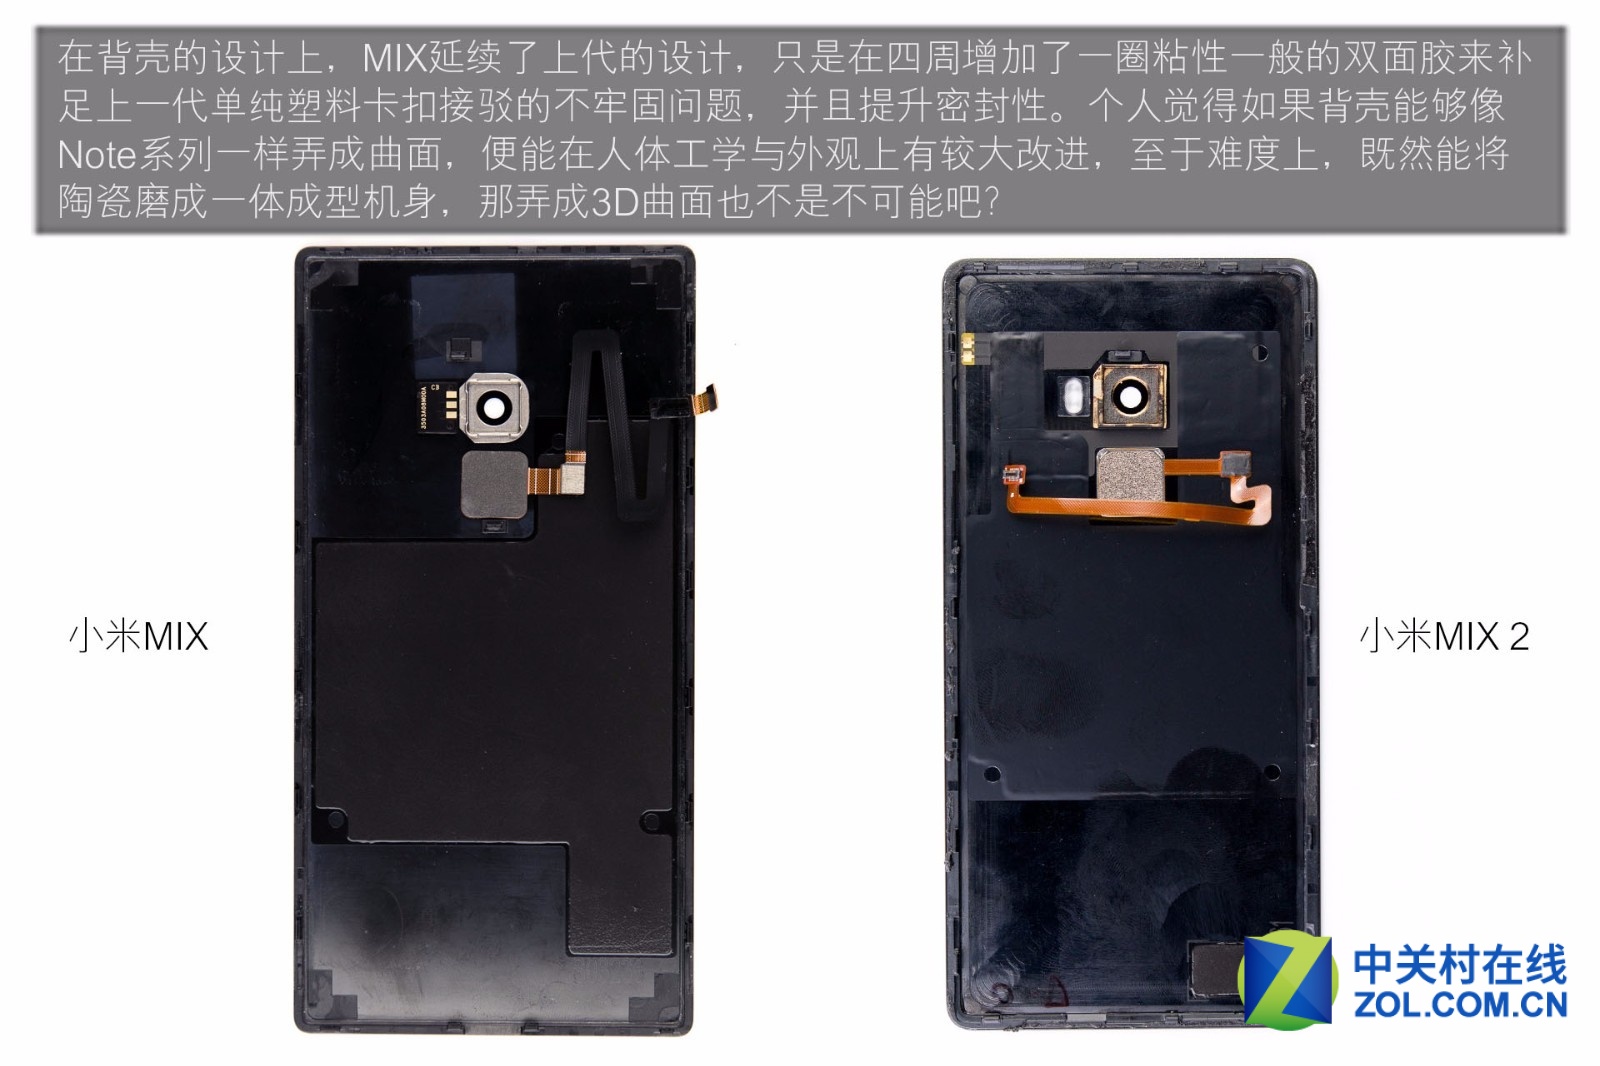
The Xiaomi MIX 2 continues the rear design of the Xiaomi MIX, but adds double-sided adhesive strips around the body. This addresses the issue of body looseness in the MIX while enhancing sealing performance. I think that if the back of the phone could adopt a curved design similar to the Note series, it would significantly improve both ergonomics and aesthetic appeal.
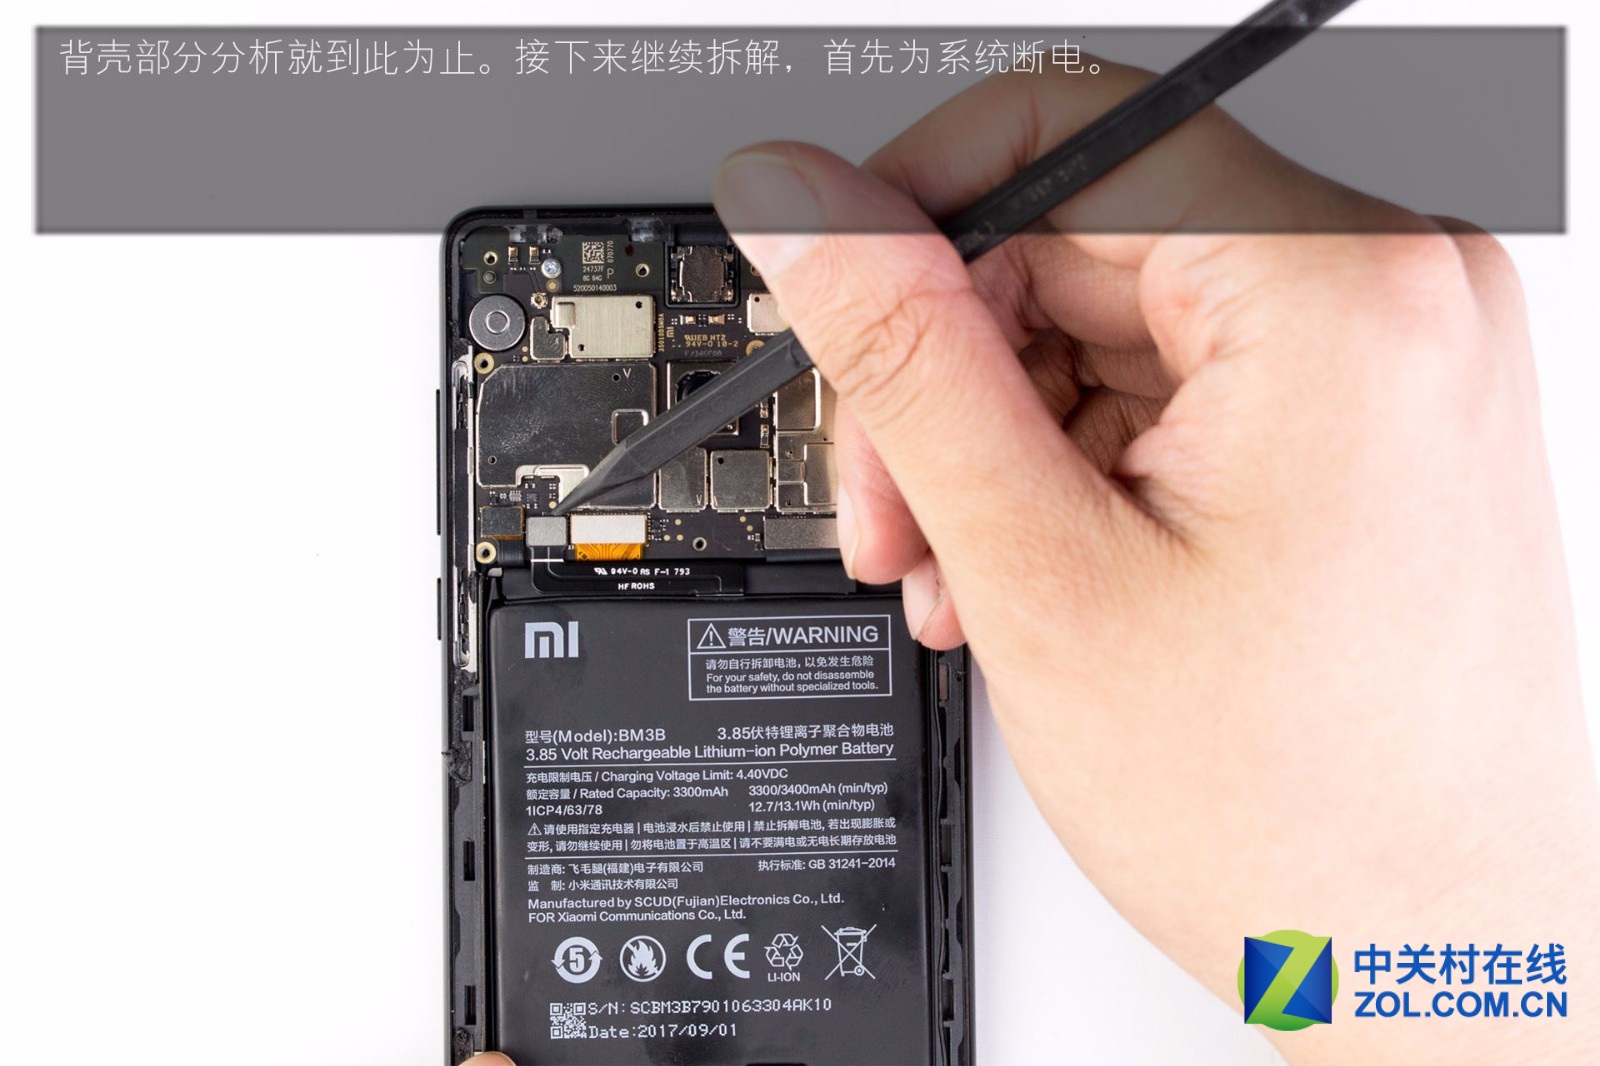
The analysis on the back case is over. Power the system off first before continuing the teardown.
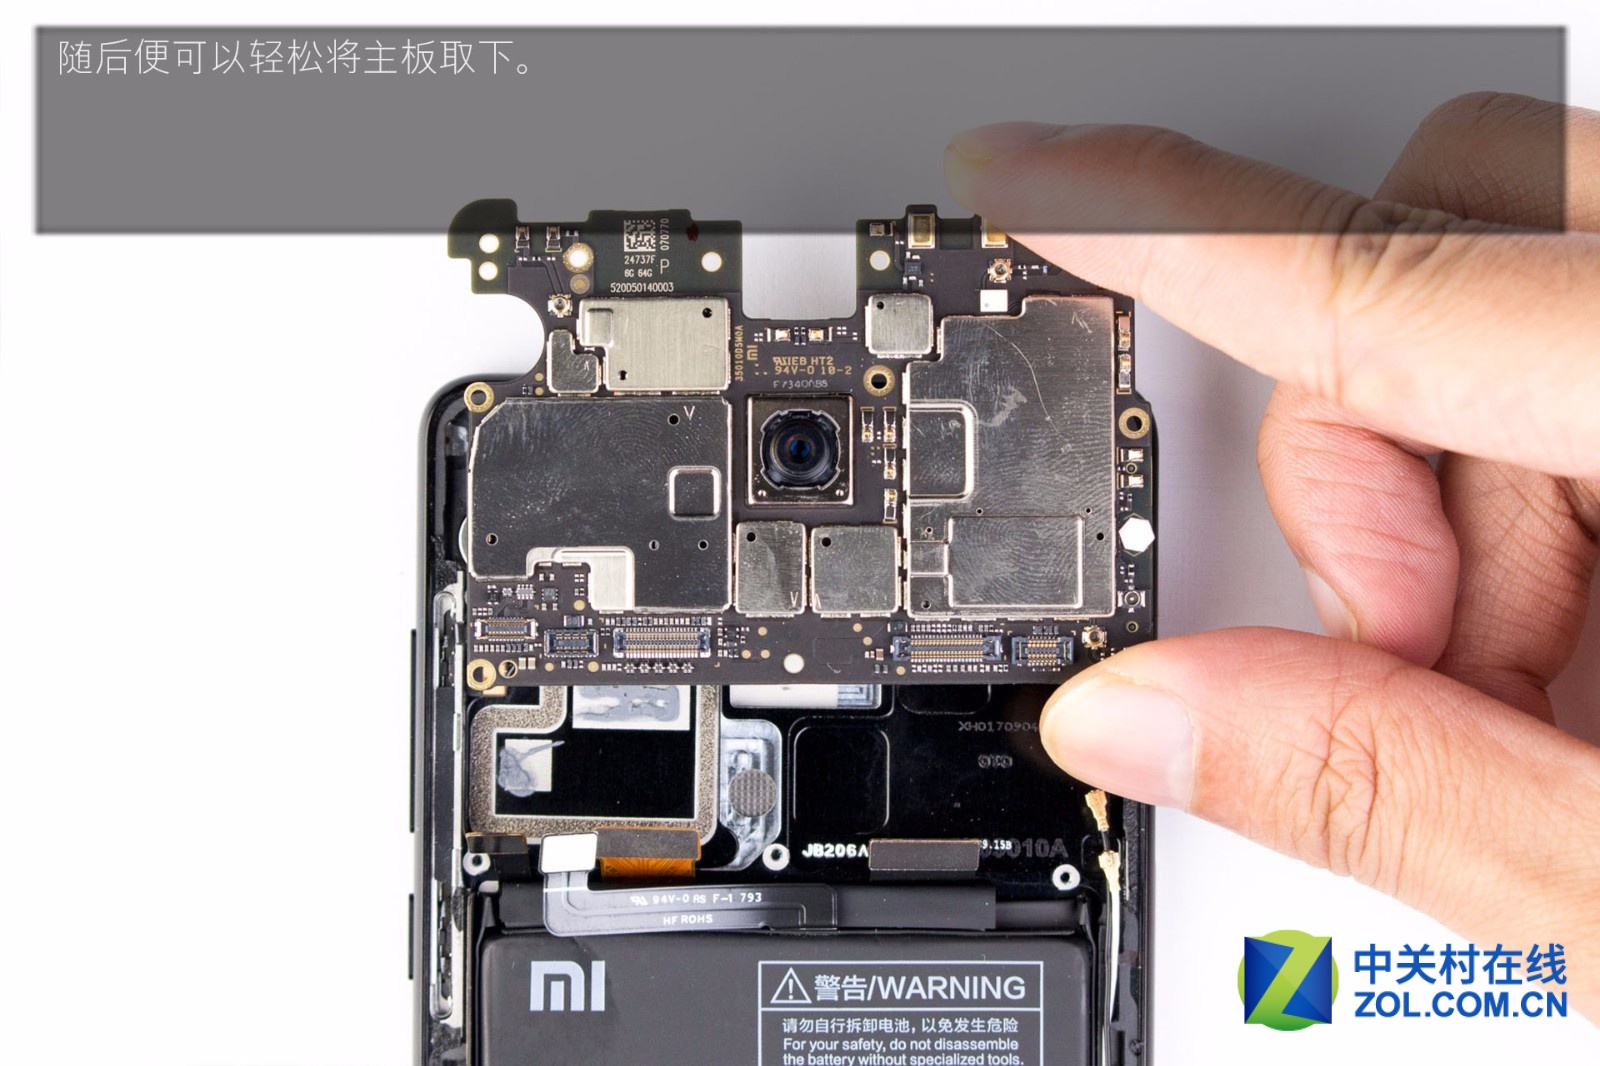
Then, remove the motherboard.
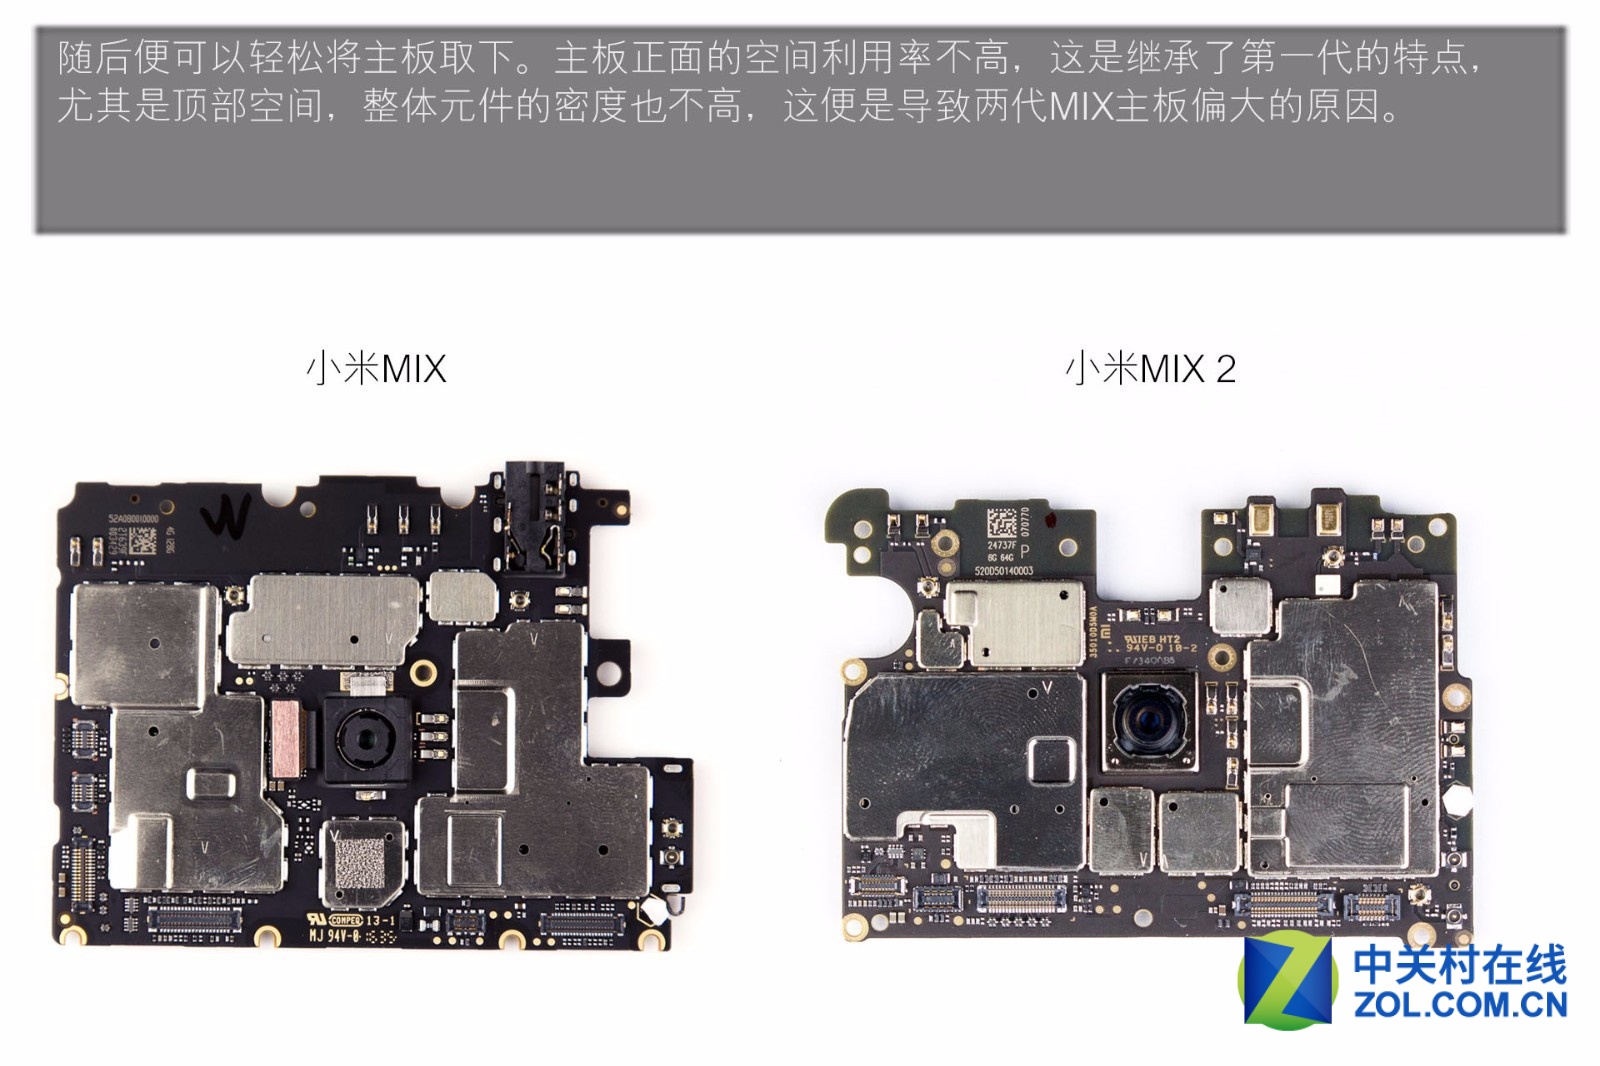
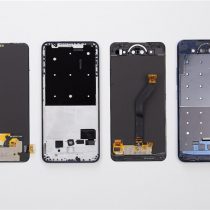
The front side of the motherboard has low space utilization. The component density is not high, which is why the motherboard sizes of these two phones are relatively large.
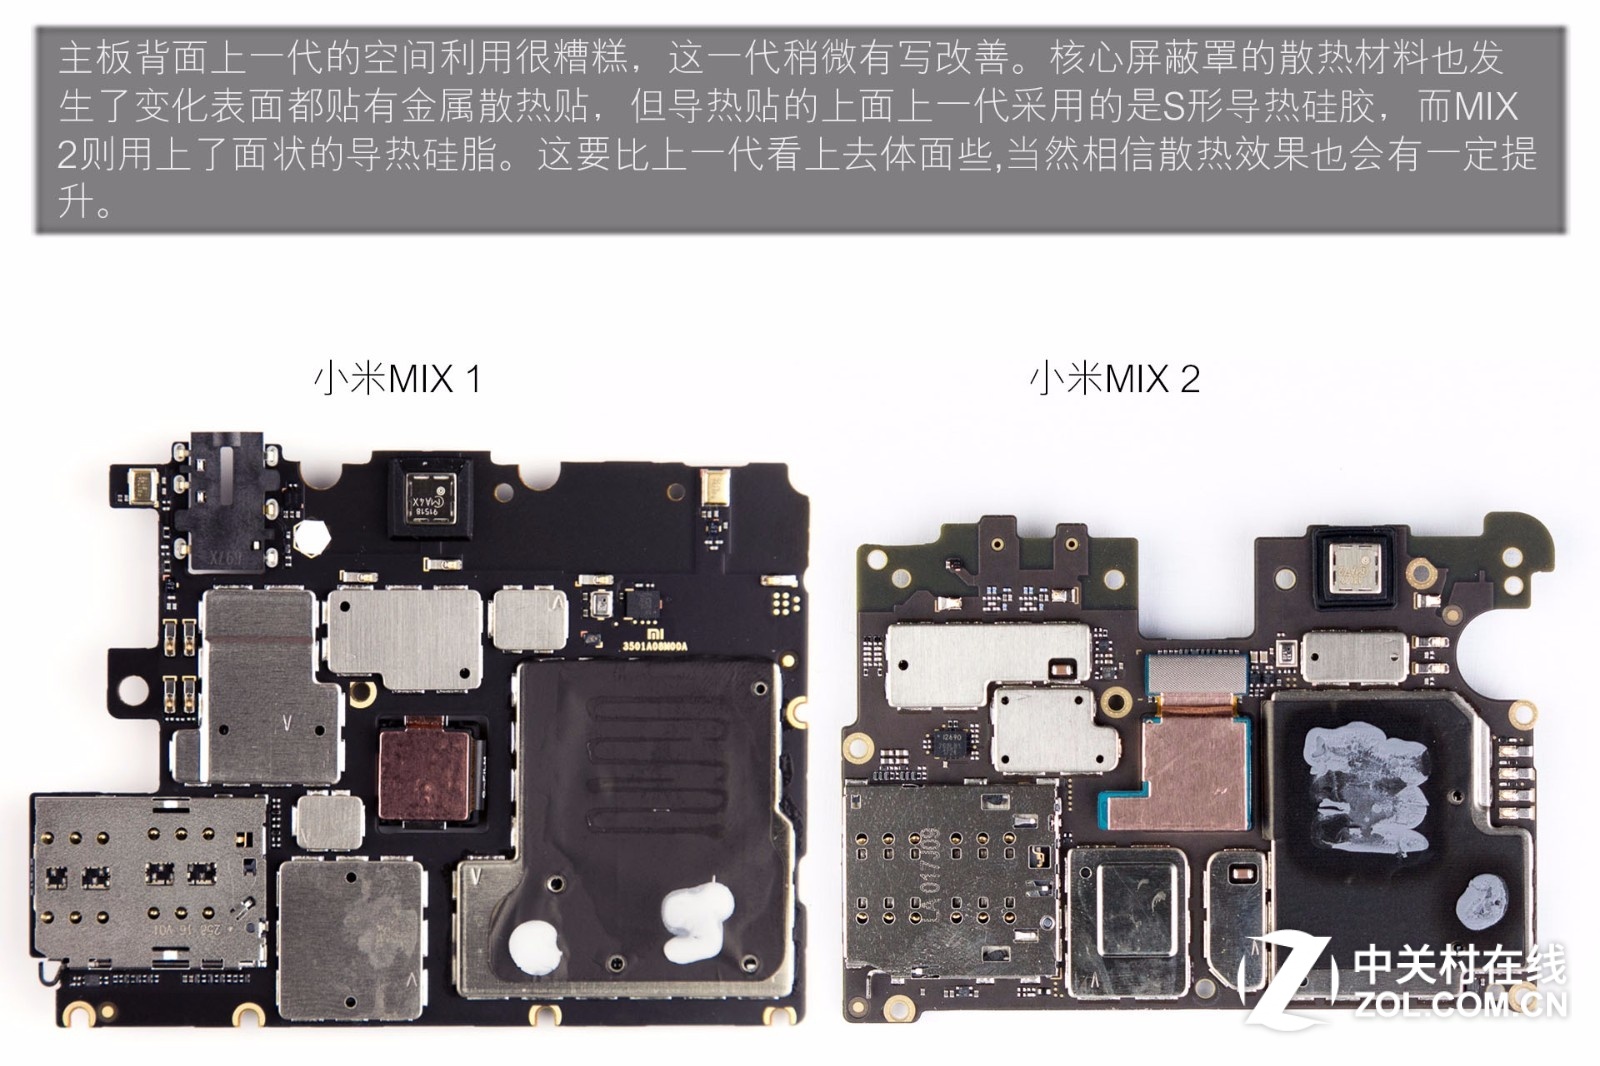
The Xiaomi MIX’s use of motherboard space is quite chaotic, while the MIX 2 has made slight improvements in this area. The metal shield is coated with thermal paste.
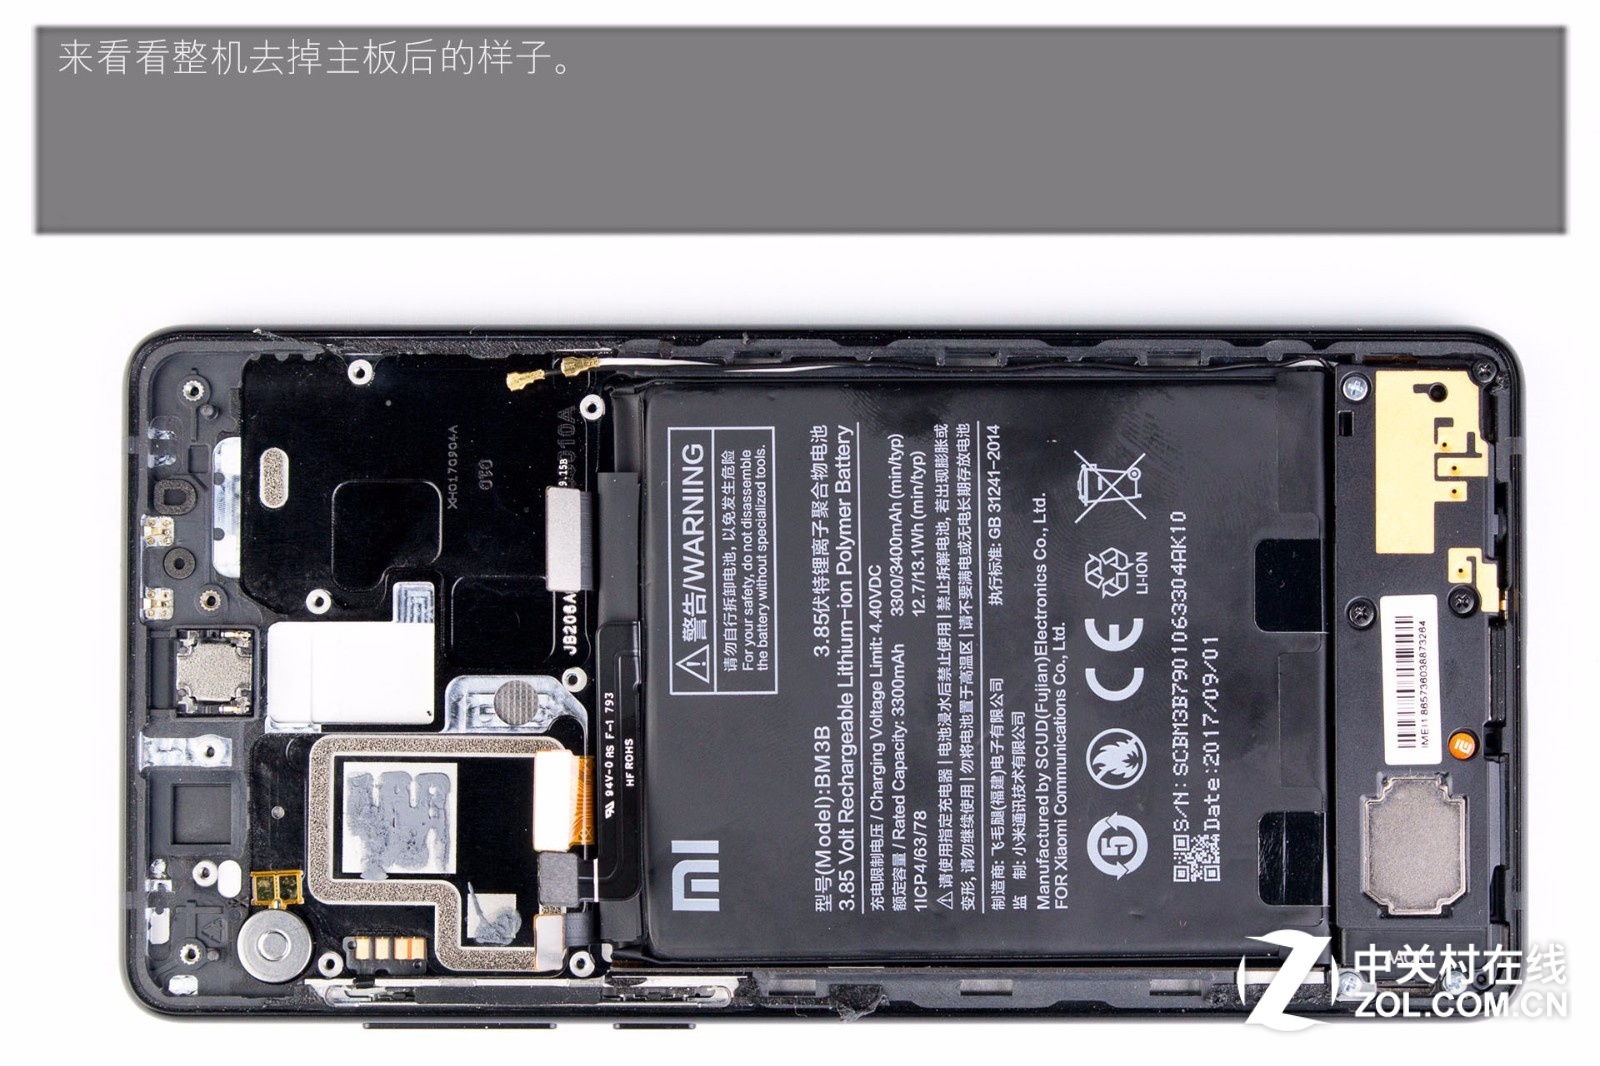
Here is the whole device without the motherboard.
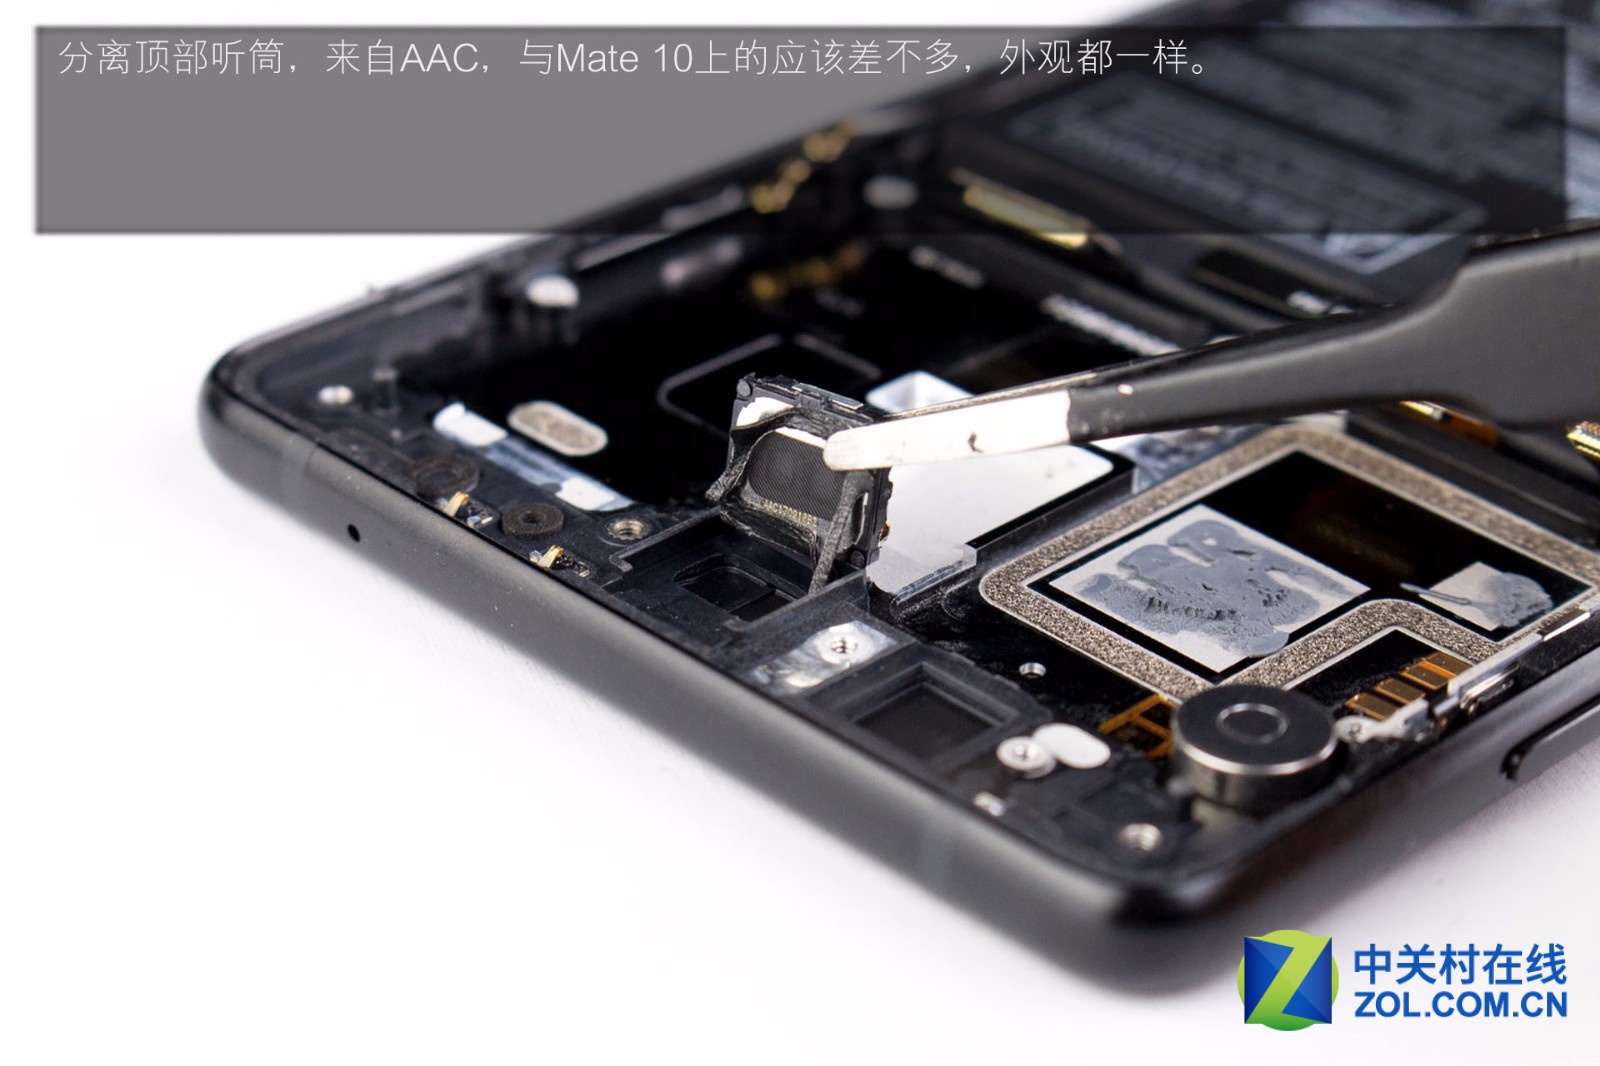
Take out the earpiece. This earpiece looks the same as the one on the Mate 10.
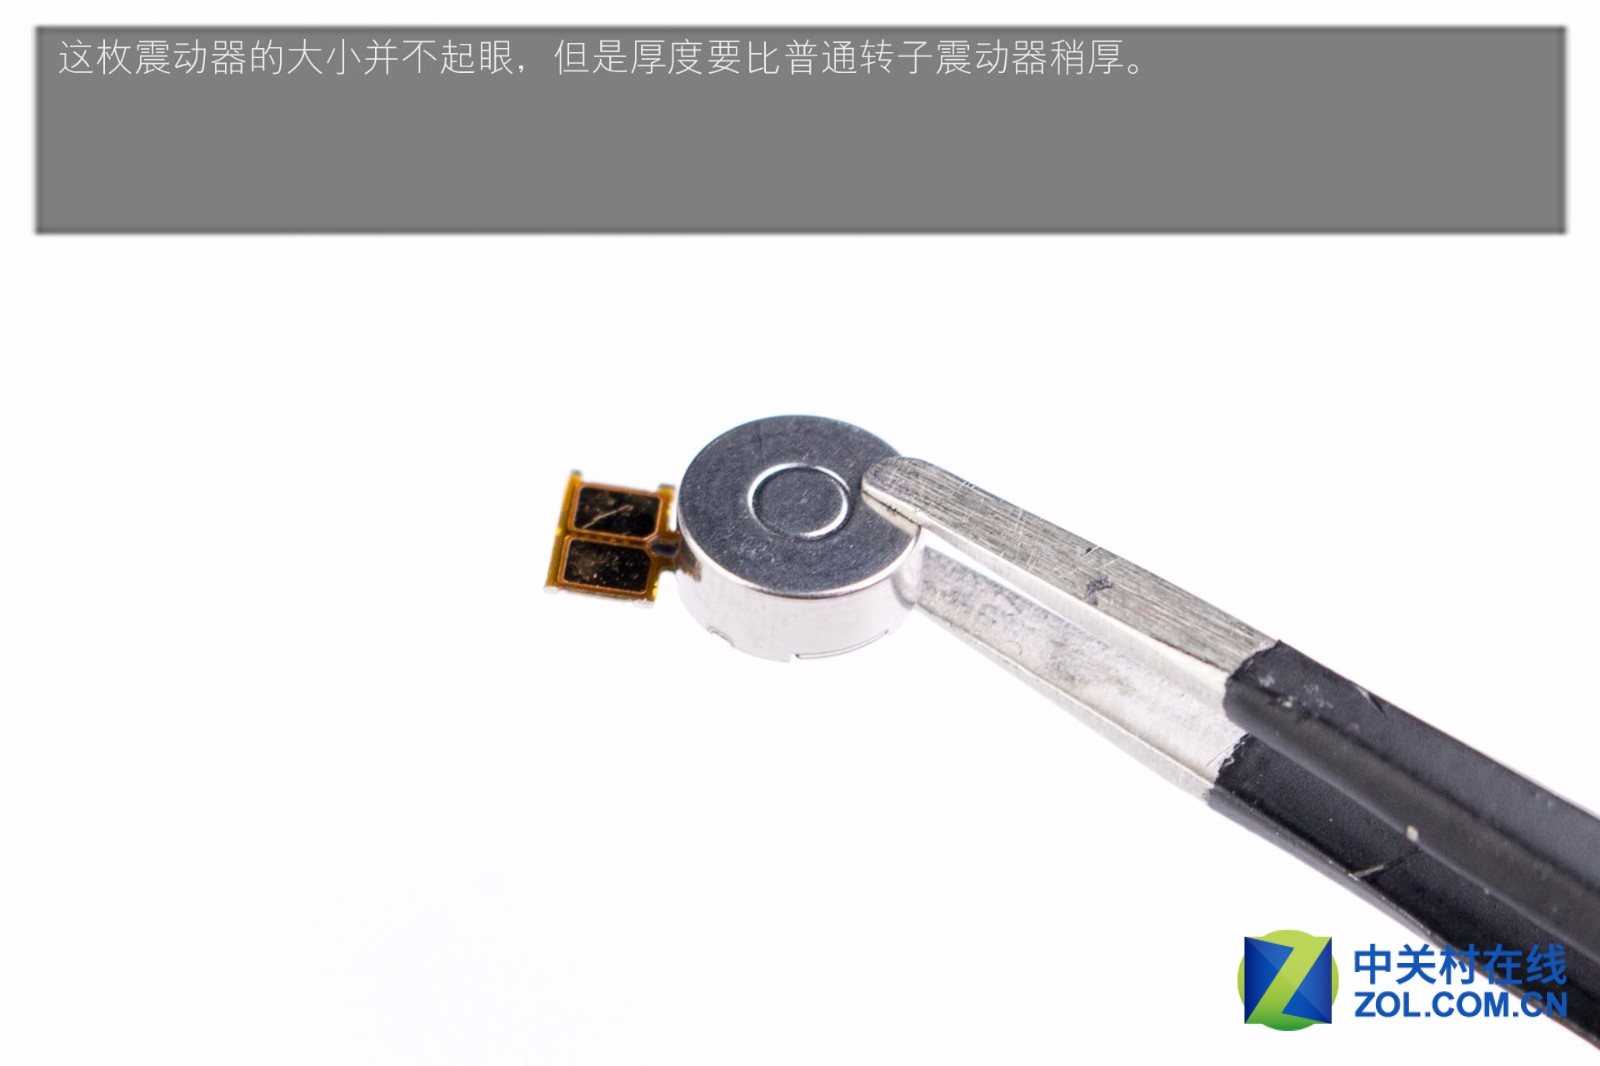
This vibrator is not large but thicker than a standard rotor vibrator.
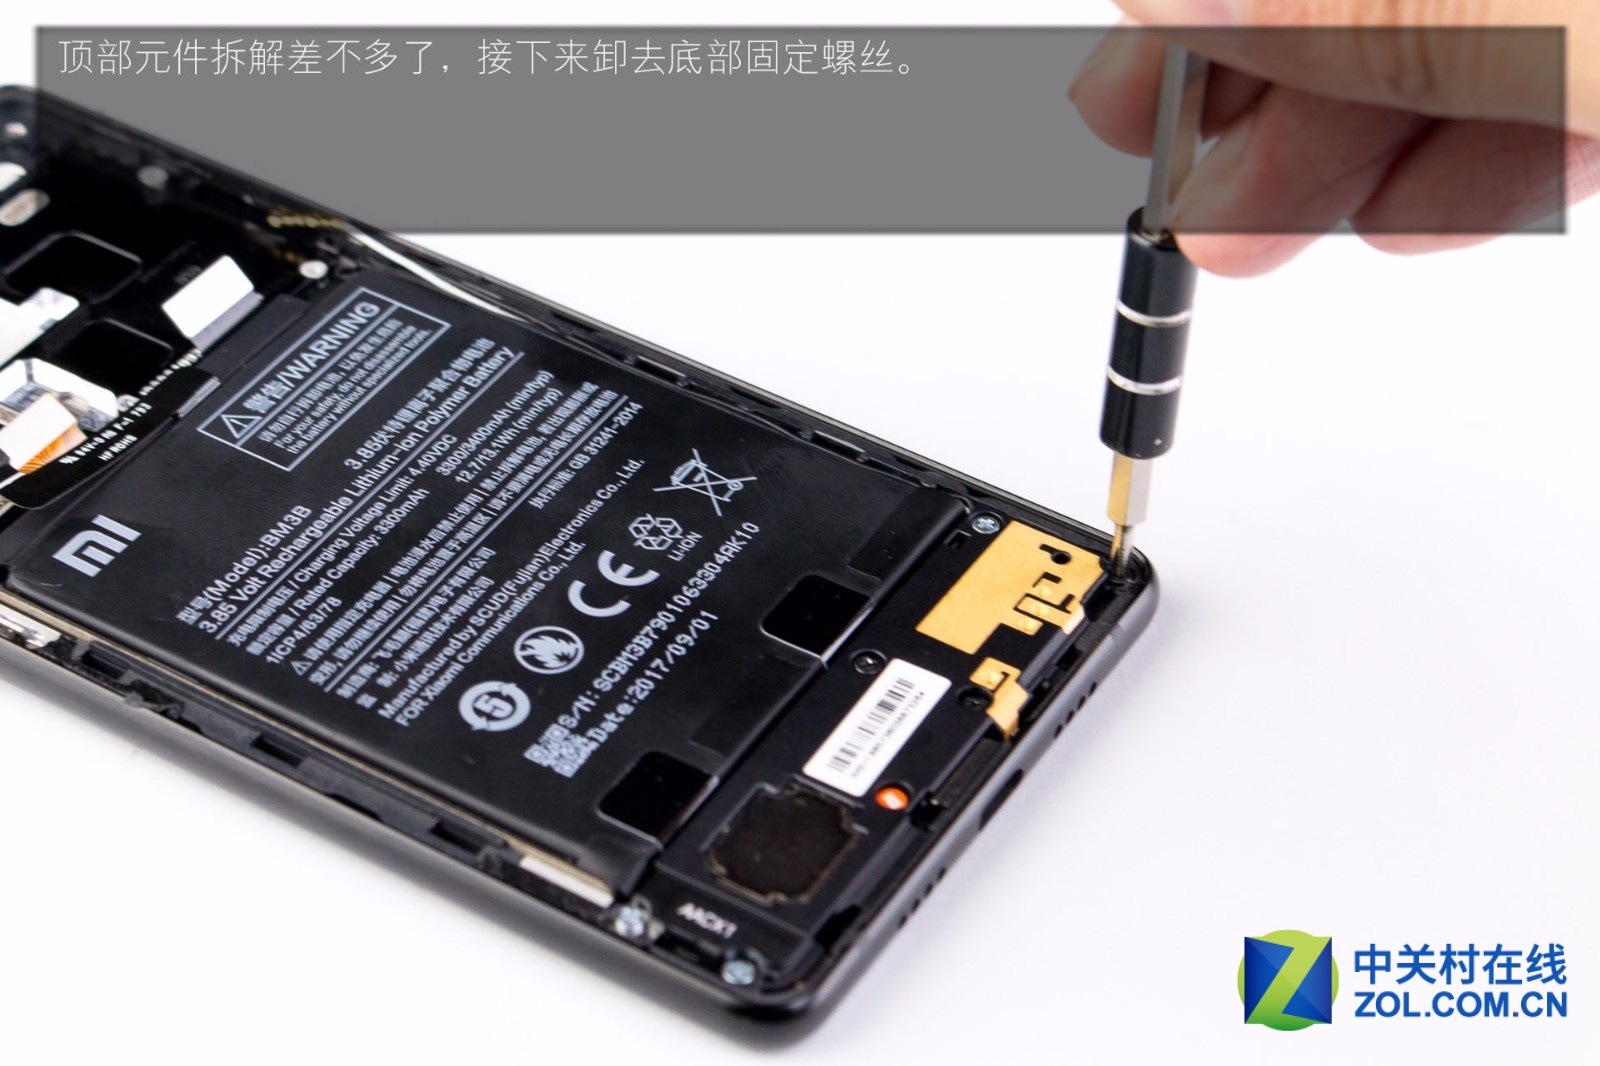
The teardown of the top components is basically over. Now, remove the screws at the bottom.
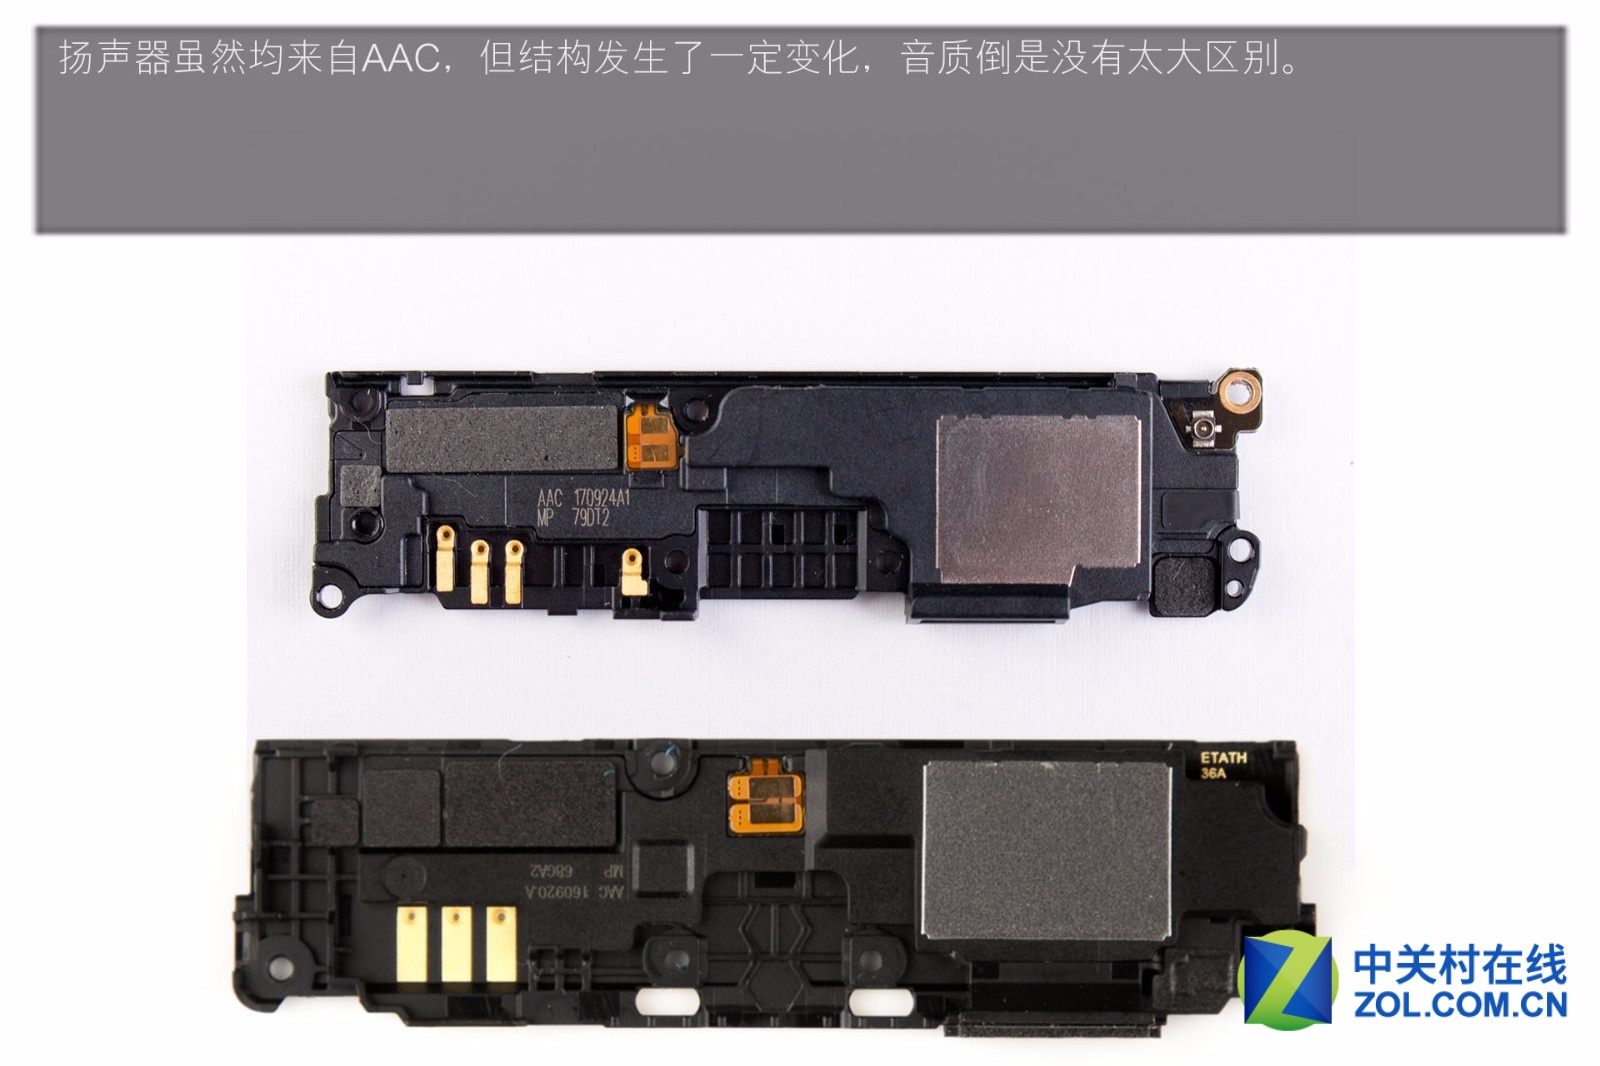
Although the speakers of both phones come from AAC, the speaker of the MIX 2 has made some structural adjustments. However, there is no significant difference between their sound qualities.
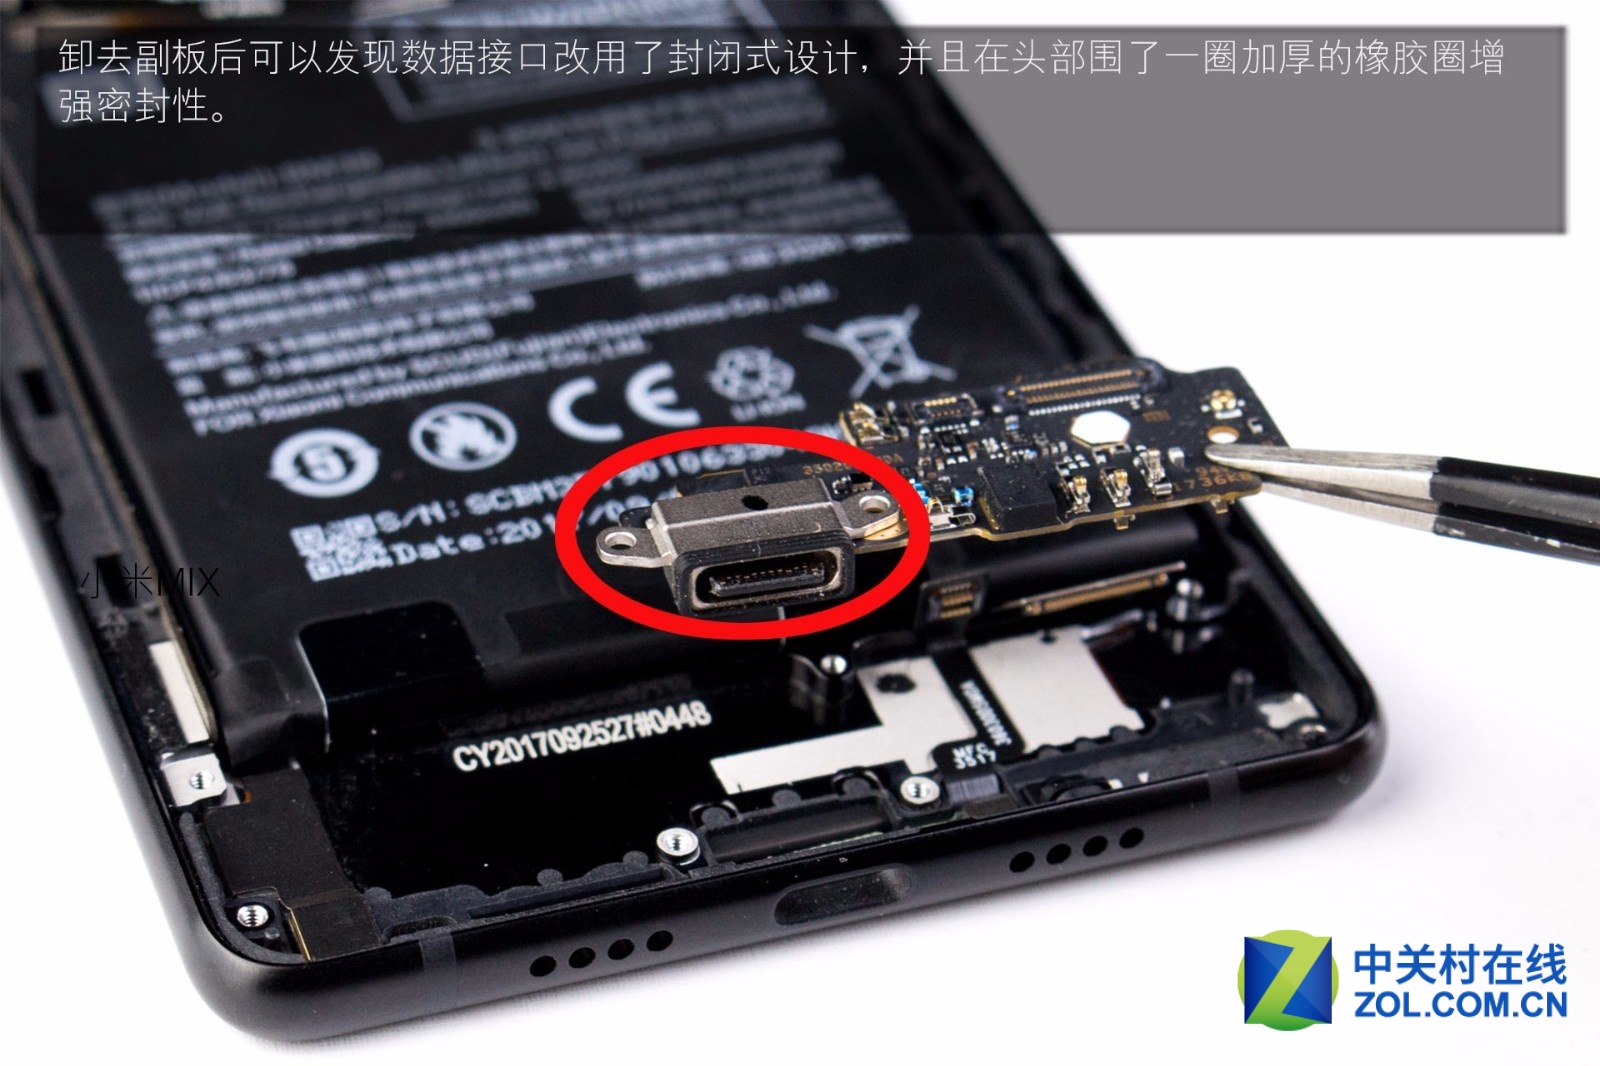
Remove the sub-board. The data port uses a sealed design, its front covered by a thick rubber ring to enhance the sealing effect.
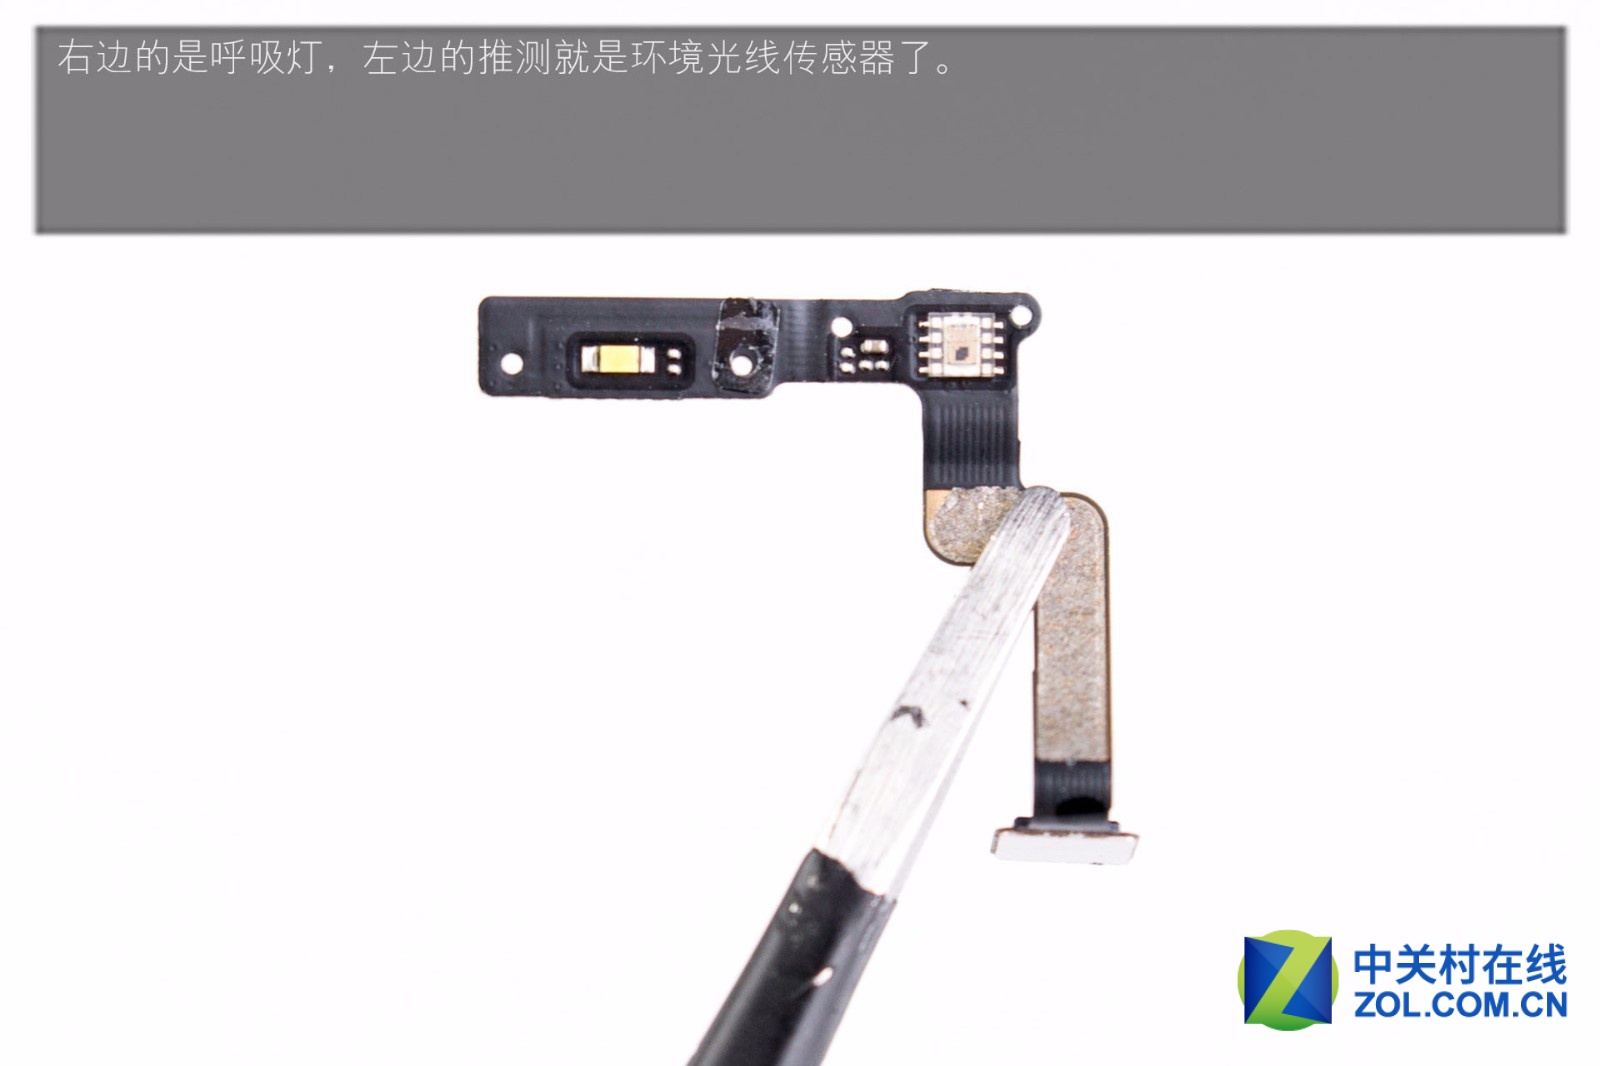
The LED indicator is on the right, and the ambient light sensor is supposed to be on the left.
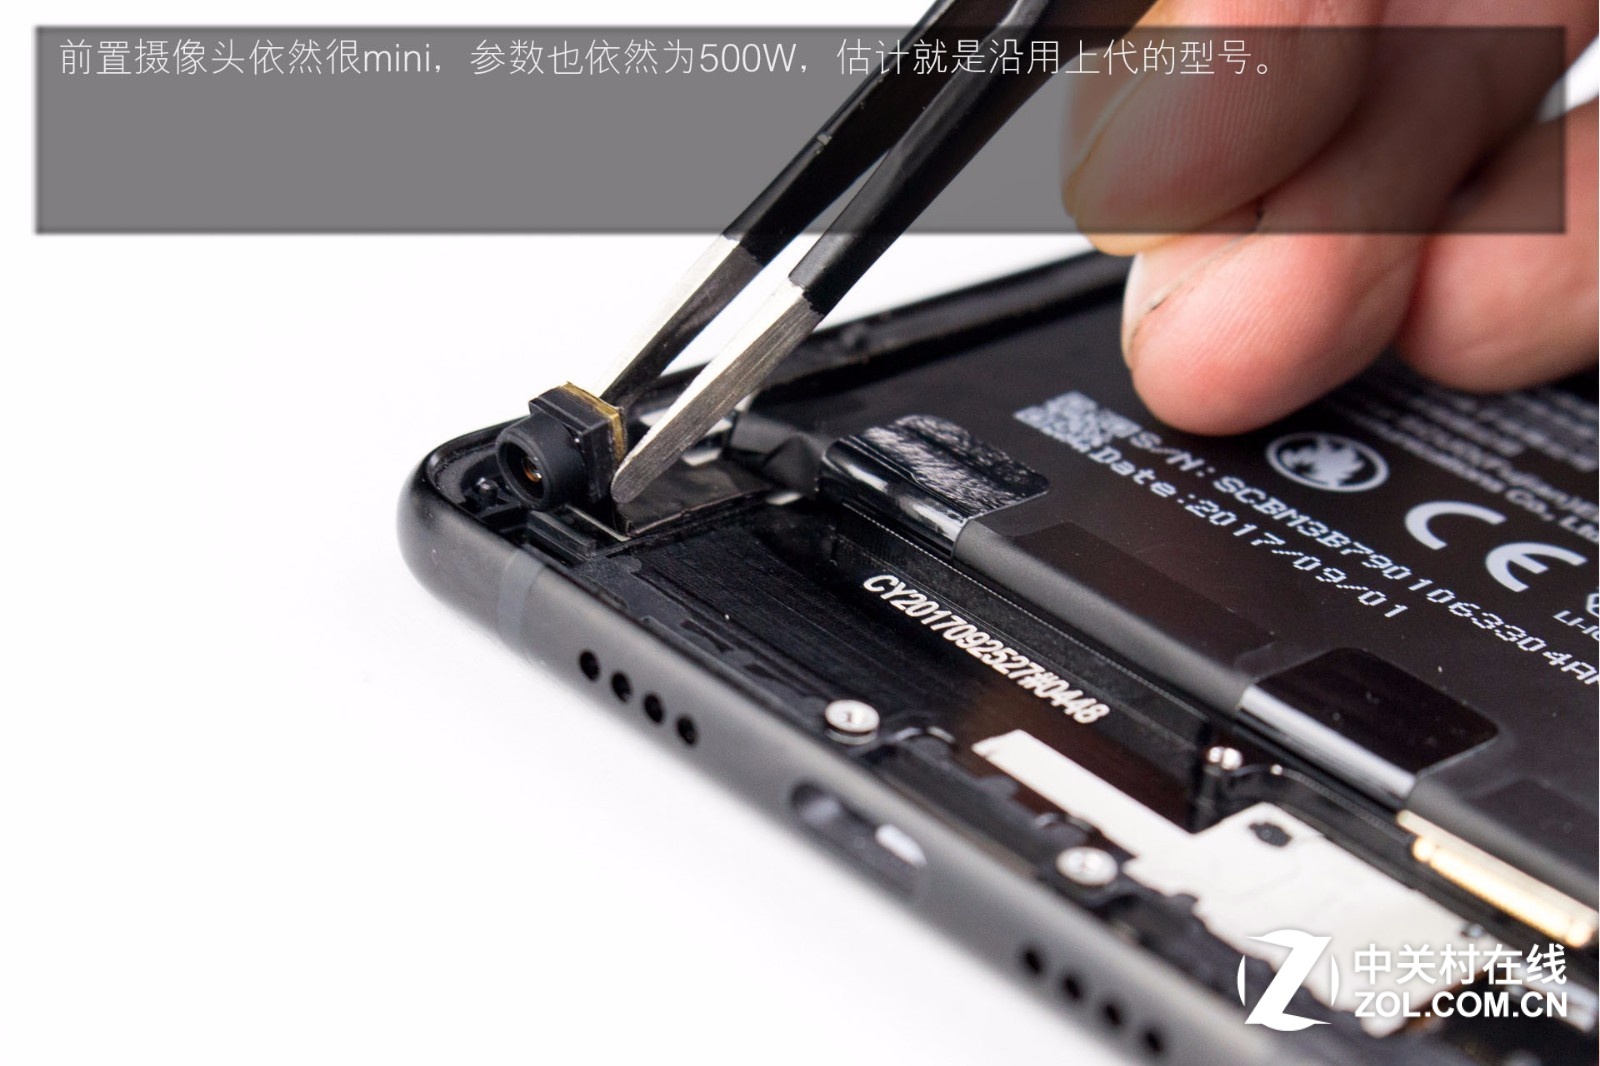
Remove the front camera module.
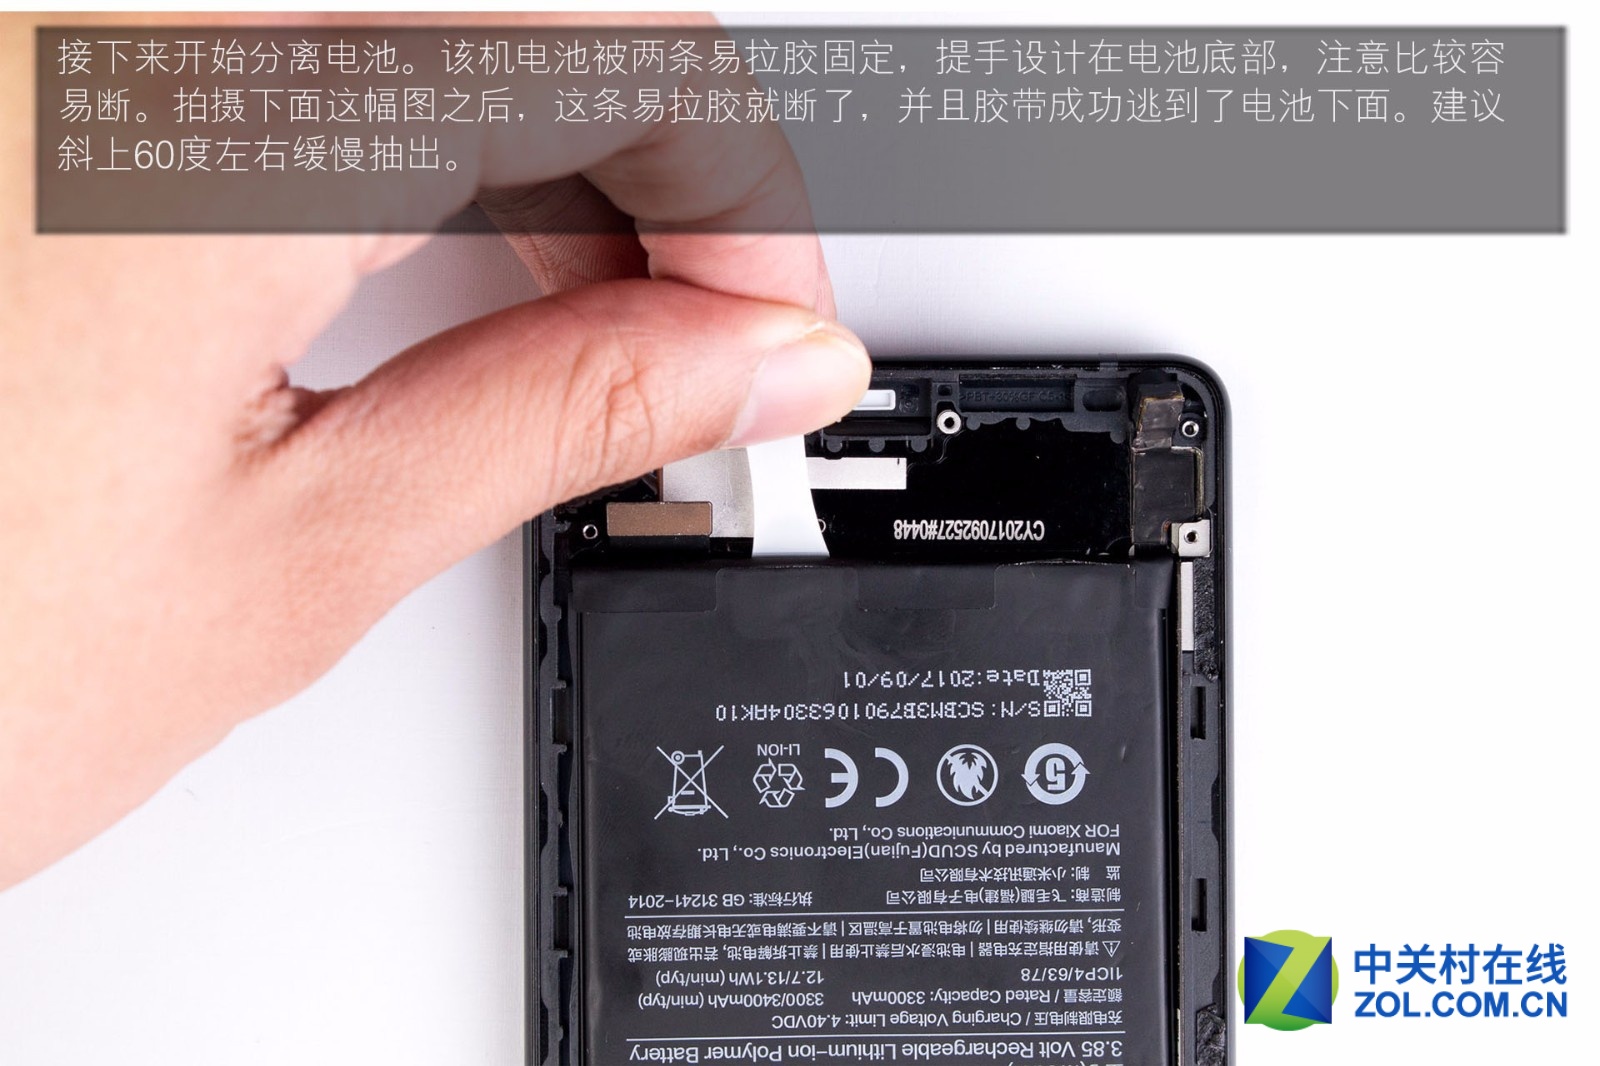
Then remove the battery. The battery is secured by two easy-to-pull adhesive tapes. The tapes are very fragile. It is recommended to peel off the adhesive tape slowly at a 60-degree upward angle.
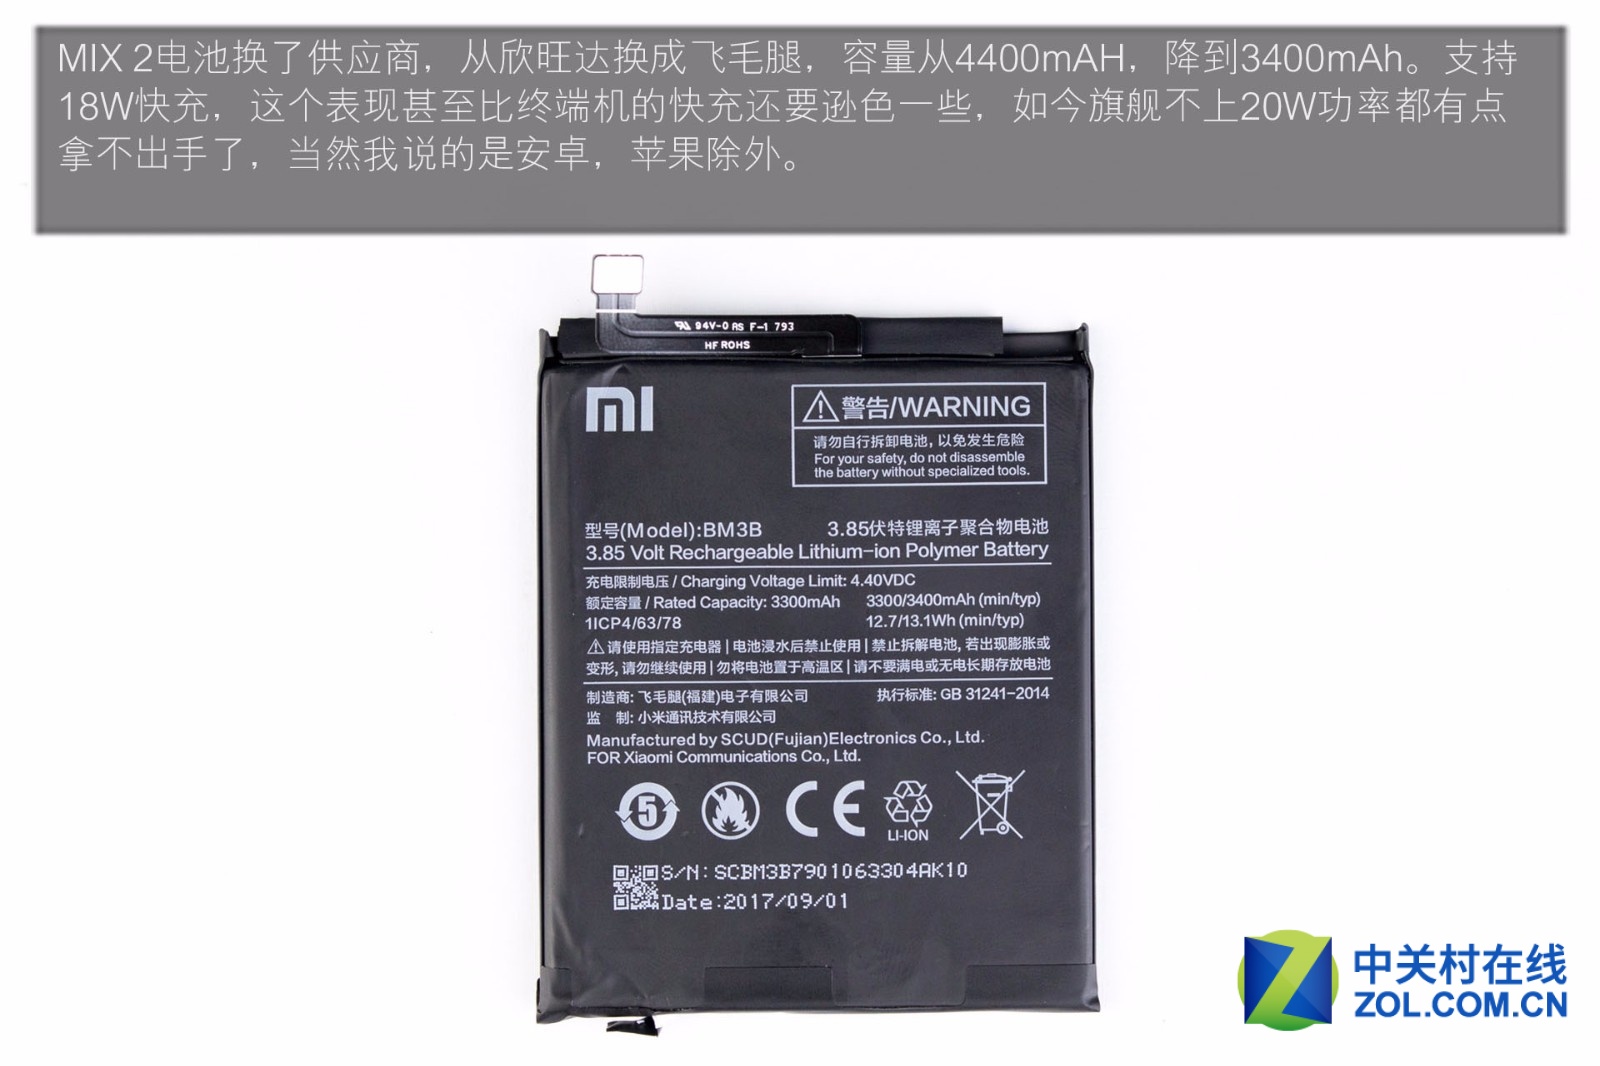
The MIX 2 battery is supplied by SCUD. Its capacity is 3,400 mAh, while the MIX has a 4,000 mAh battery. It supports 18W fast charging, which is far below the standard for phone fast charging. After all, current flagship phones all support fast charging above 20W. Of course, I am referring to Android phones, not including iPhones.
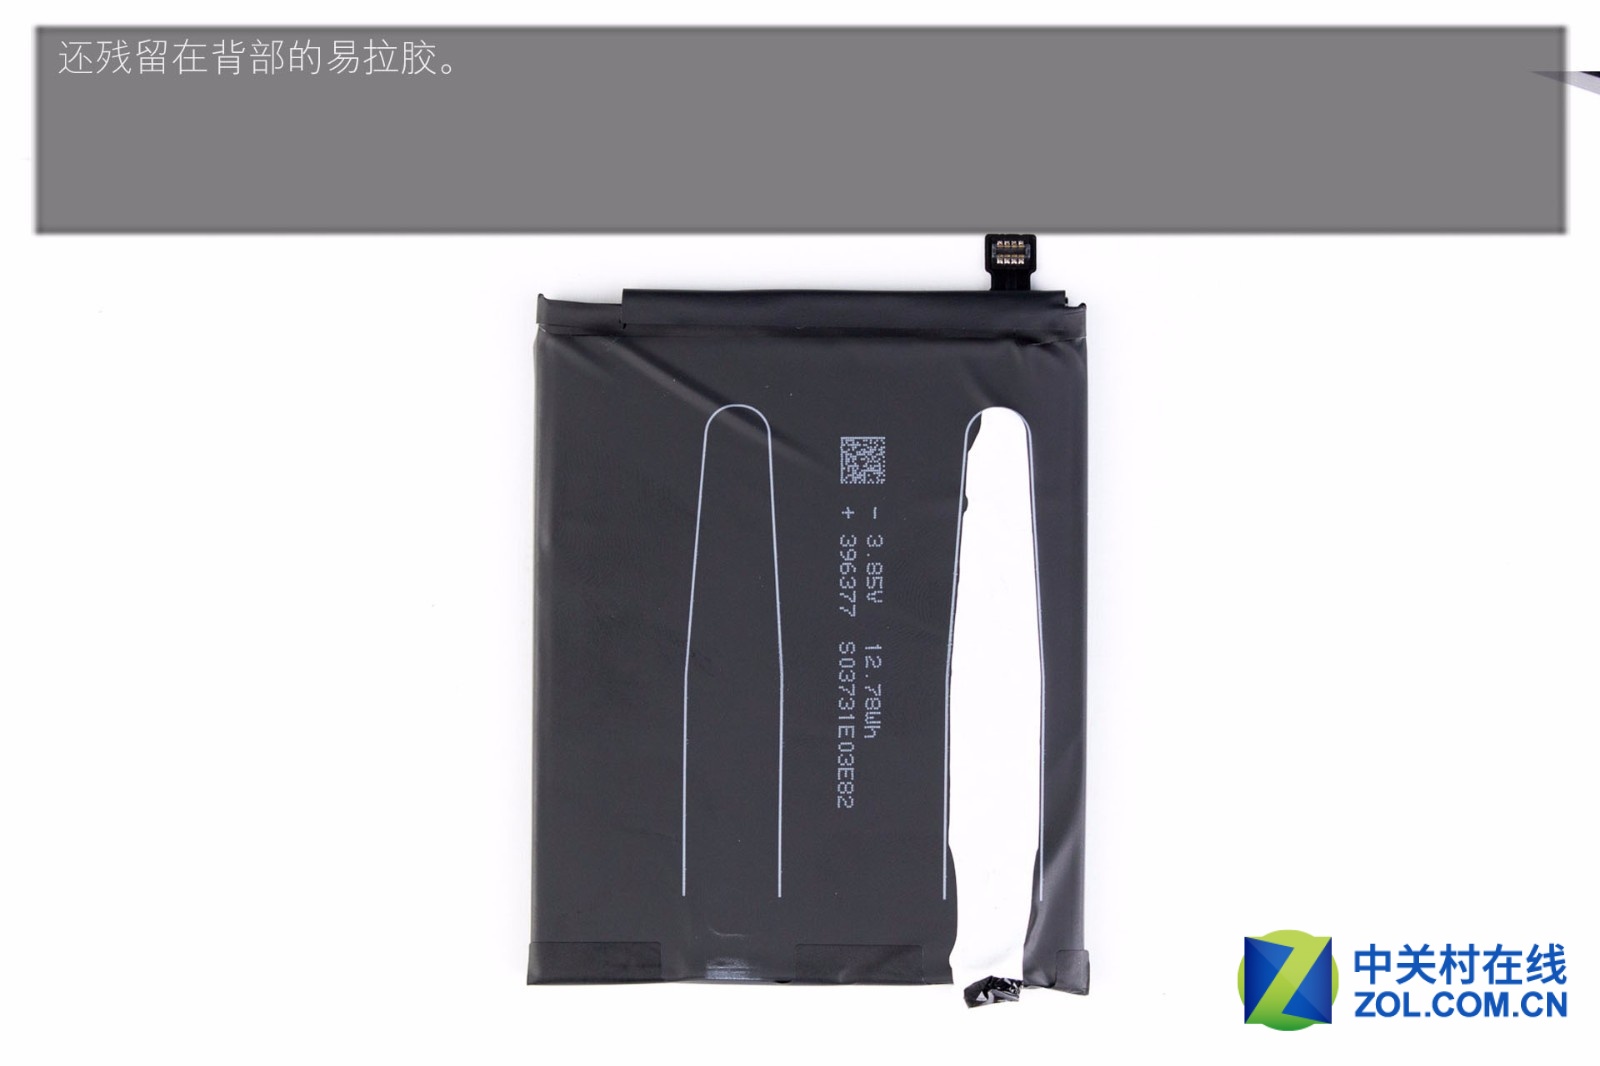
The easy-to-pull adhesive tape remains on the back.
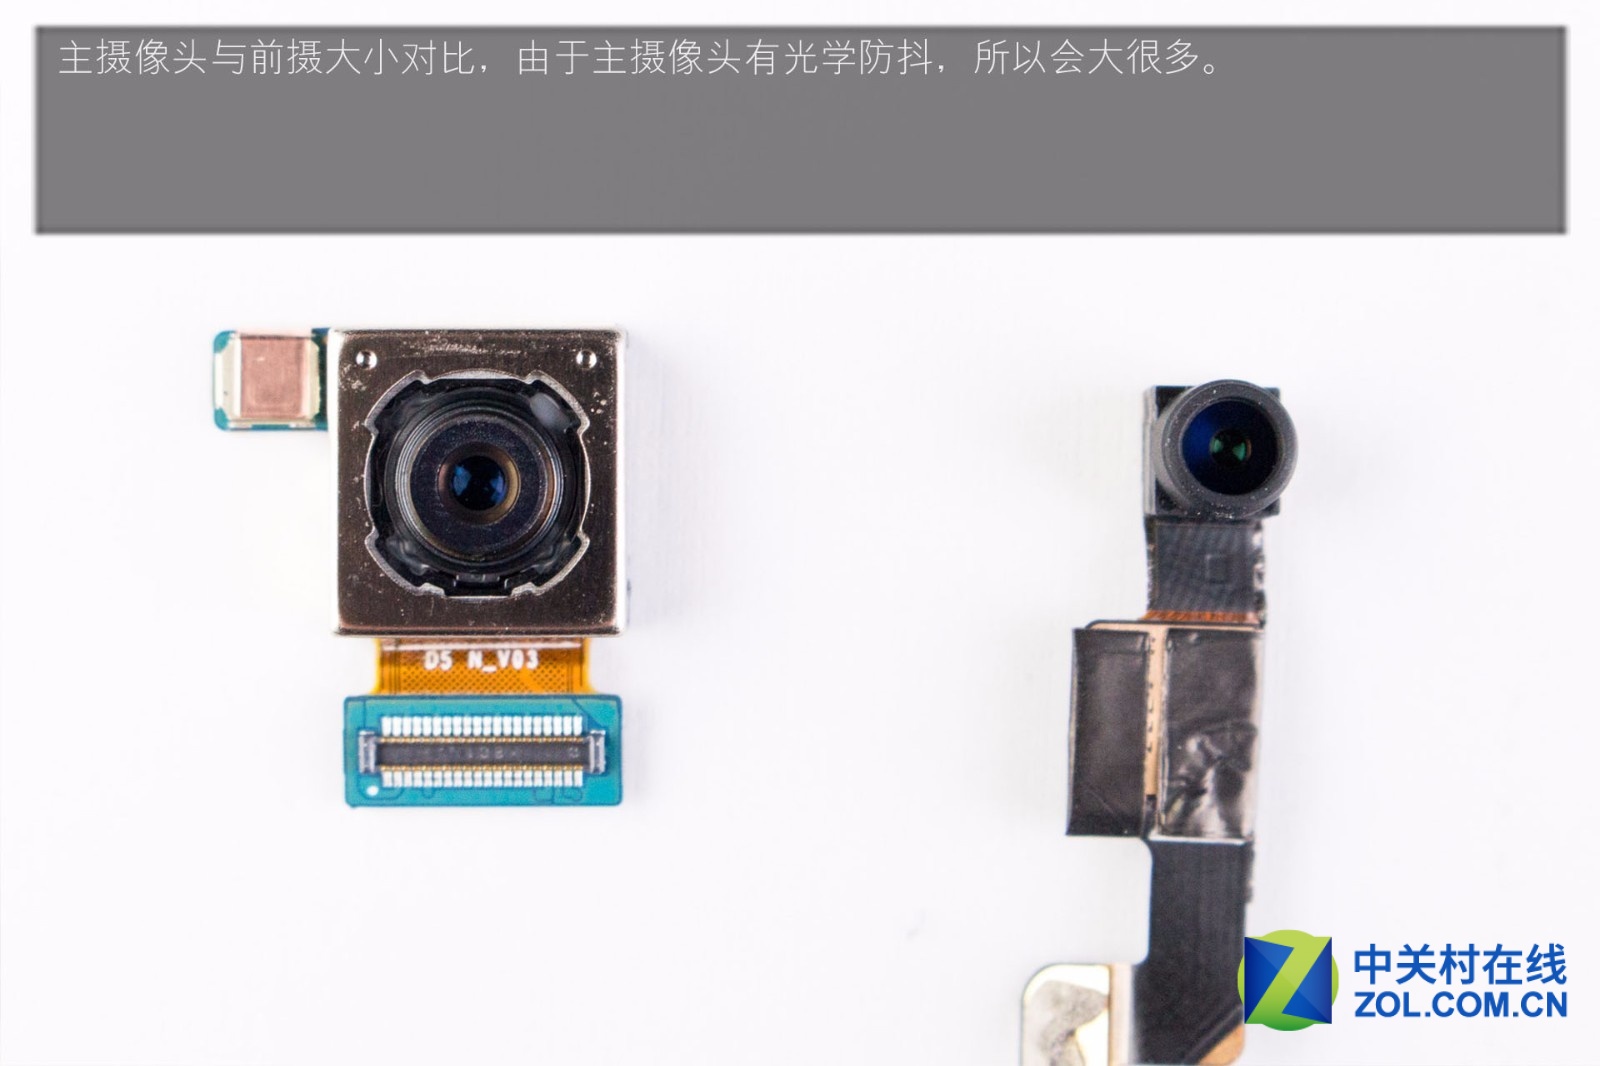
The main camera is much bigger than the front camera since it supports the OIS function.
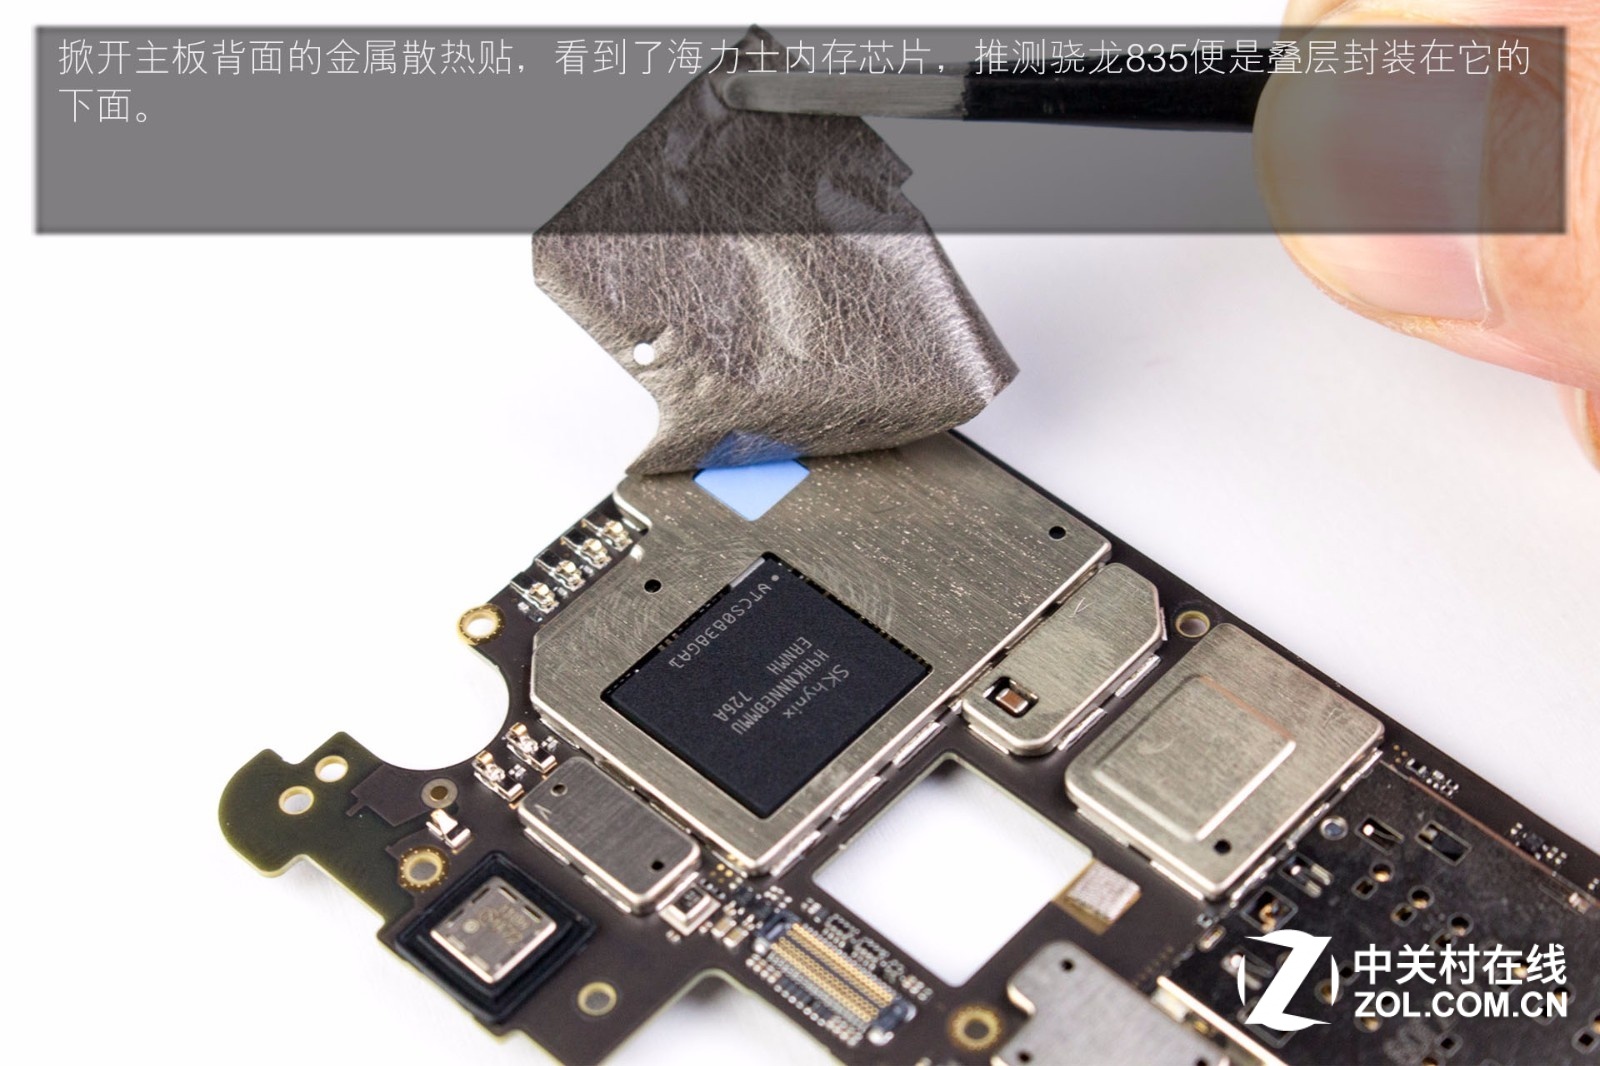
After removing the metal thermal paste from the back of the motherboard, the Hynix memory chip can be seen. The Snapdragon 835 chip is located below it.
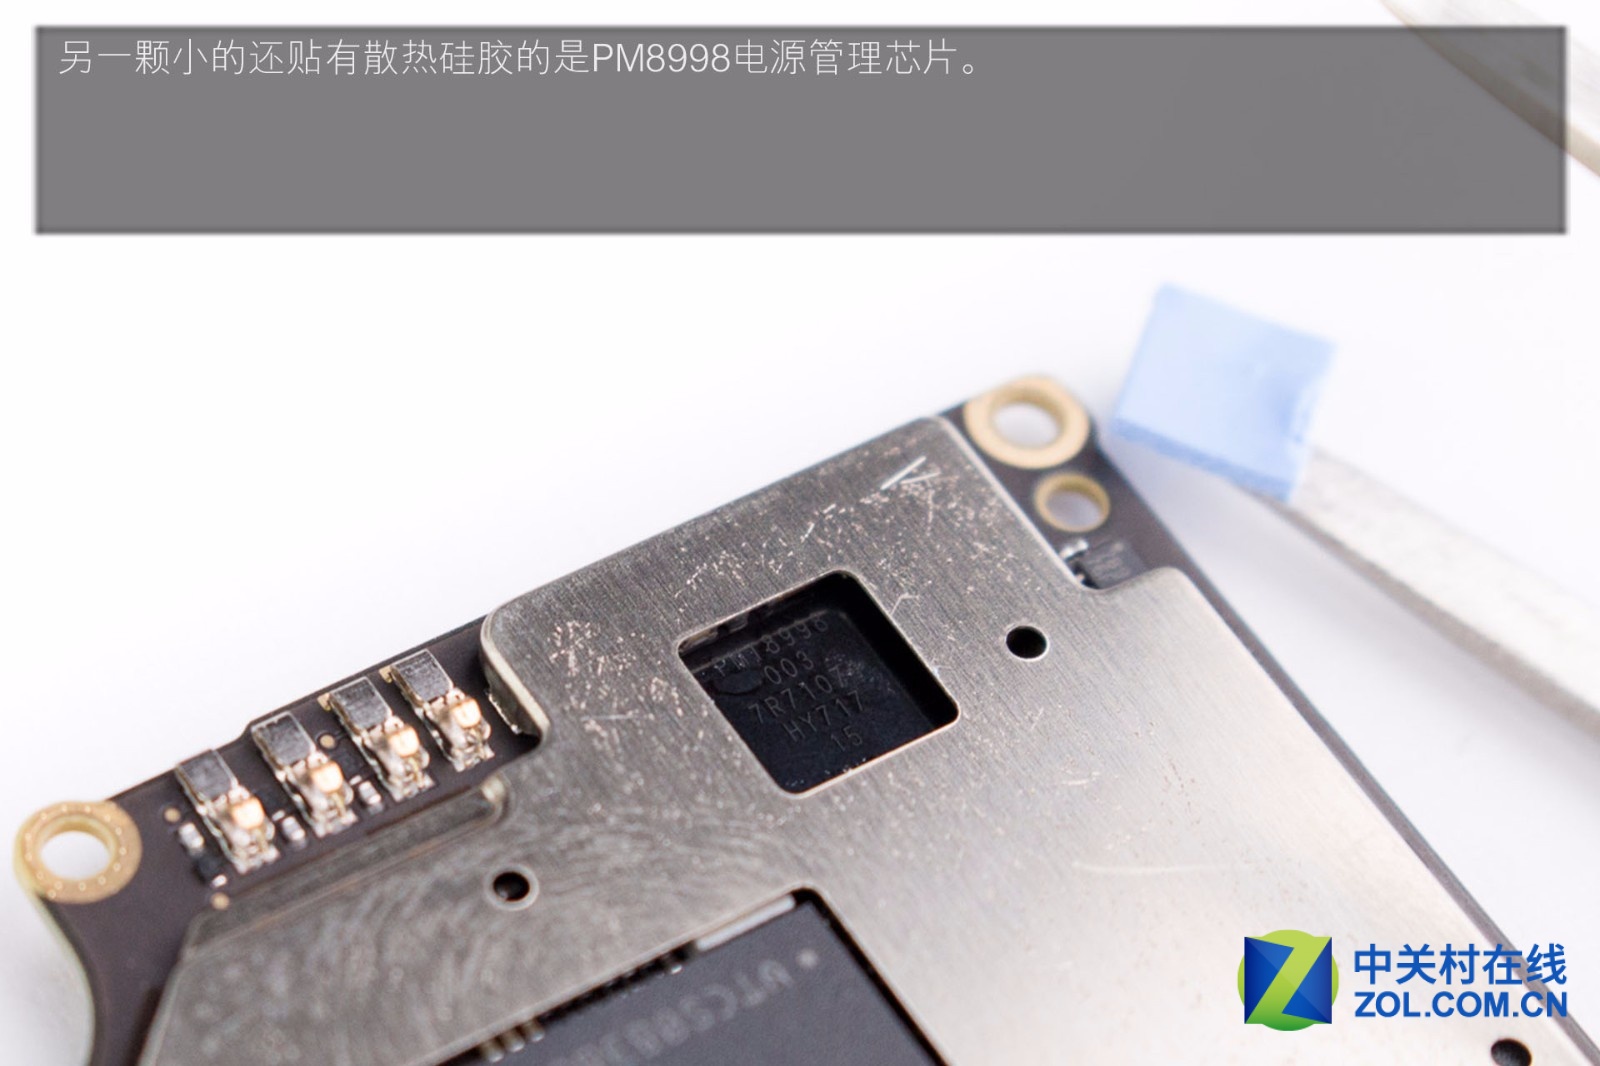
The other small one with thermal paste is the PM8998 power management chip.
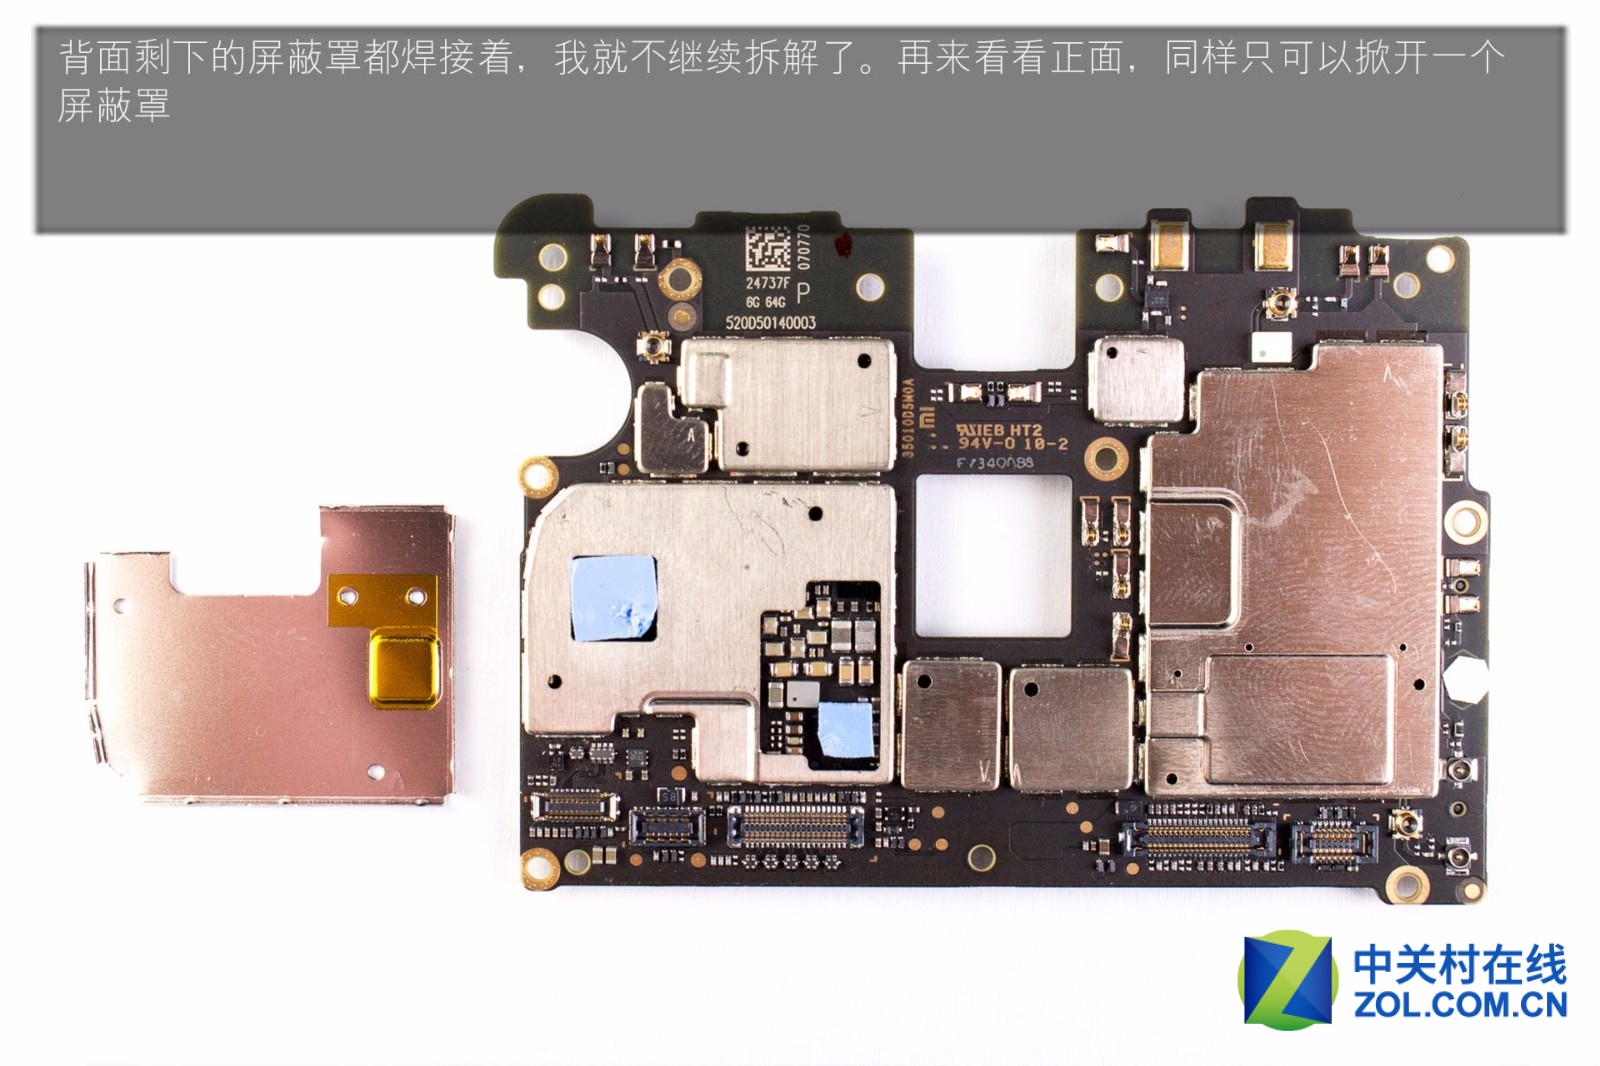
The back only has the soldering shield left, so I stopped disassembling the back. Now, let’s take a look at the front part. I can only remove the shield.
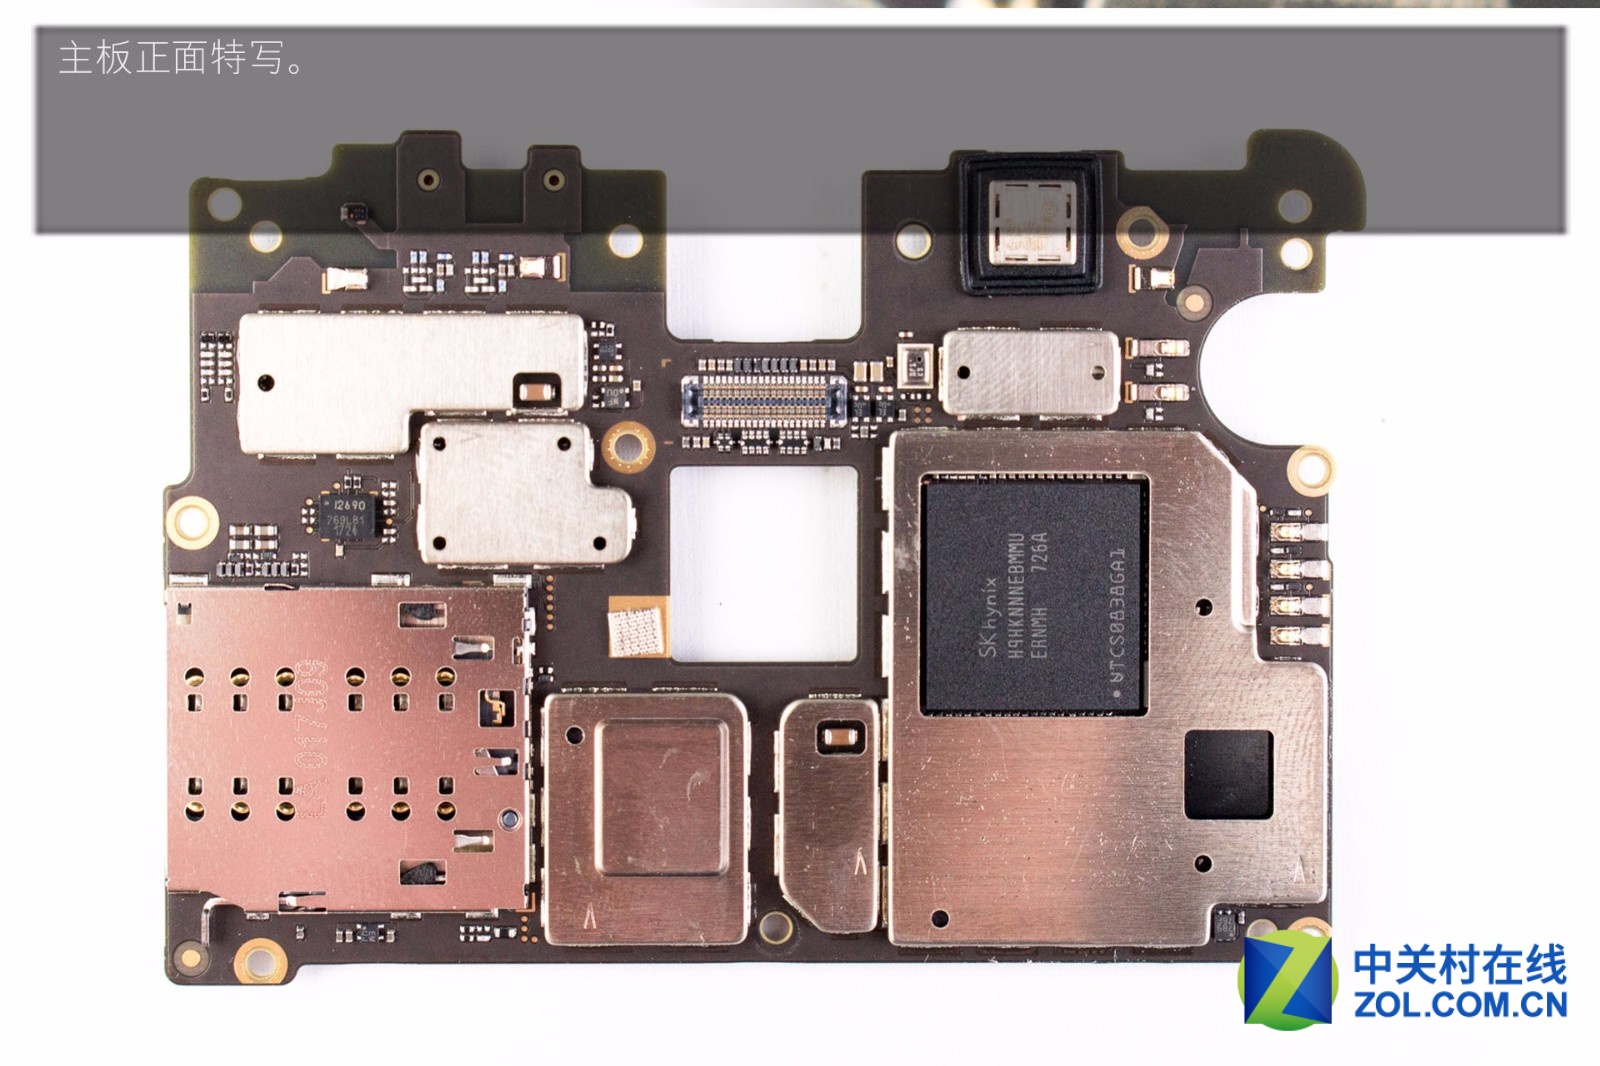
Close-up of the front of the motherboard.