The ASUS ROG GL502VM features an Intel Core i7-6700HQ processor and NVIDIA GeForce GTX 1060 graphics card. It also features a 15.6-inch IPS FHD screen, 8GB of RAM, a 128GB SSD, and a 1TB hard drive.
The best feature of this gaming laptop is that its graphics card has been upgraded to NVIDIA GTX 1060. Its performance is stronger than that of the GTX 970 and GTX 980M, and it is currently the best mobile graphics card in terms of power efficiency.
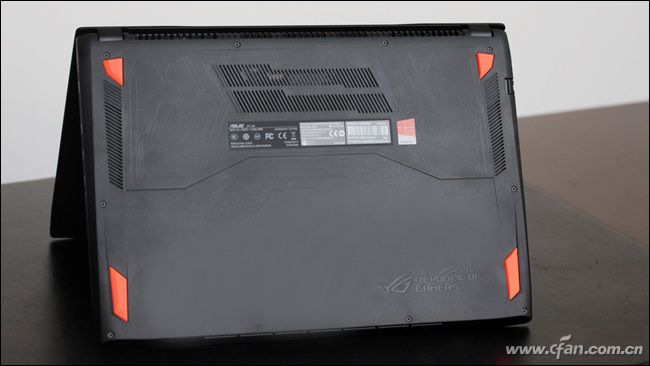
It uses a sinking hinge design. All the ports are concentrated on both sides of the body. Among them, the left side of the ROG GL502VM features the power jack, RJ-45, Mini DP, HDMI, USB 3.0, and USB Type-C ports.
The right side of the body provides a headphone jack, a USB 3.0 port, a card reader, and a security lock slot. For a 15.6-inch gaming laptop, the ROG GL502VM still has a relatively rich number of ports.
In this guide, we will show you how to remove and upgrade the SSD, RAM, and HDD on the ASUS ROG GL502VM.
Teardown is what we do! Follow us on Facebook for the latest repair news.
1. Remove the bottom cover
Remove all visible screws from the bottom cover.
Insert a pick under the bottom cover. Slide the pick along the bottom case to remove it.
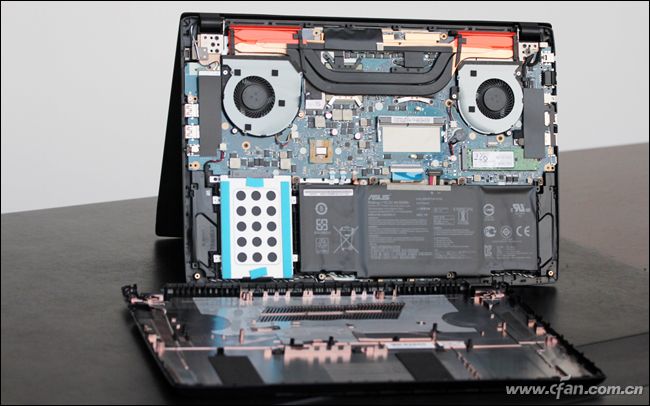
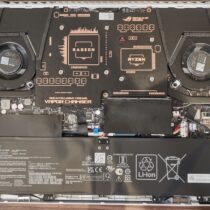
Under the bottom cover, you can access the battery, SSD, HDD, Wi-Fi card, RAM, speakers, heat sink, cooling fan, and motherboard.
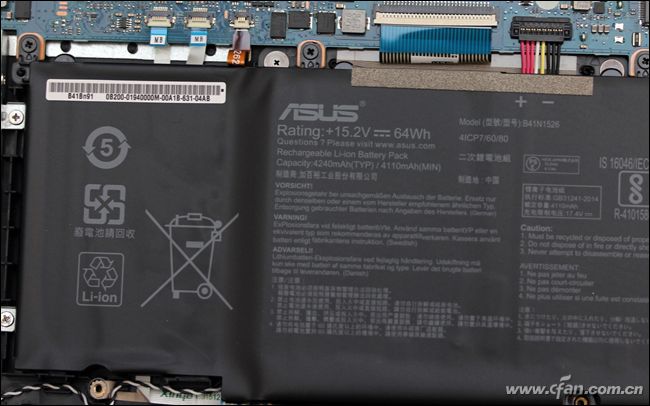
It features a 15.2V, 64Wh Li-ion battery.
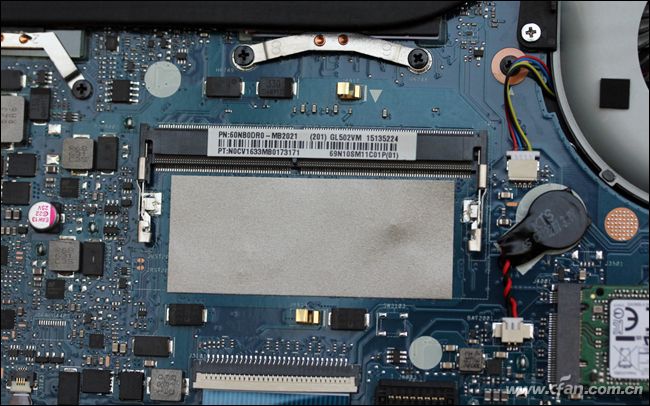
2. ASUS ROG GL502VM RAM upgrade & Install
The laptop has 8GB of DDR4-2133 MHz RAM onboard and a spare RAM slot. You can install an 8GB or 16GB DDR4-2133MHz RAM module, and it supports up to 24 GB.
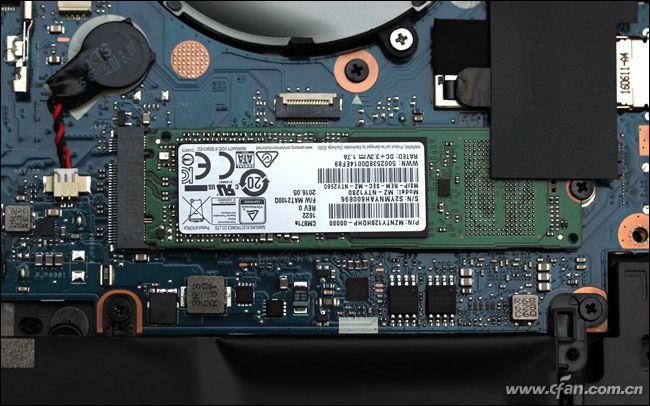
3. ASUS ROG GL502VM M.2 PCIe SSD upgrade & Removal
Although the ROG GL502VM’s M.2 slot supports PCIe 3.0 and NVMe protocols, and the price of the laptop is not low, ASUS still equips it with an M.2 SATA SSD.
Close-up of the Samsung 128GB CM871 SSD.
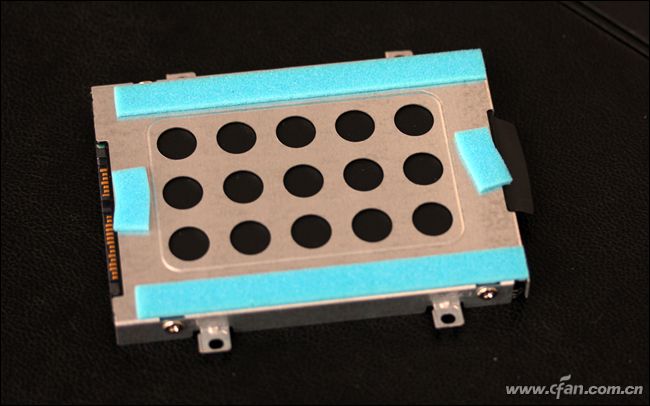
4. ASUS ROG GL502VM hard drive upgrade & Removal
Remove the four screws and lift the hard drive module. You can remove the hard drive.
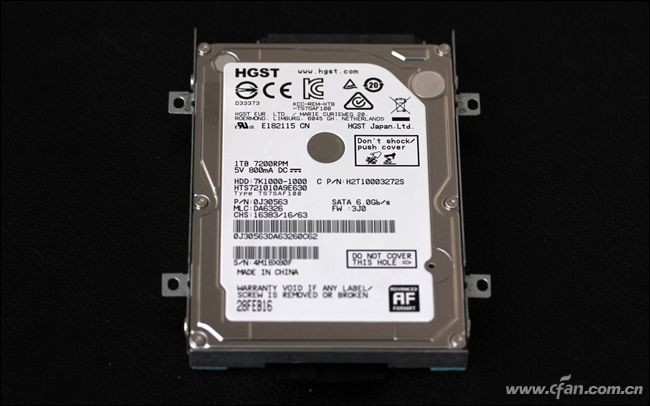
The laptop comes with a 1TB 7200 RPM hard drive. If necessary, you can replace it with a larger-capacity hard drive or a 2.5-inch SSD.
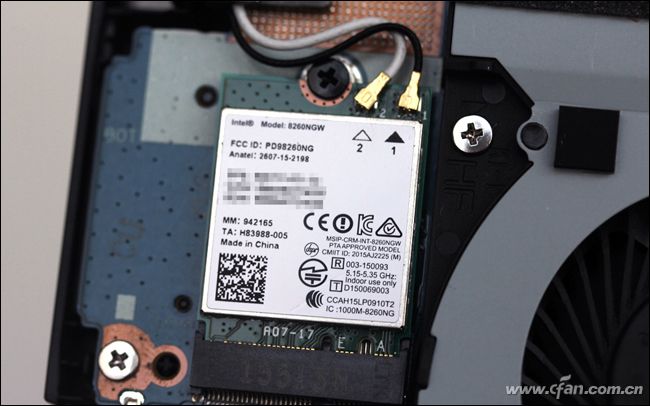
5. Remove the wireless card
Remove the screw securing the wireless card.
Unplug two antenna cables from the wireless card and remove it from its slot.
The Intel 8260NGW Wi-Fi card supports both 2.4 GHz and 5 GHz dual-band frequencies.
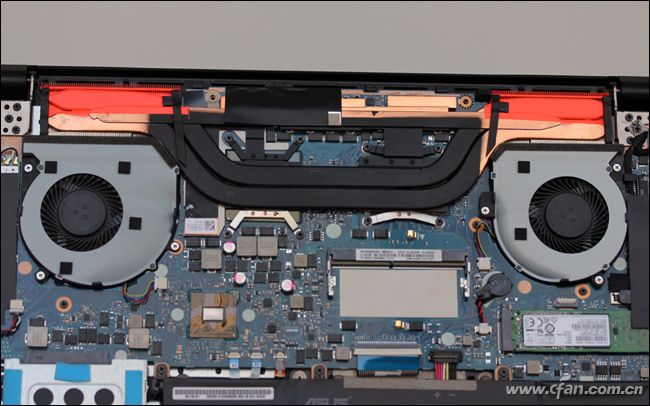
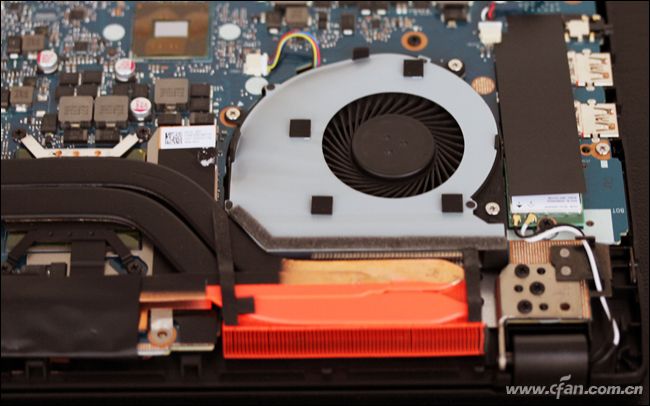
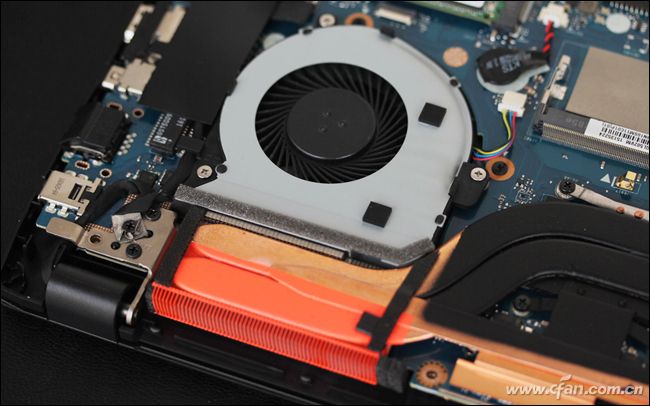
6. Remove the heat sink and cooling fan
The cooling module of the ASUS ROG GL502VM features a dual-fan and three copper design. The CPU and GPU are covered by two heat pipes, one of which is connected to the fan’s heatsink. The fan and heatsink can be removed by unscrewing the screws, making it very easy to clean up dust.
The GL502VM keyboard, screen, cooling fan, and adapter are available in our parts store.
Source: cfan.com.cn

I need help. I tried to clean my GL502VM coolers, but I was unable to remove the cooler next to the Wi-Fi module because it was stuck to the metal underneath, which was secured to the motherboard. Should it be like this? Because I can see that piece of metal in the images in this post, can I remove it from the laptop?
That’s the heat sink. It’s a complete component with the fan. You need to remove the fan and heat sink from the motherboard together.
So, there is no problem if I install a Samsung 970 Evo Plus as the first drive?