
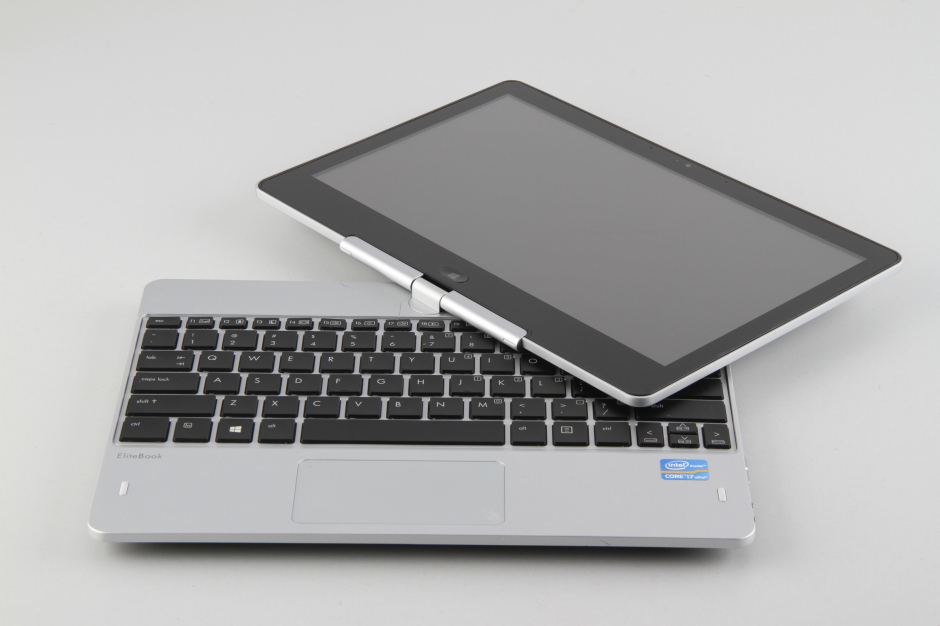
In this post, I will explain how to disassemble the HP EliteBook Revolve 810 G1 to remove the keyboard, SSD, RAM, palm rest, wireless card, heat sink, cooling fan, bottom case, and motherboard.
Want to be the first to see the latest smartphone and laptop inside? Follow us on Facebook for the latest teardown news.
Slide the battery latch to the left with your finger, then slide the battery down to remove it.
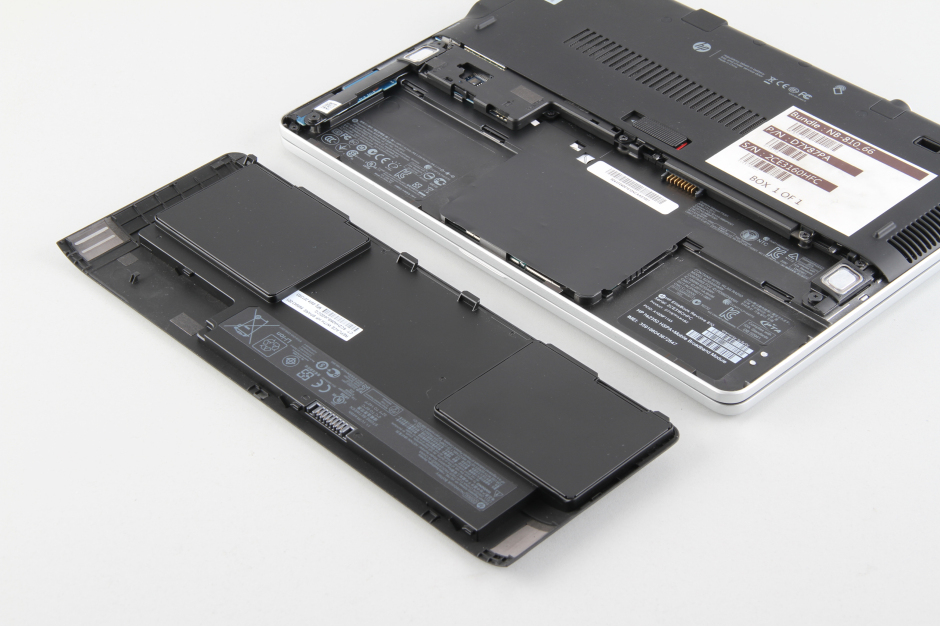
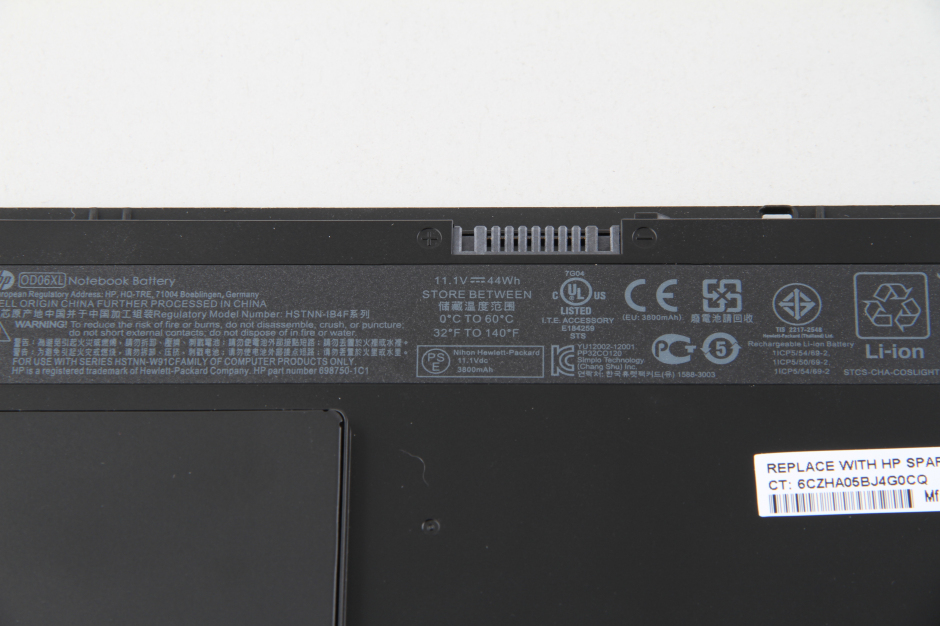
The HP EliteBook Revolve 810 G1 comes with an 11.1V, 44Wh Li-ion battery, HP part number: HSTNN-1B4F.
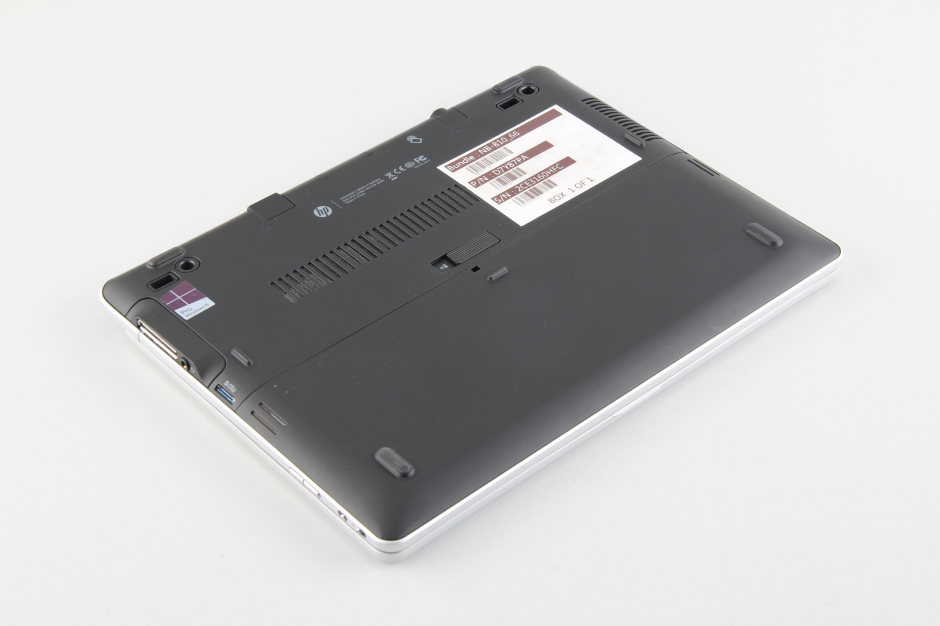
There are four hidden screws on the bottom case.

Remove the four rubber mats. You can find the screw under the rubber mats.
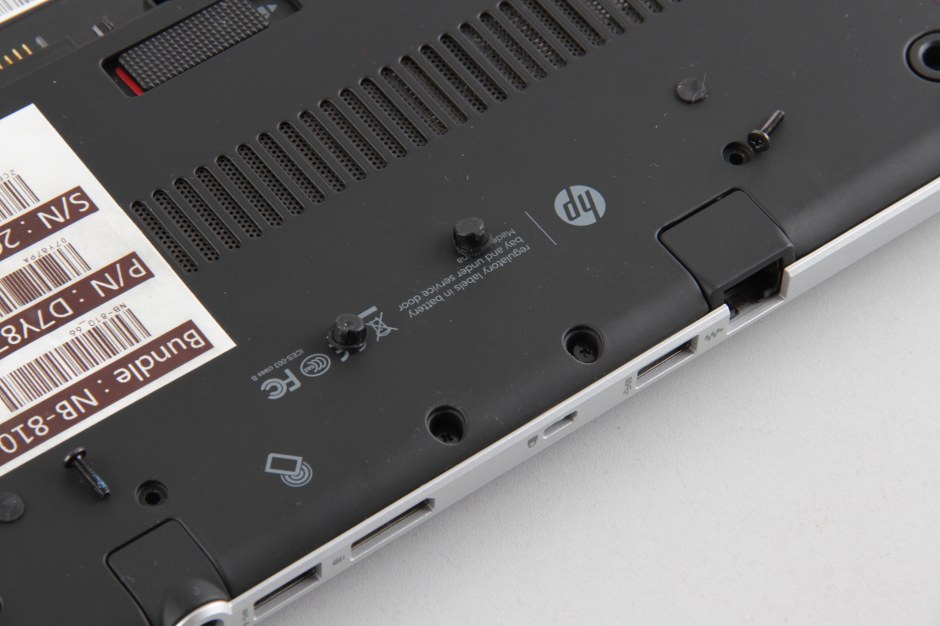
Remove the four hidden screws and other screws on the bottom cover.
Insert a pry bar under the bottom cover and slide the tab to separate the bottom cover from the laptop.
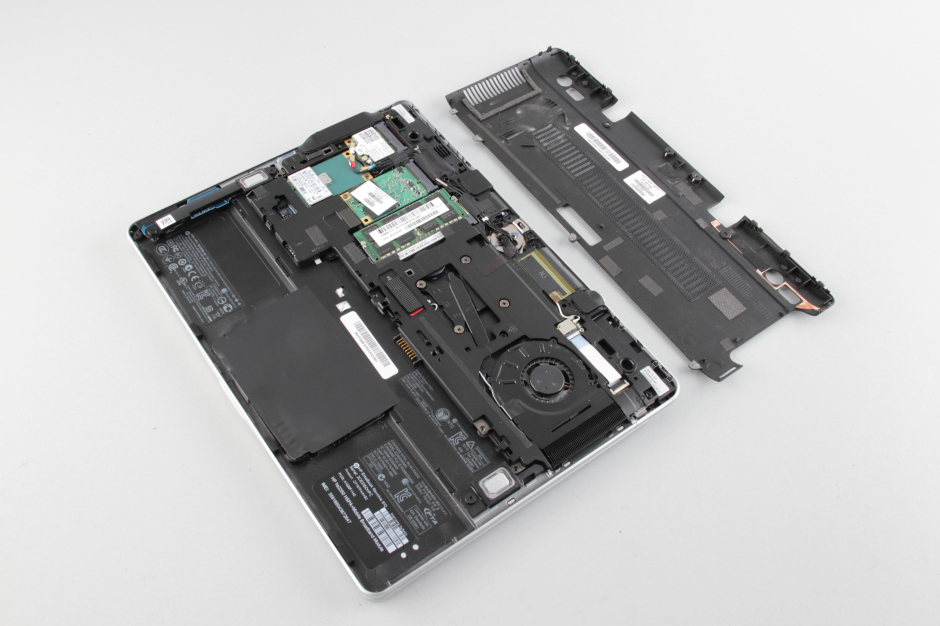
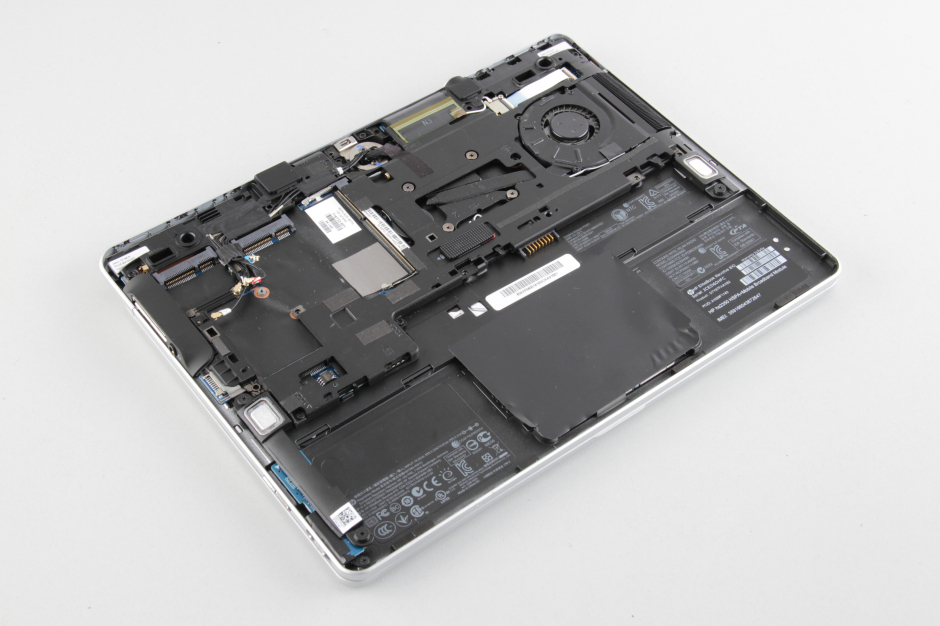
When the bottom cover is removed, you can get access to the RAM, wireless card, and SSD.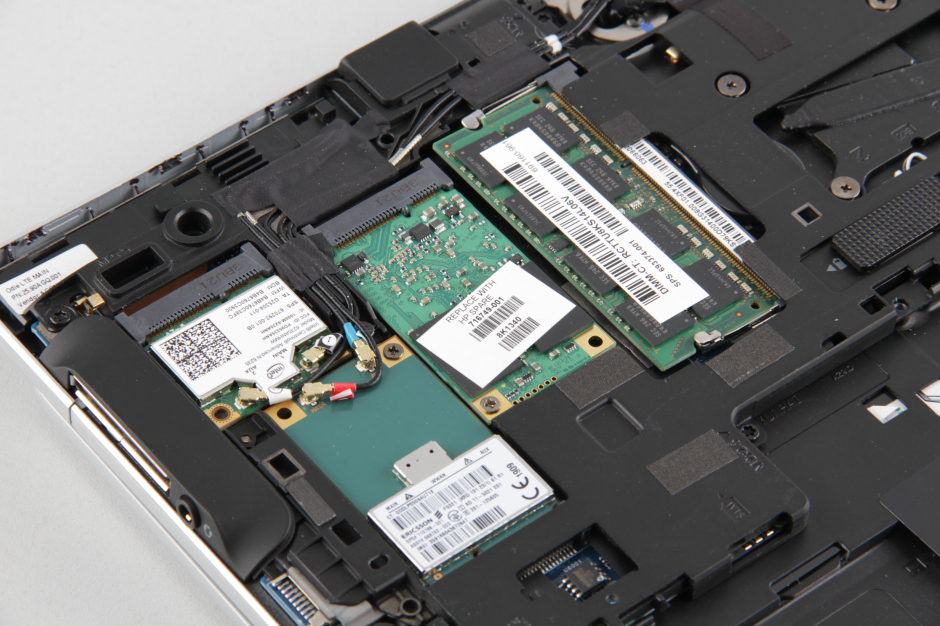
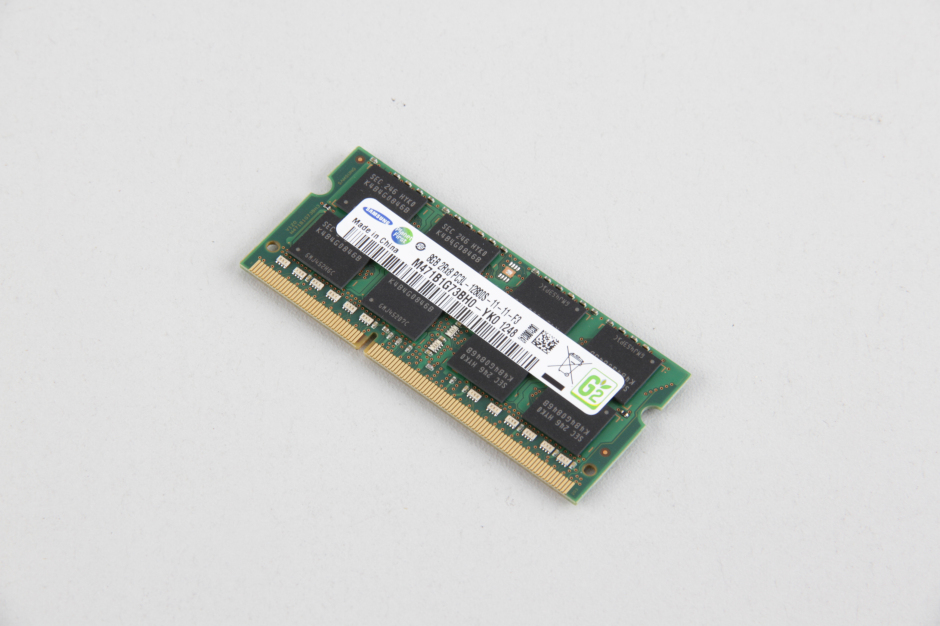
The HP EliteBook Revolve 810 G1 comes with a Samsung 8GB DDR3L-1600MHz memory module, HP part number: 693374-001.
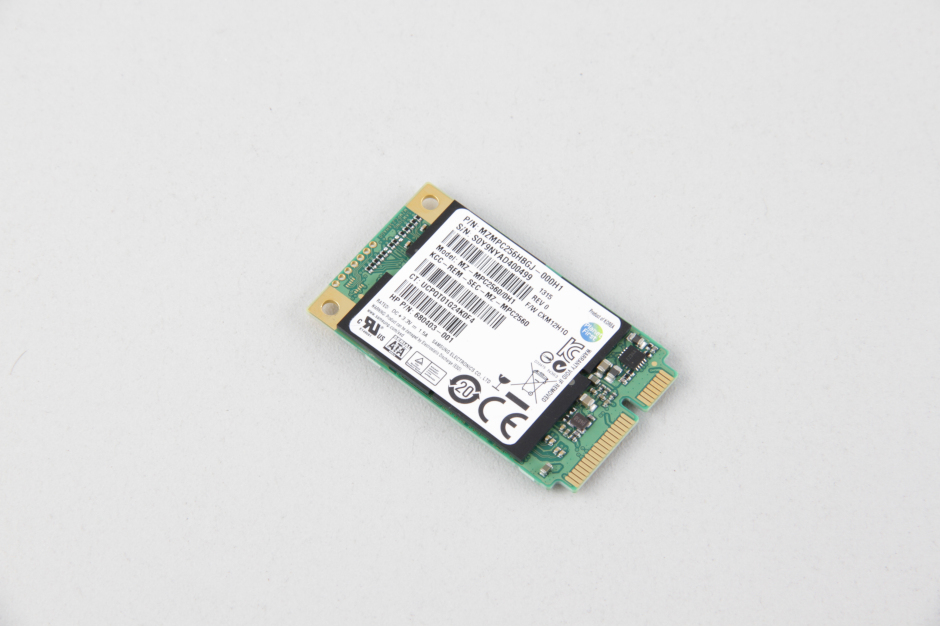
Remove the screw securing the SSD and carefully remove it from its slot.
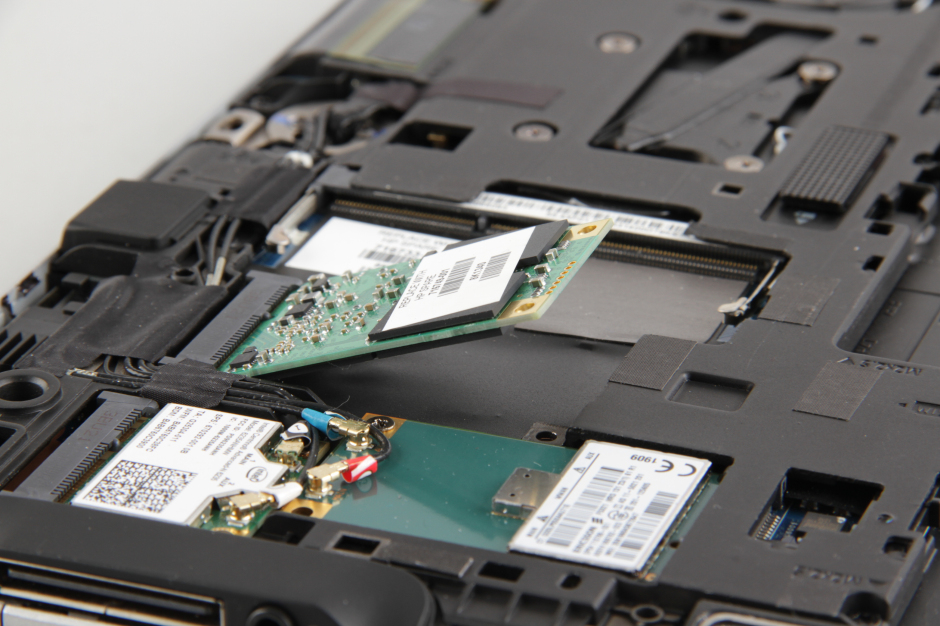
The laptop features a Samsung 256GB SSD, and the HP part number is 680403-001.
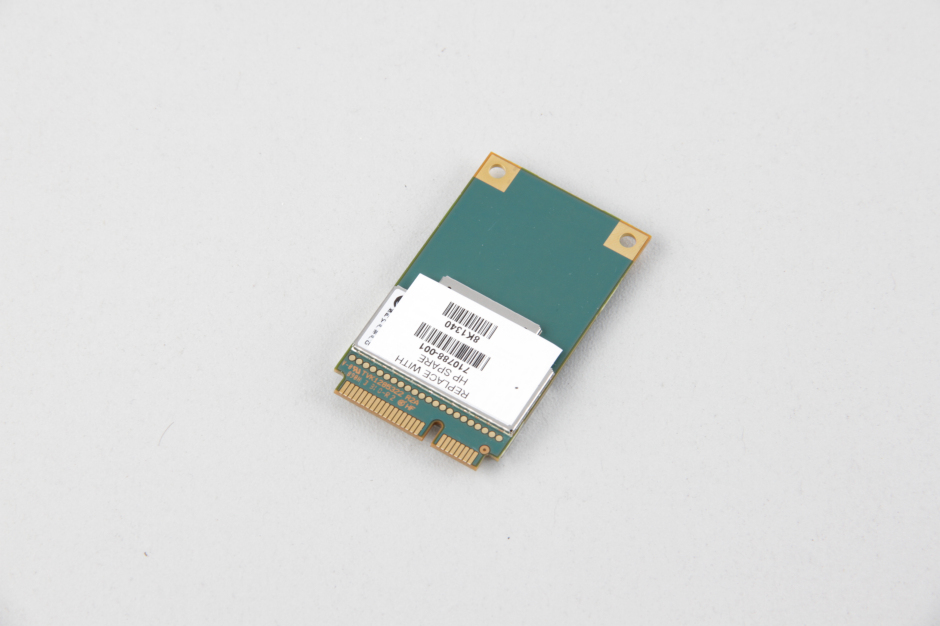
Remove the screw securing the mobile WWAN broadband module.
Unplug two antenna cables.
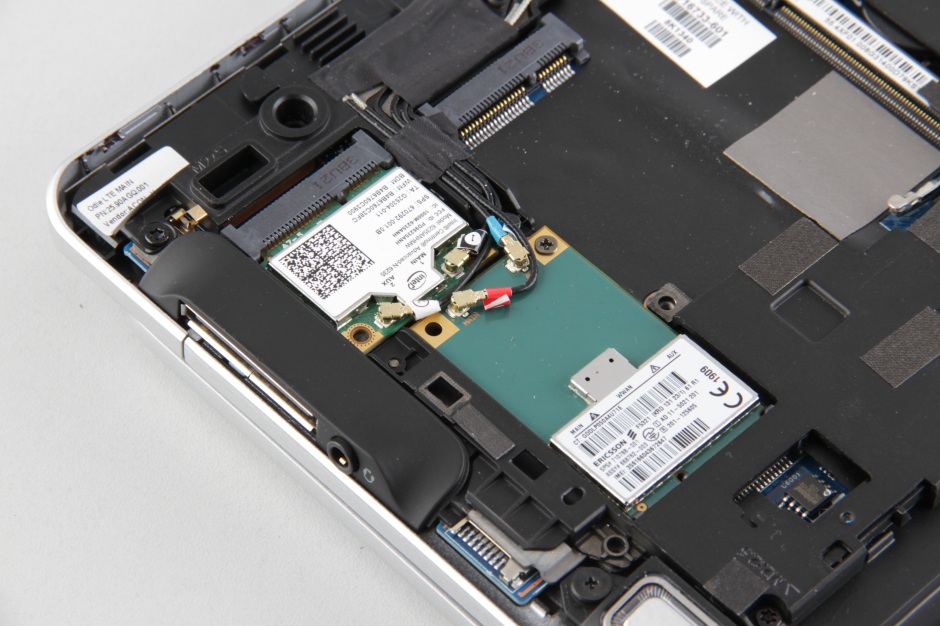
Close-up of the WWAN module, HP part number: 710788-001.
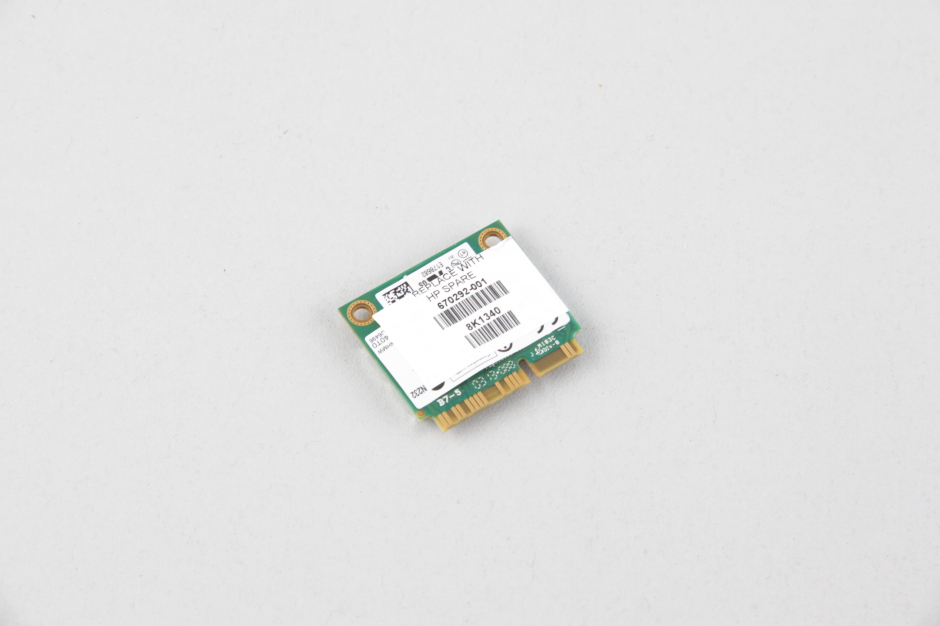
Remove the screw securing the wireless card and unplug the two antennas. You can remove the wireless card.
HP part number: 670292-001.
Insert a screwdriver into the keyboard hole on the back, pry up the keyboard slightly, and then remove the entire keyboard by hand. Then flip the keyboard over and place it on the palm rest, disconnecting the keyboard ribbon cable and backlight ribbon cable from the motherboard.

Now, remove all visible screws and disconnect the visible cables under the keyboard.
Flip over the laptop.
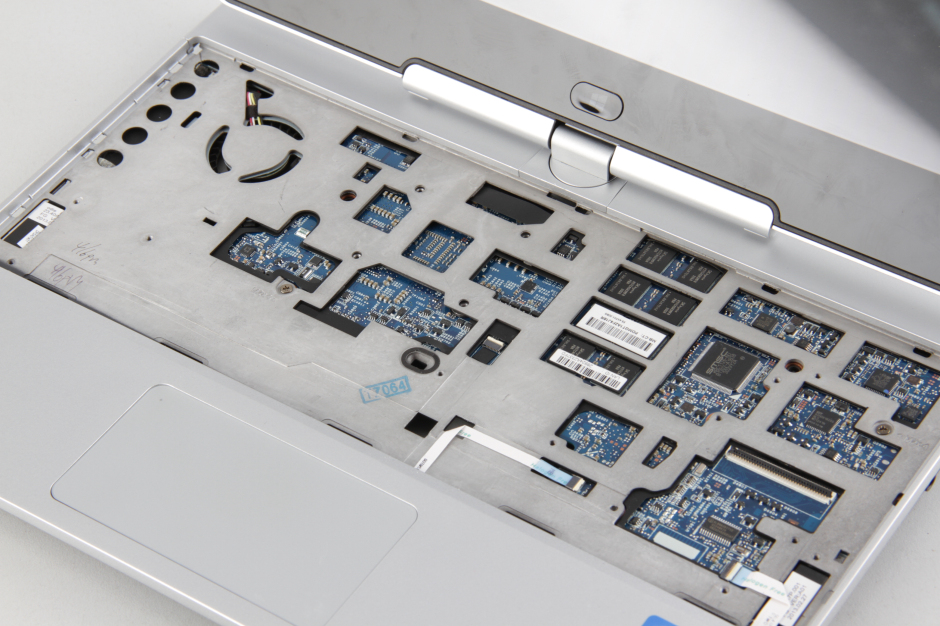
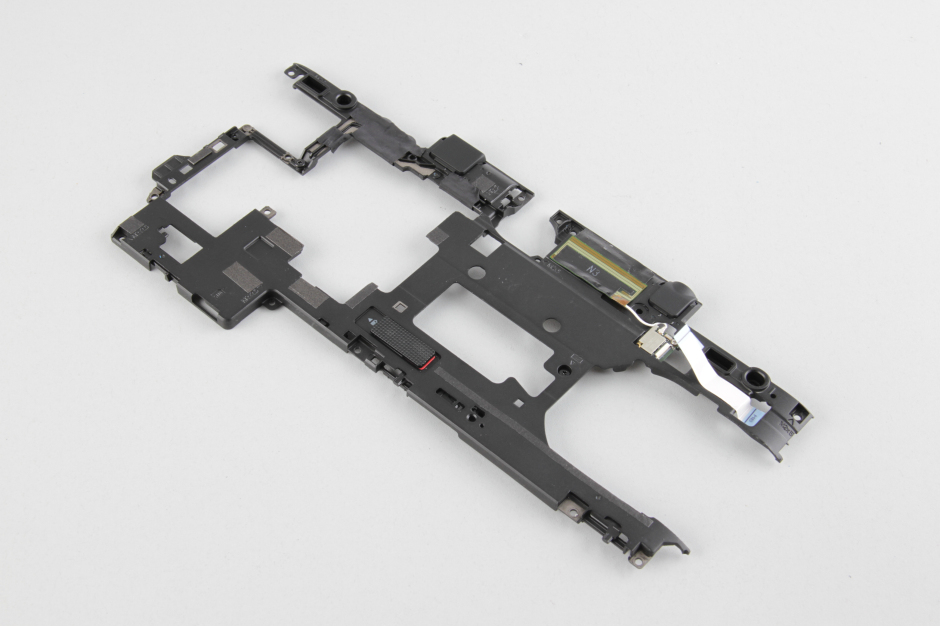
Remove the middle frame covering the motherboard.
This is a close-up of the middle frame, which also integrates some small parts, but I did not remove them.
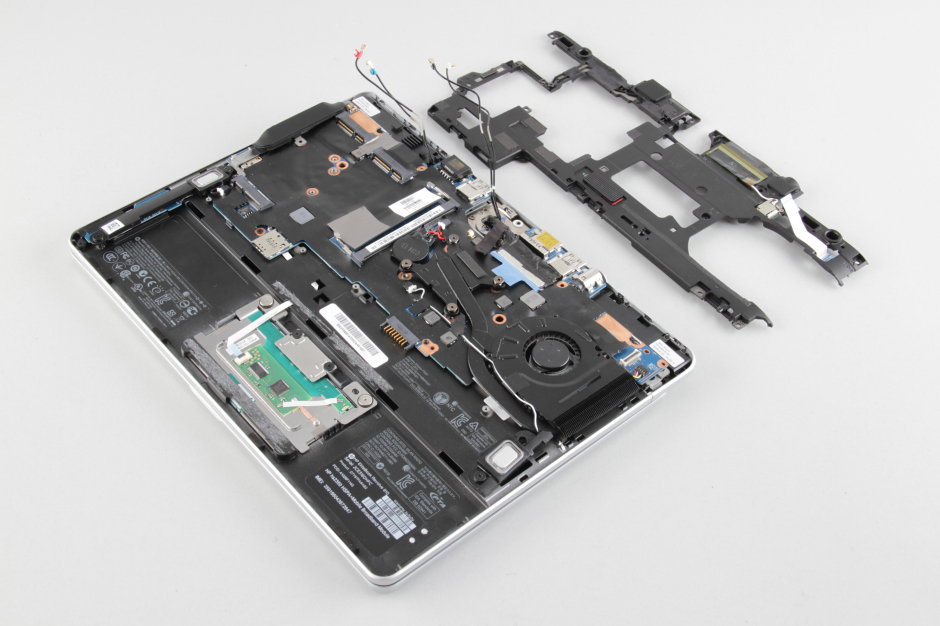
Remove all screws securing the motherboard and disconnect all cables from the motherboard.
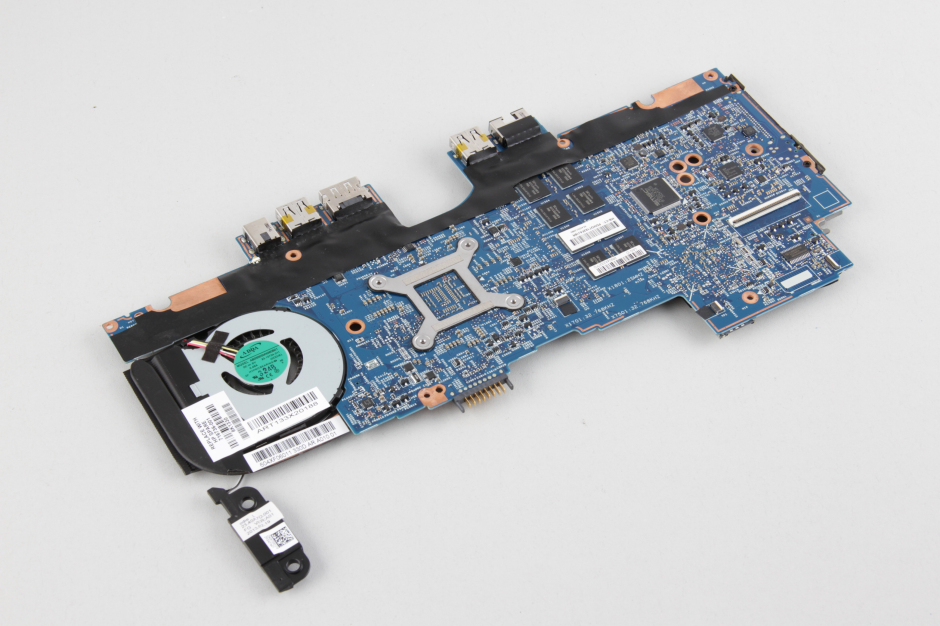
Lift the motherboard from one side with your hand and slowly remove it.
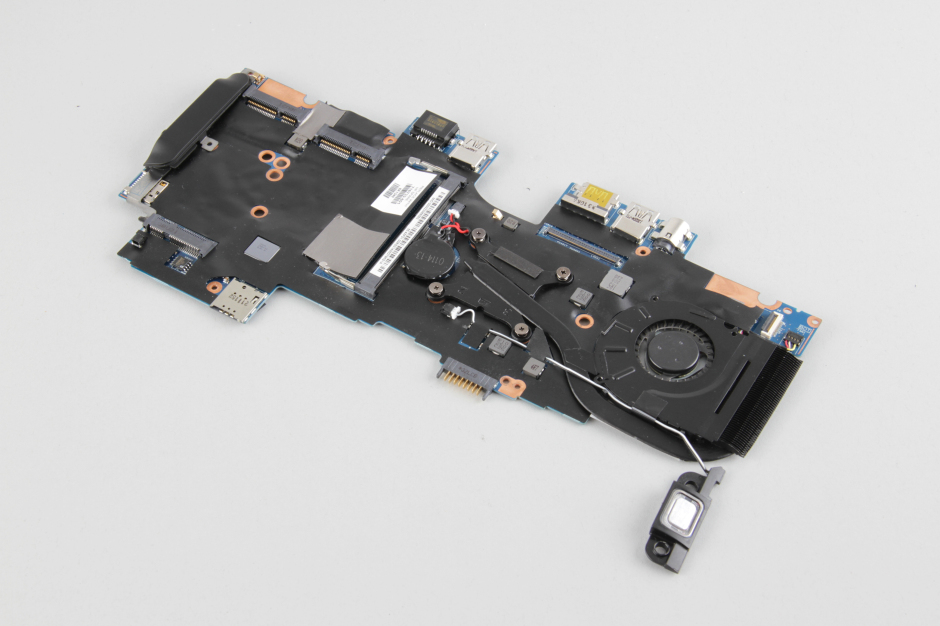
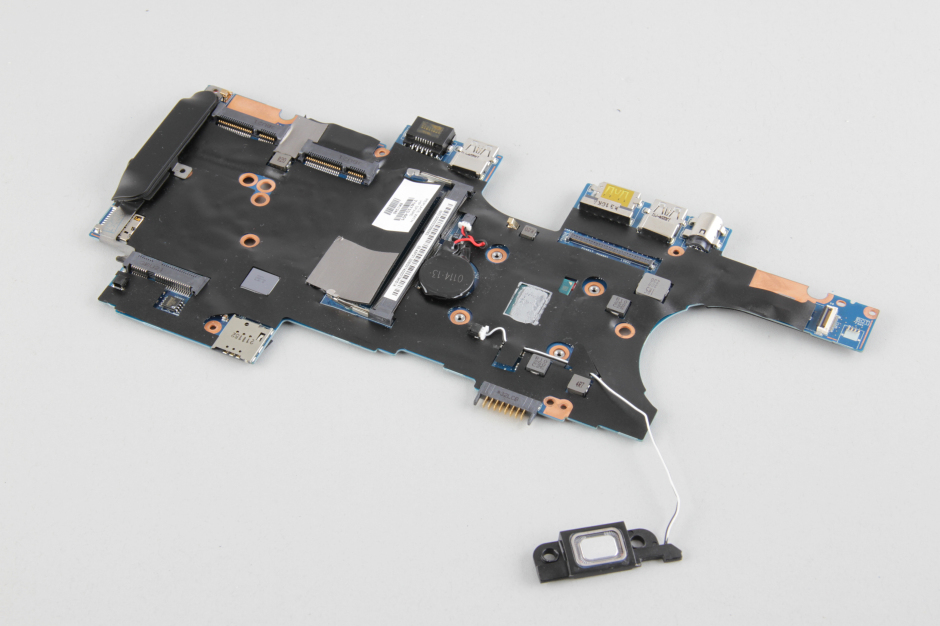
The back of the motherboard.
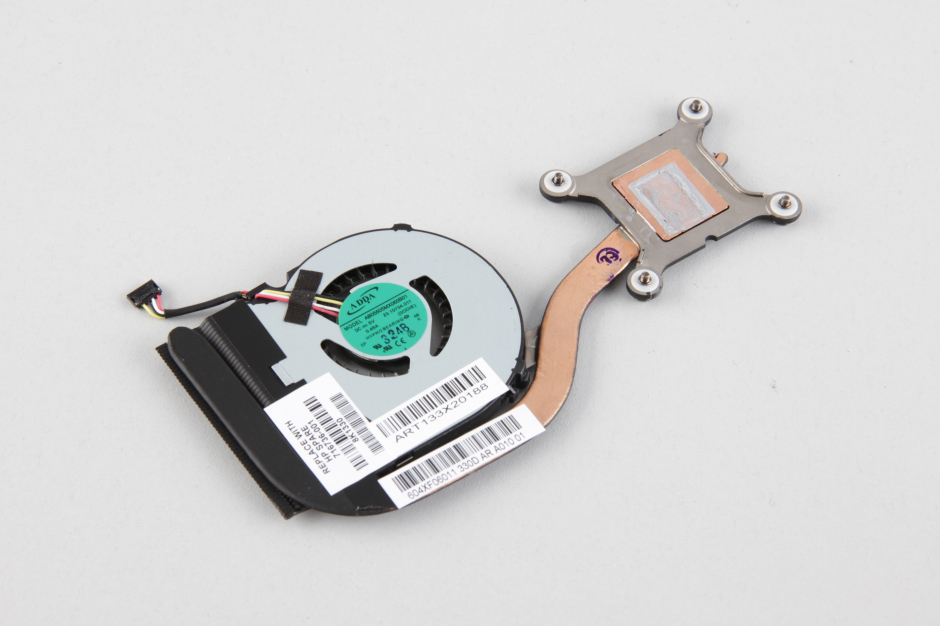
Close-up of the heat sink and cooling fan assembly.
The front of the motherboard is covered with a layer of black shielding tape. In addition, the CMOS battery and speaker are still connected to the motherboard.
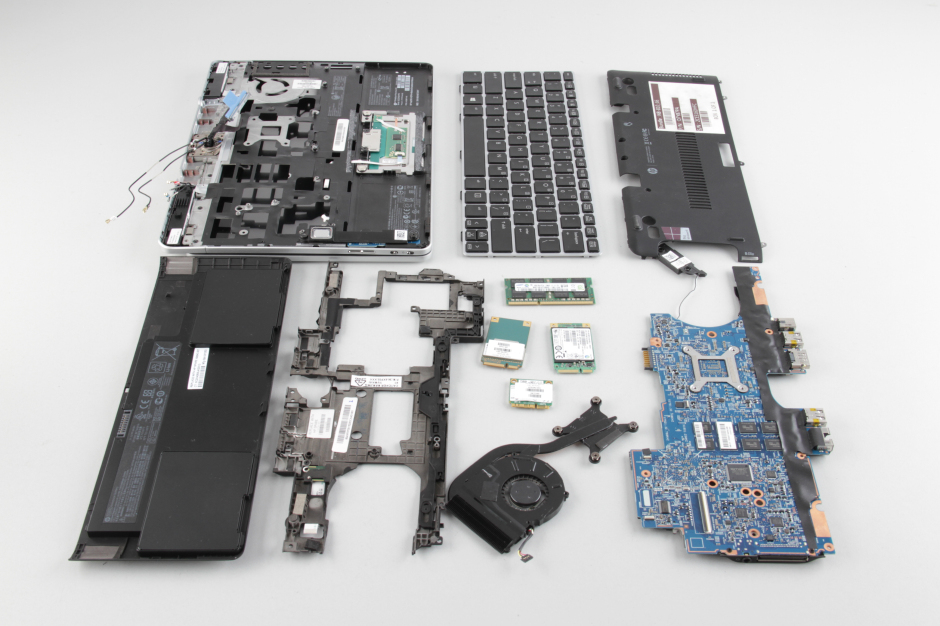
HP EliteBook Revolve 810 G1 internal parts


How to upgrade memory on HP EliteBook Revolve 810? Does it come with 4GB embedded in the machine?
Best regards
Themba M
Can you replace the WWAN Broadband with an mSATA SSD?
I would also like to know this: instead of WWAN broadband, can you add a second mSATA SSD? Anybody tried?
Usually, the WWAN slot (mSATA or M.2) supports SSDs. You can remove your SSD, install it in the WWAN slot, and enter BOIS. If you can find the SSD in the BOIS, that means you can add another SSD to the WWAN slot.
OK, so I did this: I inserted a second mSATA SSD into the WWAN slot, and sure enough, it was detected in Windows and the BIOS, as there are a HDD and a mSATA hard disk in boot options.
Where is the touchscreen cable? Mine is not working, so I want to replace it.
How about a breakdown of the process for replacing the entire screen module?
Thanks very much!
Hi,
How to upgrade the HP EliteBook Revolve 810 G3 to a bigger RAM? Is it the same as G1? Is it possible?
Will I need to solder it, or is it a socket?
Ty
The HP EliteBook Revolve 810 G3 also has only one RAM slot. Please remove the old RAM and replace it with a bigger one.
Wow! Nice!
Thanks a lot!
For some reason, the caps lock light keeps flashing constantly. Once I powered up my Revolve 810 and replaced the RAM, I was able to see the HP logo. However, when I pressed the ESC key, nothing happened.
Any suggestions would be very helpful.
You should try to remove the RAM and install it again properly. Try to clear pins with air or soft fabric when installation won’t help.
Can I have 2 SSDs simultaneously in my HP 810 Revolve G1?
Yes, you can.
My HP Revolve 810 G2 Letter “F” stopped functioning. What might be the problem?
Can the CPU be upgraded, and which models are compatible with it?