
In this teardown, we will remove the bottom cover, wireless network card, SSD, USB board, battery, and motherboard from the Samsung ATIV Book 9 Lite.
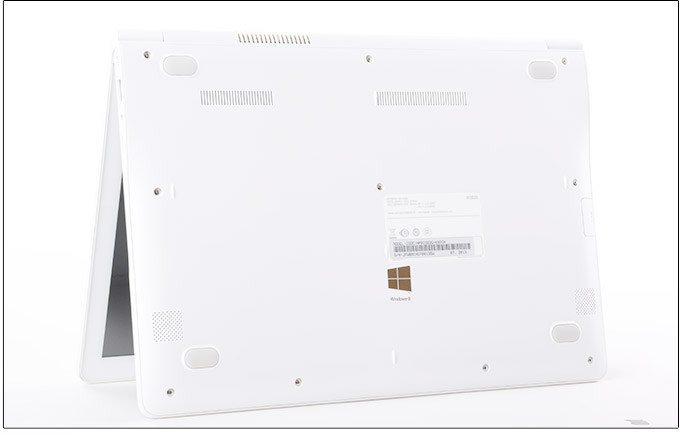
There are ten screws on the bottom of the Samsung ATIV Book 9 Lite laptop. We need to remove them first.
Join us on the social network! Follow us on Facebook for all the latest repair news.
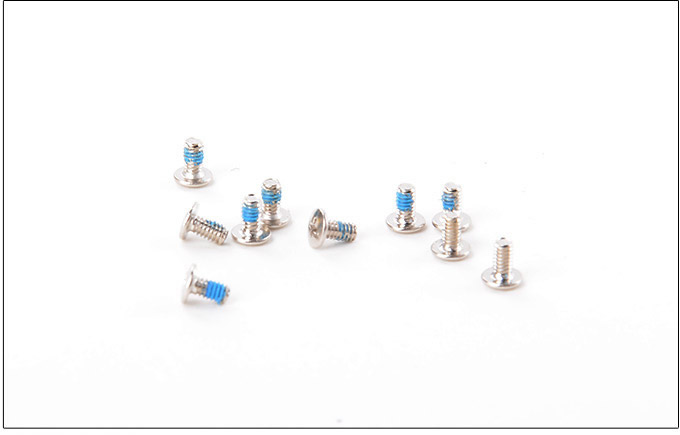
Close-up of the removed screws.
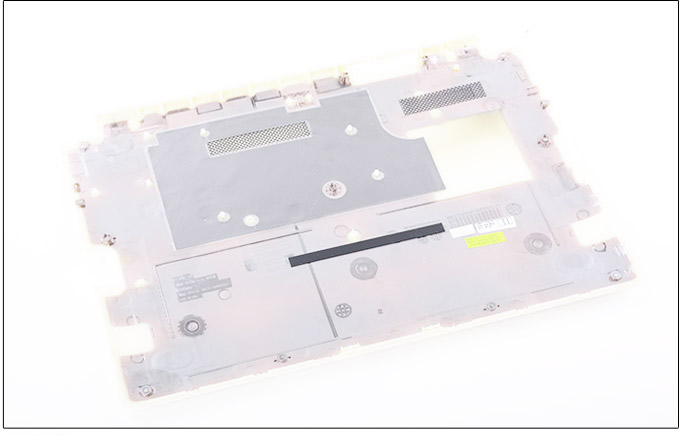
Close-up of the back of the bottom cover.
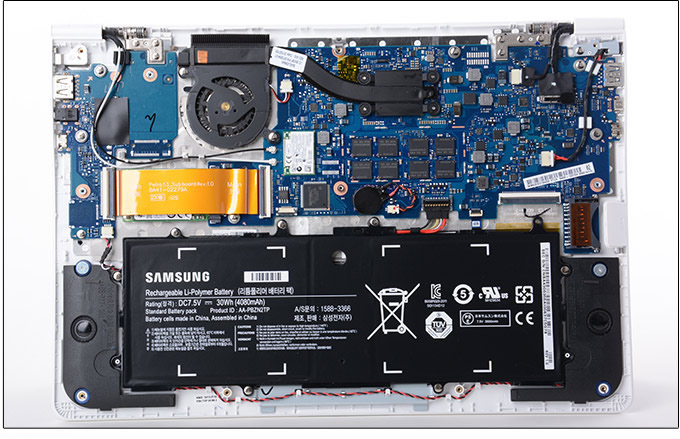
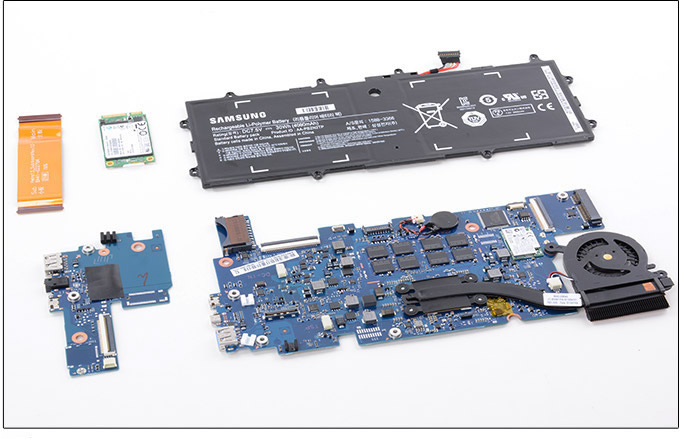
After removing the bottom cover, we can access the motherboard, battery, fan, heat sink, wireless network card, SSD, speakers, CMOS battery, and more.
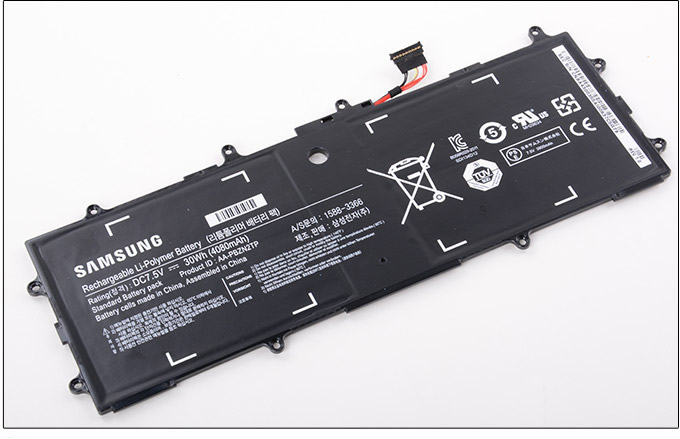
Remove the nine screws that secure the battery, and then disconnect the battery cable from the motherboard. Lift the battery from the right side to remove it.
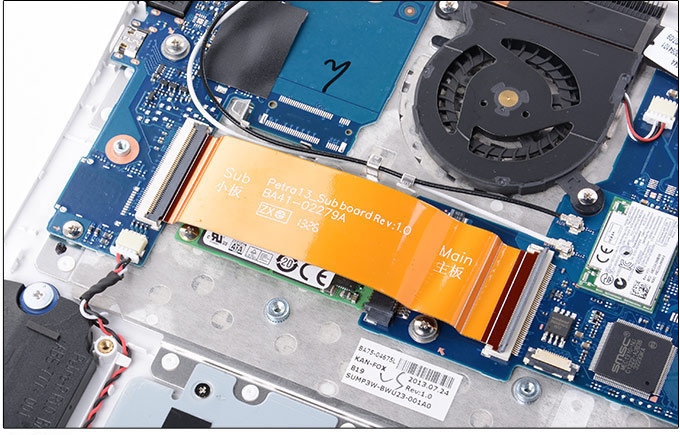
The internal circuit board of the Samsung ATIV Book 9 Lite consists of two parts: the main board and a small circuit board on the left side. They are connected by a cable marked “Sub” and “Main,” so it is impossible to connect them incorrectly.
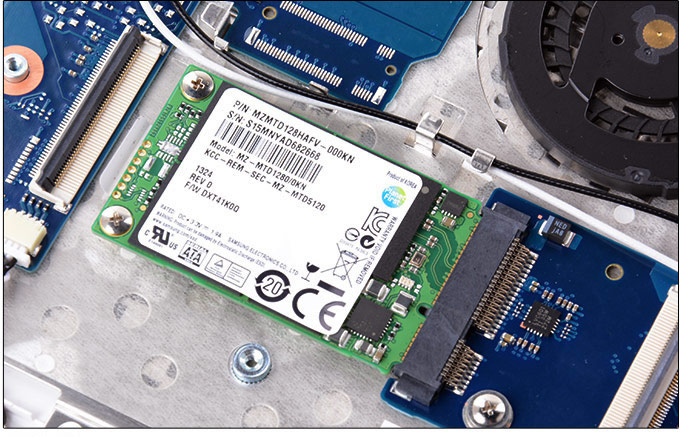
Remove this yellow ribbon cable to access the 128GB mSATA SSD. Then, remove the screws securing the SSD, and it will pop out automatically. Apply a slight force to pull it out of the slot.
The internal design of the Samsung ATIV Book 9 Lite is very simple. After removing the battery and cable, you can start removing the motherboard.
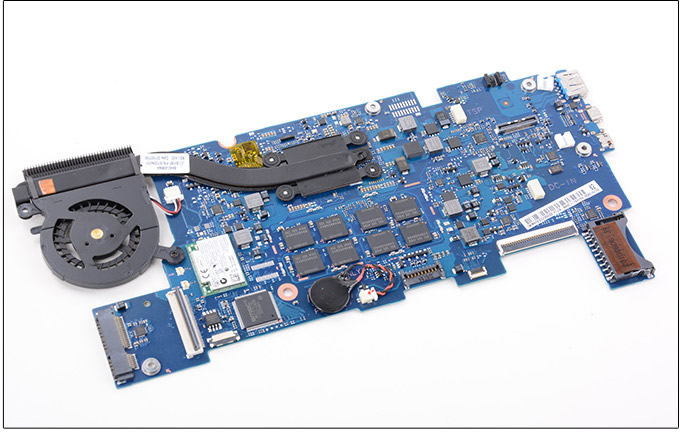
This wireless card is directly welded to the motherboard to make the body thinner and lighter.

This laptop has a very high degree of integration. The CPU uses BGA packaging and is equipped with a thin cooling system, which further reduces the thickness of the laptop through a special process.
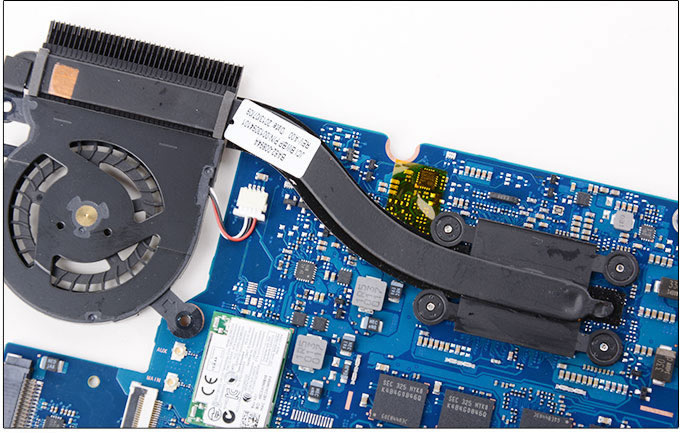
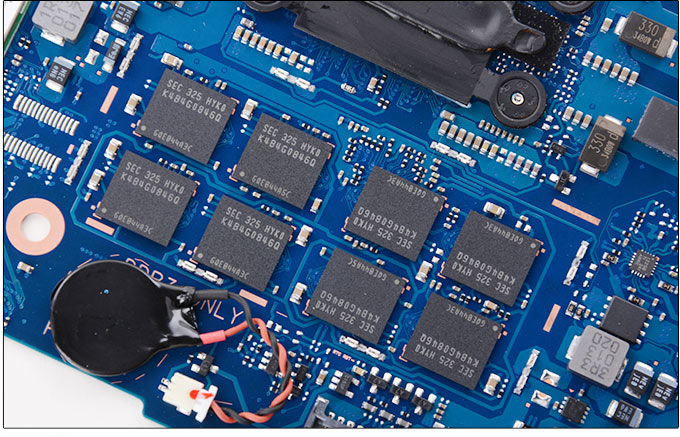
This laptop does not have memory slots. Eight 4GB DDR3-1333 memory modules are soldered to the motherboard.
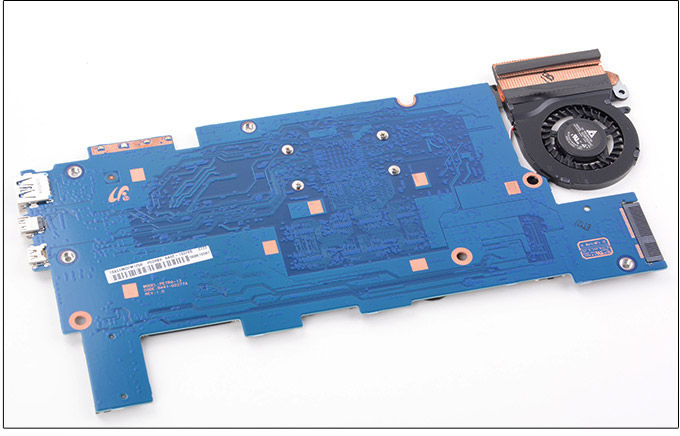
Close-up of the back of the motherboard.
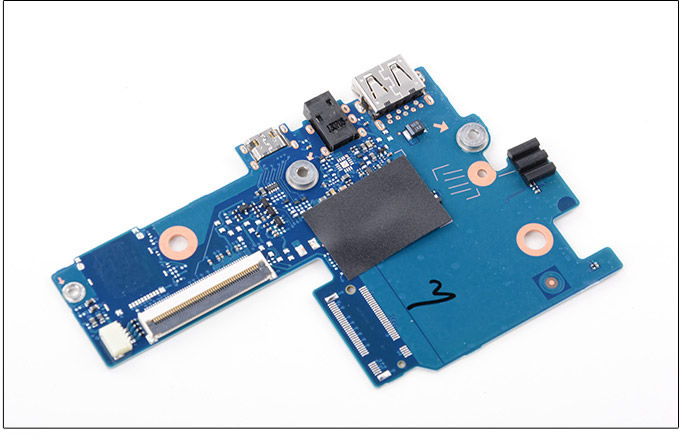
Close-up of the USB board.
Close-up of the removed parts.

Thanks for this detailed disassembly guide. I have run into an issue with my Book 9 Lite and can not remove the back cover to troubleshoot the issue. One stubborn screw is refusing to budge, so I came across this guide and noticed that the heatsink on this model (going by the pictures here) appears to be welded down to the board and looks like it can not be unscrewed/removed.
My machine is running very hot, and the temps seem way off than what I would consider acceptable (52 °C at idle)
I considered applying some thermal paste to the CPU, but I now think this may not be possible if the heatsink is Non-removable. Could anyone confirm if this is the case?
Thanks
I don’t know what version my Samsung Ativ is, but the Ativ in the picture is mine. Mine is an older version, and its battery is an external one.