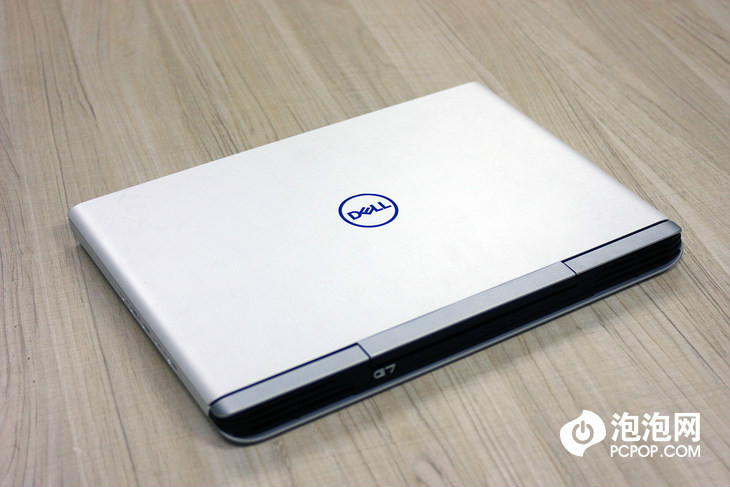
As a high-end gaming laptop, the Dell G7 15 7588 features a high-definition screen, a sleek design, an effective cooling system, and powerful performance. Today, we will take apart the Dell G7 7588 to explore its internal structure.
Before starting disassembly, power off the laptop and unplug the power cord.
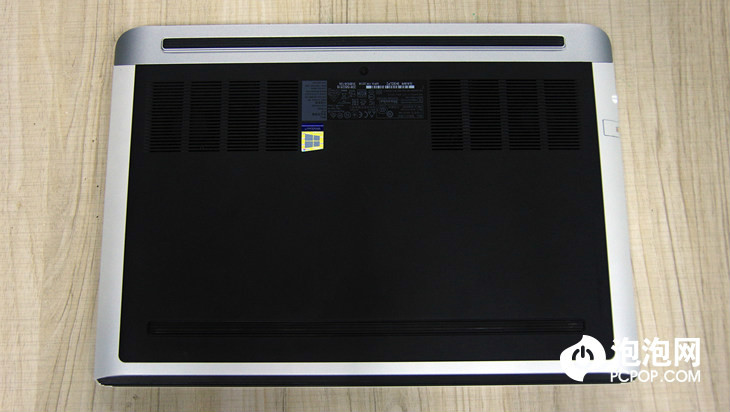
Only a screw is found on the bottom cover. Use a pry tool to lift and remove the screws, then remove the back cover.
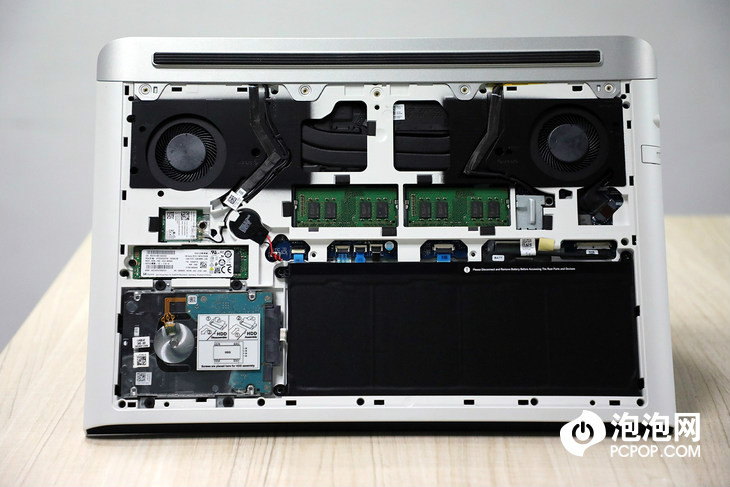
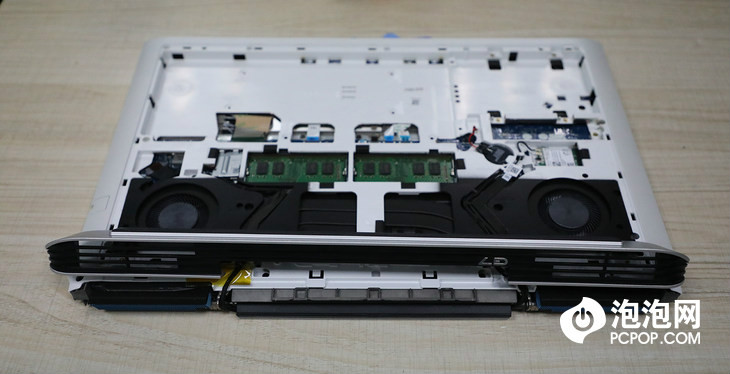
After removing the back cover, its internal structure becomes clearly visible. The memory chips, M.2 SSD, 2.5-inch hard drive, and wireless network card are all located under the back cover. Users can upgrade and replace all of these components. This design makes it more convenient for users to upgrade their laptops.
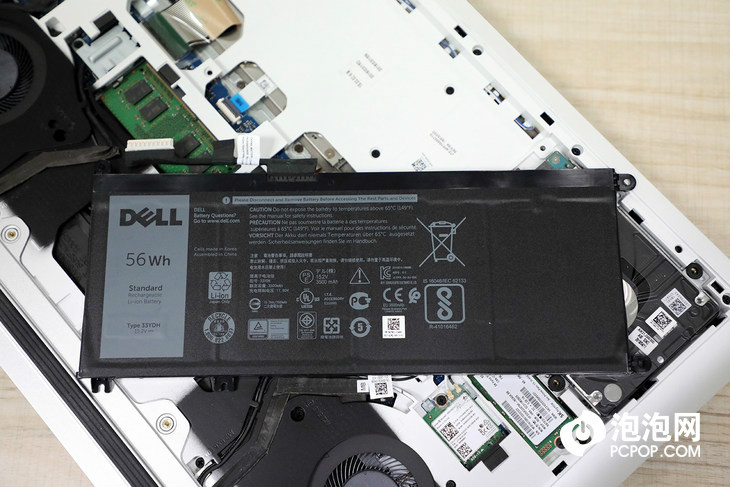
I will remove components one by one. First, remove the 56Wh battery. This laptop supports fast charge technology and can be fully charged quickly.
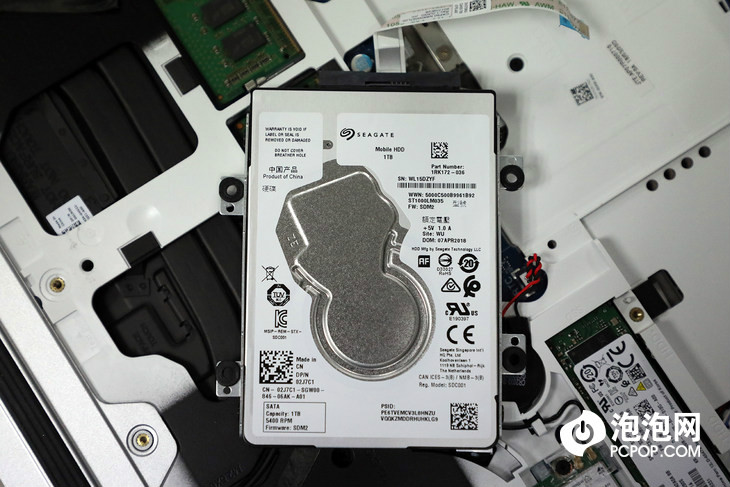
Next, remove the hard drive. The hard drive is manufactured by Seagate and has a capacity of 1TB, which meets the user’s demand for large storage.
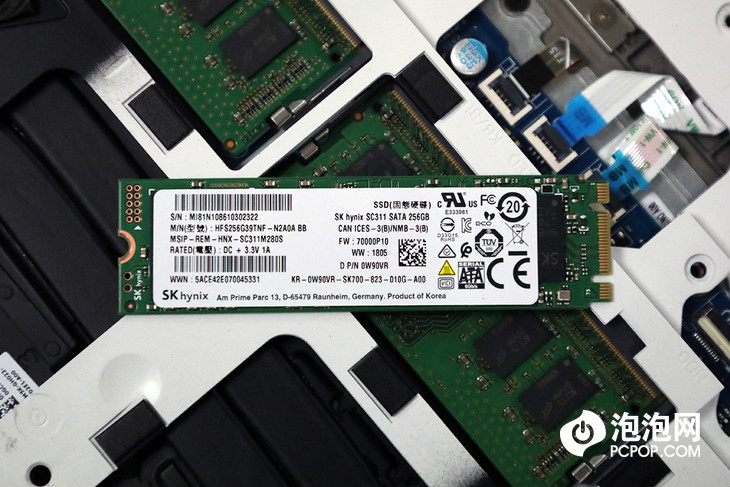
It is the M.2 (SATA) SSD from Hynix with a capacity of 256GB. With this SSD, users can store data and boot their laptops faster.
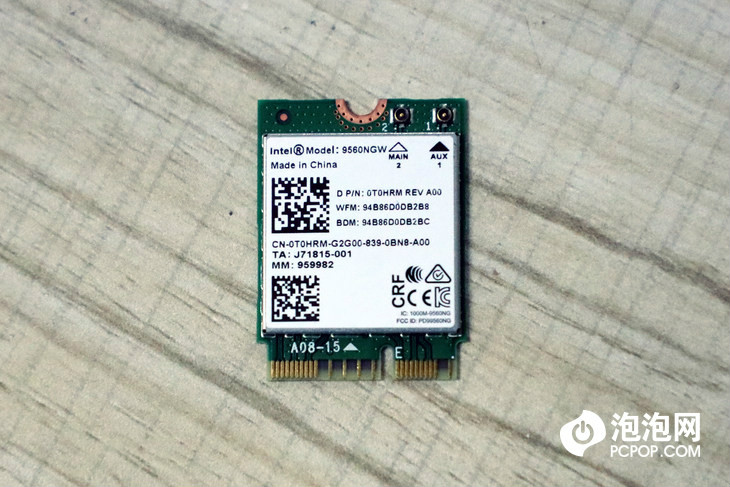
The last component to be removed is the Intel 9560NGW dual-band wireless network card. Its speed can reach up to 1.73 Gbps. It supports dual-band Wi-Fi at 2.4 GHz and 5 GHz and Bluetooth 5.0, providing users with a more stable wireless network experience and faster Bluetooth connections.
Now, remove all screws securing the middle frame. Remove the four screws, unlock the clips on both sides, and then remove the middle frame.

This is the internal structure of this gaming laptop. The keyboard and touchpad are located at the top. The motherboard, other components, and cooling module are secured on the middle frame.
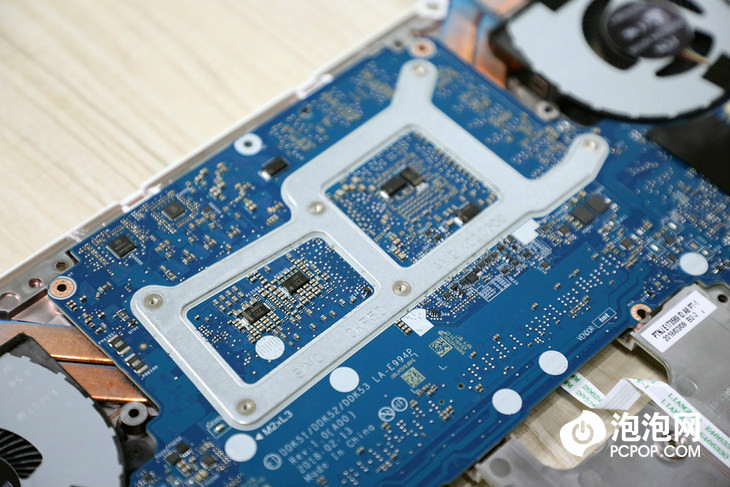
After removing the shielding sticker on the back of the motherboard, you can access the chipset.
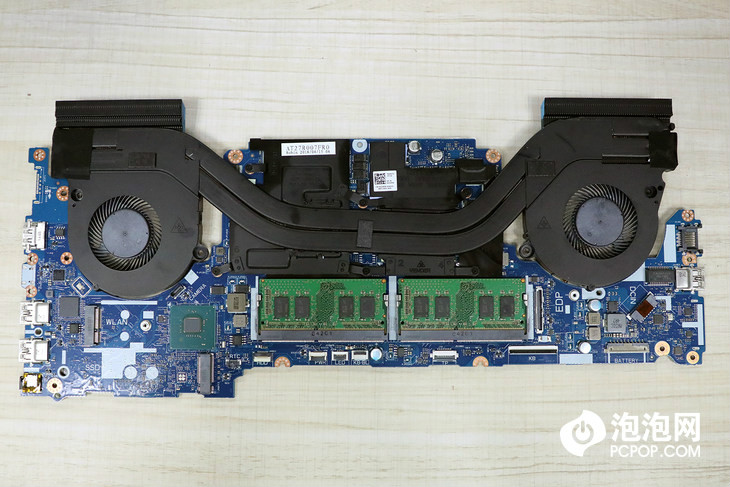
Remove all the screws and cables from the motherboard. The motherboard and the heat dissipation module can be removed.
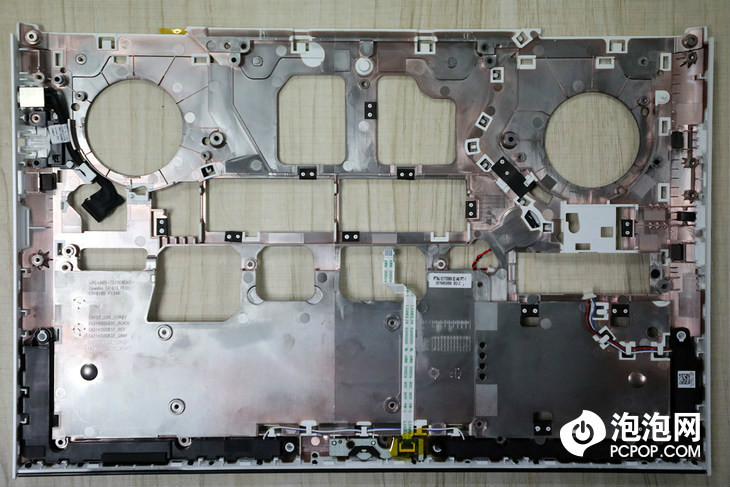
The middle frame is made of engineering plastic. The component below the middle frame is the indicator light module. This indicator light displays the running status of the laptop in real time, allowing users to obtain relevant information immediately.

Its internal design aims to improve heat dissipation. The advantages of mounting the motherboard to the middle frame are as follows: first, it can reduce the impact of high-performance laptop operation on keyboard temperature, thereby enhancing user comfort. Second, it provides ample space for heat dissipation. A well-designed cooling system can effectively lower the internal temperature of the laptop, ensuring better heat dissipation efficiency. Finally, this three-layer structural design makes the internal frame more stable and robust.
Remove the screws securing the heatsink and fan, disconnect the fan cable from the motherboard, and you can separate the cooling module from the motherboard.
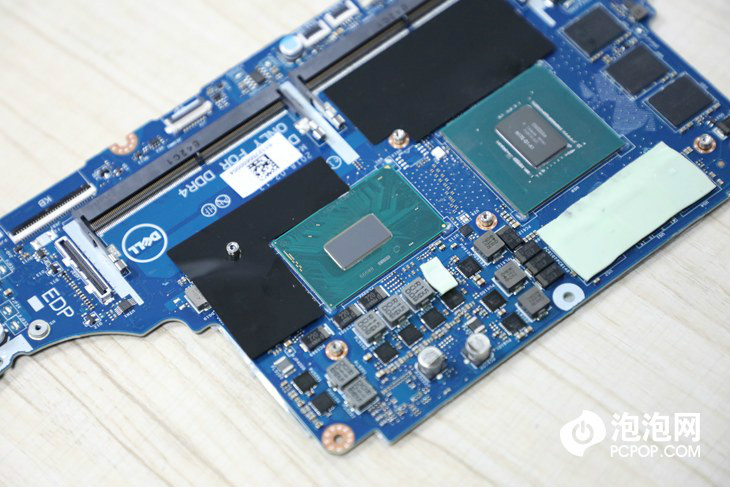
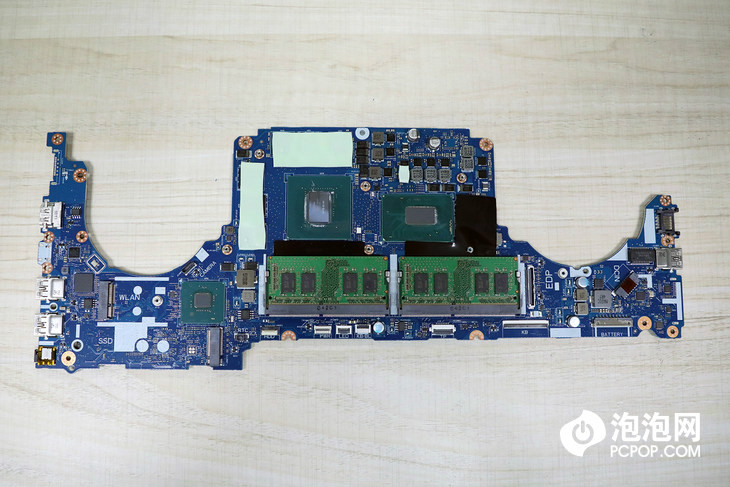
The NVIDIA GeForce GTX 1060 Max-Q graphics card and Intel Core i7-8750H processor are soldered to the motherboard.
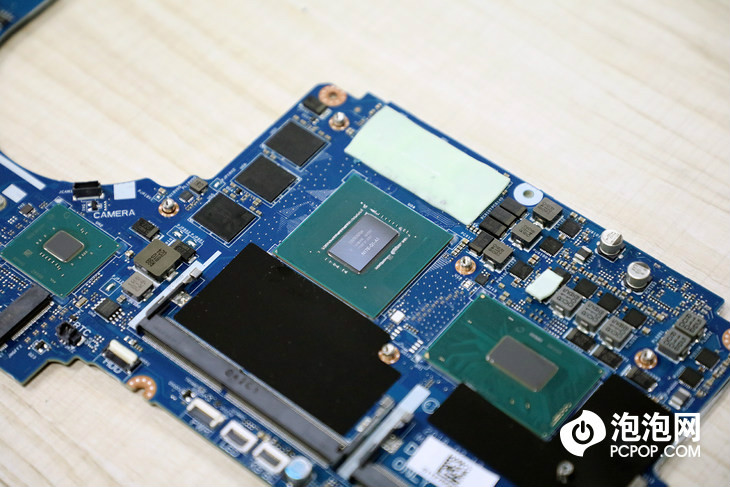
The motherboard features excellent craftsmanship and a well-designed chip layout, effectively utilizing cooling modules to enhance thermal performance for the onboard chips.
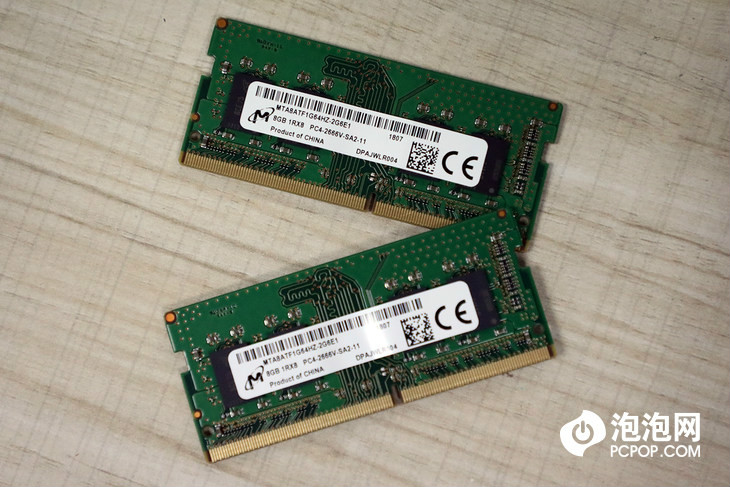
Now, remove the two memory sticks. They are 8GB DDR4 memory sticks manufactured by Micron. This gaming laptop features two memory slots, supporting up to 32GB of memory. Users can upgrade the memory themselves.
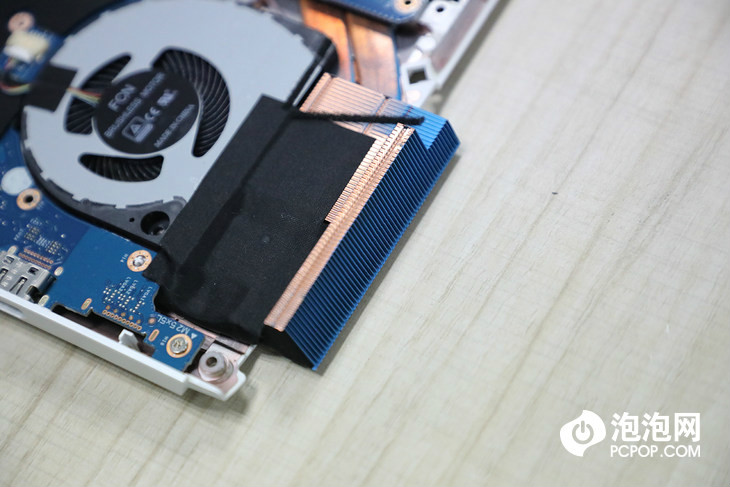
The cooling system module consists of blue heat sink fins, a three-phase motor, a cooling fan, and two copper pipes.
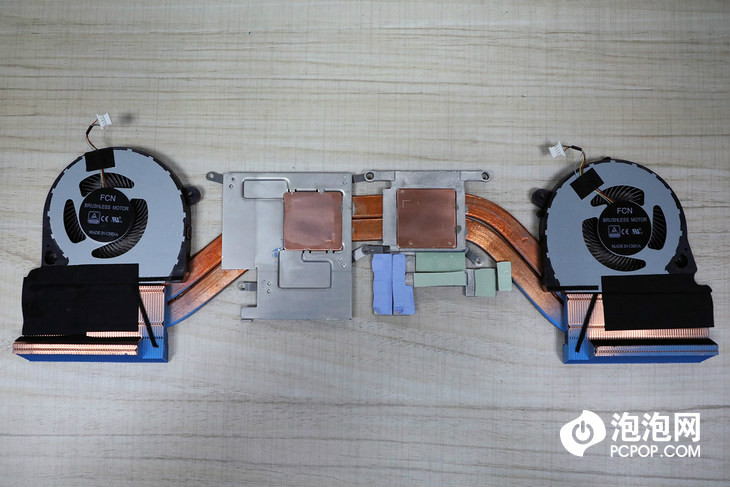
This powerful cooling module works in tandem with heat sinks covering all chips, ensuring the processor and graphics card perform perfectly. As a result, users can enjoy a higher-quality gaming experience.
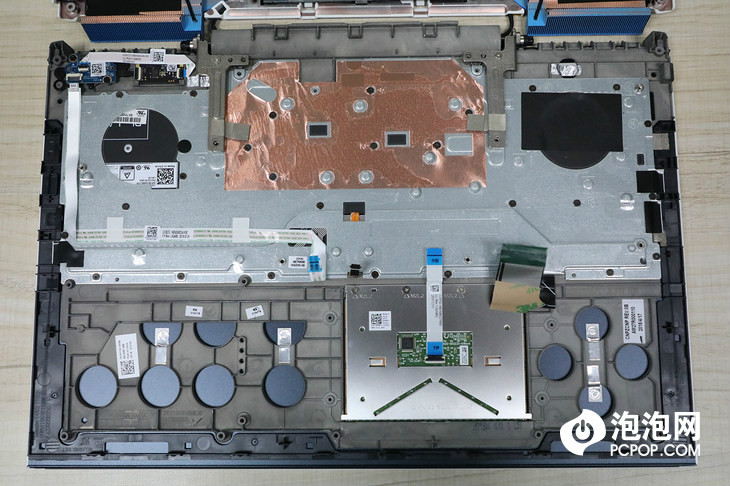
A copper sheet is placed under the keyboard to improve heat dissipation performance.
Summary
Now, I have completed the teardown of the Dell G7 15 7588 gaming laptop. I found that it has a unique internal structural design and an efficient cooling system. With its excellent thermal performance, 8th-generation eight-core processor, NVIDIA 1060 Max-Q graphics card, and high-end specifications, the Dell G7 7588 is undoubtedly a premium gaming laptop worth purchasing. It will surely bring the user a more stable and better experience.
Hi, very interesting that you disassembled the laptop. I have a question: Is the heatsink made of pure copper, or does it have a layer of copper on the aluminum pipes? I want to use liquid metal on mine later, but I heard there is a risk of corroding into the aluminum. It would be nice to know that. By the way, do you plan on using liquid metal on yours? What conformal coating is recommended for this job? Thank you
I’m also waiting for that answer! Have you found out?
Also waiting on this detail