In this article, I will take apart an HP Pavilion Gaming 15-dk0000 laptop. I will remove the bottom case, battery, SSD, HDD caddy, RAM, Wi-Fi card, heatsink, cooling fan, speaker, and motherboard. According to the article, you can upgrade the M.2 SSD and 2.5-inch hard drive. It is also very helpful for replacing the keyboard.
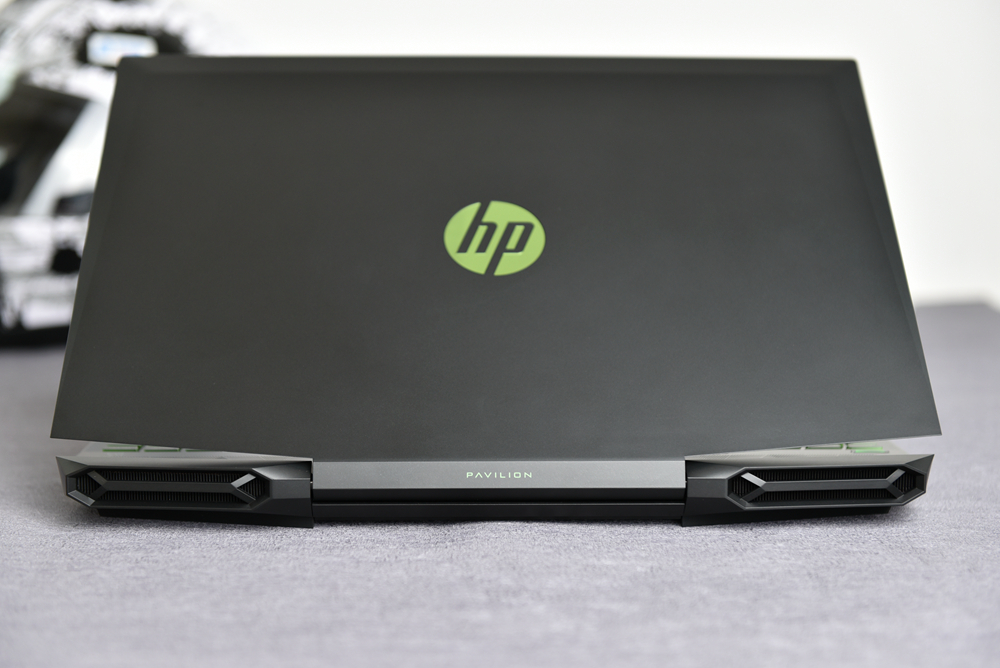
The HP Pavilion Gaming 15-dk0000 features a new design with a body thickness of only 23.4 mm, making it slimmer than the previous generation. This laptop weighs just 2.25 kg, further enhancing its portability. The black appearance and the green HP LOGO are very deep and noble.
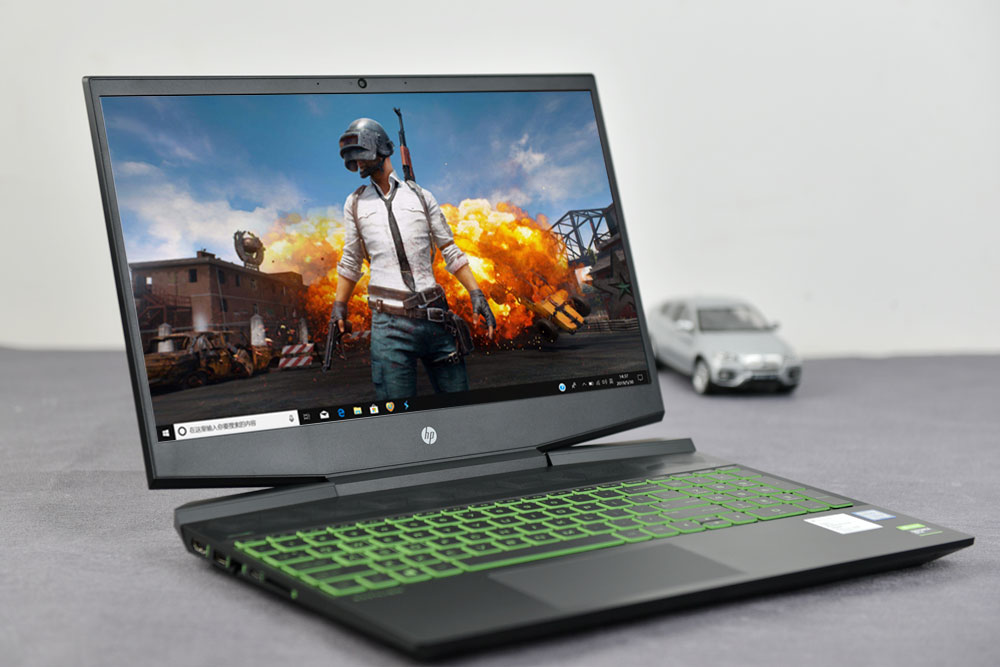
It features a 15.6-inch Full HD IPS display, making the laptop look more refined compared to traditional gaming laptops. The narrow bezel design provides a wider view and a more immersive gaming experience. What is even more impressive is the screen’s refresh rate. The 144Hz e-sports display eliminates motion blur, delivering perfect image quality. With a 72% wide color gamut coverage, the visuals are stunningly realistic.
The green keys with switchable LED backlighting appear even deeper and more mysterious in dim gaming environments. The WASD keys can be recognized at a glance, and the game moves quickly. The touch of the key is very comfortable, and the feedback is moderate.
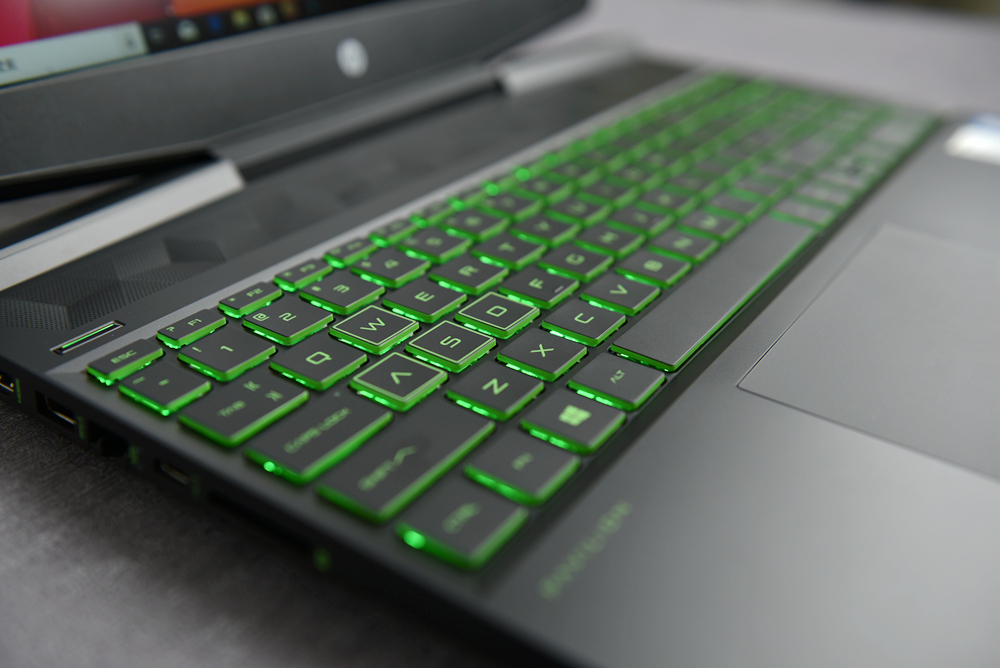
The numeric keypad is located on the right side of the keyboard. You can define shortcuts to improve efficiency in games, which is excellent for office scenarios.
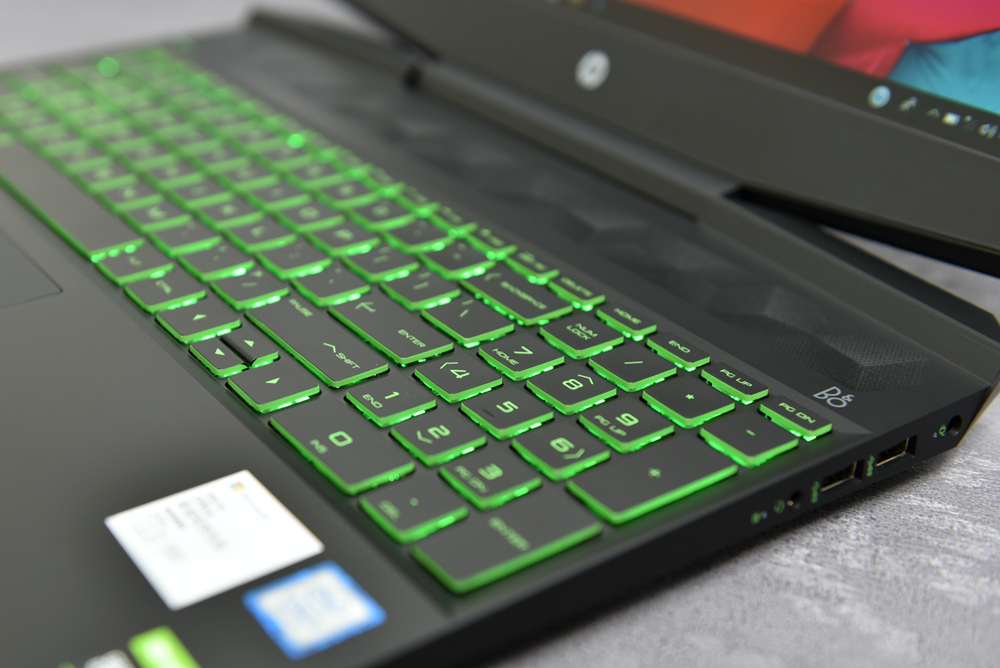
The power button is located in the upper left corner of the palm rest. It also has an LED effect to increase recognition.
Behind the palm rest is a row of three-dimensional diamond-shaped grilles. This area is not only decorative but also houses the speaker system. Two large speakers deliver a powerful and loud sound, with particularly impressive bass. Even without using professional headphones, the in-game audio can be clearly heard through the speakers.
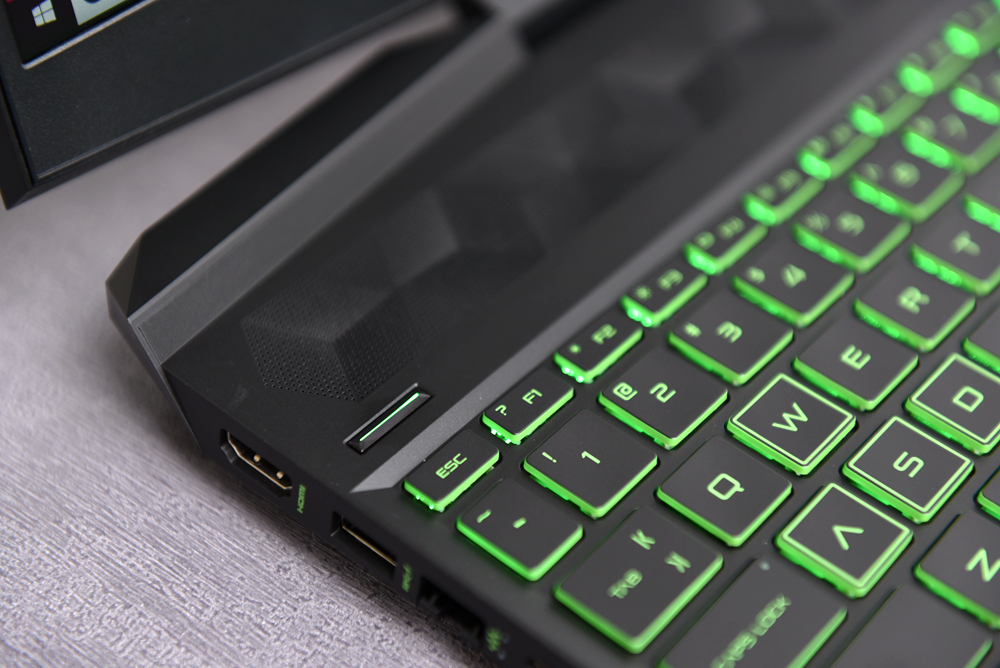
The HP Pavilion Gaming 15-dk0000 is equipped with a variety of ports. The left side of the chassis includes an SD card reader, a Type-C port (supporting video output), an RJ45 Ethernet port, a USB 3.1 Gen 1 port, and an HDMI port.
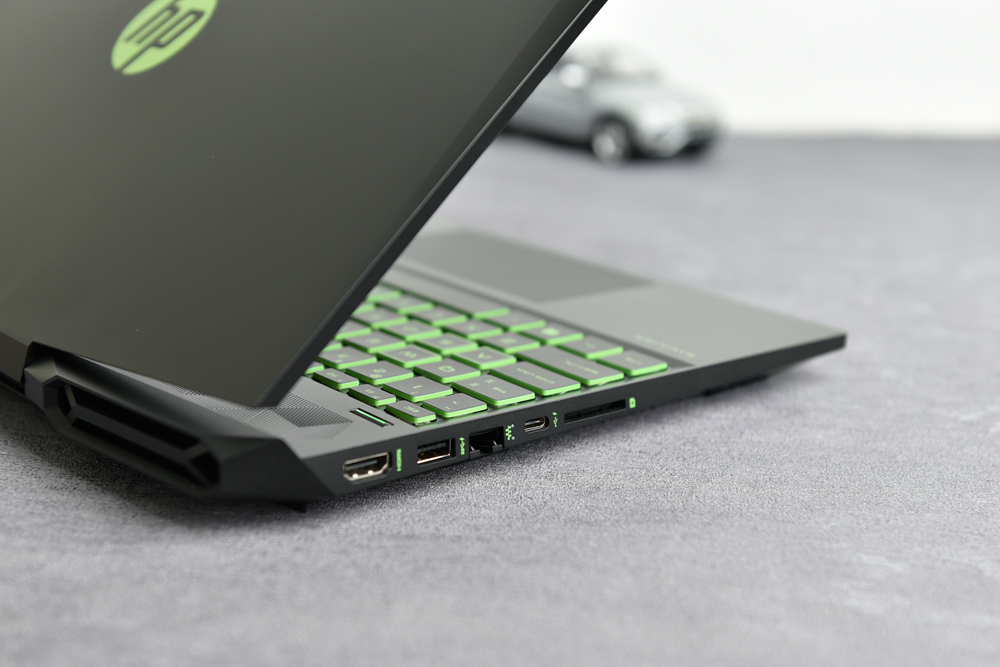
On the right side of the device, there is a DC jack, two USB 3.1 Gen 1 ports, and a headphone jack. Therefore, regardless of quantity or performance, these ports can accommodate the latest peripheral devices and will not fall behind in the next few years.

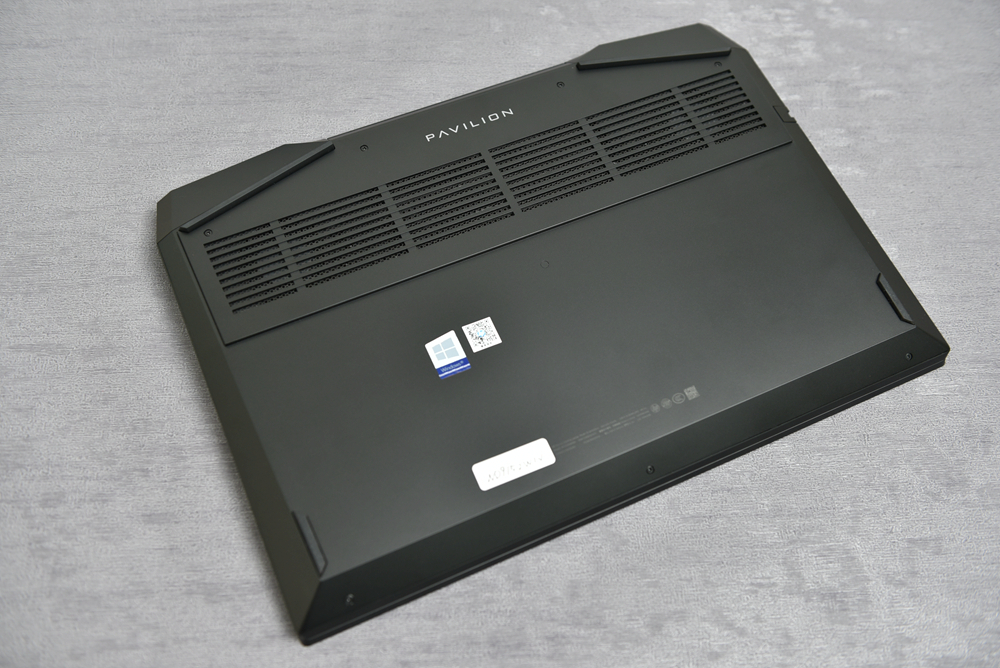
Now, let’s look at the back of the laptop. The middle part is the LCD hinges, and the two sides are the heat dissipation vents. The laptop has improved the air duct and the cooling module. The design of the four heat pipes and the adjustment of the foot pad position enhance stronger heat dissipation performance.
The bottom of the laptop features large intake grilles and four anti-slip feet, which not only provide effective anti-slip support but also elevate the chassis to promote airflow. In addition, the chamfered design on the sides of the chassis makes the appearance look slimmer, but it is only 23.4mm in thickness and weighs 2.25kg, making it very portable for a gaming laptop.
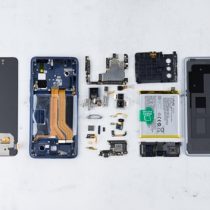
Removing the rear cover is very simple. It is secured by eight screws, but you must shut down the laptop before removing the screws. After taking off the bottom cover, first disconnect the battery cable from the motherboard. Secondly, the screws for different components have varying lengths, so be sure to organize them in order to avoid confusion. Third, when disconnecting the cables, make sure to remember the positions of the connectors. Fourth, during reassembly, ensure that all components are intact, and the battery is finally connected.
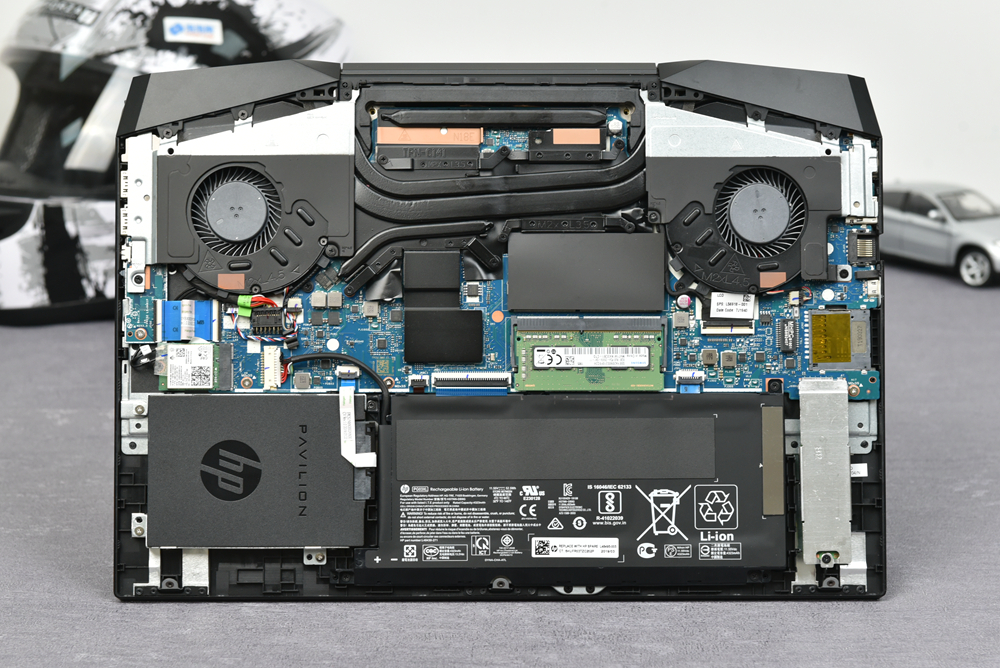
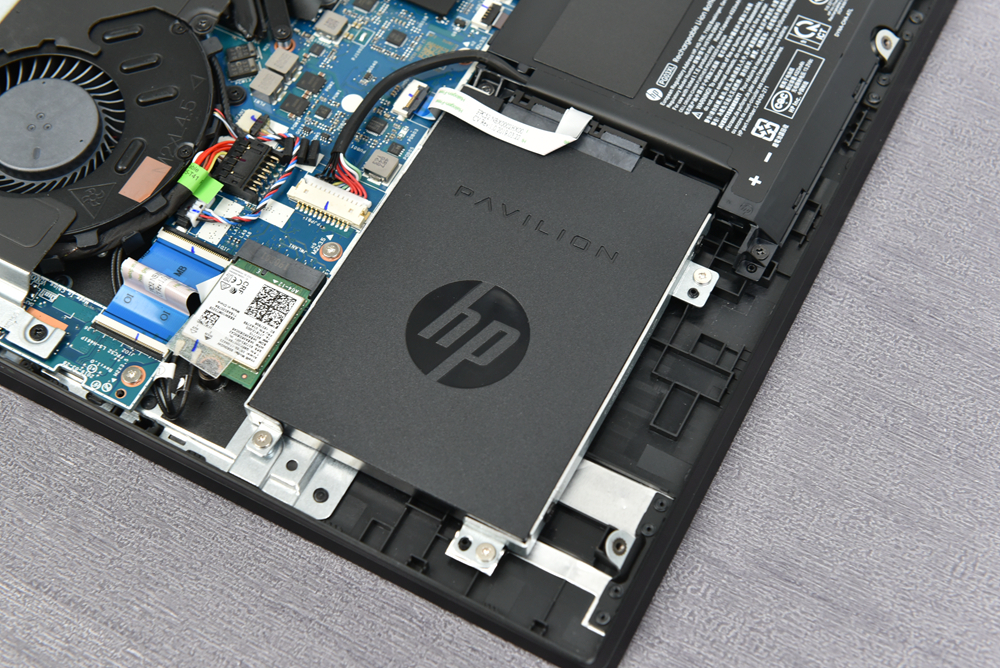
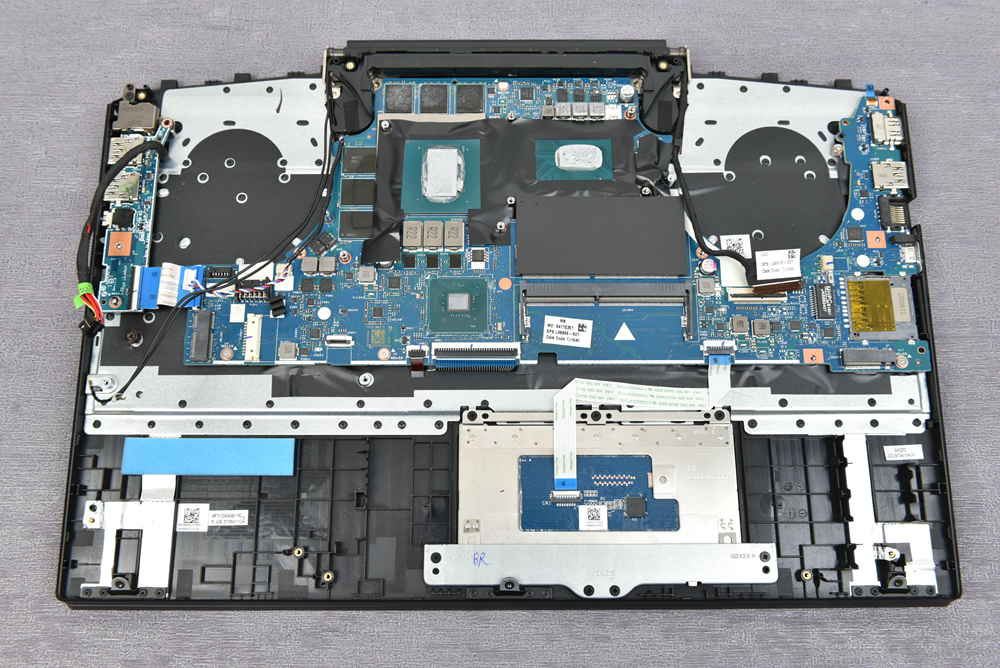
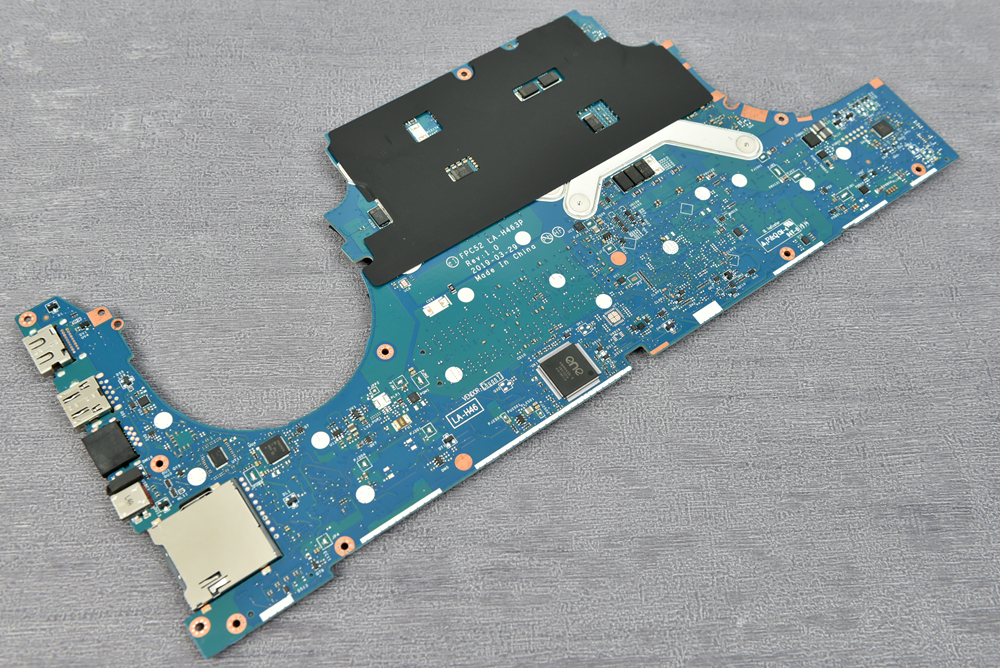
After removing the bottom cover, the internal components are revealed. The first impression is that all the parts are neatly arranged and well-organized. The key point is that there are not too many exposed cables; the cooling system and battery occupy most of the internal space. The blue motherboard also continues HP’s signature color scheme.
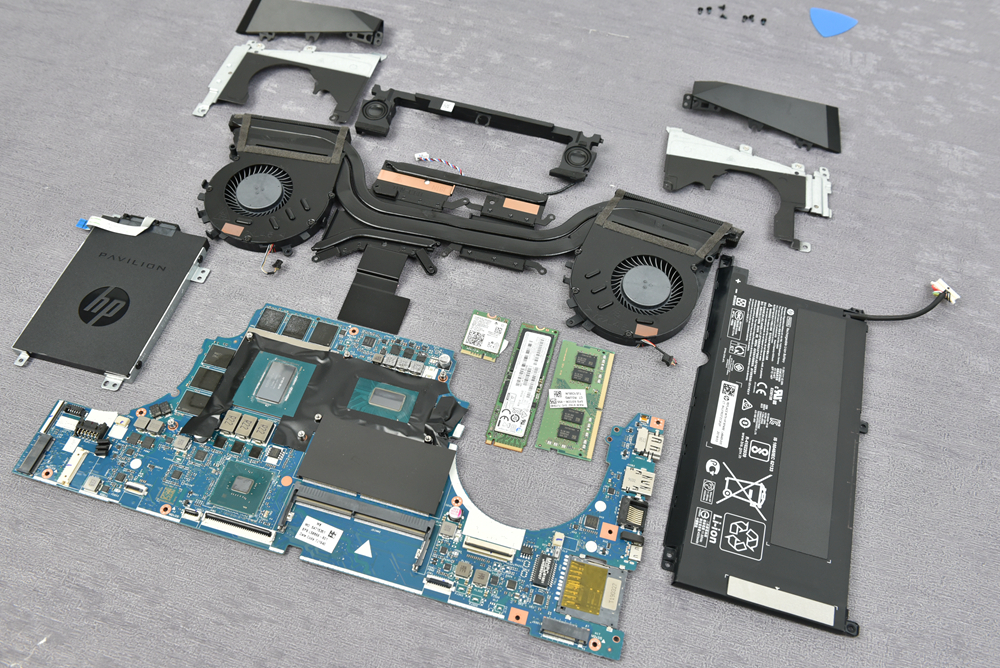
Next, we will remove the components one by one and closely examine their appearance and specifications. I believe you will appreciate the outstanding performance of this laptop, which is attributed to its ingenious design and high-quality materials.
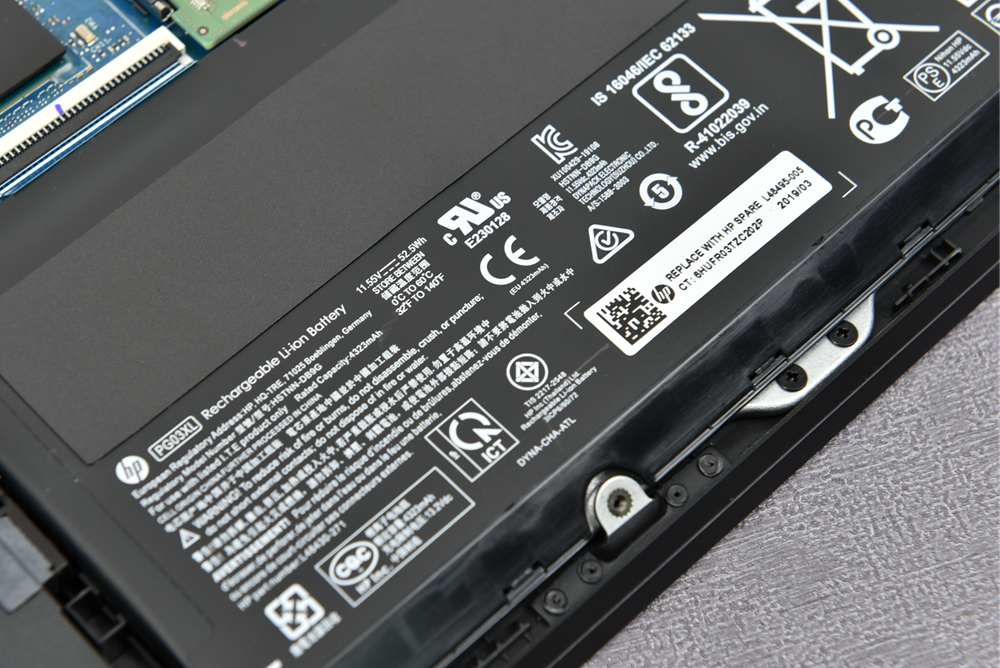
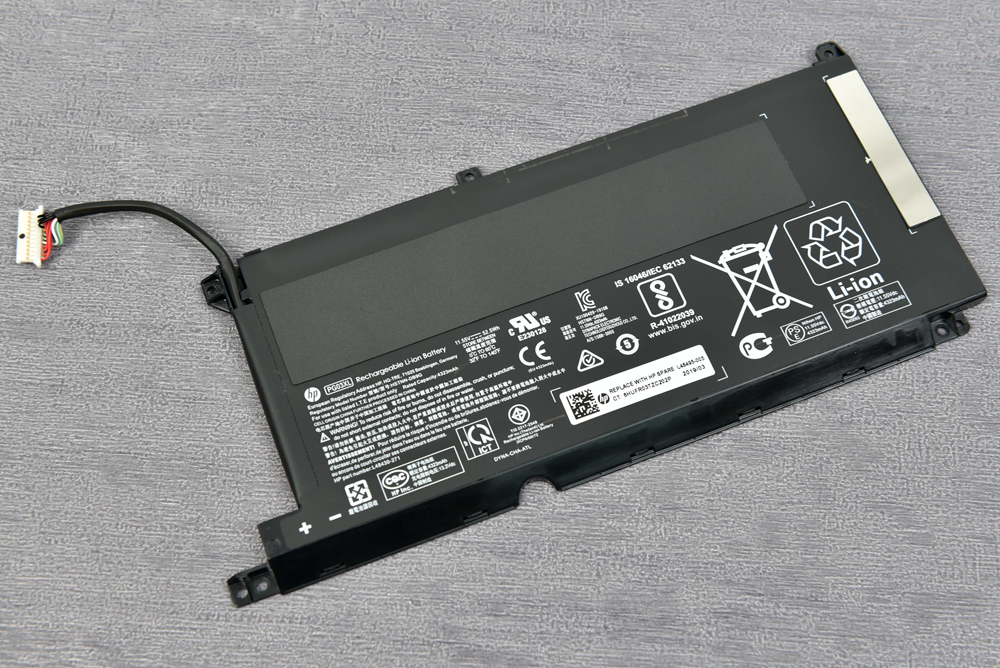
The HP Pavilion Gaming 15-dk0000 features a 3-cell lithium battery with a rated capacity of 52.5 Wh, providing a battery life of 4-6 hours. Of course, if it is mainly used for gaming, it is recommended to connect the power adapter to ensure optimal performance.
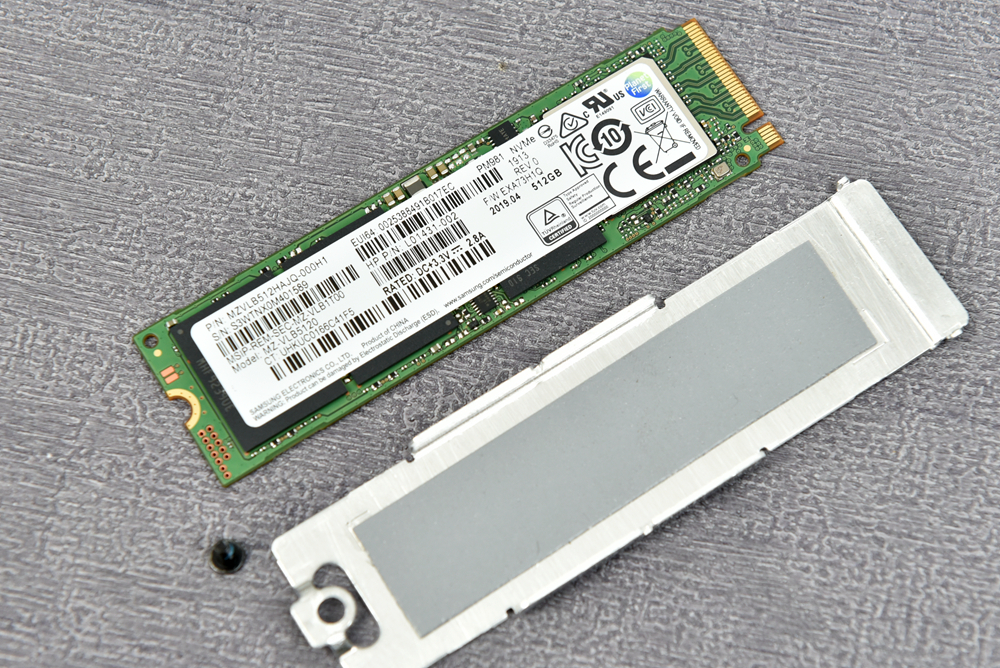
The laptop comes with an M.2 PCIe 512GB SSD with a heatsink. It is also worth noting that many HP laptops excel in security features, such as hard drive protection, port protection, as well as shock resistance, drop resistance, dust resistance, and anti-static characteristics. This shows that the laptop demonstrates excellent security design in many aspects.

The Samsung PM981 M.2 SSD features a 512GB capacity and supports the NVMe protocol, offering fast read and write speeds.
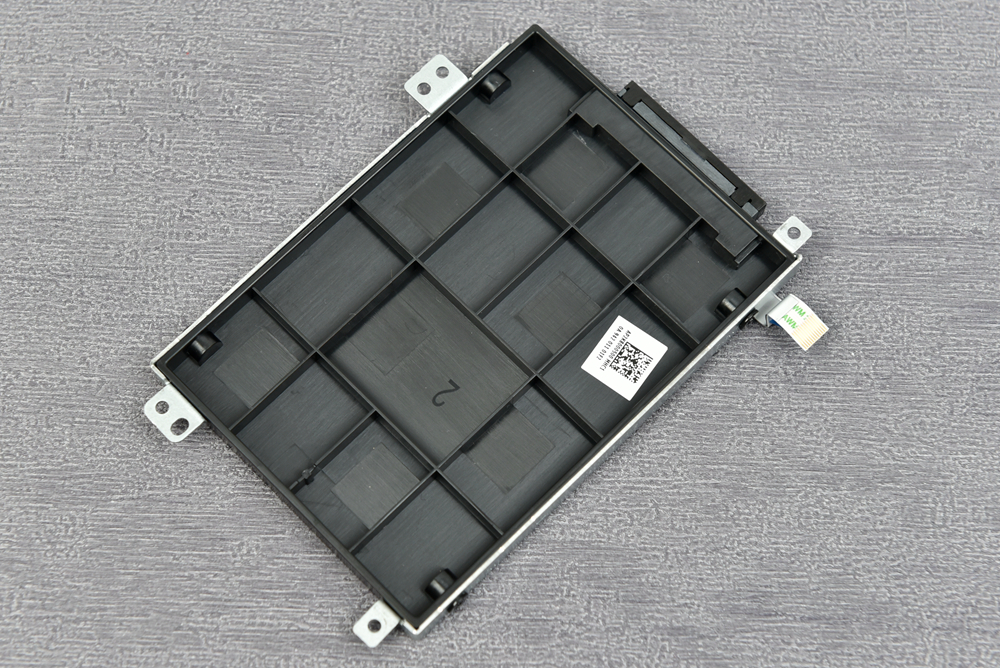
If you think the SSD capacity cannot meet your needs, there is no need to worry. The device has a reserved 2.5-inch mechanical hard drive slot; the most intimate is to reserve the HDD caddy and HDD cable.
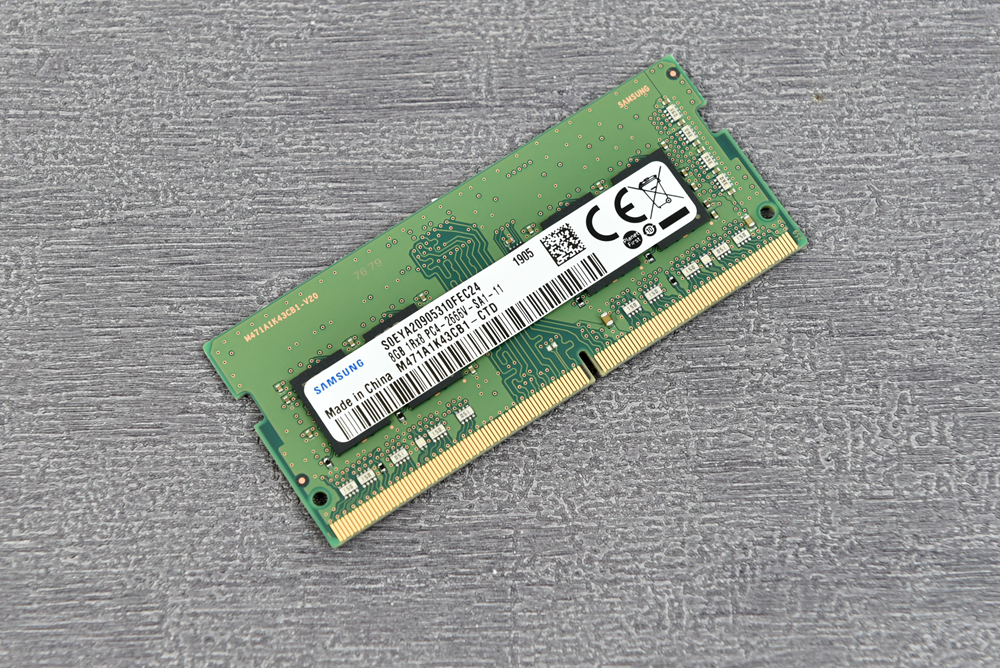
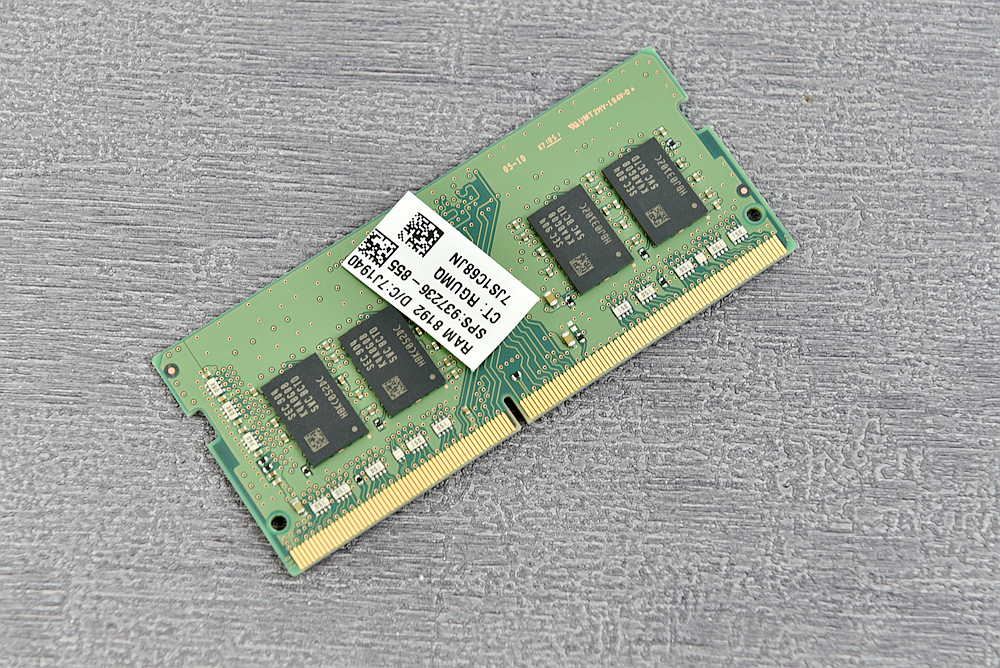
This laptop comes with 8GB of memory and includes an expandable memory slot, allowing you to add an additional 8GB or 16GB memory module.
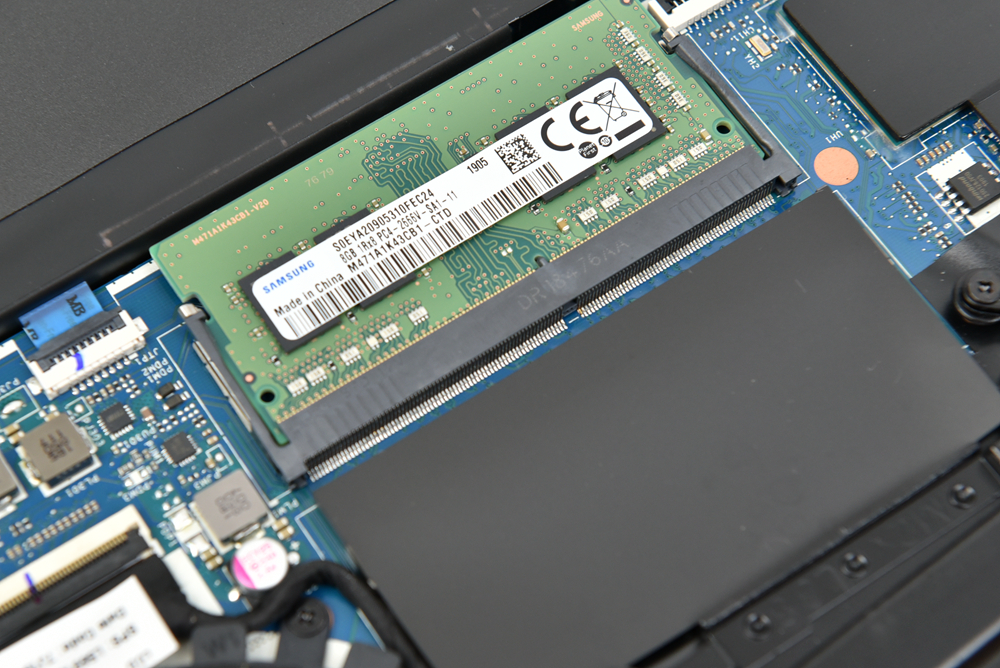
As shown in the picture, this is an 8GB DDR4 2666MHz high-frequency memory module manufactured by Samsung. Its performance will definitely not disappoint you.
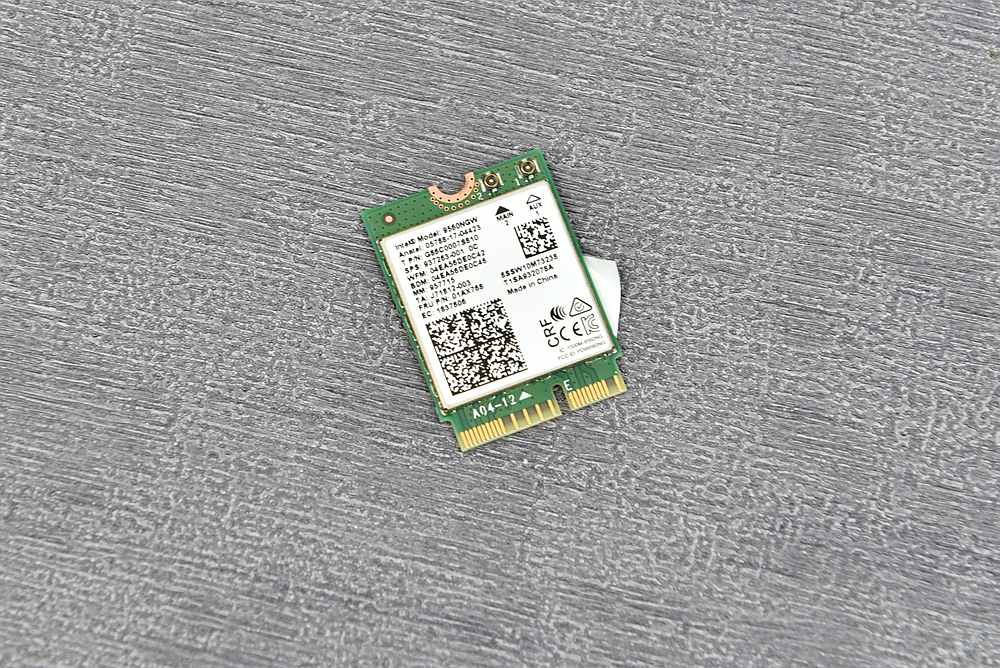
This laptop features an Intel 9560NGW wireless network card, which supports dual-band 2.4GHz/5GHz frequencies with a maximum transfer rate of 1.73 Gbps, and integrates Bluetooth 5.0. Currently, this is considered a relatively high-end wireless network card.
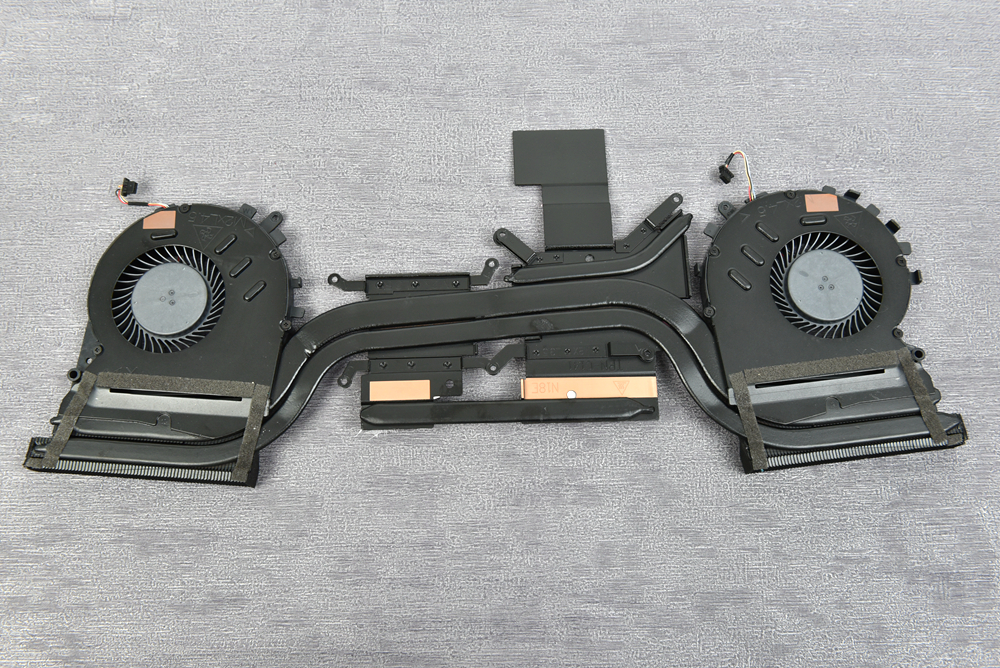
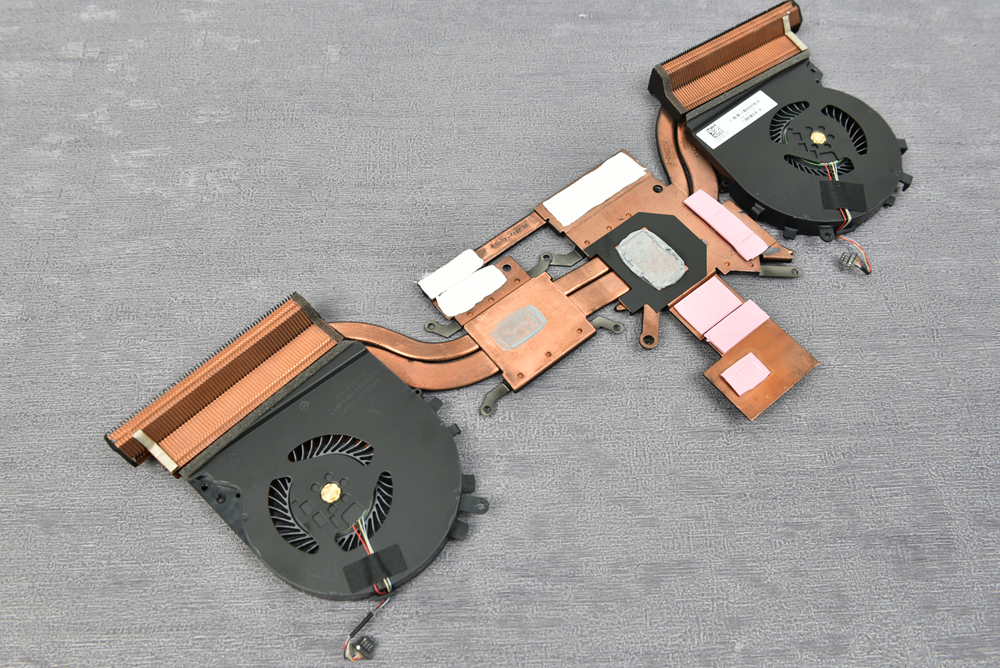
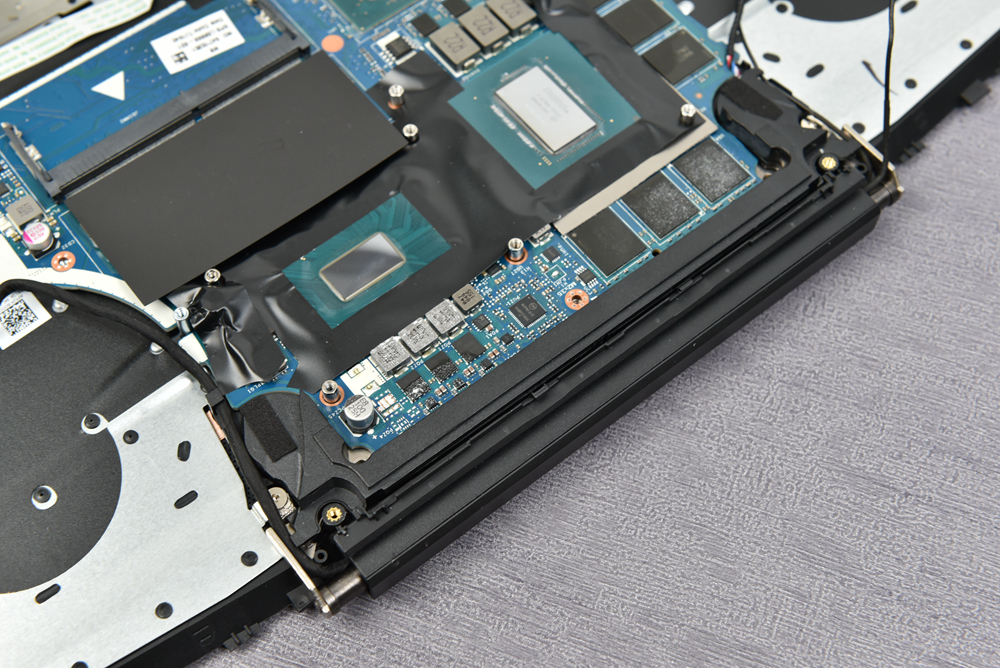
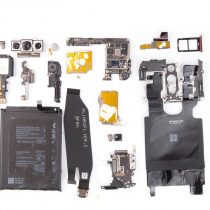
Next, we will remove its cooling system, which uses four copper tubes and dual fans. It is very large and occupies nearly half of the chassis. As we mentioned earlier, this generation of laptops has made significant improvements in cooling, including increasing fan size and enhancing airflow efficiency.

This heatsink has four copper tubes; the length of the fan is relatively short, which is a design that is advantageous for heat dissipation.
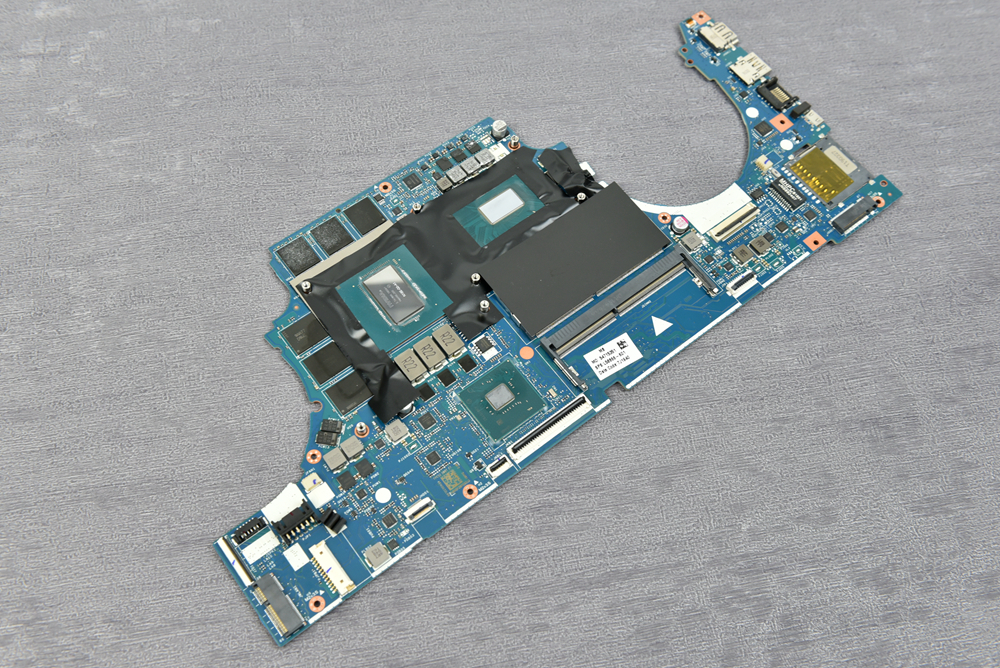
At this point, only the motherboard, touchpad, and palm rest remain. It also includes the processor, graphics card, GPU memory chips, and power supply system.
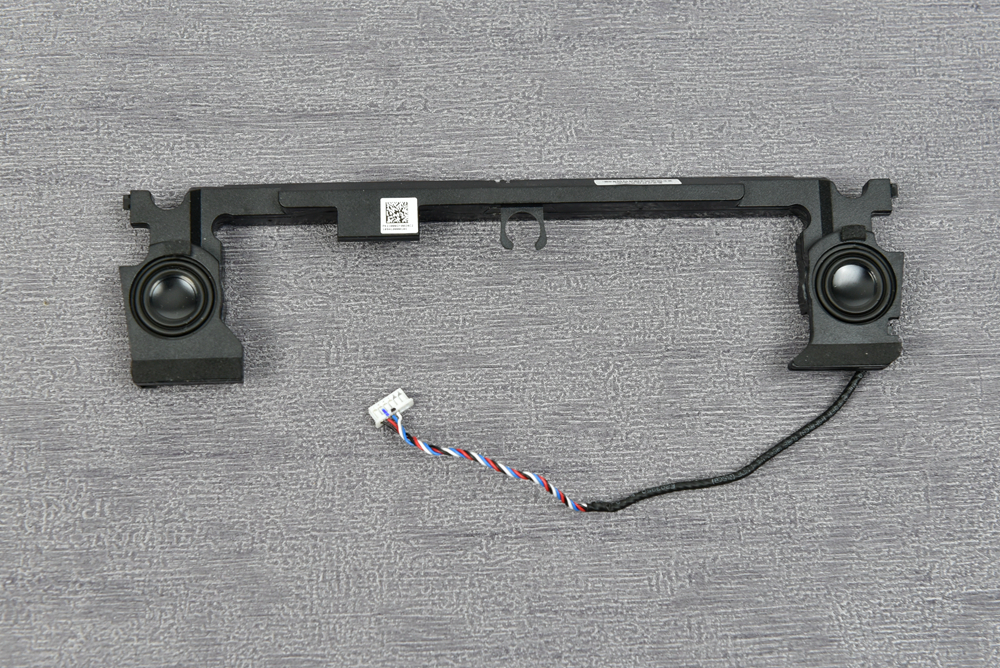
You may not have noticed, but we haven’t seen the speakers yet. They are located near the hinge of the LCD screen. In other words, the speaker system is at the back of the palm rest, beneath the diamond-shaped stereo grille.
These two speakers are big enough. In a notebook, it is rare to see a speaker of such a large size or a round design. It is no wonder that during the experience, you can feel a lot of volume and low-powered sound. The speakers are certified by Danish B&O Audio.
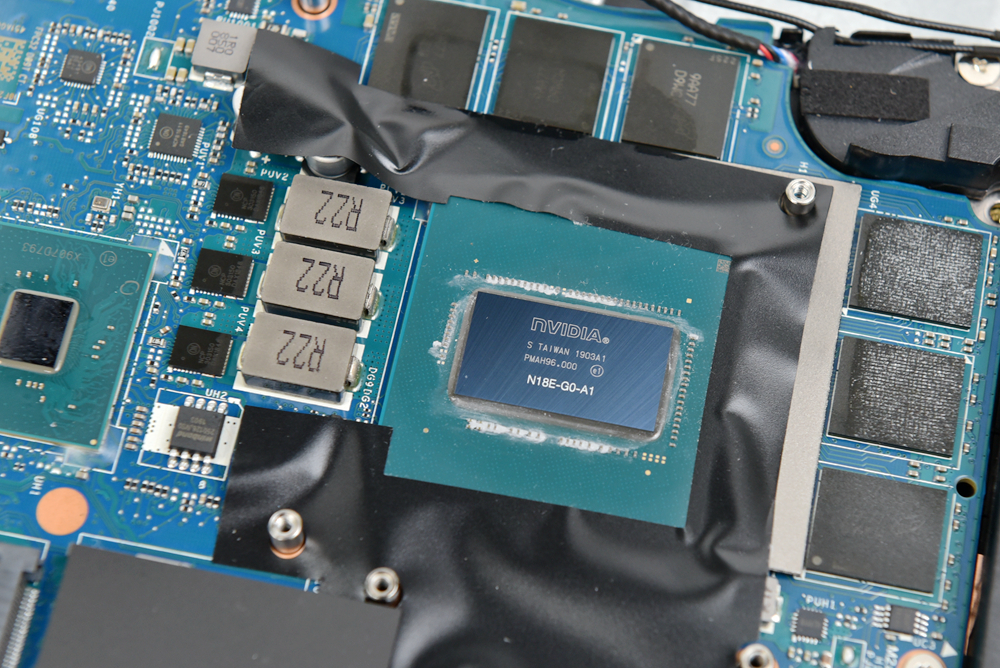
The NVIDIA GeForce GTX 1660 Ti Max-Q graphics card uses a 12nm process based on the Turing architecture and features 6GB of GDDR6 memory. Its main feature is that it can reduce power consumption while ensuring performance output, thus requiring relatively less cooling.
The laptop features an Intel 9th-generation Core i5-9300H quad-core processor. This processor is based on the Coffee Lake architecture, manufactured using a 14nm process, with a base frequency of 2.4 GHz and a maximum Turbo Boost frequency of 4.1 GHz. It features 8MB of L3 cache, a 45W TDP, and supports dual-channel memory. In fact, this i5-9300H processor can already meet the needs of most users.

Let’s take a close look at the motherboard. The level of integration is very high, so the motherboard looks quite small.
In fact, the internal layout of the HP Pavilion Gaming 15-dk0000 is already quite well-designed for a gaming laptop. Its design is reasonable, and the disassembly process is very convenient. Whether for future upgrades or routine maintenance, most users can handle it themselves.
Always be the first to know the latest news. Follow MyFixGuide on Google News.
Is this thermal pad good enough? If I want to change them, what thickness should I use? Thanks
Good article, until you get to the upgrade options. I came looking for specifications as to which HD I need to buy for the upgrade. Is it a SATA cable? Can I use a hybrid HD, SSD, or what?
Like I said above, it is a good article. I did learn much from it.
Thanks!
Jeff B
Hey, I’m not the admin of this website, but my question has still not been answered yet. I doubt the admin will answer yours soon, but I’ll help you because I also have this exact model.
As for storage upgrades, you can upgrade memory and storage.
As for the Memory, there are two memory slots. Mine came with 8GB in 1 of the slots, so there is still one memory slot left (I upgraded mine, and now it’s 2x8GB)
For storage, there is 1 M.2 NVMe slot (mine came with 256GB NVMe SSD) that you can upgrade using an M.2 NVMe drive or M.2 SATA drive, and also there is 1 2.5″ hard drive bay (mine came with a 1TB HDD) that you can upgrade using any 2.5″ hard drive like HDD, SSD, or SSHD (hybrid). Hope this helps.
Salve… il mio è con solo l’SSD da 512GB… ho cercato di aprire il fondo, ma dopo aver tolto le 7 viti, non sono riuscito a toglierlo… per quanto cercassi uno spiraglio, una feritoia, niente da fare.
Tu come sei riuscito ad aprirlo? e poi io h trovato solo 7 vii… 4 lunghe da un lato, quello vicino al monitor e 3 piccolissime dal lato opposto.
Fammi sapere, grazie
I opened mine by removing all the screws on the back, then prying the back panel open using a prying tool. It’s kinda hard doing the prying.
Hey, do you happen to know the model/serial number for the motherboard?
There are many serial numbers for HP 15-DK series motherboards. It is recommended that you go to the HP website to download the maintenance manual for this notebook. You can find all the serial numbers of this laptop’s motherboard in the manual.
What is the maximum SSD storage I can upgrade on this laptop (NVME)?
Hey, thanks for this guide, it looks to be super in-depth.
However, I’m stuck at the rear cover step (tech noob here). I removed the 8 screws, but it doesn’t budge. I tried gently prying it, but it’s even harder to move than when it was fully secured.
Any tips for this, please?
Many thanks
Since there are many clips on the back cover to secure it to the palm rest, please insert a guitar pick or an old card between the bottom cover and the palm rest, and slowly slide the pick to release the clips from the palm rest. Once all the clips are fully released, the back cover will come off the body.