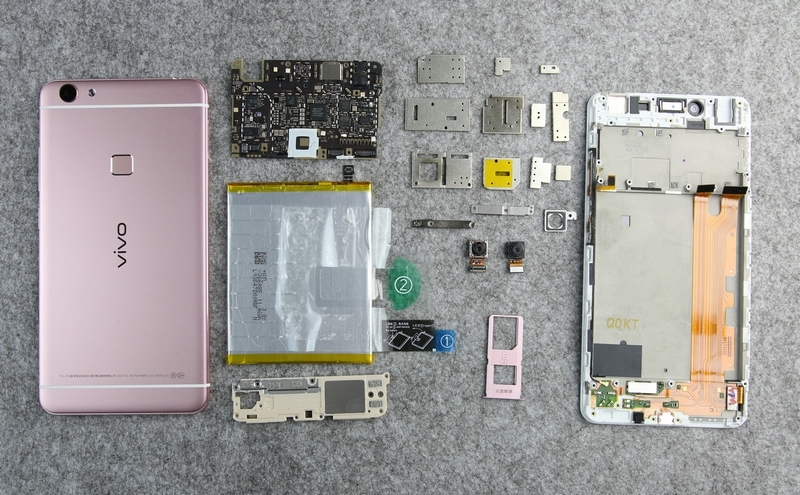
In this guide, I will explain how to disassemble the Vivo X6 Plus to remove the back cover, speakers, battery, camera, and motherboard.
Want to be the first to see inside the latest gadgets? Follow us on Facebook for the latest news from MyFixGuide.com.
Specifications:
OS: Android 5.1
CPU: MediaTek MT6752, 1.7GHz
Display: 5.7-inch Super AMOLED, 1920×1080, 386ppi
RAM: 4GB
ROM: 64GB
Battery: 3000mAh
Camera: 13MP rear camera with f/2.0, 5MP front camera with f/2.0
HIFI: ES9028 + ES9603 chip
The vivo X6Plus officially went on sale on December 14. One of its highlights is that it uses the world’s first ES9028Q2M and ES9603Q combination audio chips.
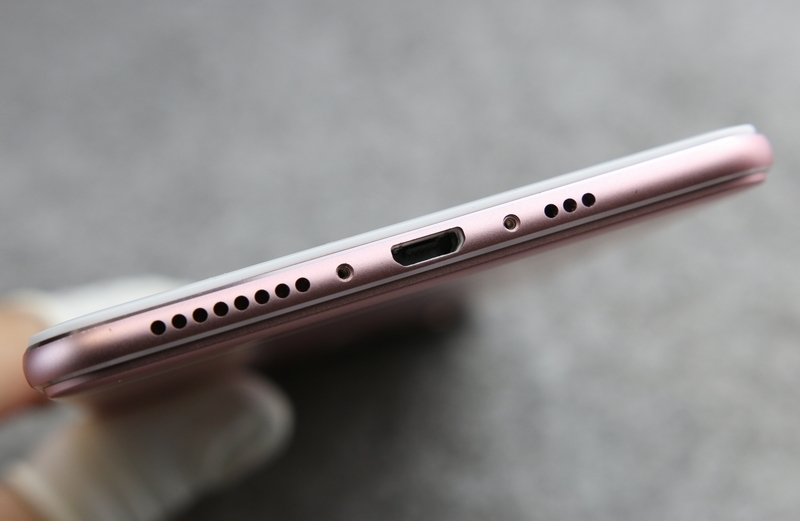
Remove the two screws next to the Micro USB port.
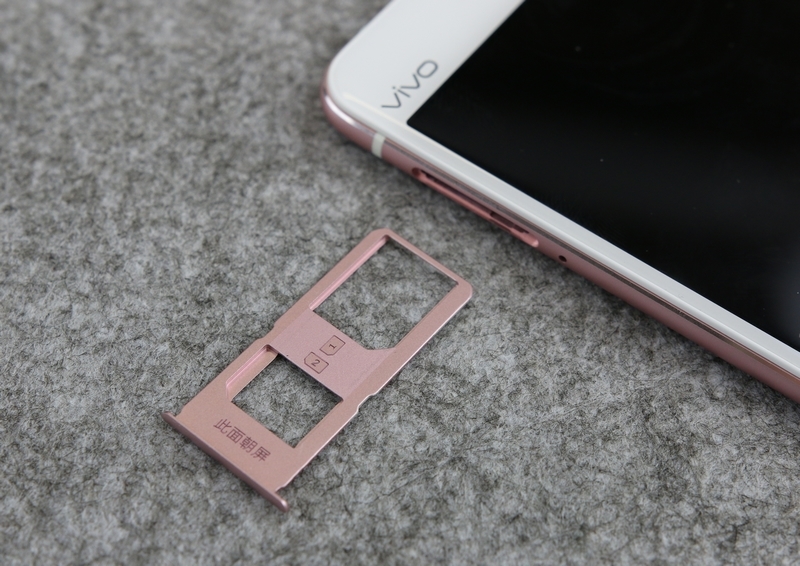
Remove the SIM card tray.
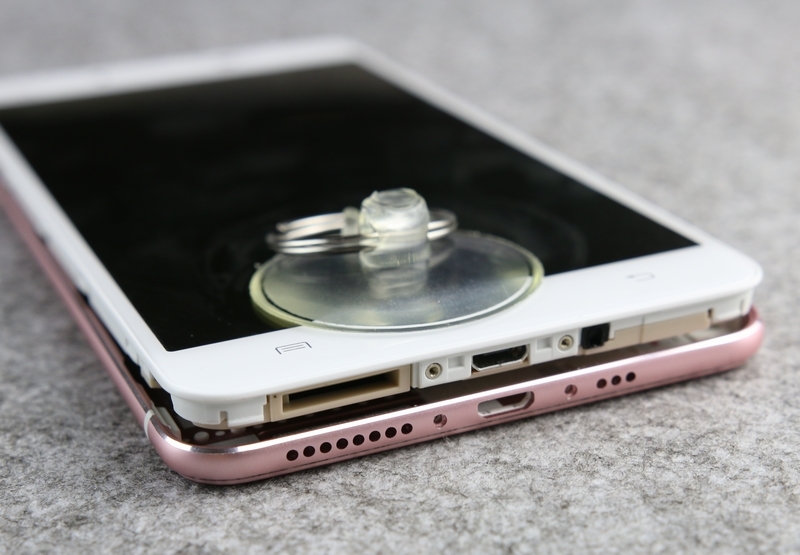
Open the display assembly a little bit with a suction cup, insert a guitar pick, and slide it to release all the clips.
After removing the back cover, you will see that it features an all-metal design with an integrated molding process.
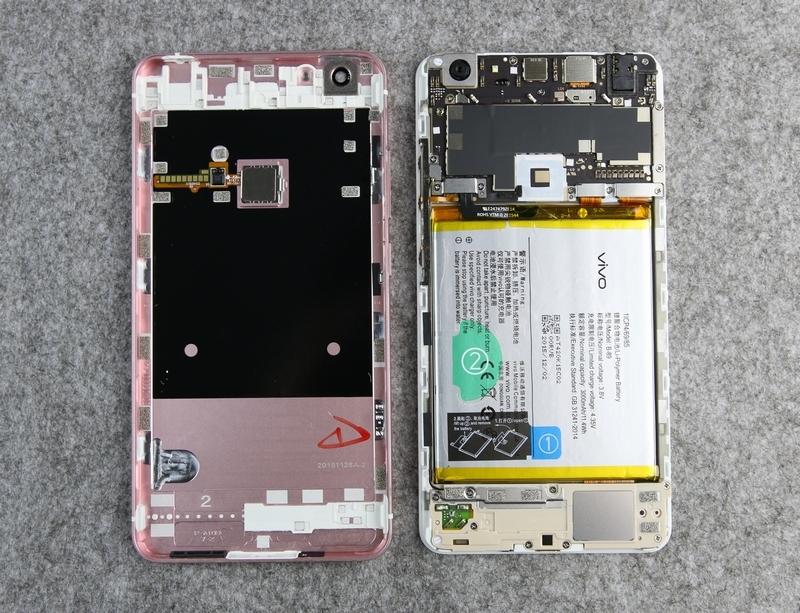
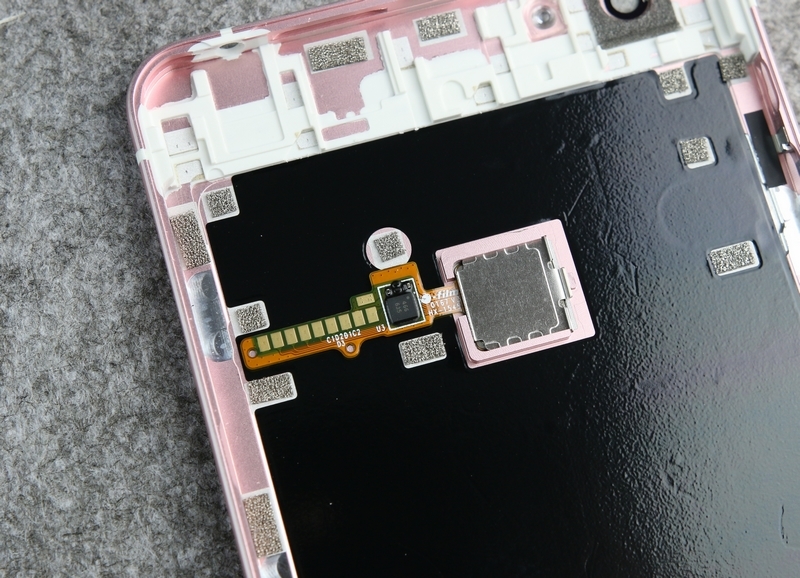
One special feature is that the back cover has a built-in fingerprint recognition module, which connects directly through metal contacts without the need for cables, making it very convenient to remove the back cover (though the back cover clips are very tight, making removal quite difficult).
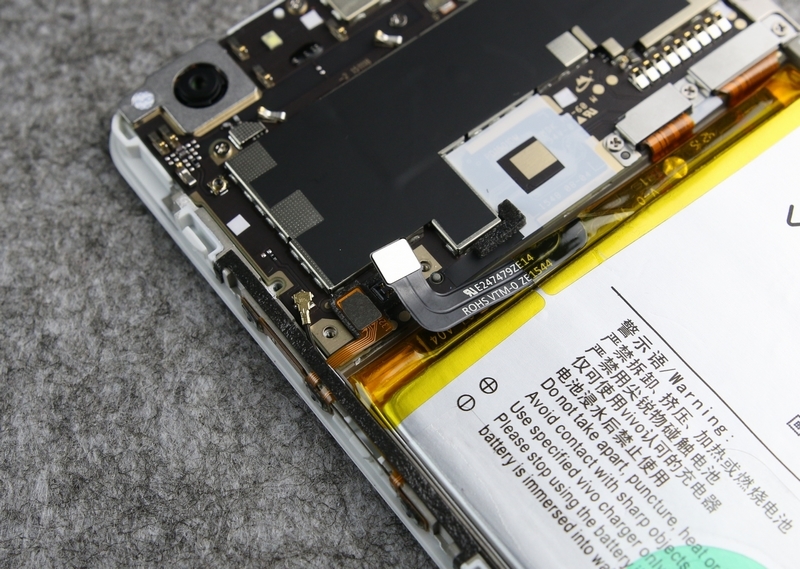
For safety reasons, disconnect the battery connector before proceeding with the disassembly. The battery connector of the X6 Plus is secured with a metal cover to prevent the cable from loosening. This design enhances reliability, but it also increases the weight of the phone.
Lift the transparent tape with your fingers and remove the battery.
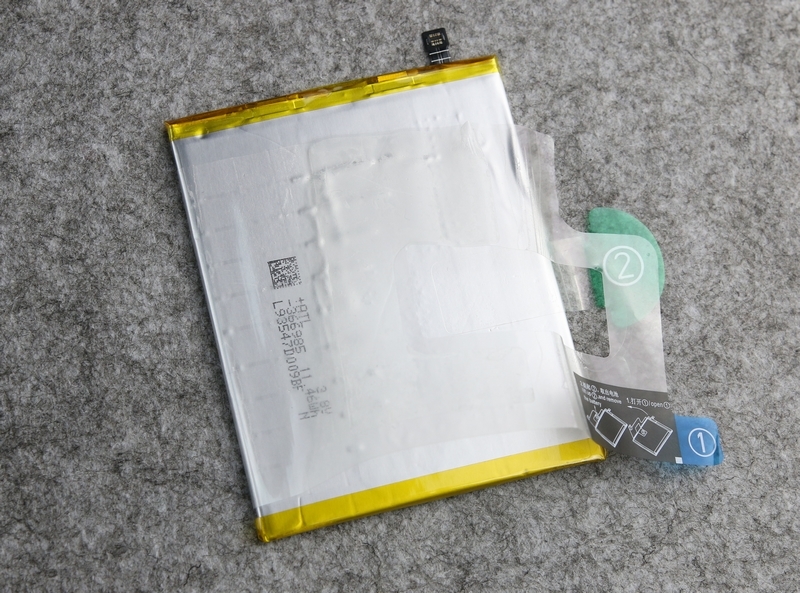
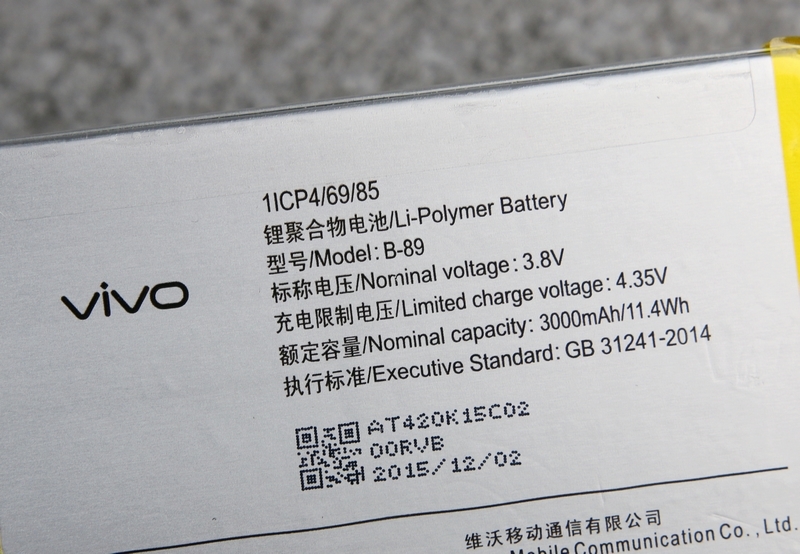
The Vivo X6 Plus features a 3000mAh Li-Polymer battery.
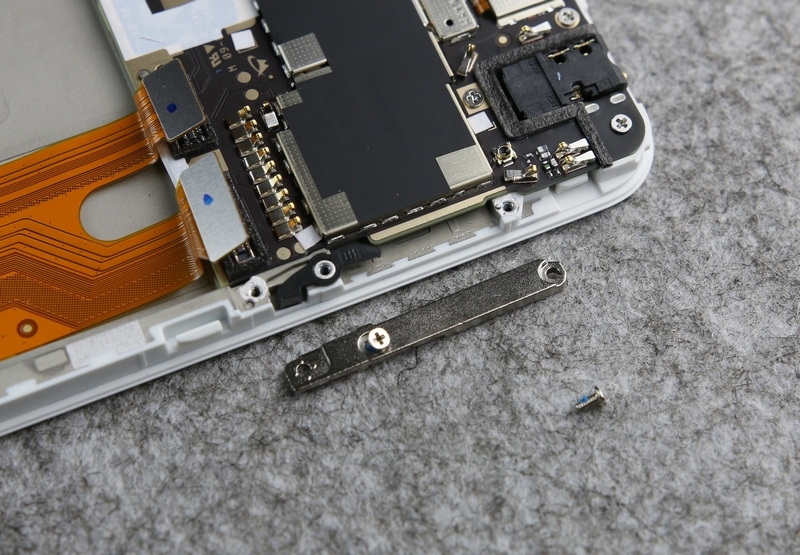
Now remove the metal plate and disconnect the yellow cable.
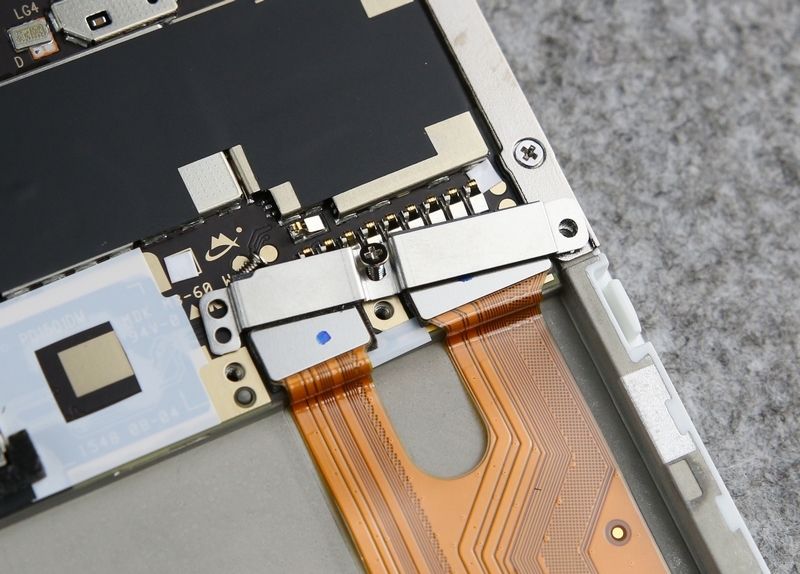
Disconnect the button cable and antenna.
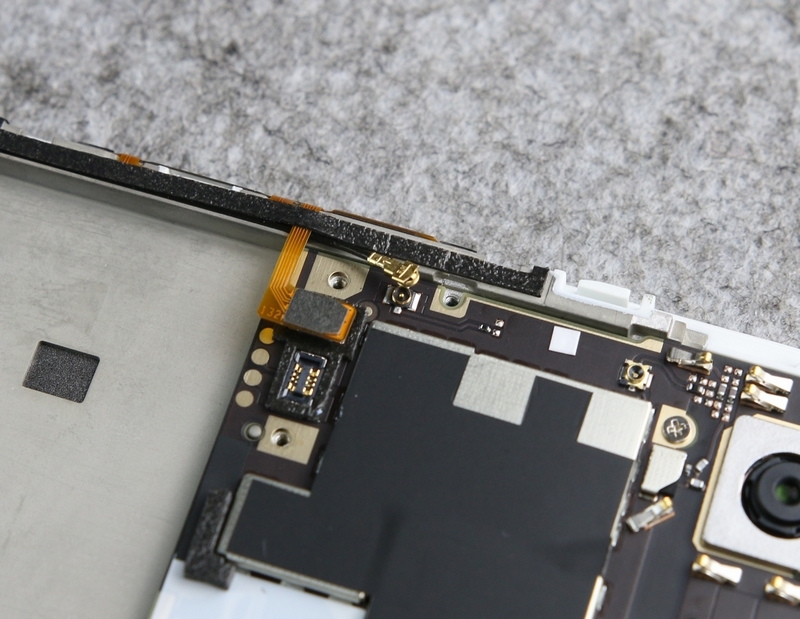
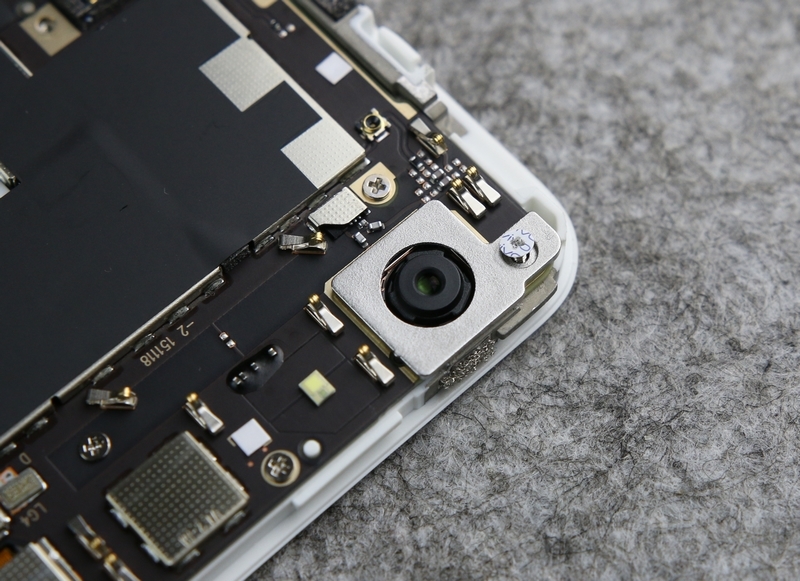
Remove the metal cover from the camera. The cover is secured by a screw (the screw is covered with a fragile sticker. If the sticker is damaged, it will void the warranty).
Remove the SIM card cover.
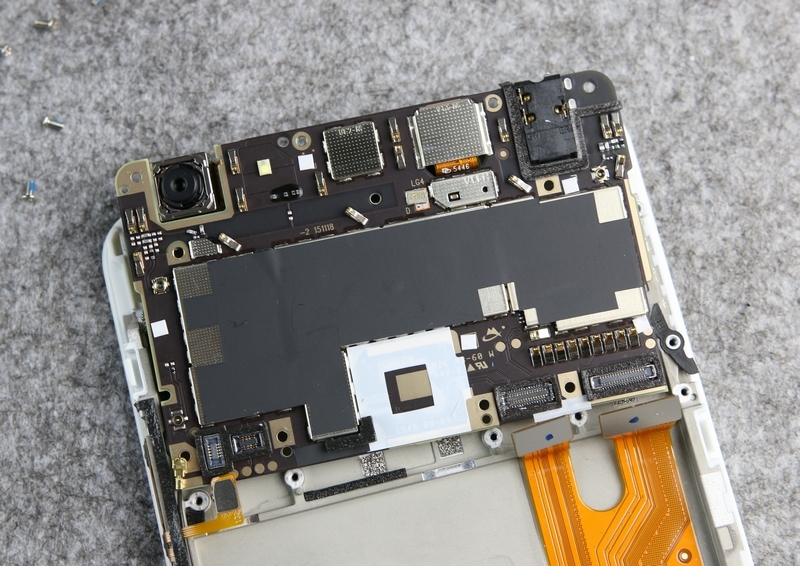
Remove all screws securing the motherboard. You can remove the motherboard.
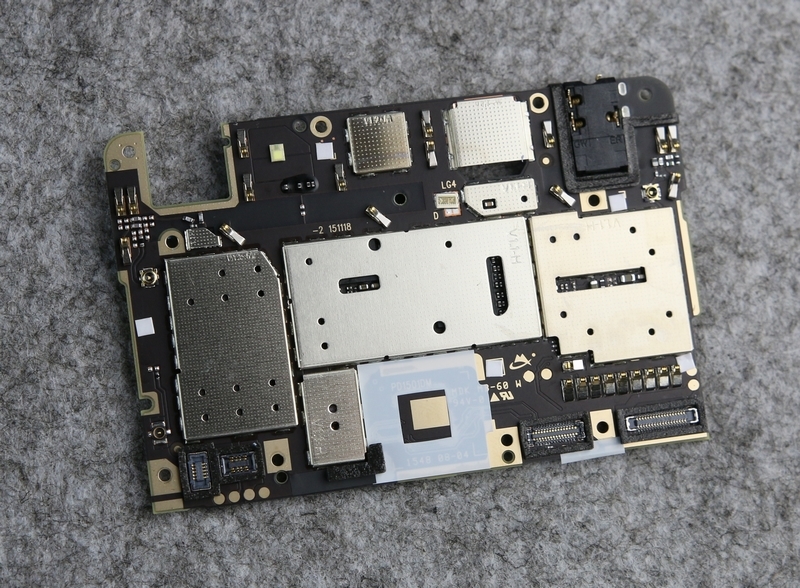
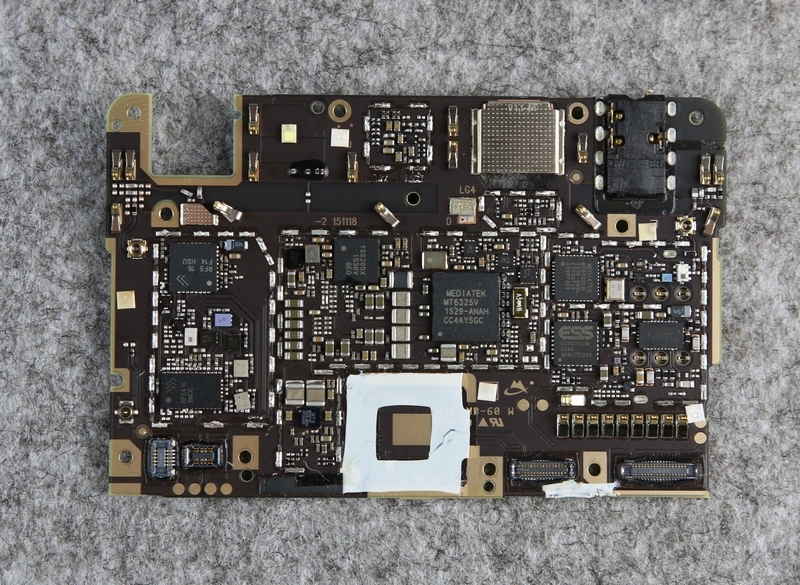
We can see that the motherboard was covered with graphite and metal shields.
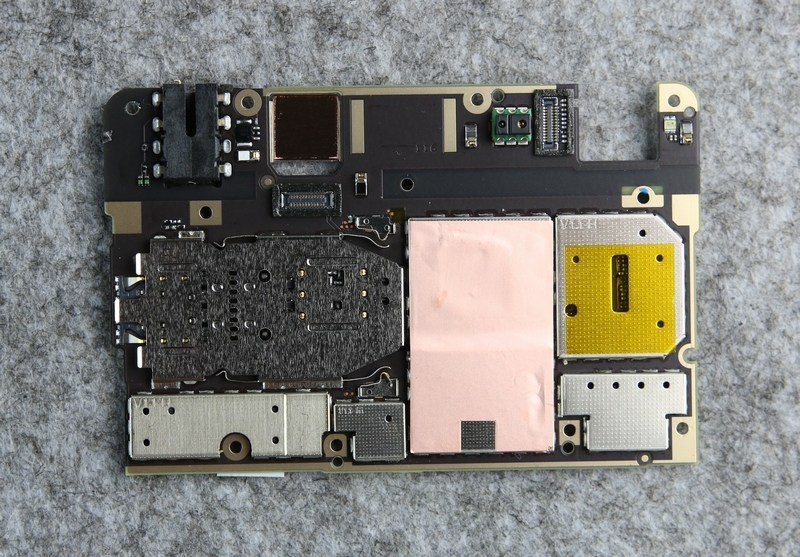
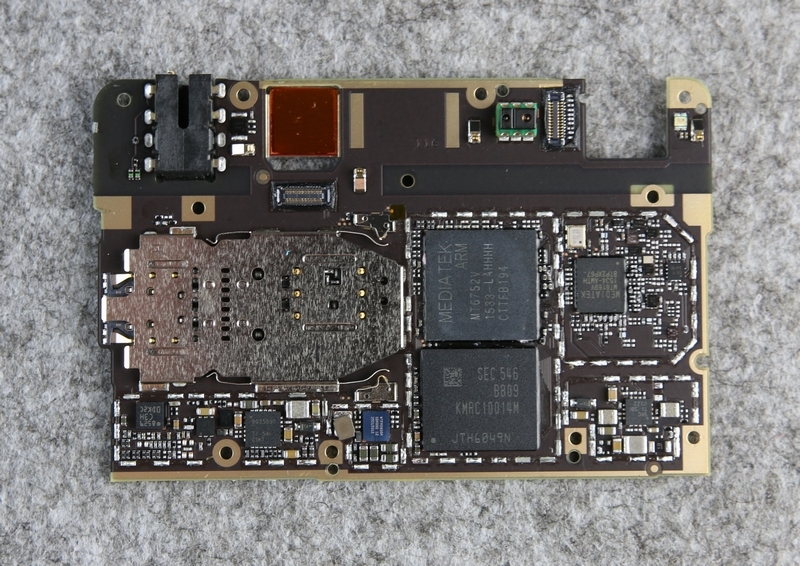
The back of the motherboard is also covered with metal shields and a copper sheet.
Under the copper sheet are the SoC and RAM.
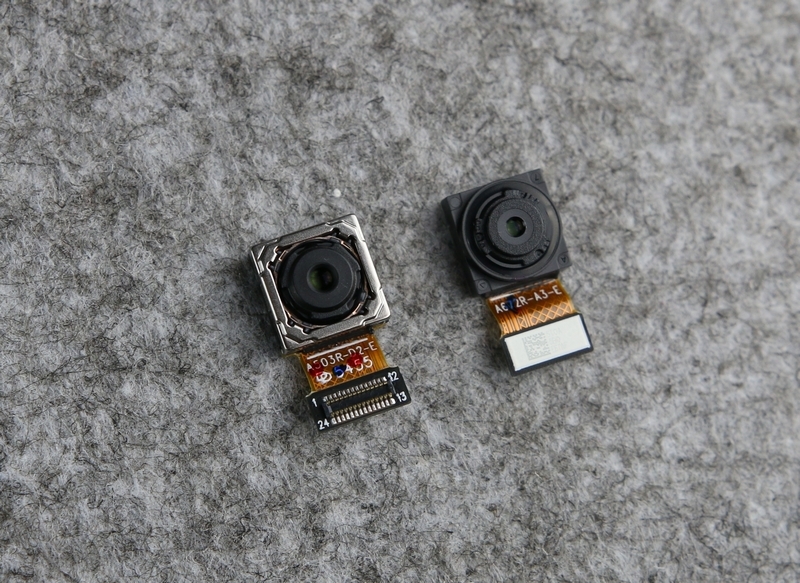
13MP camera and 8MP front camera
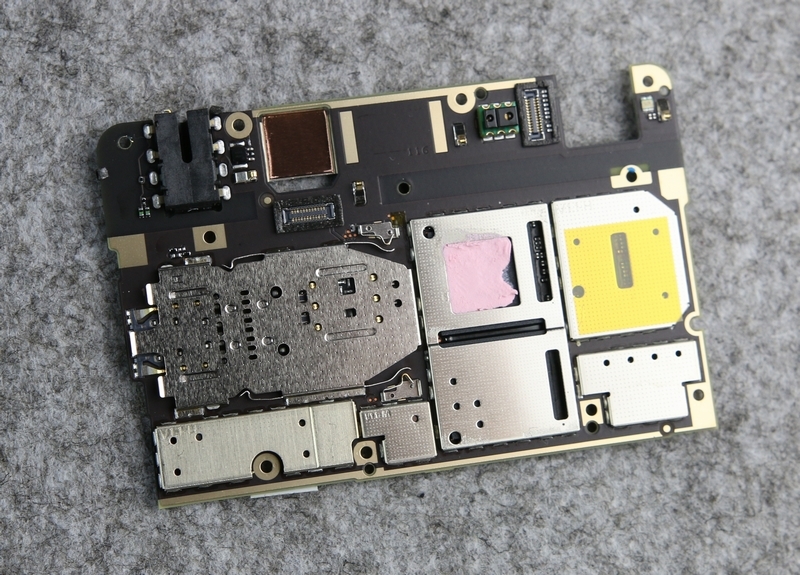
Peel off the graphite sticker, and you will find that all the chips are covered with metal shields, which are designed to serve the HiFi system and minimize interference.
Remove the copper foil from the SoC. You can see the pink thermal paste on the SoC.
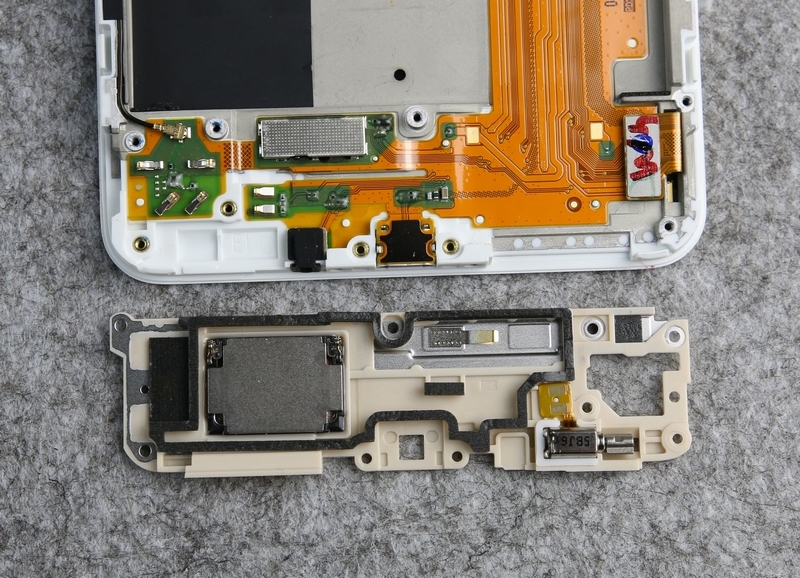
Remove the speaker board module. The board integrated a speaker and a vibrator.
These metal shields are soldered onto the motherboard. We need to heat them with a heat gun and then remove them using tweezers.
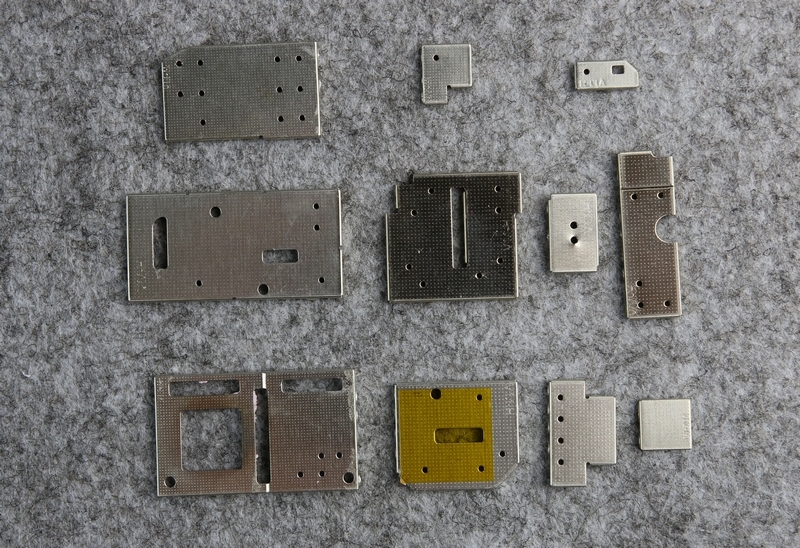
Close-up of the front of the motherboard after removing the metal shields.
Close-up of the back of the motherboard after removing the metal shields.
The MediaTek MT6752 is based on the 28nm HPM process and features a Mali-T760MP2 GPU. It is packaged together with a 4GB memory chip.

Samsung KMRC10014M-B809 64GB ROM

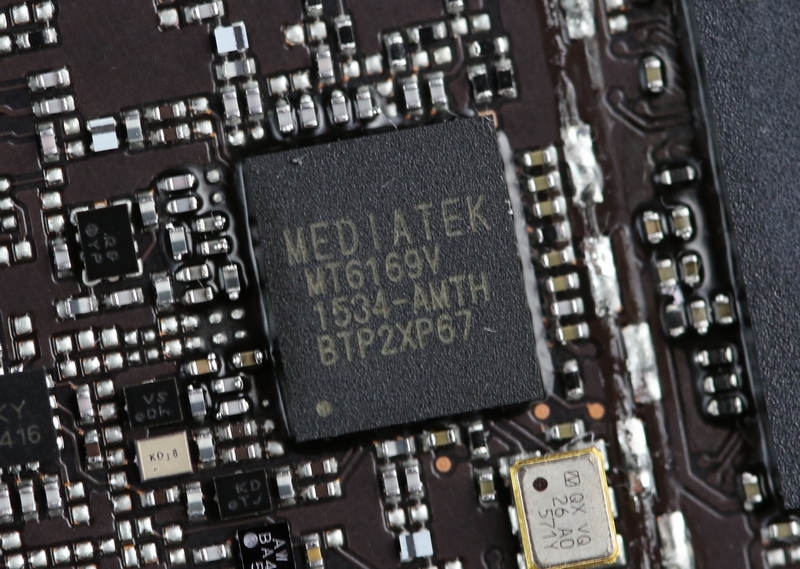
MediaTek MT6169V RF chip
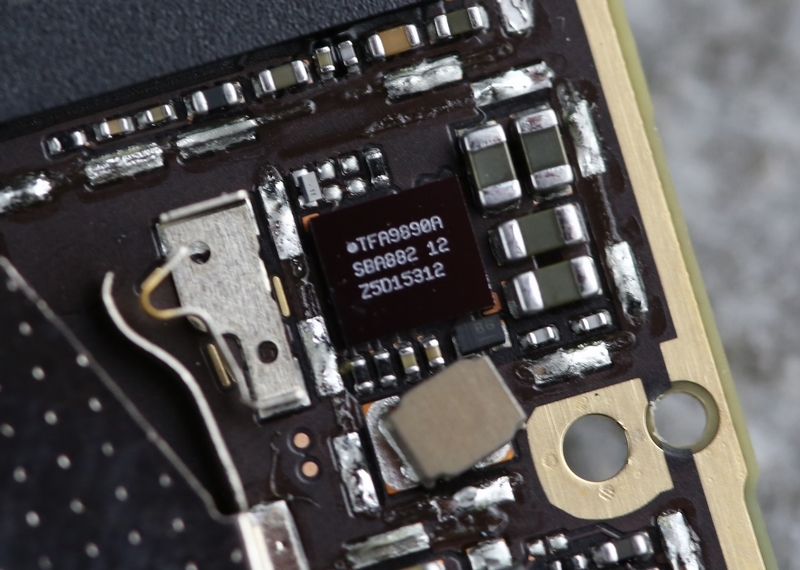
NXP TFA9890A audio Amplifier
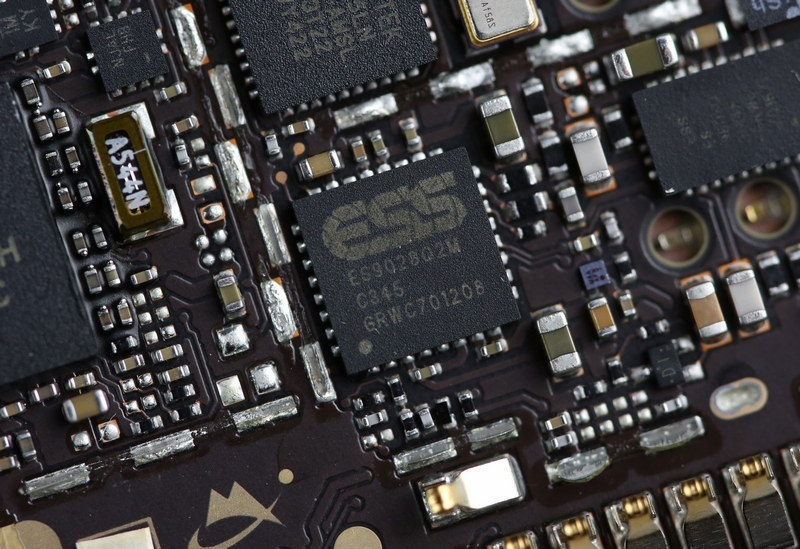
This is the ESS ES9028Q2M chip, the first product in the ES9028 series. The X6 Plus is the world’s first smartphone to feature this chip, which has a signal-to-noise ratio of up to 129 decibels.
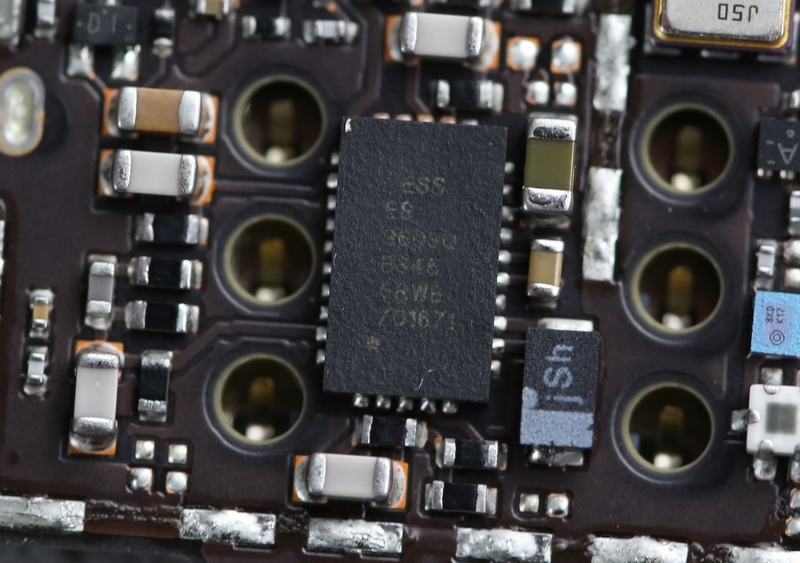
The ES9603Q is a new chip, and its specifications have not been announced yet.
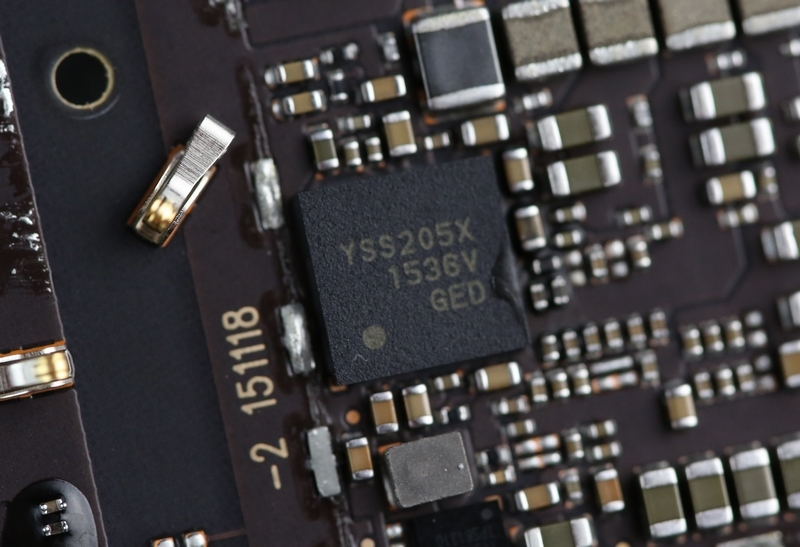
Yamaha YSS205X-CZE2 Digital surround signal processing chip
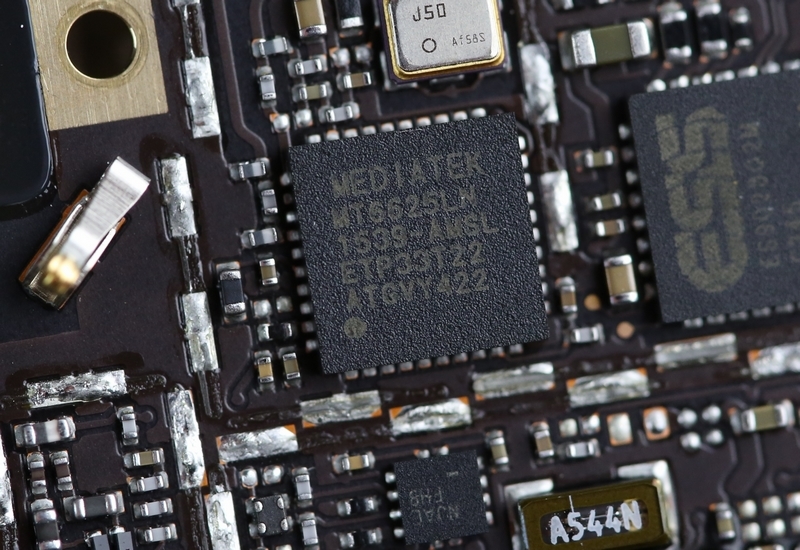
The MediaTek MT6625LN multifunction chip integrates Bluetooth, Wi-Fi, GPS, FM, and other functions.
Vivo X6 Plus internal parts