
In this guide, I will explain how to disassemble the Asus G550JK to remove the battery, hard drive, DVD drive, wireless, RAM, heat sink, speakers, keyboard, cooling fan, and motherboard.
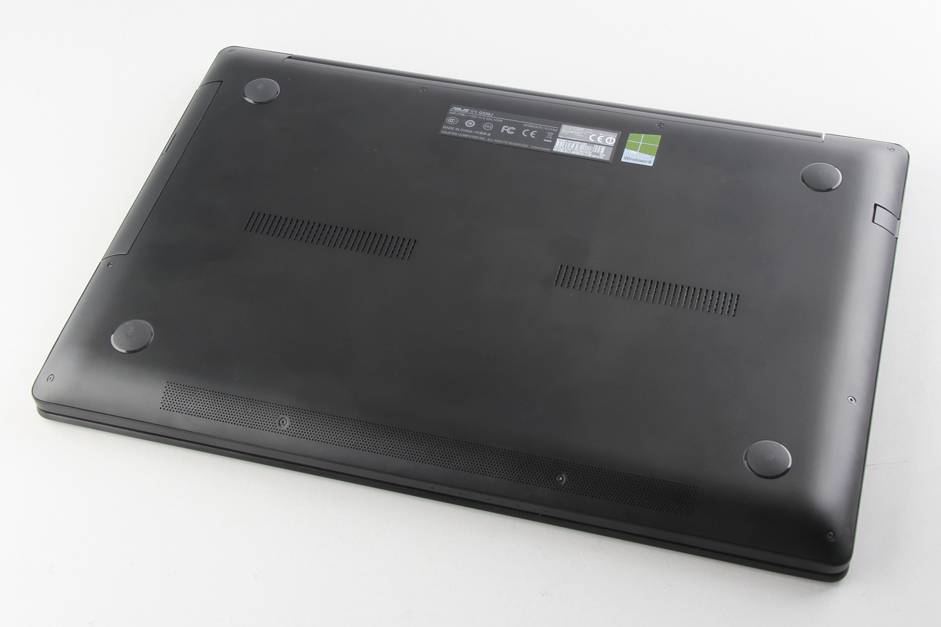
Remove all screws from the bottom cover. Insert a thin plastic card between the bottom cover and palm rest (do not use metal tools as they may damage your laptop). Slide the pry tool to release the clips on the bottom cover until it detaches completely from the laptop.
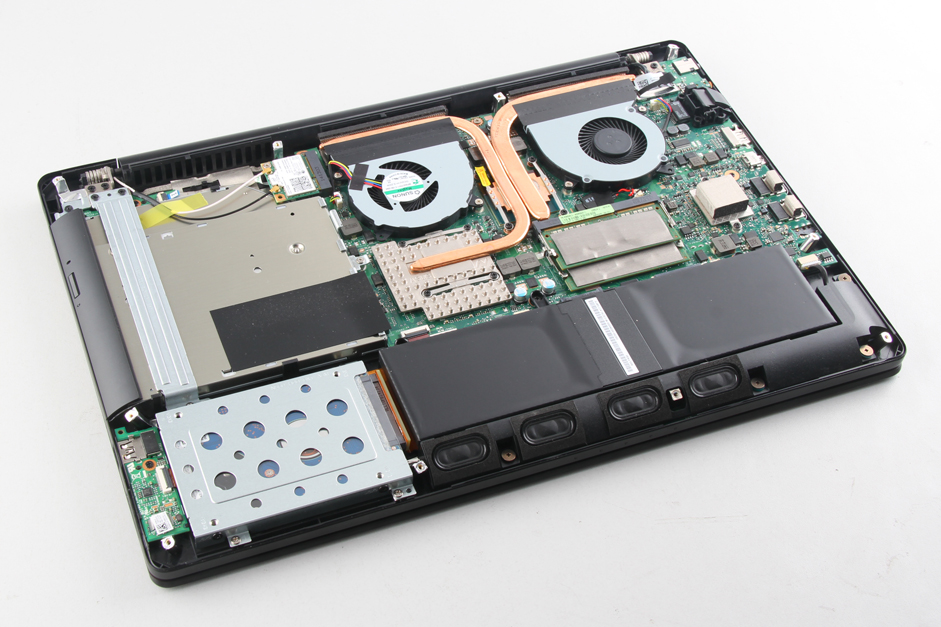
After removing the bottom cover, you can access the battery, heat sink, cooling fan, hard drive, RAM, wireless card, and DVD drive.
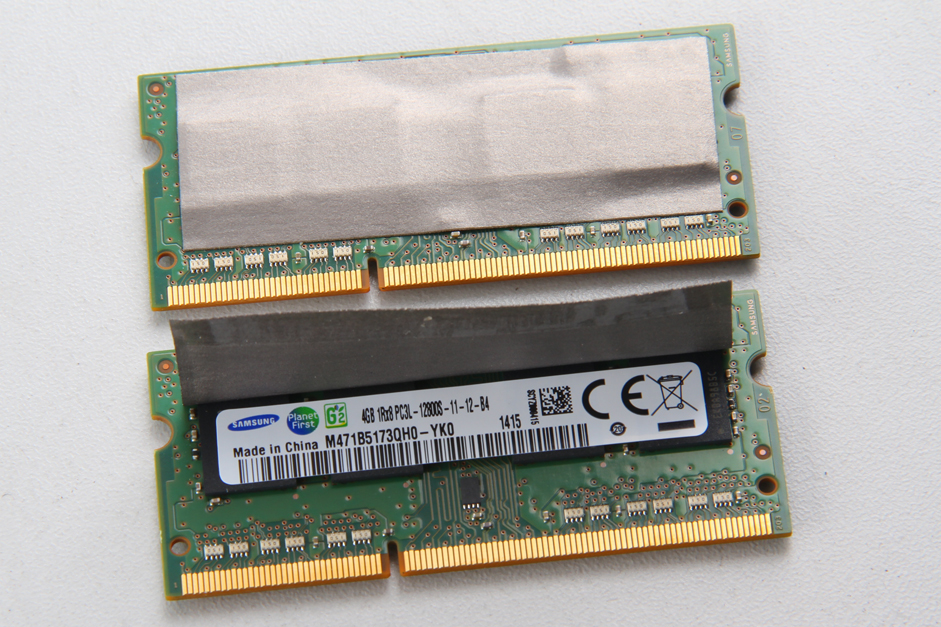
Use your fingernail to separate the clips on both sides of the memory module, and the memory will pop out automatically.
This laptop has two memory slots and comes with two memory modules. If you want to upgrade the memory, you will need to replace the existing memory modules.

The laptop comes with two Samsung 4GB PC3L-12800S RAM modules.
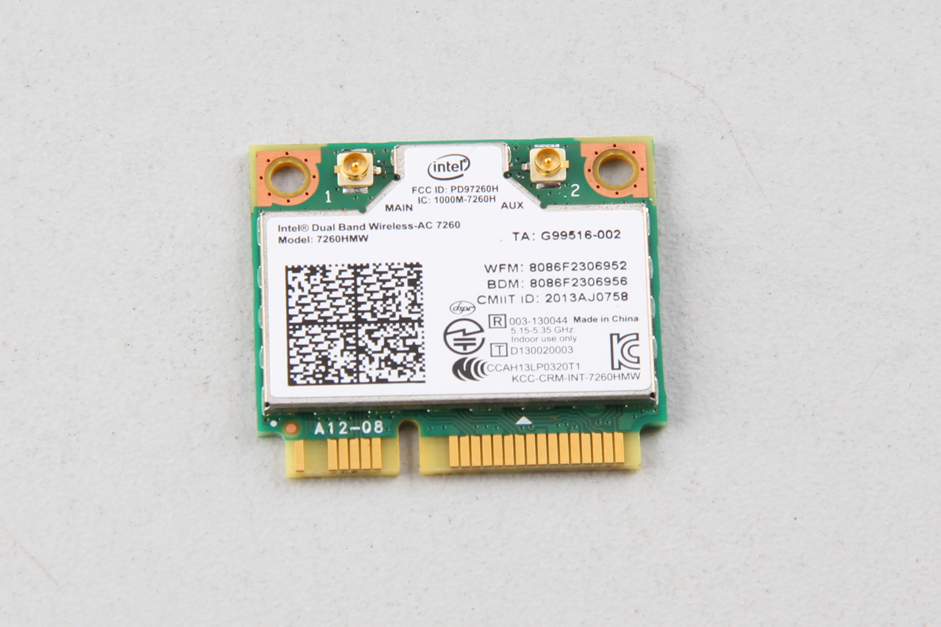
Disconnect the two antenna cables and remove the screw. You can remove the wireless card.
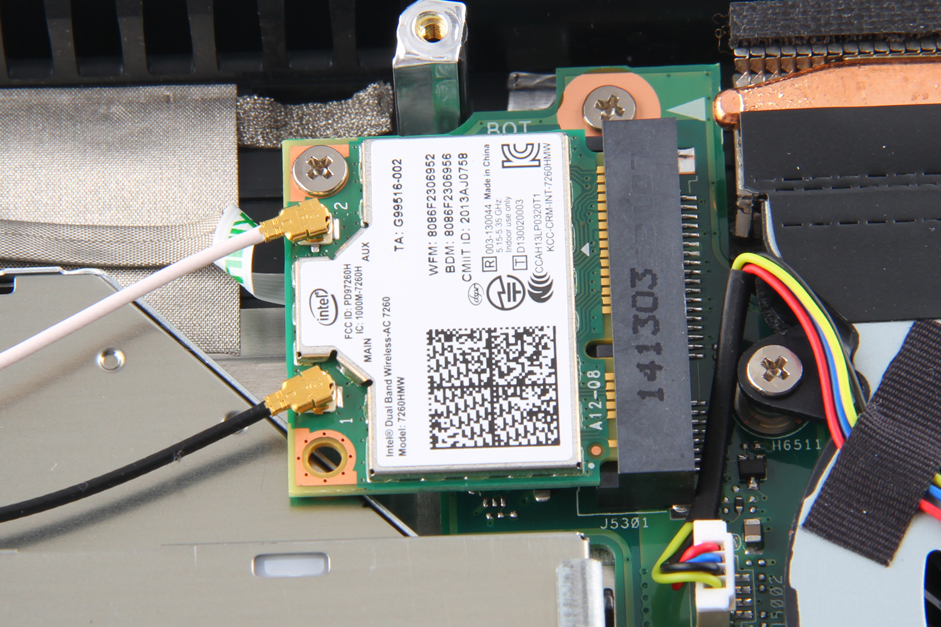
The Asus G550JK comes with an Intel Dual Band Wireless-AC 7260 wireless card.
Remove the four screws securing the silver plate, and then remove it.
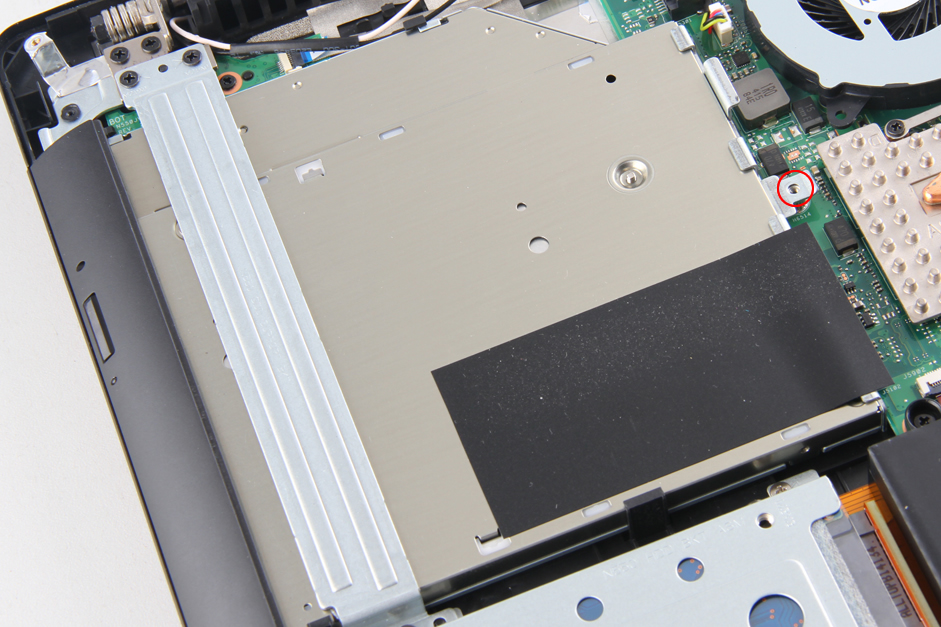
Remove the screw securing the DVD drive and then pull it out of the laptop.
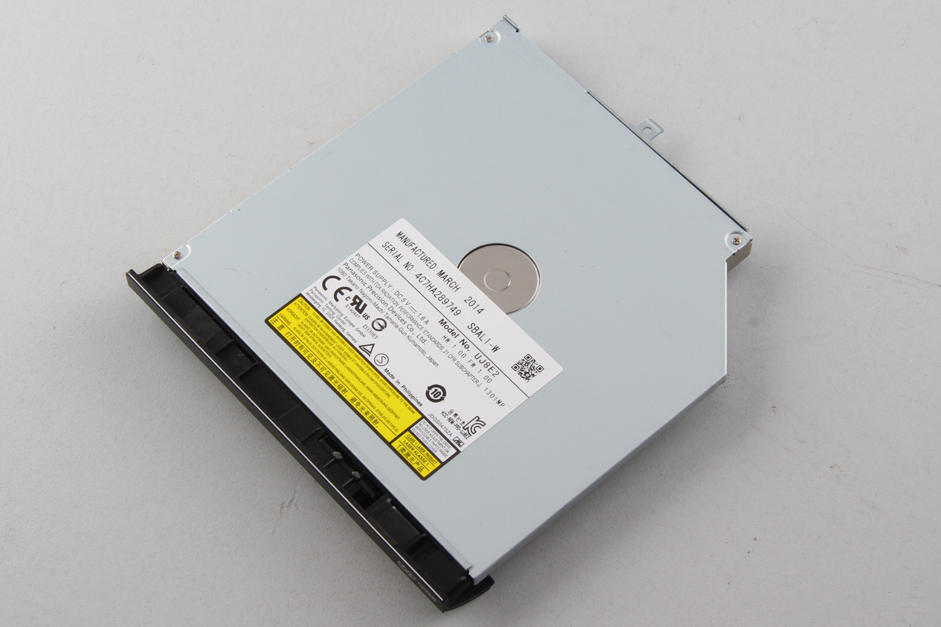
The Asus G550JK comes with a Panasonic UJ8E2 DVD drive.
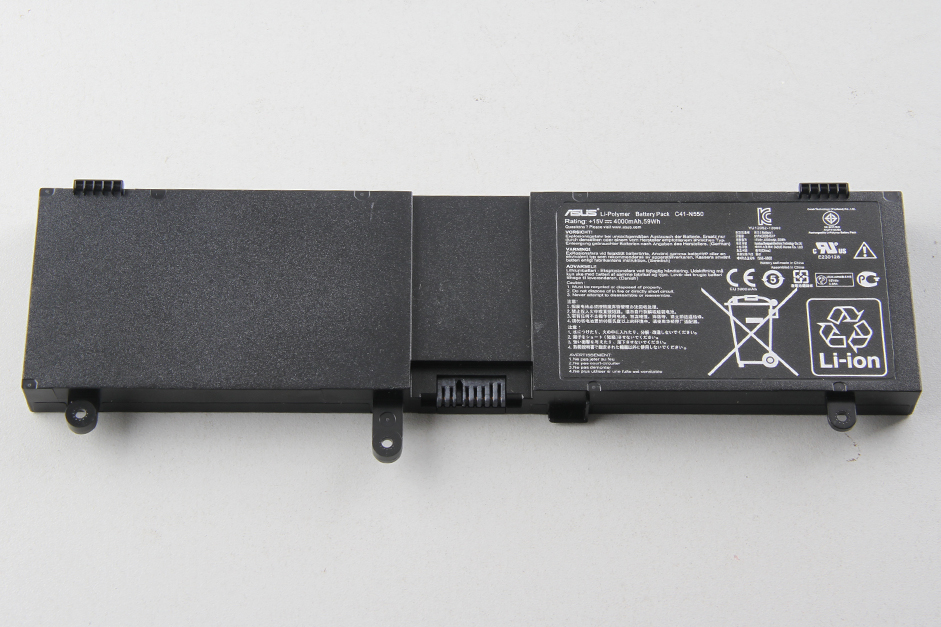
Remove the screws securing the battery and remove it.
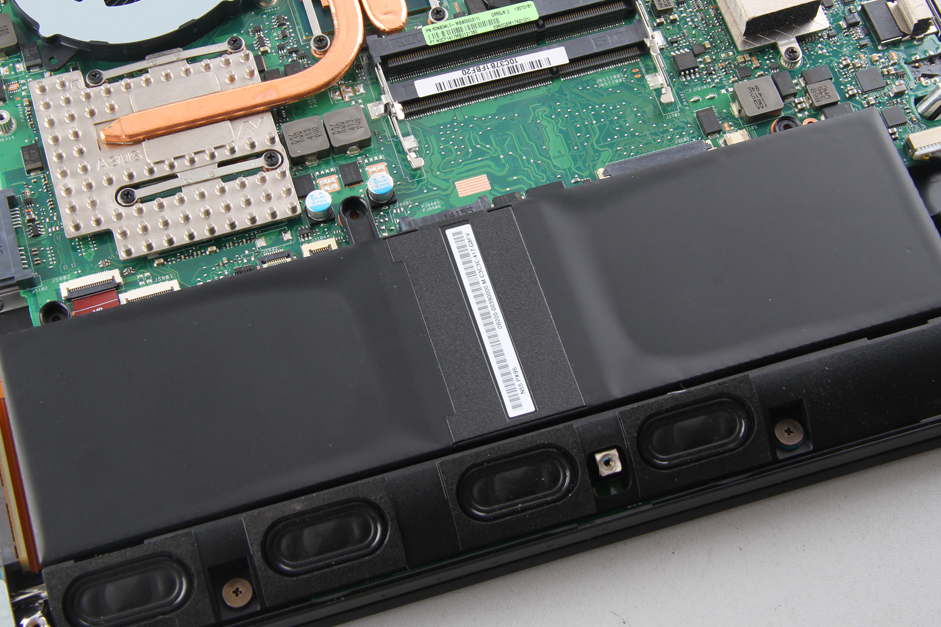
The Asus G550JK comes with a 4000mAh Li-polymer battery.
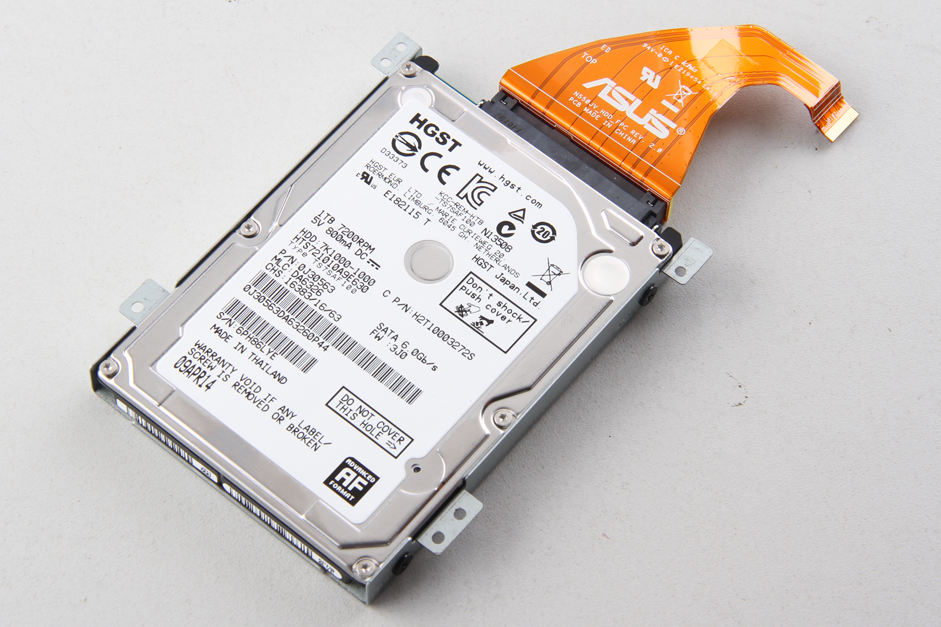
Remove the screws securing the hard drive module.
Disconnect the cable from the motherboard.
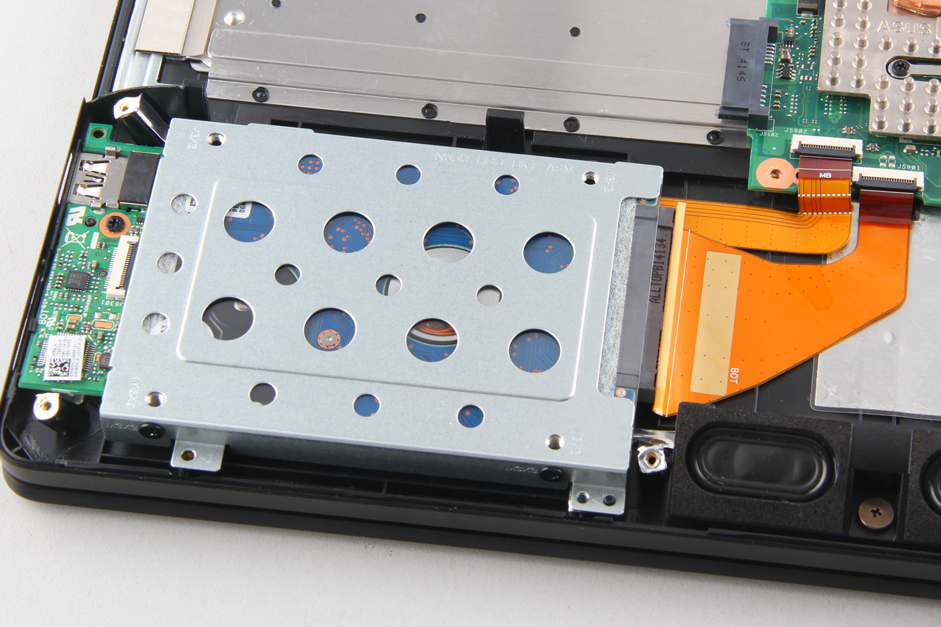
The Asus G550JK features an HGST 1TB hard drive. This hard drive is installed in an HDD caddy. If you need to replace the hard drive, you need to remove the HDD caddy and install it on the new hard drive.
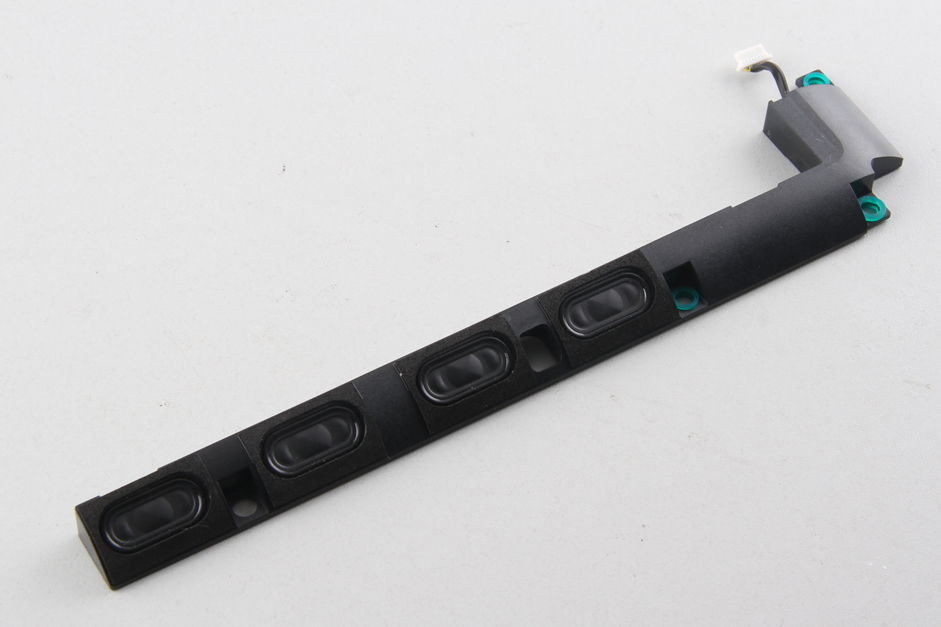
In the next step, I will remove the speaker and cooling fan.
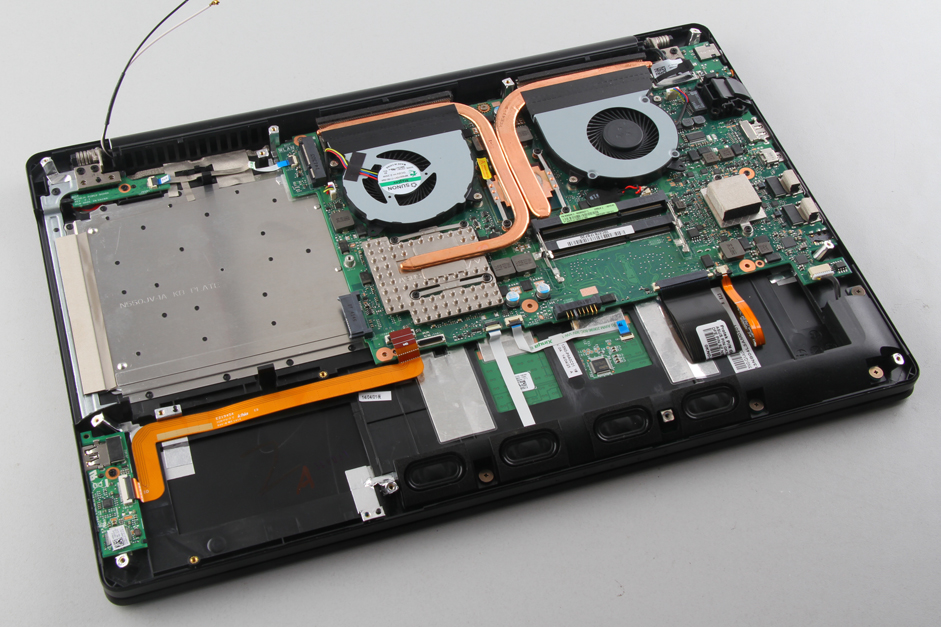
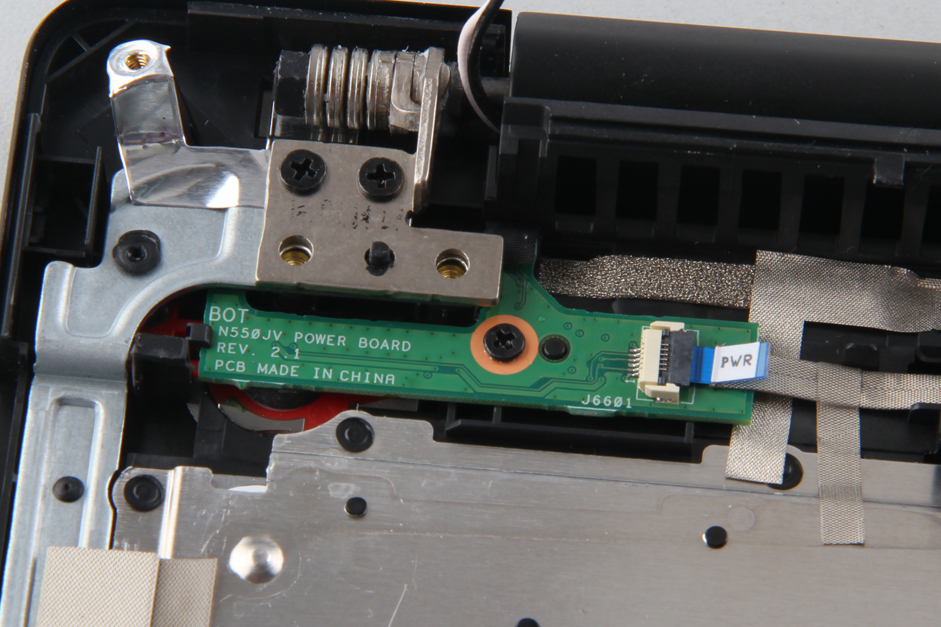
Power board
Remove the four screws and disconnect the cable from the motherboard. You can remove the speakers.
Remove the two screws securing the left cooling fan and then disconnect the cooling fan cable from the motherboard.
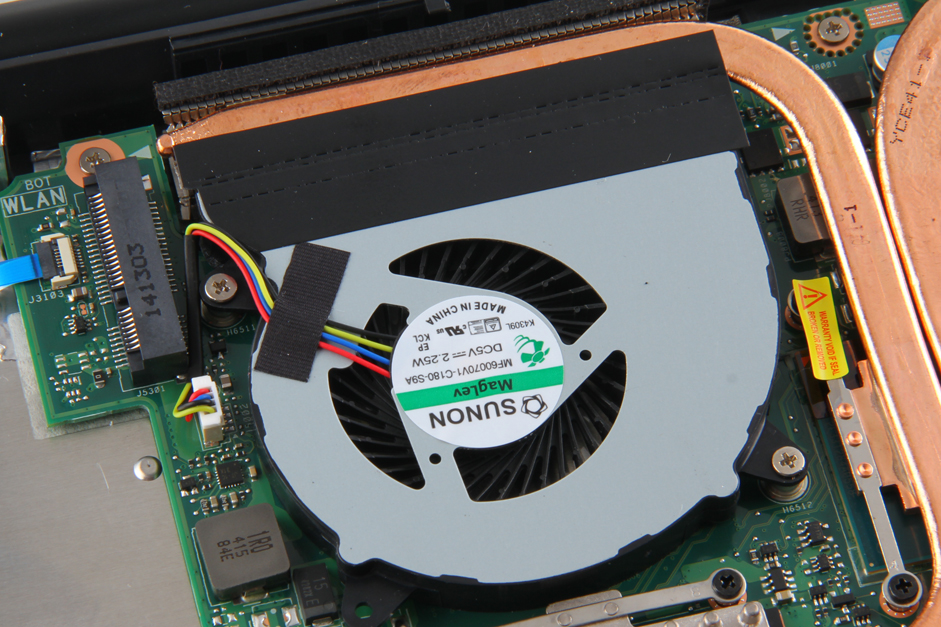
Remove the two screws securing the right cooling fan and disconnect the fan cable.
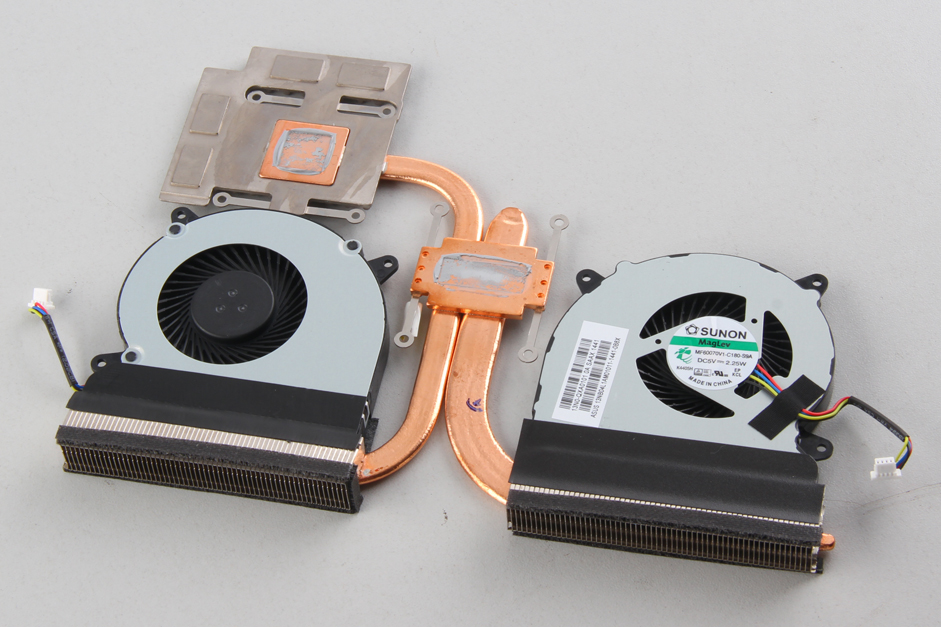
Remove the eight screws securing the heat sink.

The cooling system of the Asus G550JK consists of two fans and two heat pipes. The fans were supplied by SUNON.
Lift the motherboard from one side with your hand, gently wiggling it until it is completely detached from the laptop.
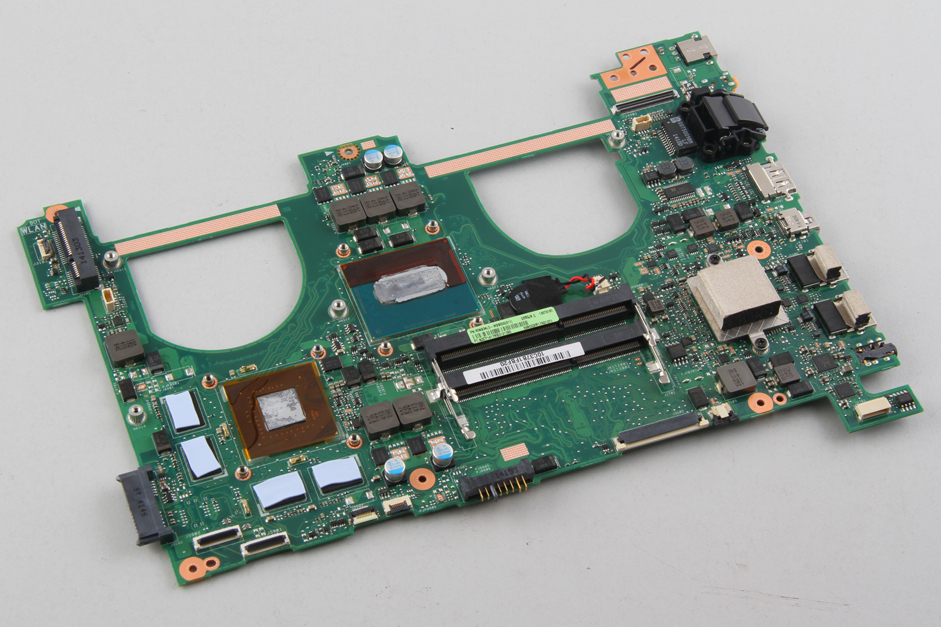
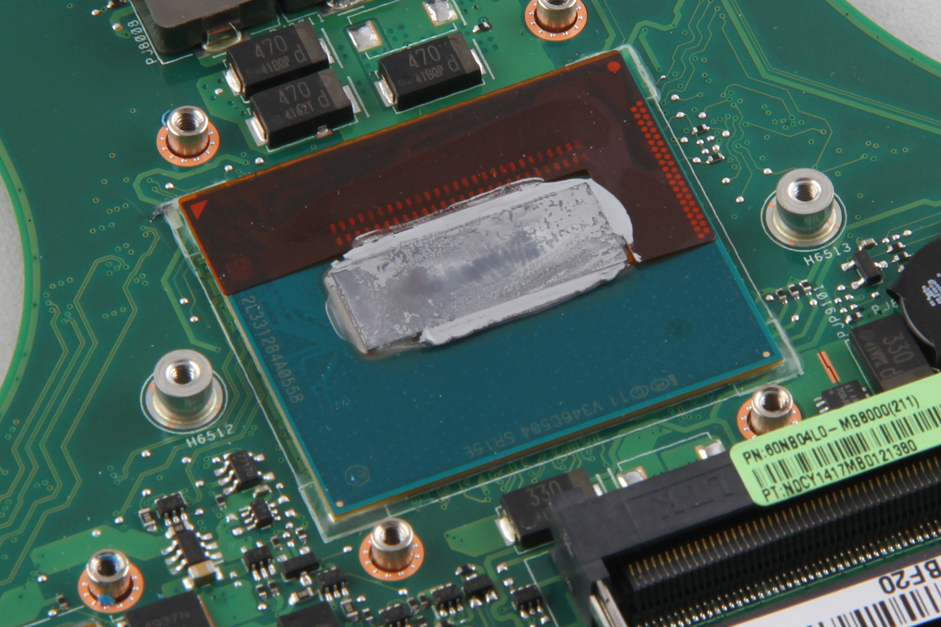
The Intel processor in this laptop is soldered directly onto the motherboard, so the processor cannot be upgraded.
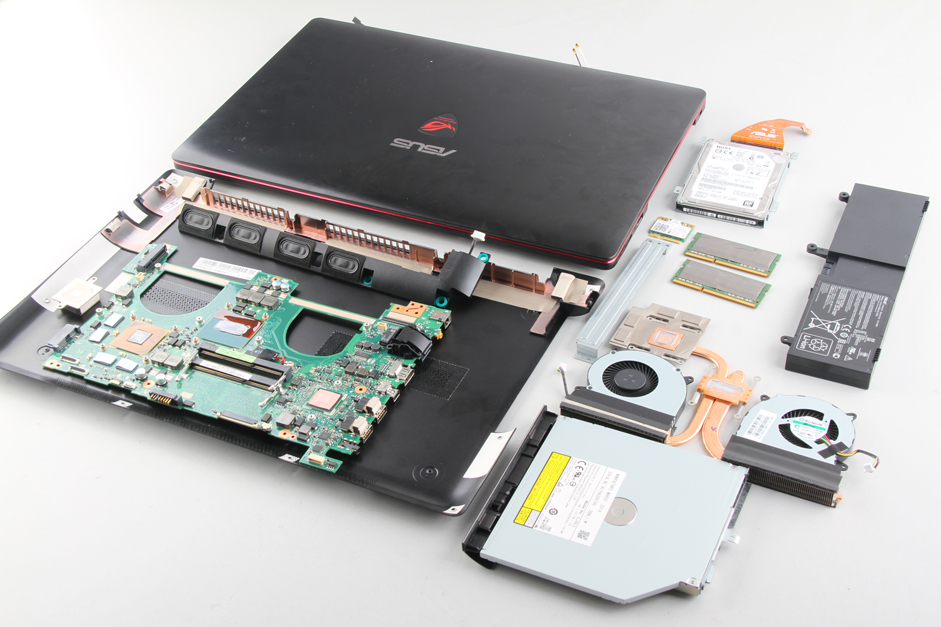
Asus G550JK internal parts
Can you post how to remove the keyboard from a G550JK and/or N550JK? I would like to know how and also figure out if the G550JK keyboard will be a match (fit and plugs) for the N550JK, because I do not like silver keys with white backlight. I can either send my keyboard to a place to get the backlight color changed and see if it fits. I want to just replace my N550JK keyboard with a G550JK one and maybe even use the top cover as well.
What size Torx screwdriver was required to remove the back panel? What type and what size screwdriver would be required to remove the hard drive from its caddy?
The Torx size is T-5 for the back panel. The hard drive screws are M2x4 Philips heads (a typical computer’s small Philips screwdrivers will do ).
If I remove the back panel and DVD drive to replace them with a second SSD drive, do I void the warranty (and any warranty stickers )?
Hi, I need to disassemble my G550JK in order to tighten the touchpad because it’s making some clicking noises while tapping on it, but first, I need to make sure I know what to do. So I found some guides for MacBook Pro with the same problem, and all that needs to be done is to tighten a small Torx screw under the battery. So here is the question: http://oi61.tinypic.com/aovtrq.jpg Is this black thing in the picture (marked with the red circle) the thing I’m looking for? Thanks for the help!
Hi, I need to disassemble my G550jk to add an SSD by removing the optical drive. The SSD came with a spacer (that fits 9.5 mm). Is the spacer enough to set up the drive? Do I need a caddy? Can I simply put the SSD directly into the SATA port without any support?
SSD: http://www.newegg.com/Product/Product.aspx?Item=N82E16820148792