
In this guide, I will explain how to disassemble the Lenovo ThinkPad T410 to remove the DVD drive, RAM, keyboard, palm rest, heat sink, and cooling fan.
Looking for more funny teardowns? Follow us on Facebook for all the latest repair news.
Turn off your laptop. Unlock and remove the battery.
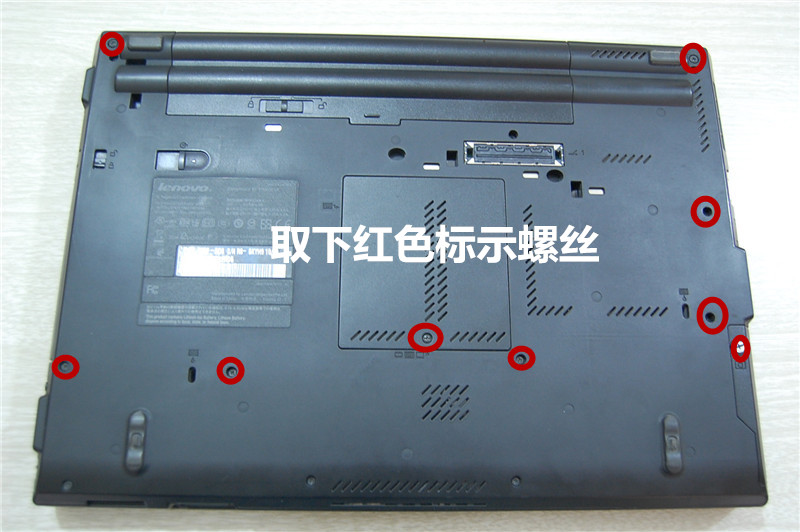
Remove the nine screws from the bottom case.
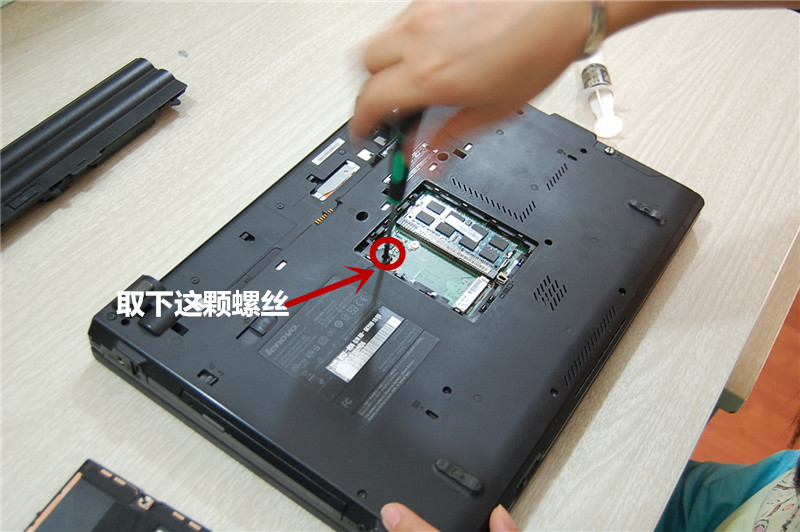
Lift and remove the memory cover; underneath the memory cover, you will find a screw next to a keyboard symbol indicating that it is used to secure the keyboard. Remove this screw.
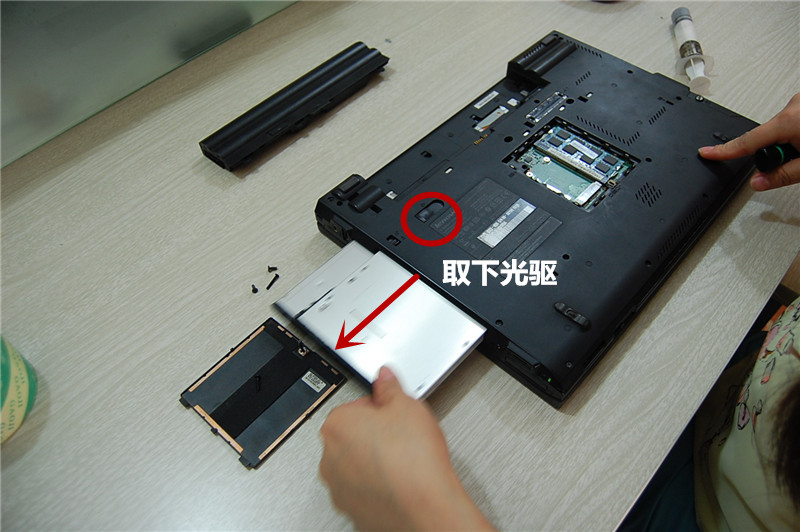
Unlock and pull out the DVD drive.
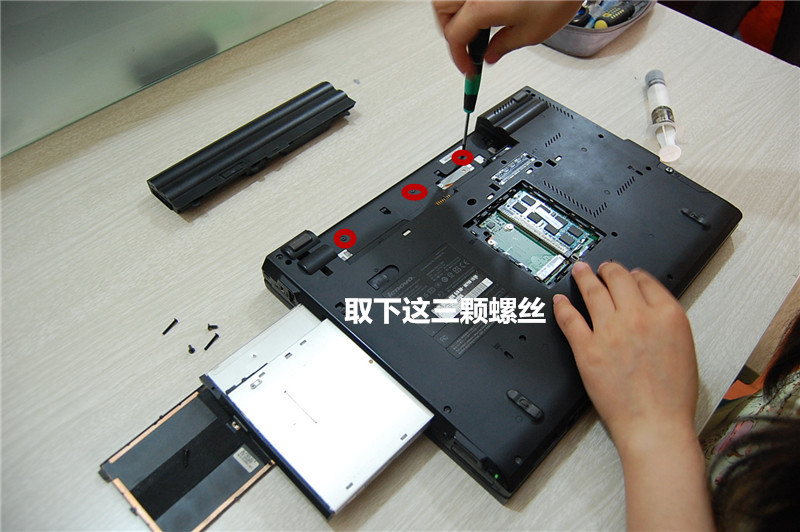
Remove the three screws from the battery bay.
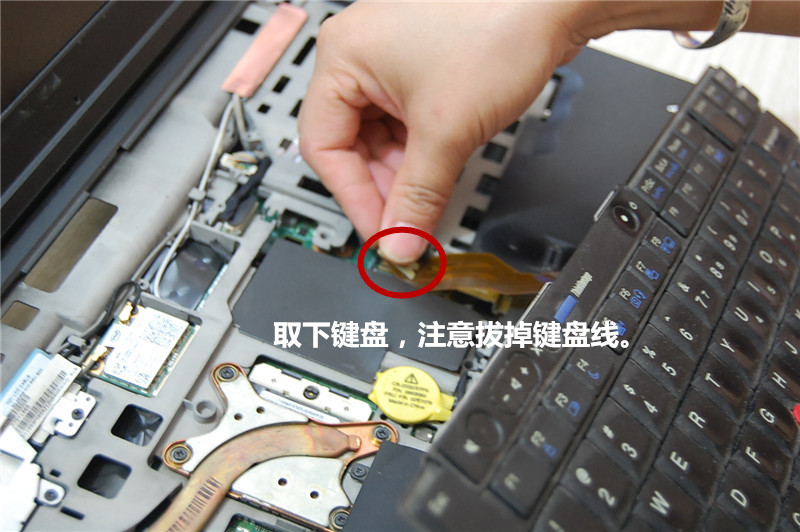
Flip and open the laptop, lift the keyboard, and place it on the palm rest, then disconnect the keyboard ribbon cable.
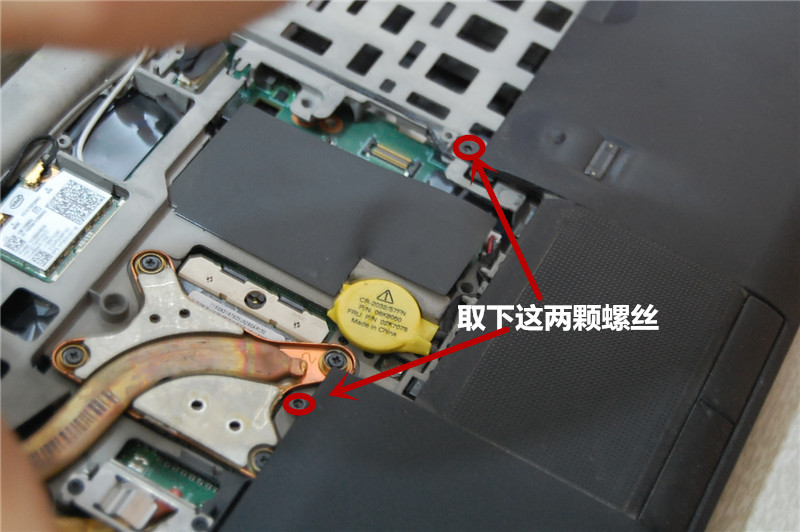
Remove the two screws securing the palm rest.
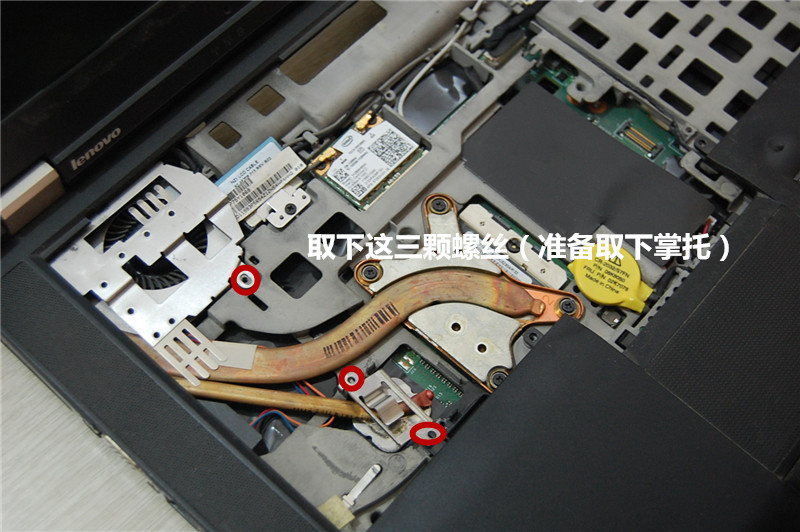
Remove the three screws securing the palm rest.
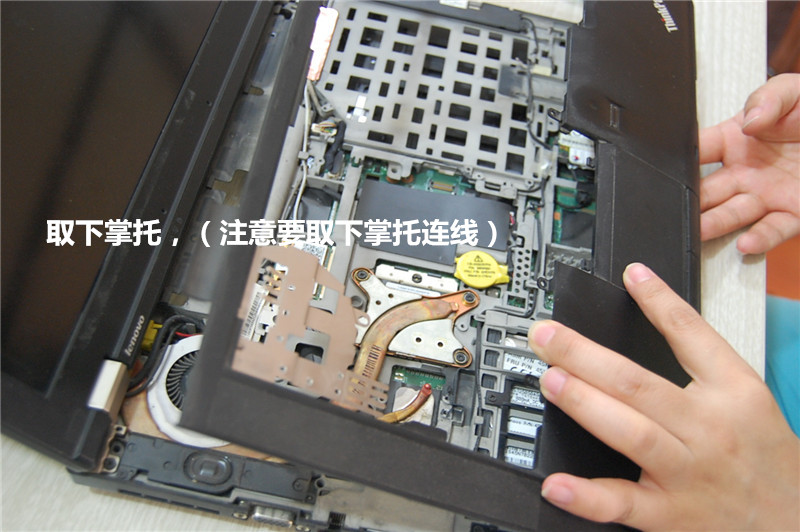
Insert a plastic pry tool near the hinge under the palm rest. Slide the pry tool to separate the palm rest from the laptop. Please note that you need to disconnect the touchpad ribbon cable from the motherboard to fully remove the palm rest.
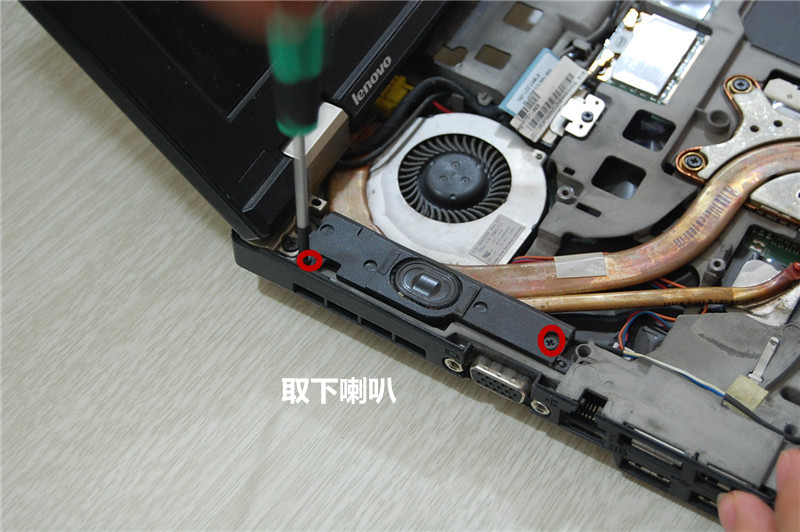
Remove the two screws securing the speaker and disconnect the speaker cable.
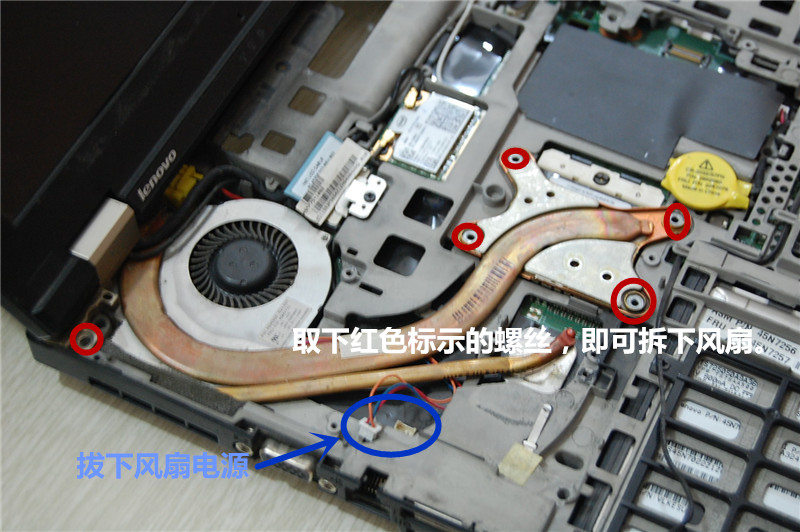
Remove the five screws securing the heat sink and disconnect the cooling fan cable from the motherboard.
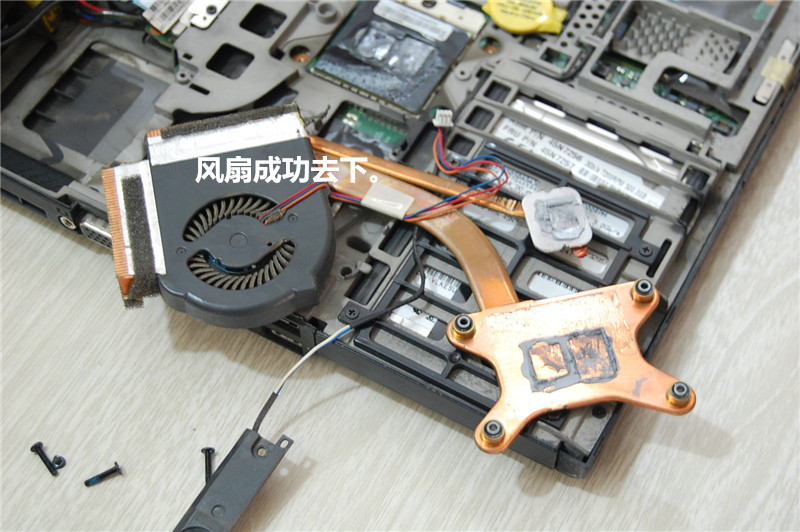
Remove the heat sink and cooling fan.
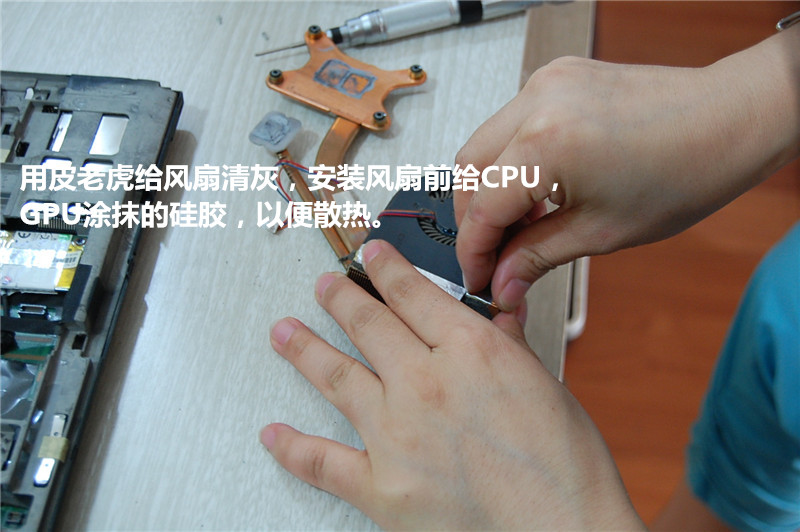
Now you can use a brush to clean the dust off the fan and the heat sink. Before reinstalling the fan, you need to remove the old thermal grease from the processor and the graphics card with a cloth and apply new thermal grease.
Excellent photos and instructions.
Thank you, David!
Tom m
Great write-up.
Thank you.
In the photo under “remove the keyboard”.
There is a second empty slot next to the wireless card. Is this where a second half-height wireless card is placed in a different model? Do you know what model features this? Can I solder in a header and attach a wireless card myself?
Thank you, it was very helpful, but as a noob in this field, it would’ve been great if you had shown me how to clean the fan, or do I have to blow air into it?