
In the following guide, I show you how to disassemble an Acer Aspire E1-531G laptop.
Join us on the social network! Follow us on Facebook for all the latest repair news.
You can use this guide for the following procedures:
– Accessing and removing the hard drive, RAM (memory) modules, and optical drive.
– Disconnecting and removing/replacing the keyboard.
– Accessing the trackpad and power button board.
– Accessing the motherboard.
– Removing or cleaning the cooling fan.
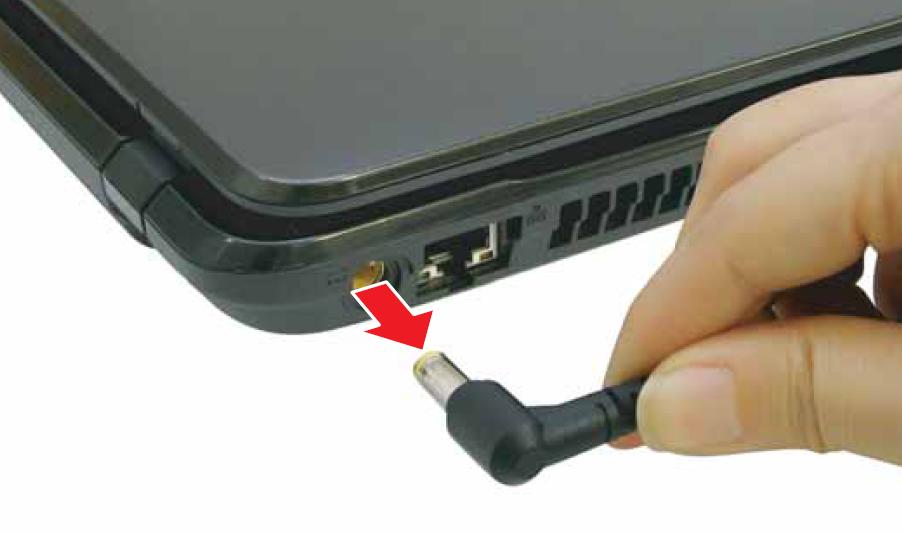
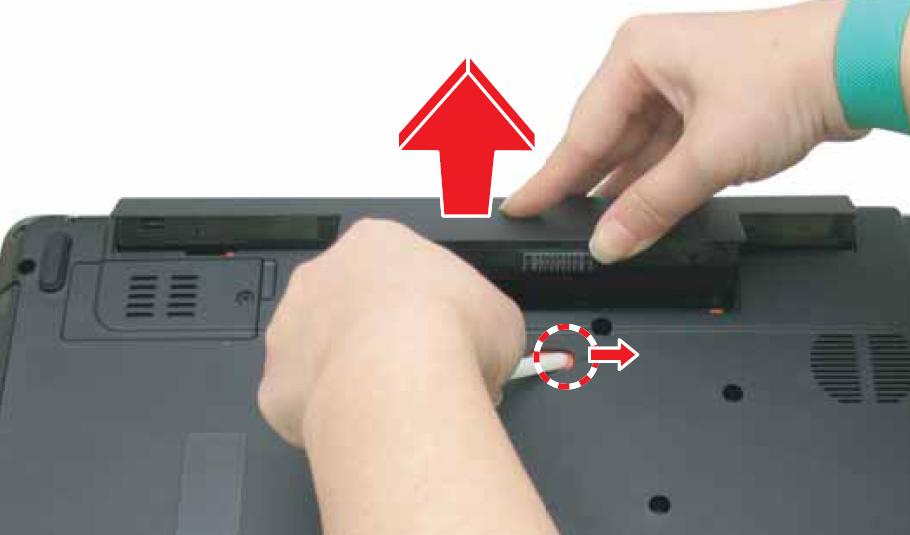
Unplug the AC adapter and remove the battery first.
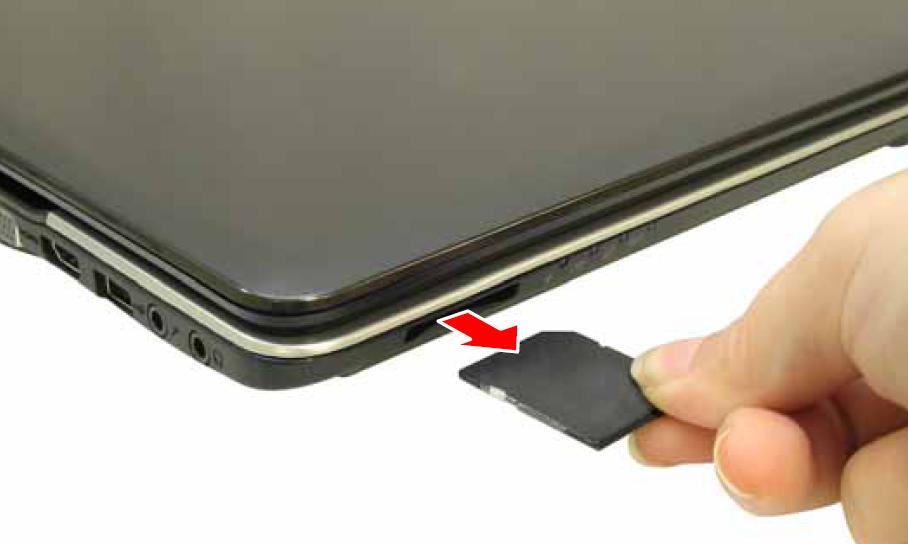
Pull out the SD card.
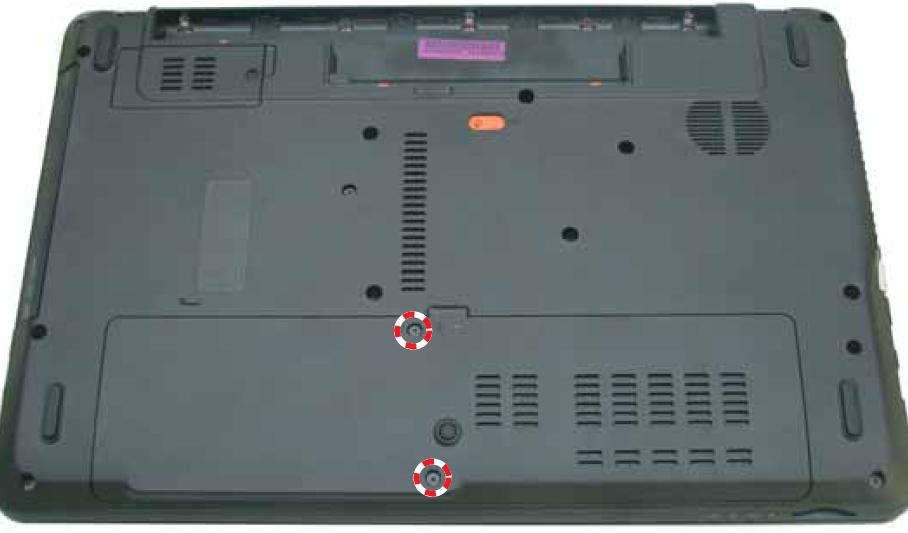
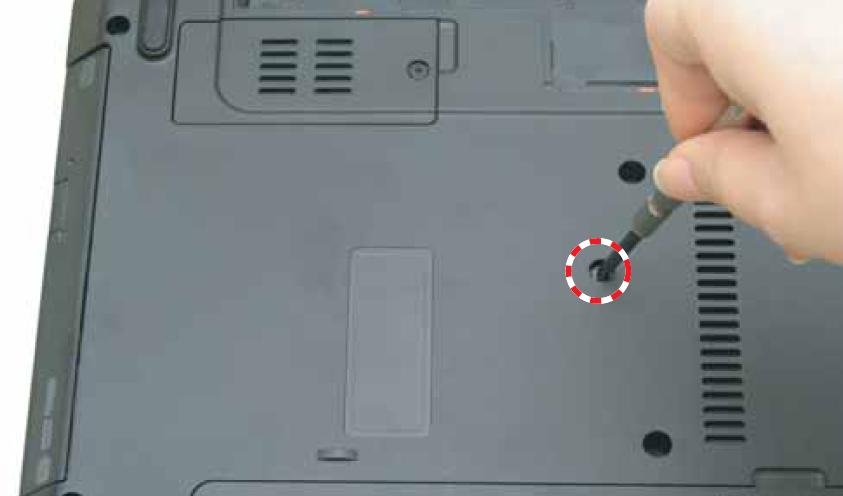
Unscrew the two marked screws to remove the service cover.

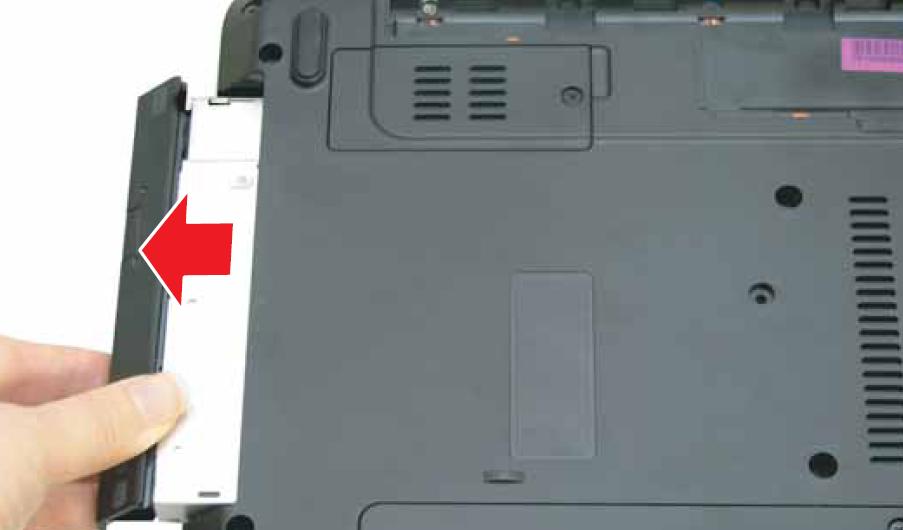
Remove the marked screw and then pull out the optical drive.
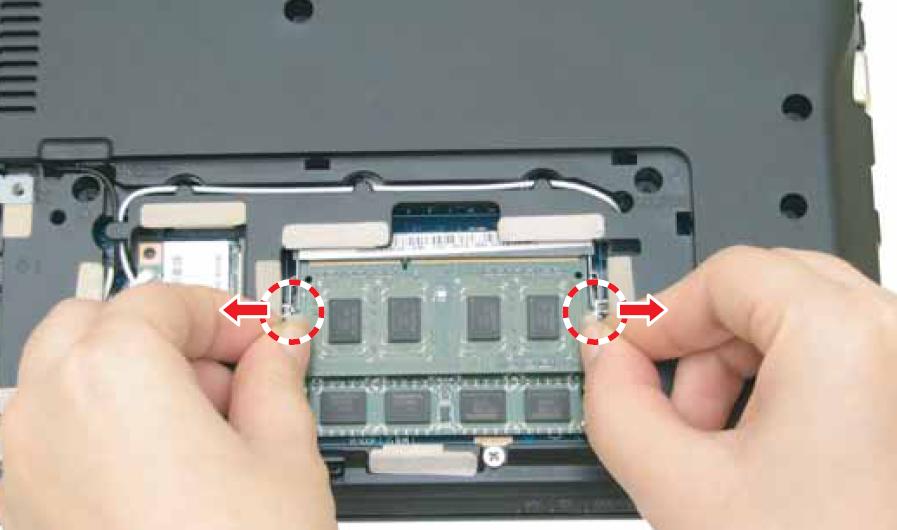
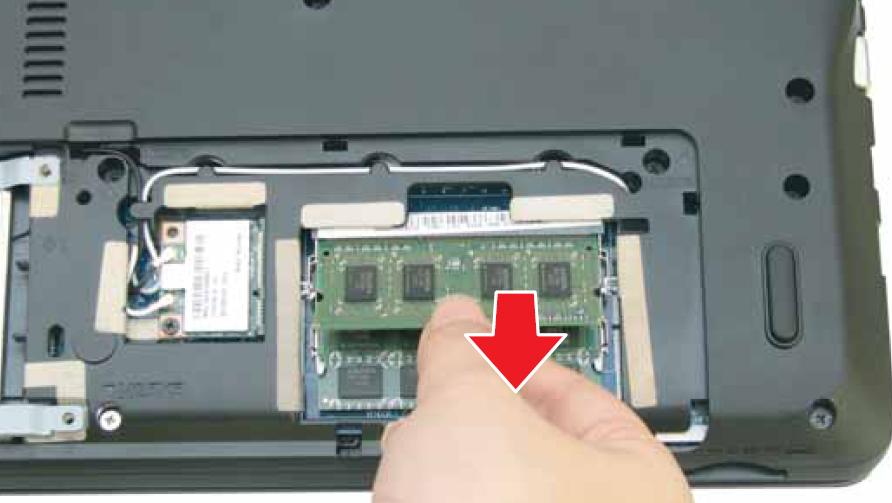
Slide the latches to remove the memory module.
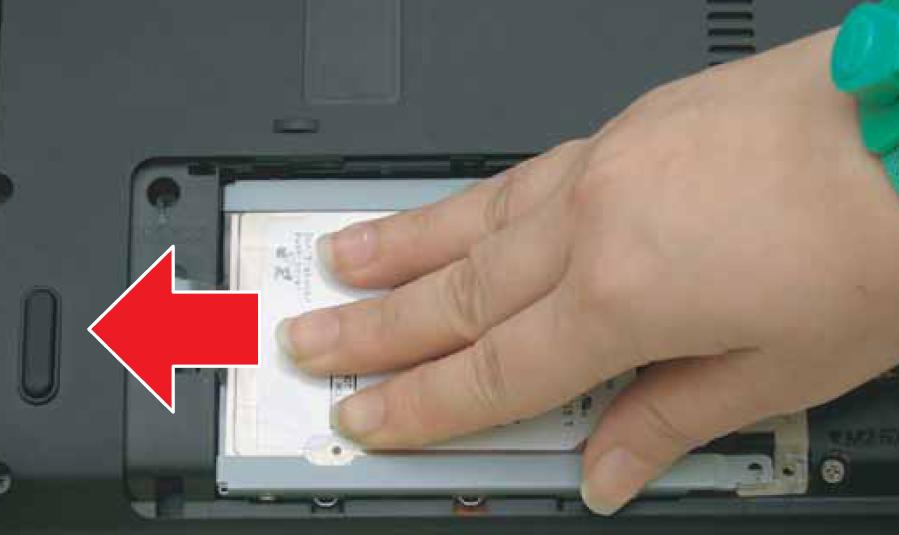
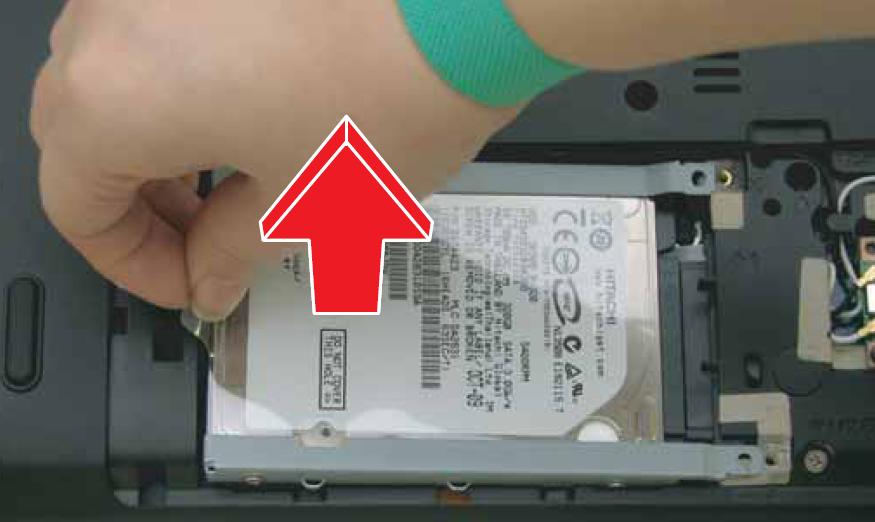
Slide the hard drive to the left and then pull it out.
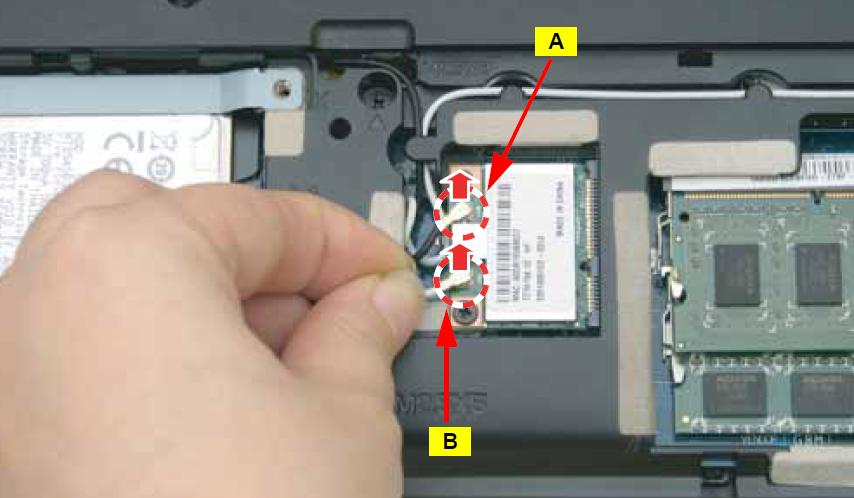
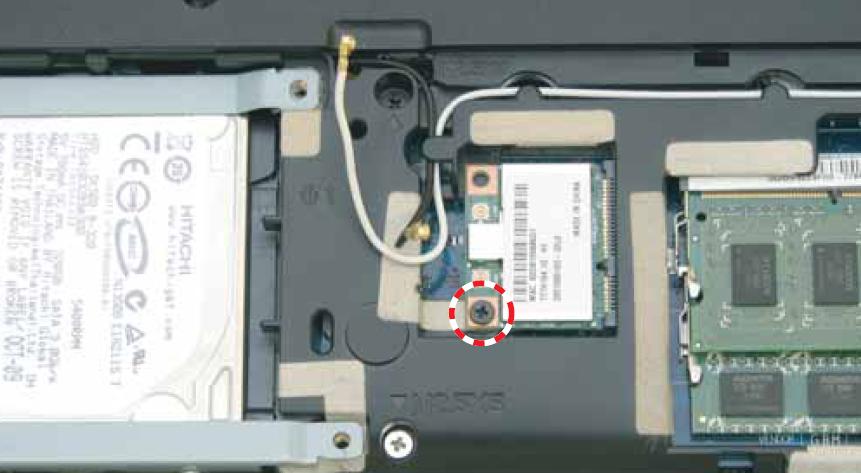
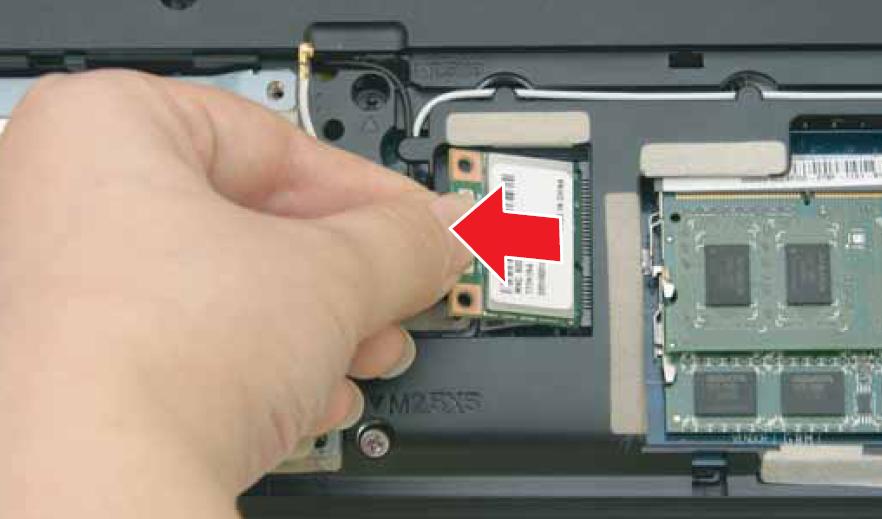
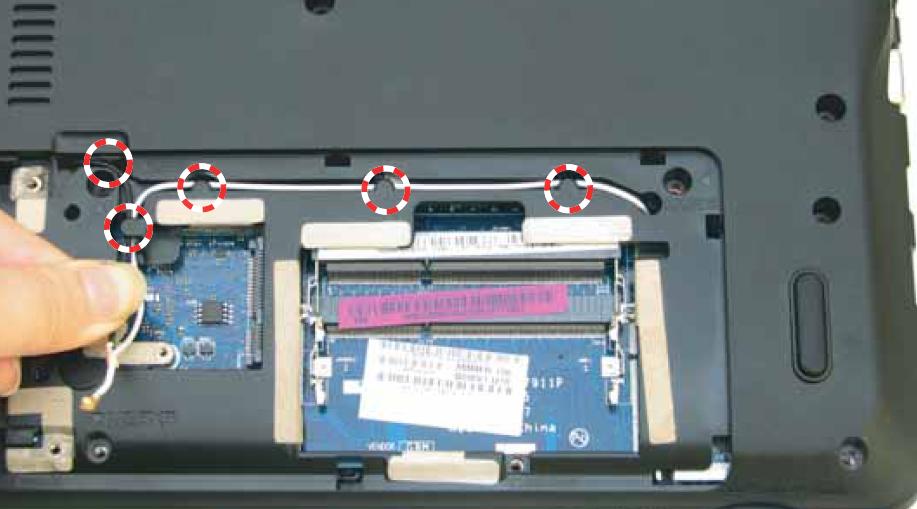
Unplug the two antennas and unscrew the marked screw to remove the wireless card.
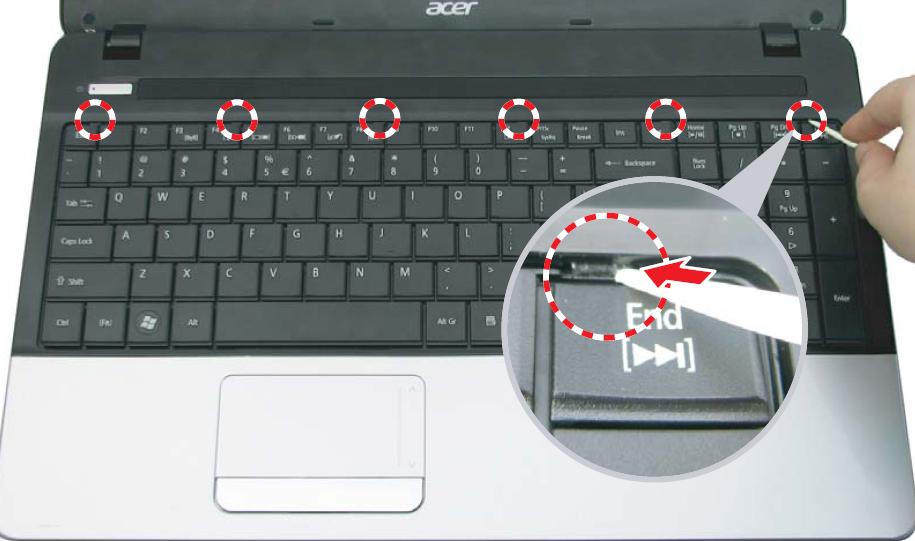
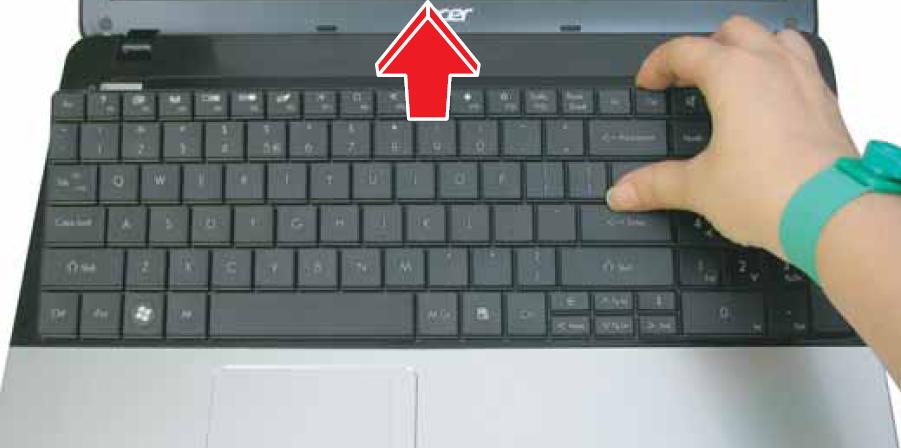
Move to the palm rest section, press the latch to pop out the keyboard, lift it up, disconnect the keyboard cable at the back, and then remove the keyboard.

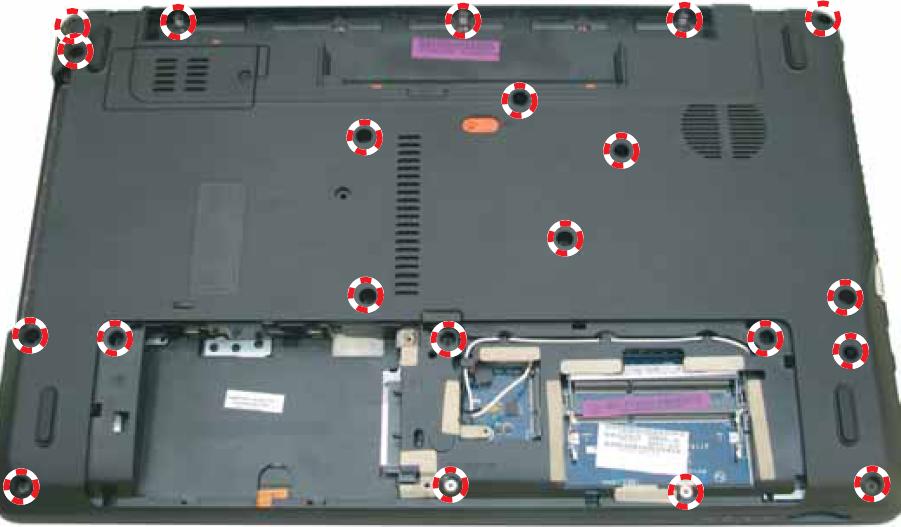
Remove all 21 screws from the back cover.
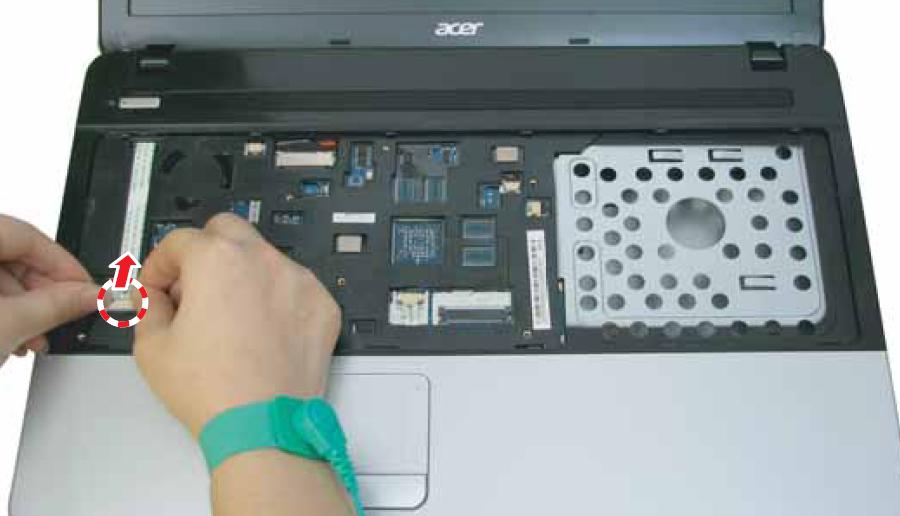
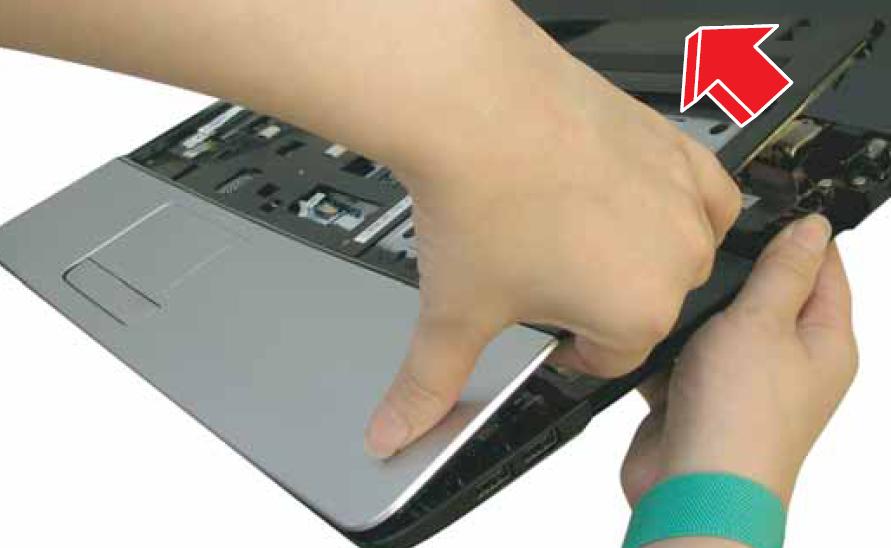
Unplug the two cables and then pry off the touchpad and the palm rest assembly.

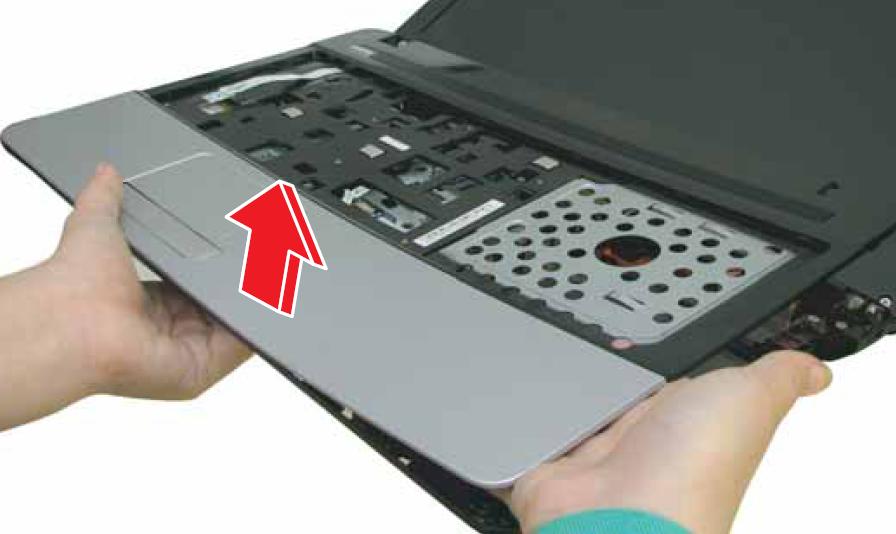
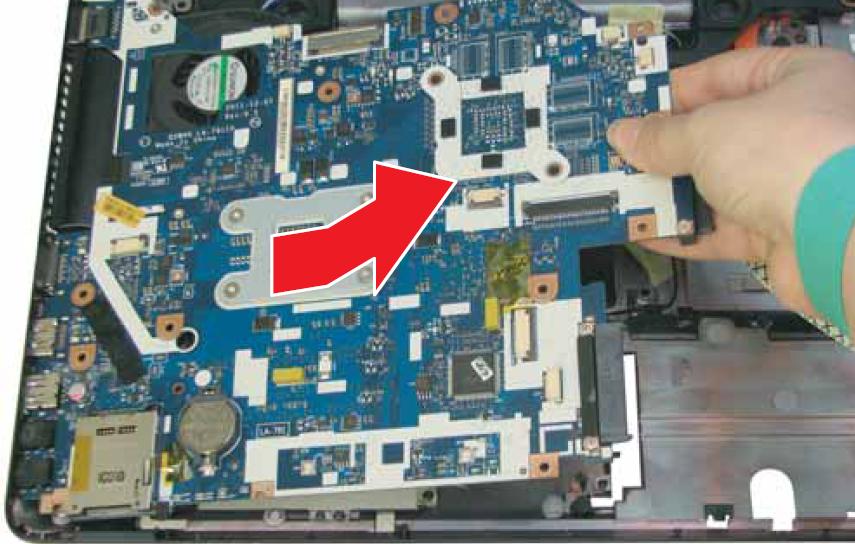
After removing the palm rest, you can access the motherboard, fan, speaker, and USB board.
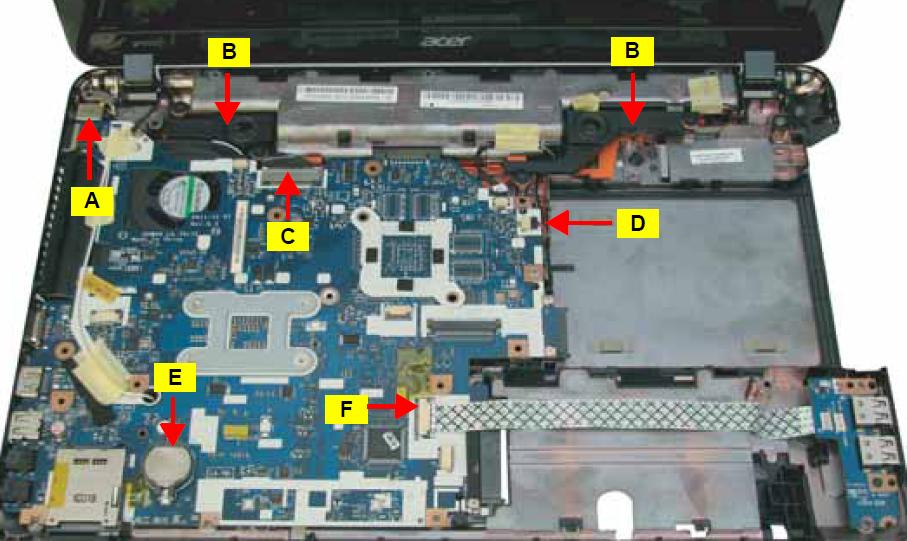
Pull out the two wireless antennas from the back and note the clips.
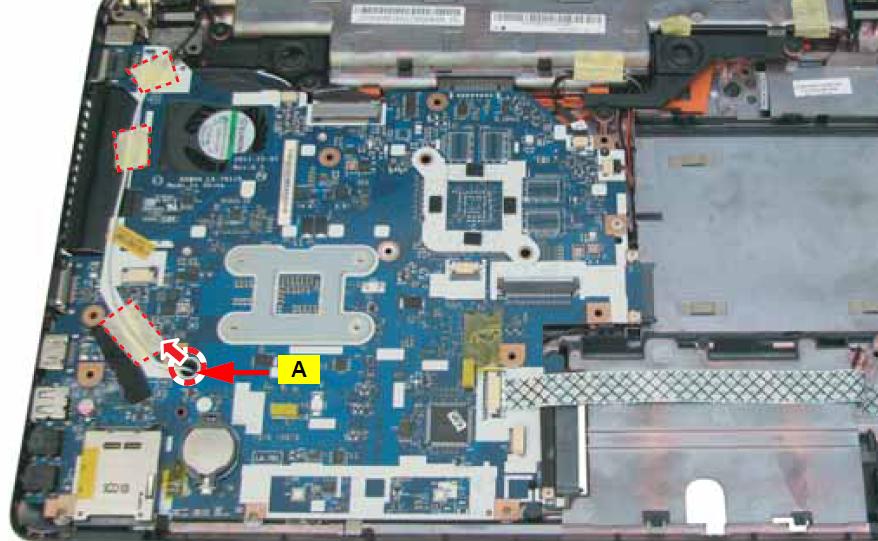
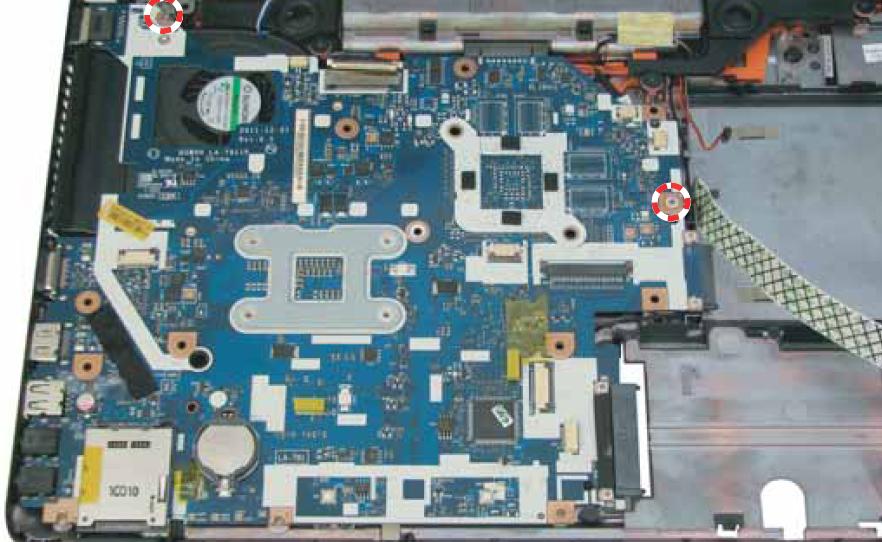
Unplug the five cables from the motherboard, then unscrew the two screws and lift the motherboard.
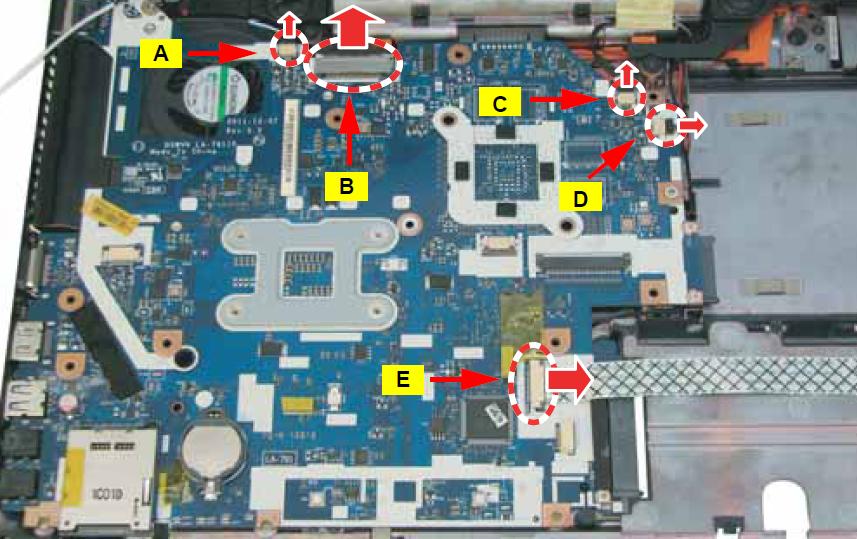
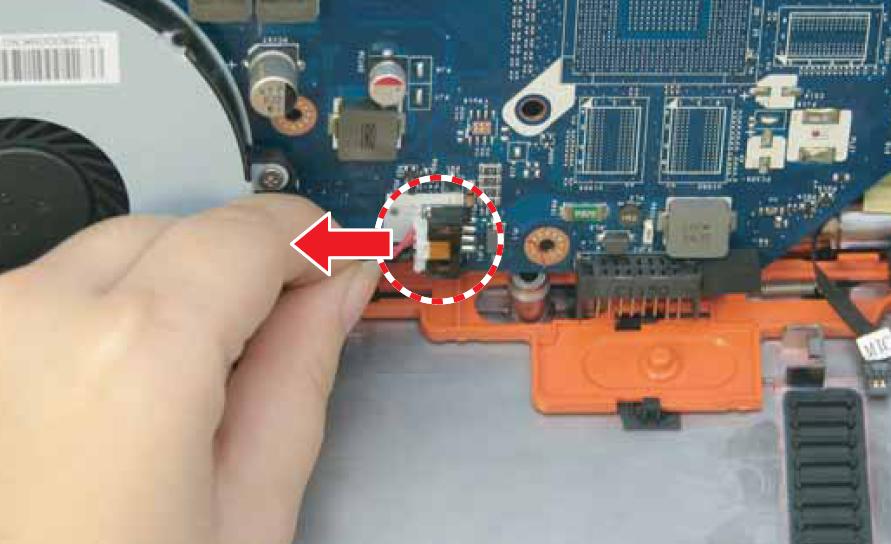
Please note the marked cable, which needs to be unplugged.
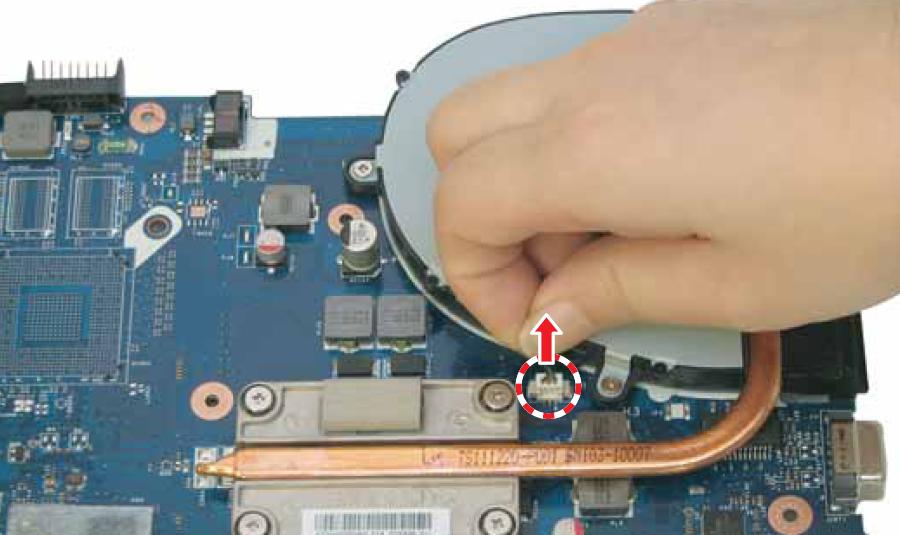
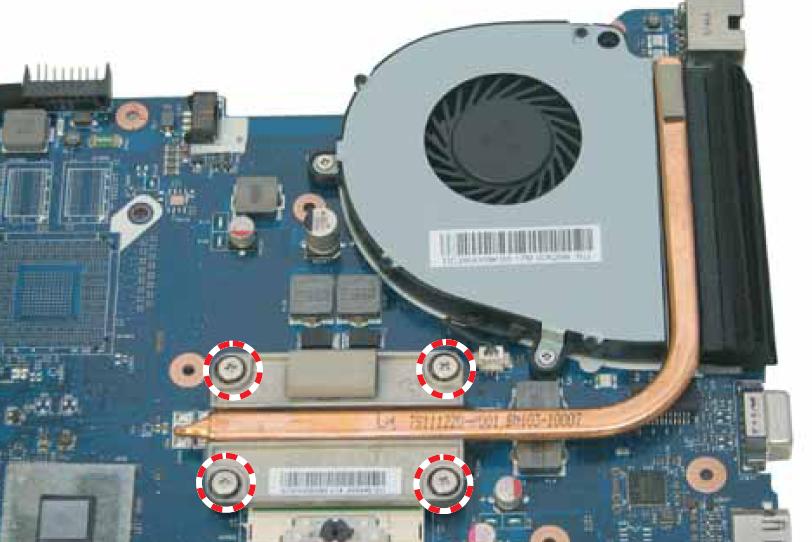
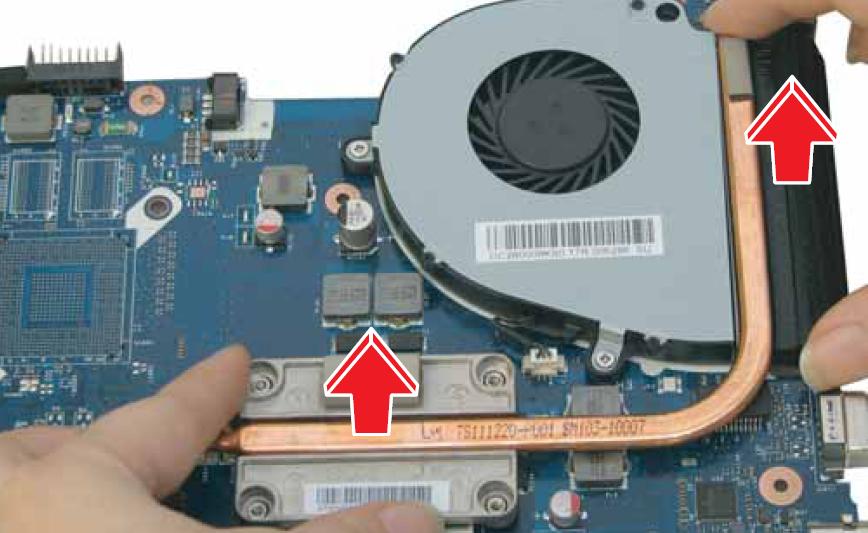
Unplug the fan and unscrew the four marked screws to remove the fan and the heat sink assembly.
Can you please tell me what CPU will be okay to replace my usual Intel B960 at 2.2GHz? Please! I’m interested in a newer i3 or maybe a second-gen i5. Please guide me!
My Aspire E1-531 is telling me there is boot media. I replaced the HDD and used the USB DVD drive. Can anyone help? Thank you
Please add the next phases when you clean the fan and apply the thermal paste.