
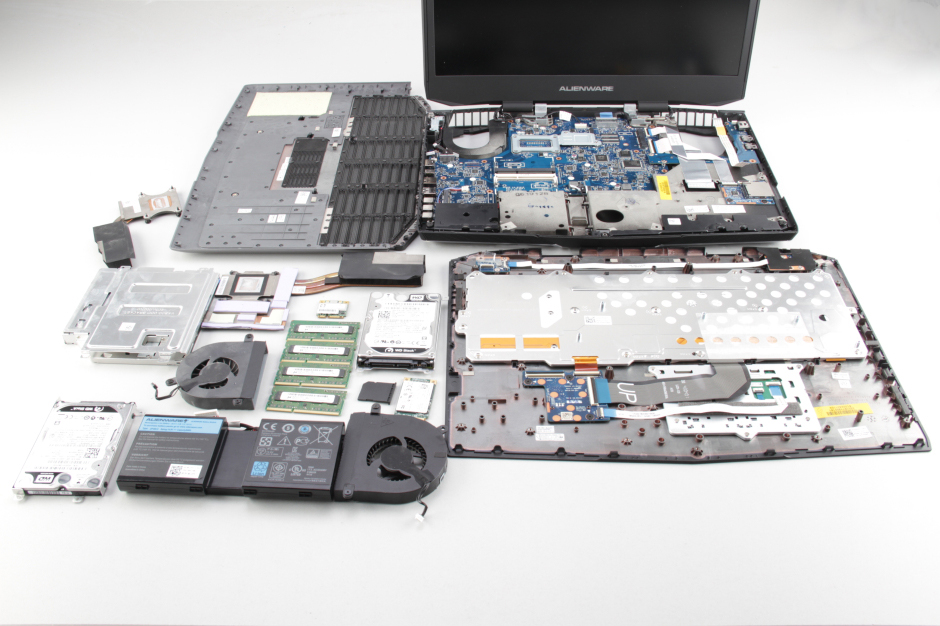
In this guide, I will explain how to disassemble the Dell Alienware 17 to remove the battery, keyboard, palm rest, SSD, hard drive, DVD drive, wireless card, RAM, cooling fan, and motherboard.
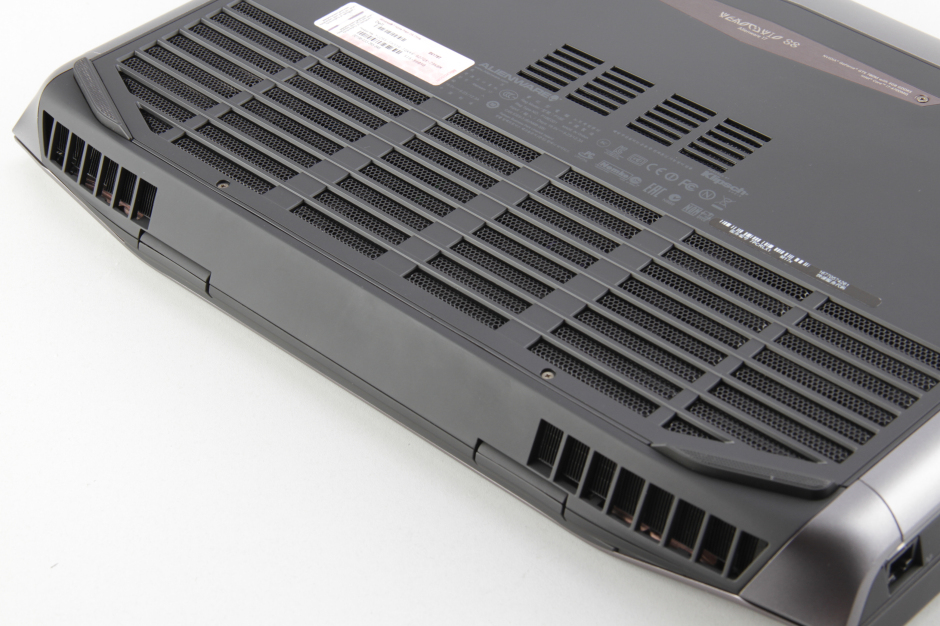
First, remove the four screws securing the back cover. Insert a thin plastic pry tool under the bottom cover to pry it open and remove the bottom cover.
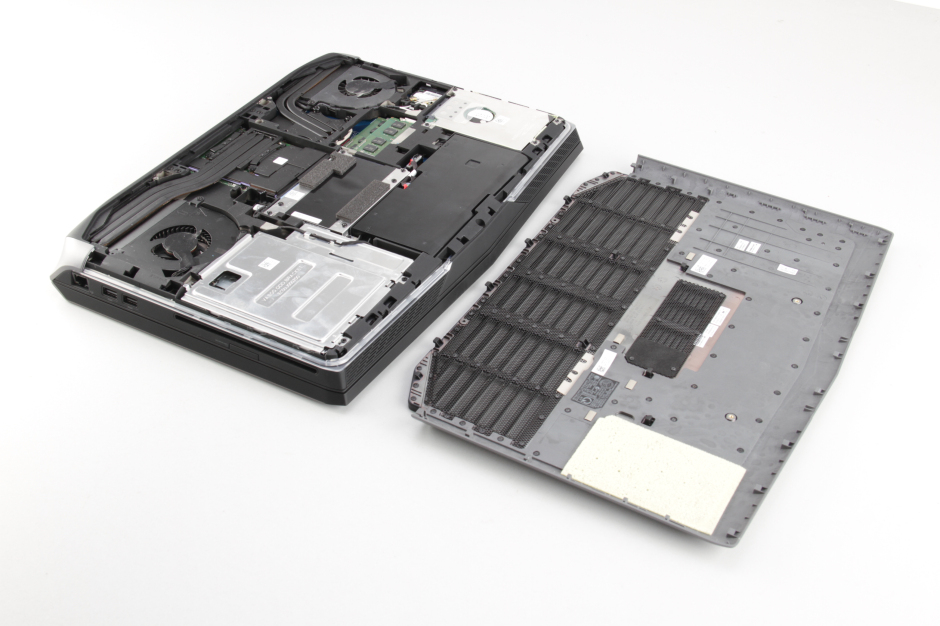
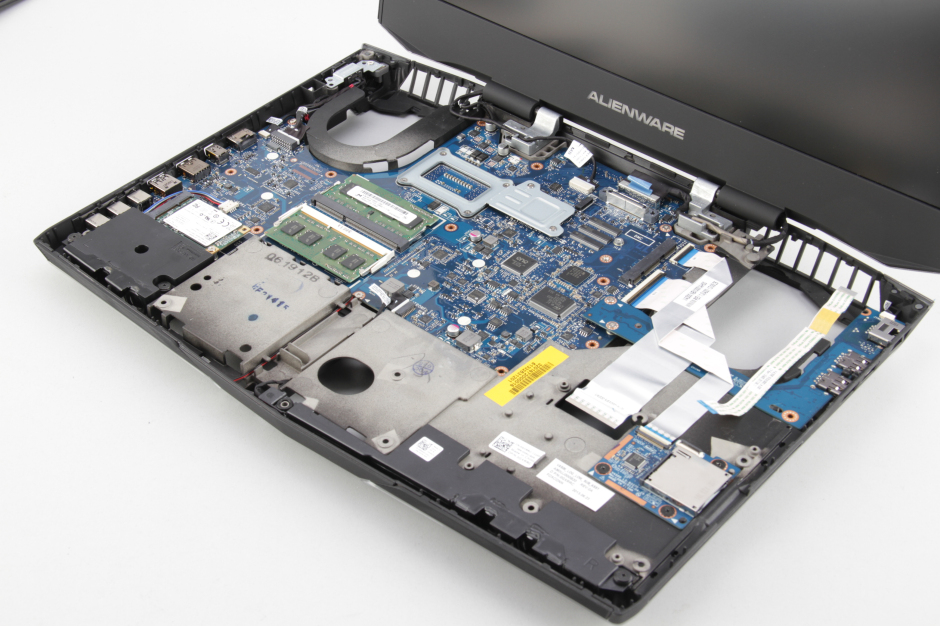
When the back cover is removed, you can access the battery, hard drive, DVD drive, wireless card, heat sink, and cooling fan.
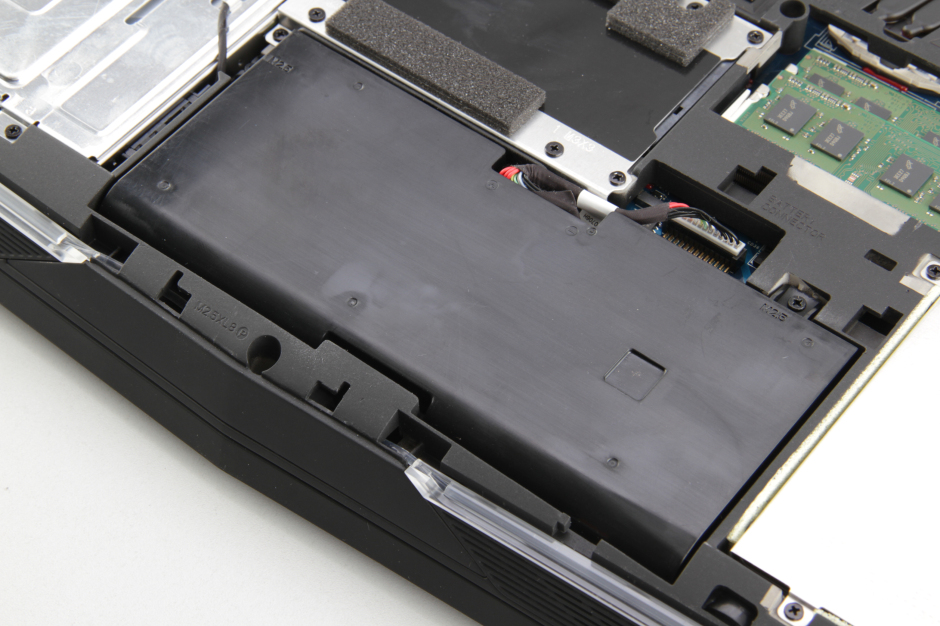
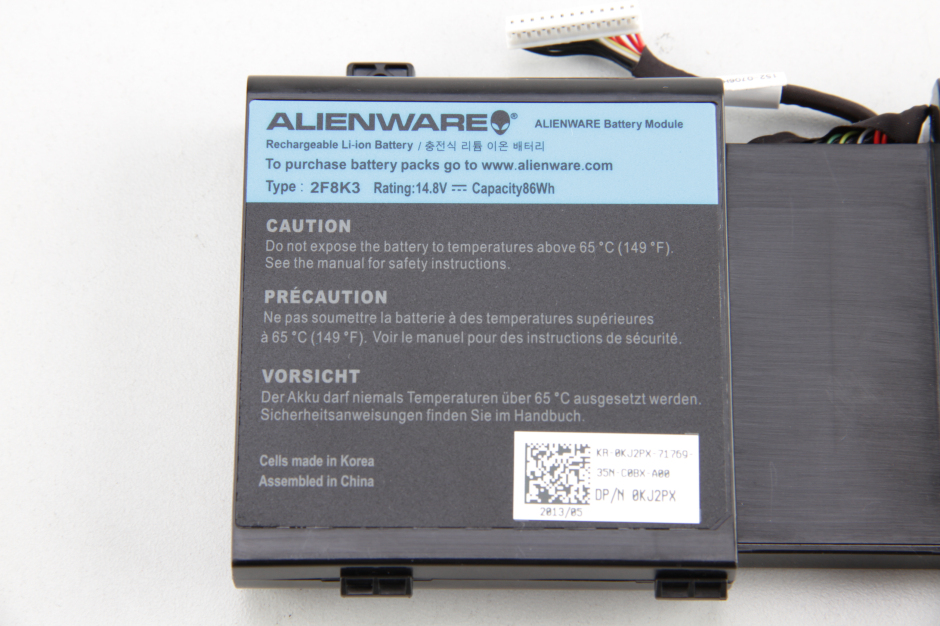
Remove the two screws securing the battery, and then disconnect the battery connector from the motherboard. You can remove the battery.
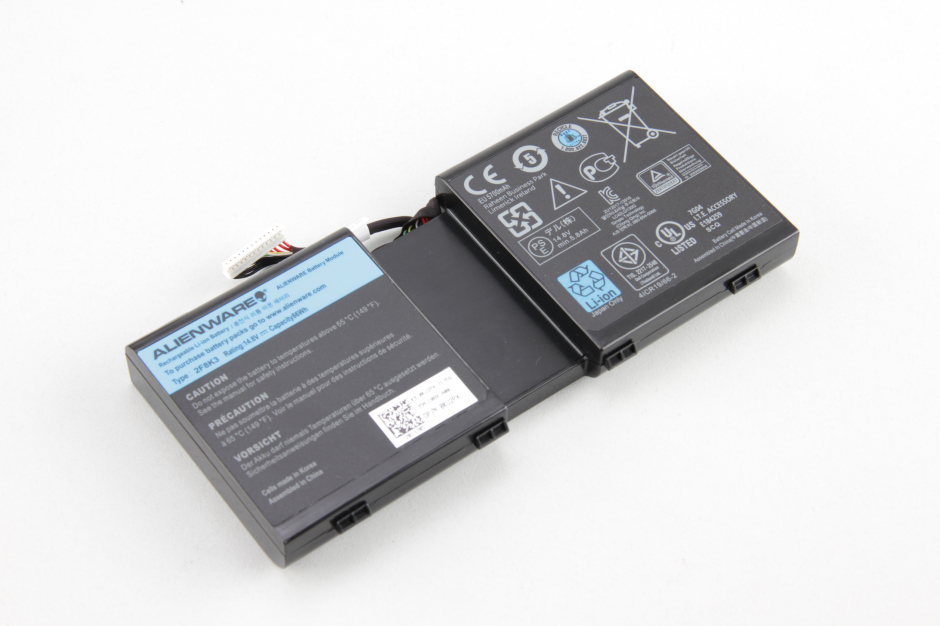
The Dell Alienware 17 comes with an 86Wh Li-ion battery. Its Dell part number is 2F8K3.
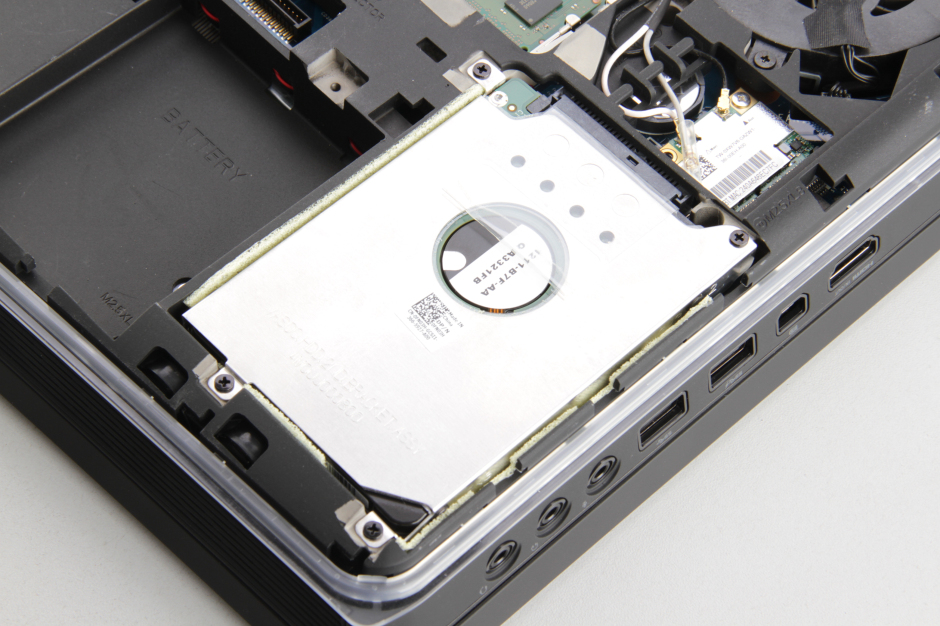
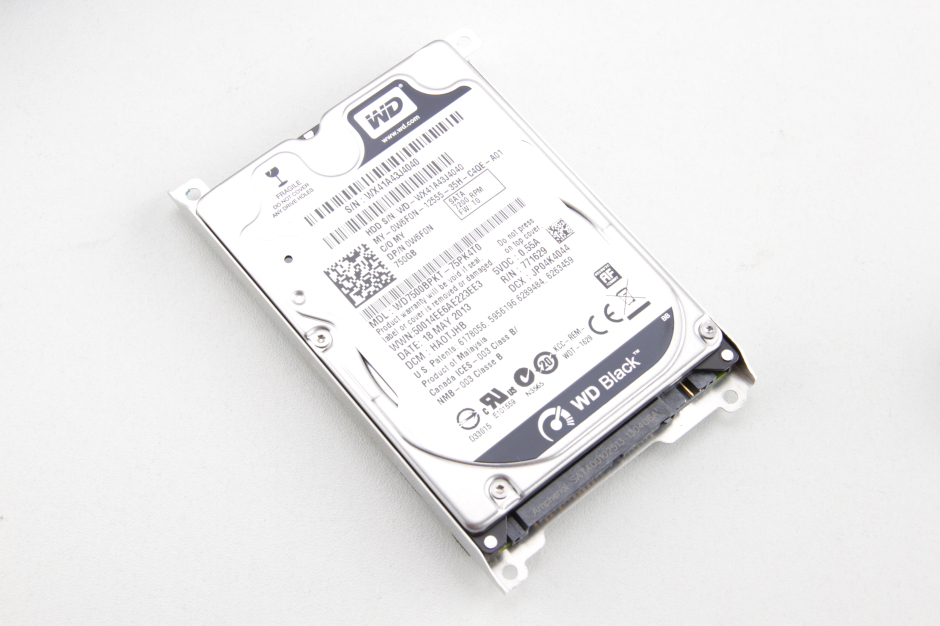
Remove the three screws securing the hard drive.
Lift the hard drive and slide it to the left. You can remove the first hard drive.
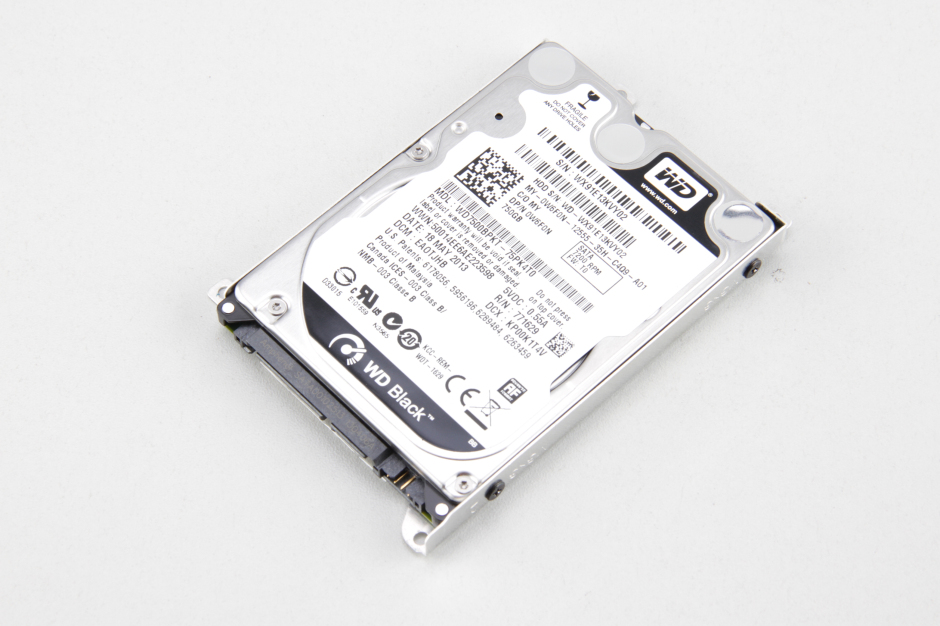
The laptop comes with a Western Digital 750GB hard drive. The hard drive is installed in an HDD caddy. If you need to replace the hard drive, you need to remove it from the old hard drive and install it in the new one.
Remove the four screws securing the second hard drive. You can remove it.
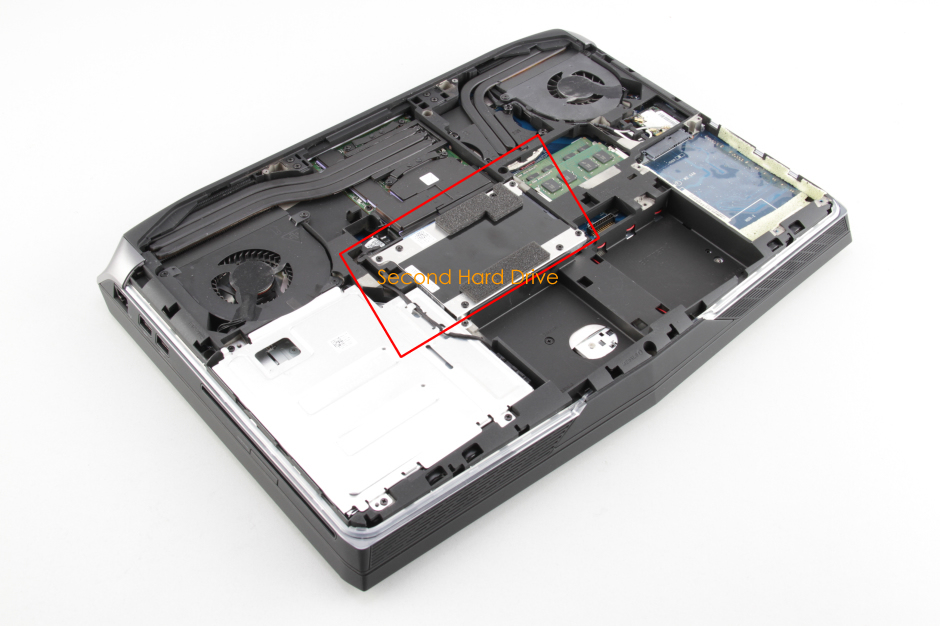
It is a Western Digital 750GB hard drive, the same as the first hard drive.
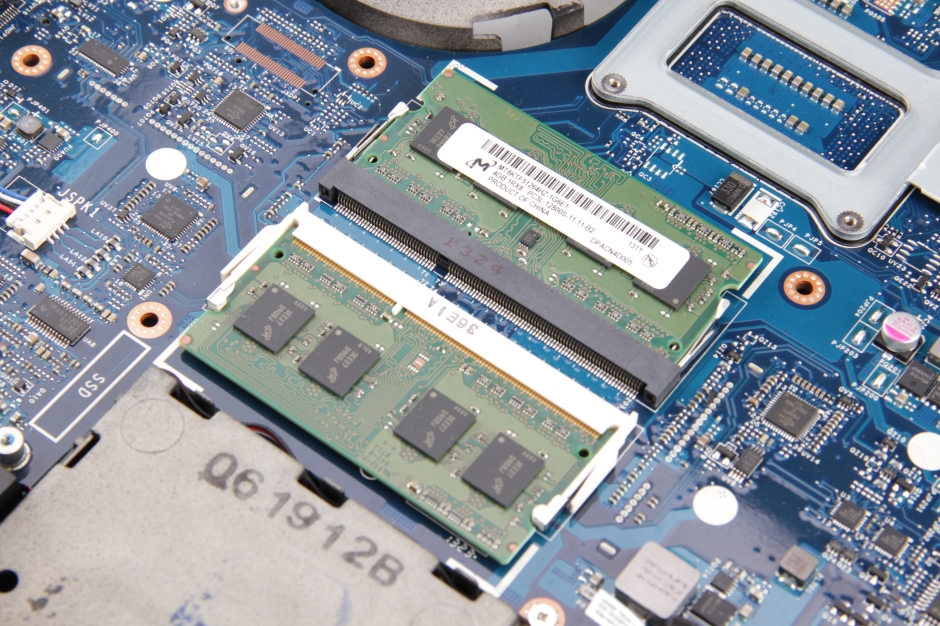
Use your nails to separate the memory clips on both sides, and the memory module will pop out automatically.
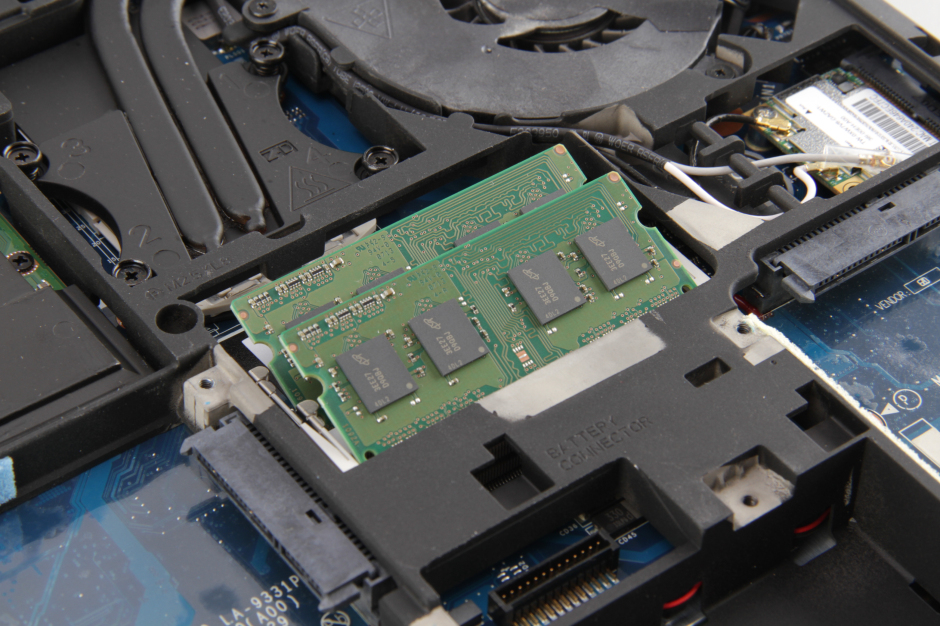
The laptop features two Micron 4GB RAM modules. If you need to upgrade your memory, you will need to replace the existing memory modules.

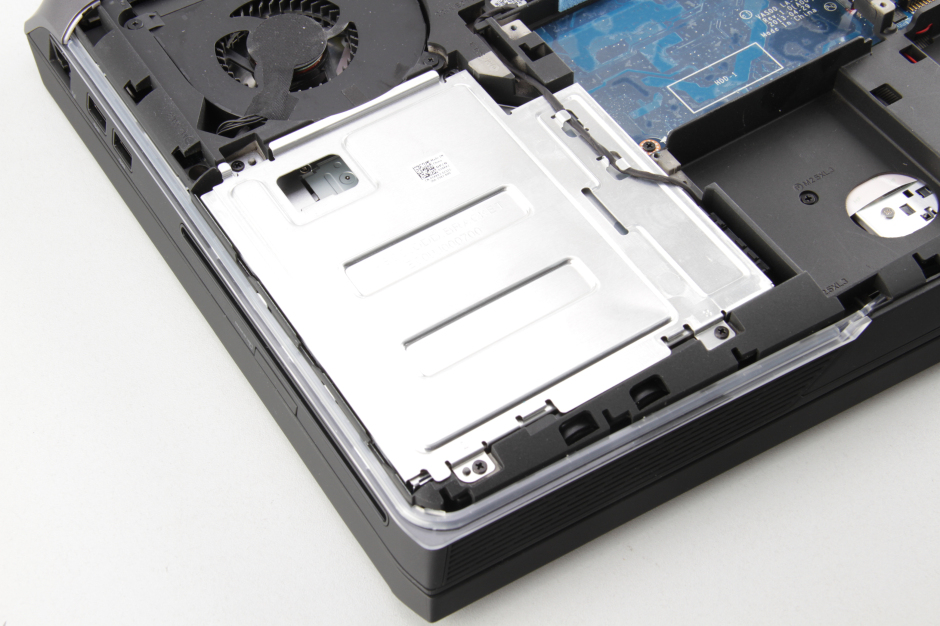
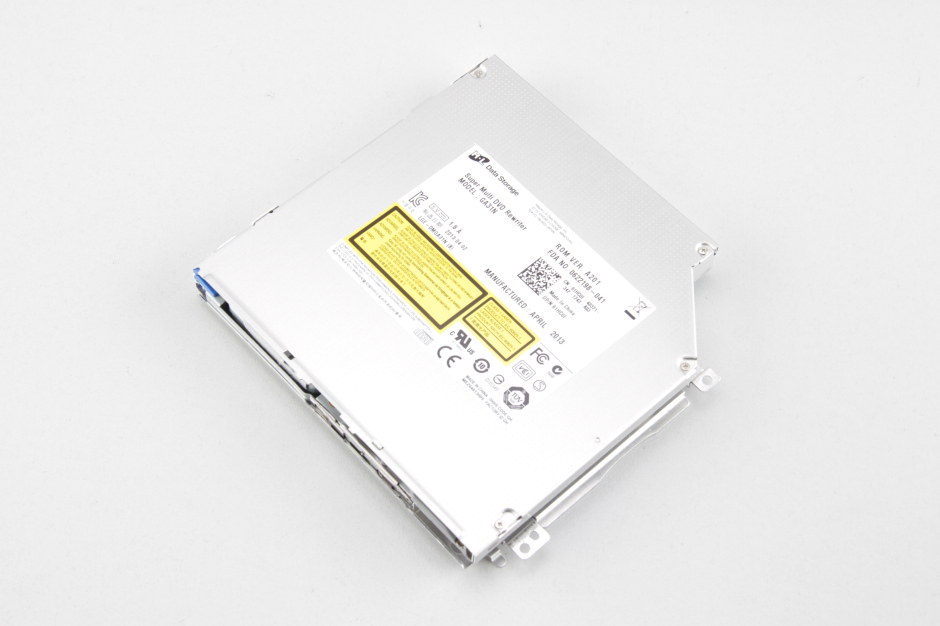
Remove the four screws securing the DVD drive and remove it from the laptop.
The laptop features a GA31N SATA DVD burner.
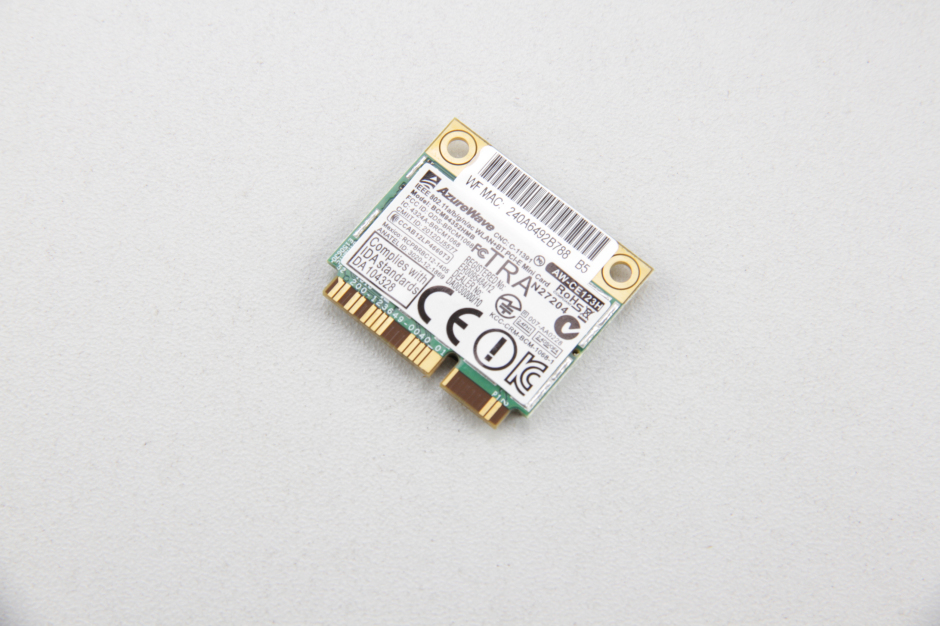
Disconnect the two antenna cables and remove the screw. You can remove the wireless card.
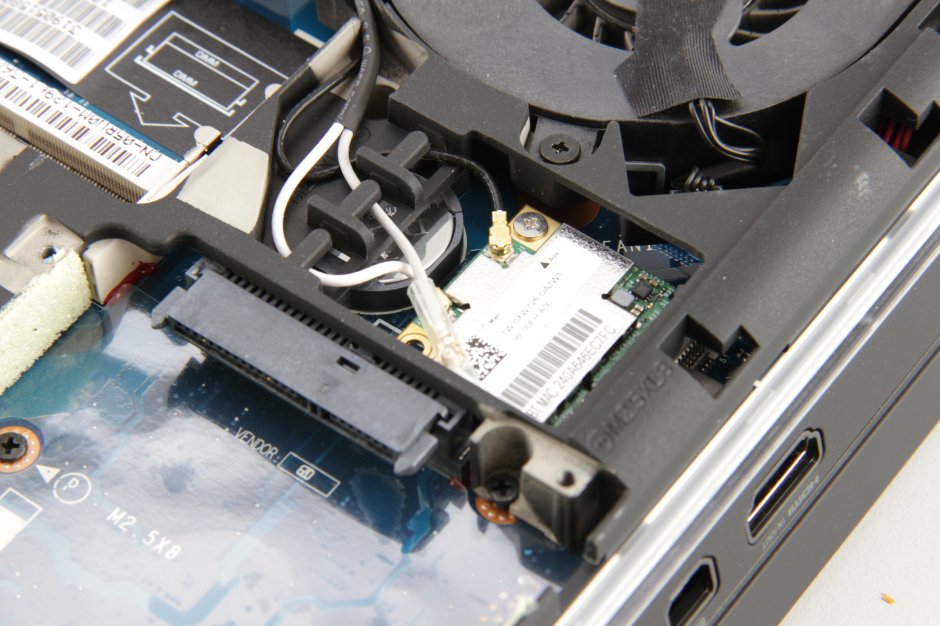
AzureWave AW-CE123H wireless card
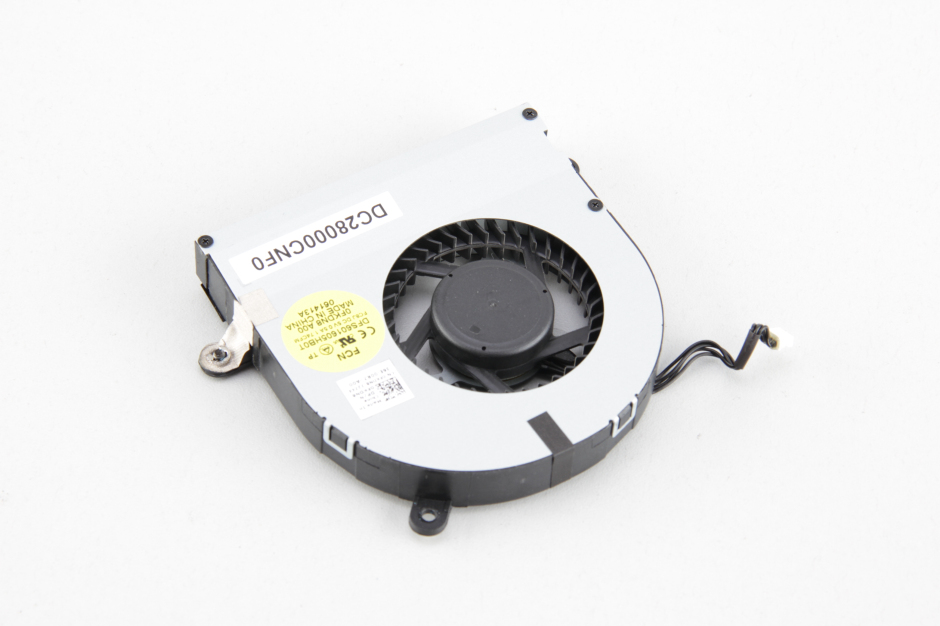
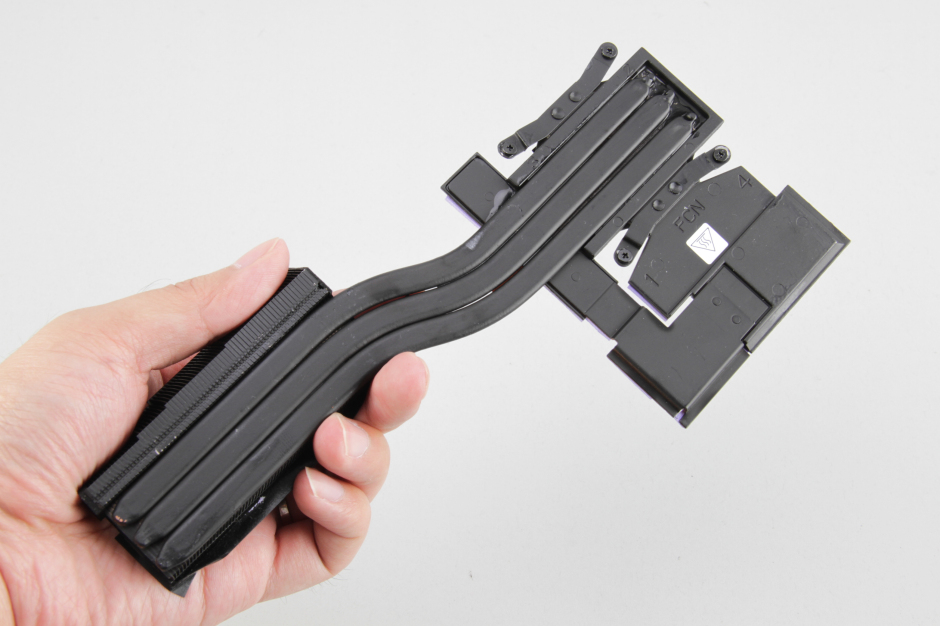
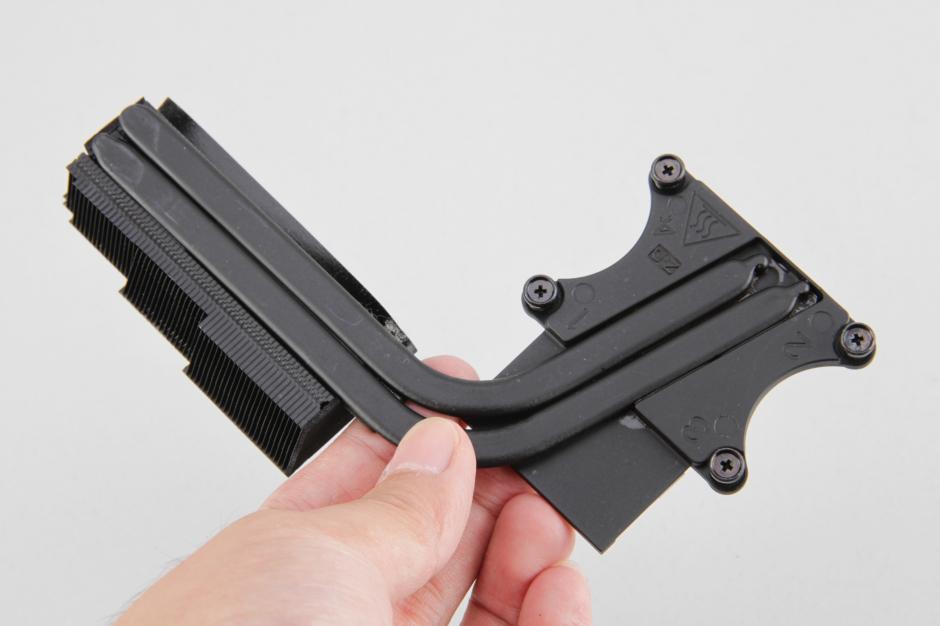
Unplug the fan cable from the motherboard and remove the three screws securing the cooling fan.
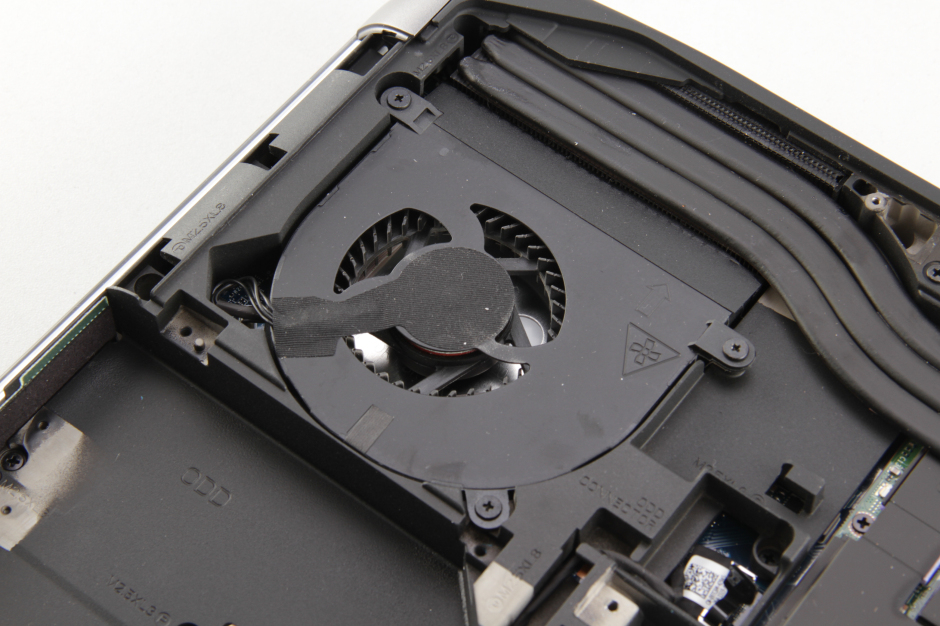
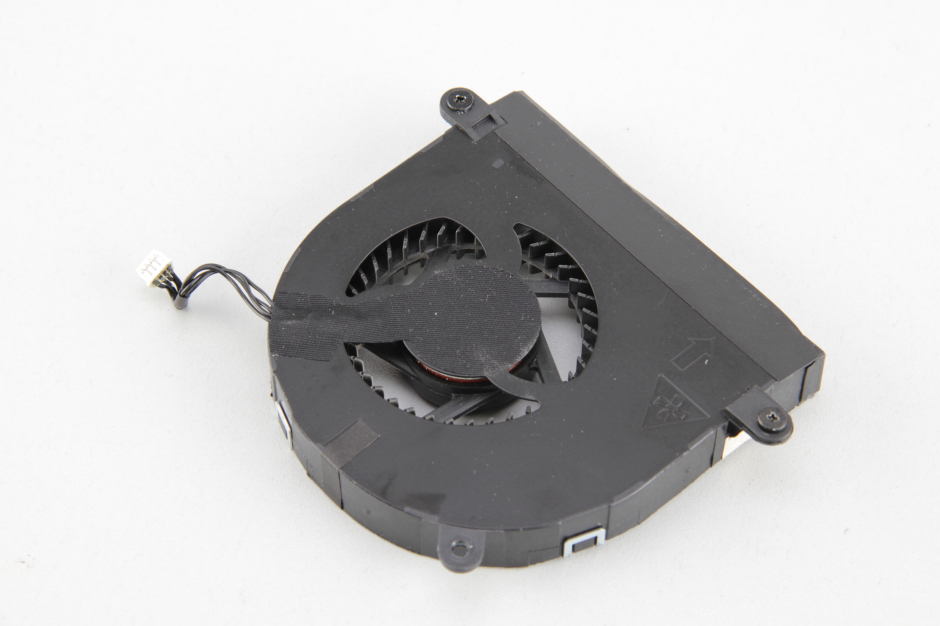
The part number for the left fan is DC28000CNF0.
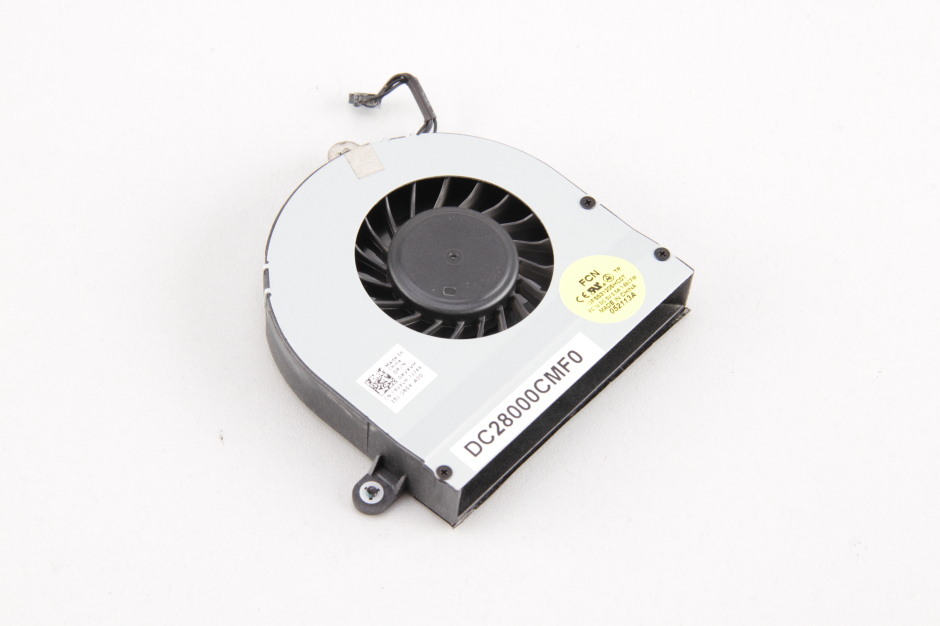
Loosen the three screws and unplug the fan cable from the motherboard. You can remove the right cooling fan.
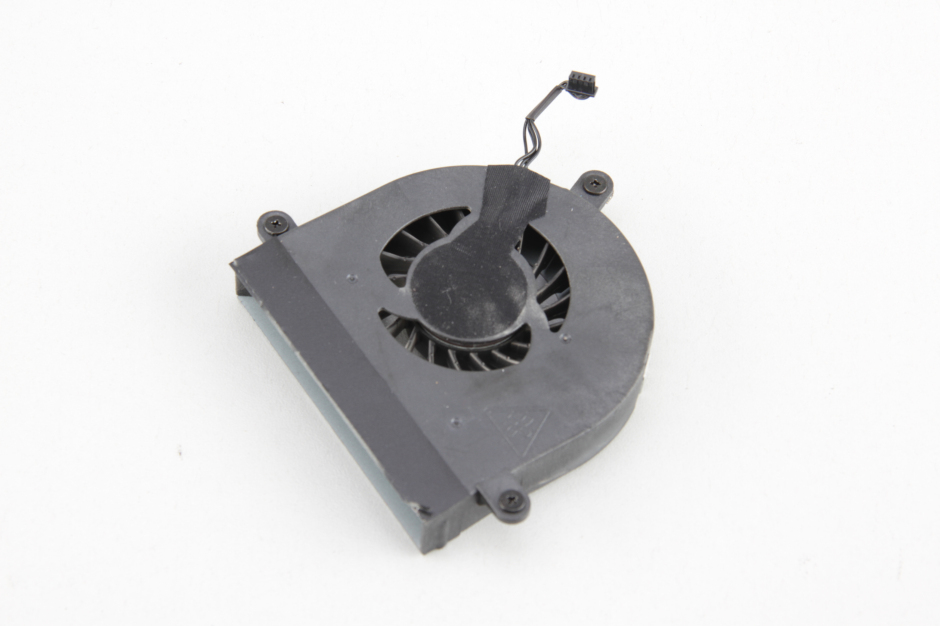
The part number for the right fan is DC28000CMF0.
In the next step, we will remove the heat sink.
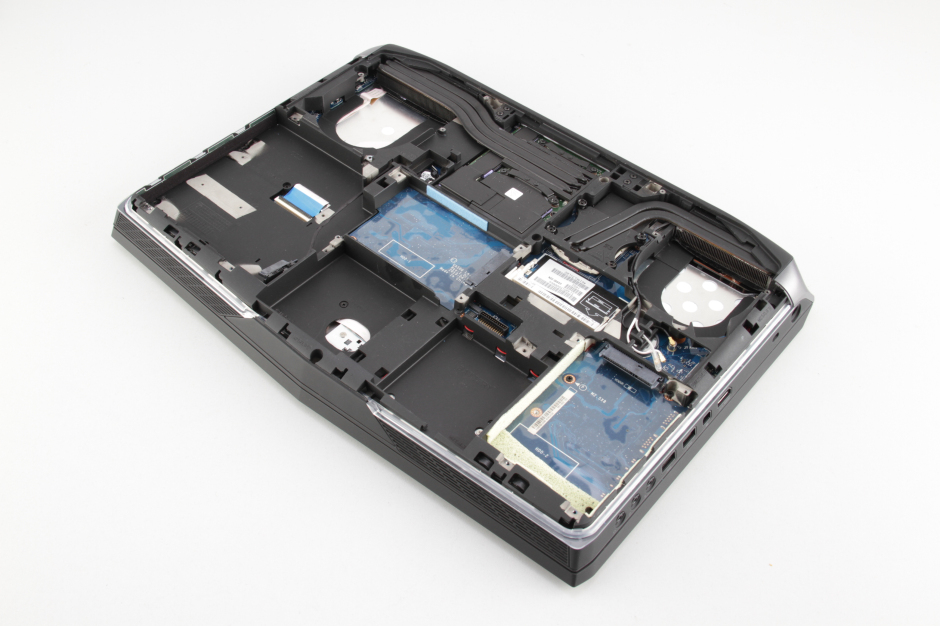
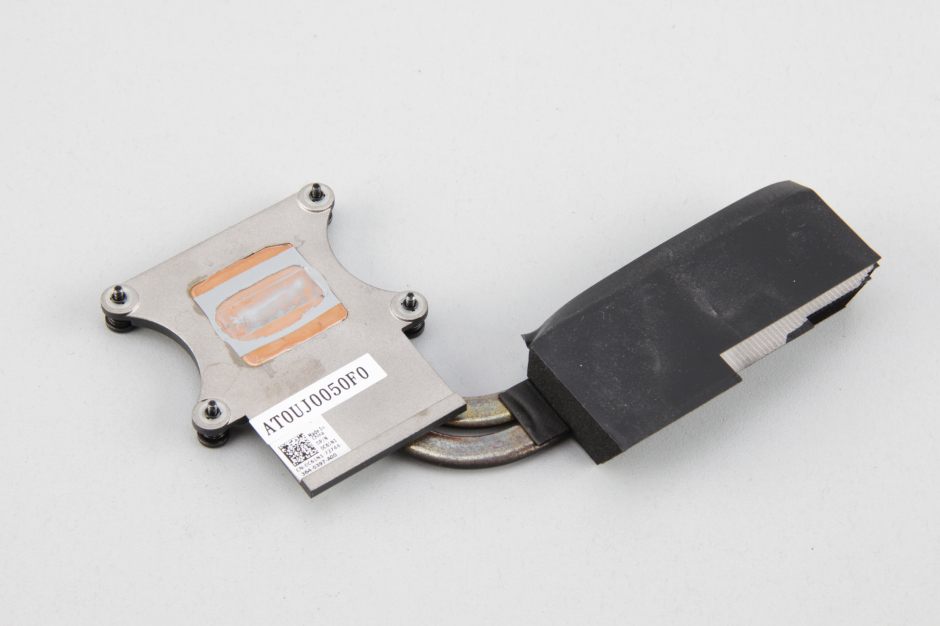
Loosen the four screws securing the left heat sink and then remove it.
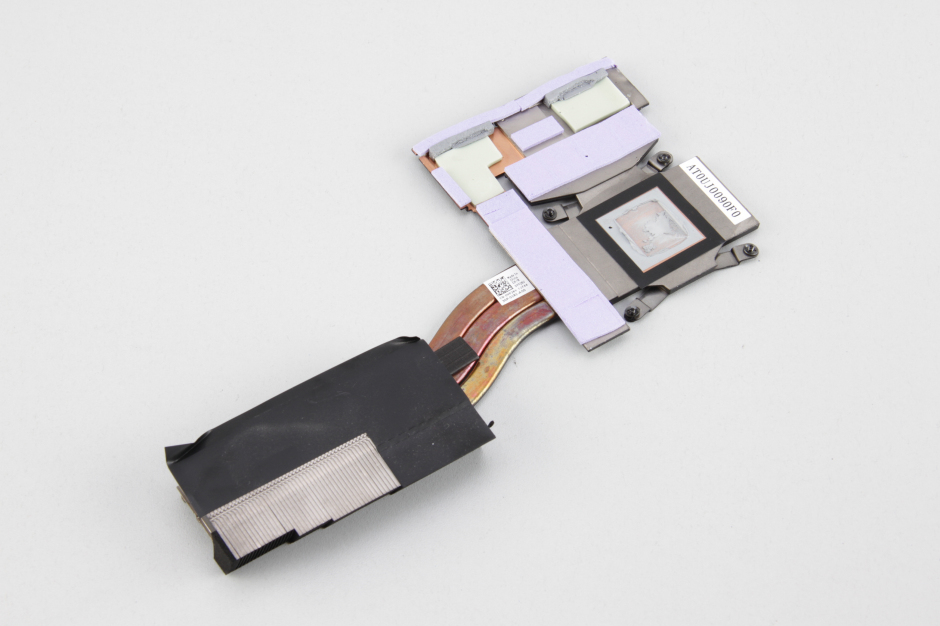
Loosen the four screws securing the right heat sink and then remove it.
Insert a plastic pry tool between the palm rest and the bottom cover. Move the pry tool to release the clips on the bottom cover until it completely detaches from the laptop.
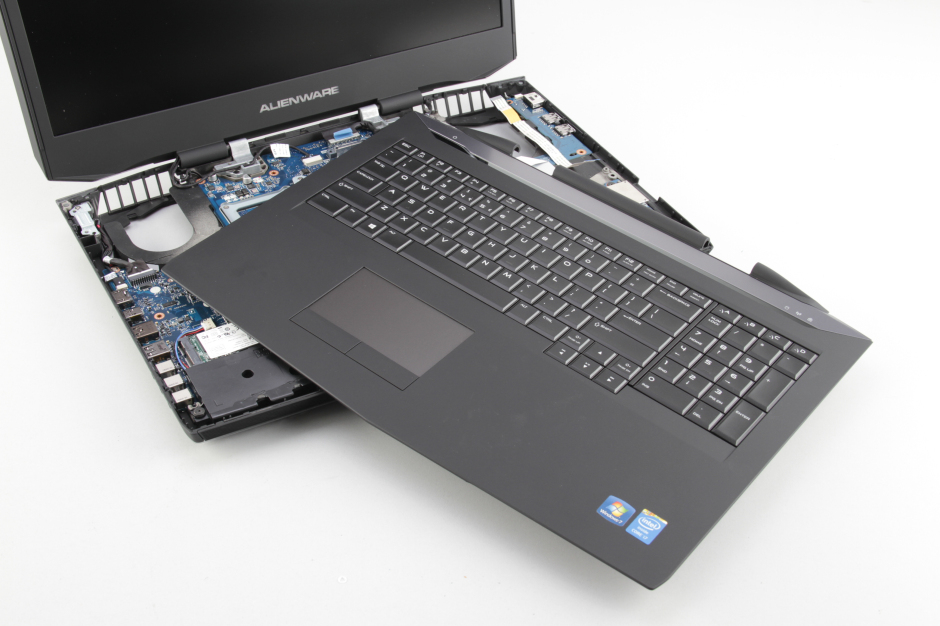
On the back of the palm rest, you can access the keyboard and touchpad. At this step, you can replace the keyboard.

You can access the RAM, SSD, speakers, and motherboard when the palm rest is removed.
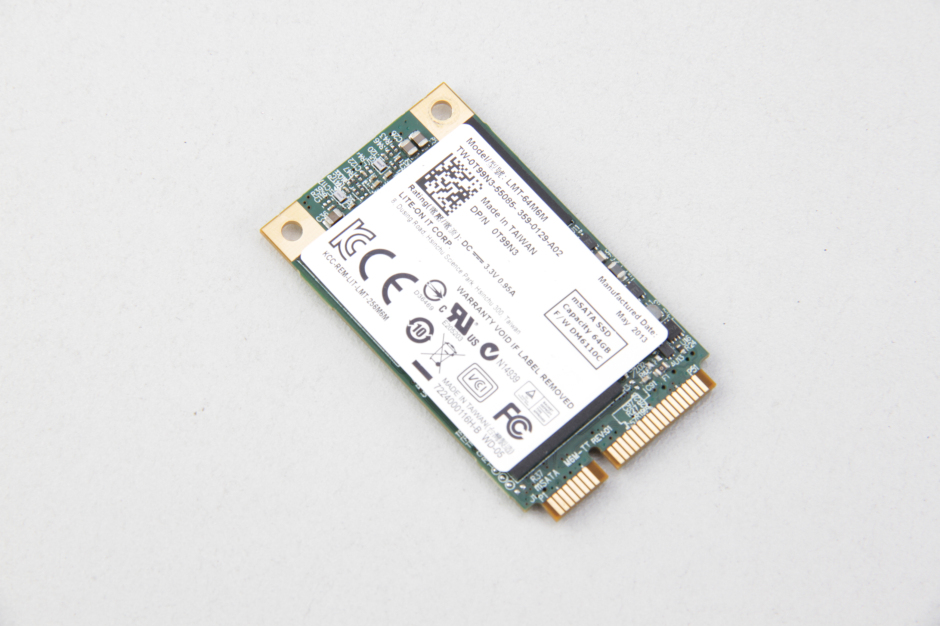
Remove the screw securing the SSD and remove it from the M.2 slot.
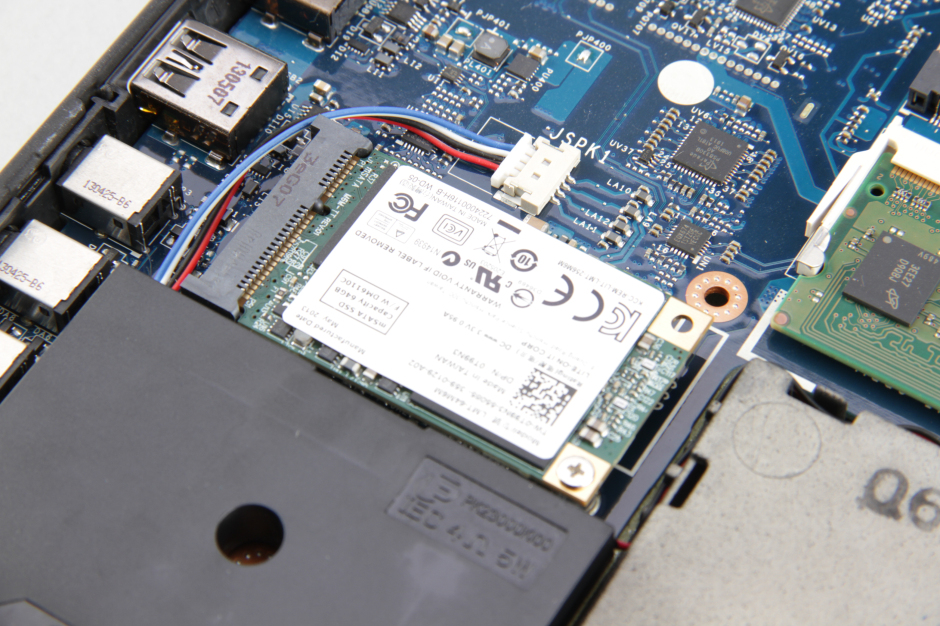
The Dell Alienware 17 comes with a Lite-On LMT-64M6M 64GB SSD.
Use your nails to separate the clips on both sides, and the memory module will pop out automatically. If you need to upgrade your memory, you will need to replace your current memory modules.
Dell Alienware 17 internal parts
I’m guessing the heat sink screws are connected to the palm rest assembly. So after you remove the heat sinks, check around for any other screws that look like they go through to the other side. Then it is just held on with snaps. that’s how my other Alienware laptops were.