
In the guide, I will show you how to disassemble the Lenovo IdeaPad Yoga 2 Pro to remove and replace the battery, keyboard, SSD, wireless card, heat sink, cooling fan, bottom case, and motherboard.
Looking for more guides? Follow us on Facebook for all the latest repair news.

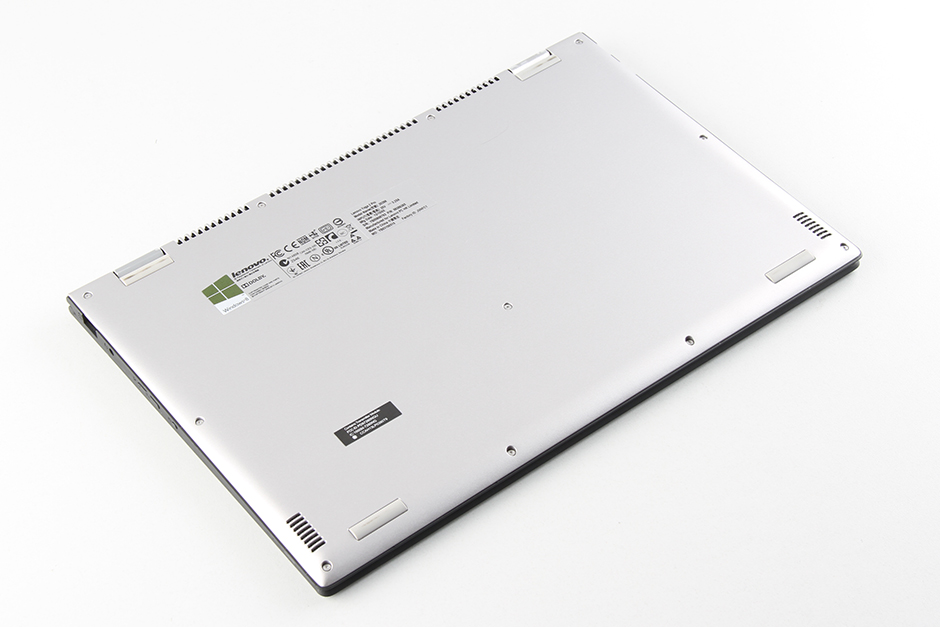
Remove all screws from the bottom case.
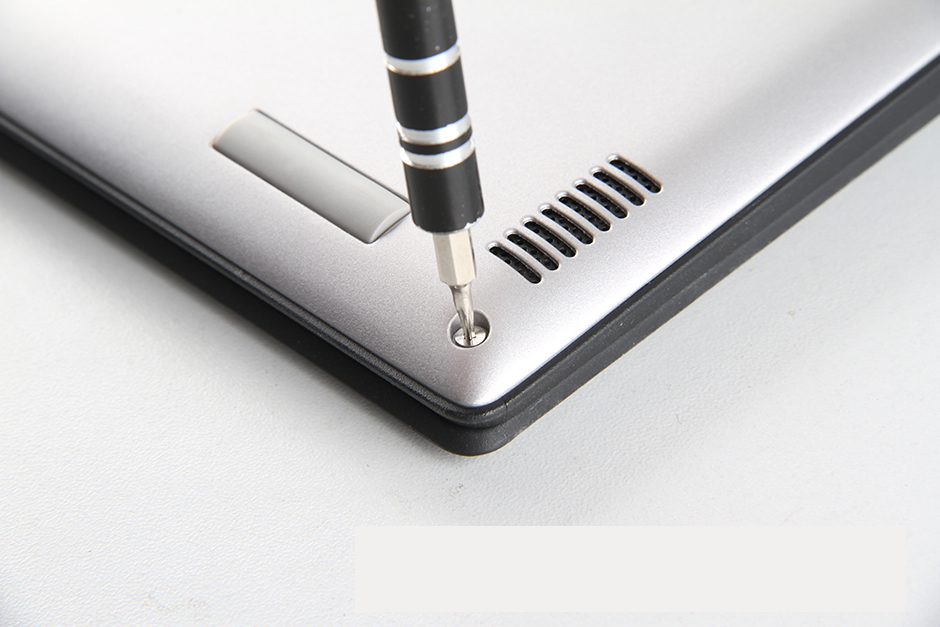
When all screws are removed, you can pry up and open the bottom case.
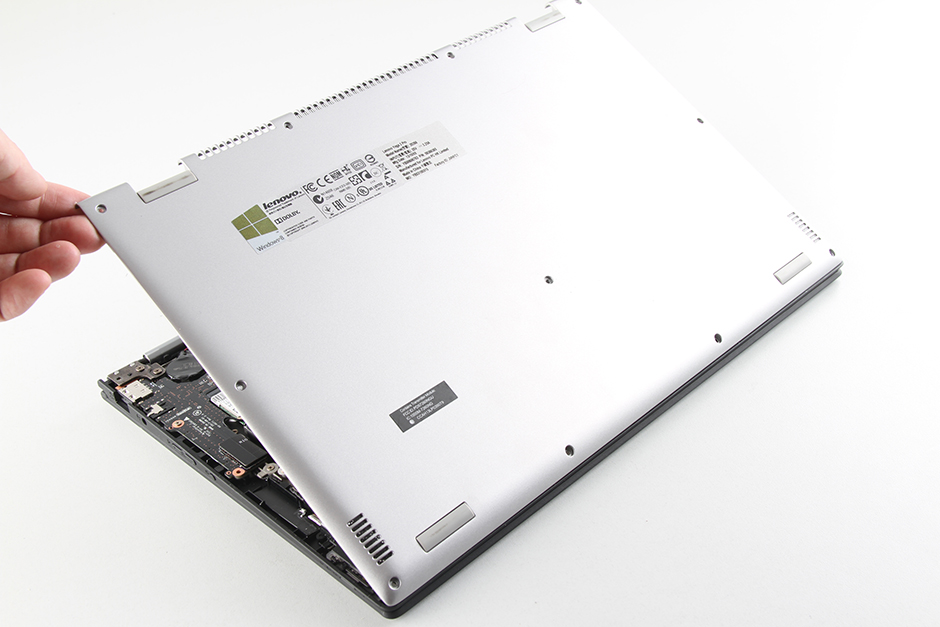
Since the bottom cover does not use traditional clips to secure it in place, simply inserting a pry tool under the bottom cover allows you to easily pry it open.
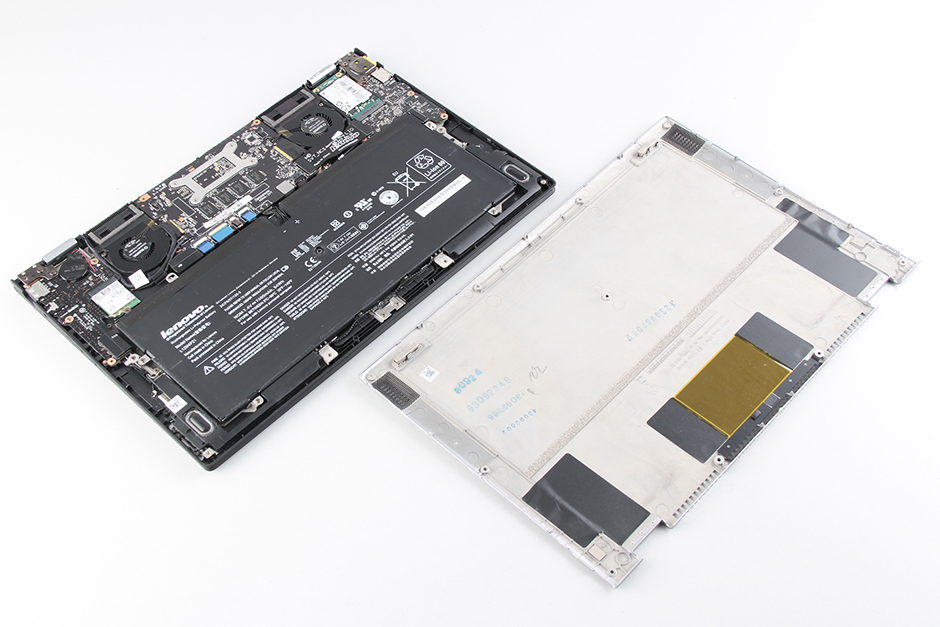
Close-up of the bottom cover. There are no additional parts on the bottom cover, except for some black shielding stickers in specific locations.
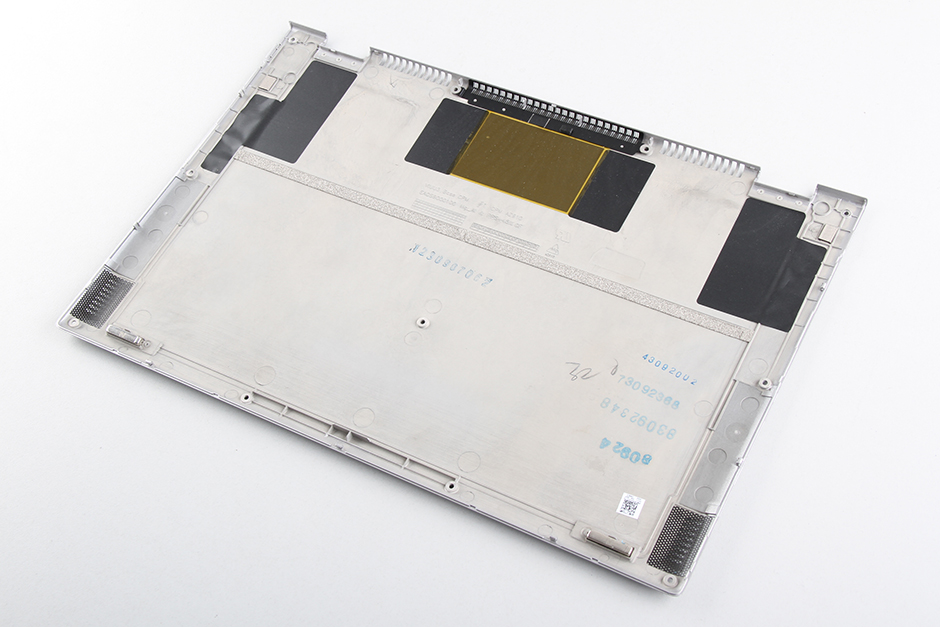
The characters on the bottom cover indicate that it is made of magnesium alloy.
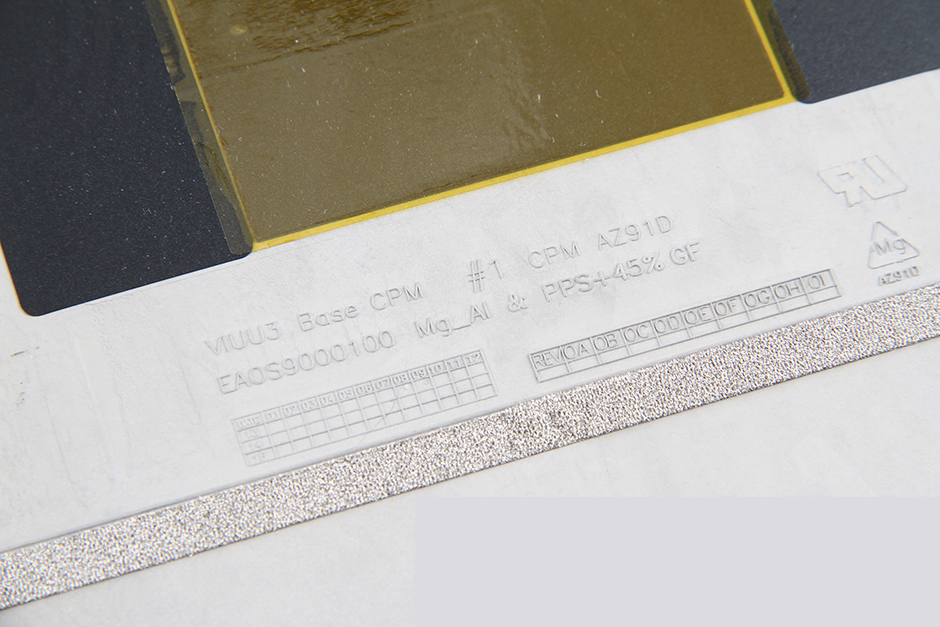
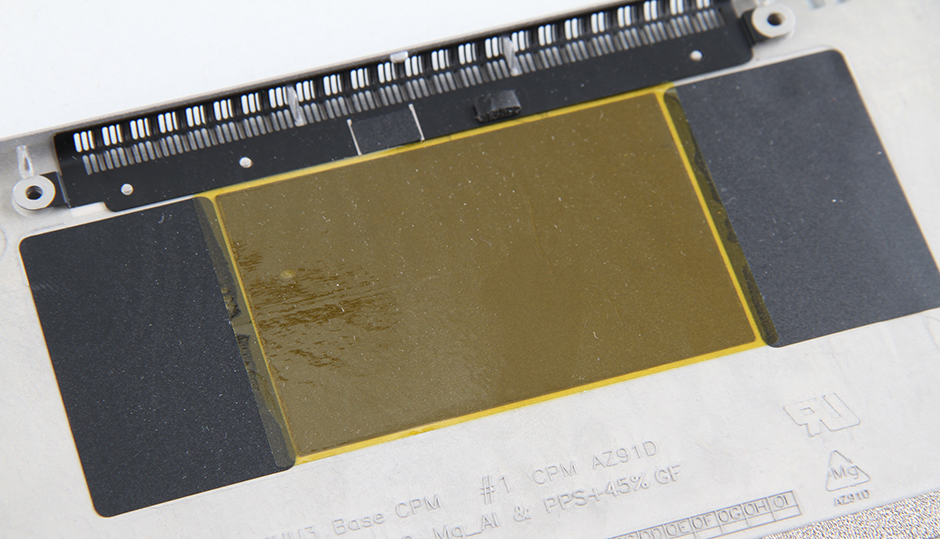
The yellow area is the copper sheet. The main role is to shield against electromagnetic interference.
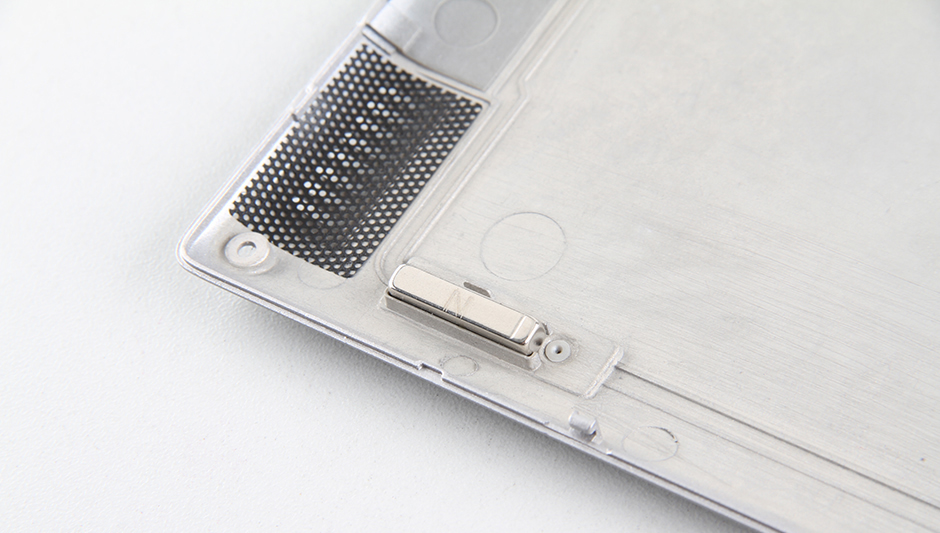
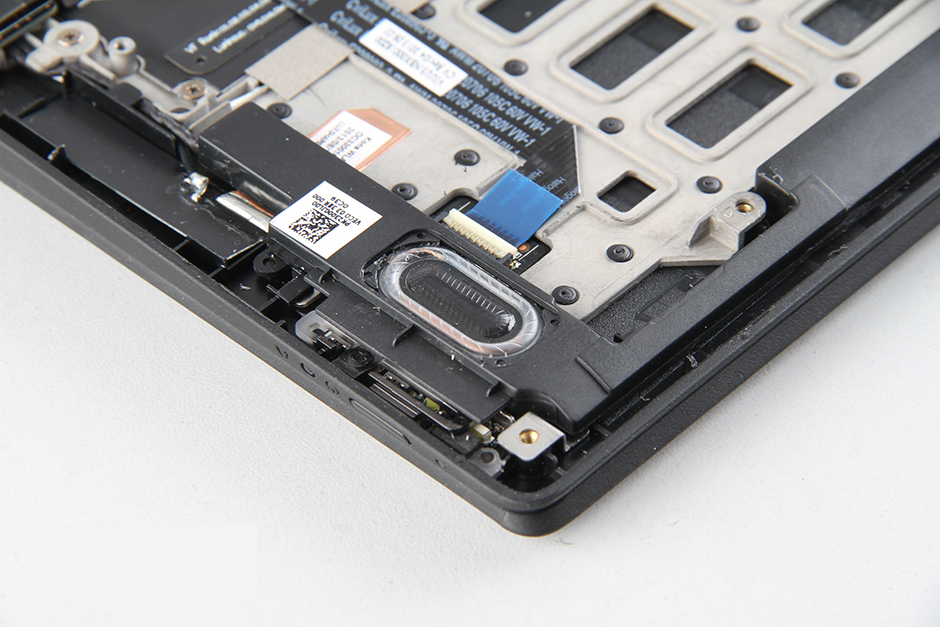
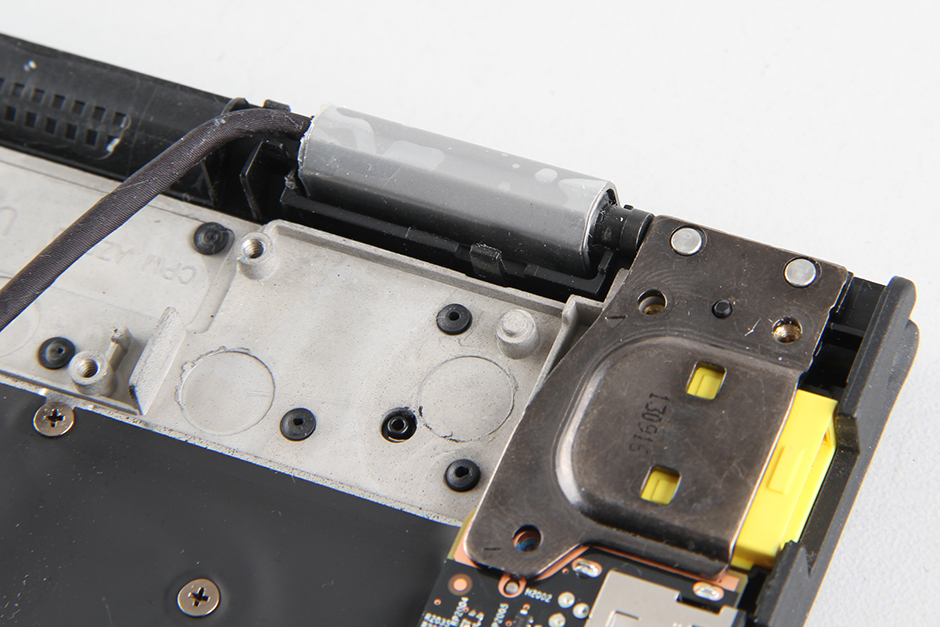
This is the opening of the speaker, which is covered with a dust cover.
When the bottom case is removed, you can access the internal components. The battery takes up most of the space.
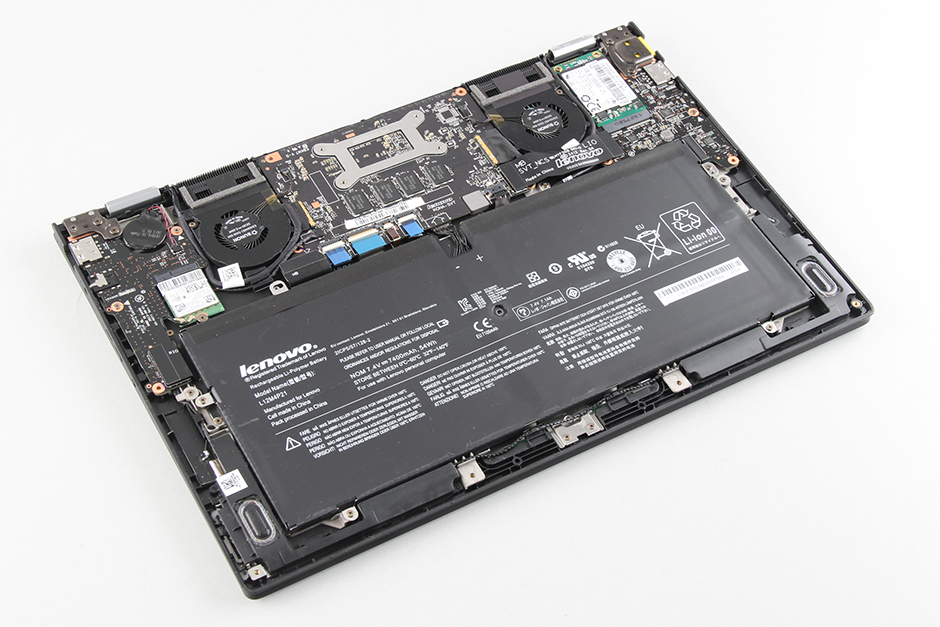
The Lenovo IdeaPad Yoga 2 Pro comes with a 7400mAh Li-polymer battery, Lenovo part number: L12M4P21.
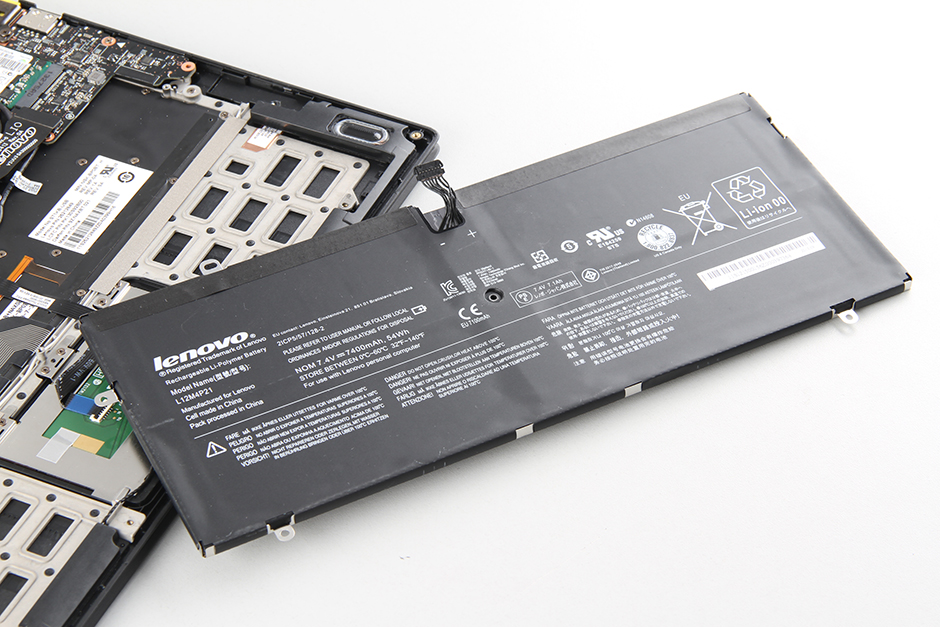
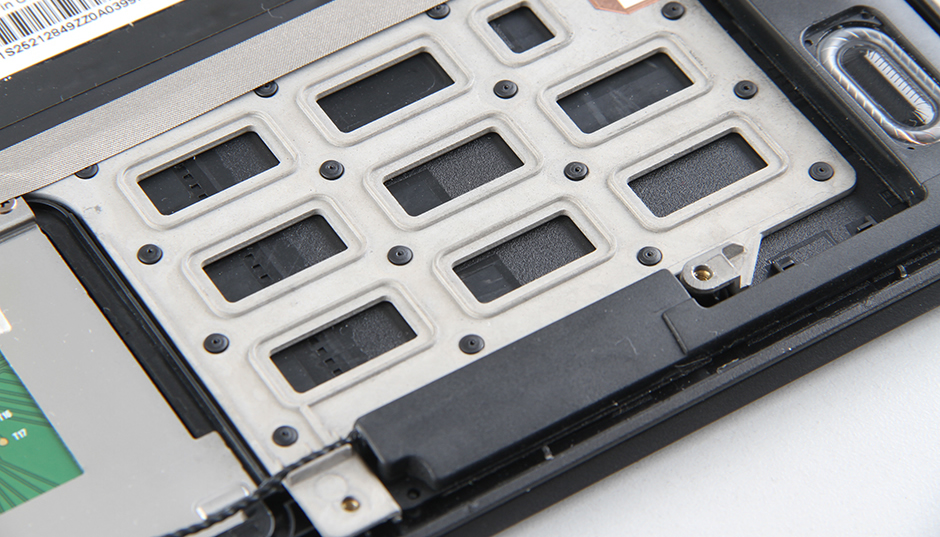
With the battery removed, you can access the magnesium alloy roll cage.
The speakers have a longer sound guide tube, which can produce better bass.
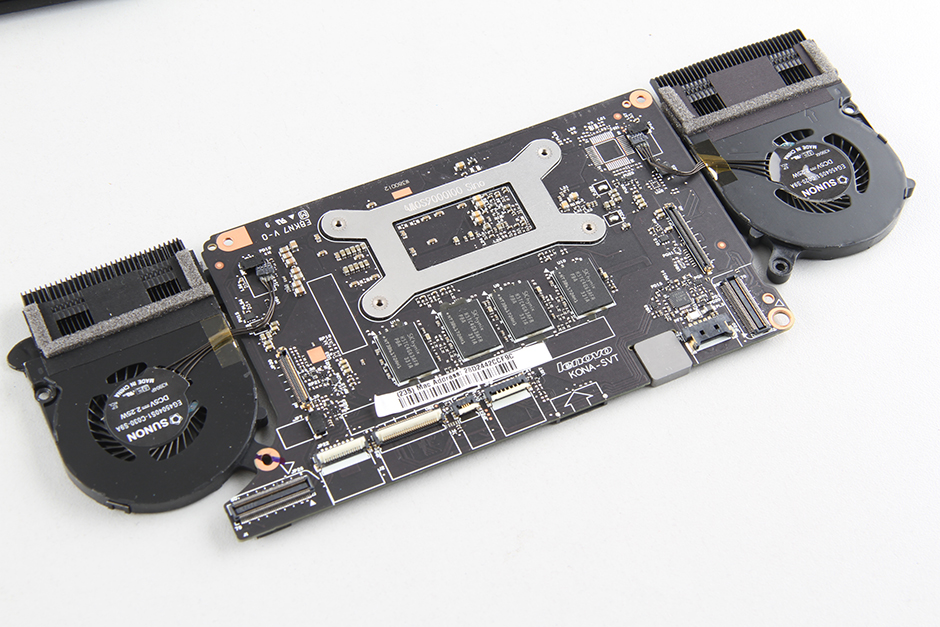
Close-up of the CPU fan
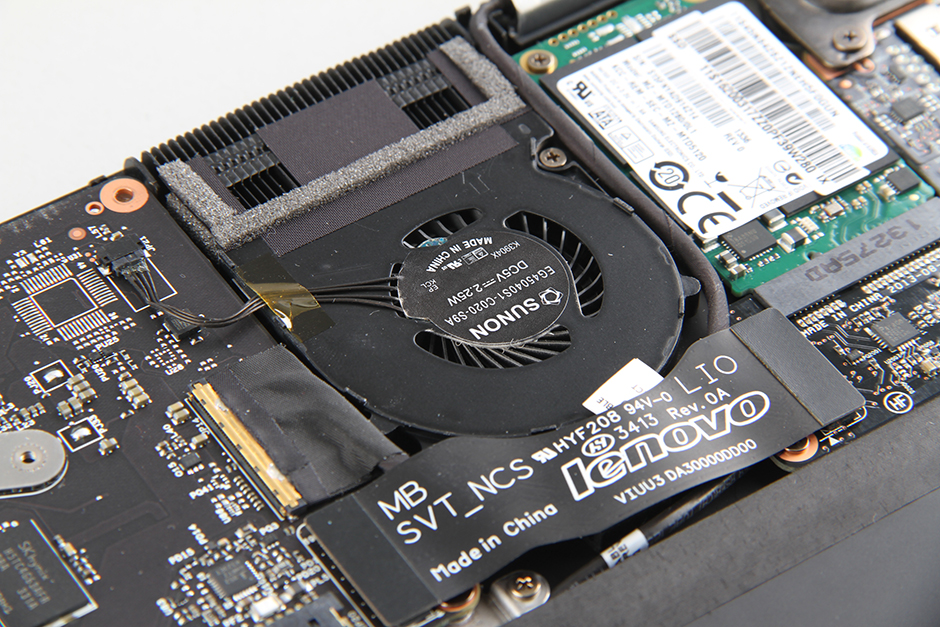
Remove the screw securing the SSD, then remove it from its slot.
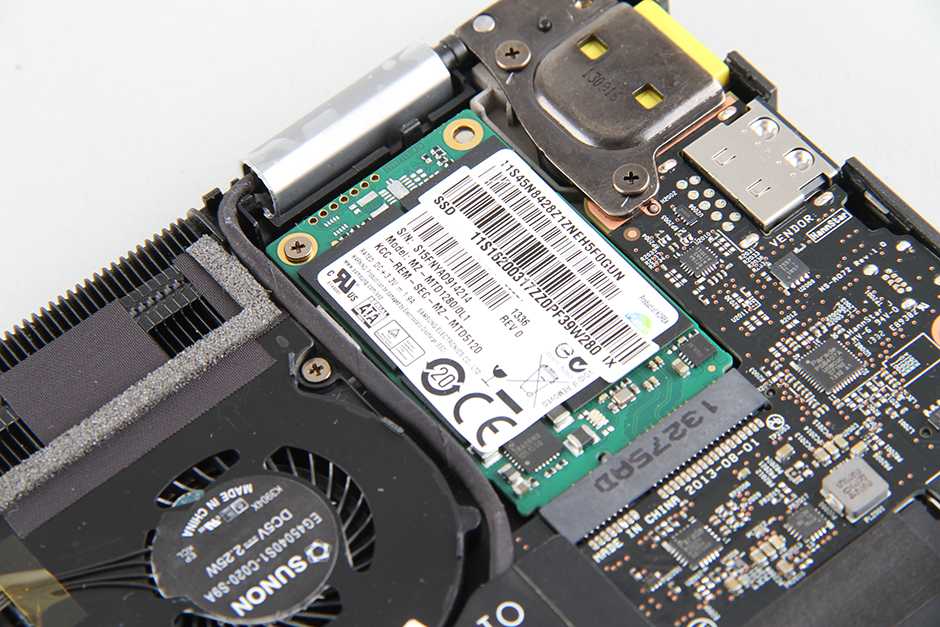
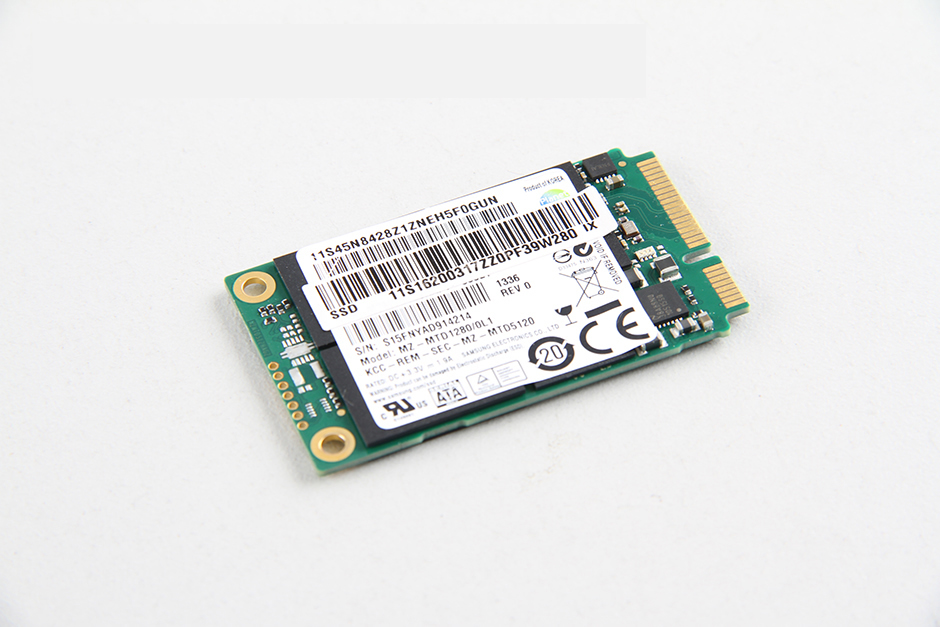
The Lenovo Yoga 2 Pro comes with a Samsung 128GB mSATA SSD.
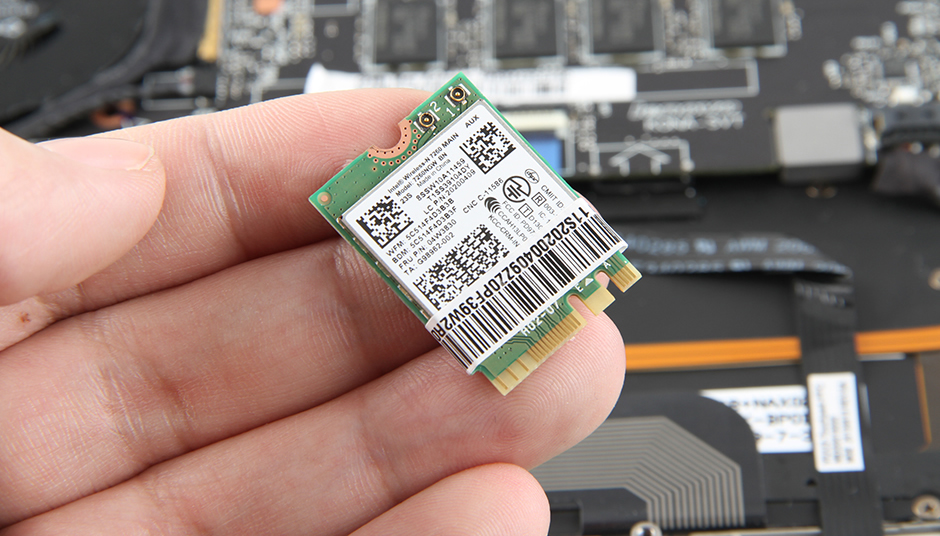
Remove the screw securing the wireless card.
Unplug two wireless antenna cables.
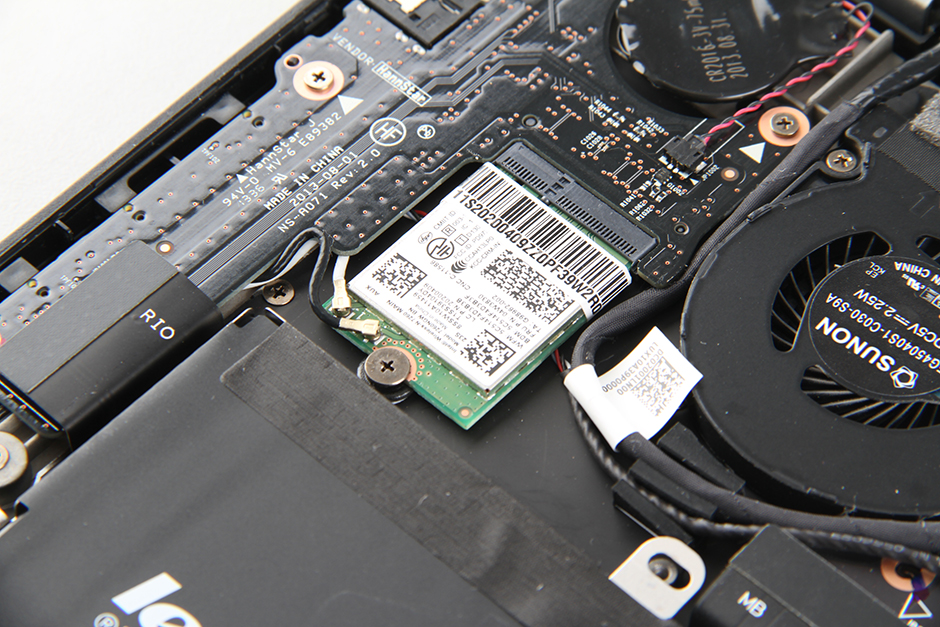
The laptop features an Intel Wireless-N 7260 wireless card. It supports 802.11n, Wi-Fi, and Bluetooth 4.0.
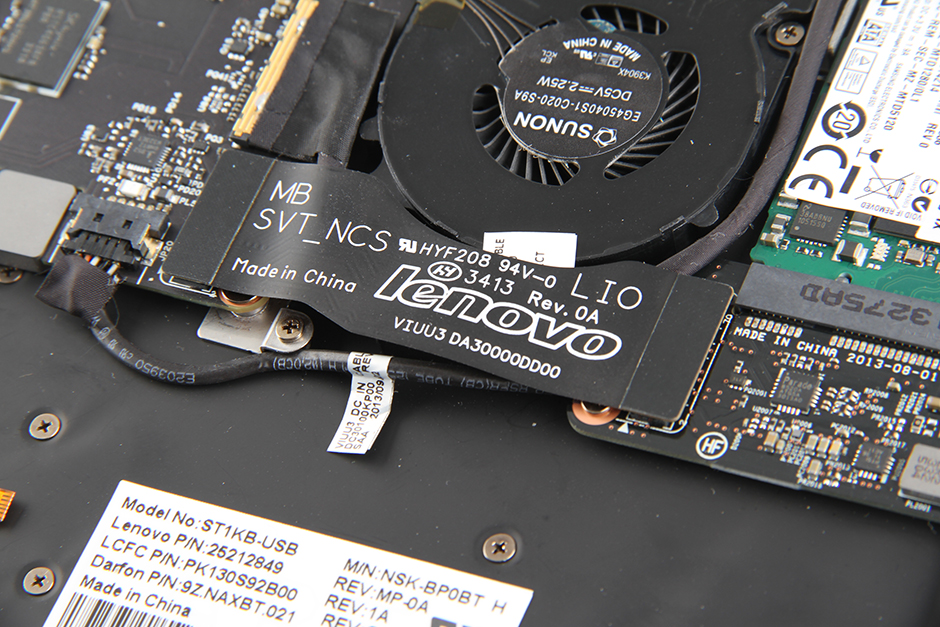
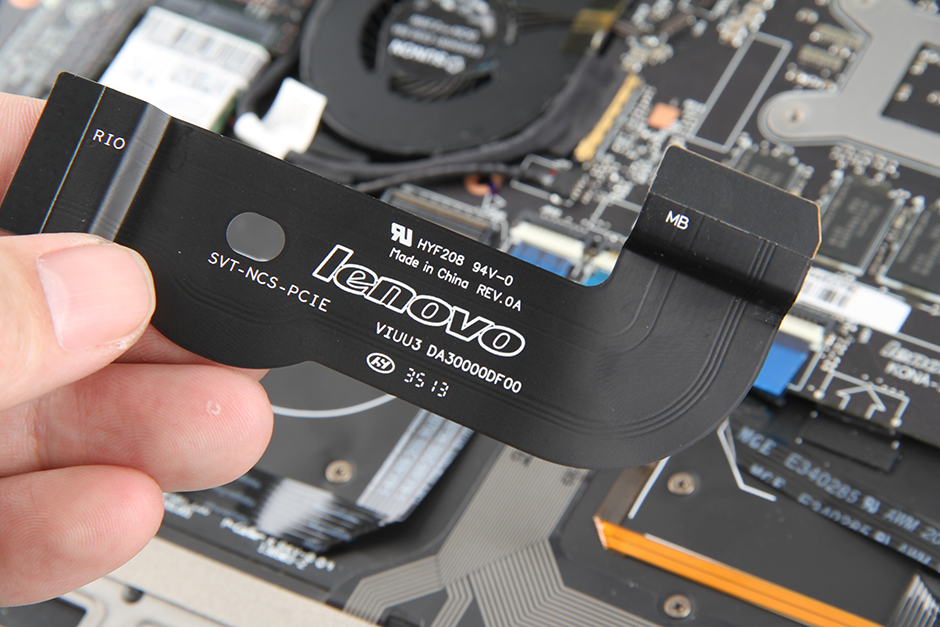
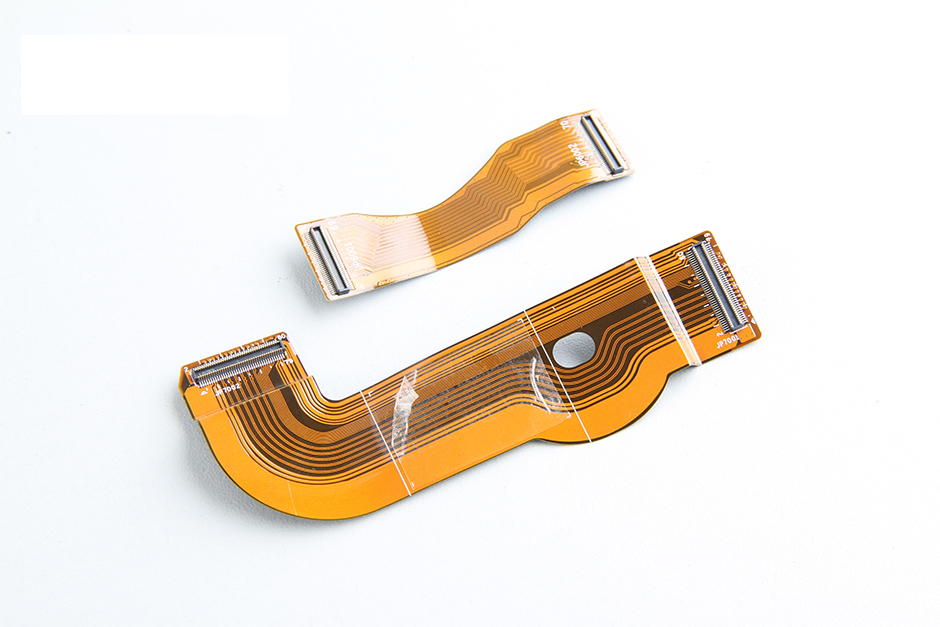
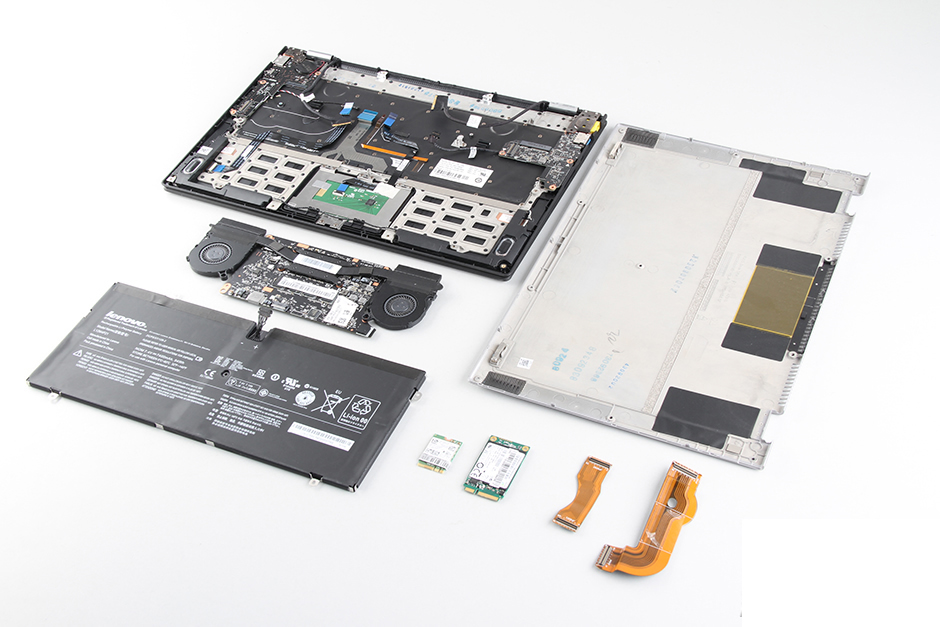
The motherboard is divided into three parts and connected via a flexible PCB board.

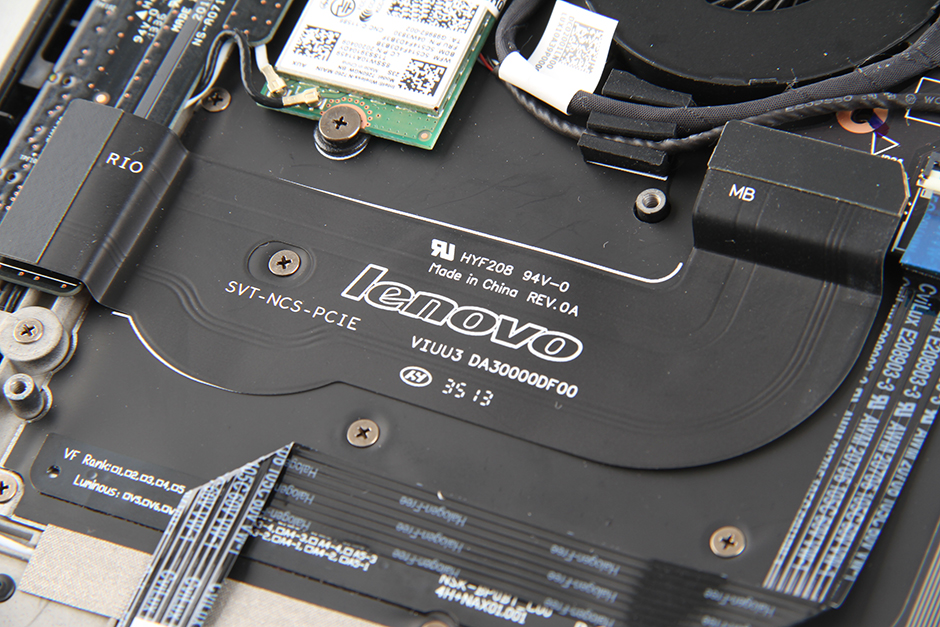
The cooling system is still connected to the motherboard, and I do not plan to remove it.
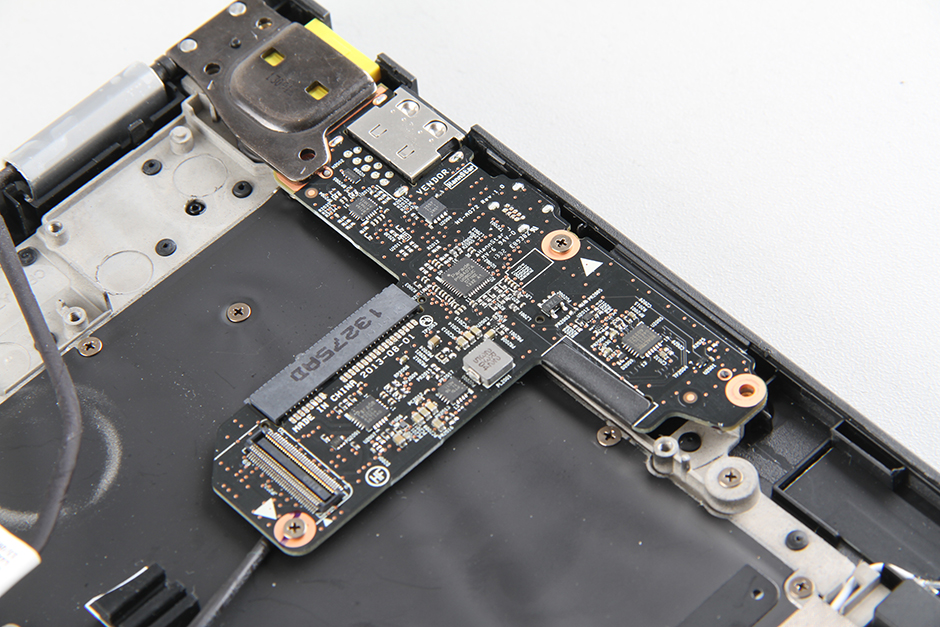
The board integrated a USB port and a DC power jack.
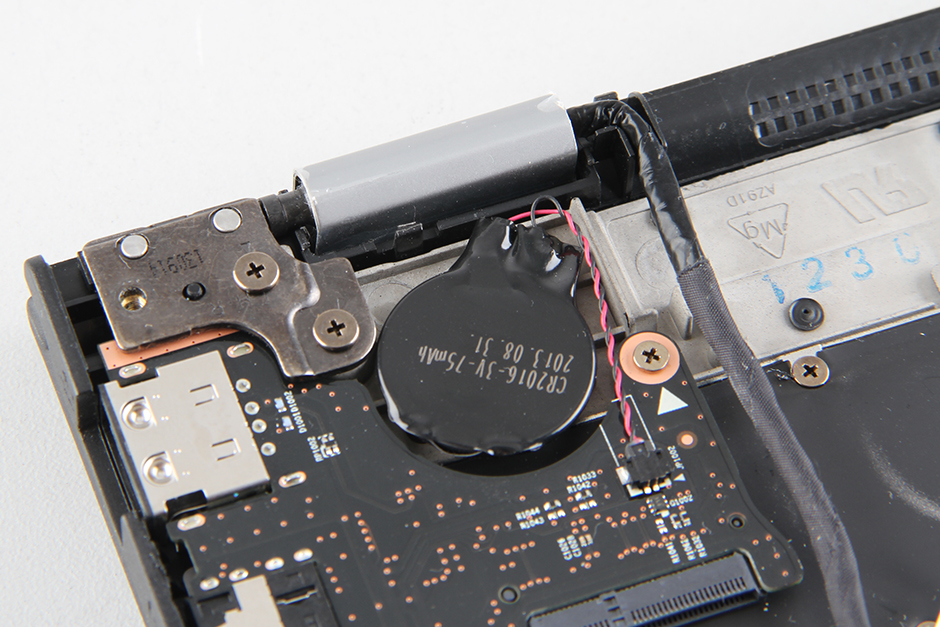
The board integrated a USB port and a CMOS battery.
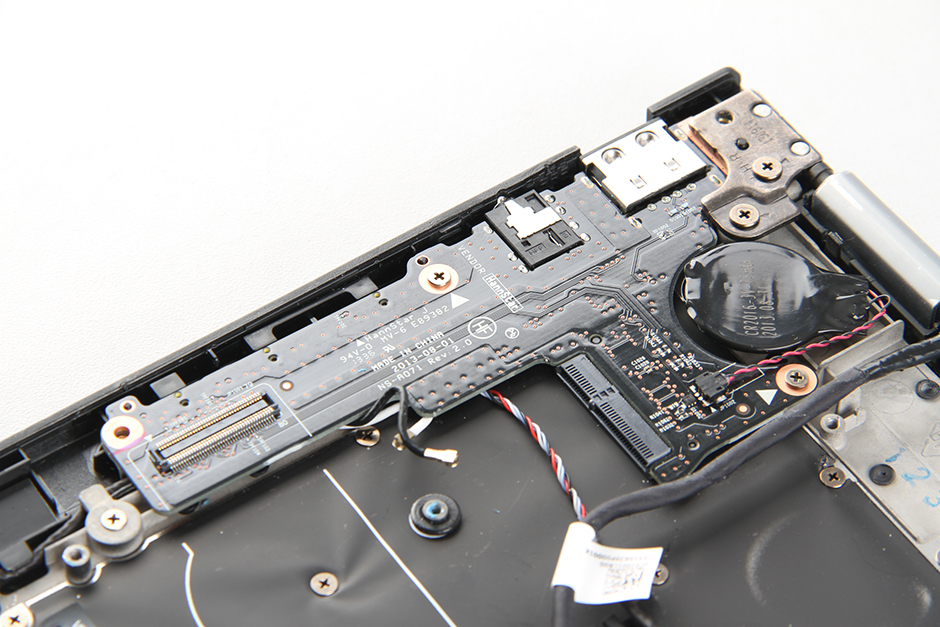
CMOS battery
Lenovo IdeaPad Yoga 2 Pro internal parts.

Thank you VERY MUCH for this excellent guide !!!
Excellent guide, especially if you want to upgrade your hard drive.
Thank you. I’m sure it will help. Even we amateurs sometimes have to make repairs ourselves. Can you tell me why it has magnets? It’s amazing that staples are stuck to it.
Excellent guide! What about the top cover? Can that easily be replaced? I want to swap covers on two Lenovo Yoga 2 Pros due to their different colors and internal specs.
Hi, Dee,
If you mean the magnets in the case shells, I think they’re usually used with a magnetic switch in the body to sense when the lid has been closed. If you remove it, you may be able to close your lid without putting the machine to sleep. (Although there may be less destructive ways of achieving the same thing within the operating system itself.)
Rich.
Thanks for the useful guide. I am sure it will come in handy at some point. Can you please tell me how easy it is to fix a broken power button? The bower button light is on, which probably means the connection is still OK, but it is completely unresponsive when pressed.
I think you should replace the power button, and there is no way to repair it.
I have the same problem. My power button is not working, but the light is on, and the NOVO button functions normally. Do I need to replace the power button card, or is this just a driver issue?
Can you swap out an i3 motherboard with an i5 motherboard if they are both Yoga 2 11?
I think it’s no problem.
After battery replacement, the service mic is not detected. A year later, the wireless radio is not detected.
Can I fix it, or should I send it to repair?
Can the graphics card be upgraded?
The graphics were soldered on the motherboard, so it can’t be upgraded.
Hi there,
What would be the steps to get to the keyboard to clean up a spill as the keys are sticky now?
Thanks
I have sent the DC JACK link to your email, please check!
Hi David,
I did receive the link, thank you. The part number on my DC Jack states 3BBE, but the part they have listed is different. Perhaps it’s a substitute, but it’s hard to tell. My model is the Lenovo Yoga 2 #2066. Thank you kindly for any help you can provide.
Cliff
I have checked, and the part number is 3BTF. It is compatible with 3BBE.
Can you tell me the product ID of a replacement larger SSD drive? It does not seem to be the standard replacement SSD like the Samsung 850 that you would install in a larger laptop.
The disk is an mSATA disk. I swapped out my 256GB mSATA that came with the machine for a “Samsung SSD 850 EVO mSATA 1TB”.
Hello,
I need to replace the motherboard for the Lenovo Yoga 2 Pro (model 20266). The current motherboard configuration is Intel i7 + 8GB. Other than eBay, are there any other US online stores where I can purchase a refurbished or new motherboard? Please let me know. Thanks in advance,
Sen
I have lost two screws from the rear of my Lenovo Yoga 2 Pro laptop, as shown in the photos above. Could you please tell me the size of the screw?
I have a Yoga 2 Pro in which the CMOS battery connector came loose from the board. Is there any way to repair this myself, or should I seek the help of a professional? The connector is very small. The unit started to shut down intermittently before failing to power on entirely.
Thank you so much in advance.