
In this guide, I will explain how to disassemble the Lenovo ThinkPad T430 to remove the optical drive, RAM, hard drive, keyboard, palm rest, screen, heat sink, and cooling fan.
Want to stay connected to MyFixGuide.com? Follow us on Facebook to check out the latest teardowns.
Turn off your laptop. Unlock and remove the battery.
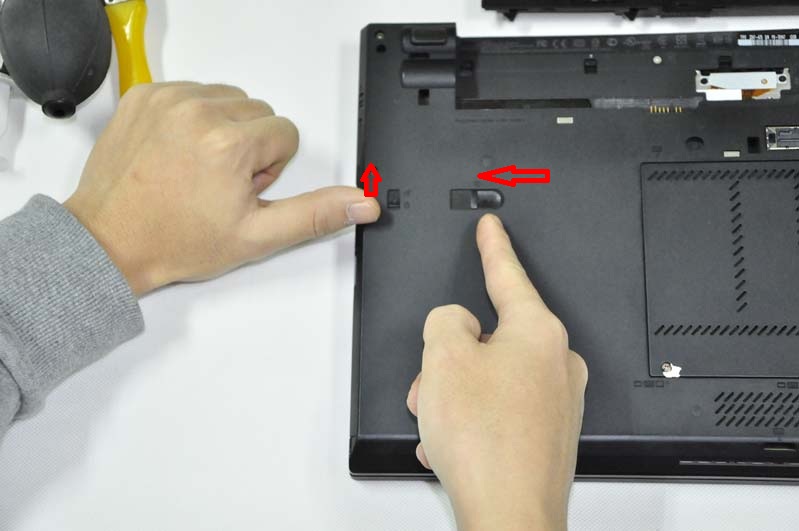
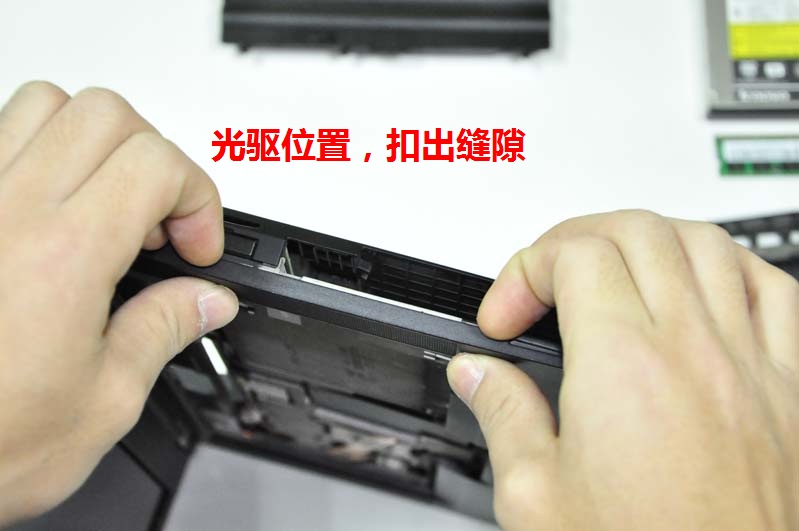
Unlock the latch 1, and push on the latch 2.
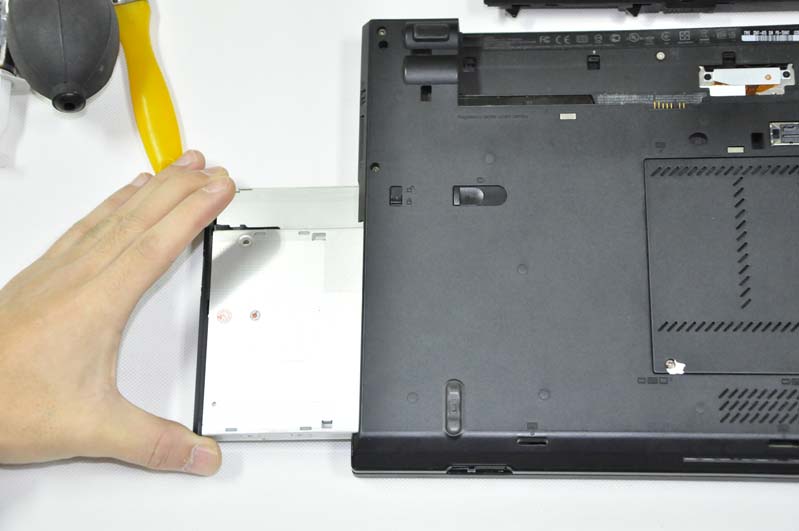
Pull out the optical drive.
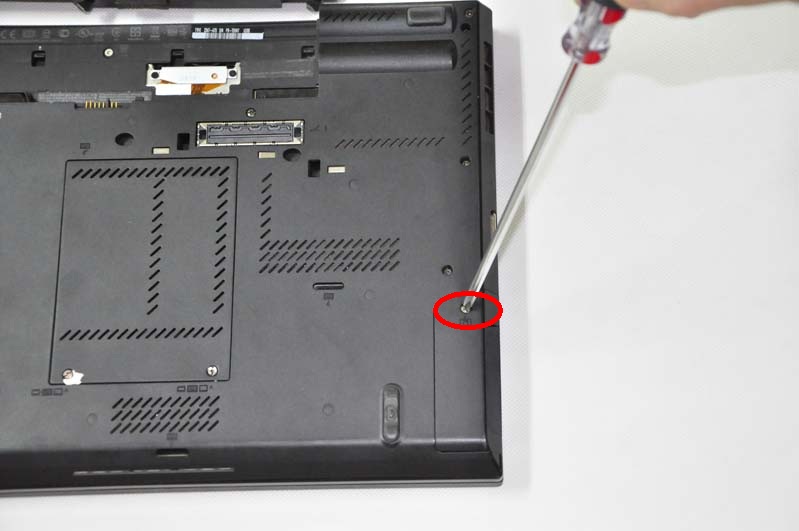
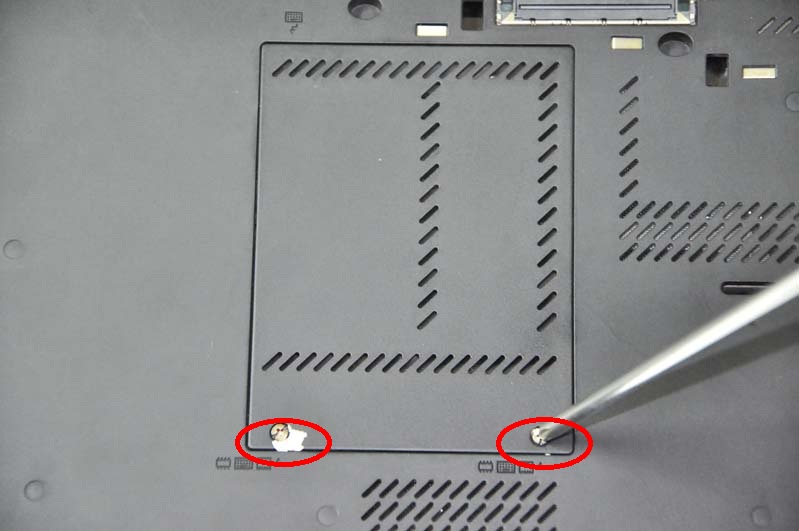
Remove the screw securing the hard drive cover.
Pry up and remove the cover with your fingers.
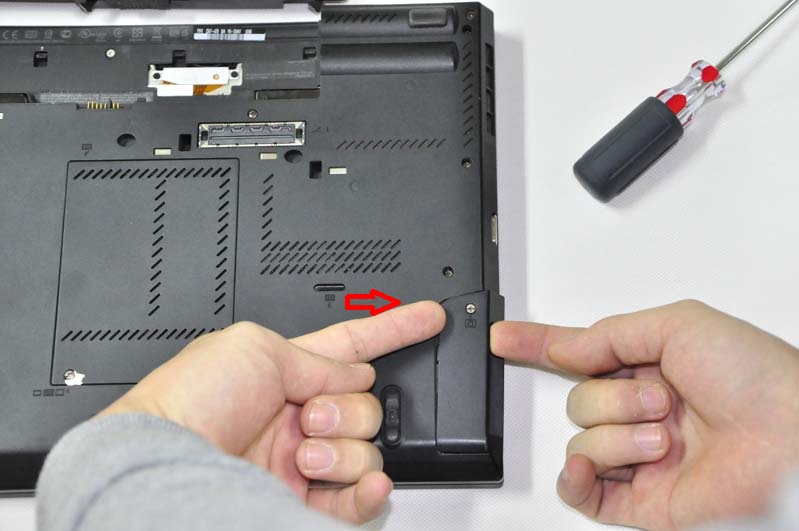
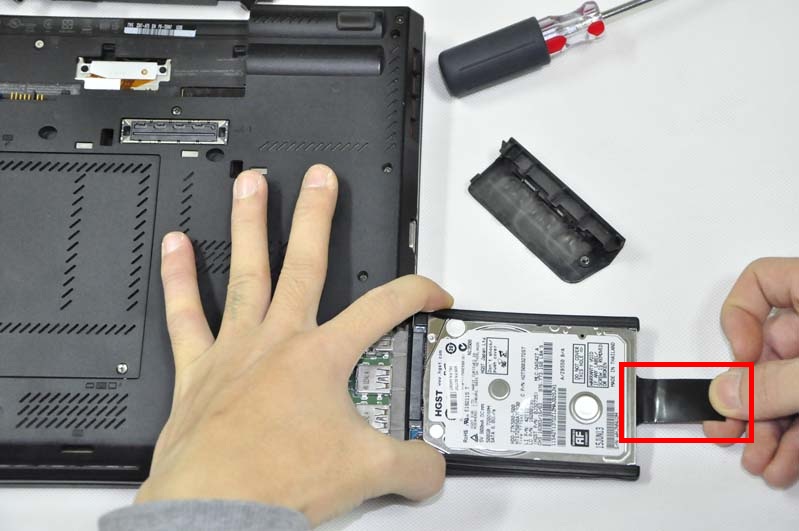
Pull out the hard drive module.
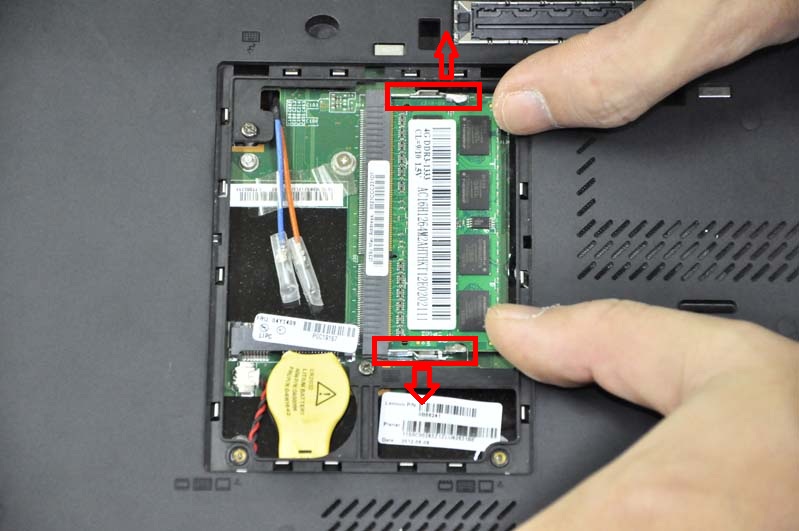
Remove the two screws securing the RAM cover and remove the cover.
Use your nails to separate the clips on both sides, and the memory module will automatically pop out.
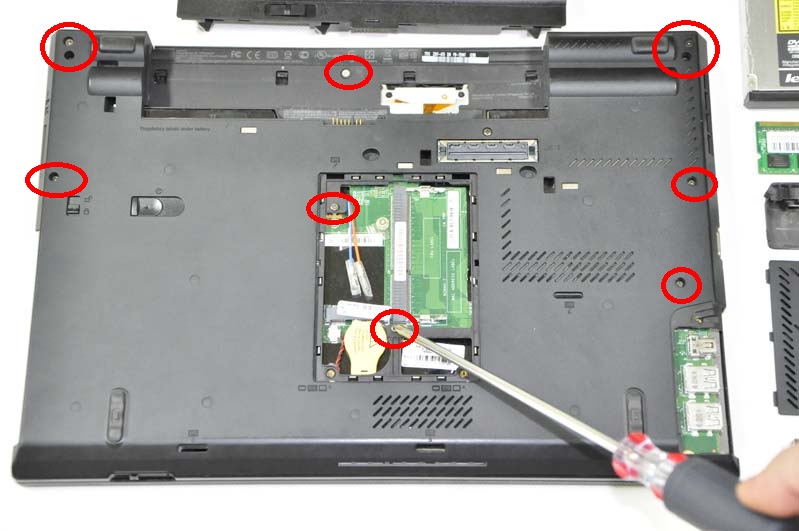
Remove the eight screws from the bottom cover.
Flip over the laptop. Slide the keyboard by the arrow.
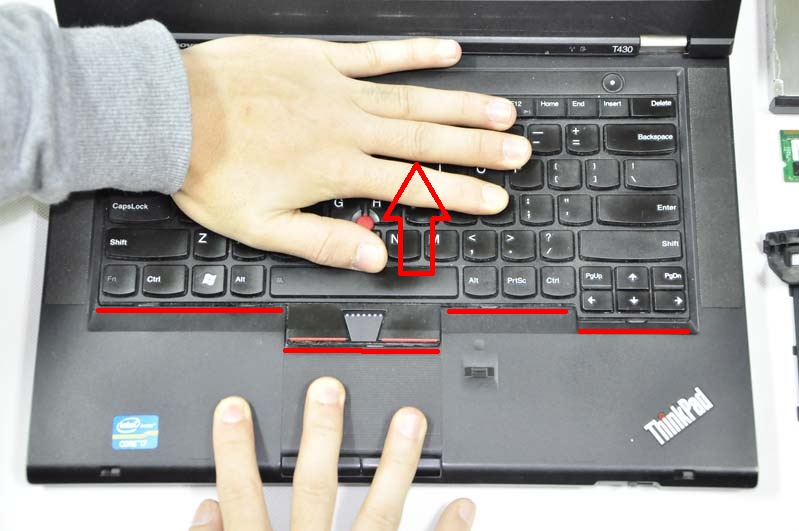
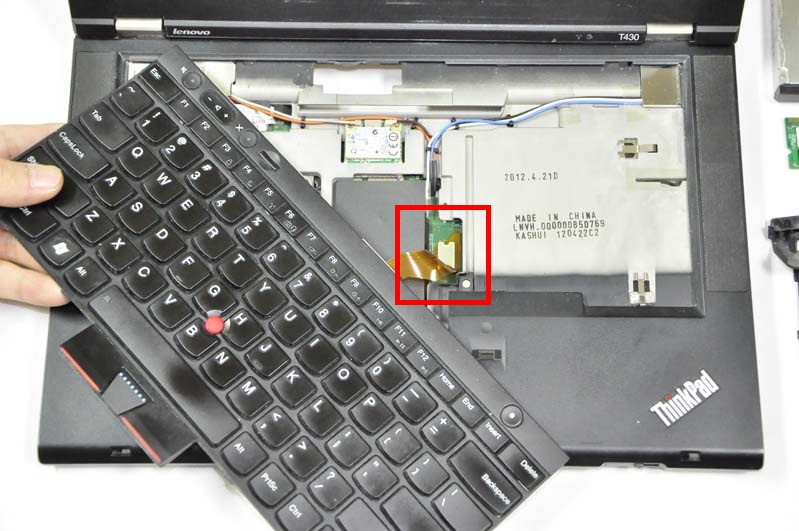
Lift the keyboard and disconnect the keyboard cable.
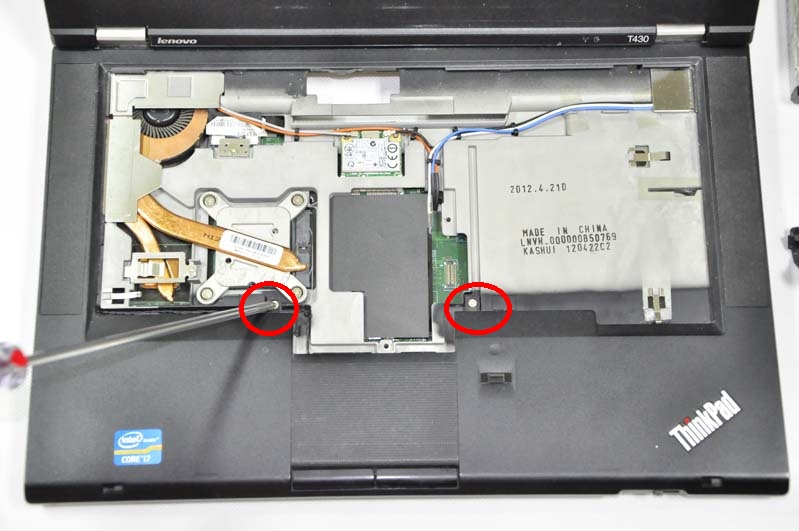
Remove the two screws securing the palm rest.
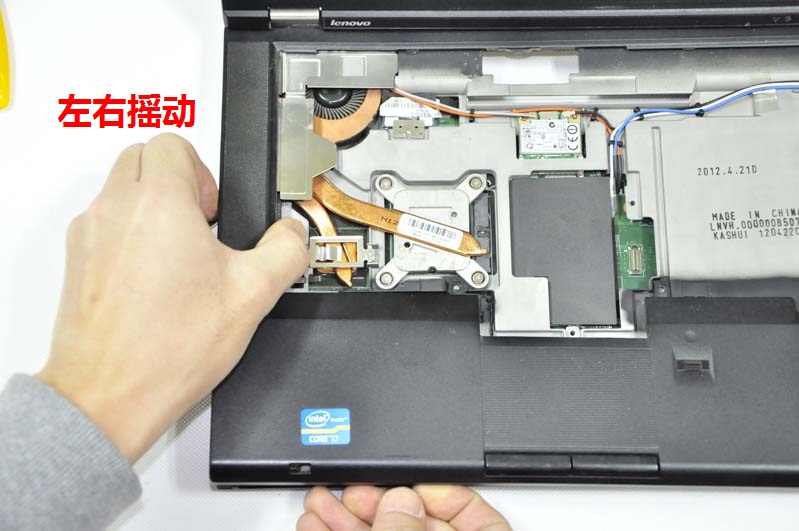
Pry up the palm rest, and you can pry it up with picks
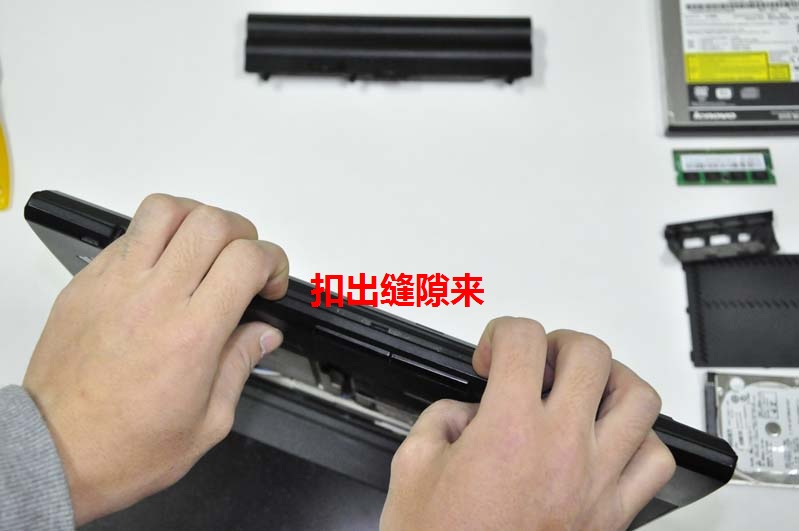
Continuing to pry up the palm rest
Lift the palm rest. Be careful; the touchpad cable is still connected to the motherboard.
Disconnect the touchpad cable and remove the palm rest.

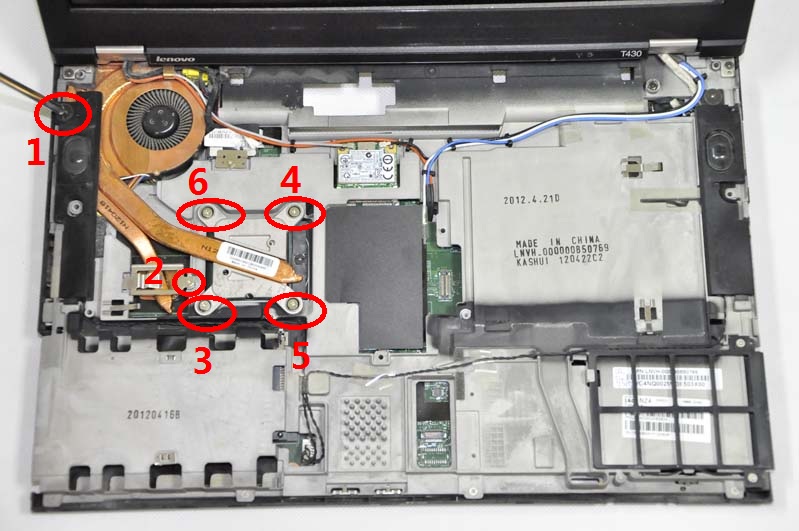
Loosen the six screws securing the heat sink.
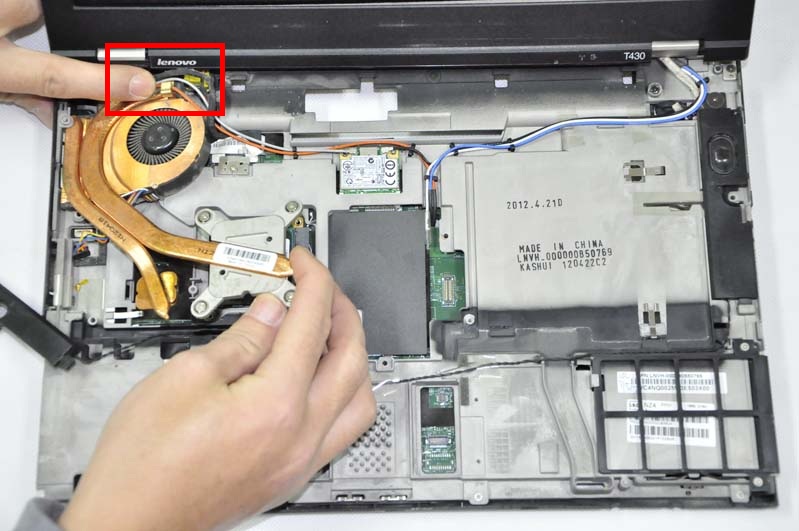
Disconnect the cooling fan cable from the motherboard.
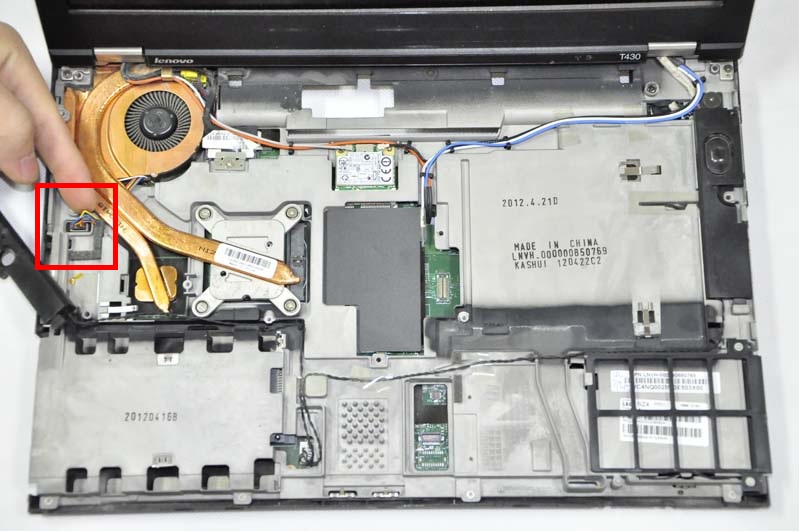
Remove the heat sink and cooling fan.
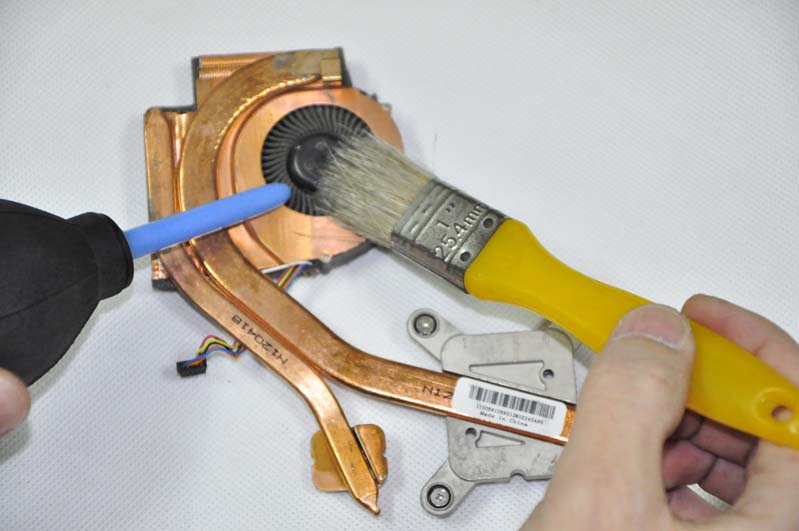
Now you can clean the cooling fan with a hairbrush.
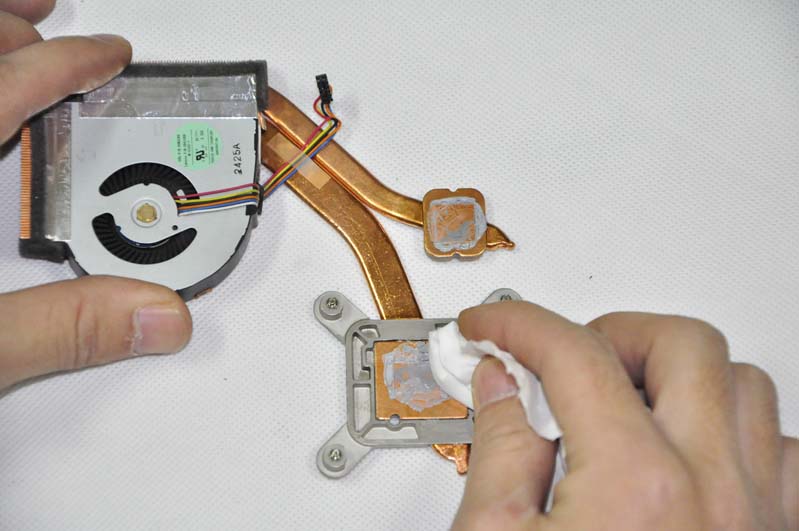
Remove the old glue from the heat sink.
Remove the old glue from the processor.
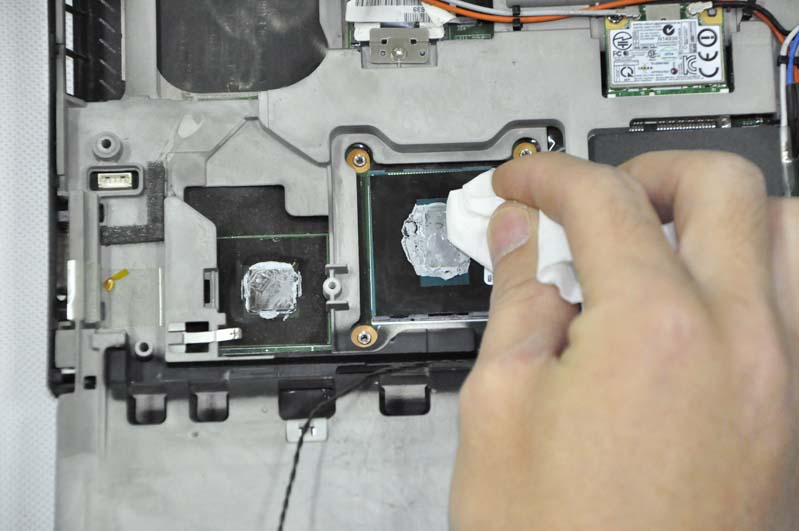
Apply new glue to the processor.

In this step, I will remove the Lenovo Thinkpad T430 screen.
Pry up the screen bezel with picks.
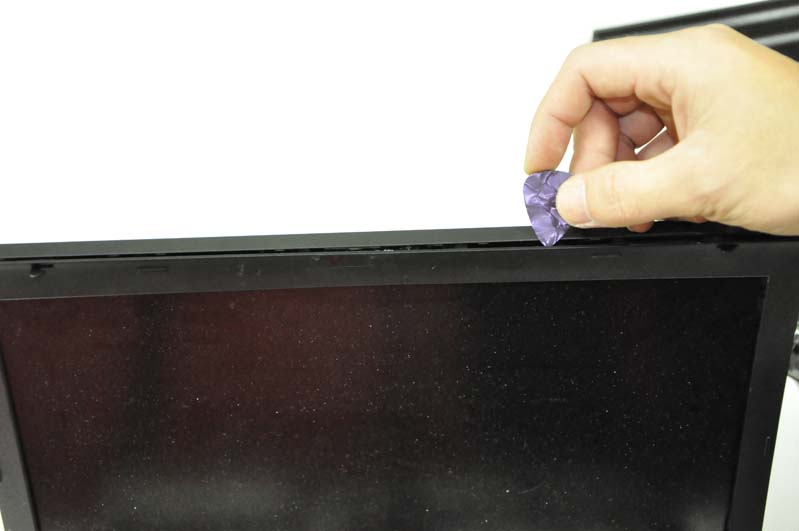
Remove the screen bezel.
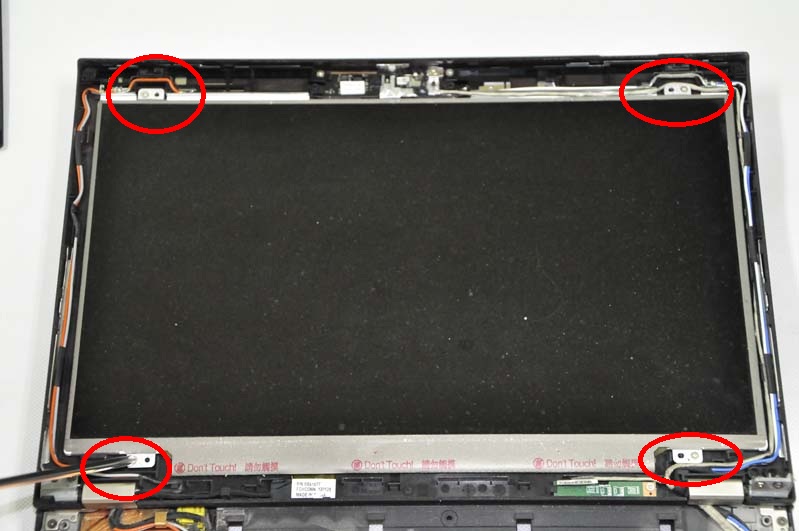
You can find four screws. Remove these screws. Place the screen on your laptop. You can access the LCD cable.
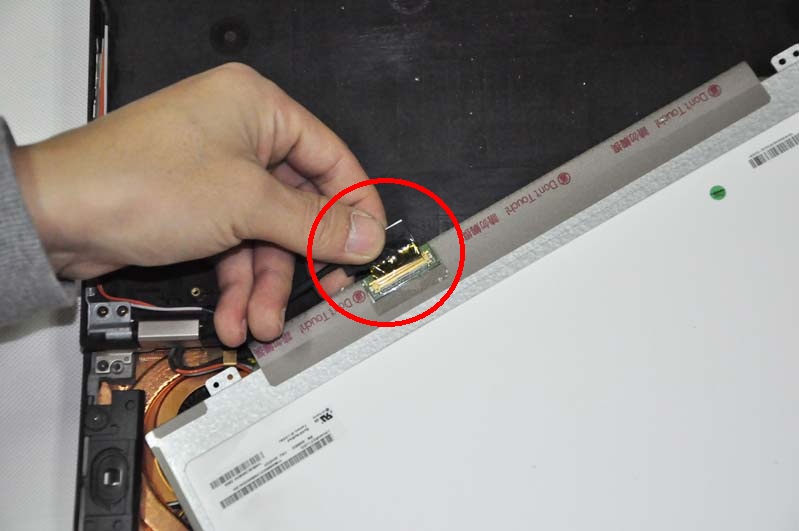
Disconnect the LCD cable.
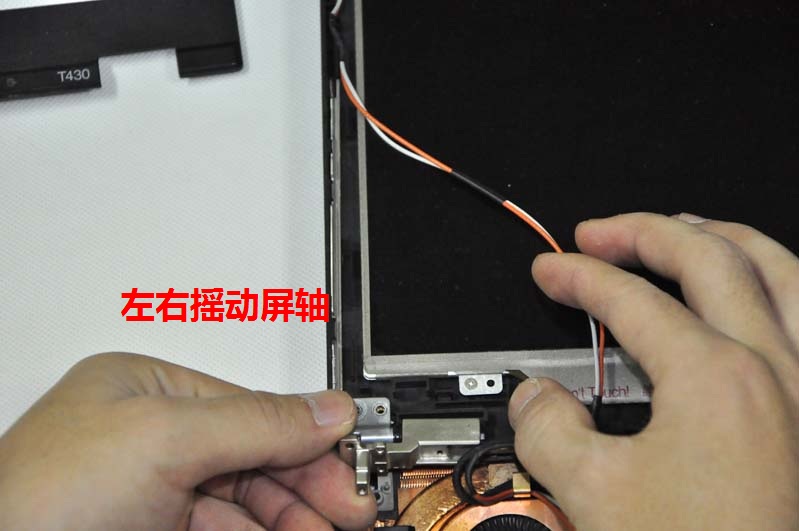
Remove the screws securing the LCD hinges.
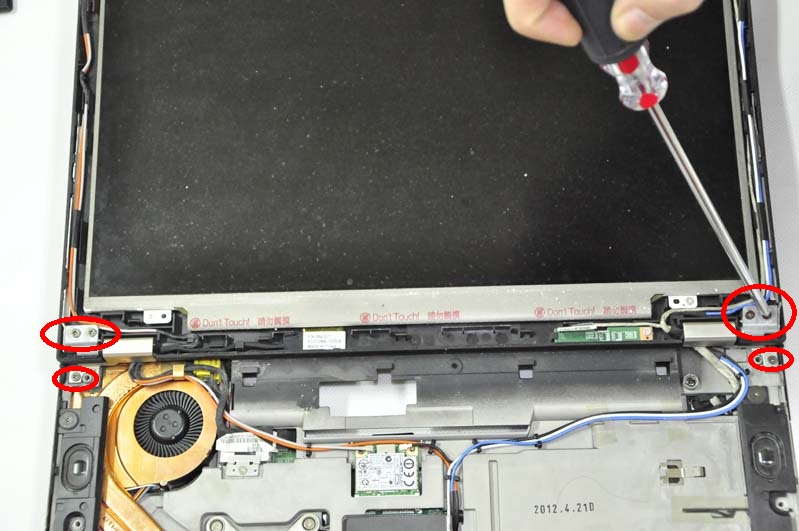
Remove the LCD hinges.
That is not how you apply thermal paste. Way too much.
I just noticed you wrote ‘glue’. If you actually used glue, you just ruined your unit.
Thank you! I fixed my Mom’s Lenovo ThinkPad T430 thanks to these disassembly instructions. (Broken on-off switch)
Thank you! The laptop is now running 35 degrees cooler after dusting the fan and replacing the thermal paste! 🙂