
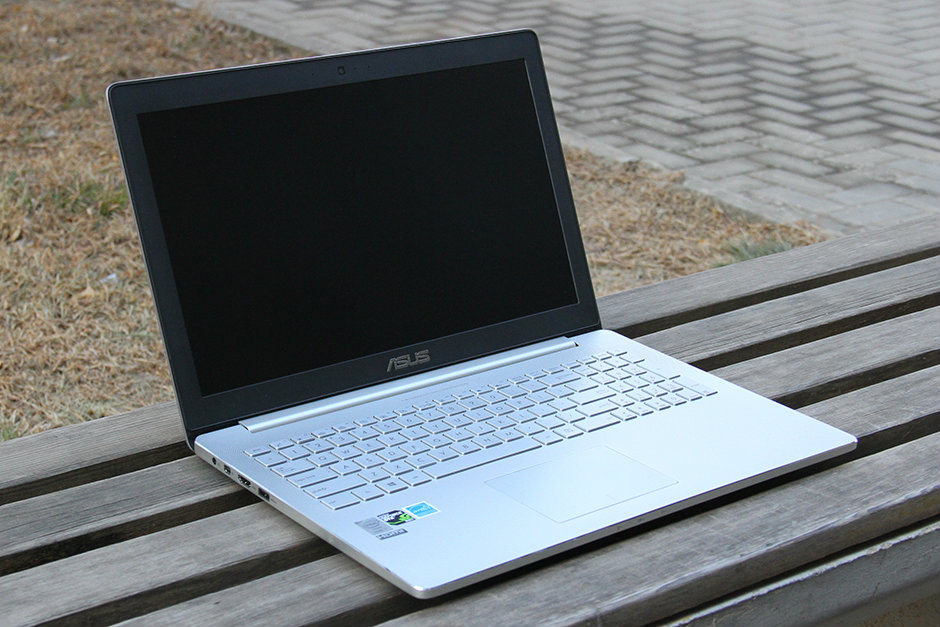
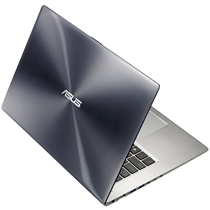
In this guide, I will explain how to disassemble the Asus ZenBook Pro UX501 to remove the bottom cover, battery, SSD, RAM, wireless card, cooling fan, and motherboard.
Follow us on Facebook for the latest updates from MyFixGuide.com.
Remove all screws securing the bottom cover.
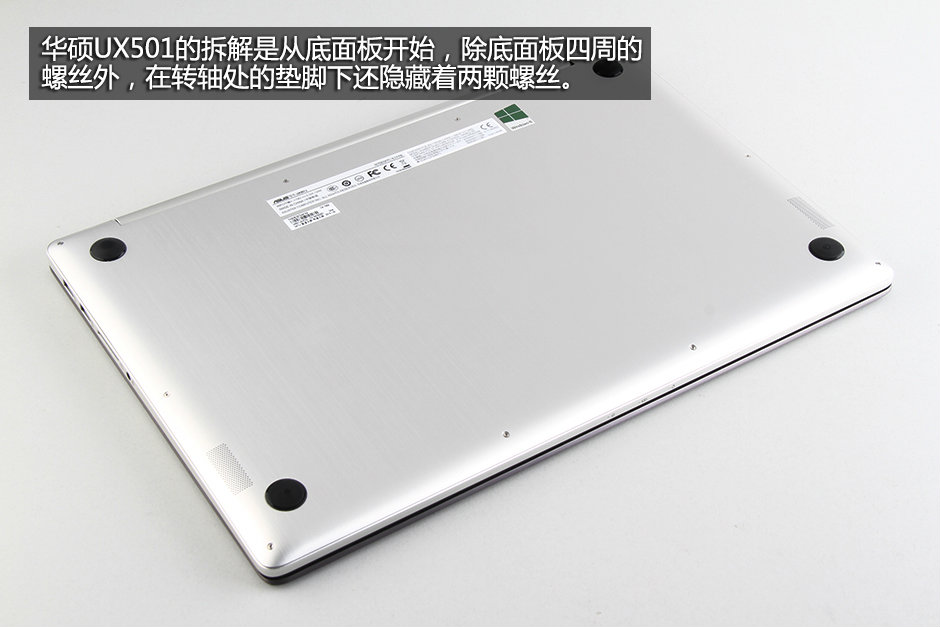
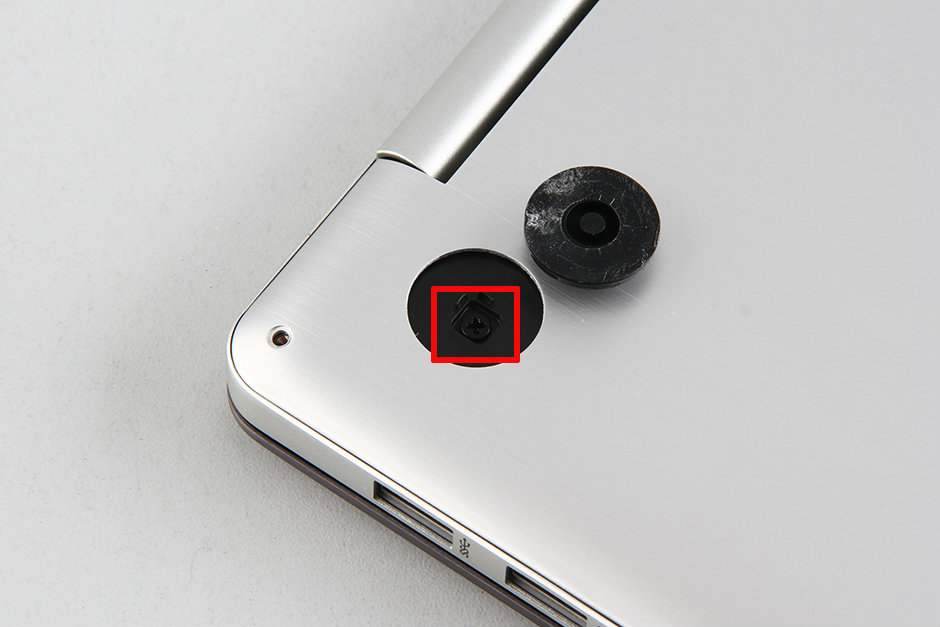
There is a rubber pad at each of the four corners of the bottom cover. Remove the rubber pads and then remove the four hidden screws underneath them.
Insert a plastic pick near the screen hinge under the bottom cover and slide the pick to separate the bottom cover from the notebook. Since there are no clips on the bottom cover, you can easily remove it.
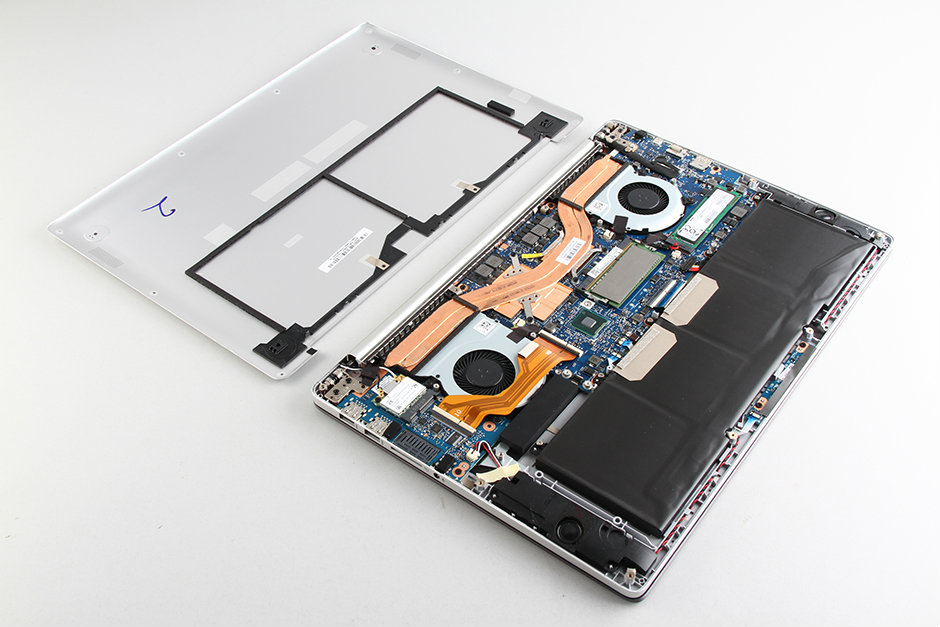
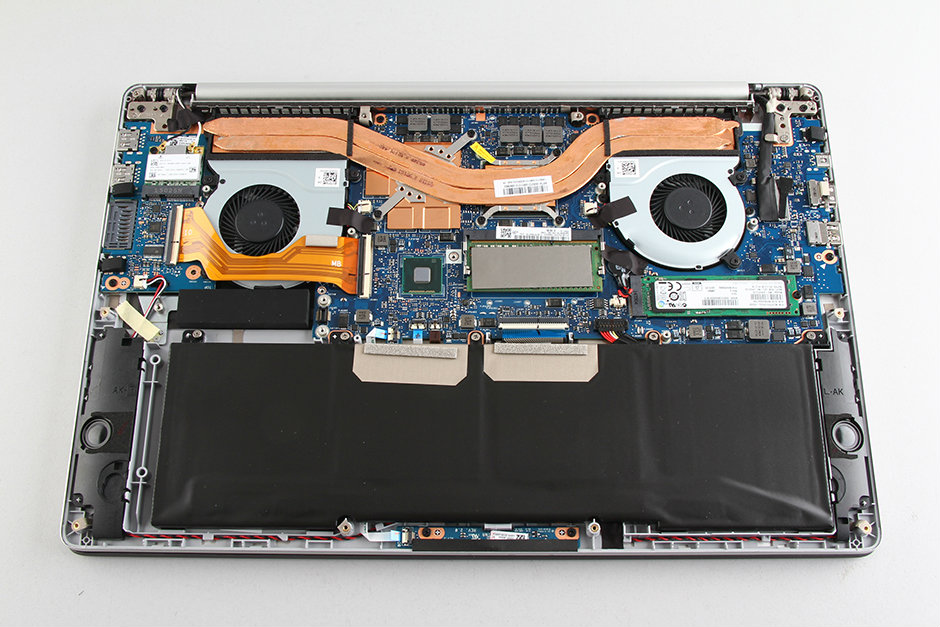
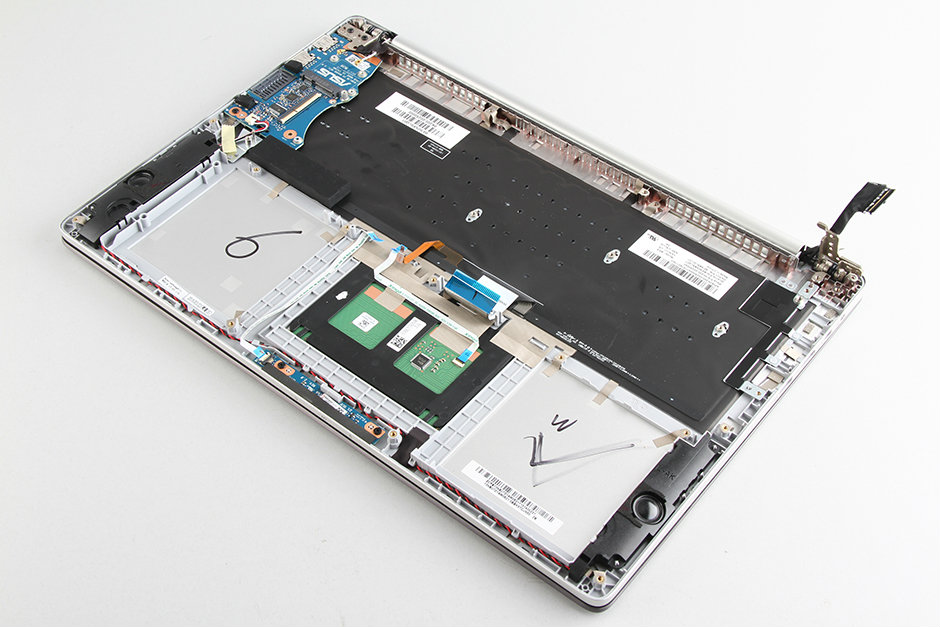
When the bottom case is removed, you can access the internal components, including the battery, SSD, RAM, speakers, wireless card, heat sink, and cooling fan.
To protect the hardware, we should remove the battery first.
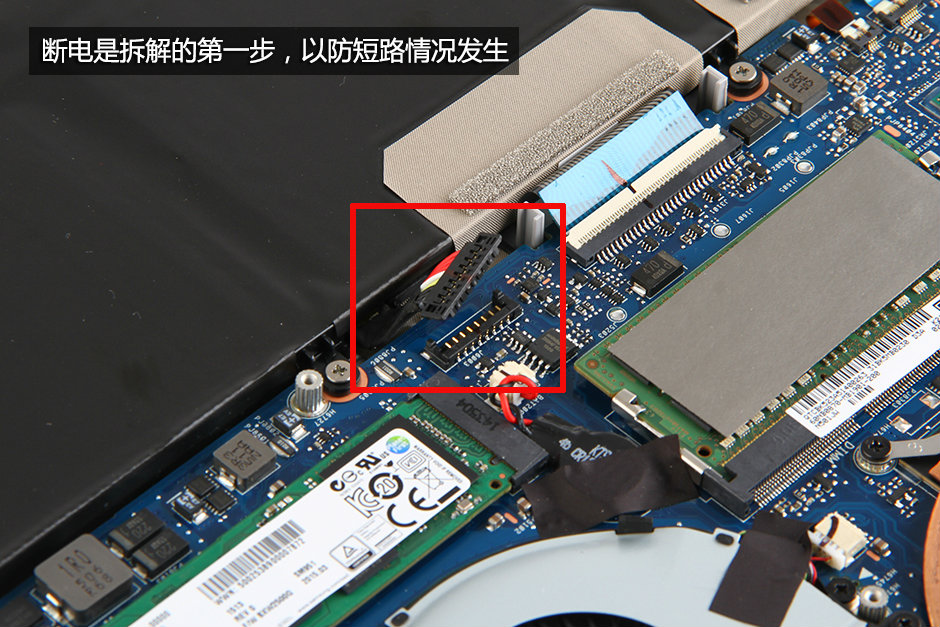
Disconnect the battery power cable from the motherboard and remove all screws securing the battery.
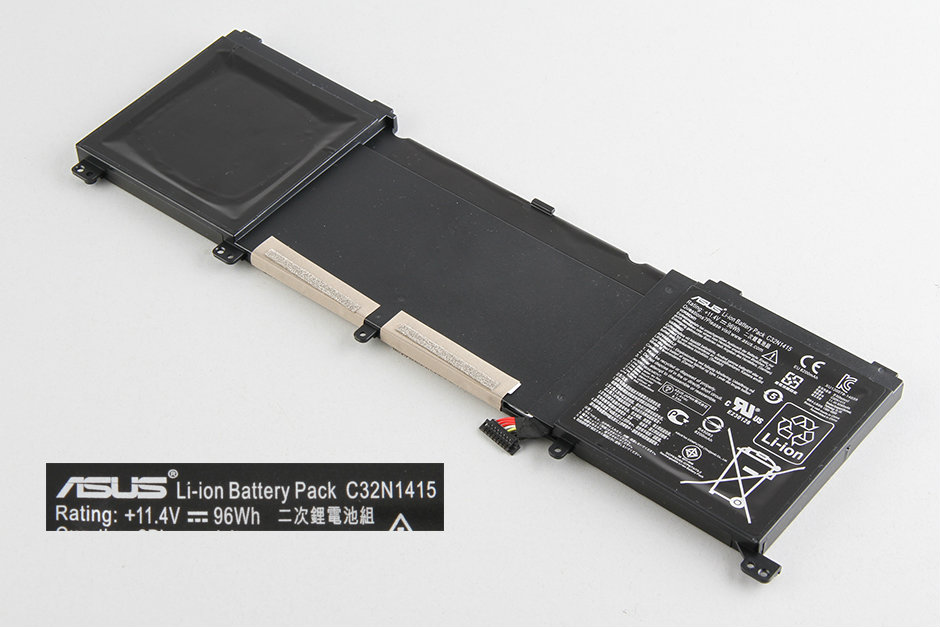
The Asus ZenBook Pro UX501 comes with a 96Wh Li-ion battery, and the Asus model is C32N1415.
In the next step, we will remove the SSD, RAM, and wireless card.
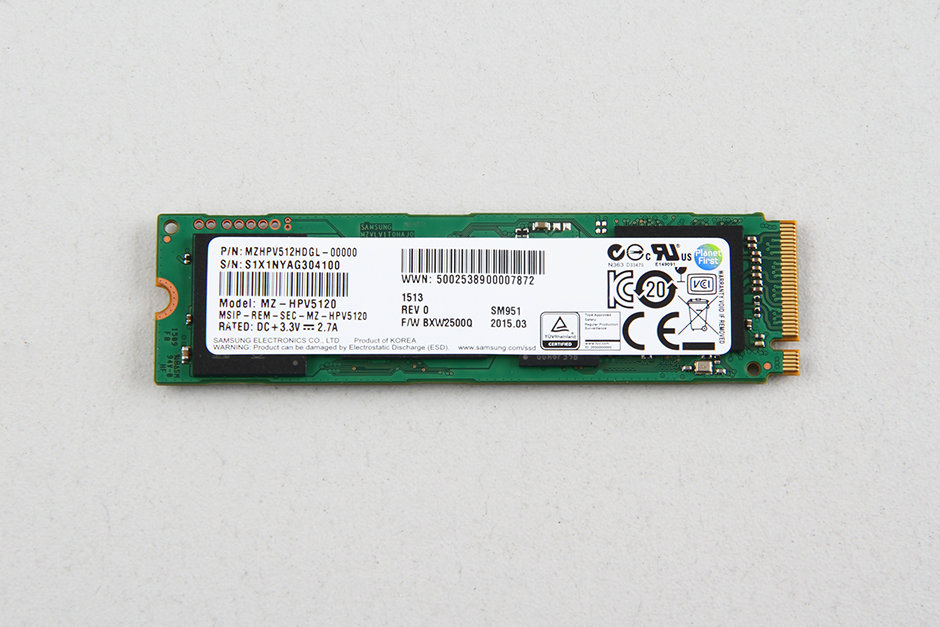
Remove the screw securing the SSD and take it out of the M.2 slot.

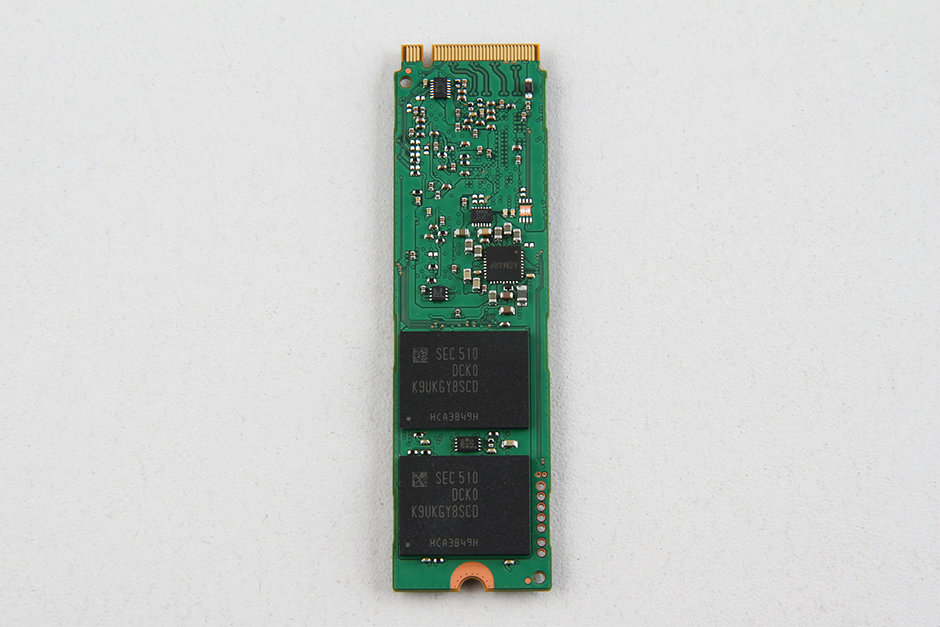
The Asus ZenBook Pro UX501 features a Samsung SM951 512GB M.2 SSD. Since it only has one M.2 slot, you will need to replace your existing SSD.
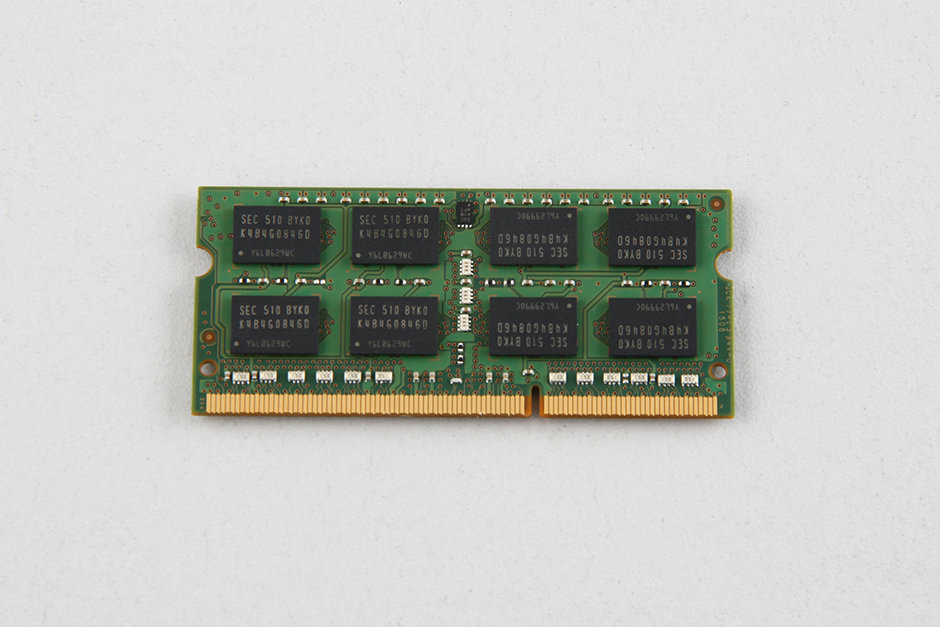
Use your nails to separate the clips on both sides, and the memory module will pop out automatically.
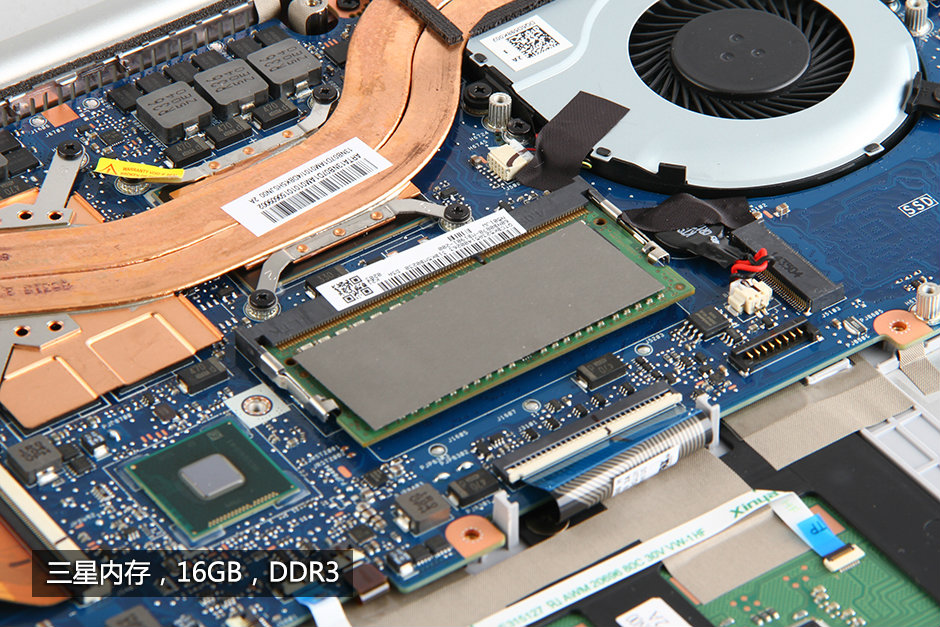
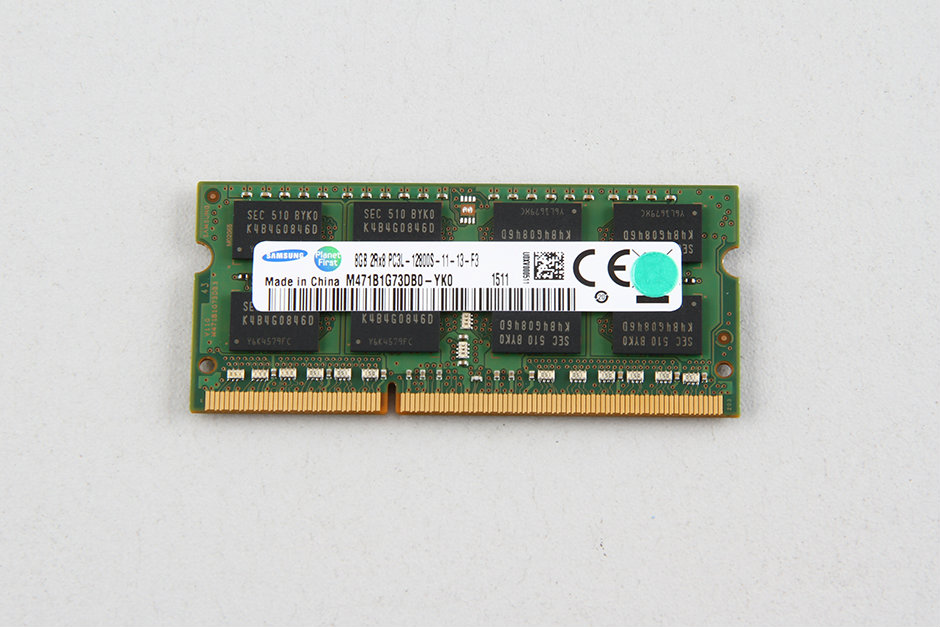
The Asus ZenBook Pro UX501 comes with a Samsung 8GB PC3L 12800S RAM module. This laptop has only one memory slot. If you need to upgrade the memory, you will need to replace the existing memory module.
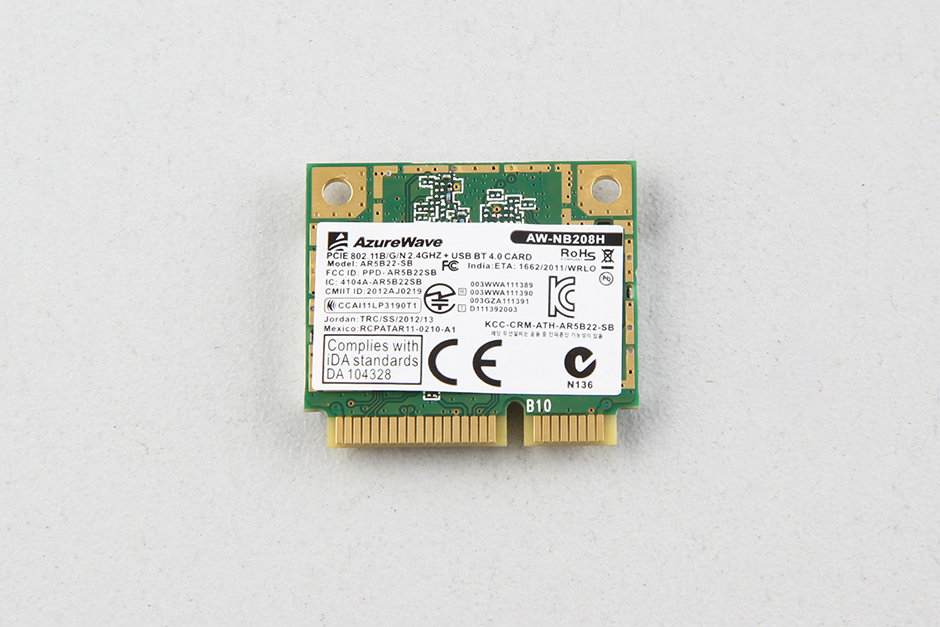
Remove the screw securing the wireless card and disconnect the two wireless antenna cables.

The laptop features an Azurewave AR5B22-SB wireless card.
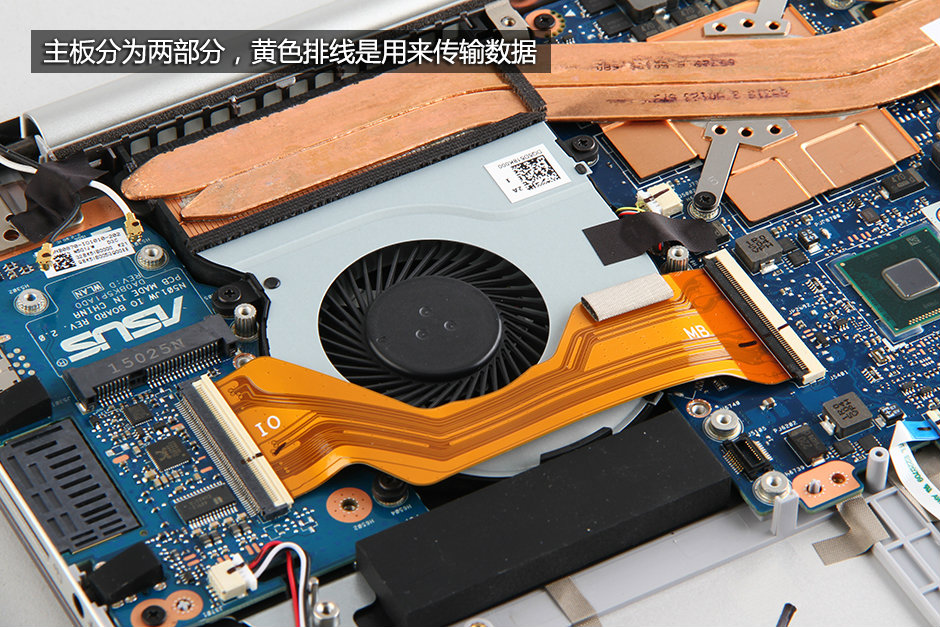
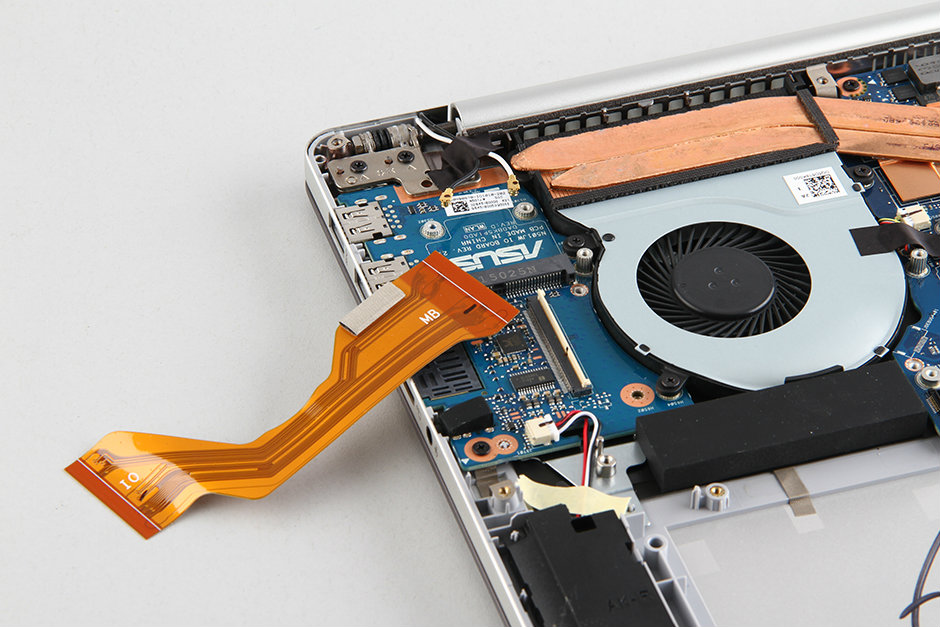
In the next step, we will remove the motherboard and cooling system.

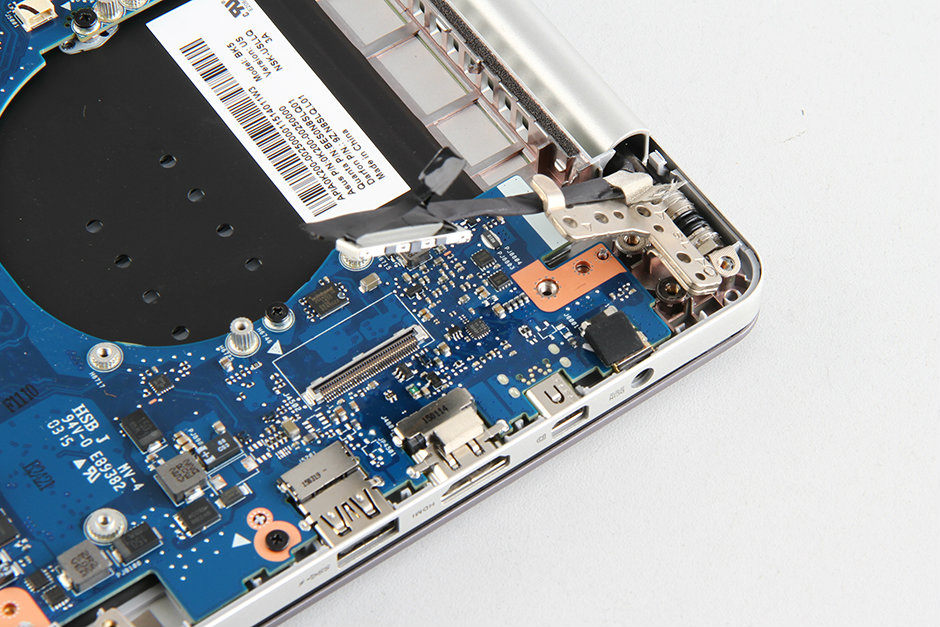
Remove the yellow cable. The cable is used to connect the motherboard and the USB board.
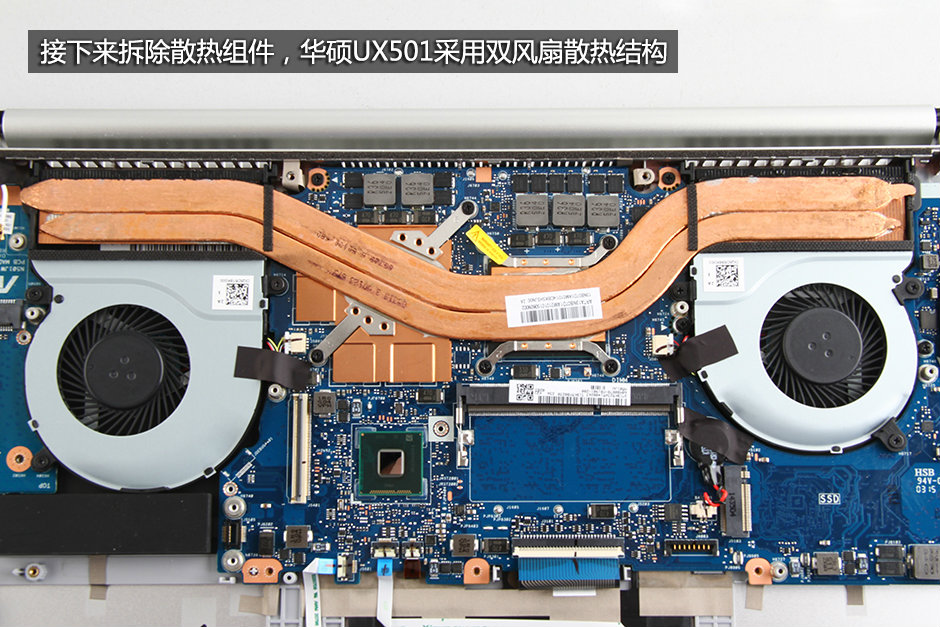
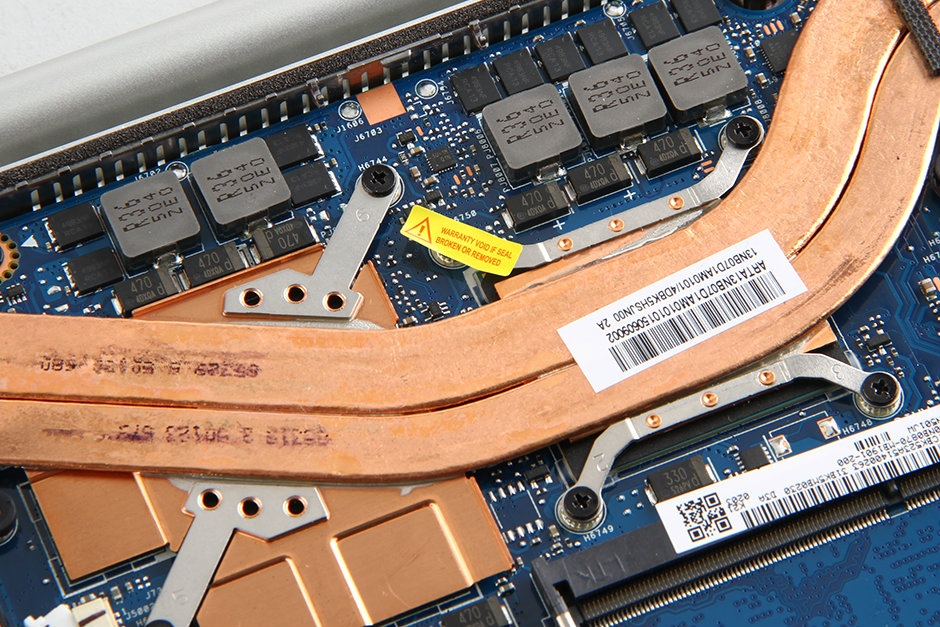
Remove all screws securing the heat sink and cooling fan.
Disconnect the two cables from the motherboard.
The yellow label is the Asus warranty label. If you damage it, you may void the warranty.
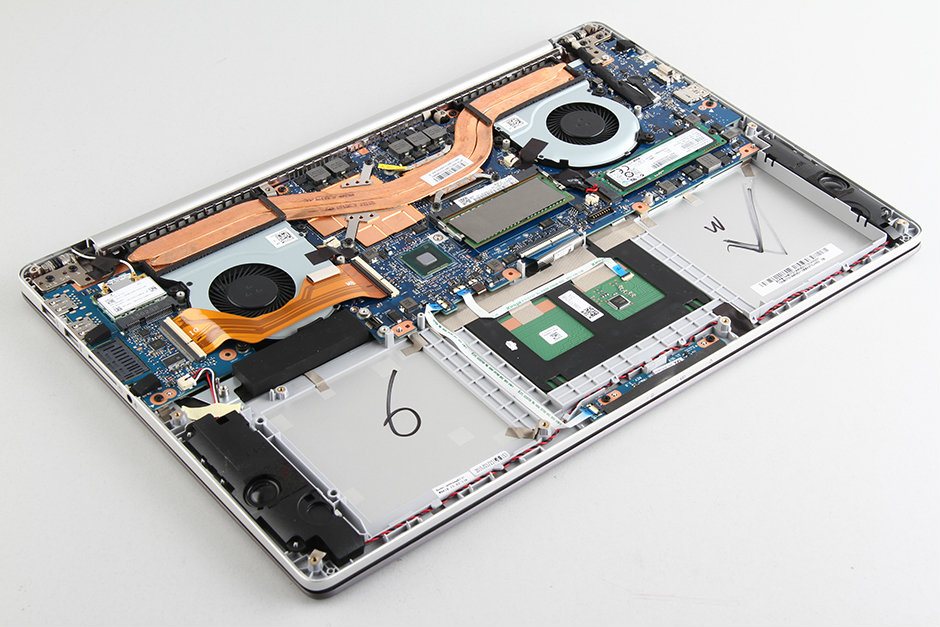
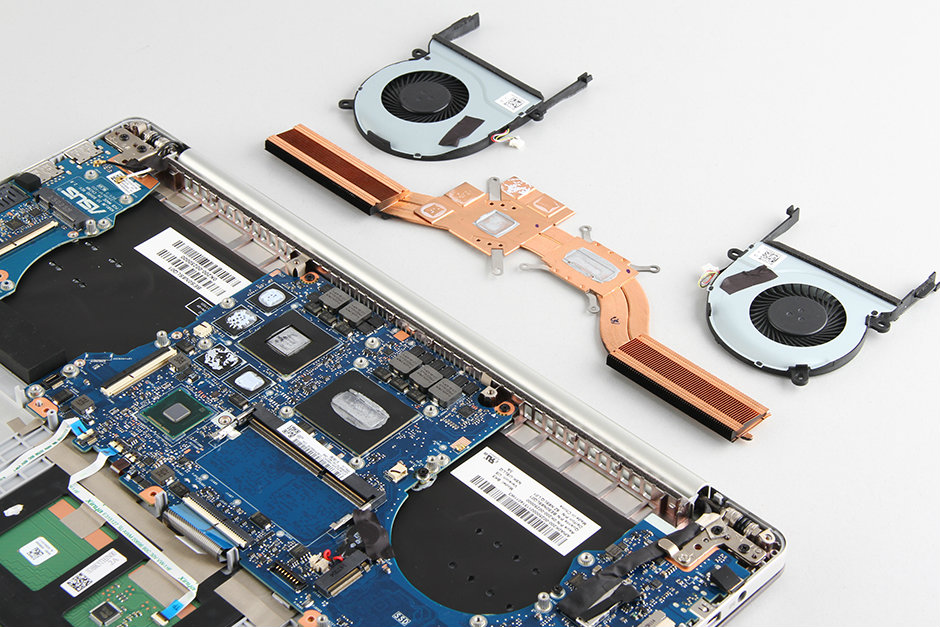
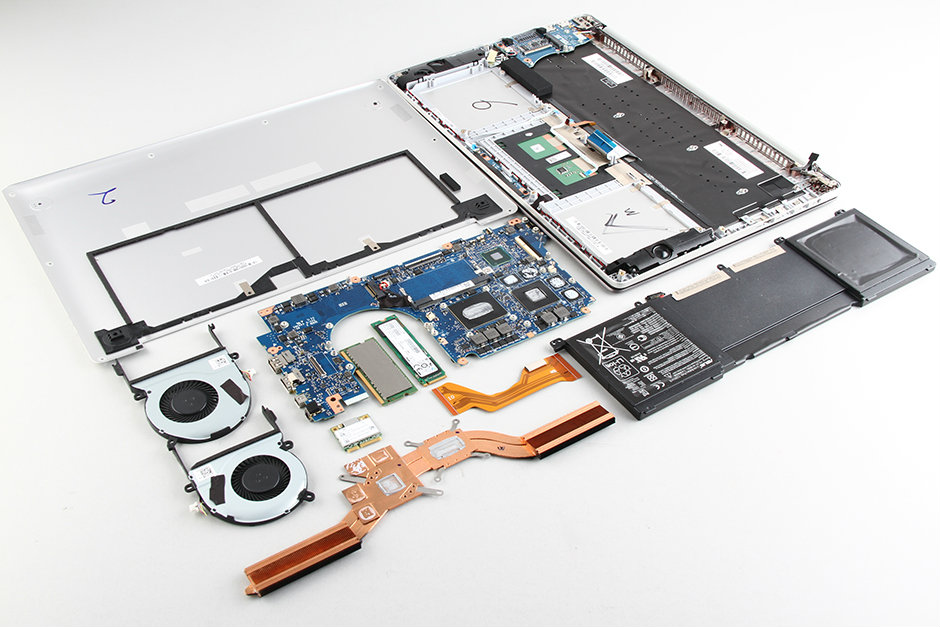
The cooling system of the Asus ZenBook Pro UX501 consists of two heat pipes and two fans.
Remove all cables connecting the motherboard, including the LCD cable, touchpad cable, keyboard cable, and speaker cable.
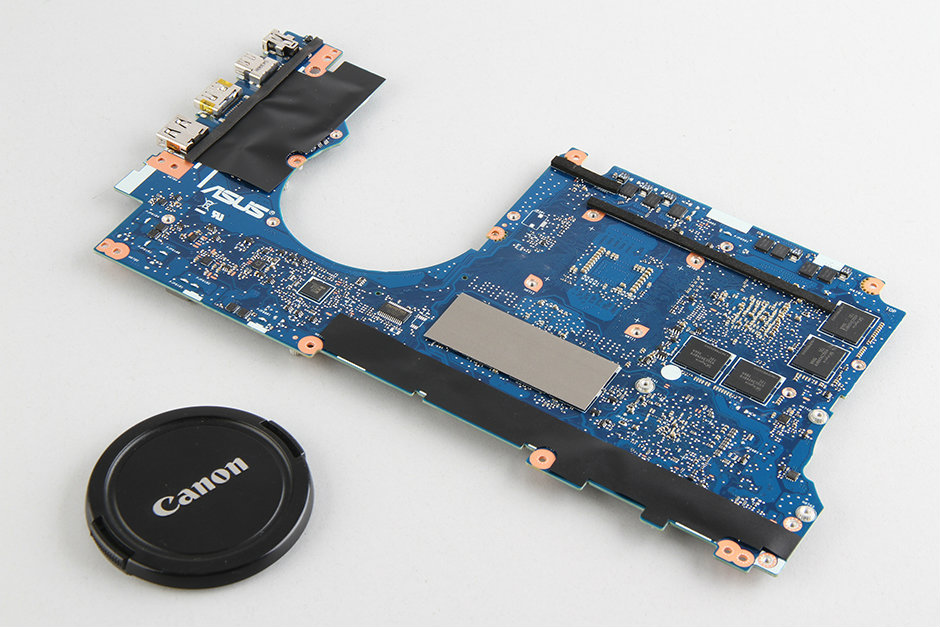
Remove all screws securing the motherboard.
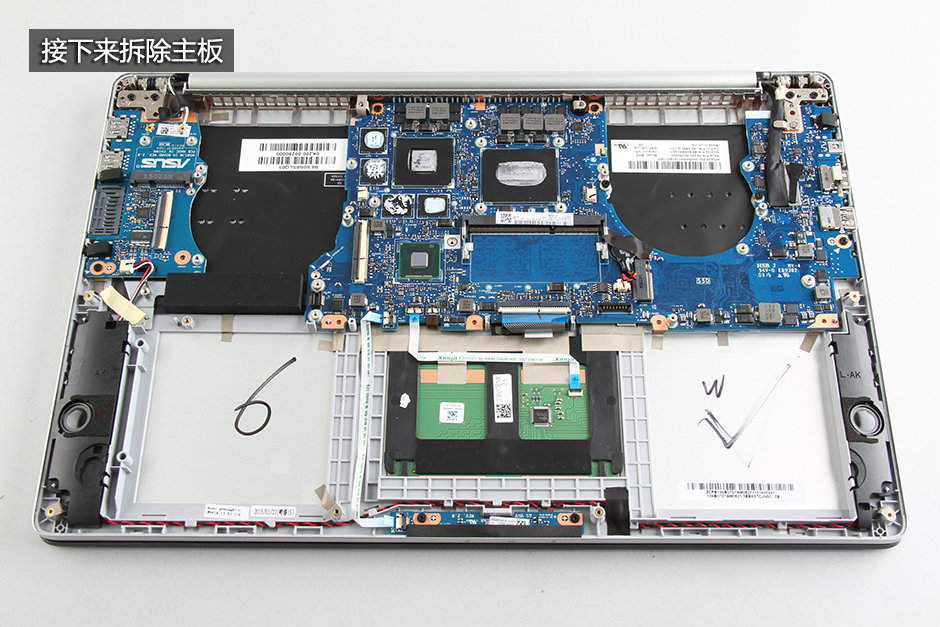
Remove all screws securing the LCD hinges (left and right LCD hinges). Then lift the motherboard from one side with your hand and wiggle it until it separates from the laptop.
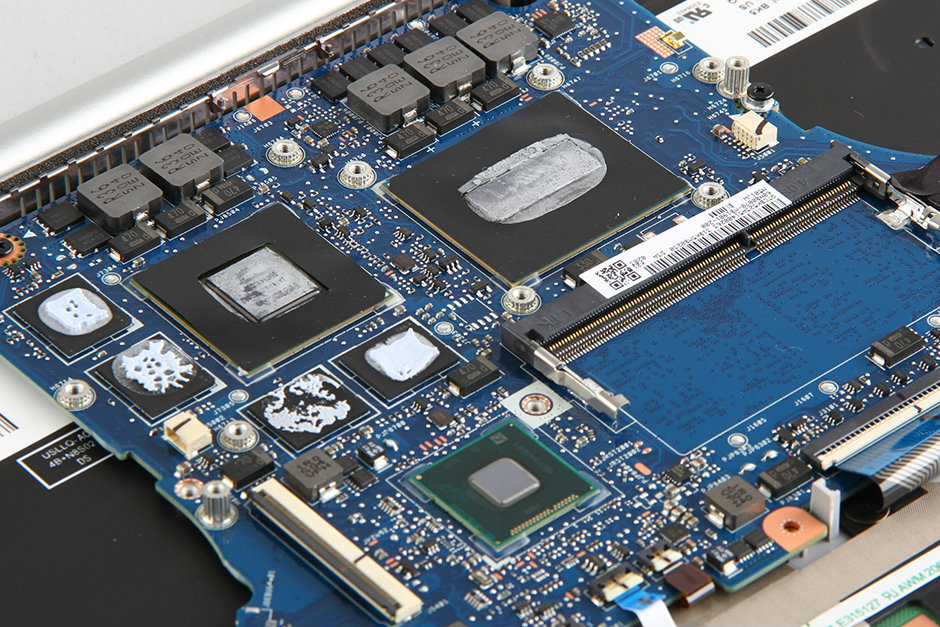
The NVIDIA GeForce GTX 960M graphics card and Intel Core i7-4720HQ processor of the Asus UX501 are both soldered onto the motherboard, so they are not upgradeable.

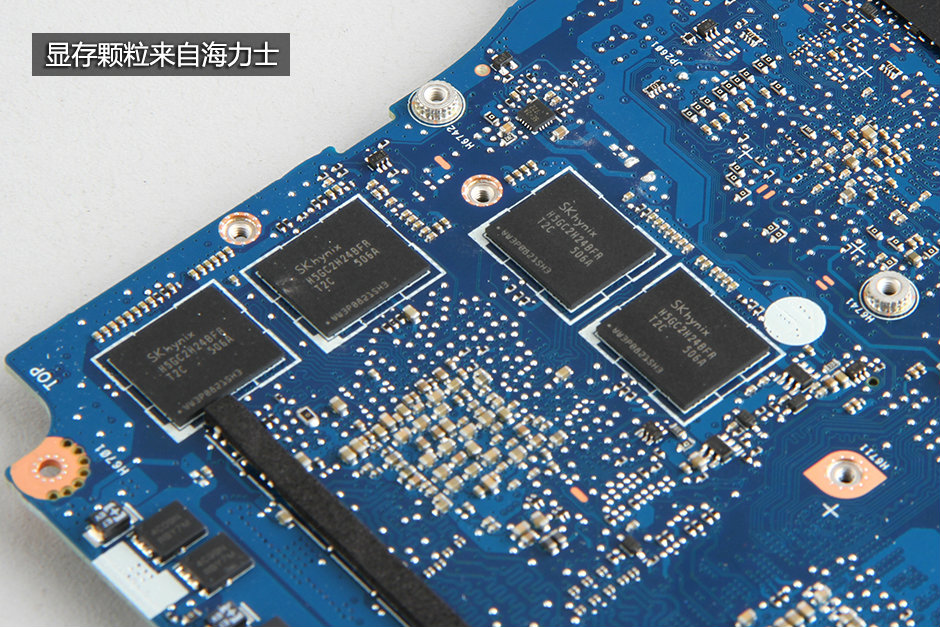
SK Hynix graphics memory
Ports

When the motherboard is removed, you can access the touchpad and keyboard. At this step, you can replace the keyboard and touchpad.
USB board

Asus UX501 internal parts

I found a really good sale on this laptop (30% off an already discounted price). I didn’t open mine up (it needs a Torx 5 screwdriver), but from all the pics, there’s only one RAM module slot and one M.2 SSD drive slot.
The USB 3.0 ports will be handy for an external drive. USB 3.0 tops out at 5 Gbps, compared to SATA III at 6 Gbps. An SSD external drive connected via USB 3.0 can read/write at speeds of 200-300 MB/s, according to this 2014 video. https://www.youtube.com/watch?v=ntJaYCTDaBQ
Really, the only letdown so far is the 1MP webcam. Not even full HD!
The display is very glossy. It’s bright enough to be used outside, but the reflections will make it very difficult to see. Probably not the best choice for outdoor use.
By default, the display brightness is lower for battery power. However, when I set the brightness to maximum for both battery and wall power, I couldn’t notice any difference when switching between them.
In my opinion, the screen looks very nice. The colors are very sharp, and I like that it’s a touchscreen. I know that some people don’t like glossy screens like this.
I would rather have a decent internal 2TB SSD than lugging along an external one. My version only has a 256GB SSD, so it is really small. I will upgrade to a larger SSD as soon as the price is attractive enough.
The question is, how do you transfer/clone the content of the existing SSD to a new one via the USB 3 with an adapter? That was the way I upgraded my 2.5″ HDD on my MSI notebook using Seagate software (only works on Seagate HD)
Hi, San,
I recently updated the Microm M600 256 GB M.2 to the Samsung EVO 850 SSD M.2, which was compatible with my version. To clone the content of my previous SSD, I needed a box for an SSD M.2 with USB 3.1. In your case, if it is a normal SSD, you can buy a USB 3 adapter for it. After that, I cloned the content using Samsung’s migration tool, and when this was finished, I only had to replace the old SSD M.2 with the new one.
After that, you can use the M.2 SSD as an external SSD or, in your case, it is a normal SSD.
I hope this will be useful for you.
Thanks. I think mine has an M.2 too. I will have to get an M.2 USB 3 adapter. Currently, a 500GB Samsung 850 EVO M.2 SSD costs $AUD225, and the 1TB 960 EVO costs $AUD629, so I may have to wait a bit more time.
You must confirm it supports 16GB RAM.
I bought this months ago for professional purposes, specifically for photo archiving optimization and editing. I immediately noticed the significant issue of the yellow color shifting to green. There is no way to get a normal yellow color, even after changing the display, cable, and motherboard through Asus service.
Even worse, the service returned my Zenbook with 2 new defects: the memory card and keyboard backlit were no longer working.
What can I do to fix these two problems myself? I opened the case and noticed that the cables seemed to be properly connected to the related cards.
Thanks for the answers
Is the Wi-Fi card upgradable?
Hi, has someone already tried to get the 4K display working in the full HD version of the UX501? I think the system board is quite the same. The question is, will the cable connecting from the mainboard work with the 4K panel as well? Has someone tried it out? Thanks for your answers.
What size are the Philips screws under the rubber feet?
You only need a common flat-head screwdriver.
Can you replace a UX501J motherboard with a UX501VW motherboard?