
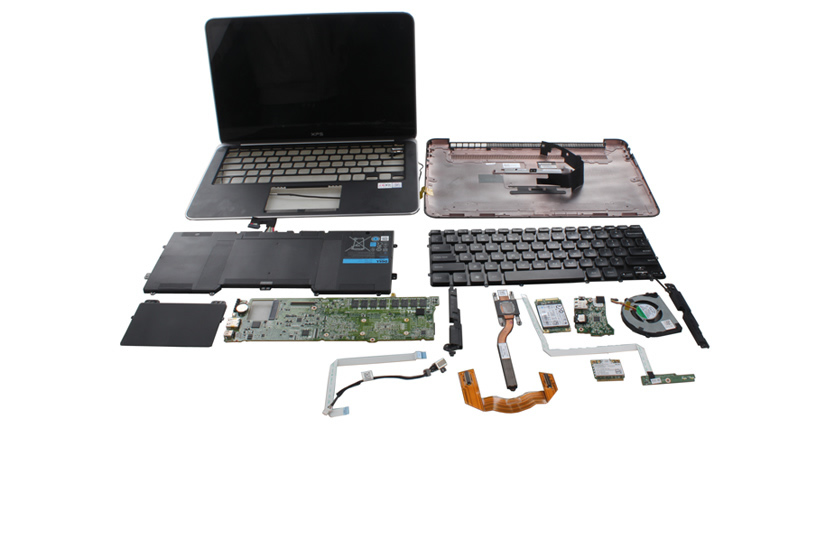
In this guide, I will explain how to disassemble the Dell XPS 13 L321x ultrabook. I will remove the battery, keyboard, SSD, wireless card, palm rest, speakers, heat sink, cooling fan, and motherboard. This guide can help you upgrade, repair, and clean your XPS 13 L321x.
Follow us on Facebook for the latest updates from MyFixGuide.com.
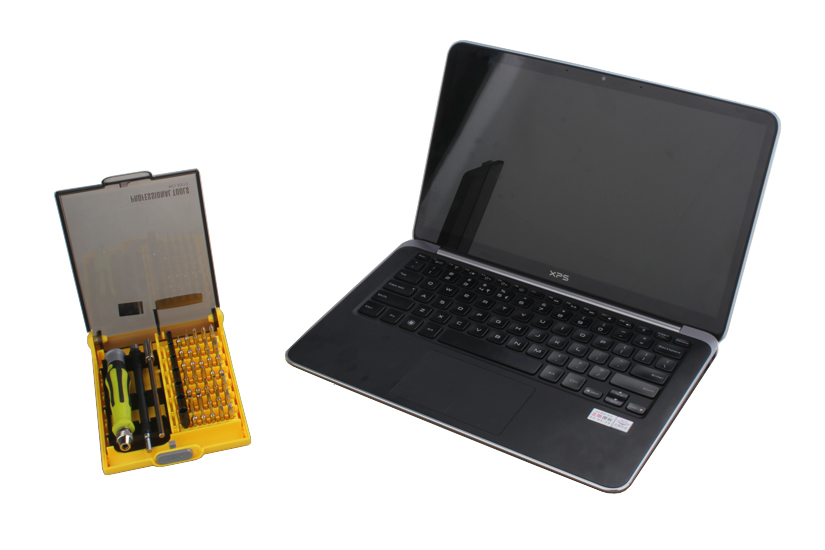
To disassemble this laptop, you will need some tools, including screwdrivers, pry bars, and crowbars. The screwdriver I used has multiple heads that can be changed depending on the type of screw.
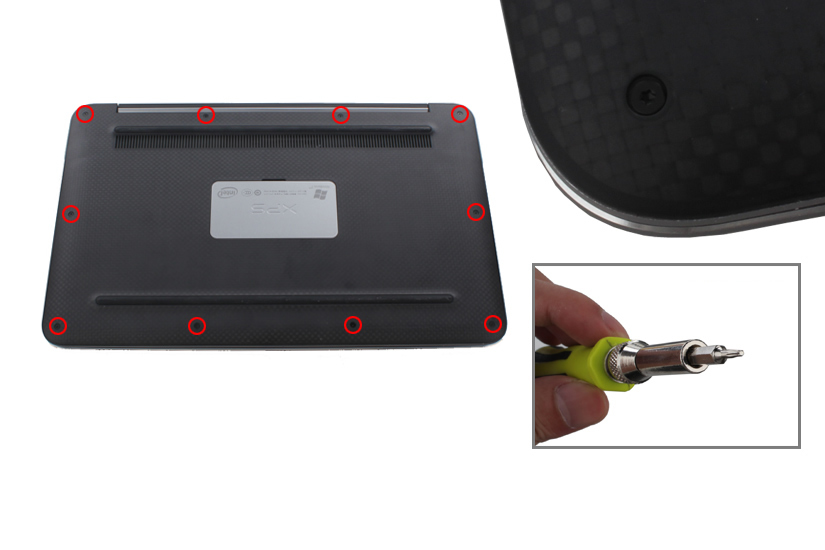
Remove ten screws from the bottom case.
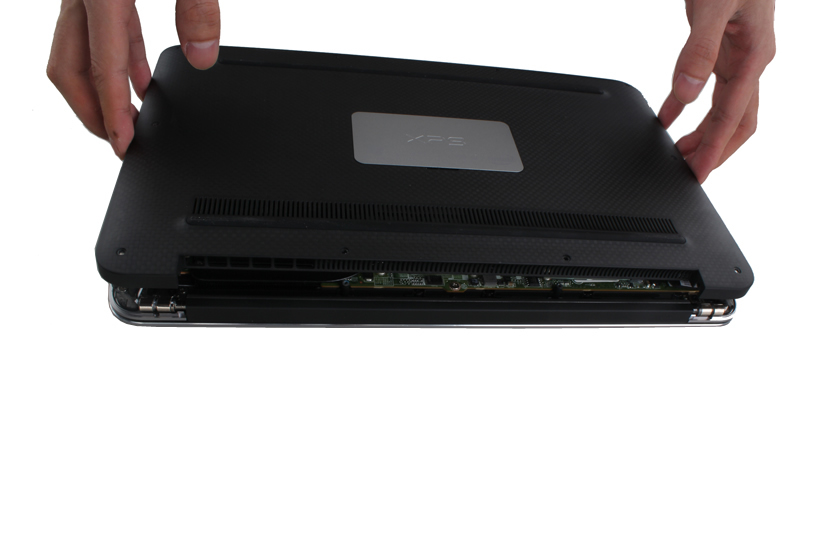
Use the pry tool to insert it directly into the bottom cover and palm rest, then slide the pry tool to detach the bottom cover from the palm rest.
Close-up of the bottom cover.
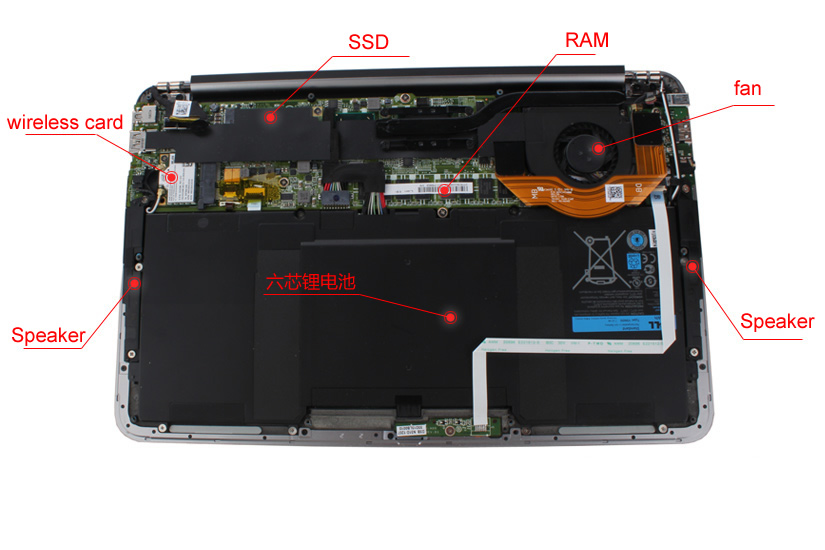
When the bottom case is removed, you can access the SSD, wireless card, RAM, heat sink, cooling fan, battery, speakers, and motherboard.
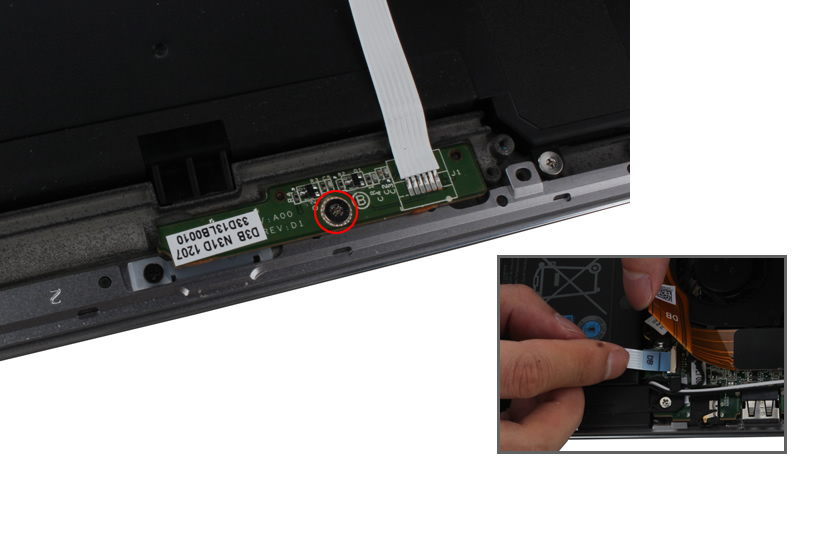
Disconnect the touchpad cable and remove the screw securing the touchpad.
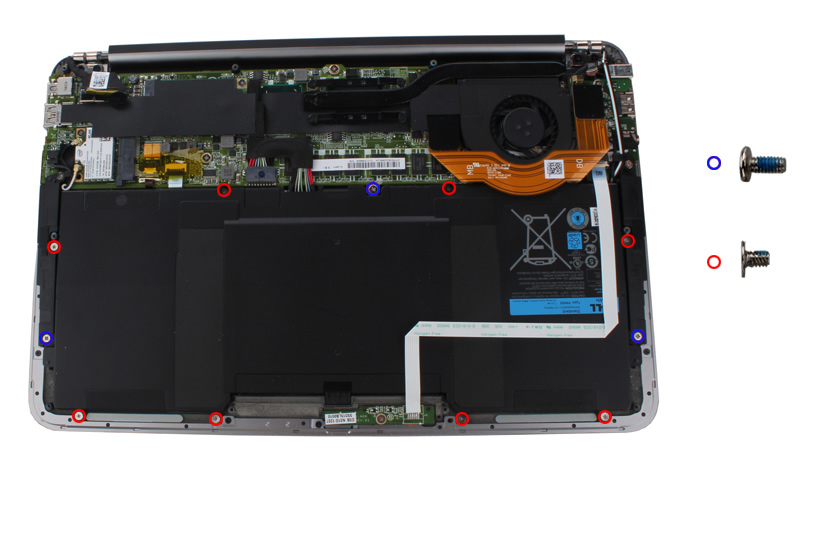
Remove the eight screws securing the battery.
Disconnect the battery connector. You can now remove the battery.
Note: Do not remove the screws securing the speaker and motherboard.
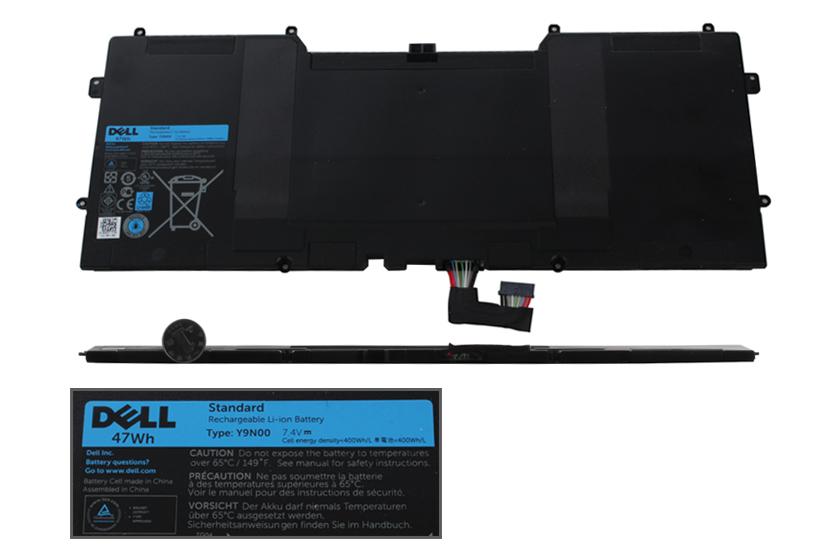
The Dell XPS 13 comes with a 7.4V 47Wh Li-ion battery.
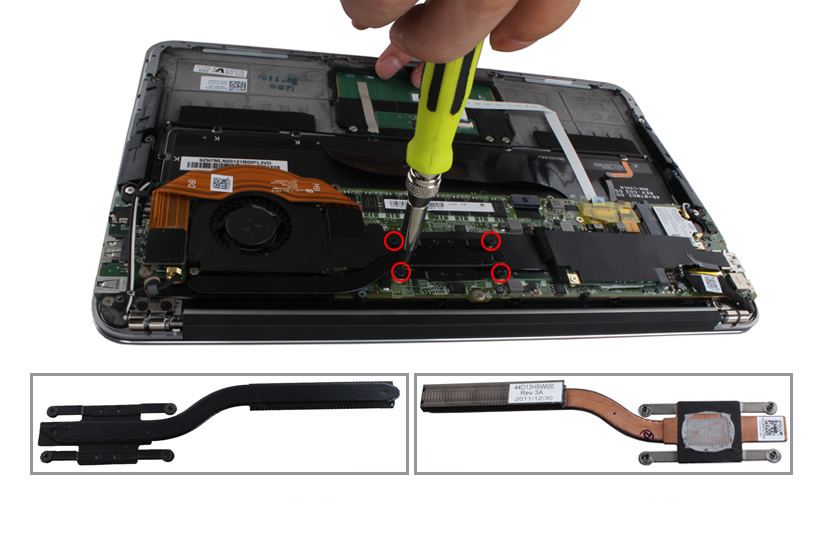
Remove the four screws securing the heat sink to remove it.
Remove the two screws securing the cooling fan.
Unplug the fan cable from the motherboard. You can now remove the cooling fan.
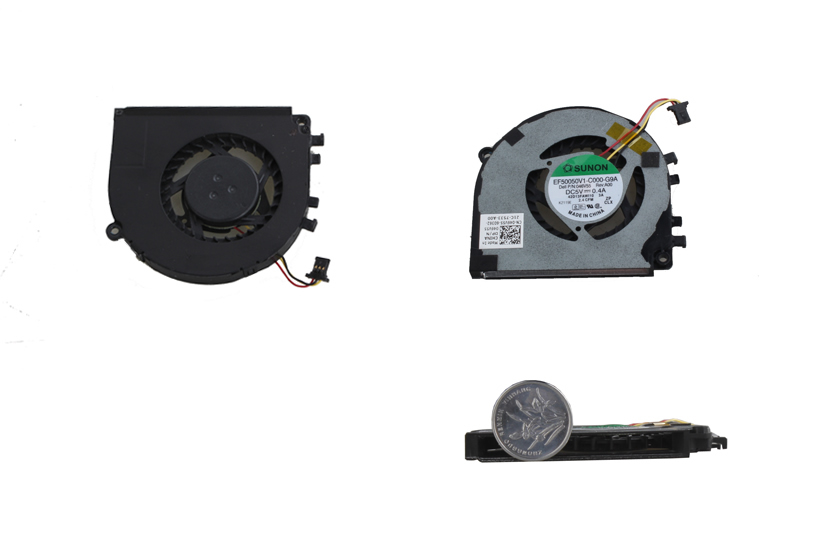
This is the fan for the Dell XPS 13 L321x, manufactured by Sunon.
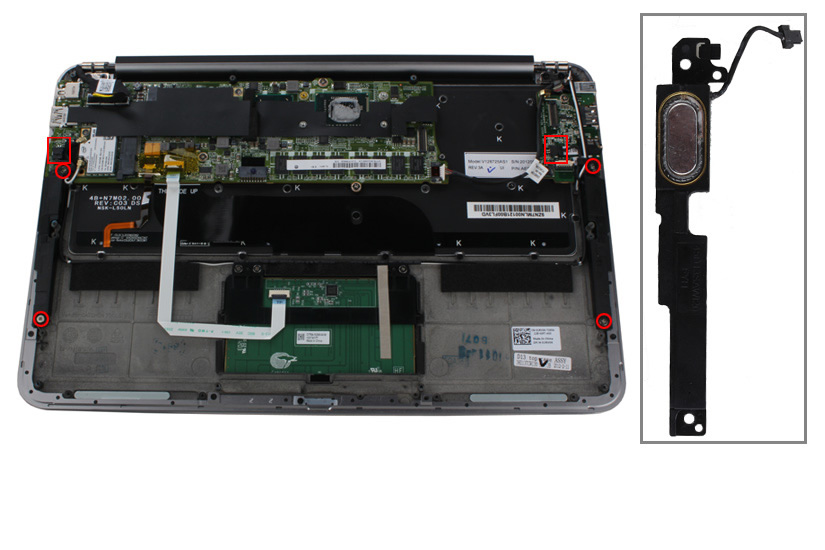
Remove the four screws securing the left and right speakers, disconnect the cables from the motherboard, and then remove the speakers.
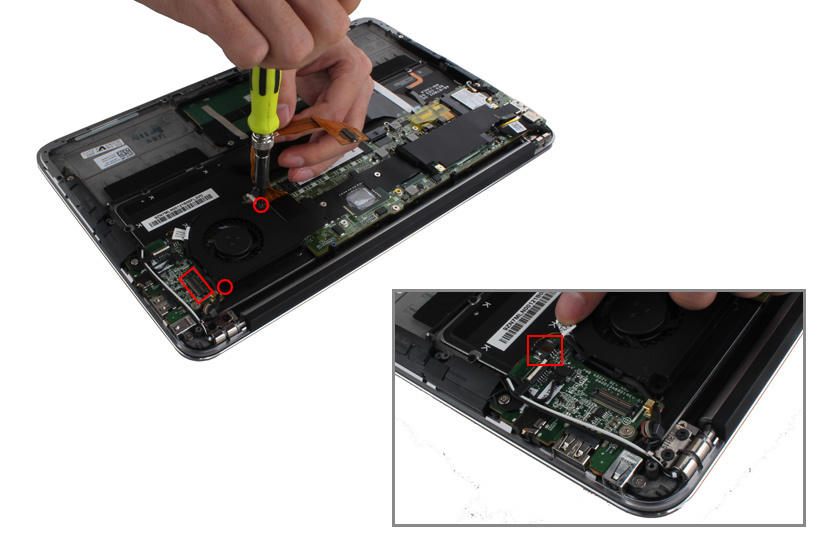
Remove the screw securing the motherboard, then lift the motherboard from one side with your hand, and it can be removed.
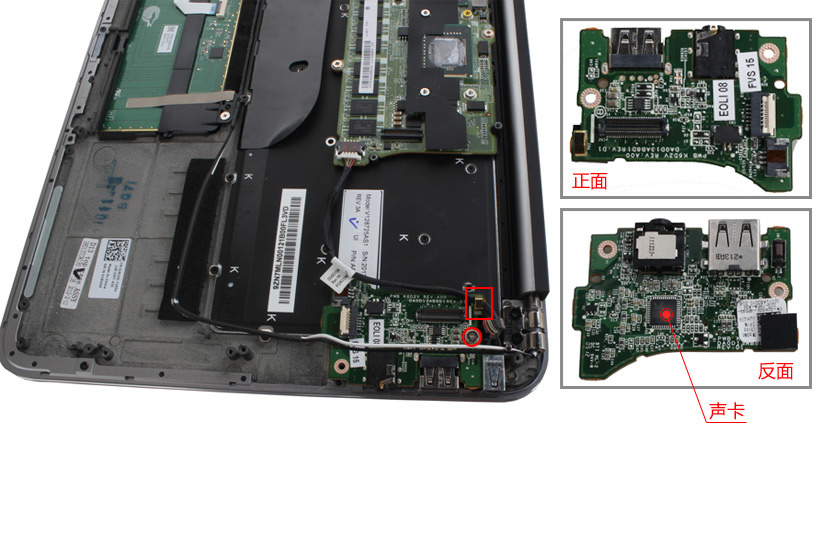
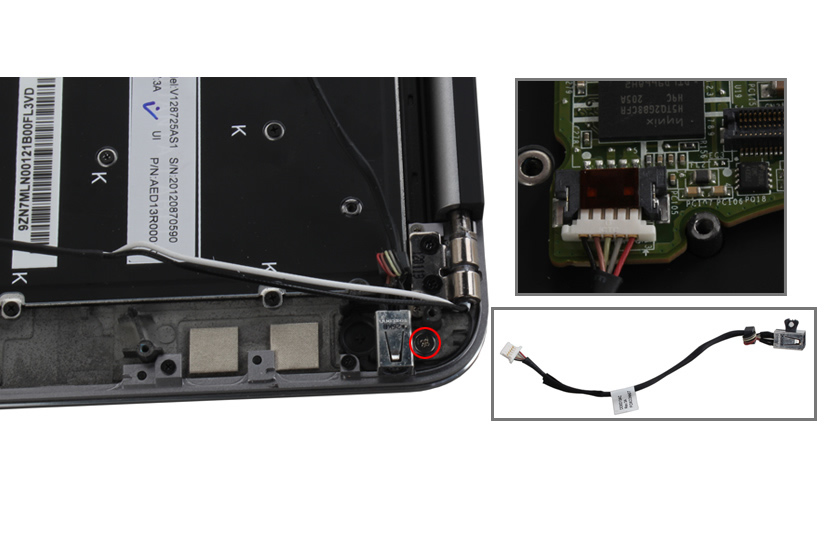
Remove the screw securing the DC power jack, and disconnect the cable connected to the motherboard.
Remove the screws securing the wireless network card, disconnect the cable, and then remove the wireless network card.

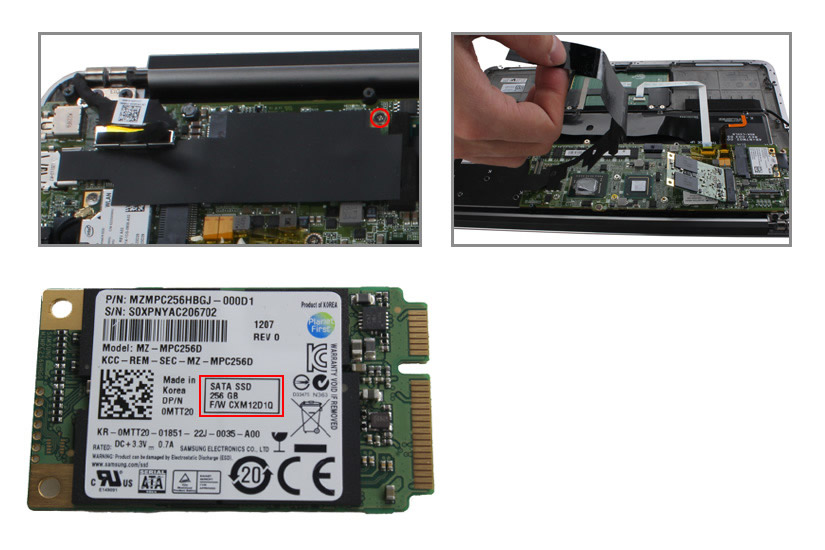
Remove the screw securing the SSD, lift it up with your hand, and remove the SSD.
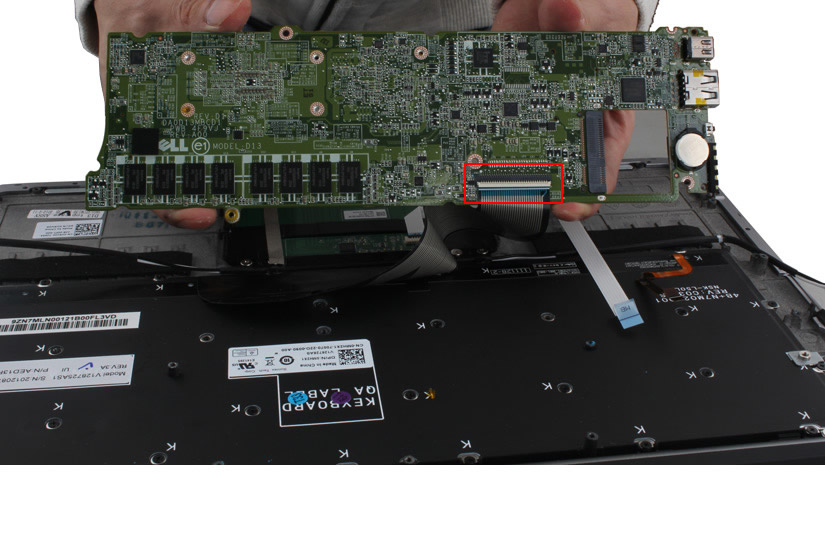
Unplug the video cable, touchpad cable, and keyboard cable. Remove the four screws to remove the motherboard.

To remove the motherboard, we also need to disconnect the keyboard ribbon cable on the back of the motherboard.
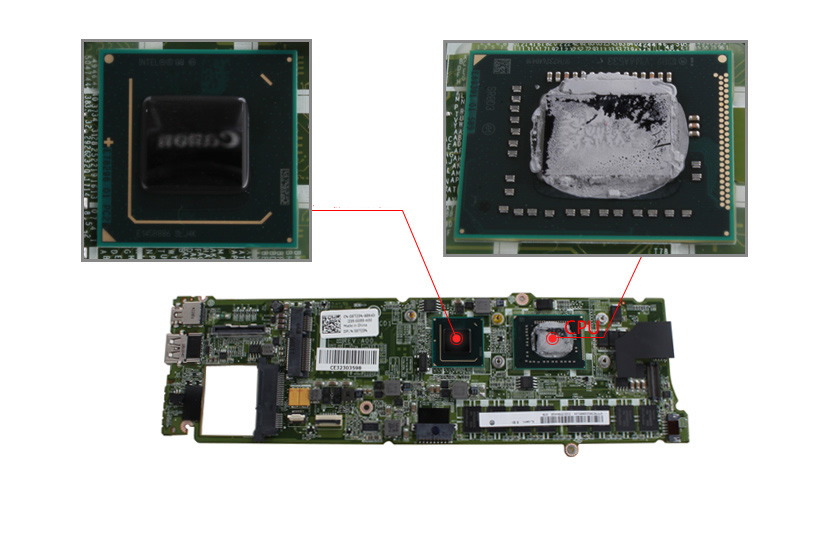
Close-up of the processor.
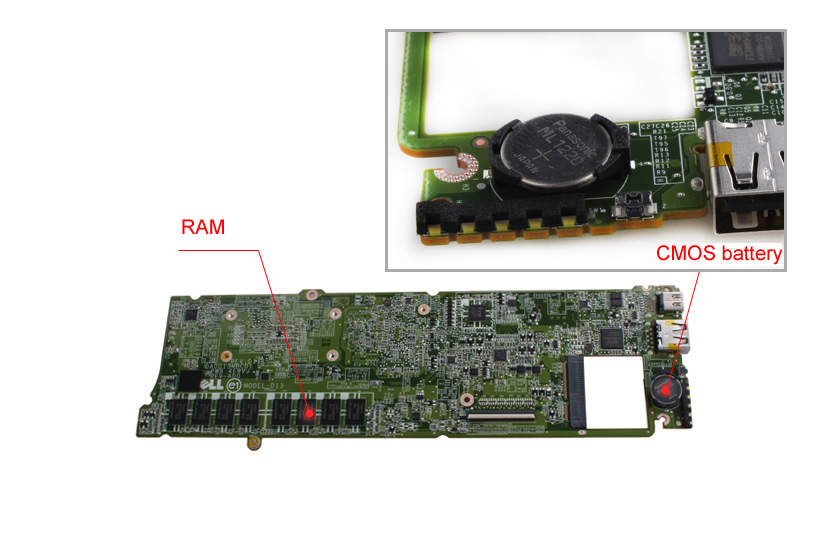
Close-up of memory and CMOS battery. The memory in this laptop is soldered to the motherboard, so it cannot be upgraded.
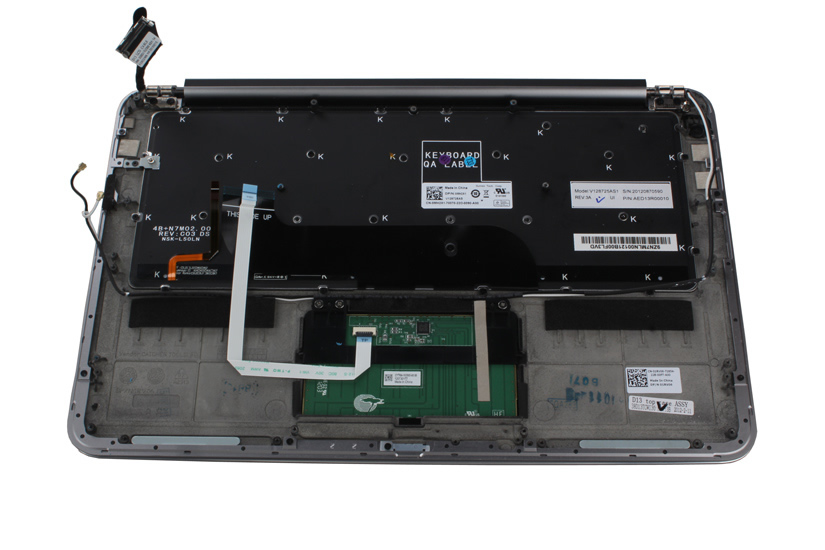
Remove all screws securing the keyboard and remove the keyboard.
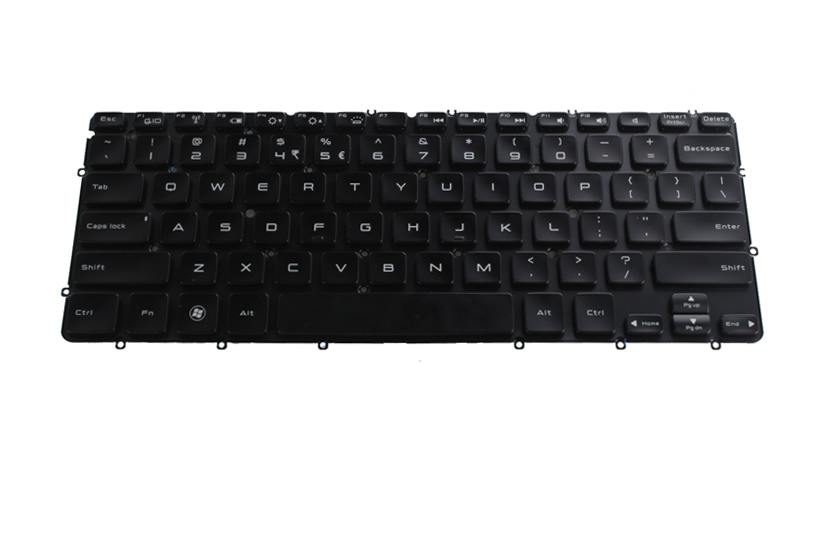
Close-up of the keyboard.
Close-up of all parts of the Dell XPS 13 L321x.
What size/kind of tool do you use to take off the D cover?