In this guide, I will show you how to remove the bottom cover of the Asus ZenBook 14 UX433FN. I will also remove the SSD, battery, heatsink, cooling fan, speaker, touchpad, keyboard, palm rest, motherboard, and screen.
Teardown is what we do! Follow us on Facebook for the latest repair news.
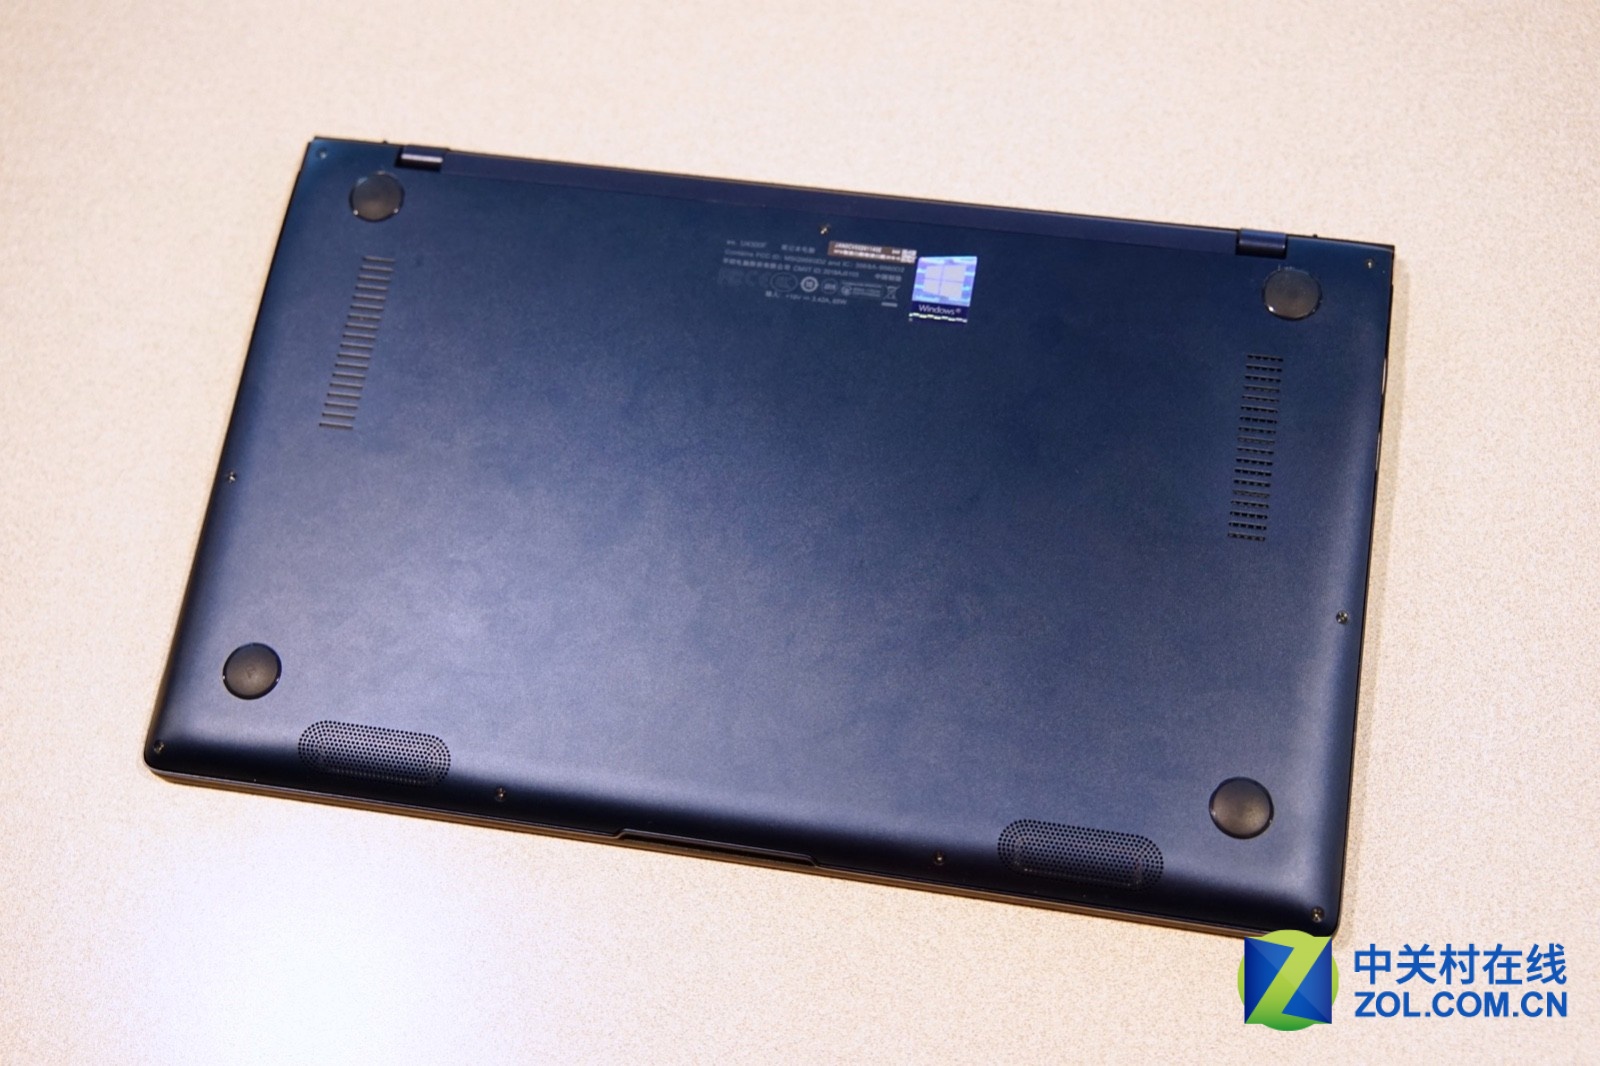
The air inlet at the bottom is not really large, and the main air inlet should be on the other side of the LCD hinges. We also noticed a small gap at the front of the body, which indicates that the Asus ZenBook 14 UX433FN is a thin and light laptop that can be opened and closed with one hand.
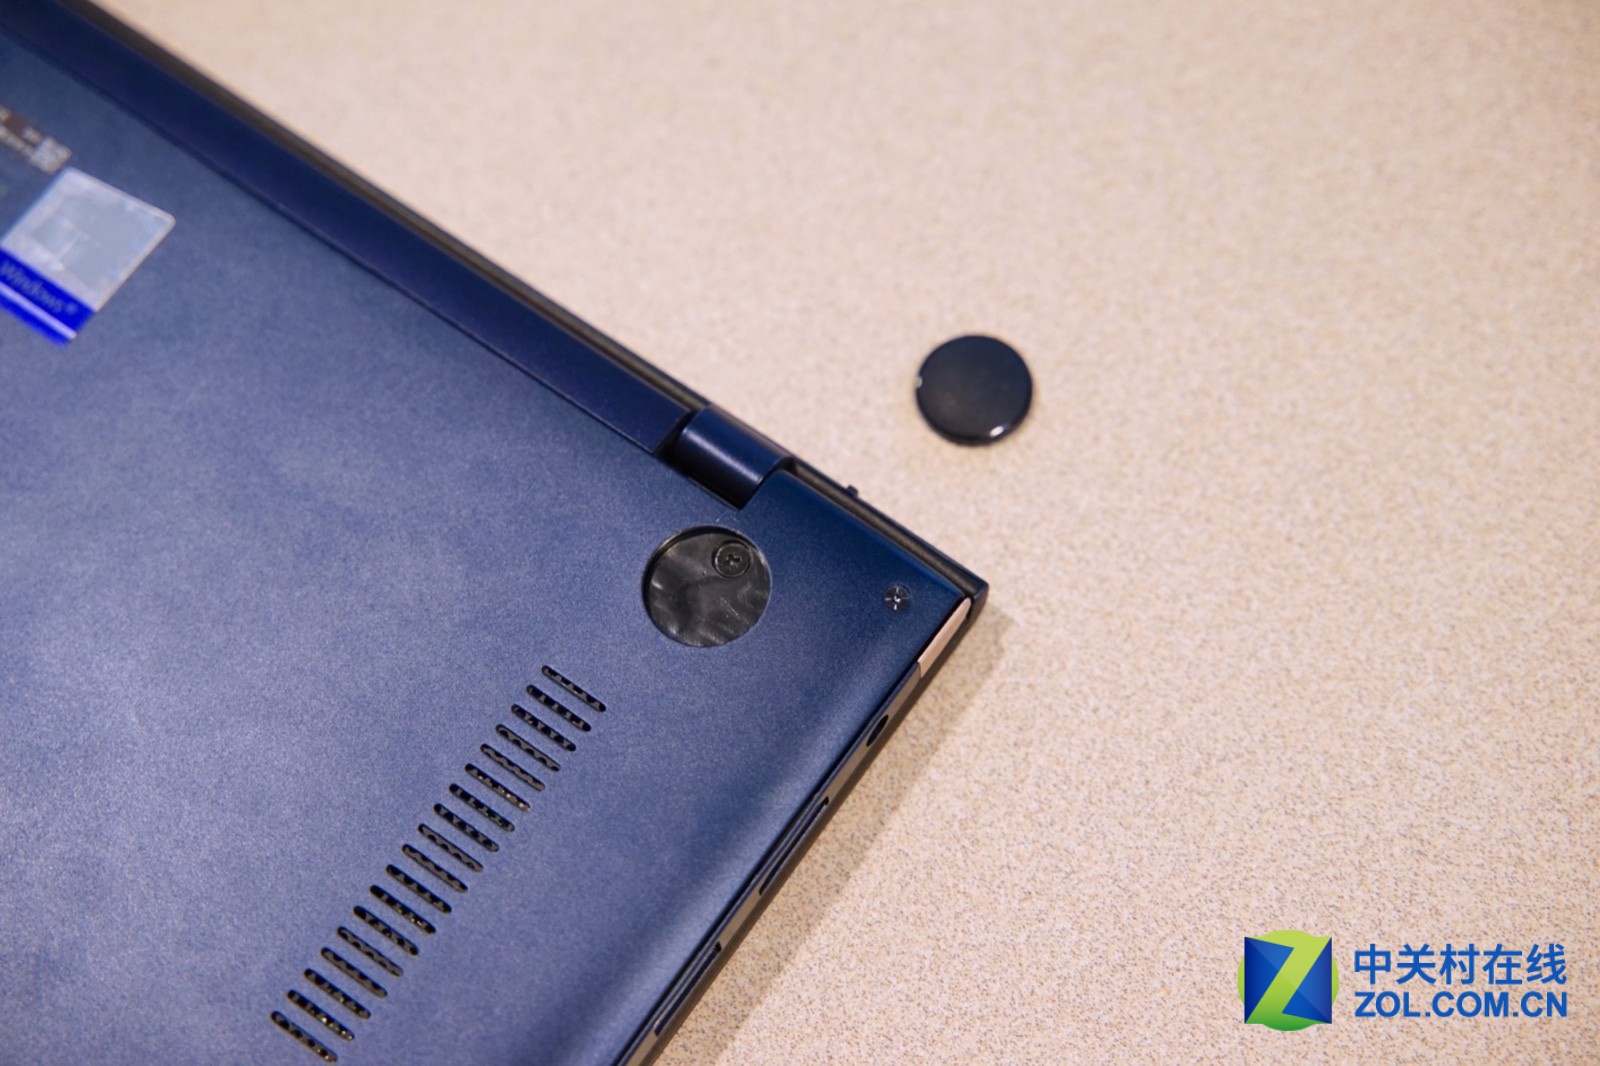
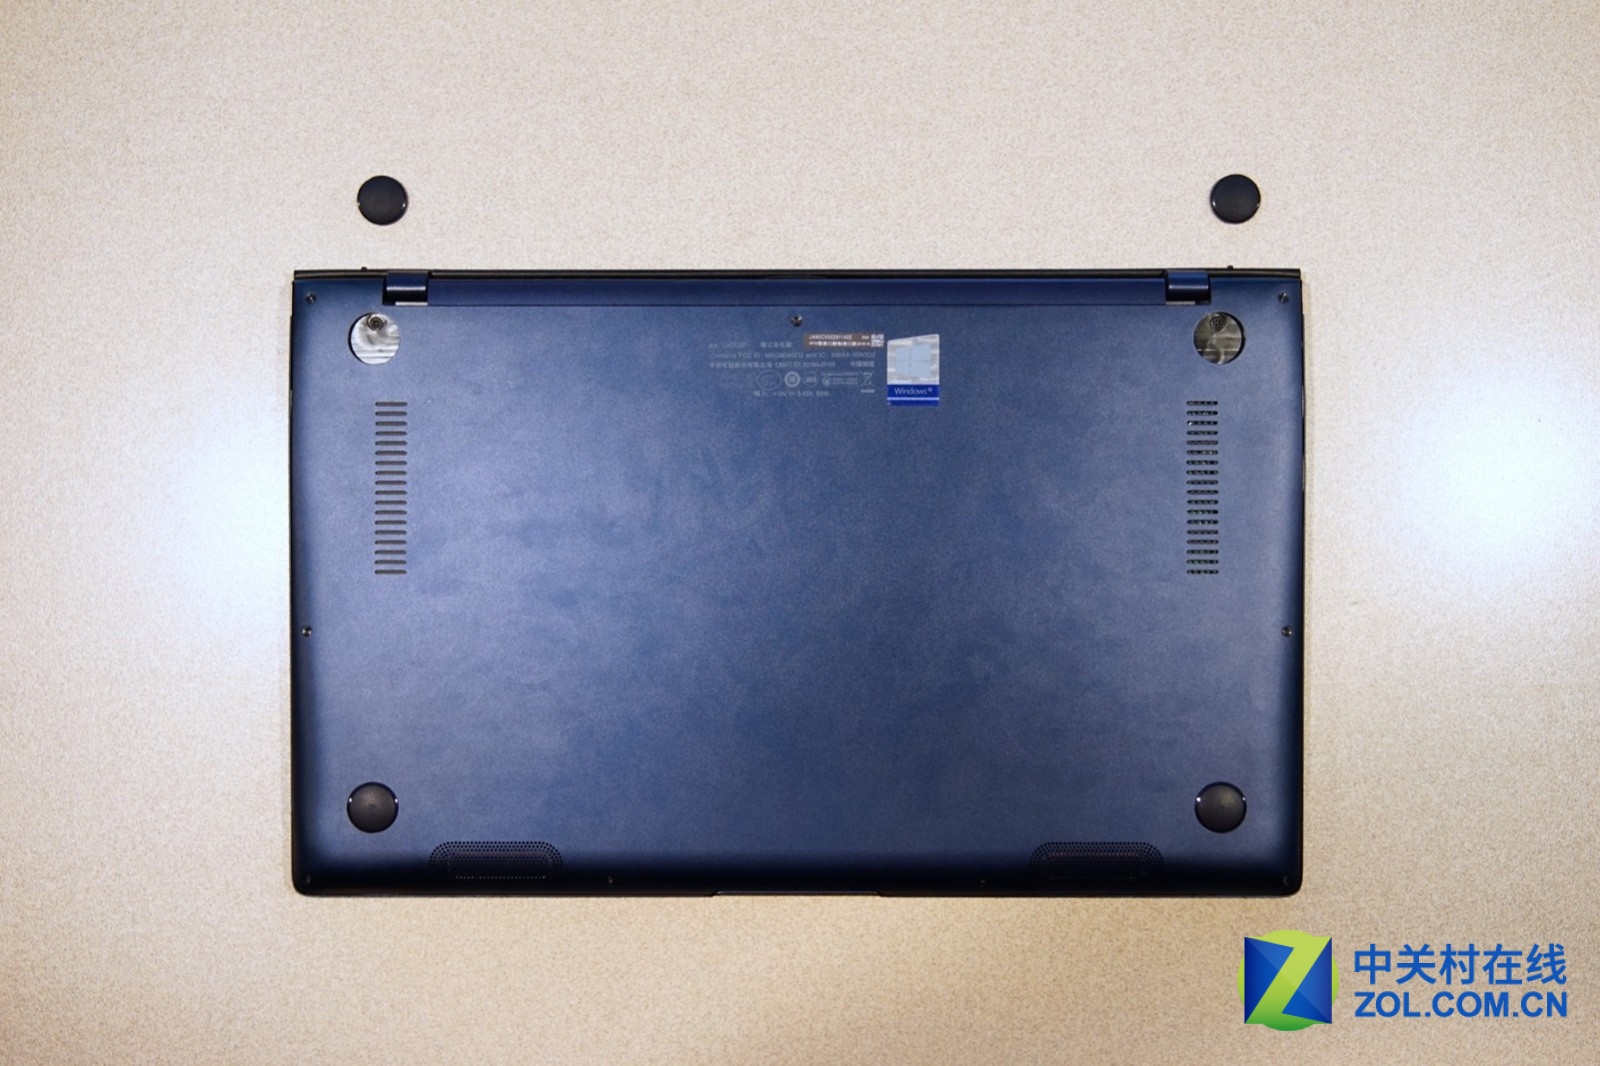
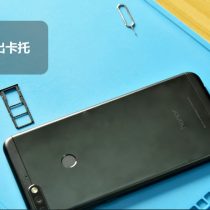
The bottom cover is secured by nine visible screws, but please note the screws under the foot pads
After removing the 11 screws, insert a thin plastic tool under the bottom cover and slide the tool to unlock the clips that secure the bottom cover to the palm rest.
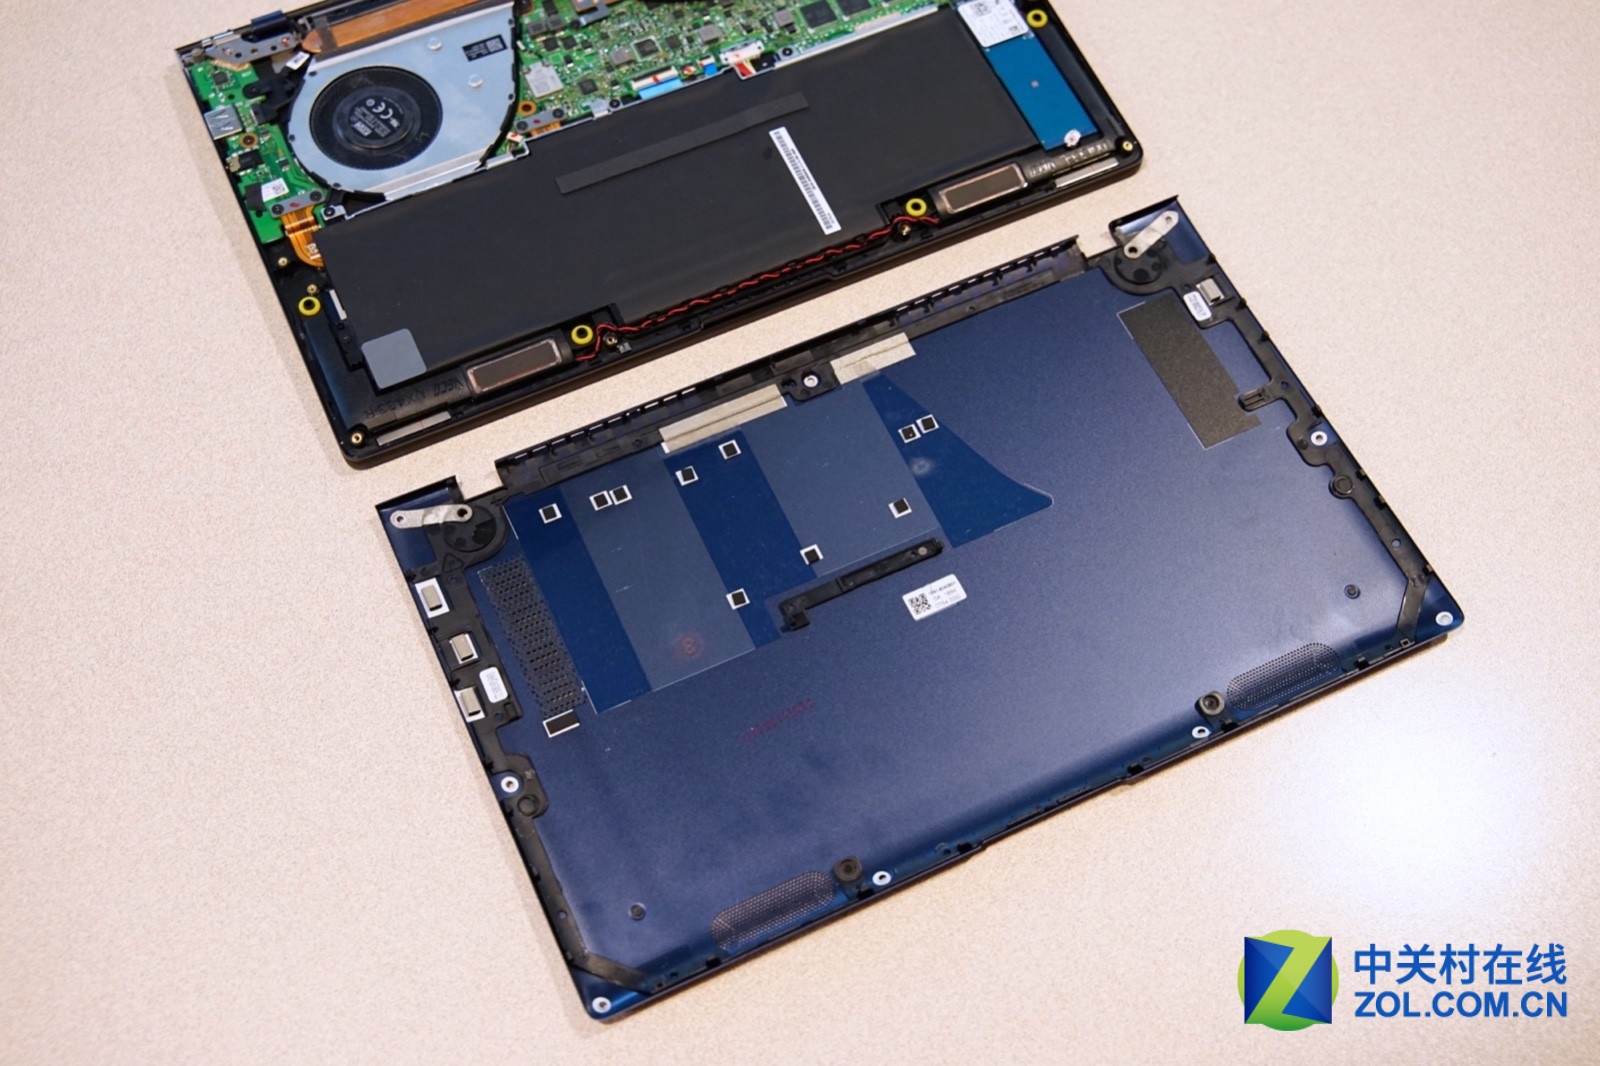
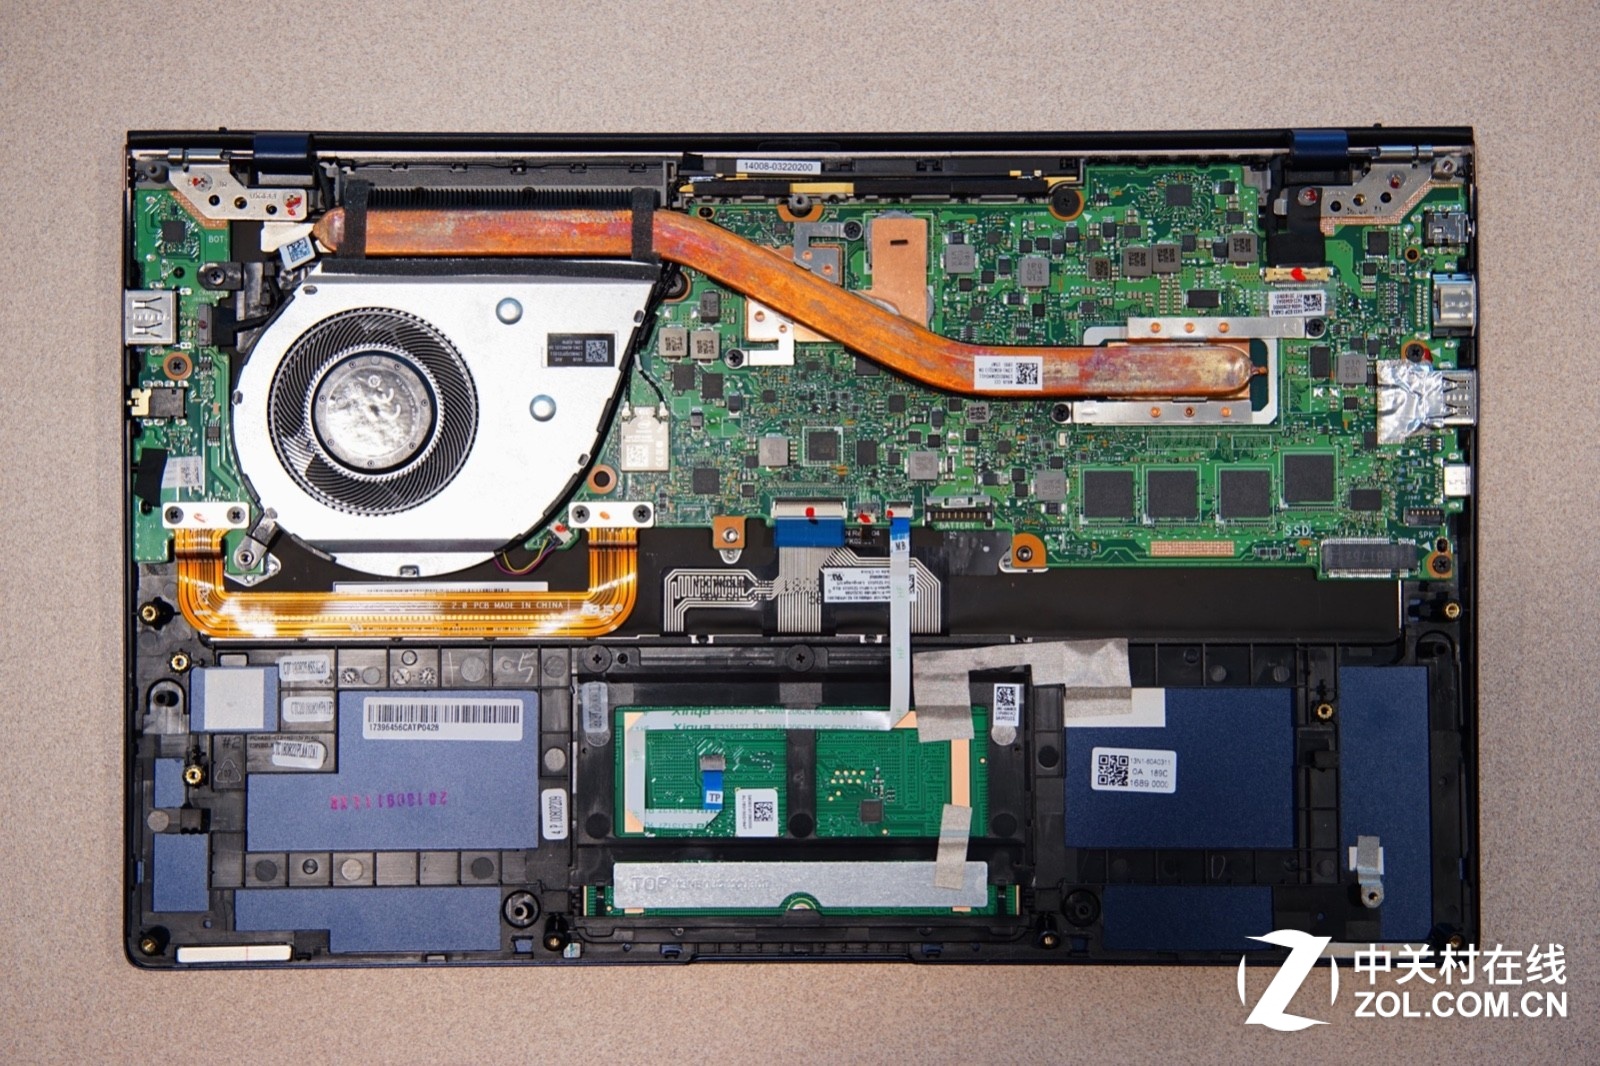
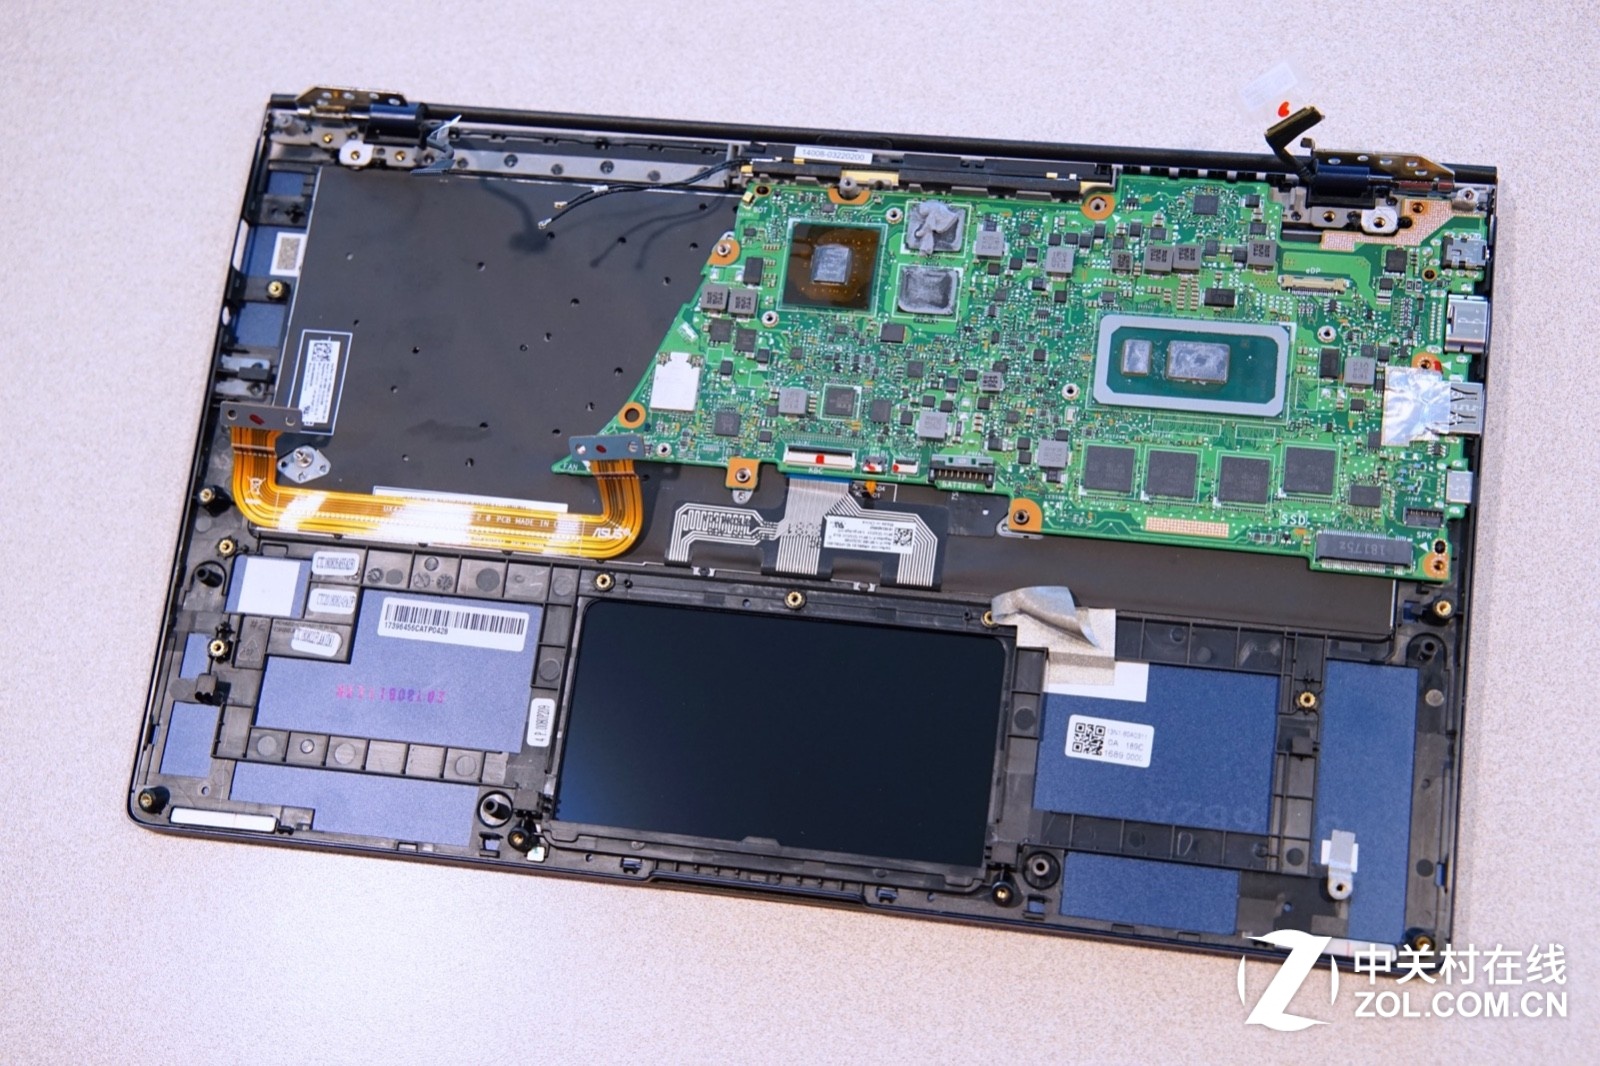
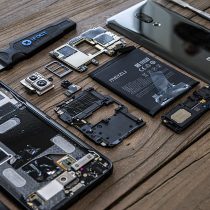
The internal layout of the Asus UX433FN is perfect; each part is neatly placed and has a high internal space utilization.
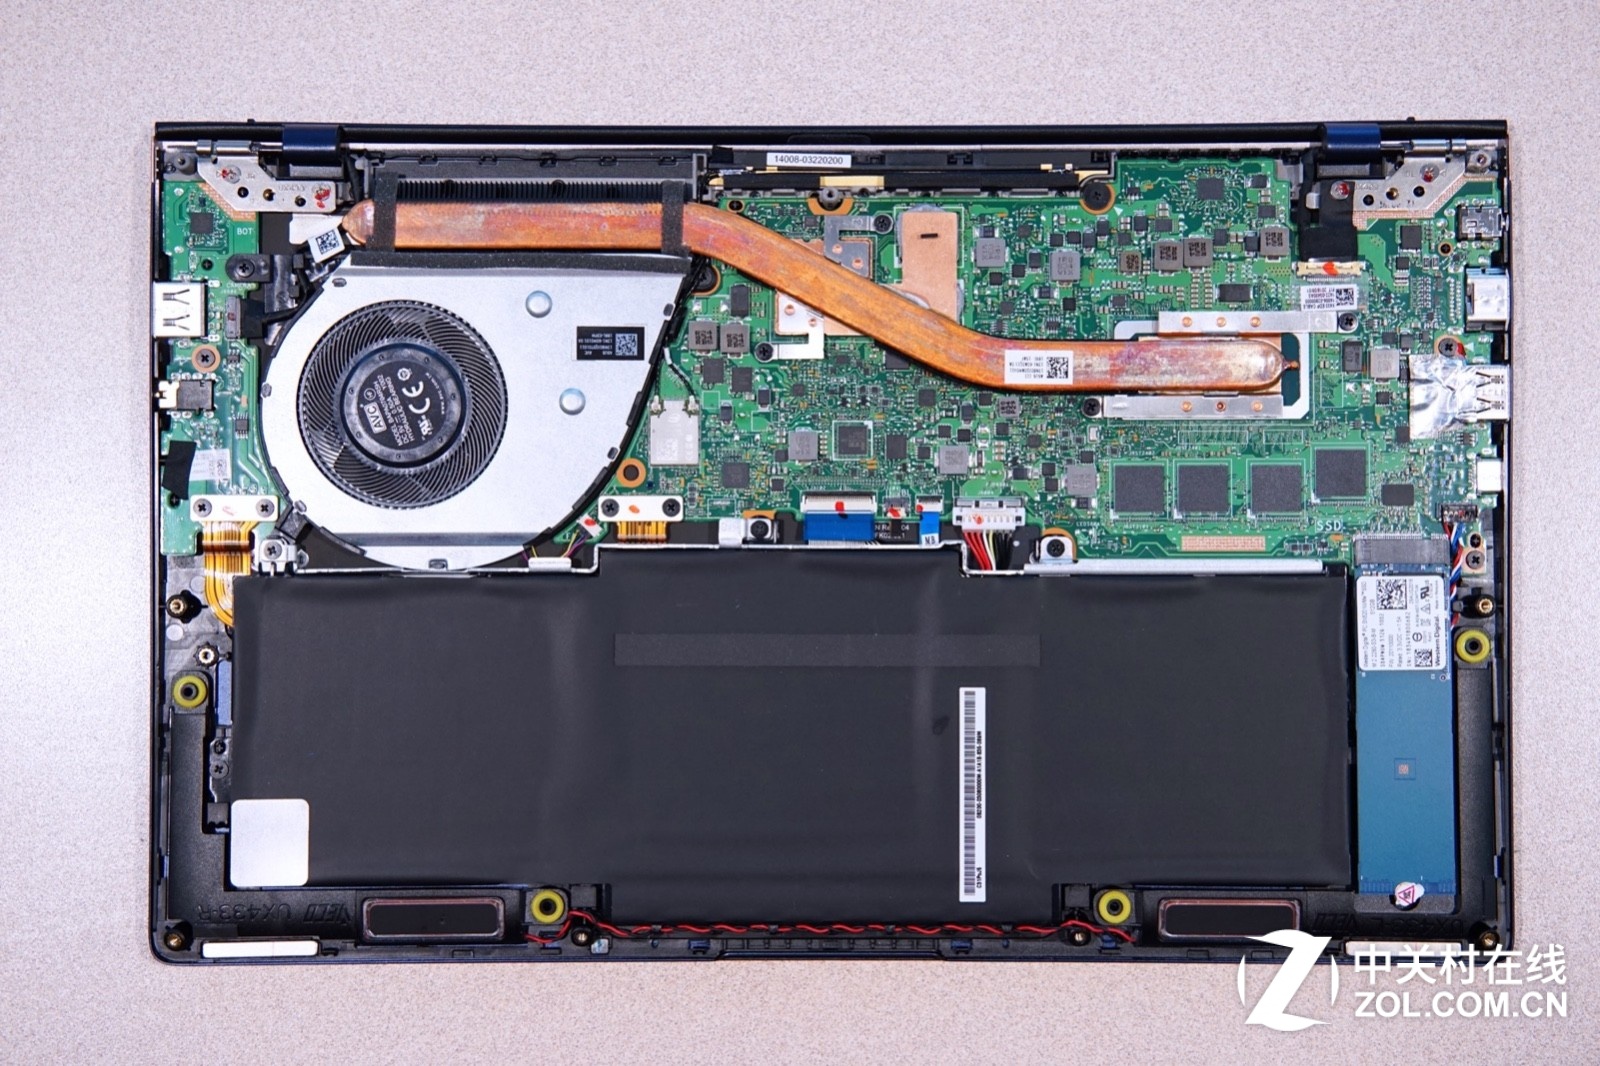
There is a metal plate on the battery to hold and protect it. This is the first time I have seen this design on a thin and light laptop.
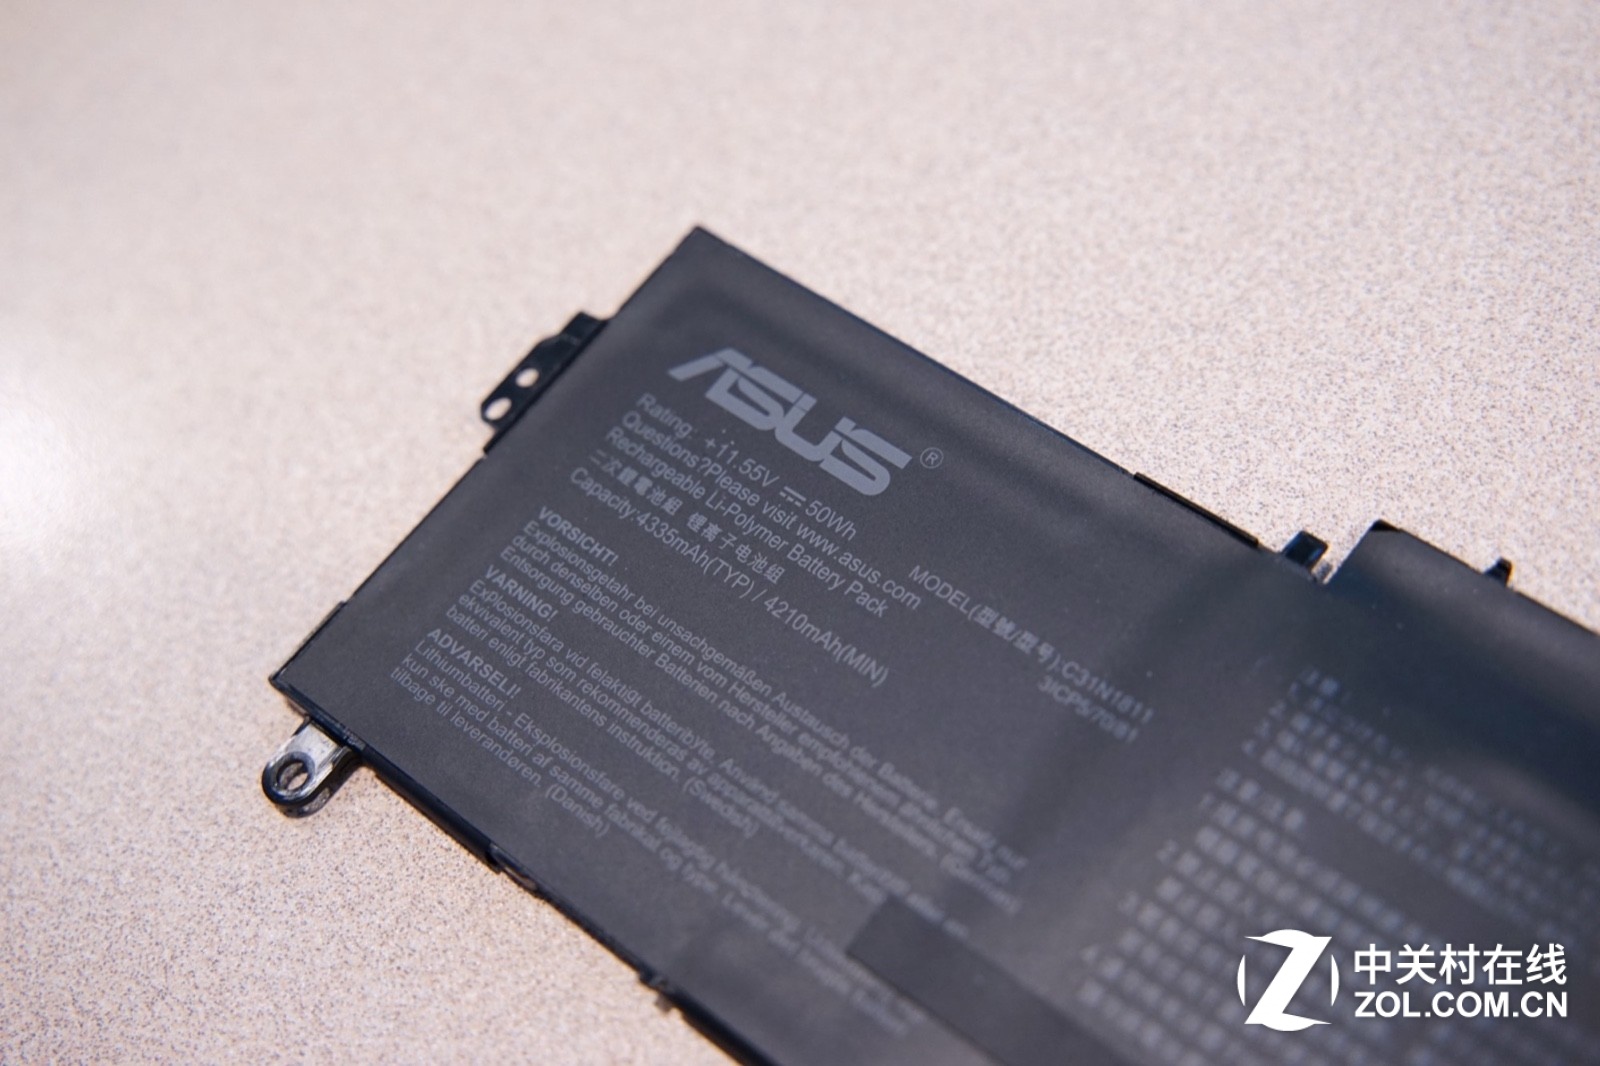
Since the battery occupies nearly half of the internal space, its capacity reaches 50 watts, which is relatively large for an ultrabook.
Disconnect the battery cable from the motherboard and remove the screws that secure the battery to remove the battery.
Under the battery, we can access the touchpad module and the keyboard cable. On the right side of the battery is an M.2 SSD.
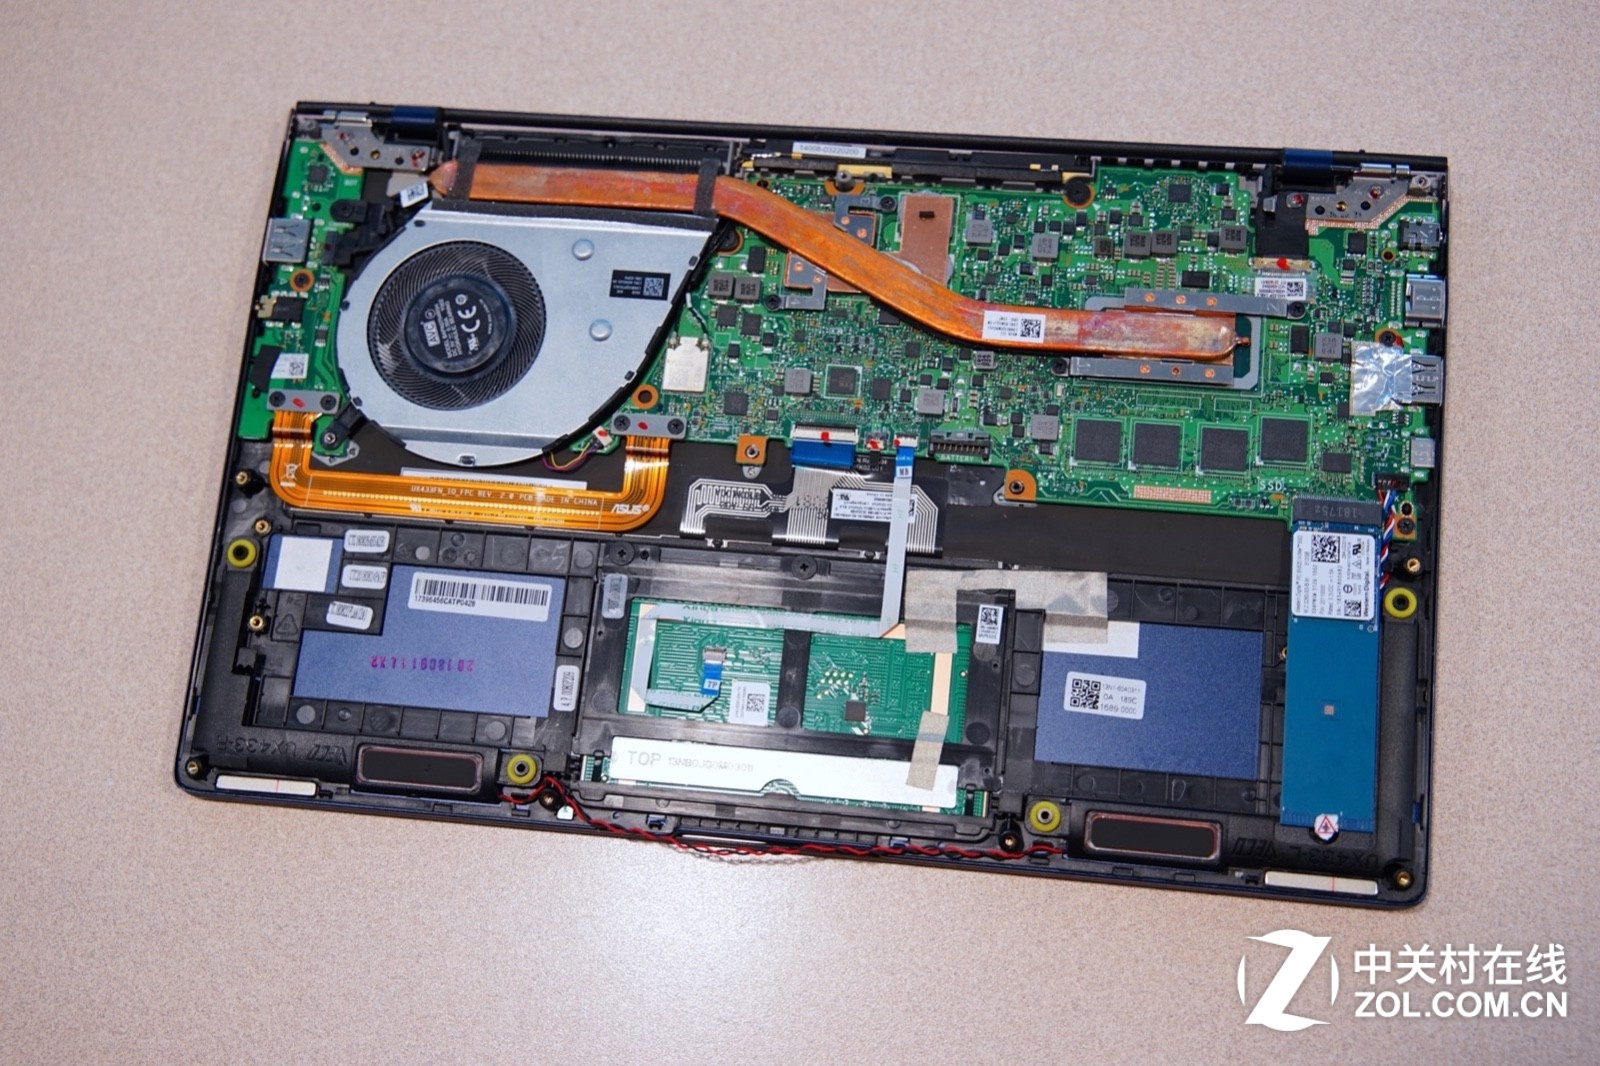
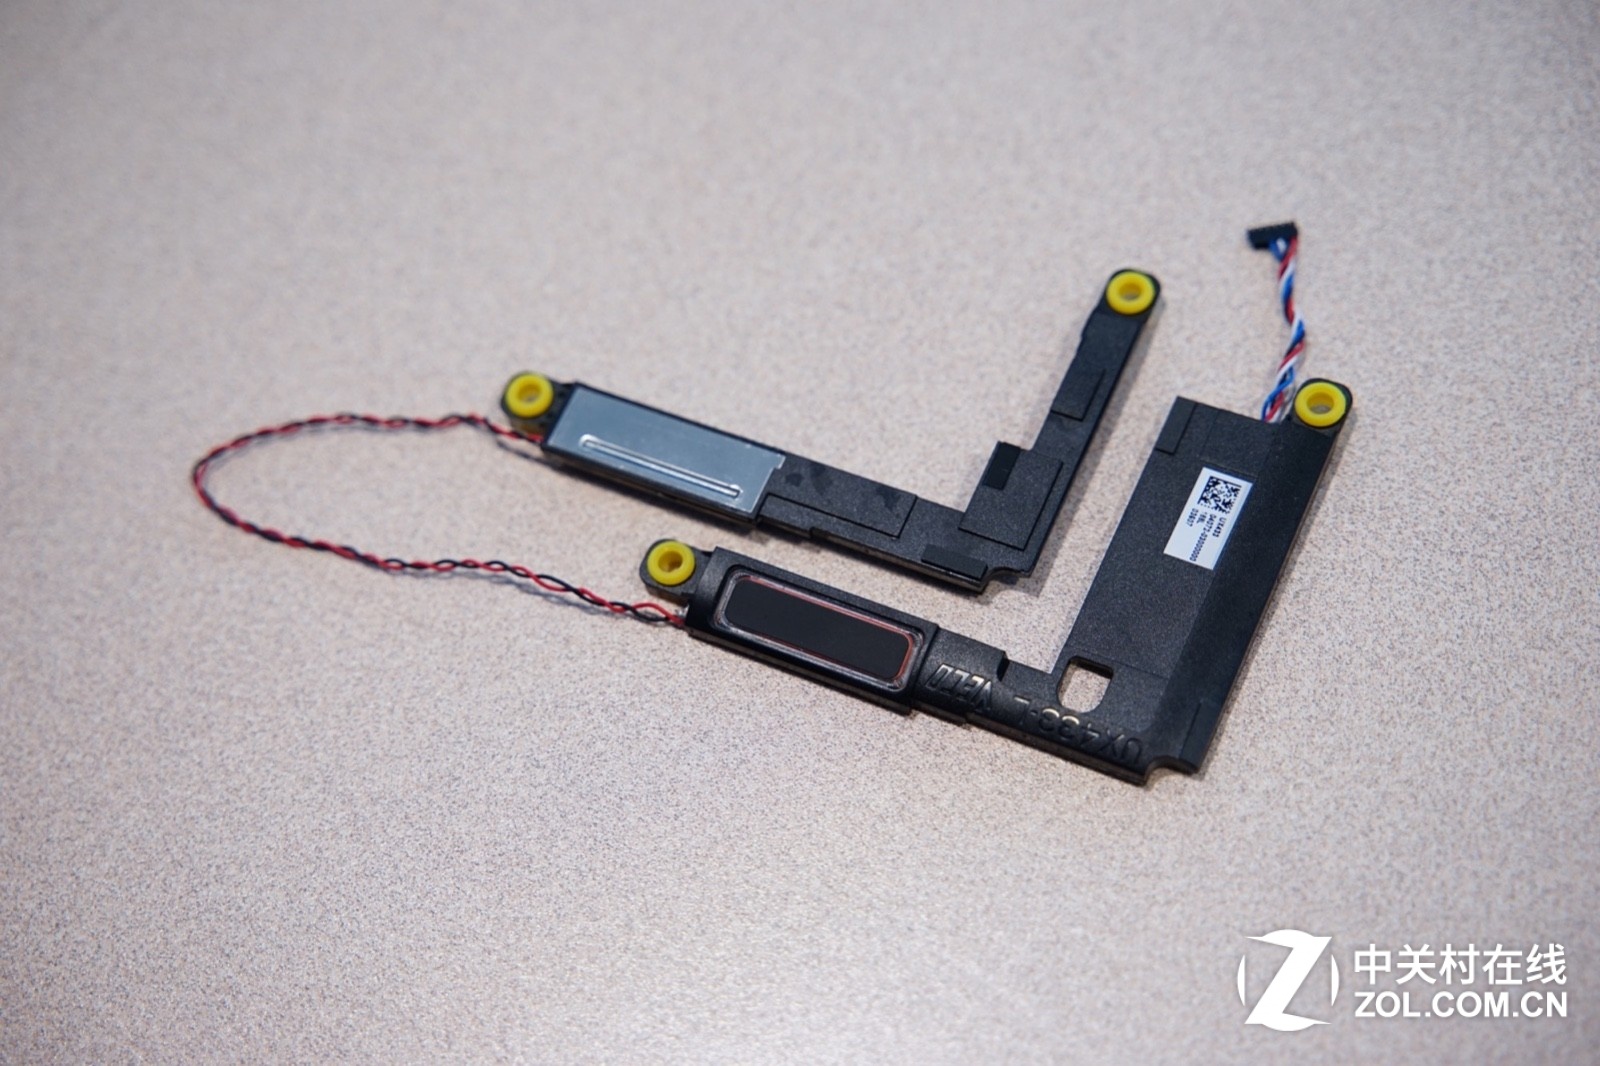
The speaker is relatively large in size, which can bring good sound quality.
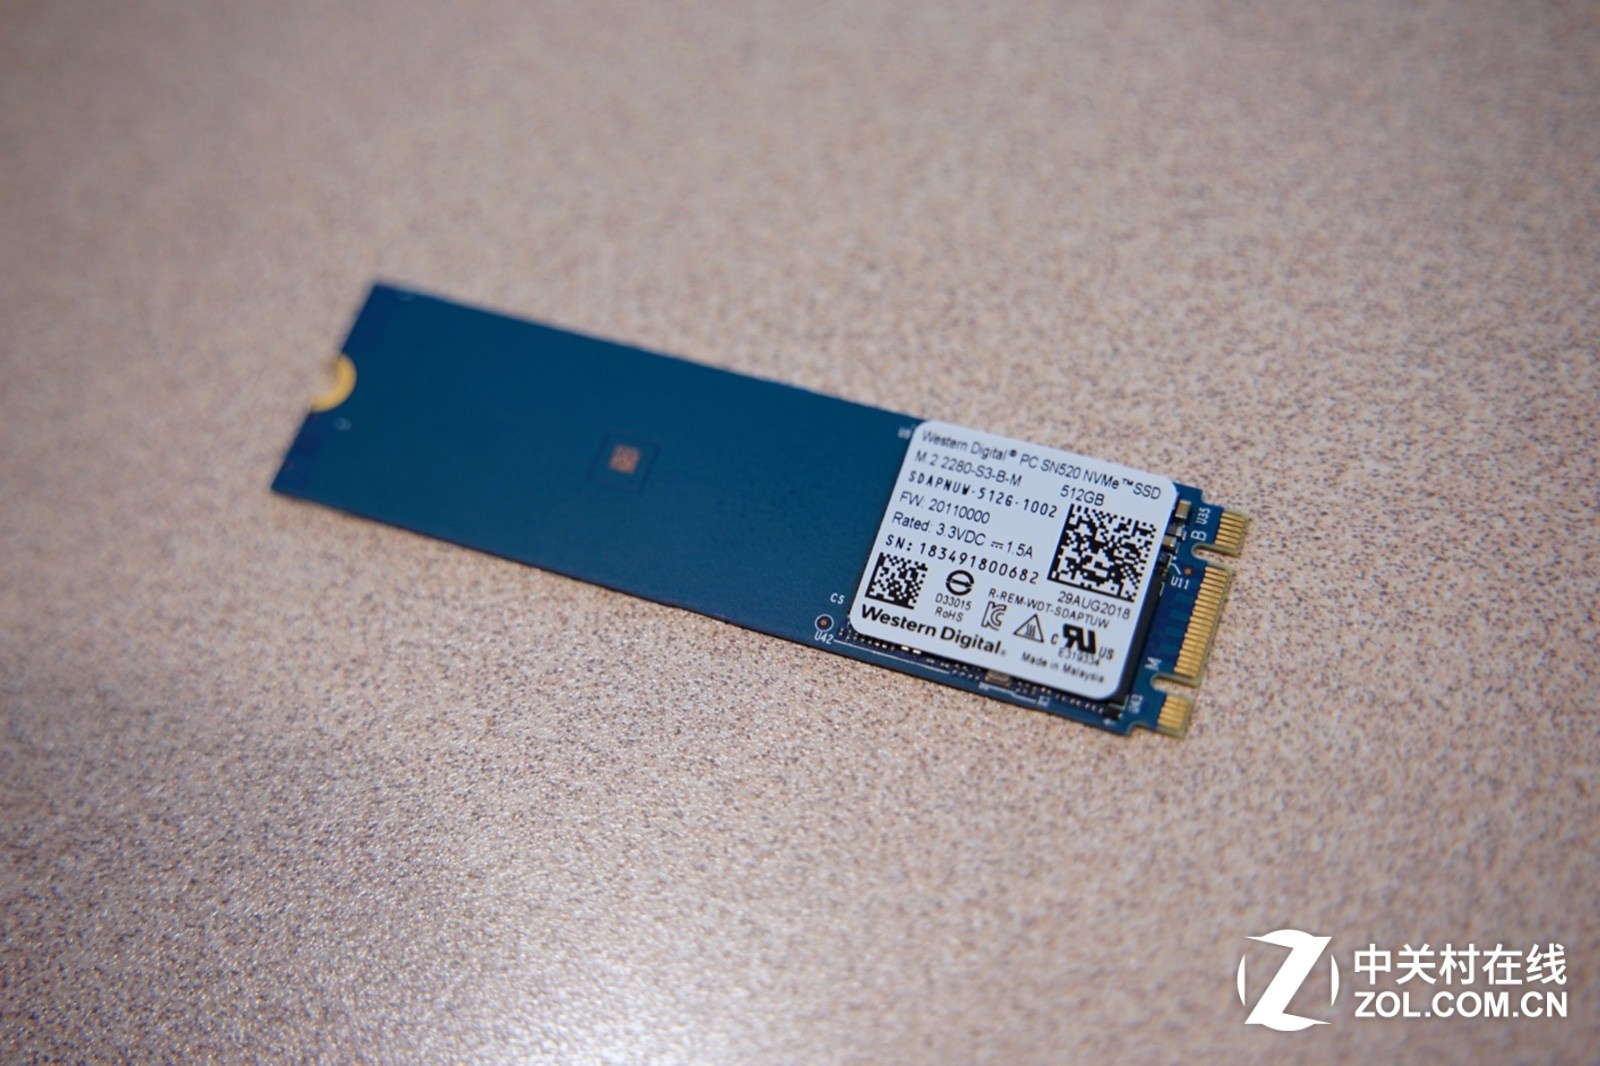
The ASUS ZenBook 14 UX433FN comes with a Western Digital 512GB NVMe M.2 SSD, which uses a multi-chip stacked design, making the effective area of the circuit board quite small.
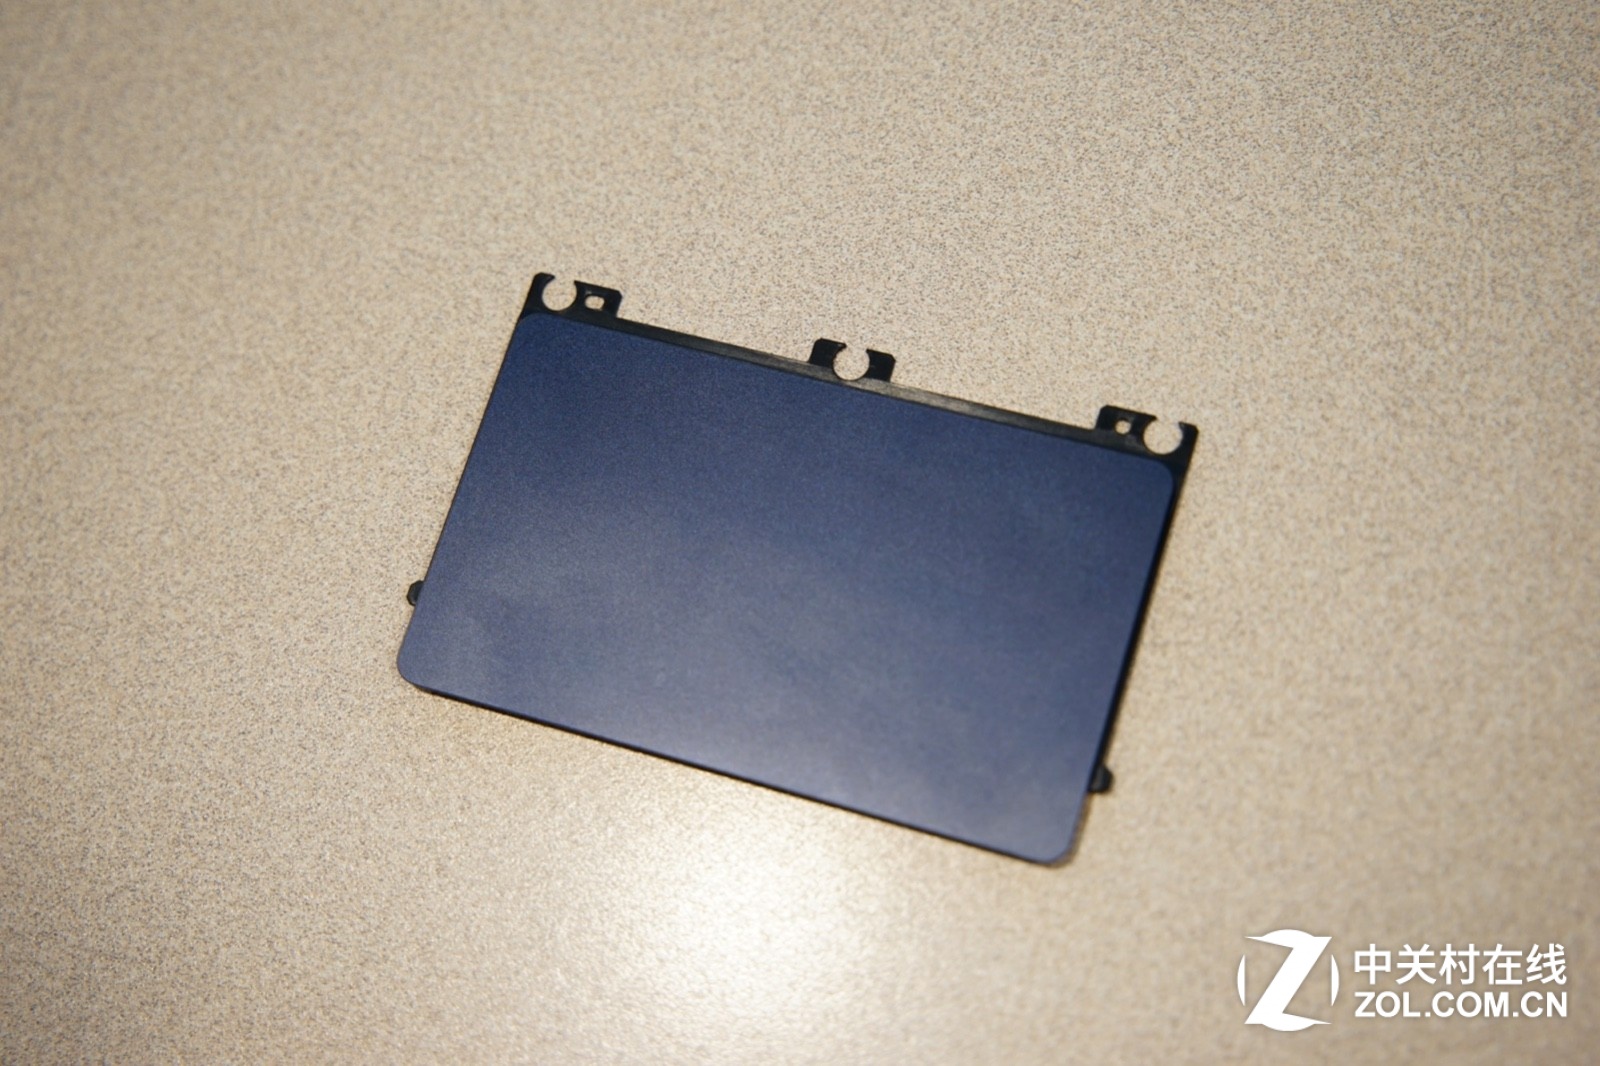
Remove the three screws that secure the touchpad, and then remove the touchpad.
The touchpad surface is covered with a layer of glass, providing users with an excellent experience.
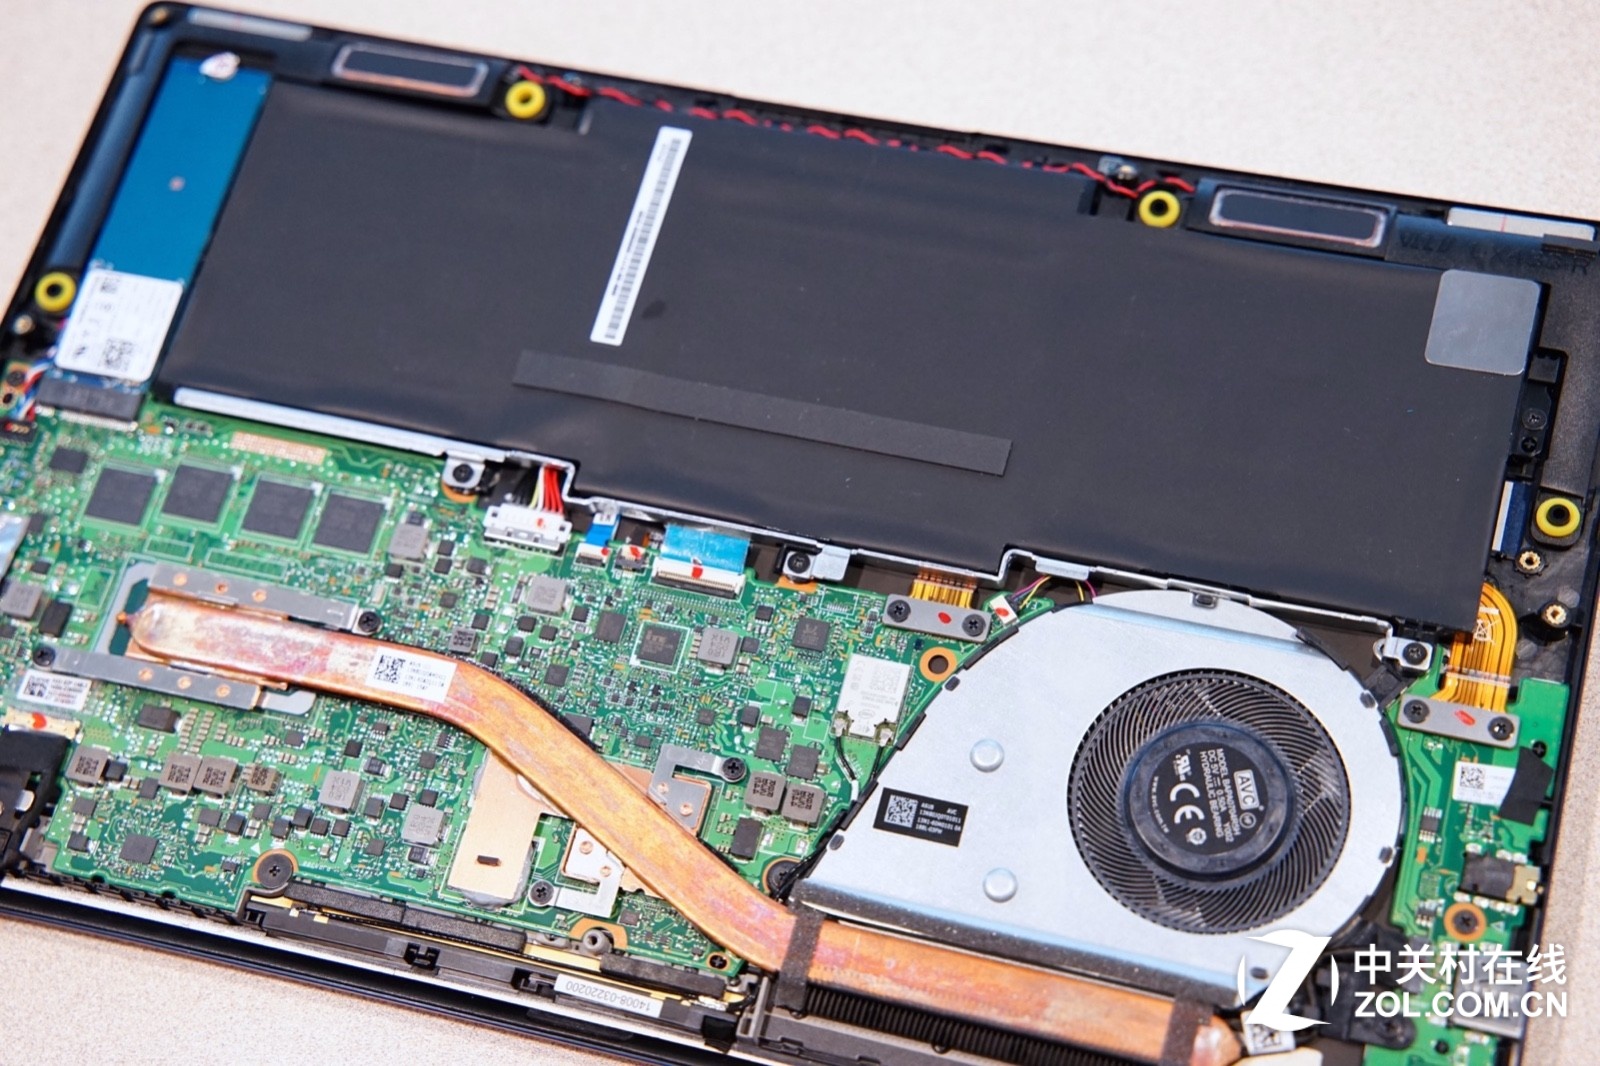
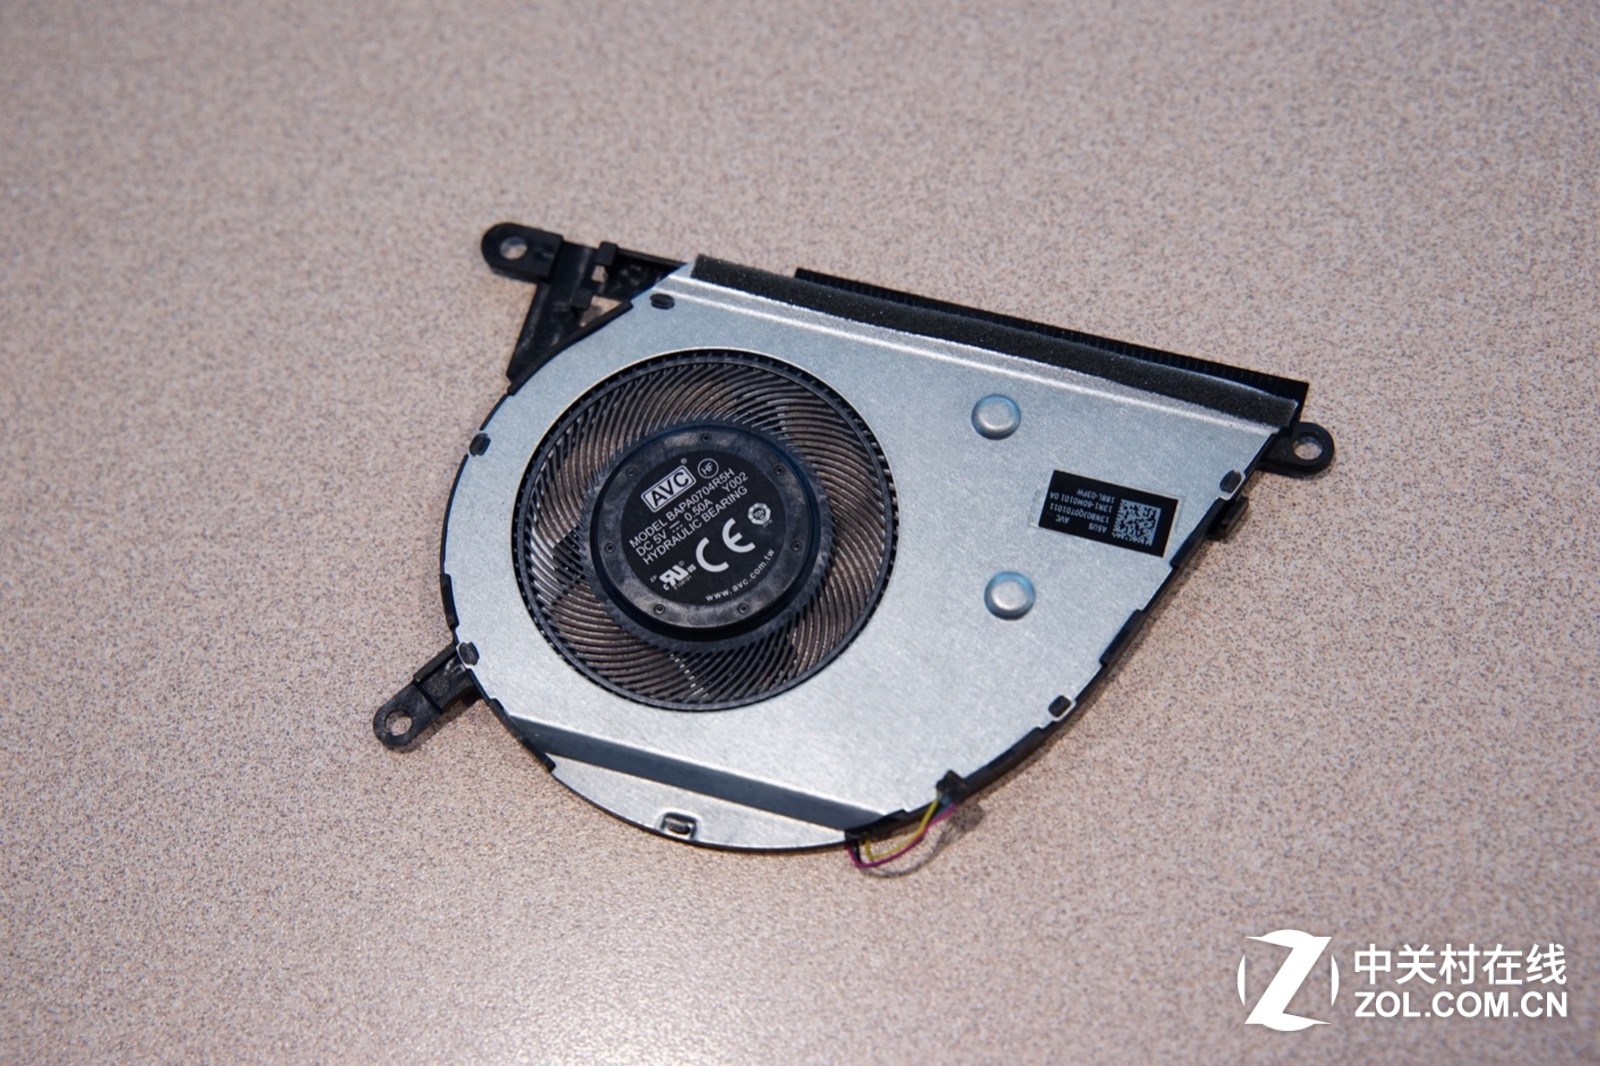
Remove the three screws and disconnect the fan cable from the motherboard. Then, remove the cooling fan.
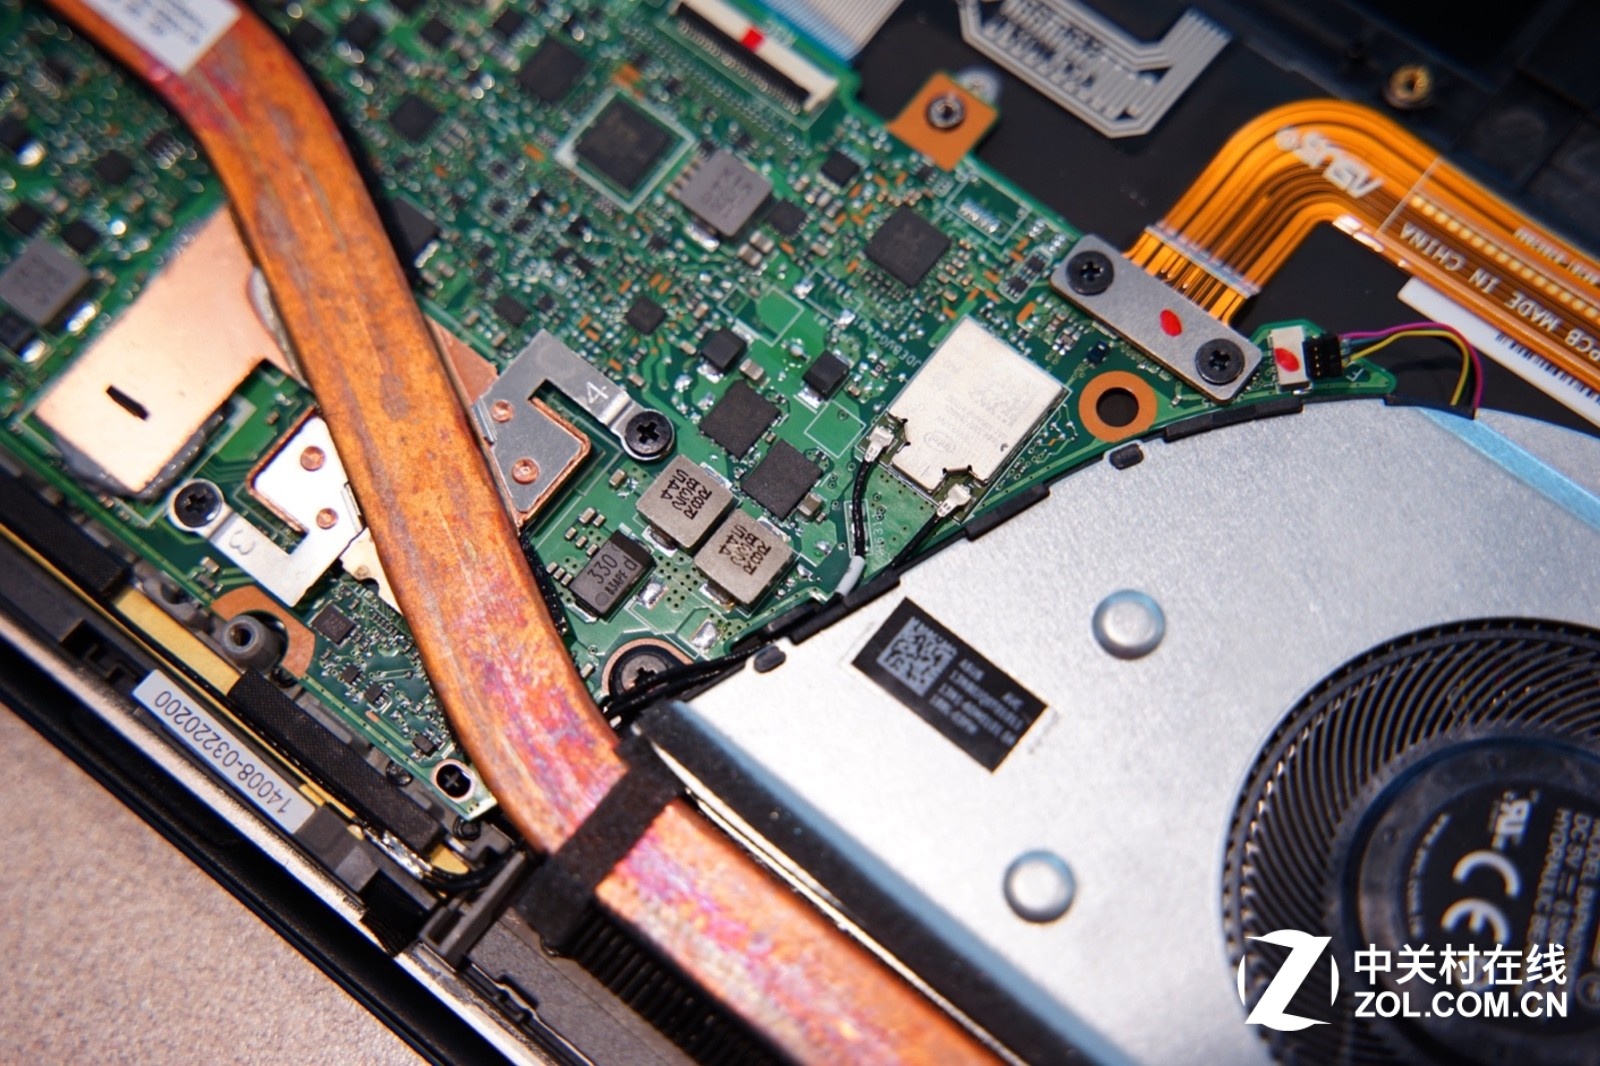
It can be seen that the fan is very slim, but the fan blade area is not small, so even a single CPU fan can provide a considerable airflow.
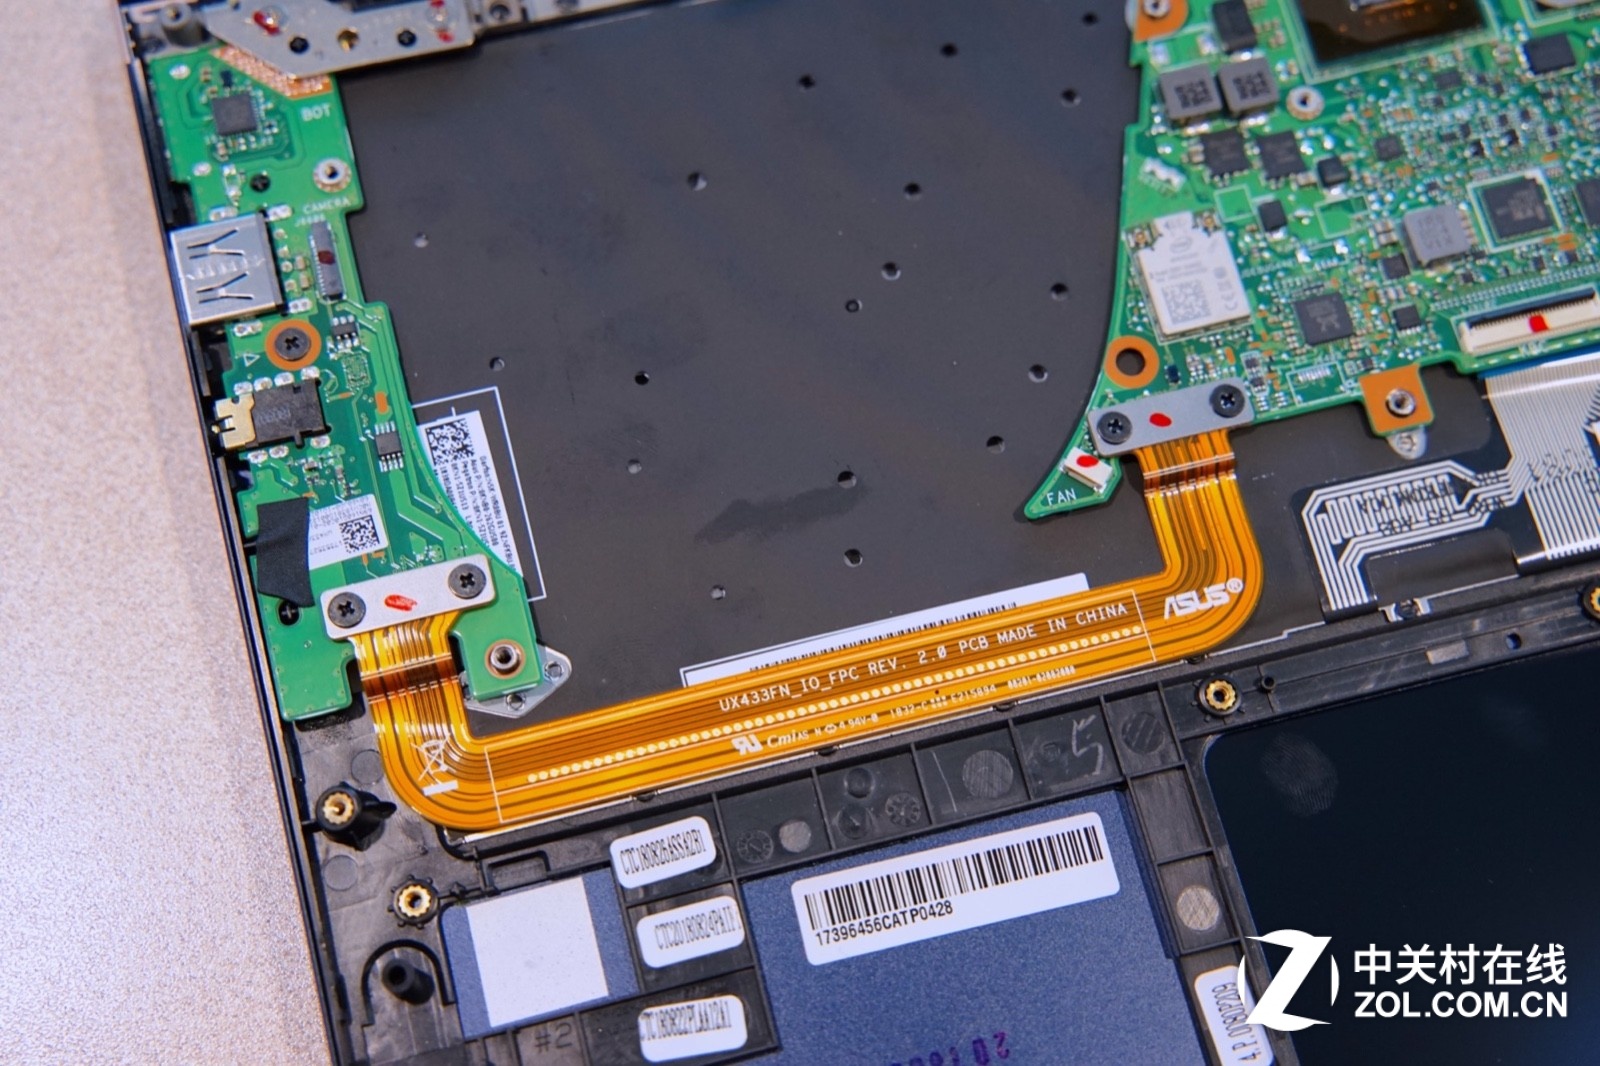
The fan divides the motherboard into two parts, and a yellow cable is used to connect the two circuit boards.
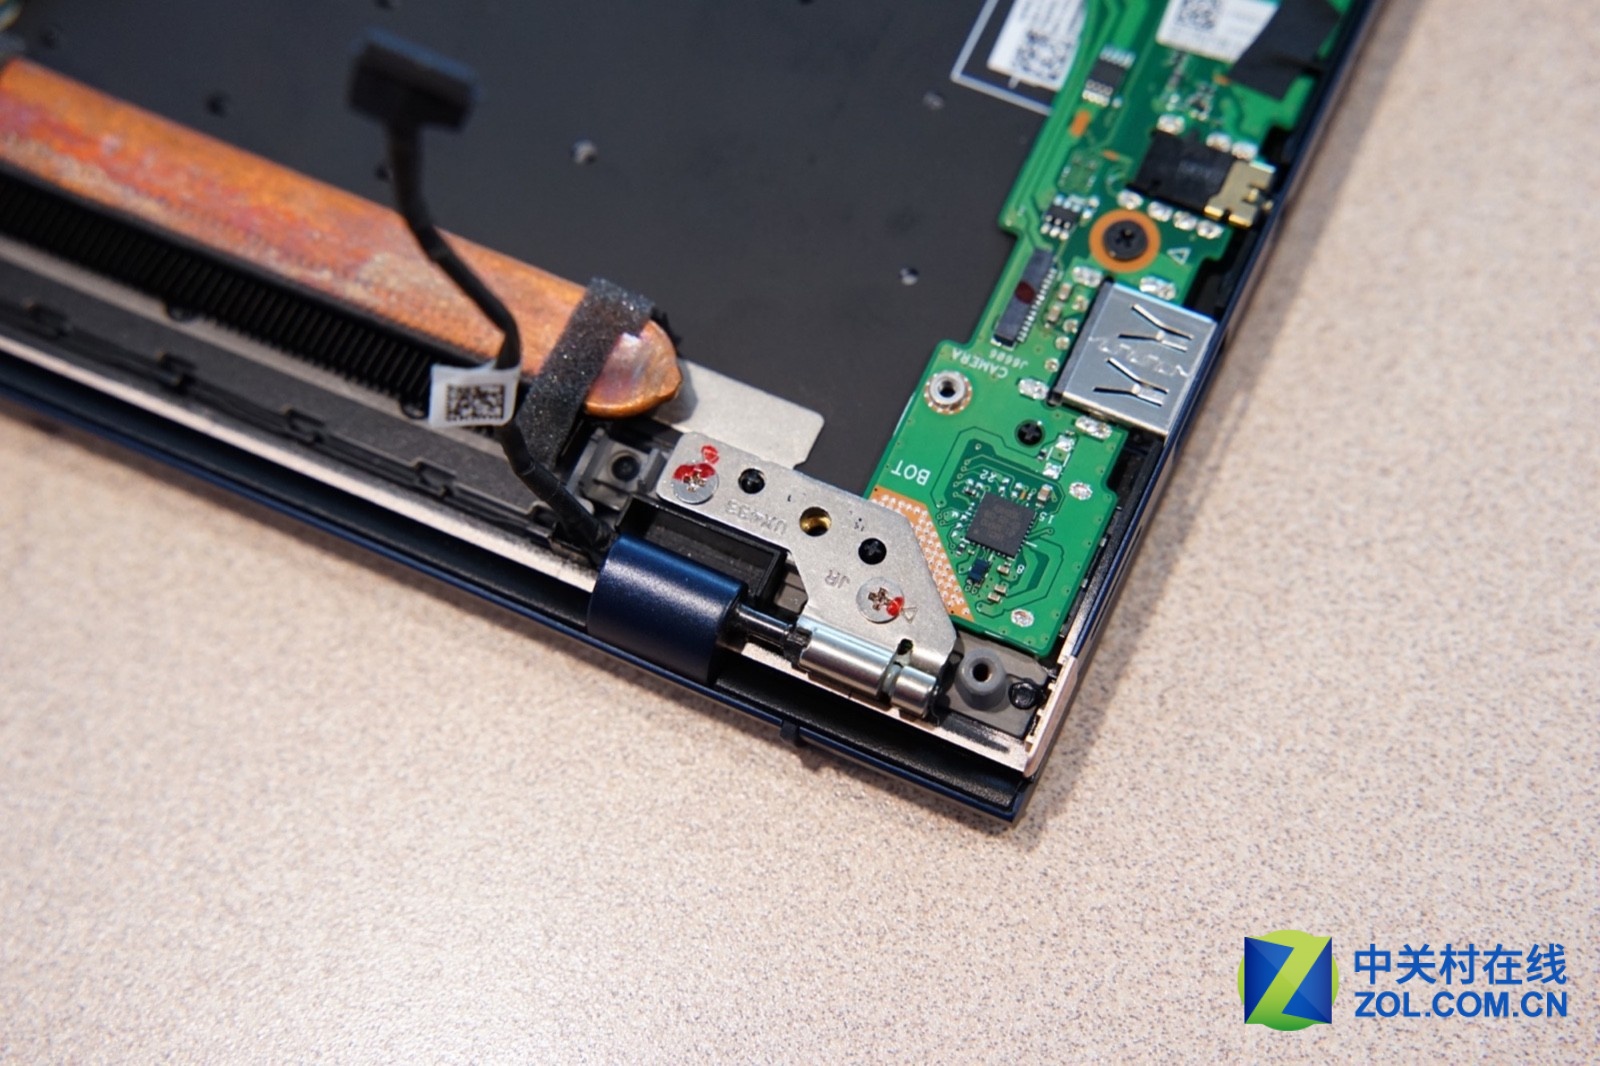
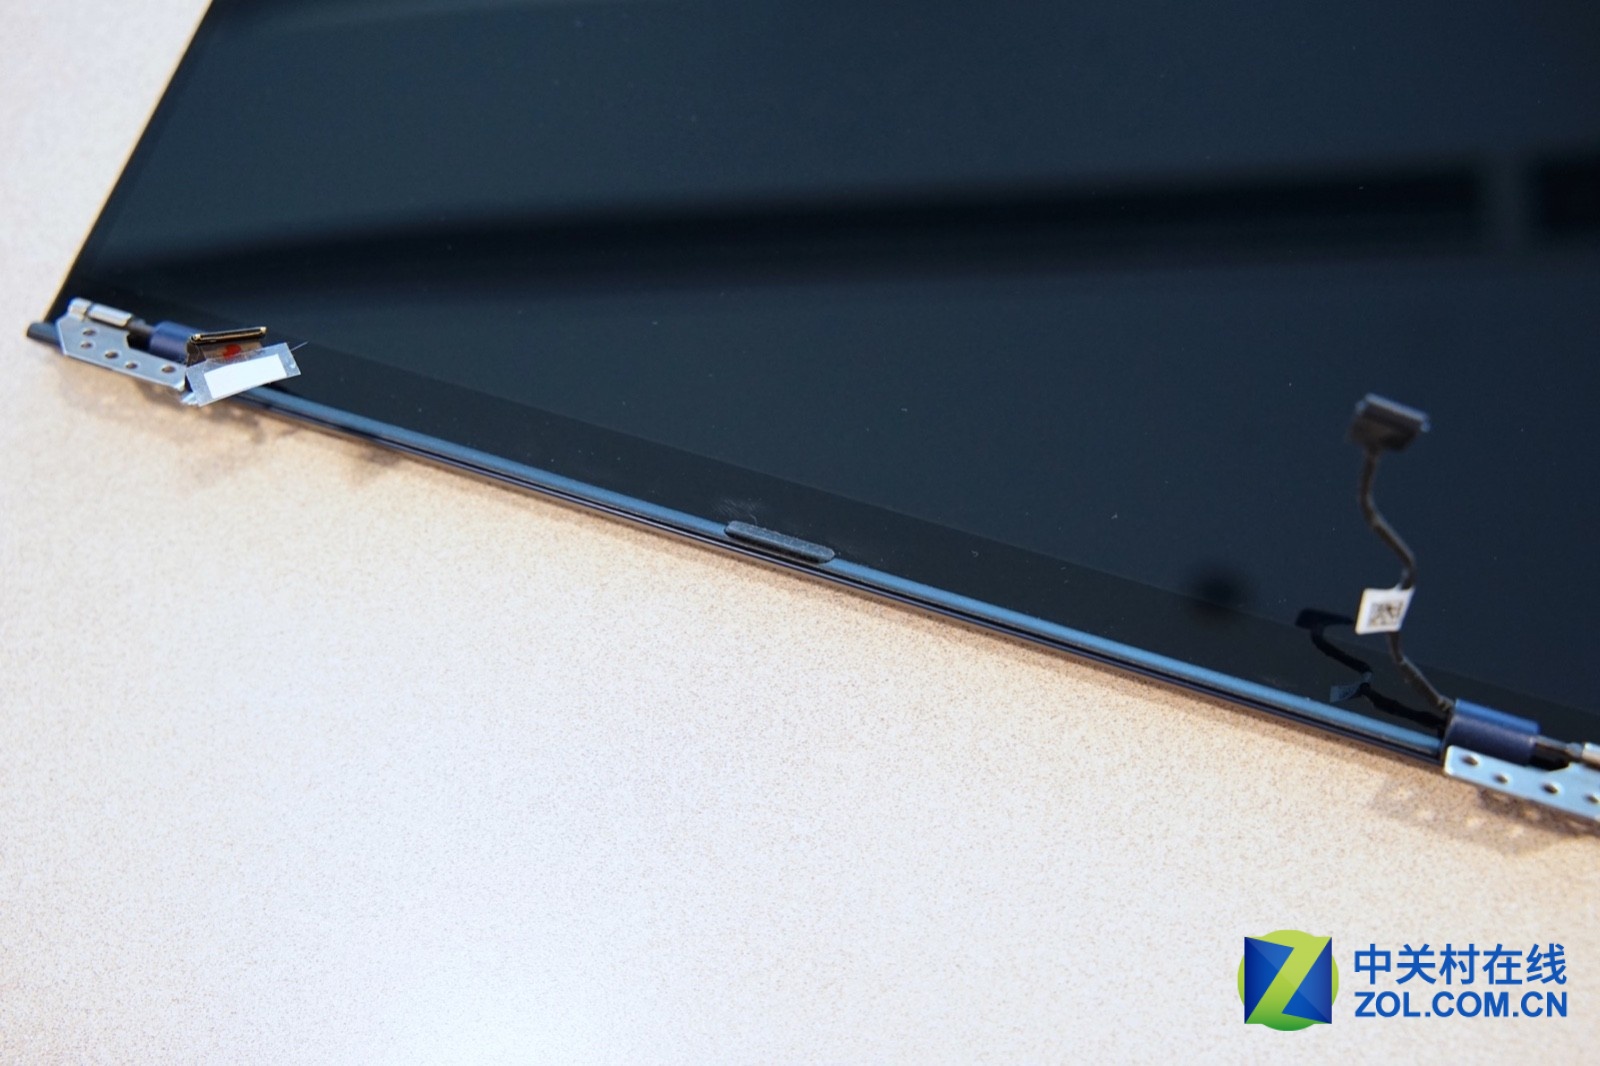
It is worth noting that the LCD hinge is secured to the motherboard.
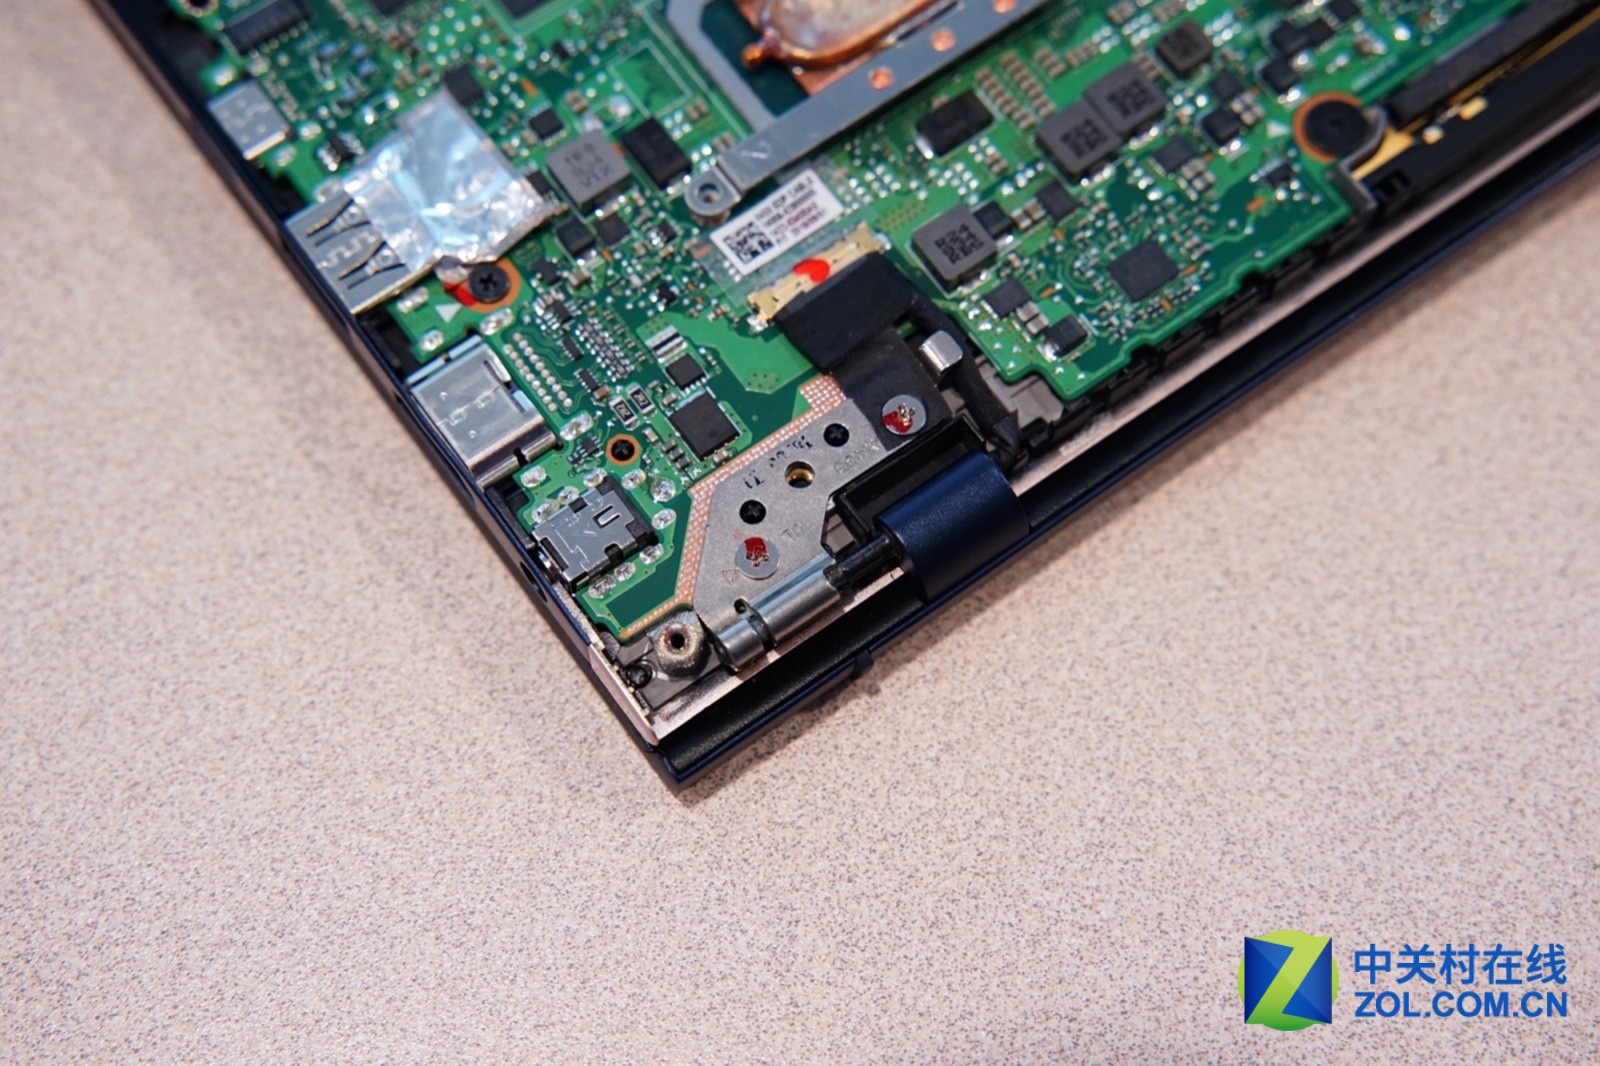
Before continuing with the disassembly work, we need to remove the LCD hinge first.
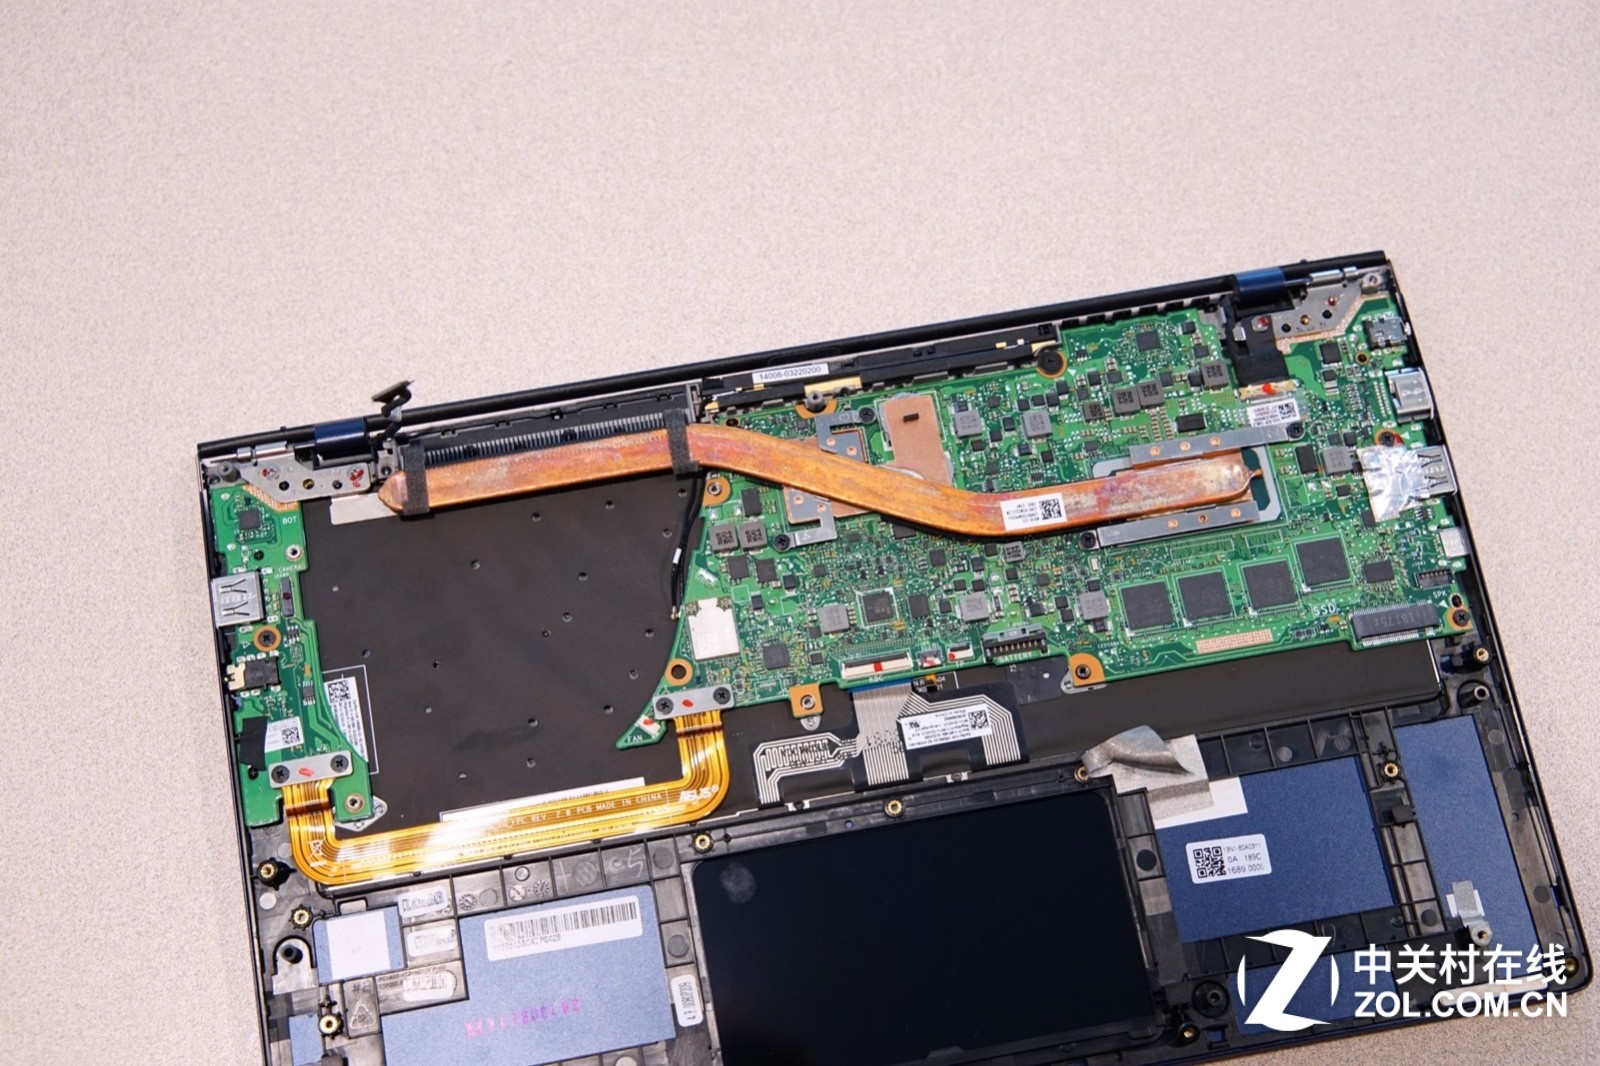
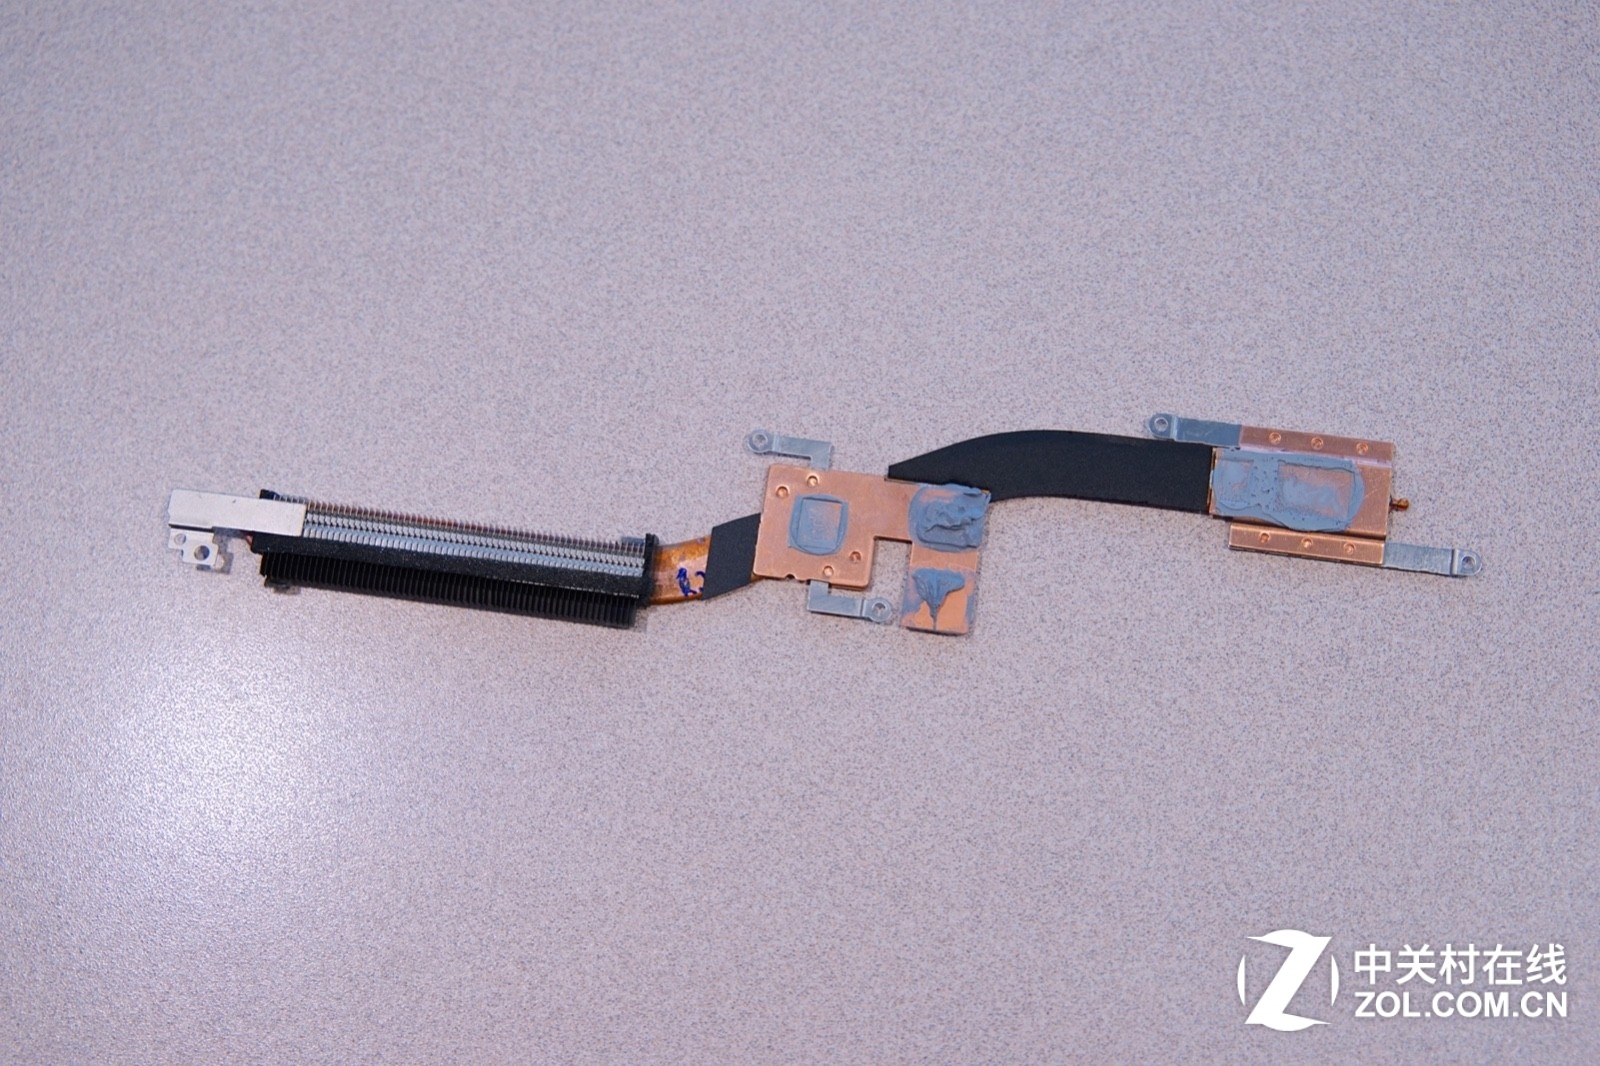
Remove the heatsink module. You can see it is very simple.
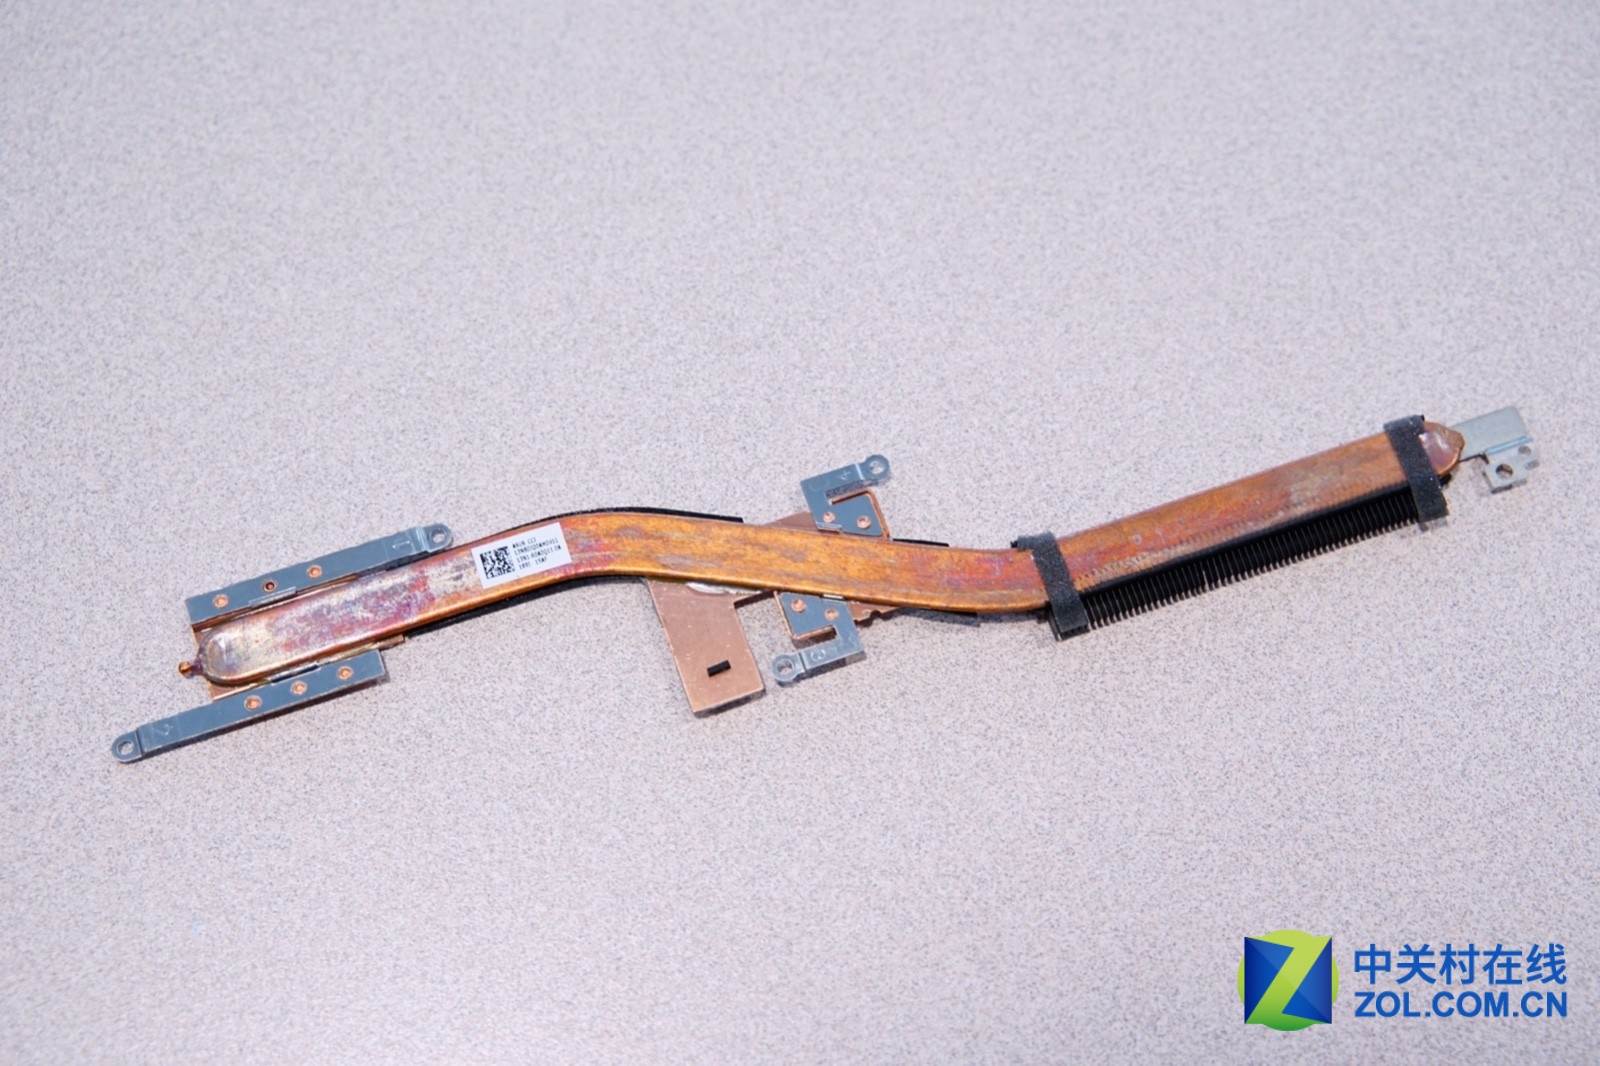
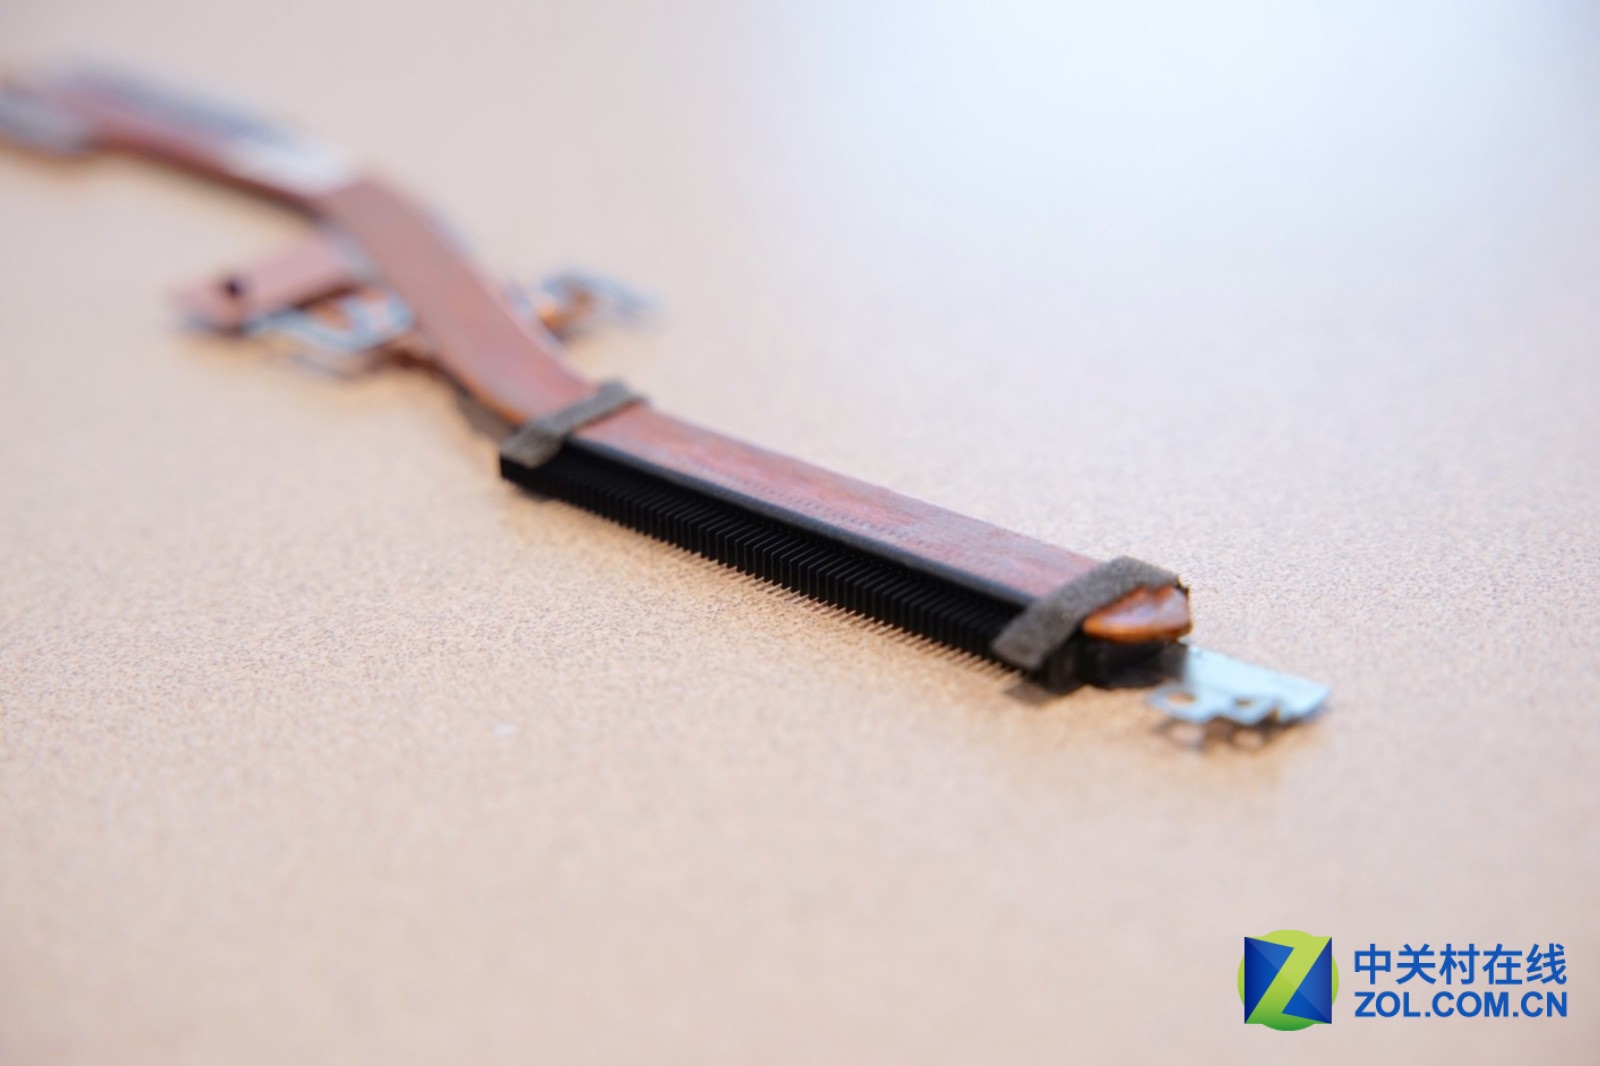
However, when viewed from the side, this heat pipe still has a certain thickness, and with a width of 8mm, it can also achieve good thermal conductivity.
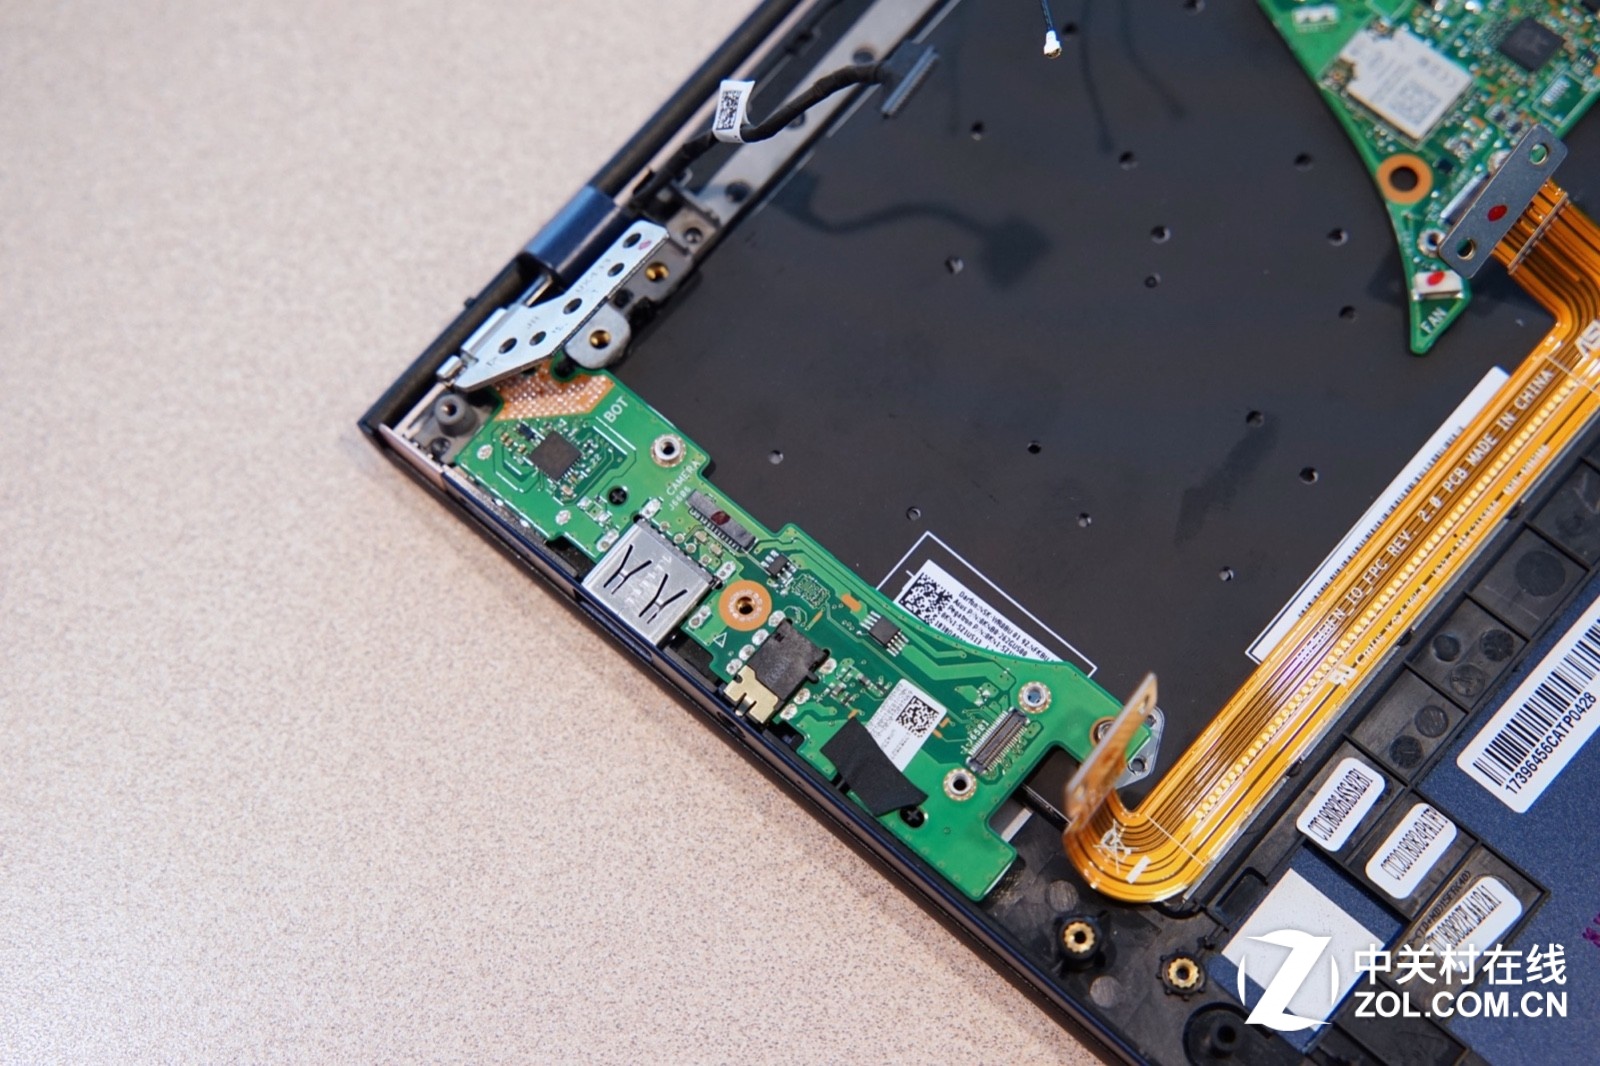
The USB board is connected to the mainboard via a yellow ribbon cable, and the connector is secured with a metal plate to ensure a stable connection between the USB board and the mainboard.
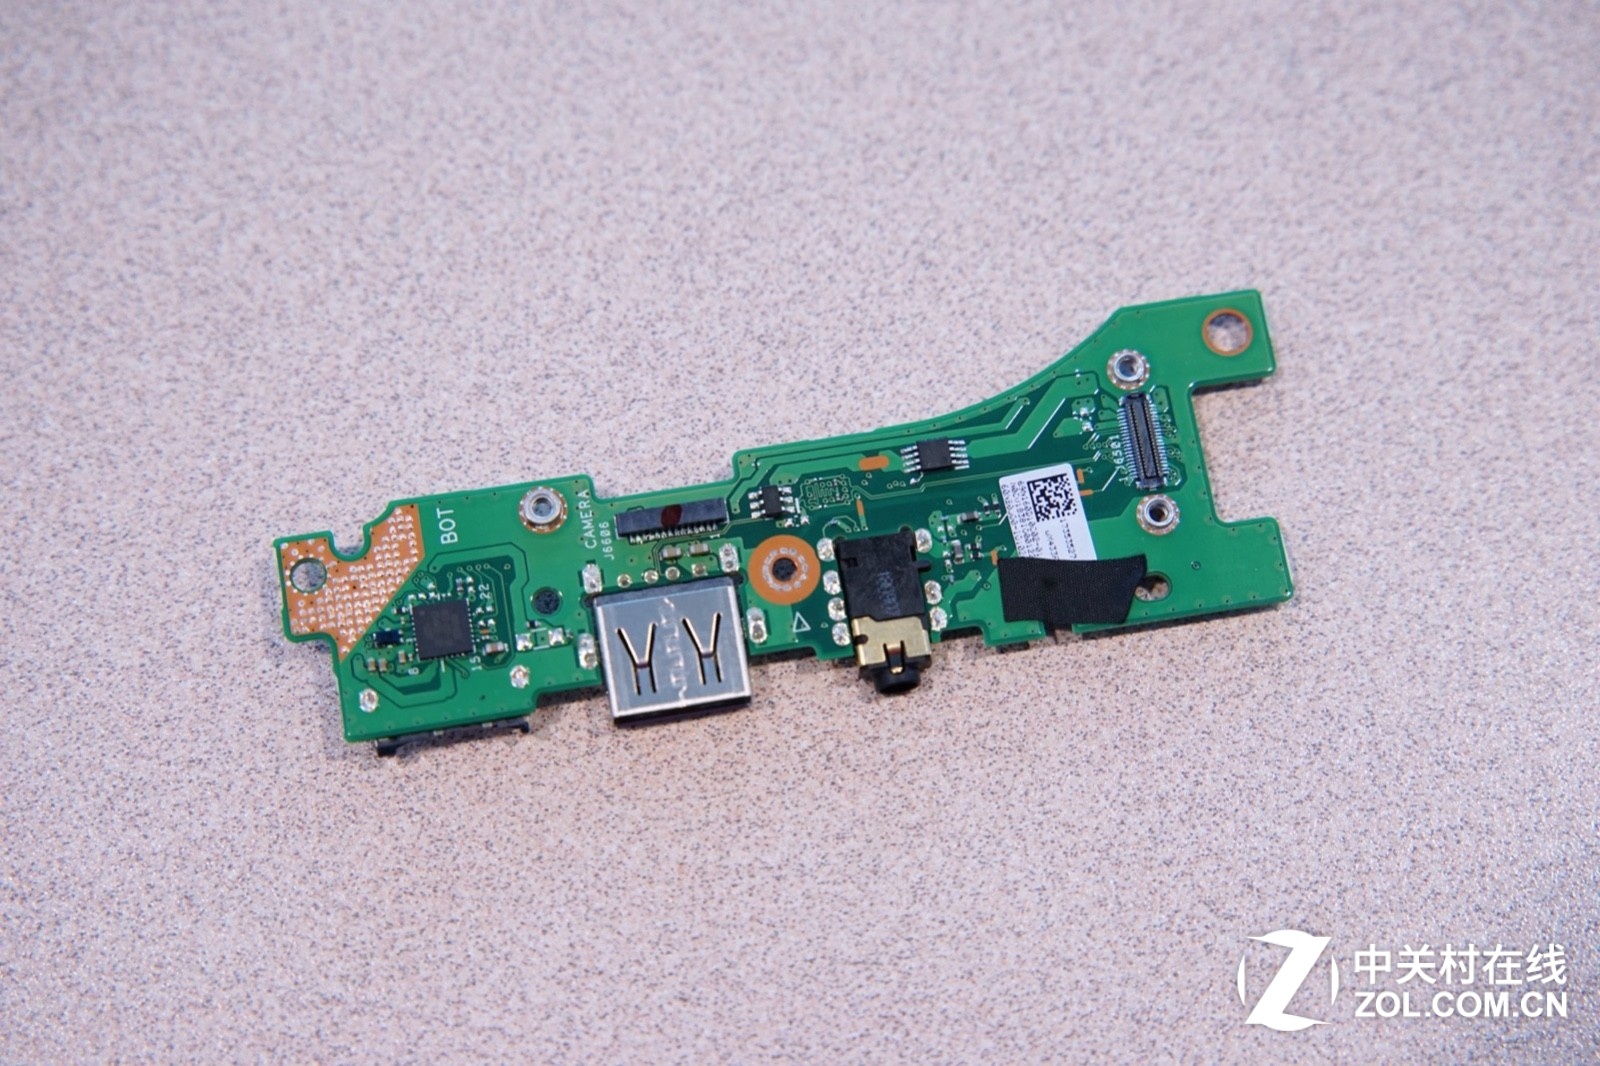
After disconnecting the yellow cable, the USB board can be removed.
A USB 2.0 port and a 3.5mm headphone jack are integrated on the USB board.
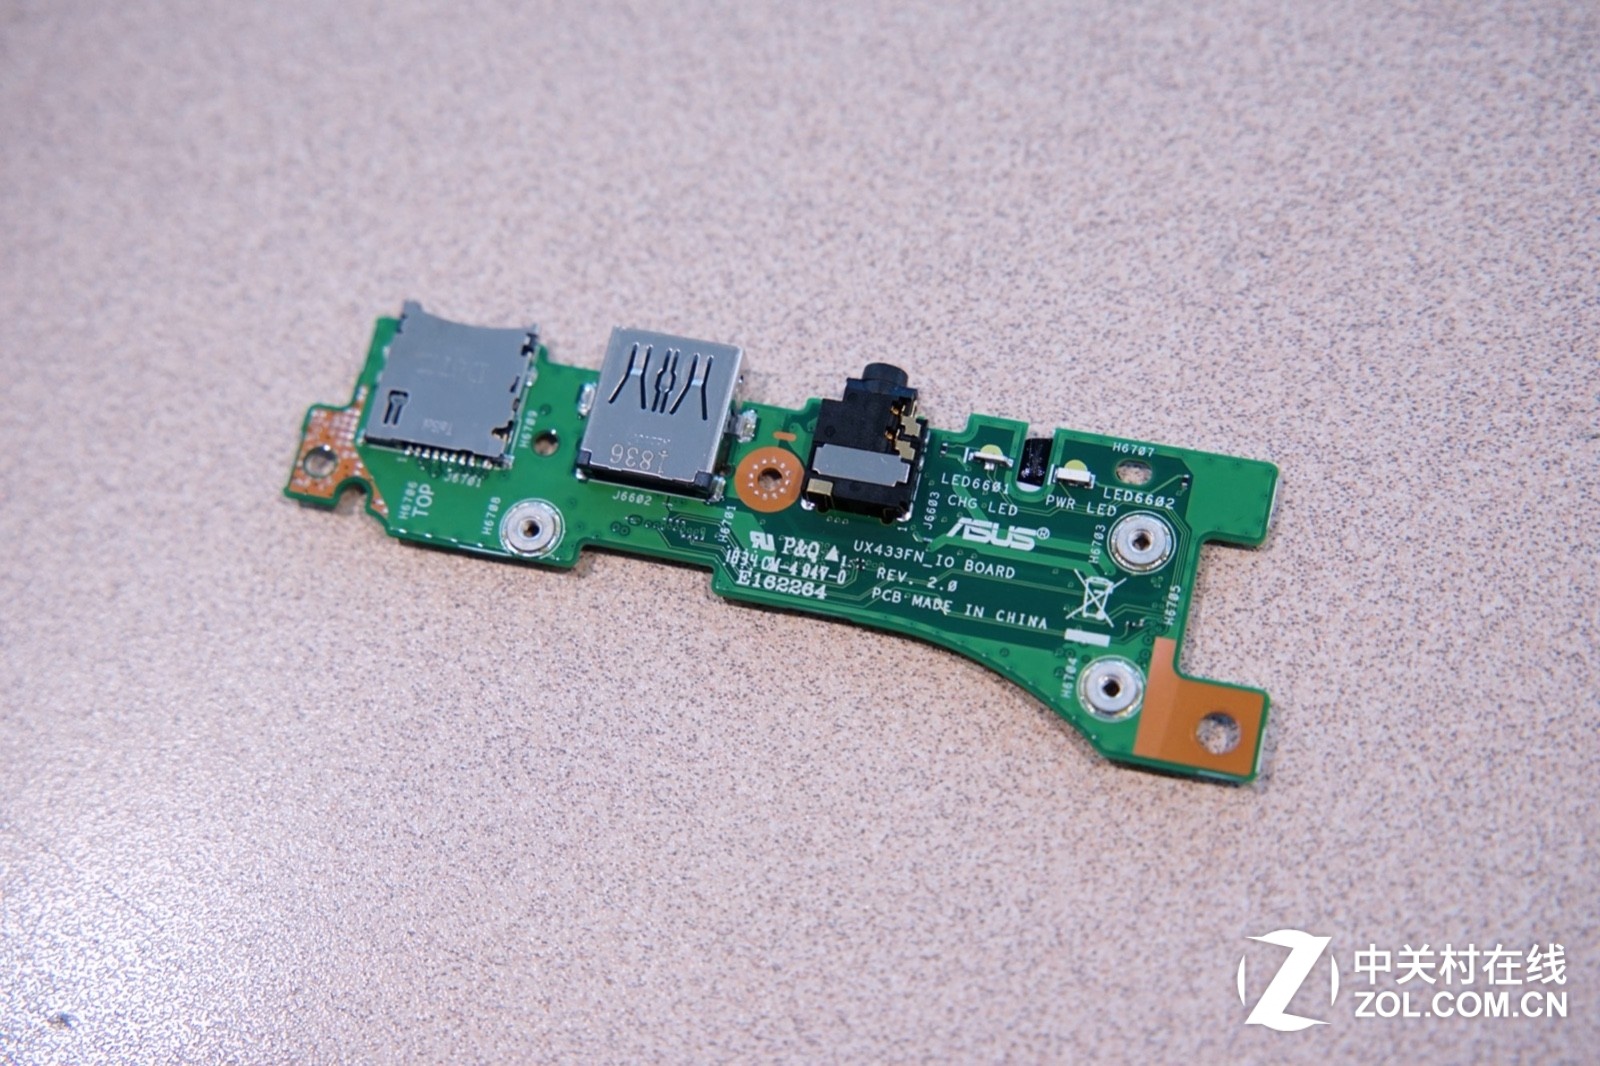
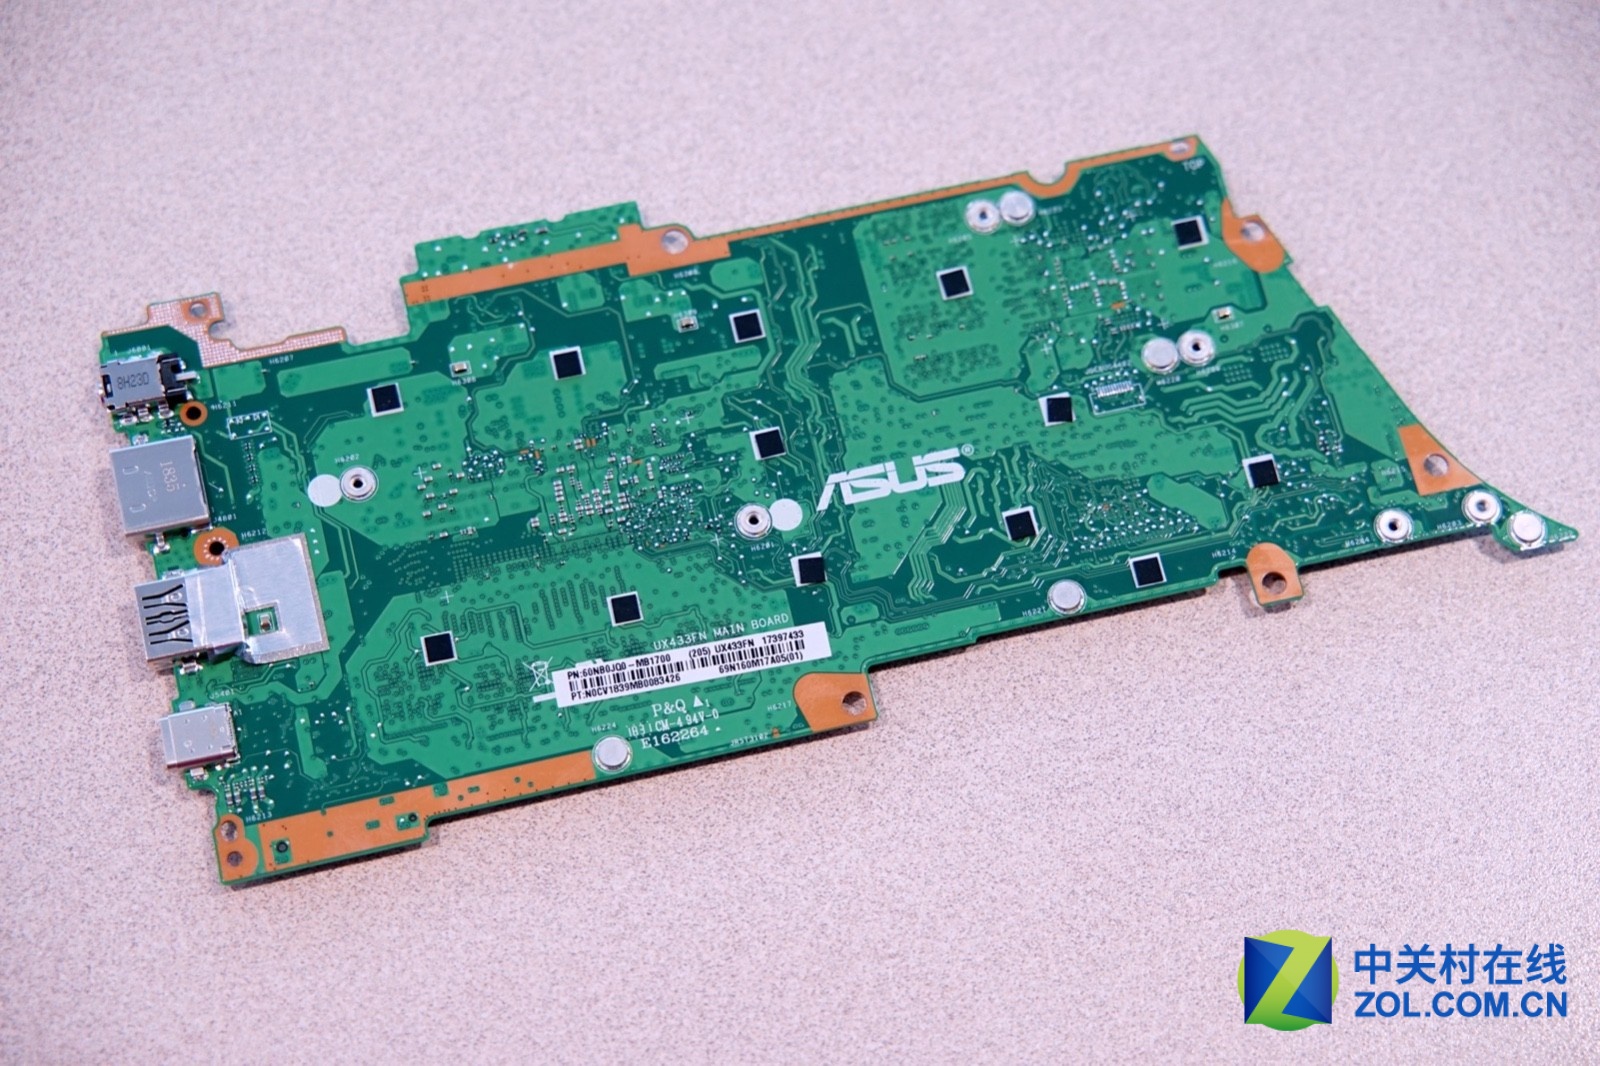
Each component has been clearly marked on the back of the board.
Now, remove the screws that secure the motherboard and disconnect the LCD cable to remove the motherboard.
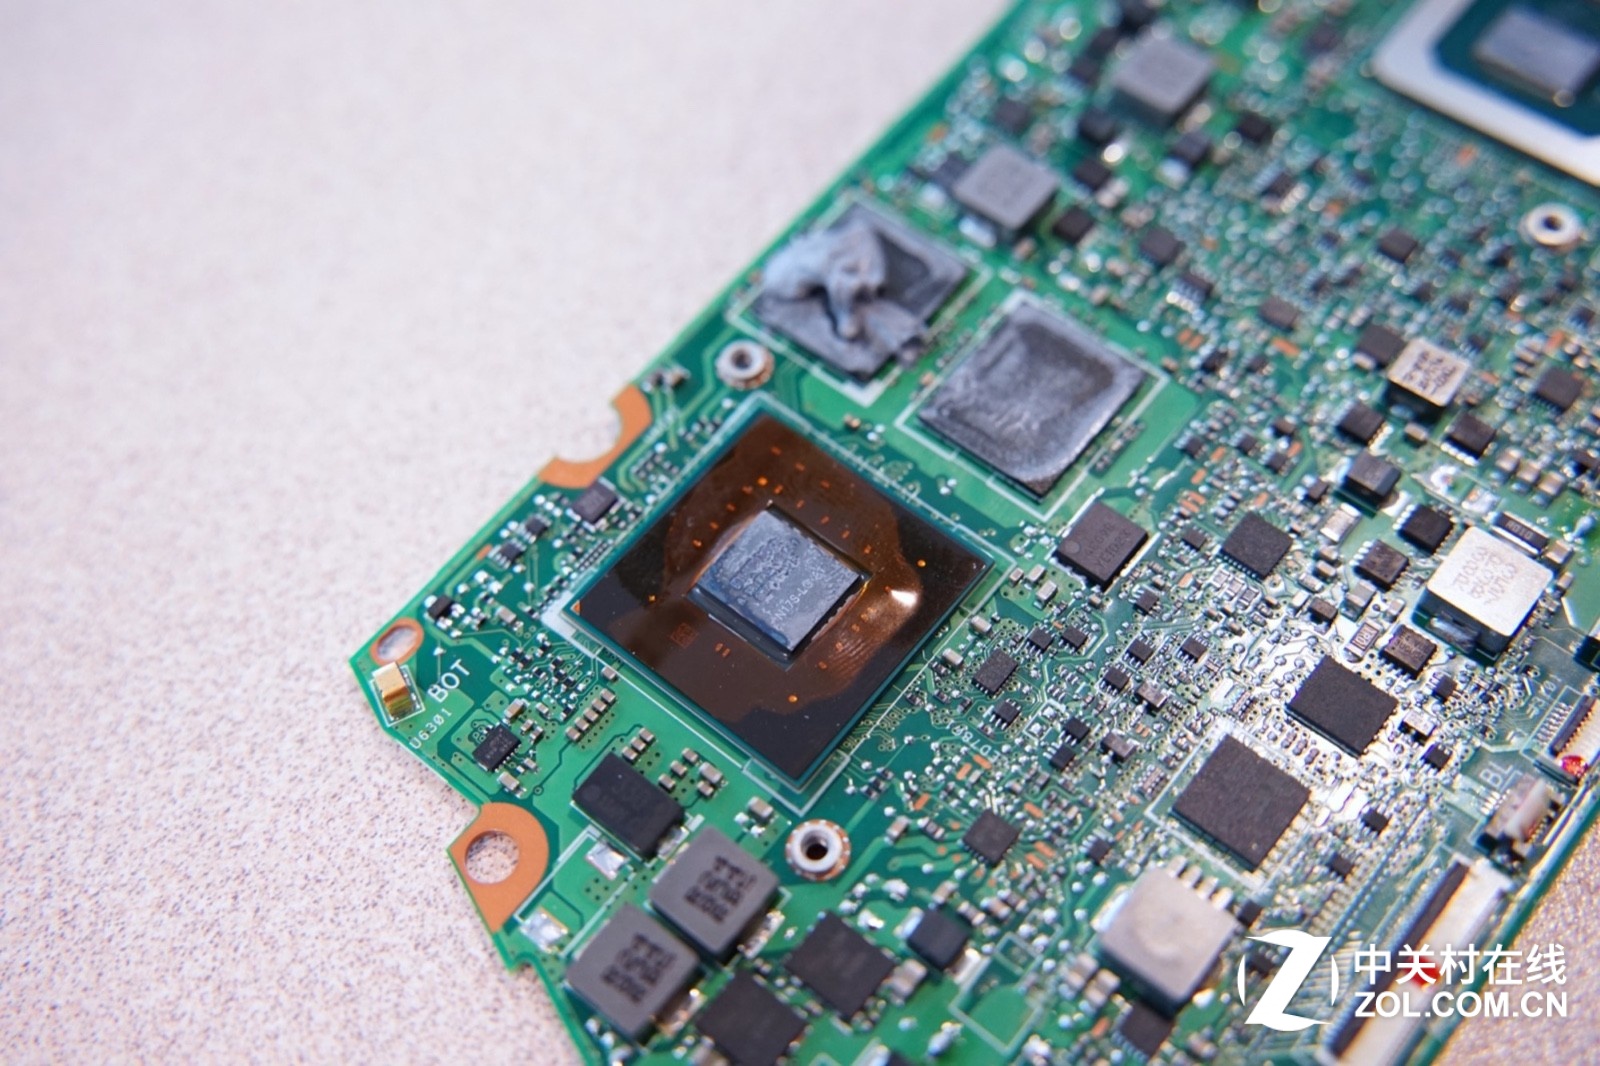
The various components are neatly arranged on the front of the motherboard. They mainly consist of an Intel processor, an MX150 graphics card, and 8GB of memory.
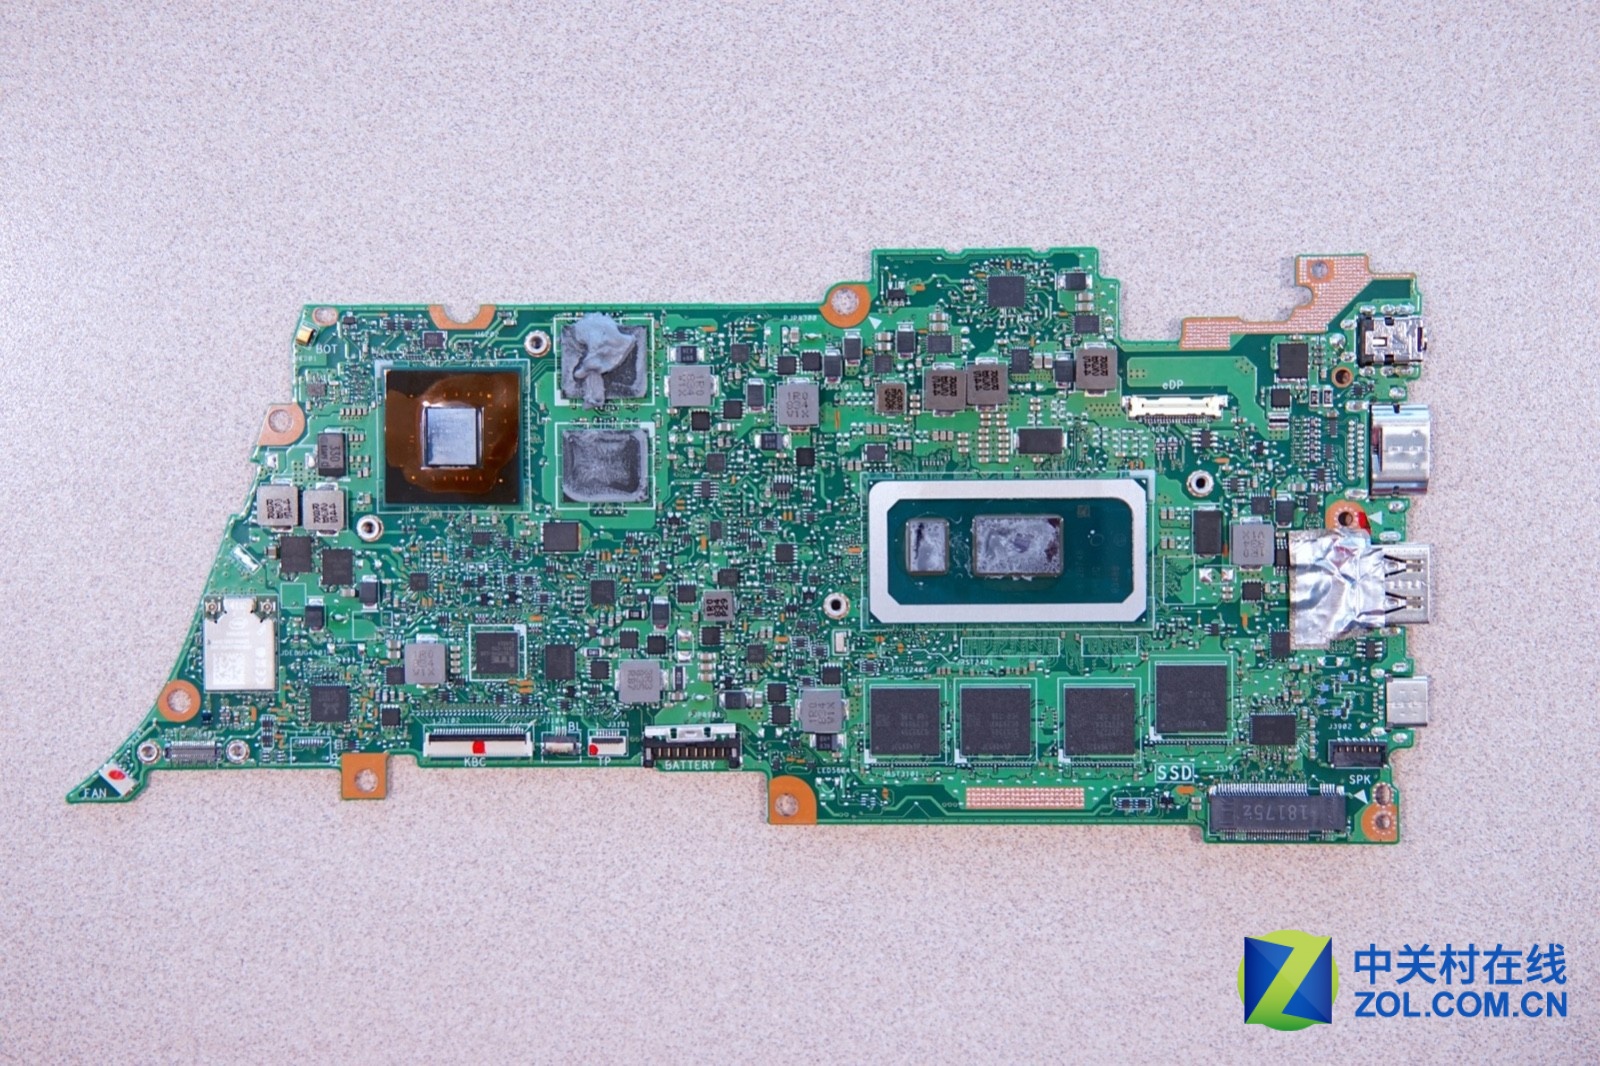
This laptop has 8GB of memory soldered on the motherboard. It does not have a free memory slot, so upgrading the memory is impossible.
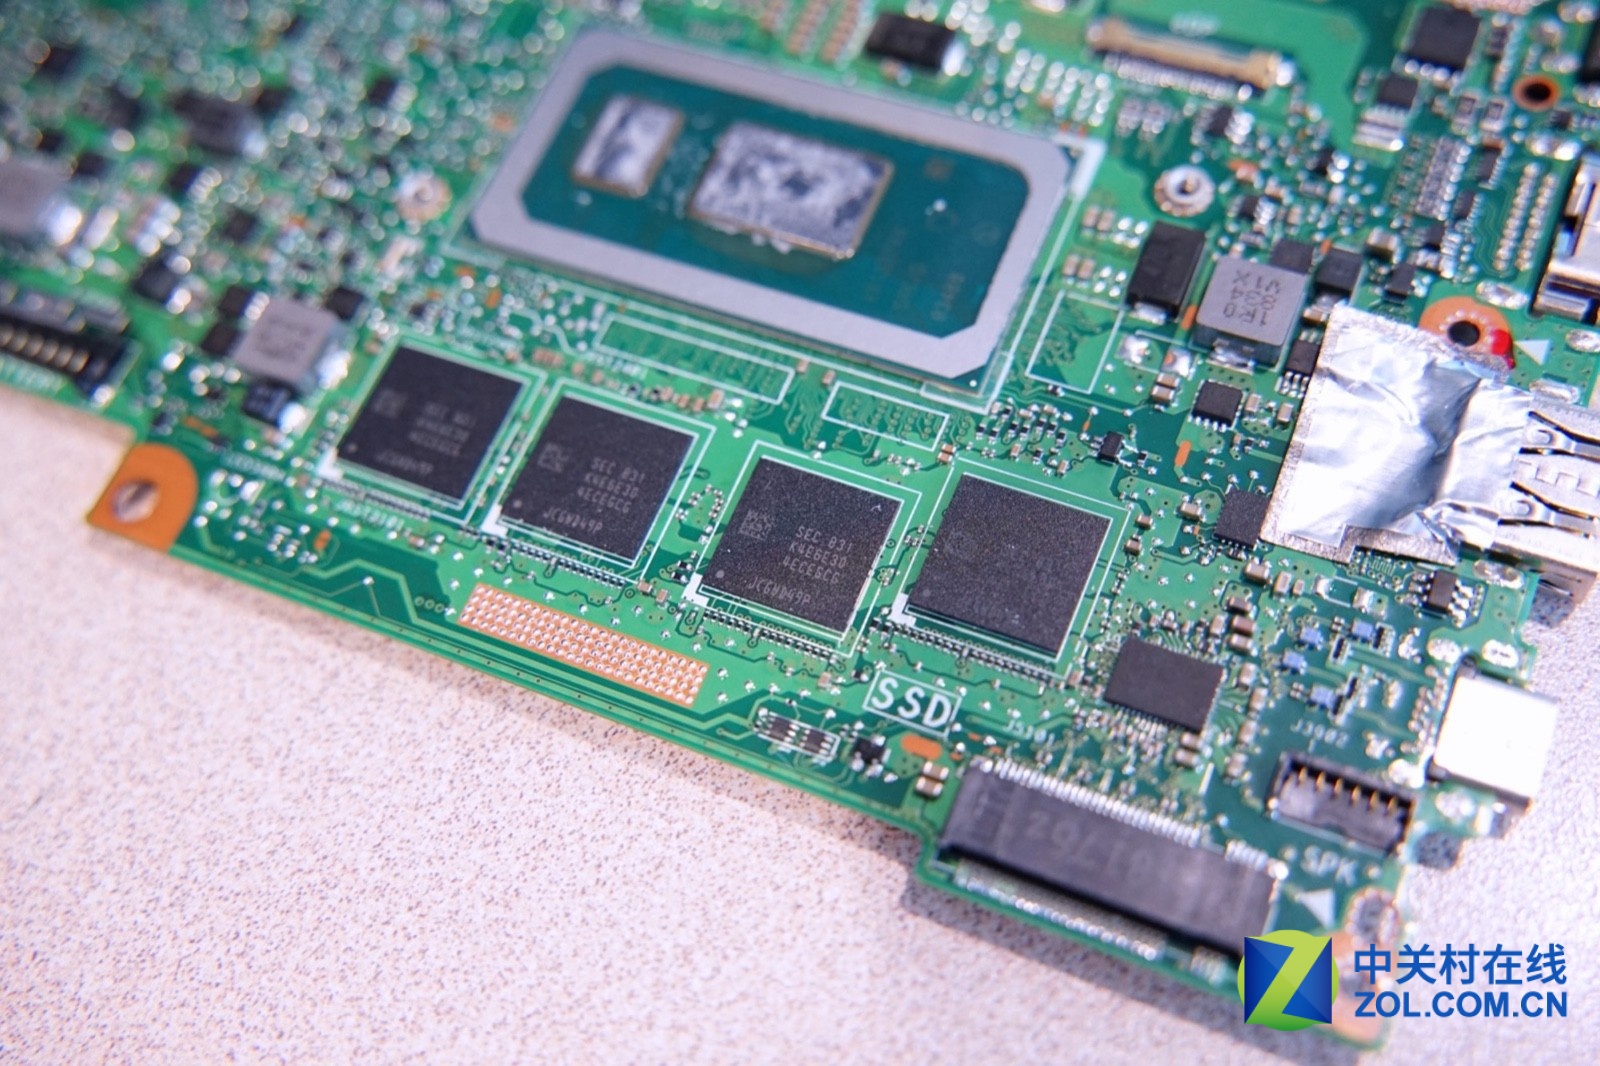
This is the Intel Core i5-8265U processor.
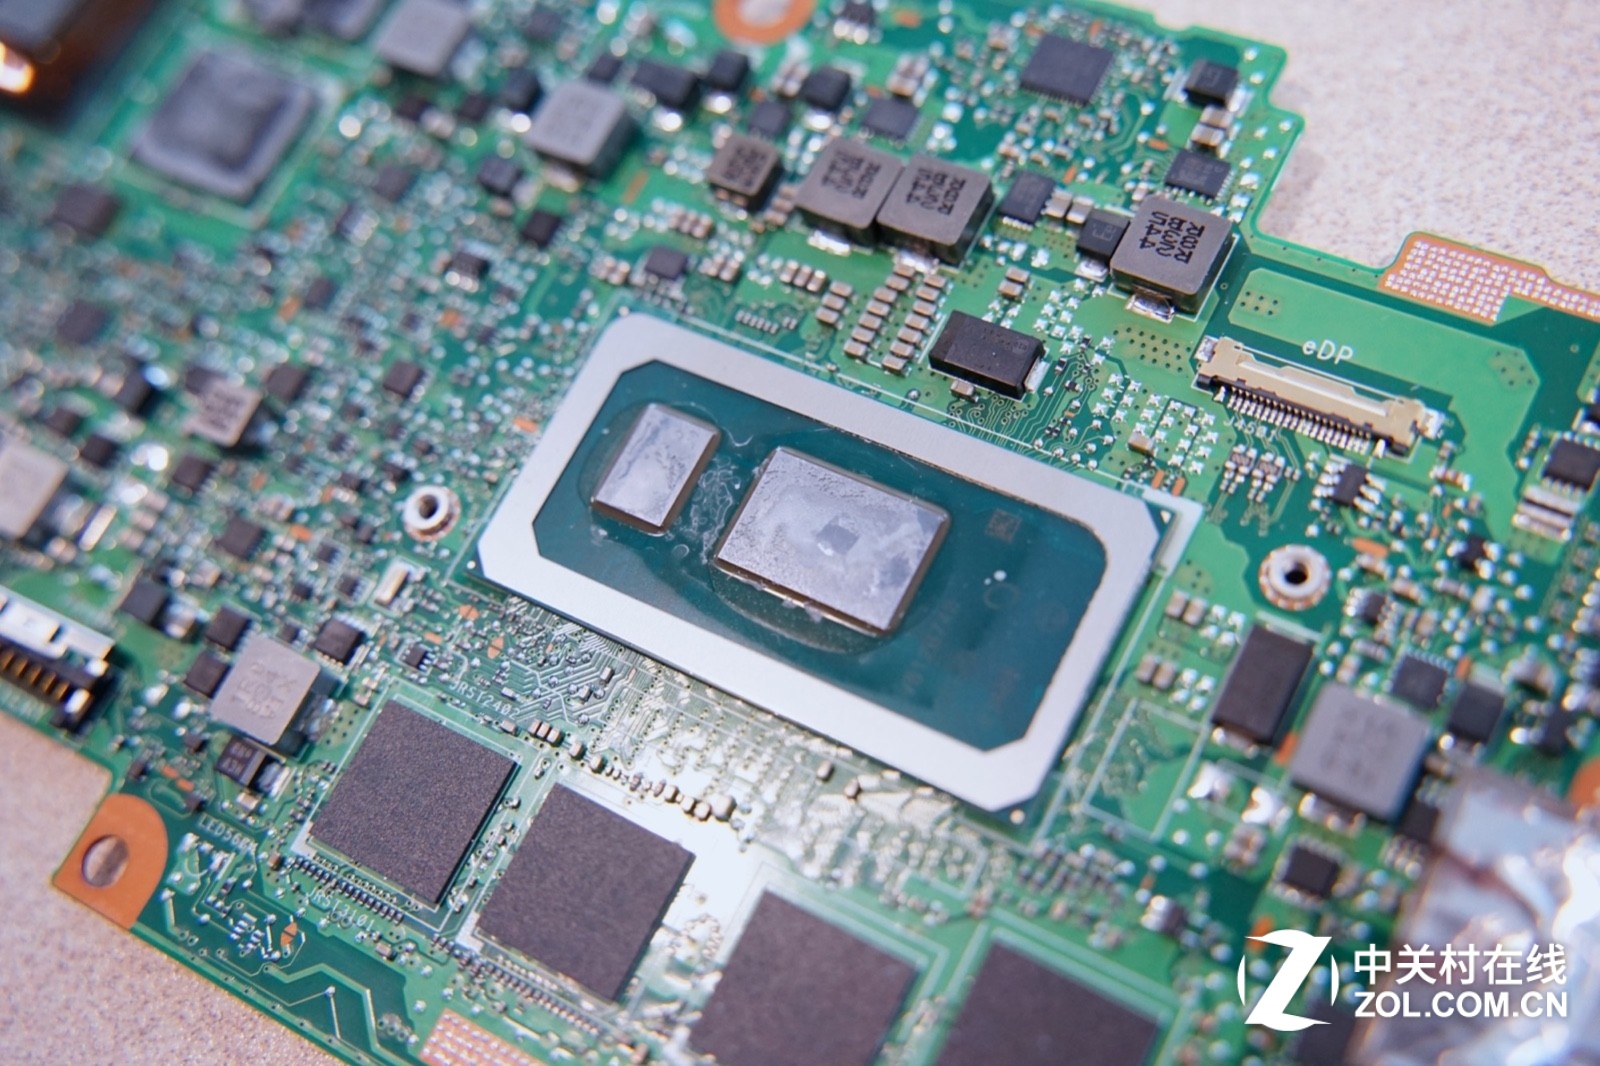
The NVIDIA GeForce MX150 discrete graphics card comes with two video memory chips.
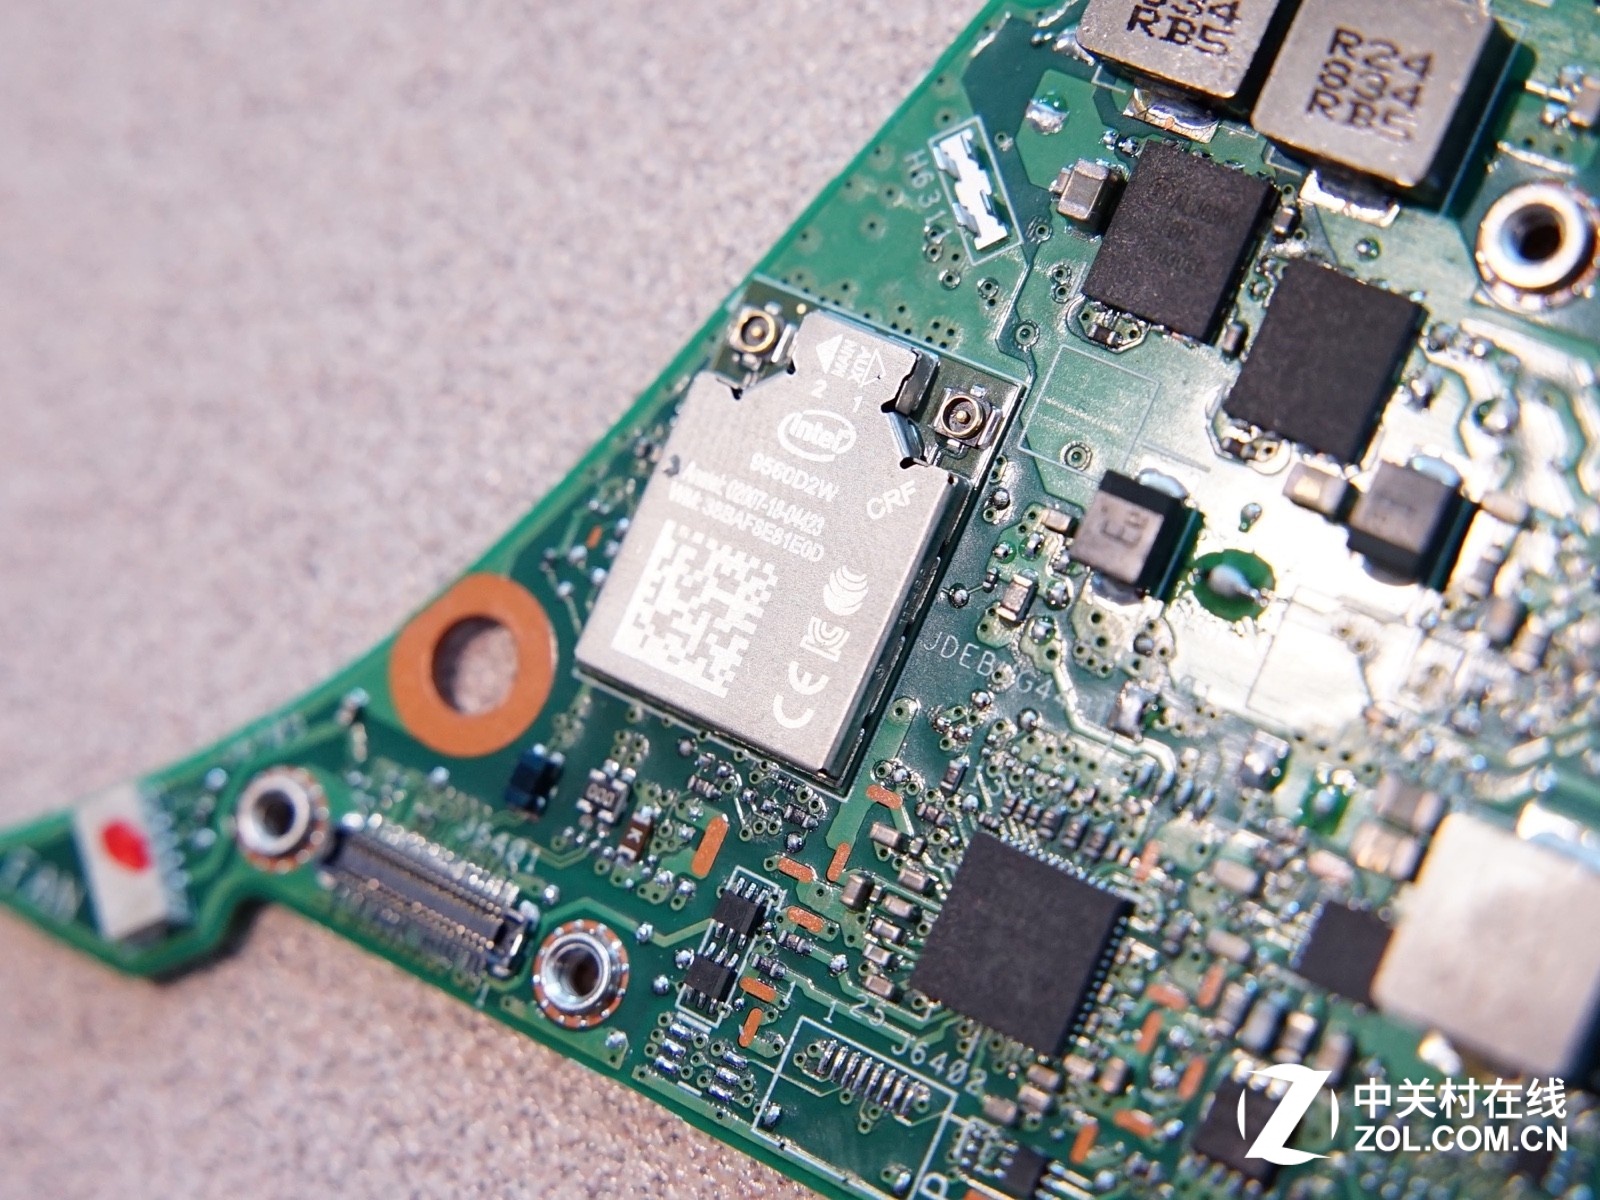
This is an Intel 9560 Wi-Fi adapter with Bluetooth 5.0. It is soldered directly to the motherboard, so it cannot be replaced.
There are no important chips on the back of the motherboard, nor any insulating stickers, but it has many black insulating blocks.
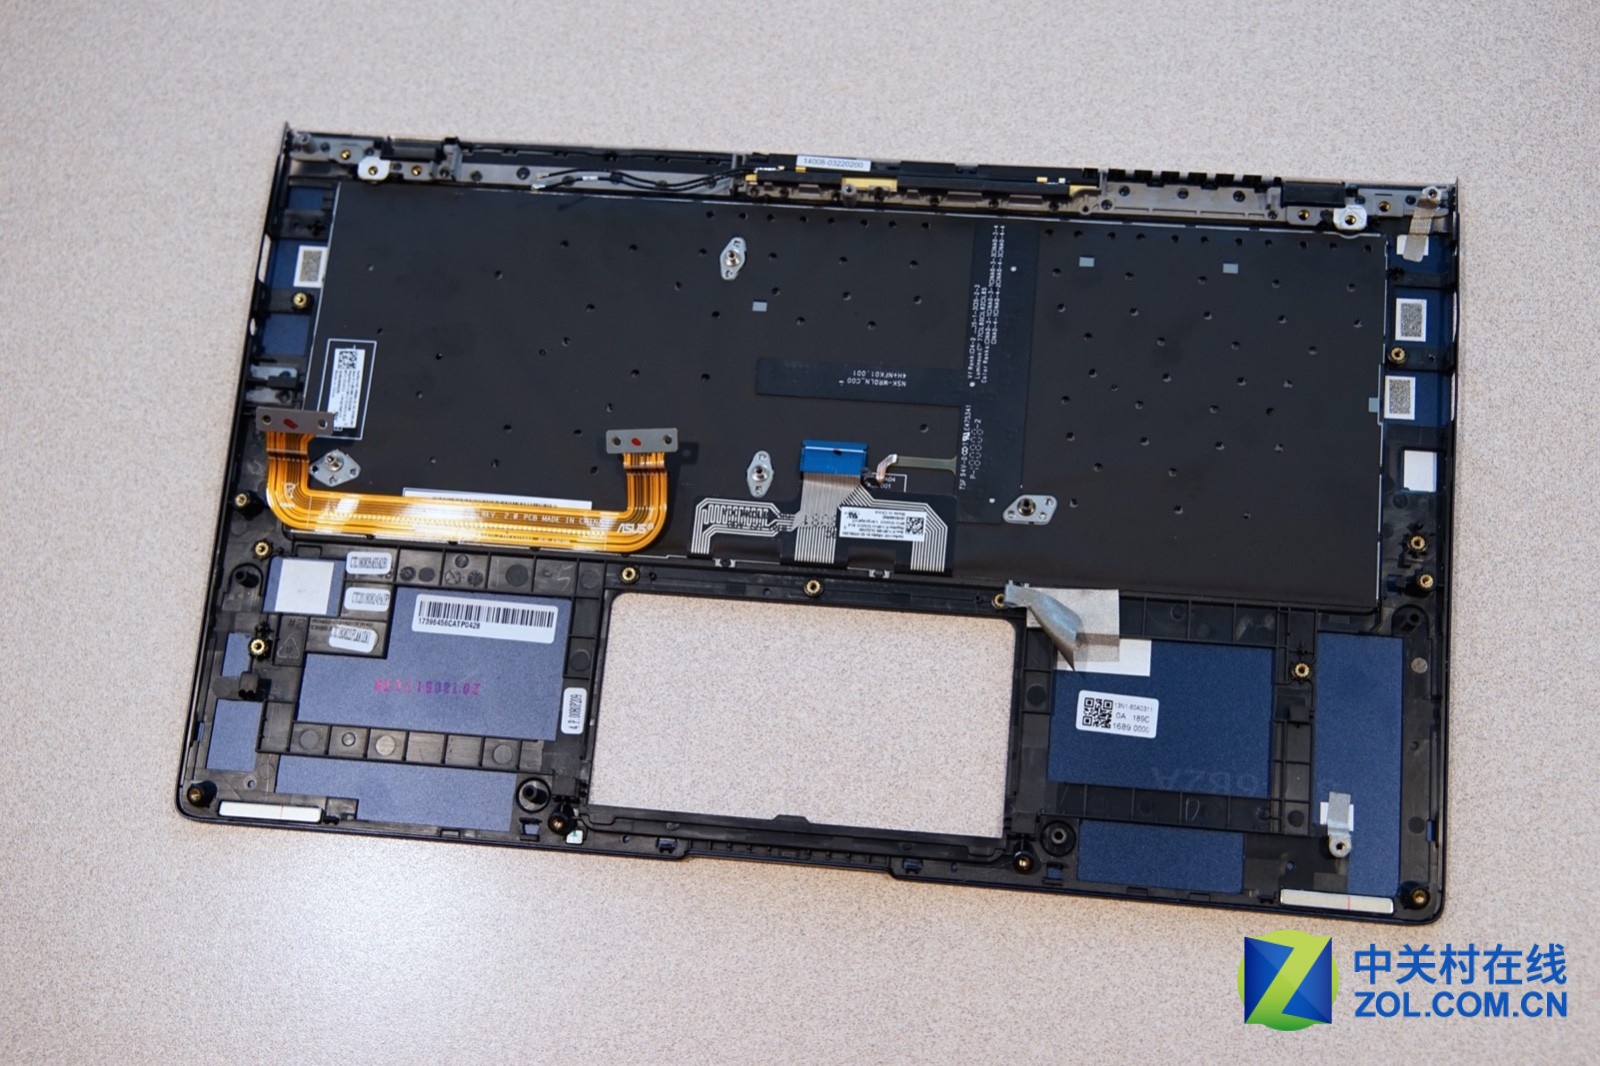
After the motherboard is removed, you can access the keyboard. Its keyboard can be separated from the palm rest, but it may be more difficult.

There is also a foot pad at the bottom of the screen assembly. This pad serves as a buffer to prevent the screen from coming into contact with the body when it is fully opened or closed.
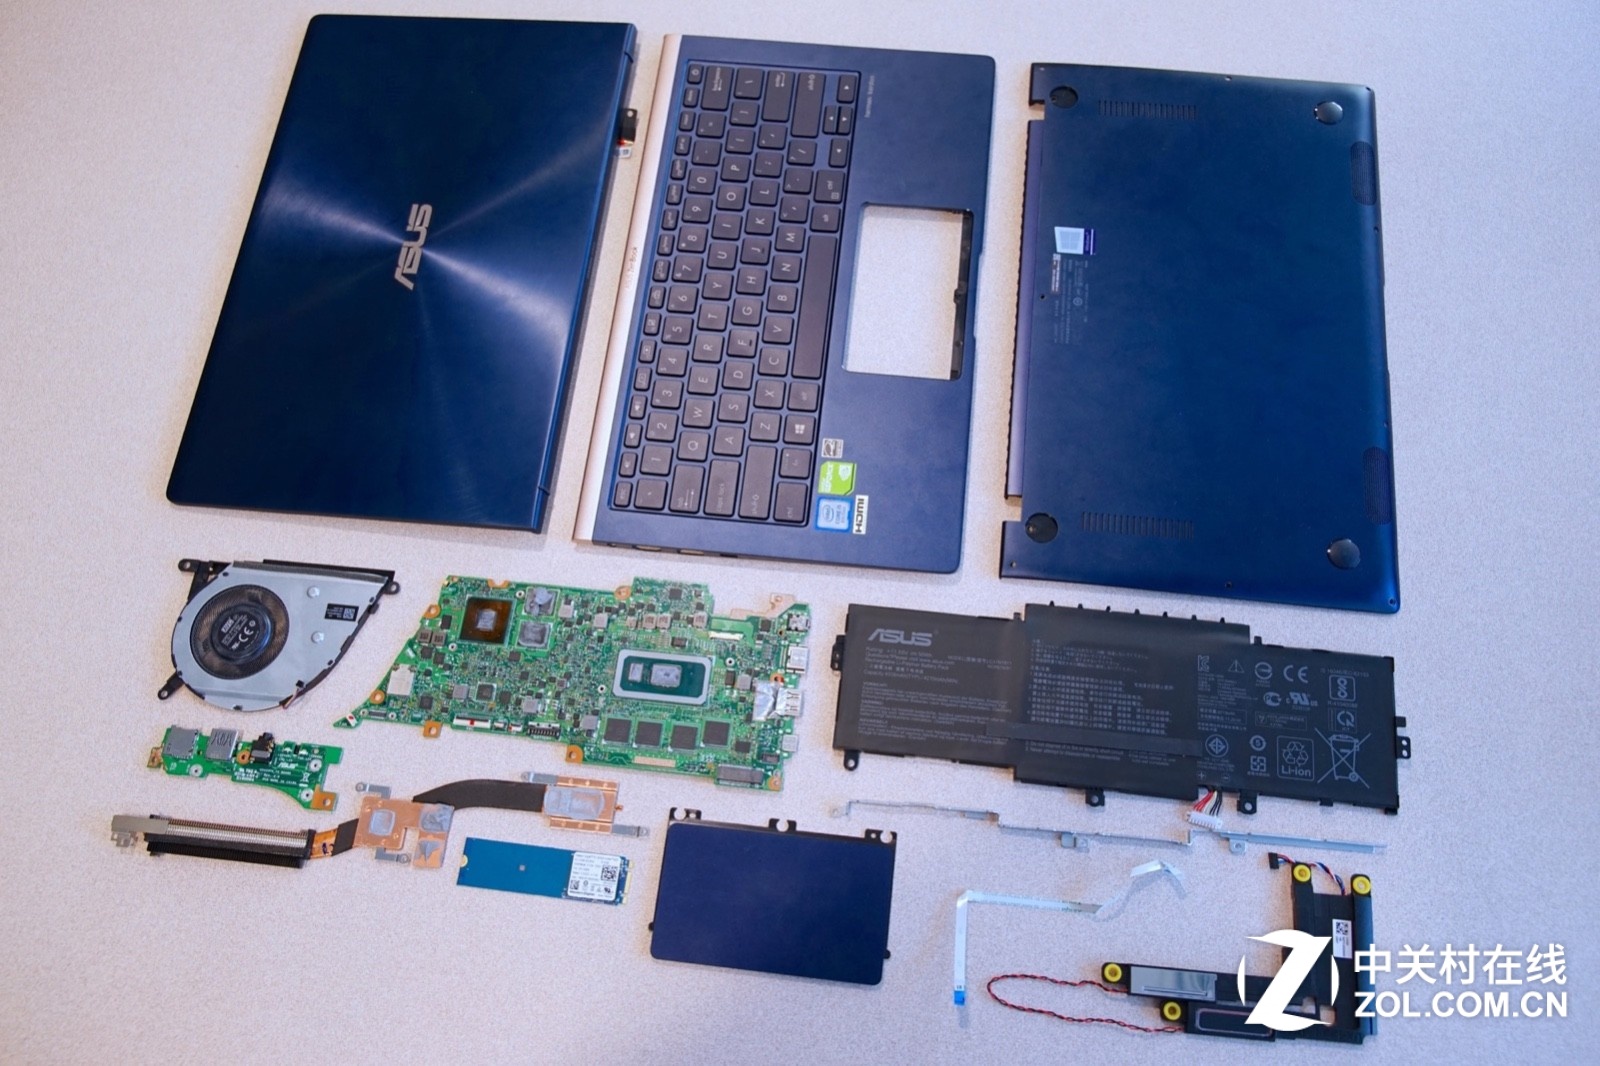
Through the disassembly of the ASUS UX433FN, it is clear that ASUS has maximized the use of internal space within such a compact body. Compared to traditional-sized laptops, its volume has not decreased, but it appears more refined, which is the best proof of the manufacturer’s design ability.
My new UX433FN has a few millimeter lifts on the bottom right-hand of my touchpad. It’s not very noticeable, and you’ll only feel it when you run your fingers from the palm rest to the touchpad. Given that this is a brand new laptop, I don’t suspect that this is battery-related. Would you mind sharing your opinion on this?
What on earth is the Torx screwdriver size used to unscrew the 11 bottom screws? I can’t find it anywhere.
T5
Hi,
Is it possible to add one more SSD, or is the motherboard limited to connecting a single SSD?
Thanks in advance!
Yes, this laptop has only one M.2 slot. There is no way to add more SSDs, but you can replace your SSD with a larger one.
Hello, I have a UX433FN that suffered water damage. I opened it up for drying and then sent it for repair. The repair people say the motherboard is missing some pieces, so I was wondering if you still have the motherboard to check what it has, or if you have high-resolution pictures of the motherboard that might help repair it. Thanks!
I have an Asus UX433 with 8GB of RAM. Can I remove this one and put the other one with 16GB of RAM?
It doesn’t work. The memory is soldered to the motherboard, and no free memory slots are reserved.
Is it possible to replace the RAM by removing the soldered RAM and replacing it with a new one?
Yes, you need to go to a professional repair shop, but only a few repair shops can provide this service.
Is it possible that something gets broken while removing the soldered RAM, and my PC will remain inoperable forever?
Or is there zero risk that it will break?
Hi, I got this laptop, but the hinge seems a bit too loose. How can I replace it or fix that? Thanks!
This is not a particularly good solution. You can remove the existing hinge and replace it with a new one. You can go to YouTube to search for relevant videos.
Whenever I unscrew all screws (also under the rubber pads), I can’t remove the bottom plate because it feels stuck/glued in the center of that plate.
Any tips?
Can I insert an Intel Optane 32GB 512GB NAND in slot M. 2? If so, can you share your opinion on this? Thank you.
Thank you so much for the guide. I fixed two issues: the touchpad was slightly lifted, and the hinges were loose.
Can anybody tell me what size screws are needed to replace the T5 base screws? I successfully replaced the screen, but three of the base screws got mangled.
Hi,
Is it possible to use an AX210ngw Wi-Fi 6 adaptor on this laptop? Is an M.2 Wi-Fi slot available?
Thank you!
The Wi-Fi card of this laptop is soldered on the motherboard, and there is no M.2 port reserved for the Wi-Fi card.
Where else can you get a replacement ScreenPad besides ASUS? I have 1/5 not working
You can try searching for it on eBay.
Hello!
Thank you for such a great teardown resource! Question for you: You stopped short of removing the keyboard and said it might be difficult to remove and replace it. What do you mean? Is this something best left to the pros? I have just the replacement keyboard, not a keyboard and palm rest assembly. I was afraid you meant this was one of those laptops that the keyboard is attached to the palm rest via plastic rivets that would require being melted to remove the keyboard.
Thanks again!
In this picture, you can see the keyboard; only a few plastic rivets hold it in place. You need a soldering iron to remove the keyboard very easily.
https://www.myfixguide.com/wp-content/uploads/2019/04/Asus-ZenBook-14-UX433FN-Disassembly-32.jpg
Is there any CMOS battery? I can’t find it.
This laptop doesn’t have a separate CMOS battery. It has a CMOS battery as a module as well as integrated into the battery.
I’m not sure if I understood this correctly: “It has a CMOS battery as a module.” What do you mean by that?
Did I understand this correctly?:
There is no CMOS battery. The main battery serves as the CMOS battery.
Thank you for your reply!
Yes, you’re right.