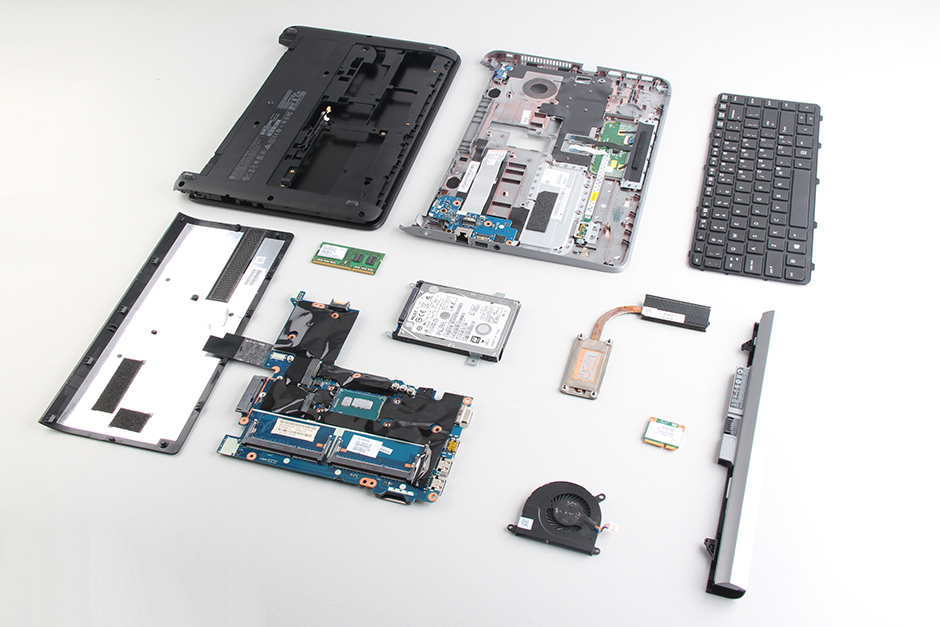
In this guide, I will explain how to disassemble the HP ProBook 430 G1 to remove and replace the hard drive, keyboard, palm rest, RAM, wireless card, bottom case, heat sink, cooling fan, and motherboard.
Want to stay connected to MyFixGuide.com? Follow us on Facebook to check out the latest teardowns.
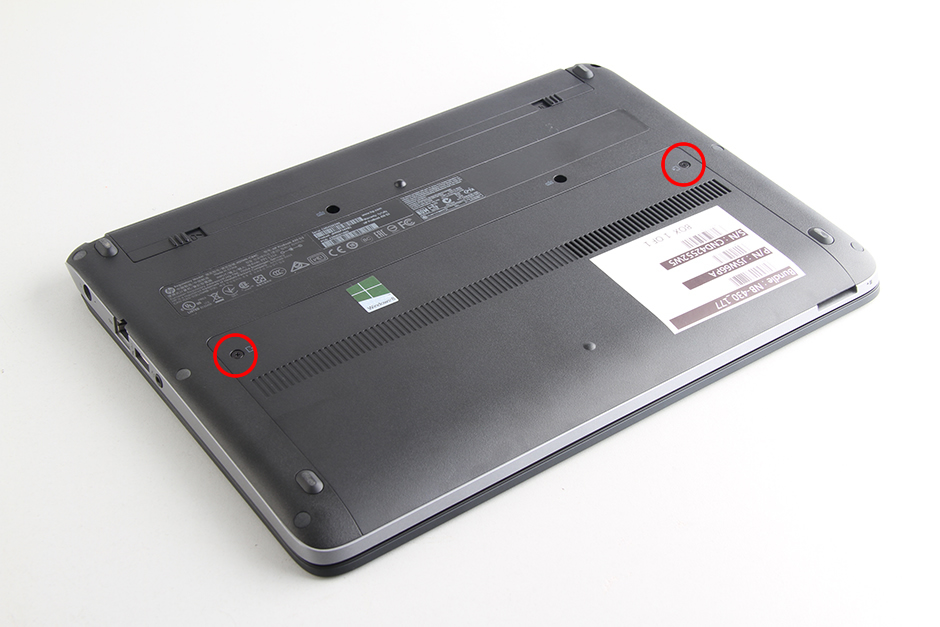
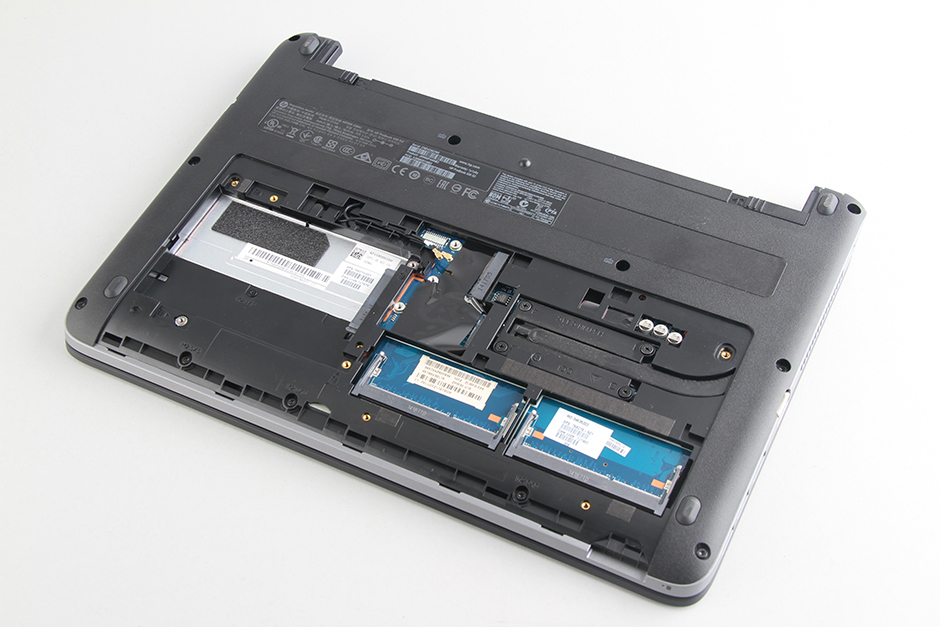
Step 1: Remove the service cover
-
- Unlock and remove the battery.
- Remove the two screws securing the service cover.
-
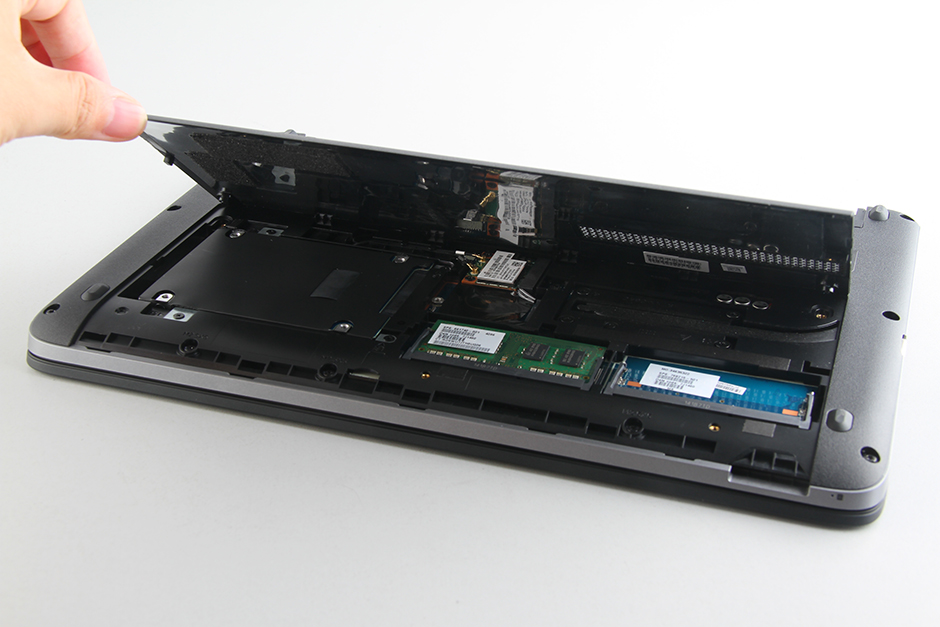
- Insert a screwdriver or pry tool into the groove, pry open the service cover, and remove it.
-
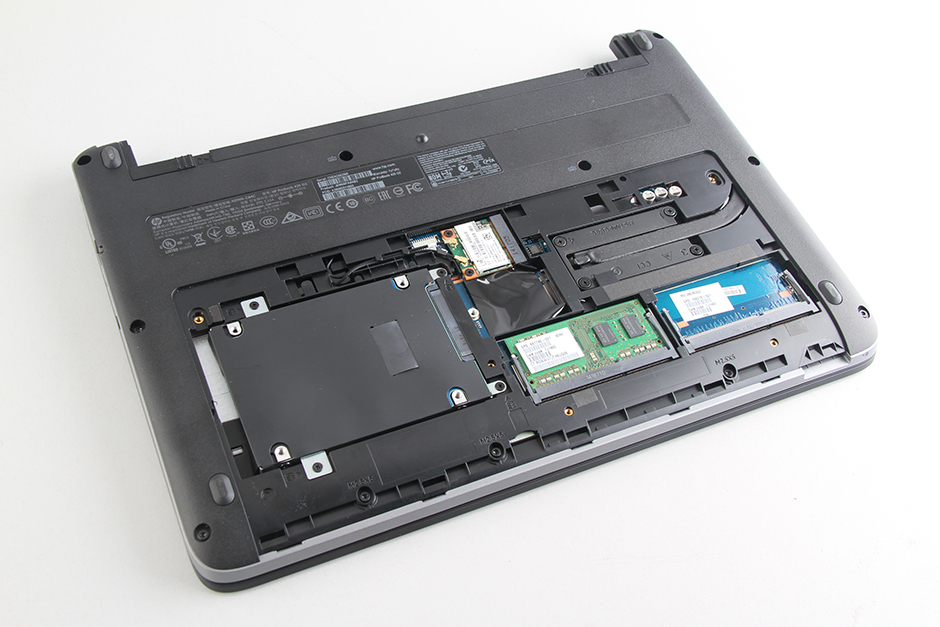
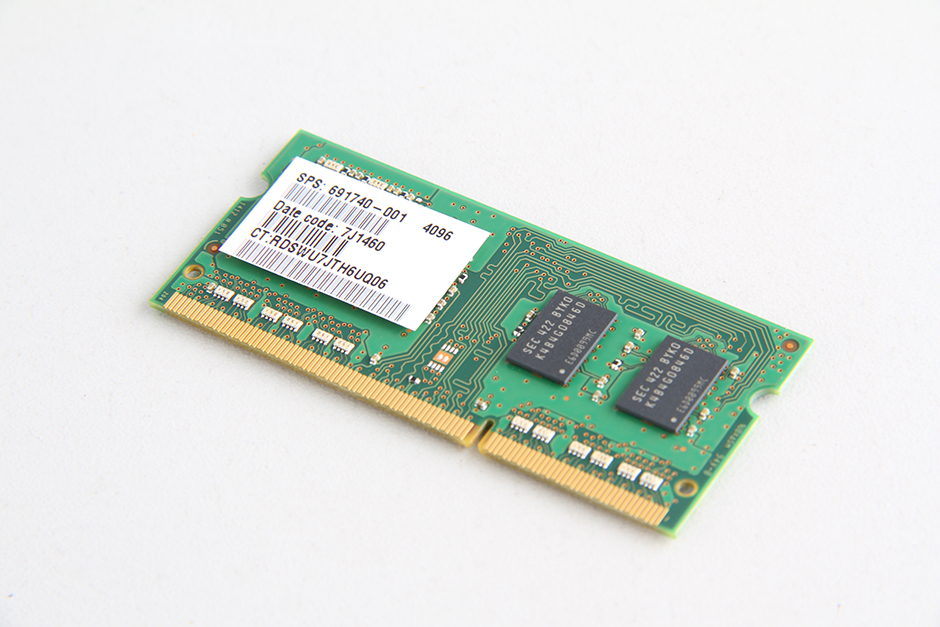
- Under the service cover, you can access the hard drive, RAM, and wireless card.
- This laptop has two memory slots, but only one memory module is pre-installed, so you can add another memory module to upgrade the memory.
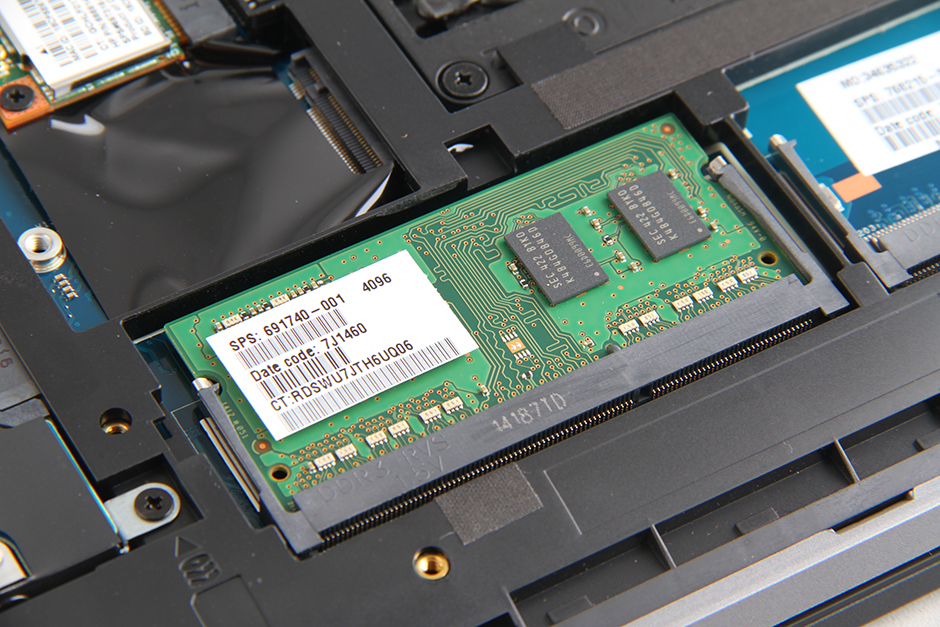
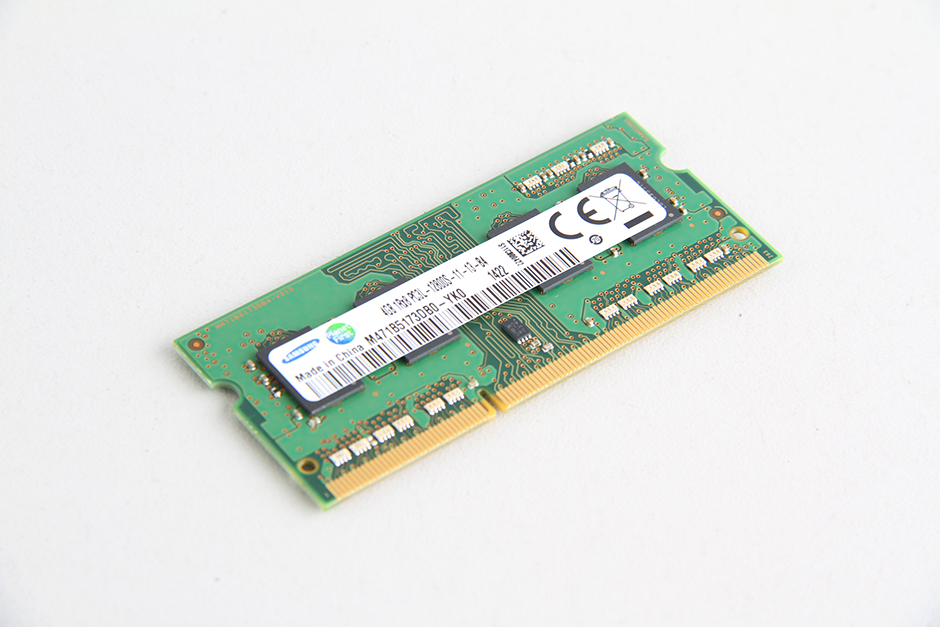
Step 2: Remove the RAM
-
- Use your nails to separate the clips on both sides of the memory module and remove it.
-
- The HP ProBook 430 G1 comes with a Samsung 4GB PC3L-12800S RAM module.
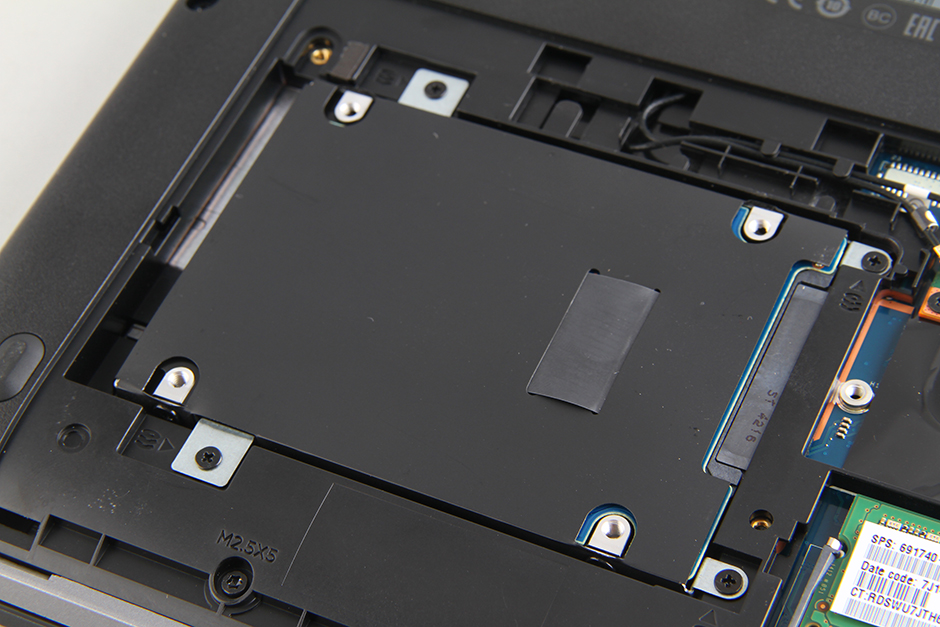
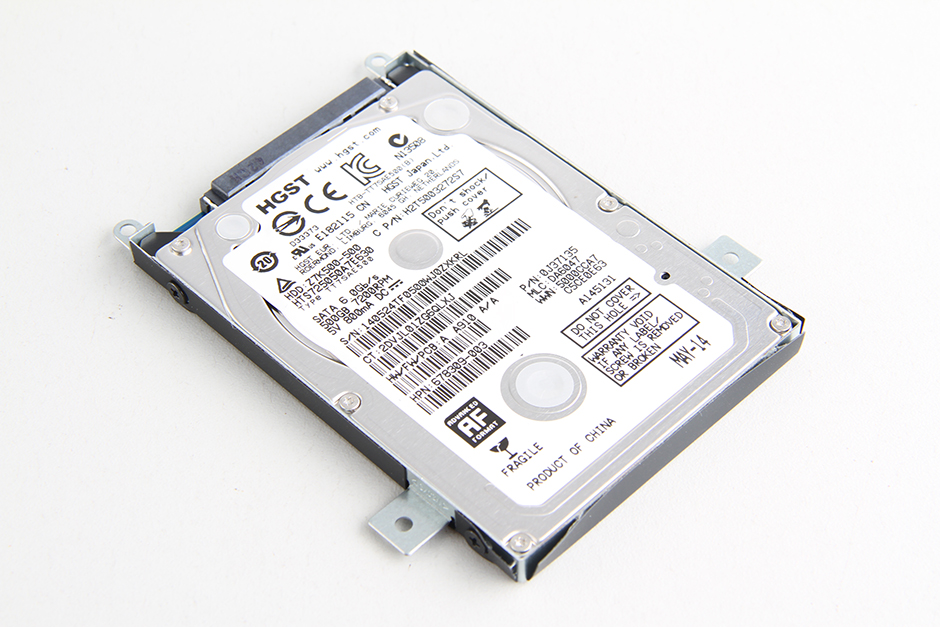
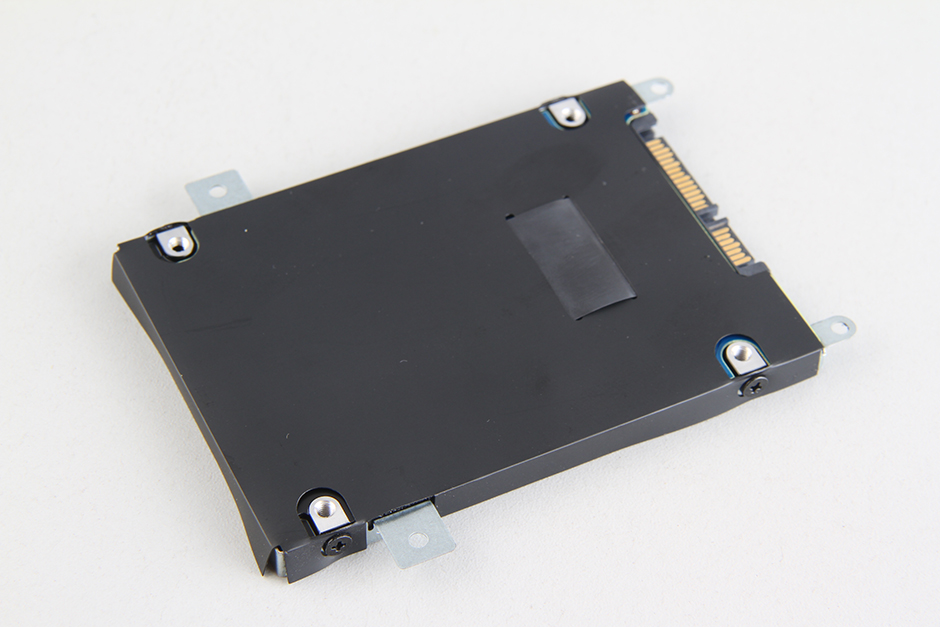
Step 3: Remove the hard drive
-
- Remove the four screws securing the hard drive module. Lift the black tape with your hand and slide it to the left to remove the hard drive.
-
- The laptop comes with a 500GB HGST hard drive. The hard drive is mounted in an HDD caddy. To upgrade the memory, you need to remove the HDD caddy and install it on the new hard drive.
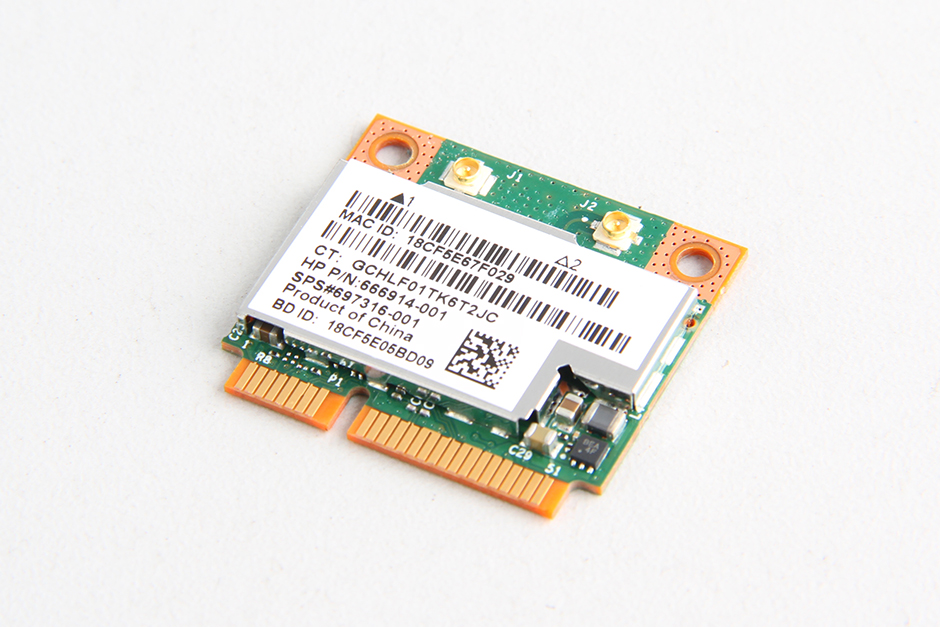
Step 4: Remove the wireless card
-
- Remove the two screws securing the wireless card and disconnect the two antennas.
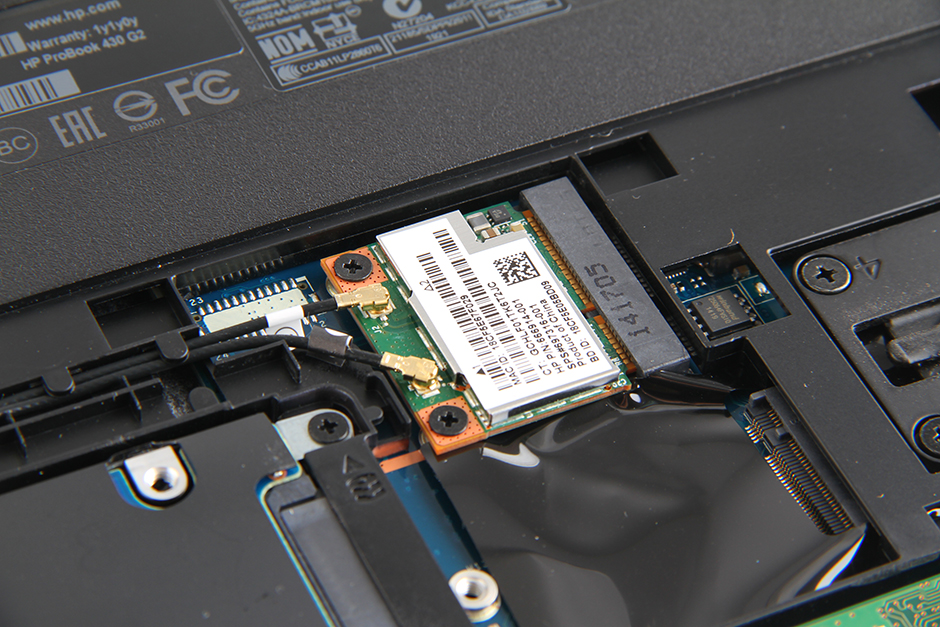
-
- Wireless card
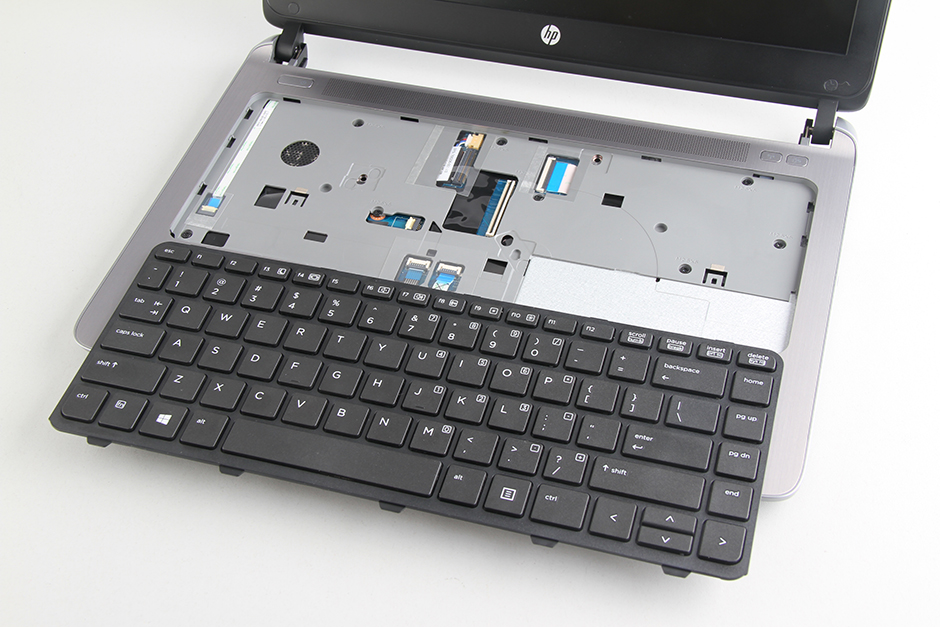
Step 5: Remove the keyboard
-
- Now, remove all screws from the bottom cover.
-
- Turn over the laptop.
- Pry up the keyboard and disconnect the keyboard cable. You can remove the keyboard.
- Disconnect the four cables and remove the screws securing the palm rest.
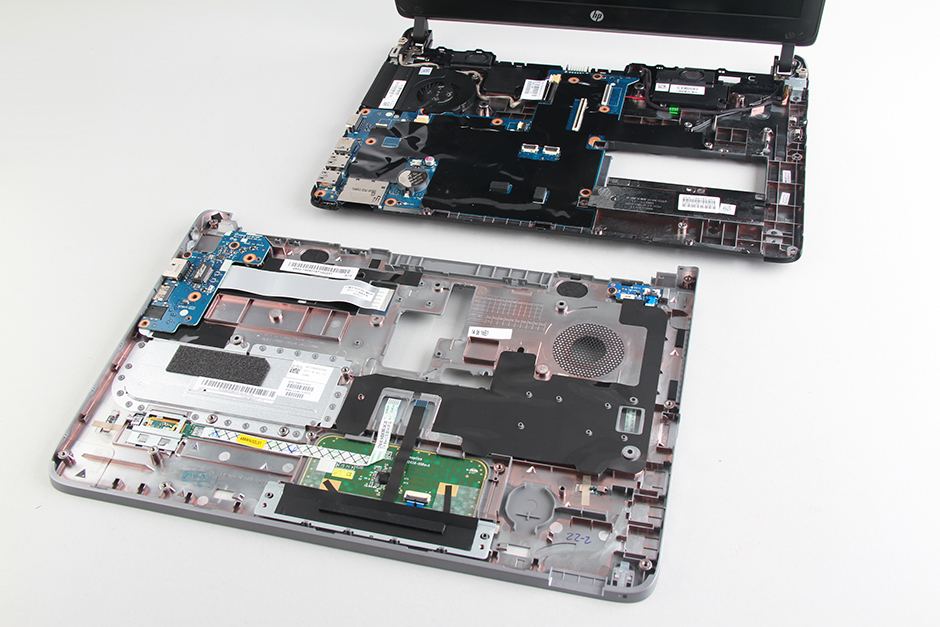
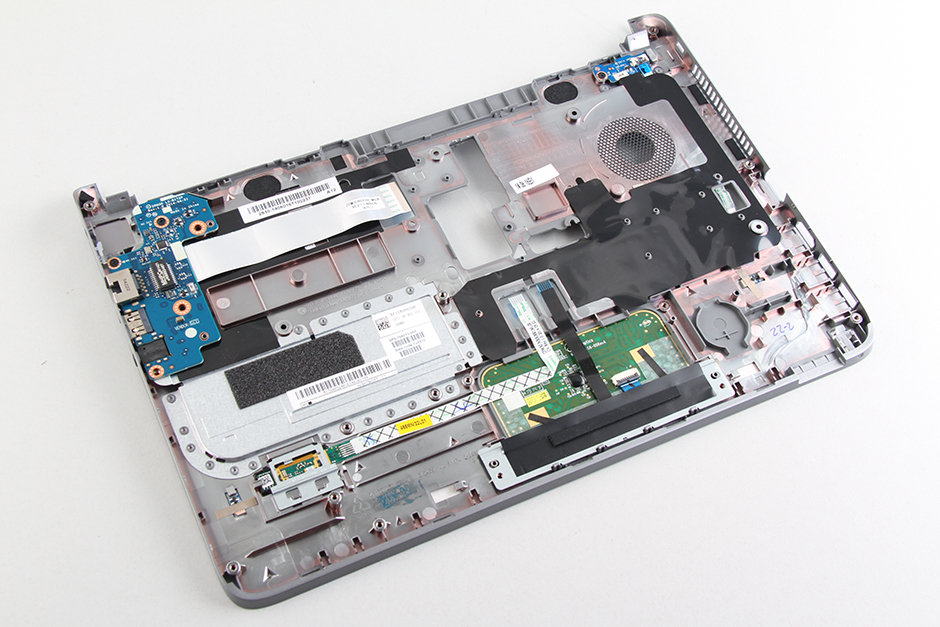
Step 6: Remove the palm rest
-
- Insert a plastic snap between the palm rest and the bottom cover. There are many clips on the palm rest to secure it to the laptop, and you need to release these clips in order to remove the palm rest.
-
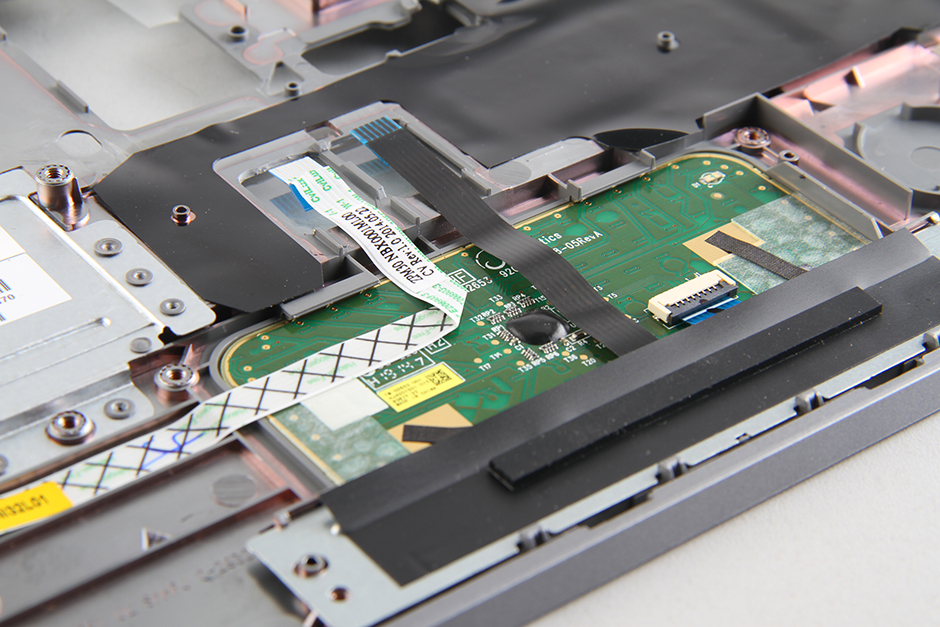
- Several small circuit boards and a touchpad are still retained on the back of the palm rest.
-
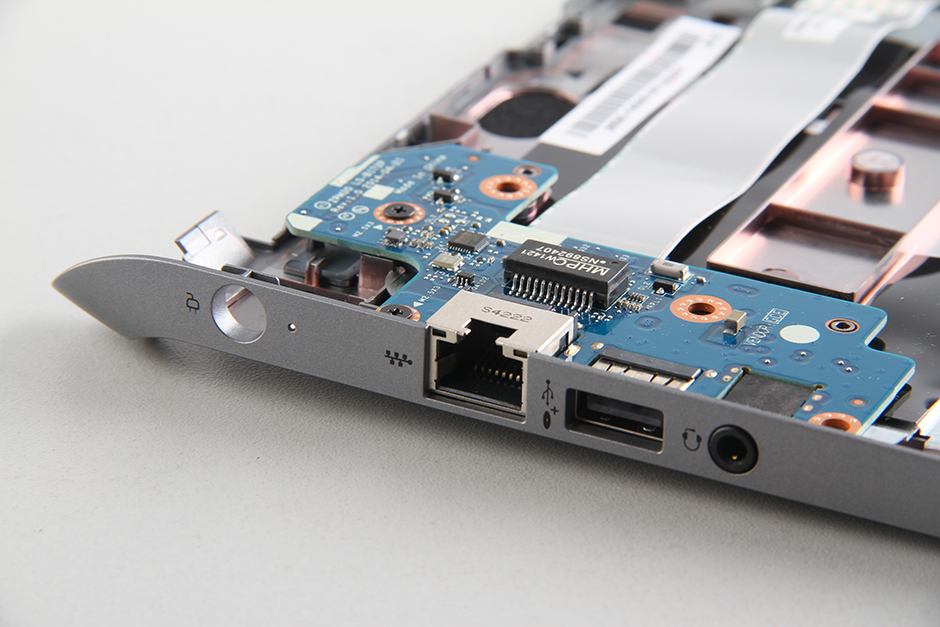
- USB board.
-
- Touchpad
-
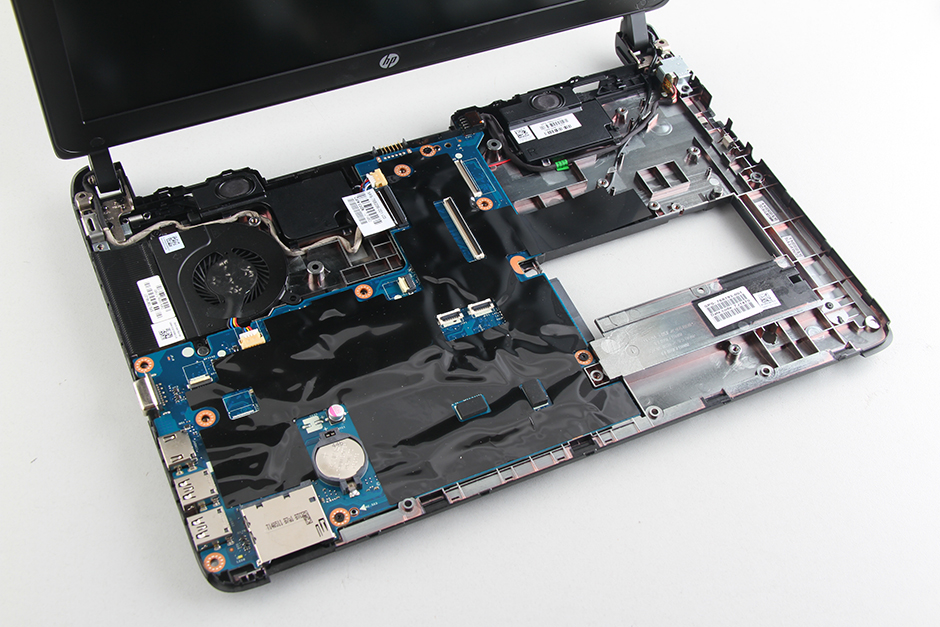
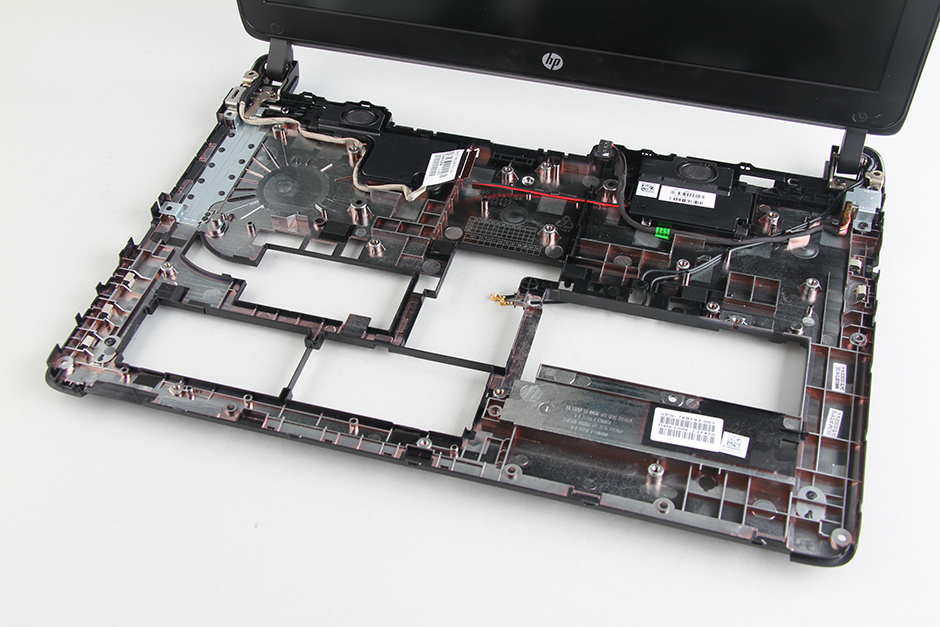
- When the palm rest is removed, you can access the motherboard, speakers, heat sink, and cooling fan.
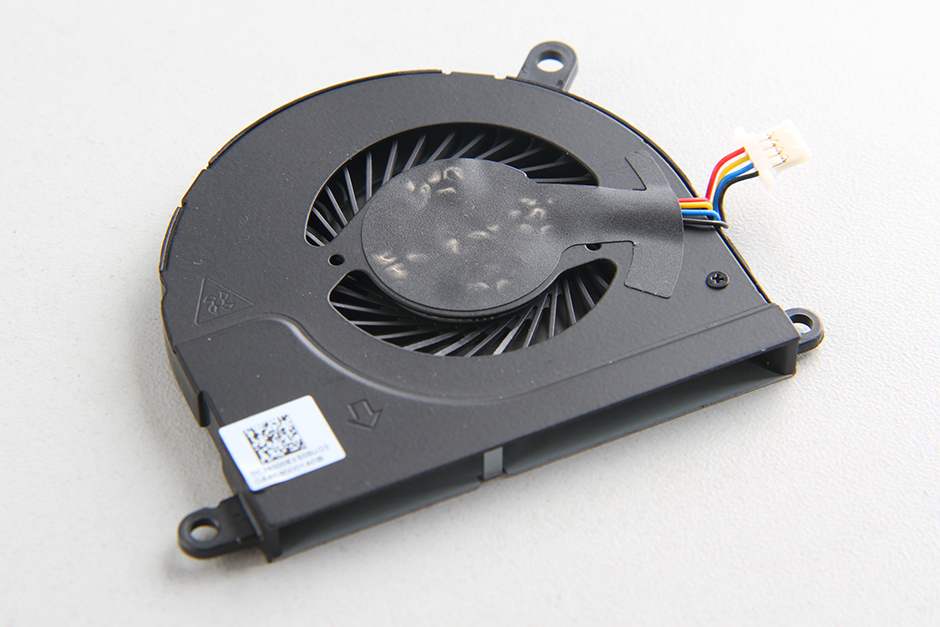
Step 7: Remove the cooling fan
-
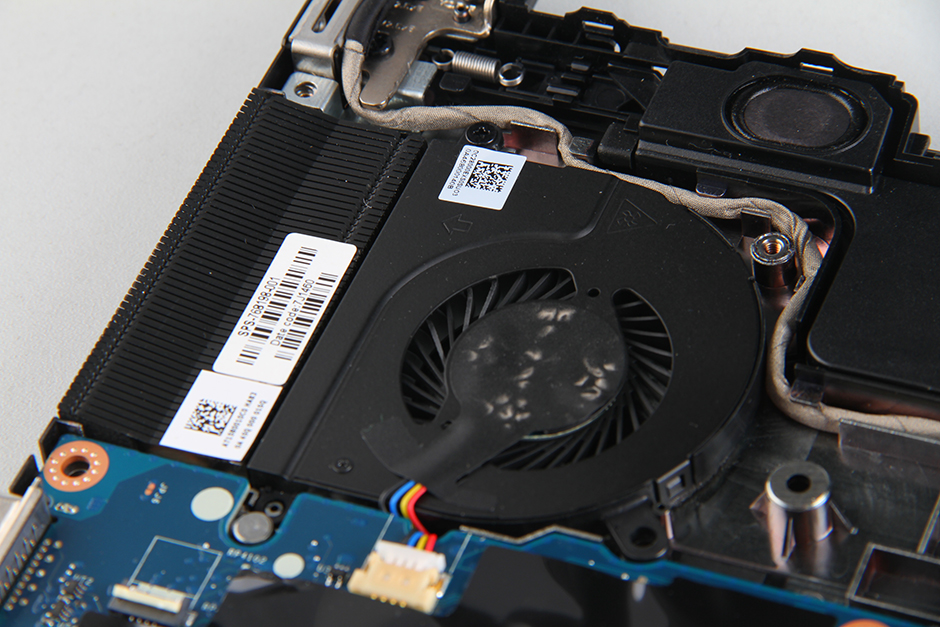
- Remove the three screws securing the cooling fan and remove the cooling fan.
-
- Cooling fan
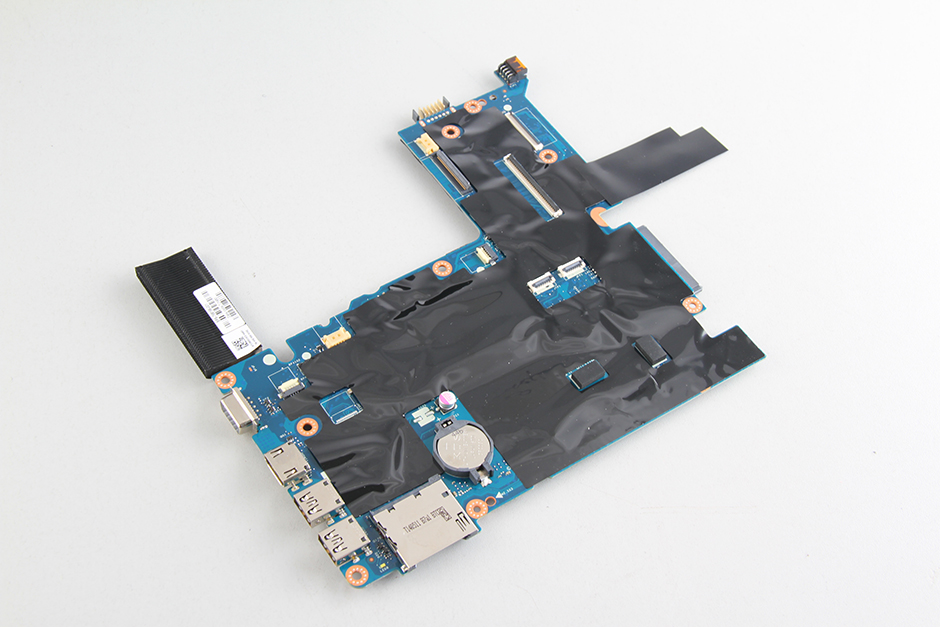
Step 8: Remove the motherboard
-
- Lift the motherboard from the right side with your hand and wiggle it until it completely detaches from the laptop.
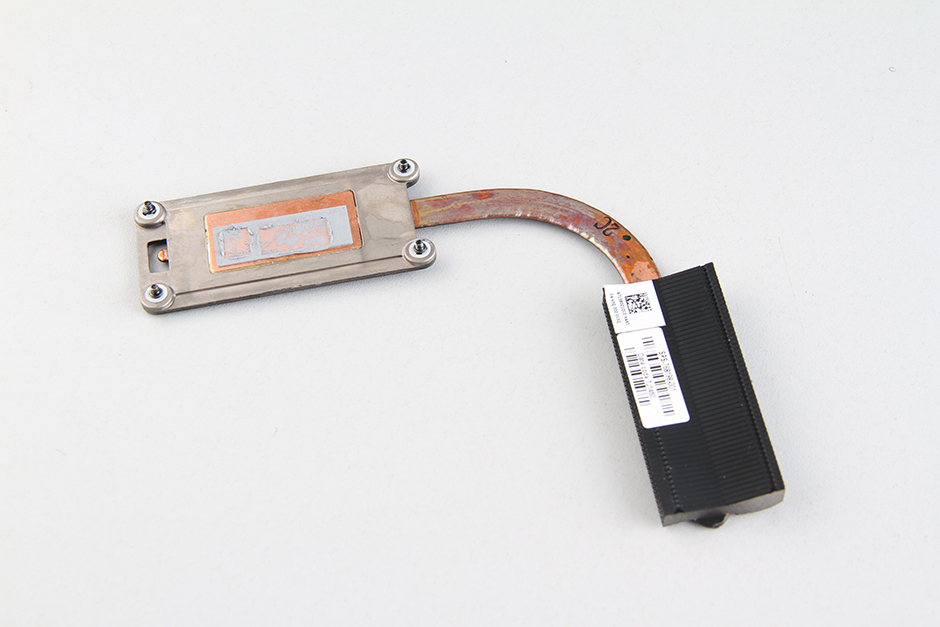
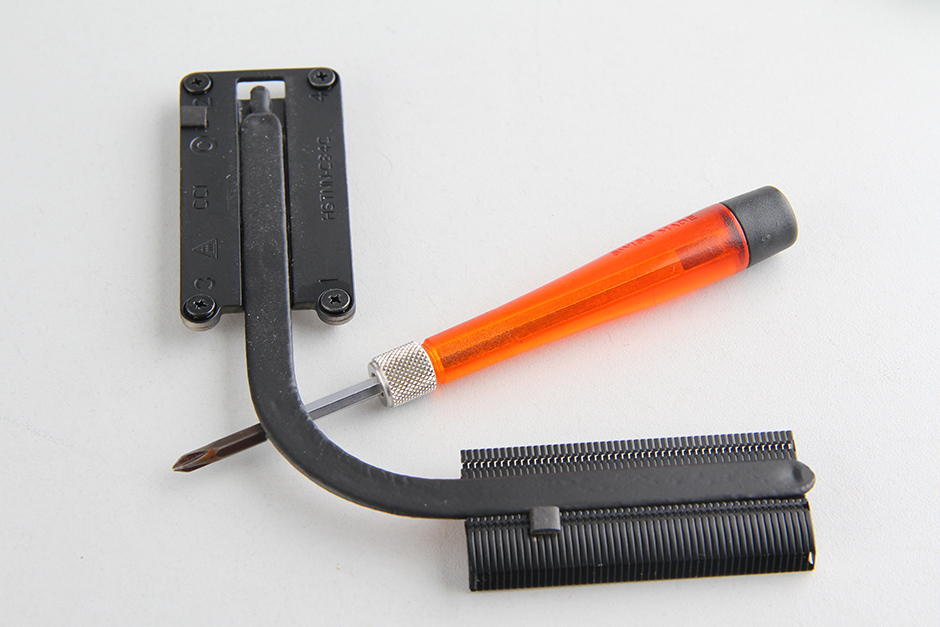
Step 9: Remove the heat sink
-
- Loosen the four screws securing the heat sink and remove it.

Heatsink
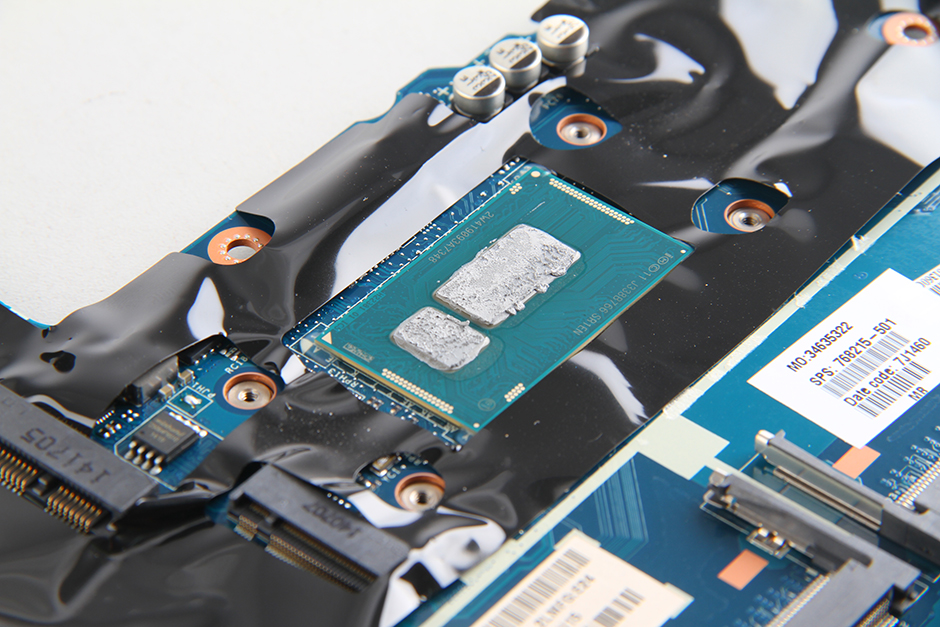
The processor of the HP ProBook 430 G1 is soldered onto the motherboard, so its processor cannot be upgraded.
HP ProBook 430 G1 internal parts