
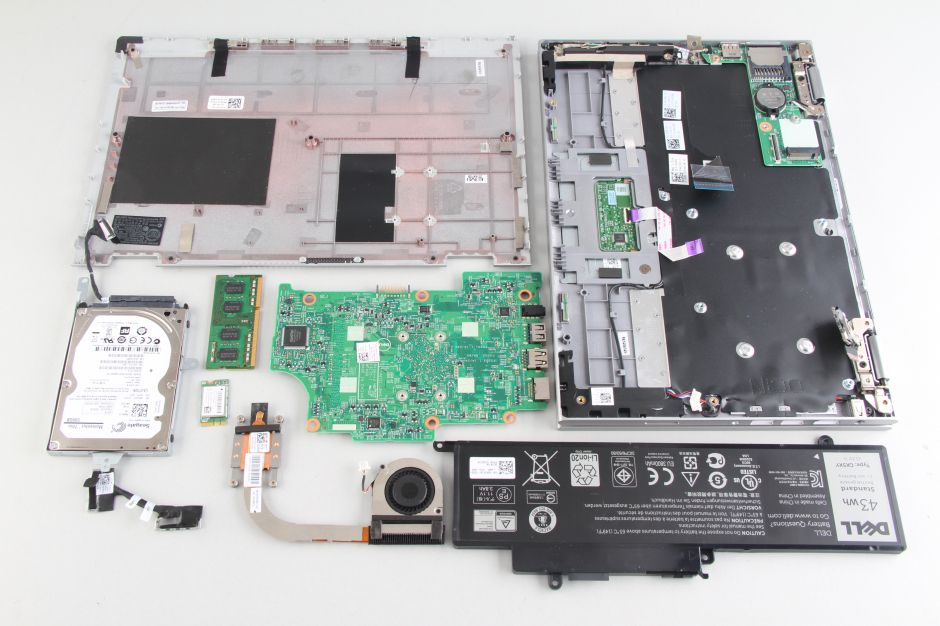
In this guide, I will explain how to disassemble the Dell Inspiron 11-3147 to remove the battery, hard drive, RAM, touchpad, wireless card, heat sink, cooling fan, speakers, and motherboard.
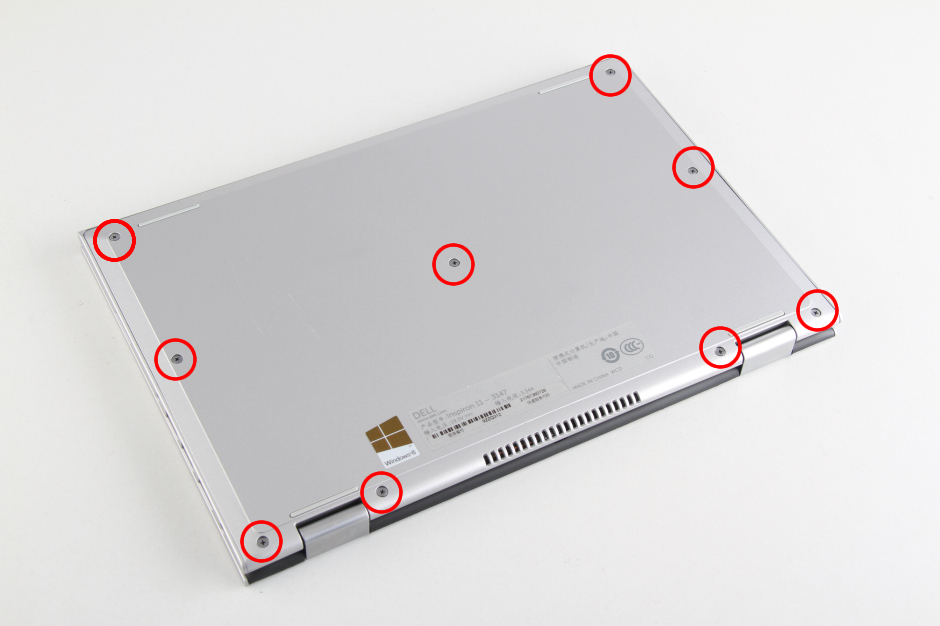
Step 1: Remove the bottom cover.
-
- Remove the nine screws from the bottom cover.
-
- Insert a plastic pry tool between the bottom cover and palm rest. Slide the pry tool to completely separate the bottom cover from the laptop.
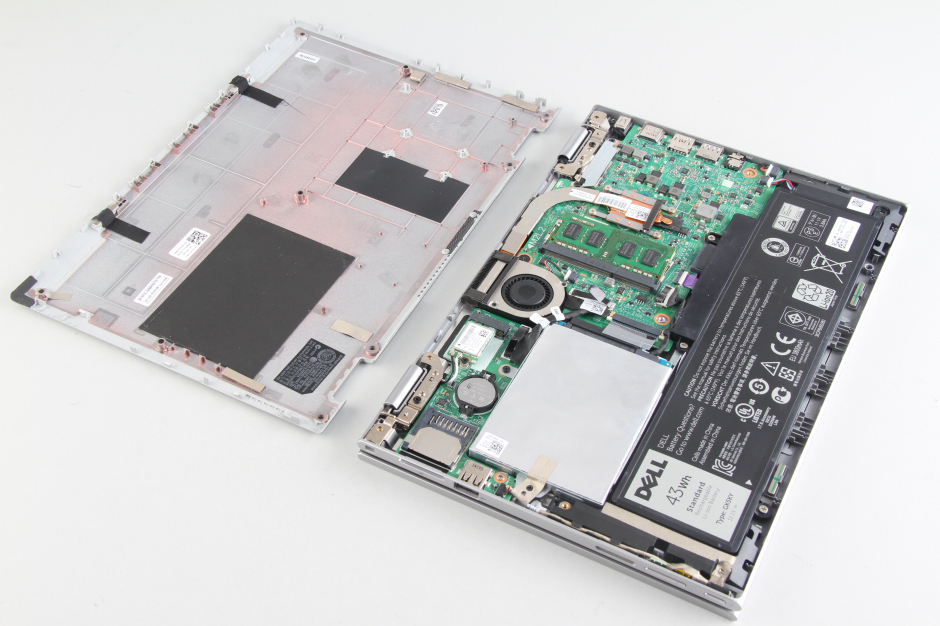
Step 2: Remove the battery
-
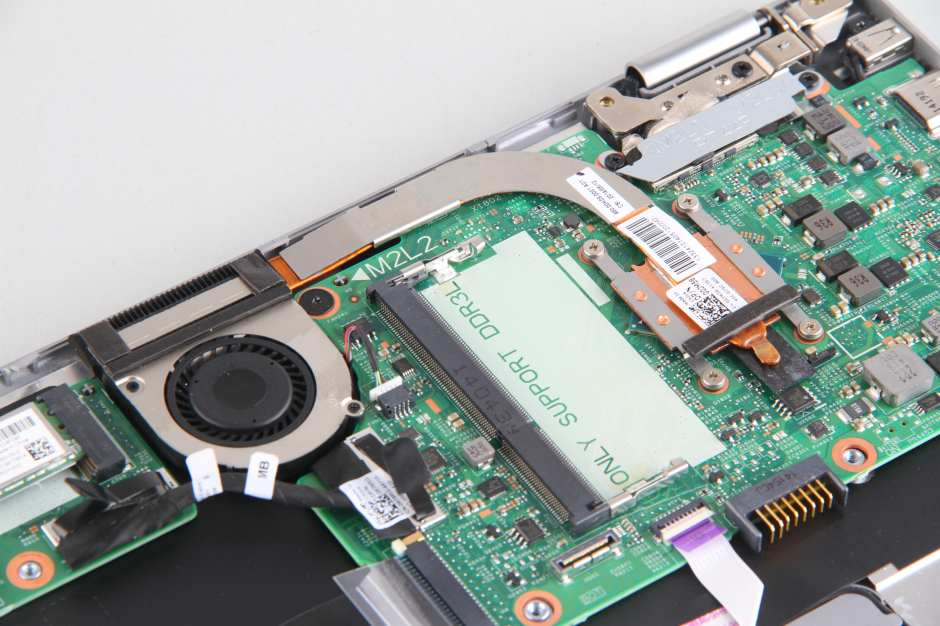
- Under the bottom cover, you can access the hard drive, battery, RAM, wireless card, speakers, heat sink, and cooling fan.
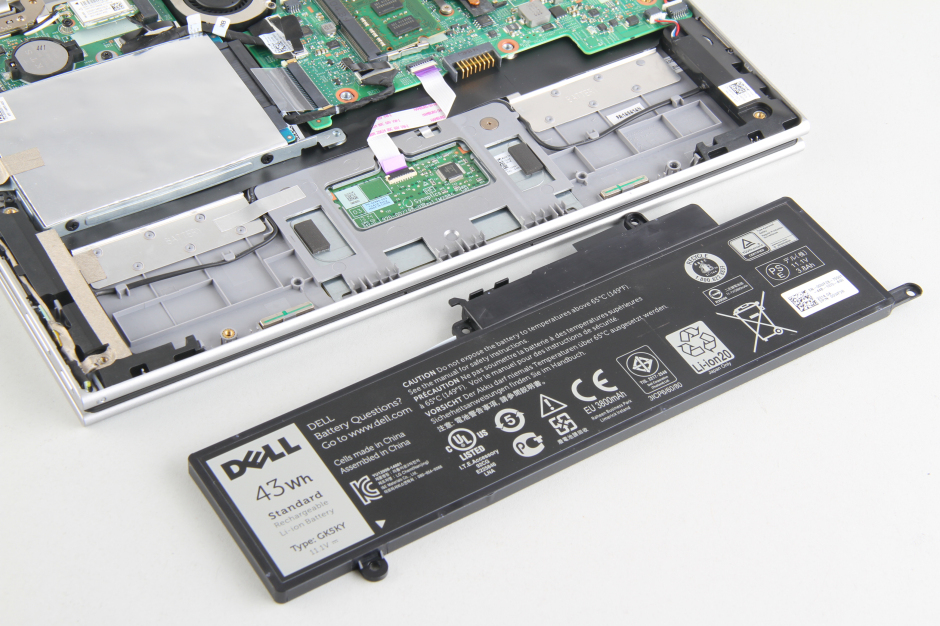
Remove the three screws securing the battery. You can remove the battery.
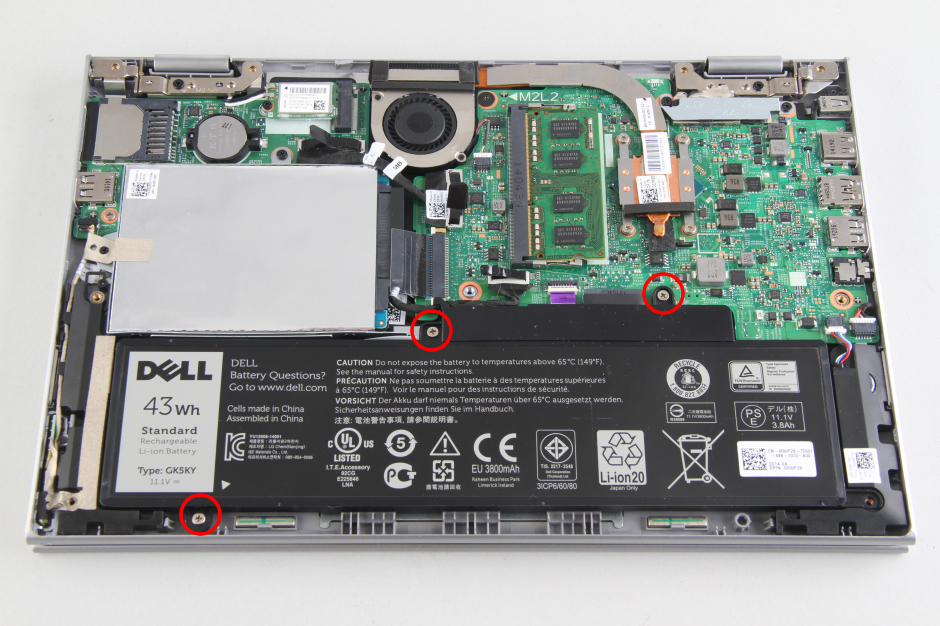
- The laptop comes with a 43Wh Li-ion battery. The Dell part number is GK5KY.
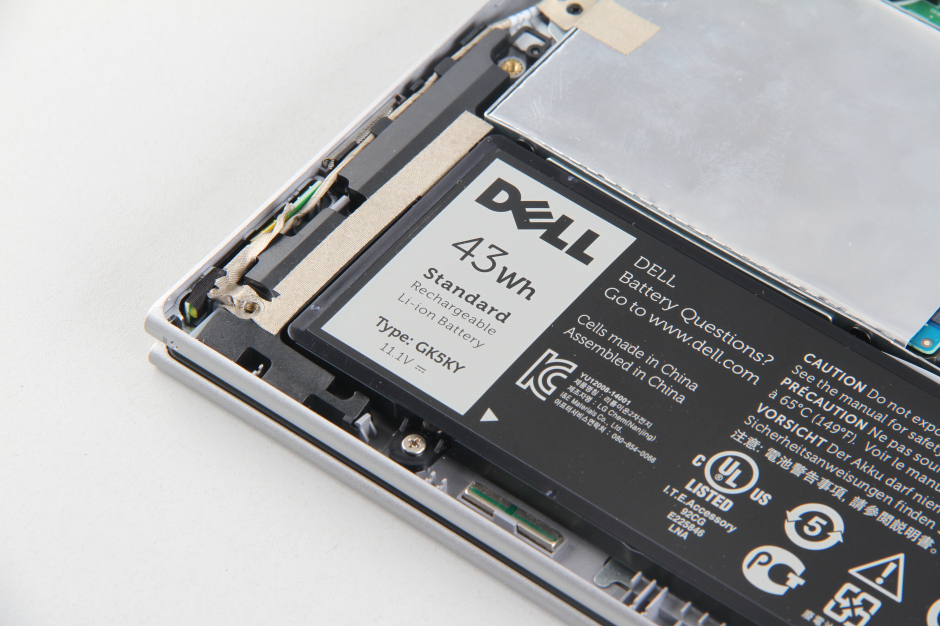
- The battery has been removed.
Step 3: Remove the RAM
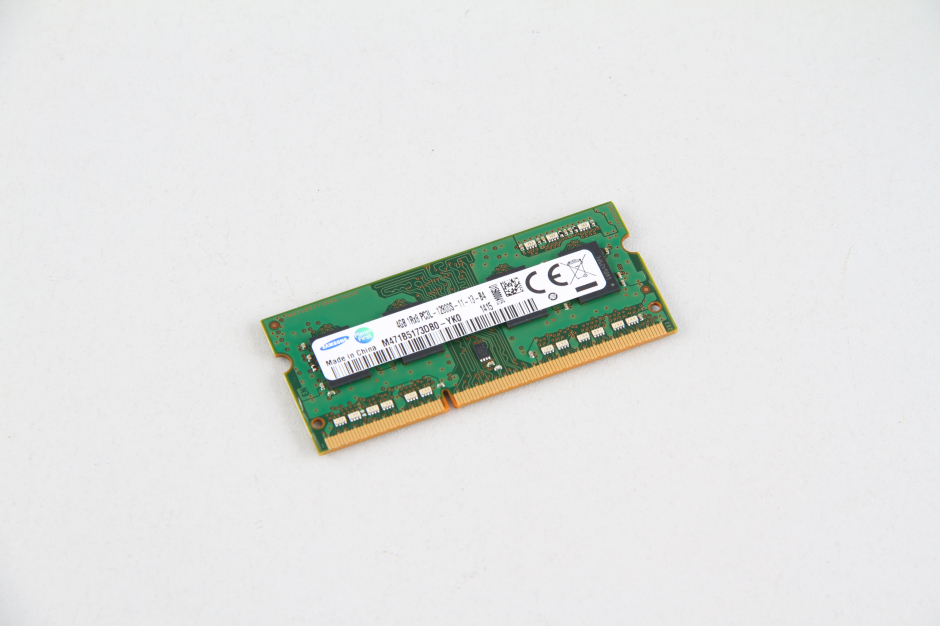
-
- Use your nails to separate the clips on both sides of the memory module. The memory will pop up automatically. Take it away from its slot.
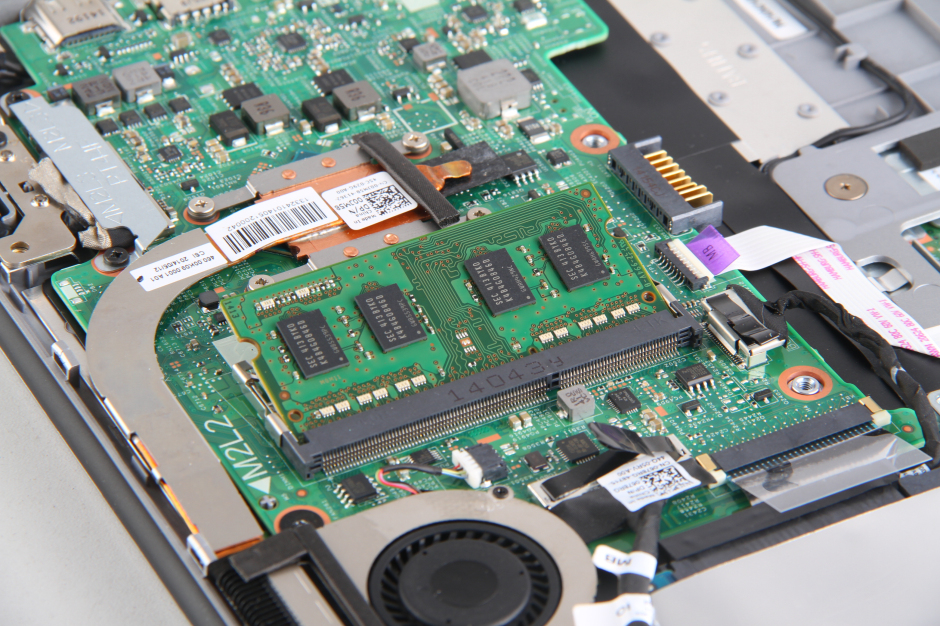
-
- It comes with a Samsung 4GB PC3L-12800S memory module. This laptop has only one memory slot. If you need to upgrade the memory, you will need to replace the existing memory module.
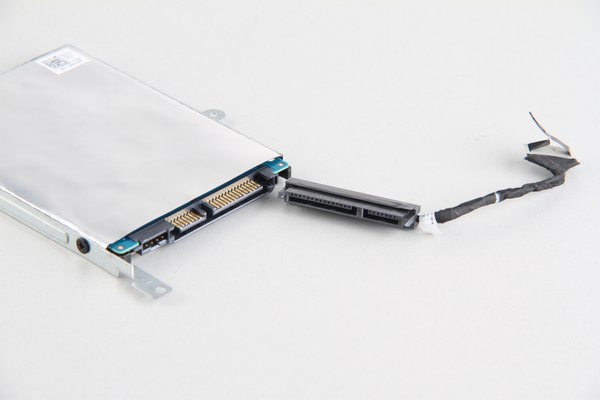
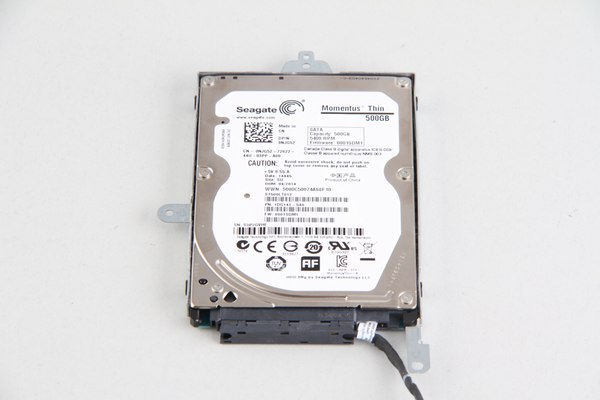
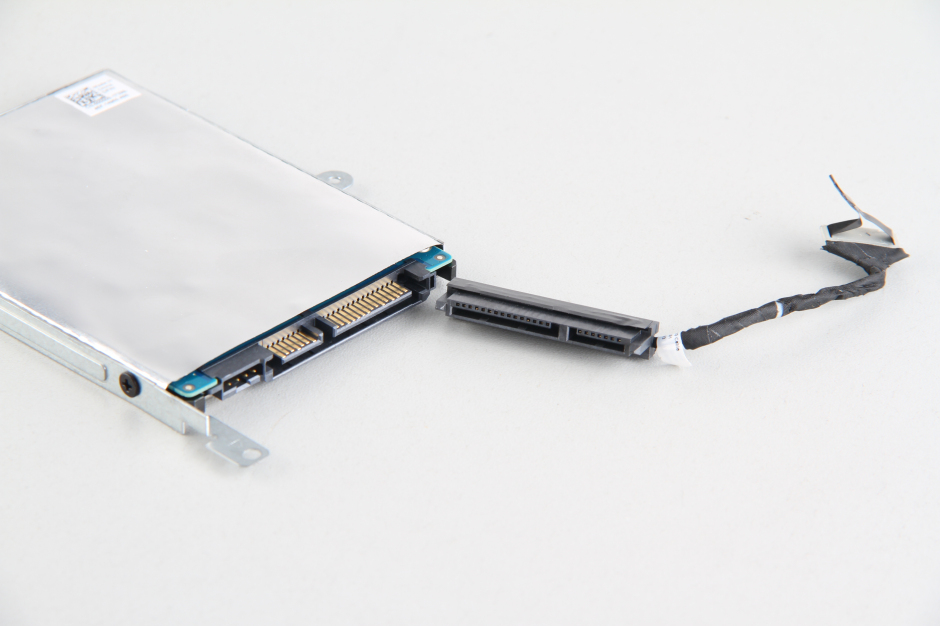
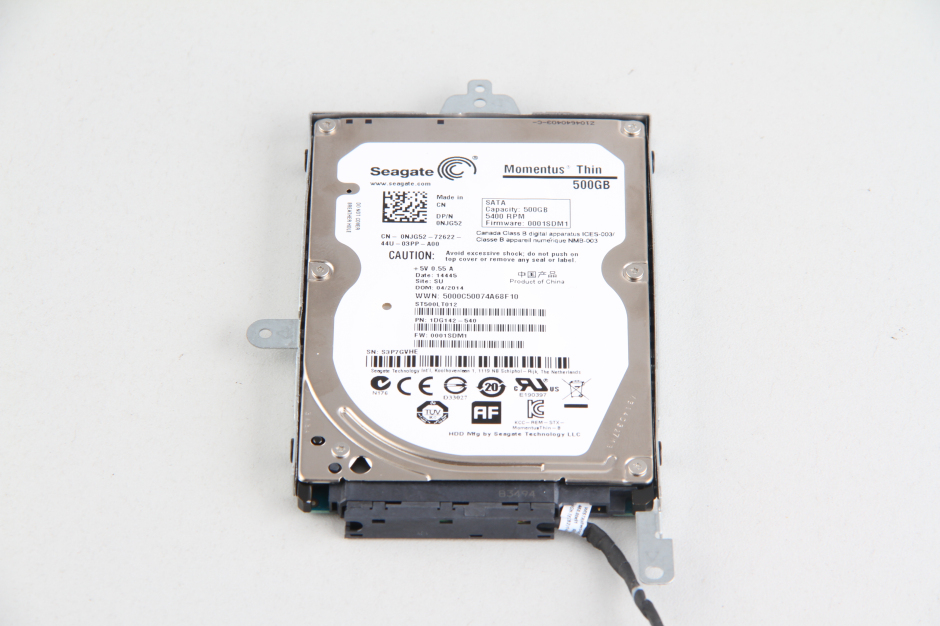
Step 4: Remove the hard drive module
-
- Remove the screws securing the hard drive module. Disconnect the HDD cable from the motherboard.
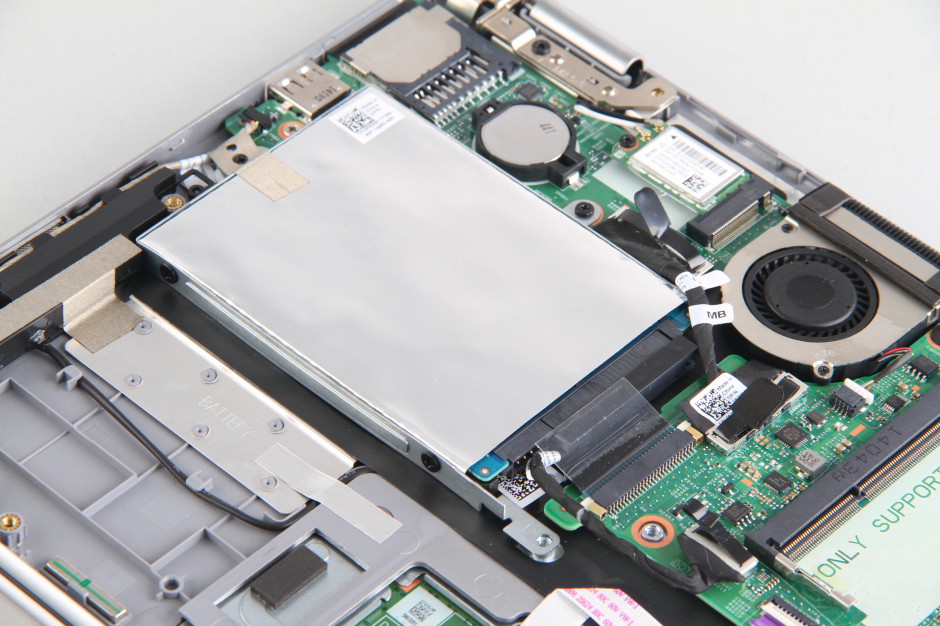
- The HDD cable
- The laptop featured a Seagate 500GB 5400 RPM hard drive.
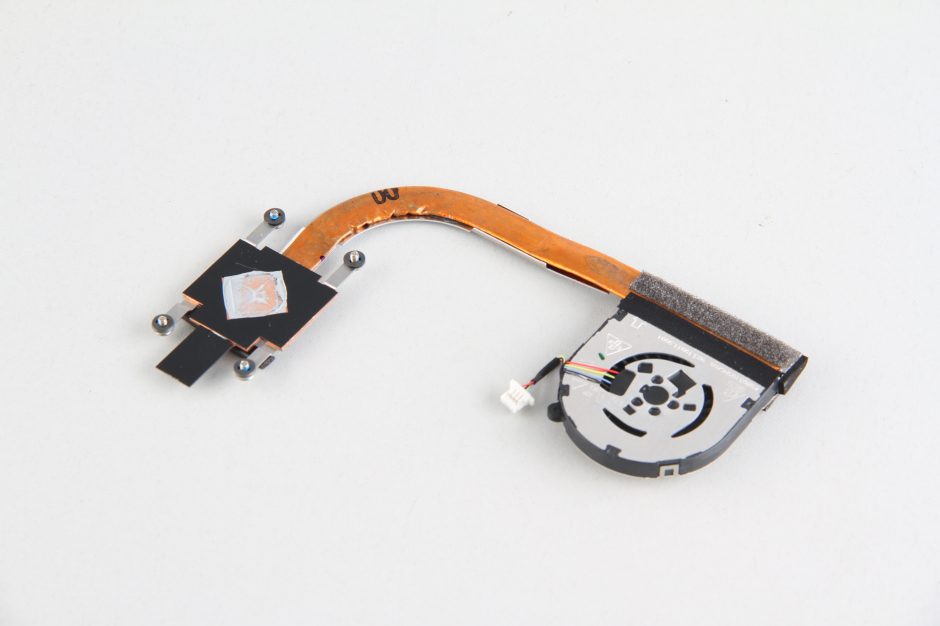
Step 5: Remove the heat sink and cooling fan
-
- Remove the four screws securing the heat sink and unplug the fan cable from the motherboard. You can remove the cooling system module.
-
- Dell Inspiron 11-3147 cooling system module

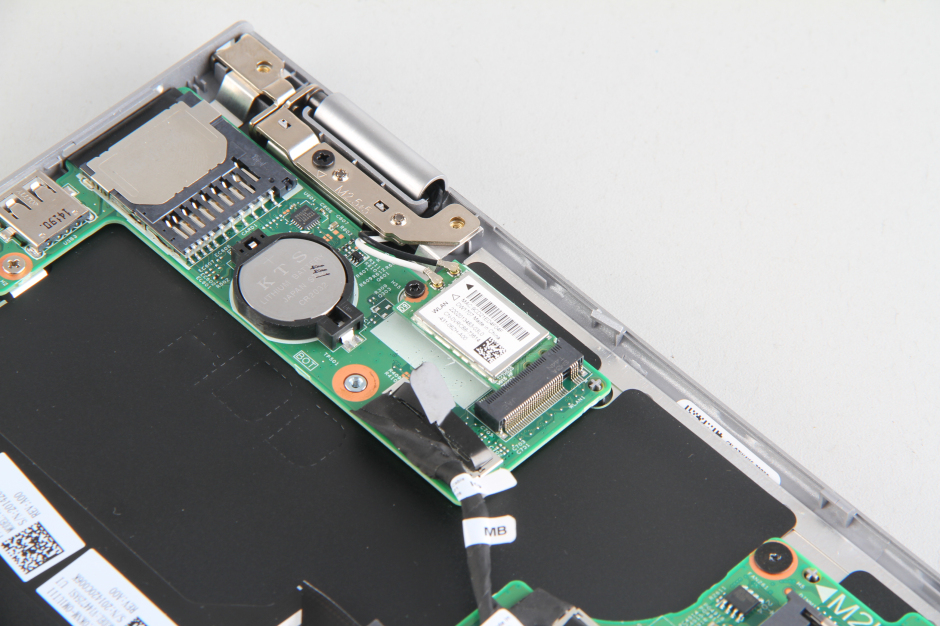
Step 6: Remove the wireless card
-
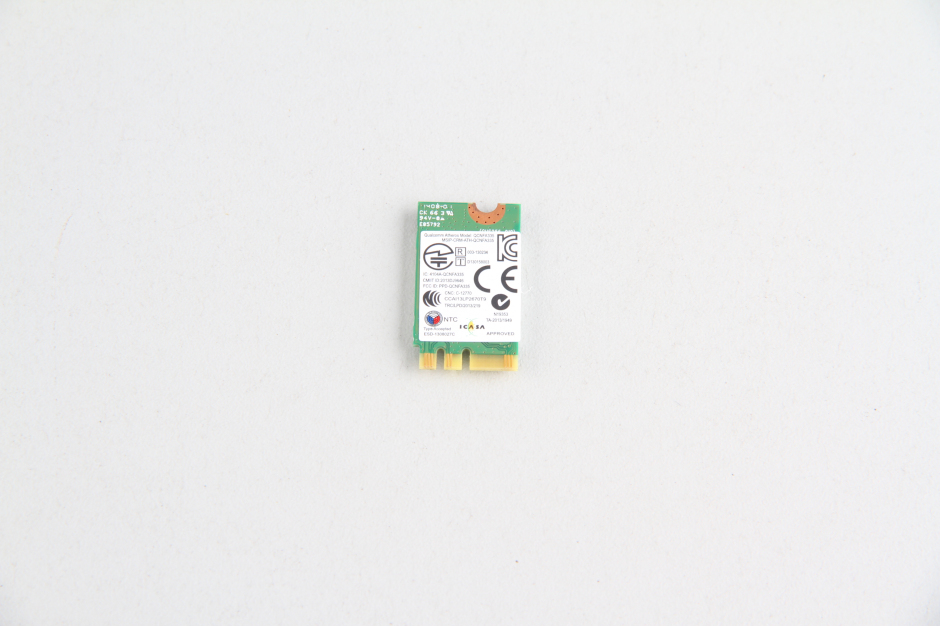
- Disconnect the two antennas and remove the screw securing the wireless card. Take it away from its slot.
-
- Wireless card
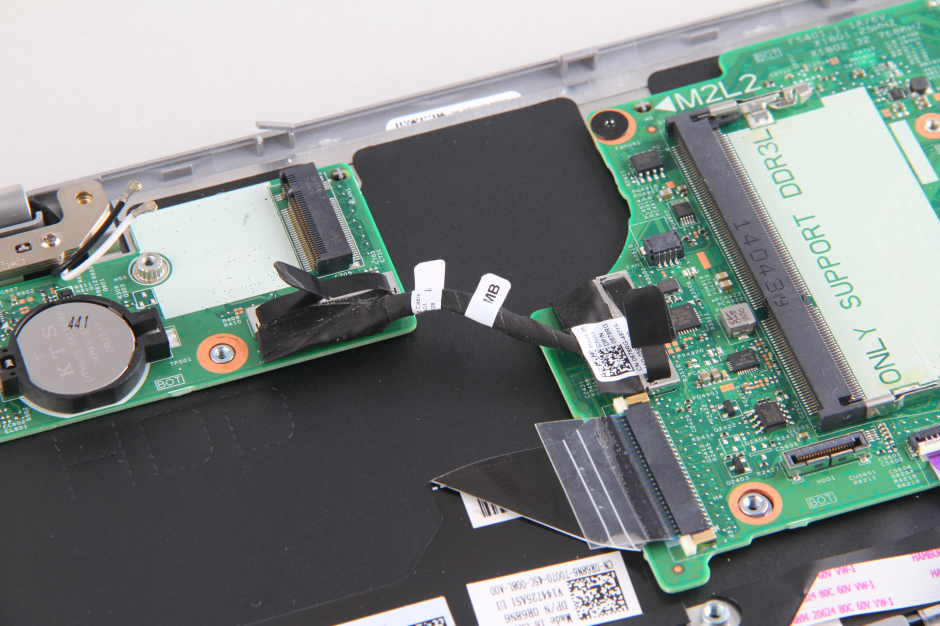
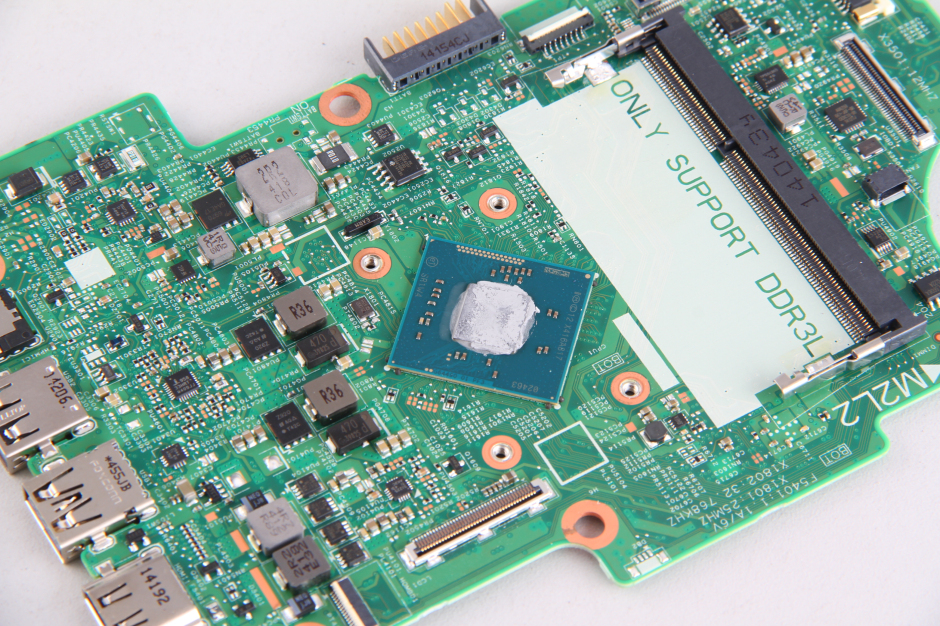
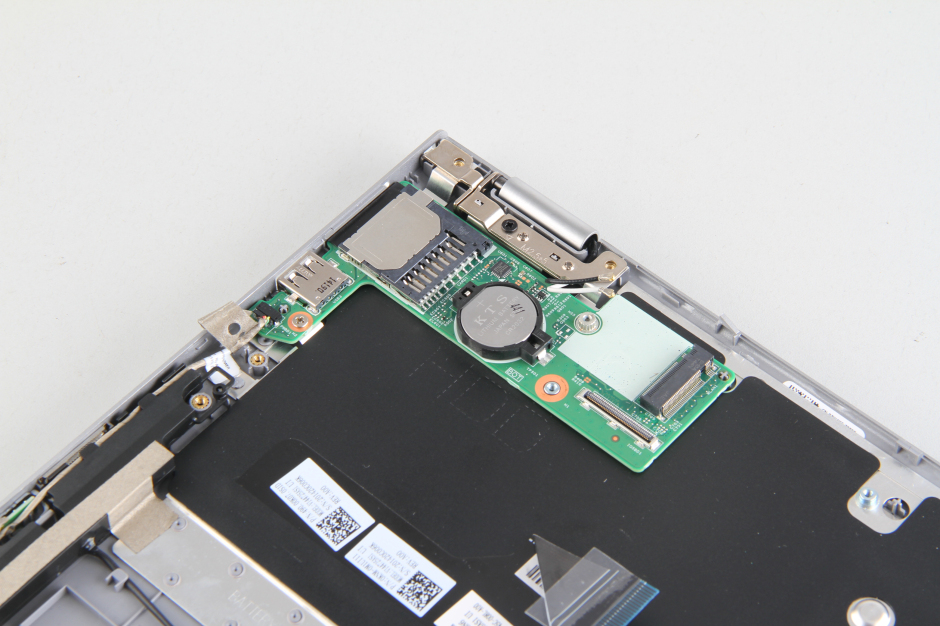
Step 7: Remove the motherboard
-
- The sub-board is connected to the motherboard via a cable.
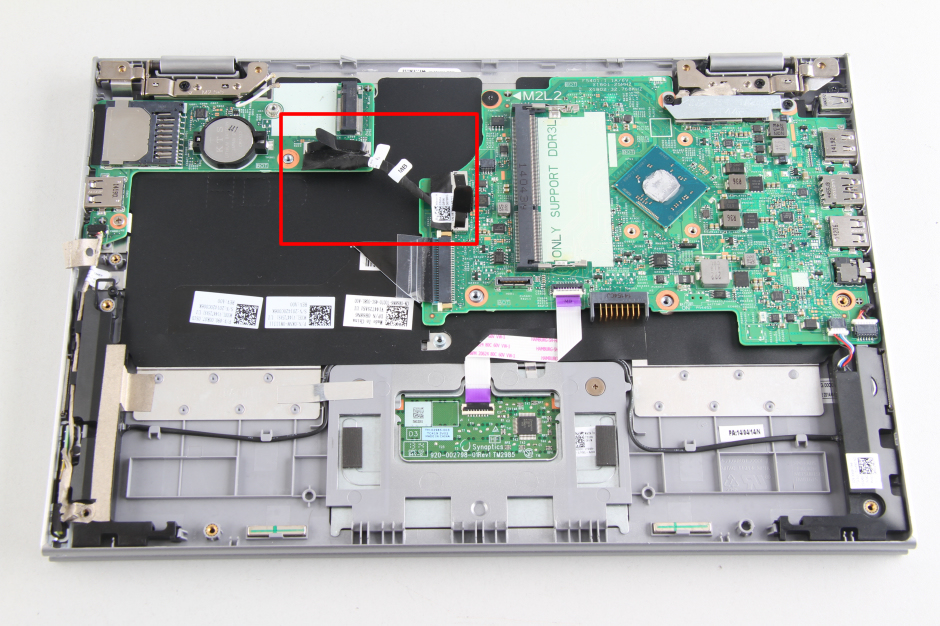
-
- Disconnect the sub-board and motherboard.
-
- Disconnect the touchpad cable and speaker cable. Remove the screws securing the motherboard.
- Lift the motherboard from one side and wiggle it until it completely detaches from the laptop.
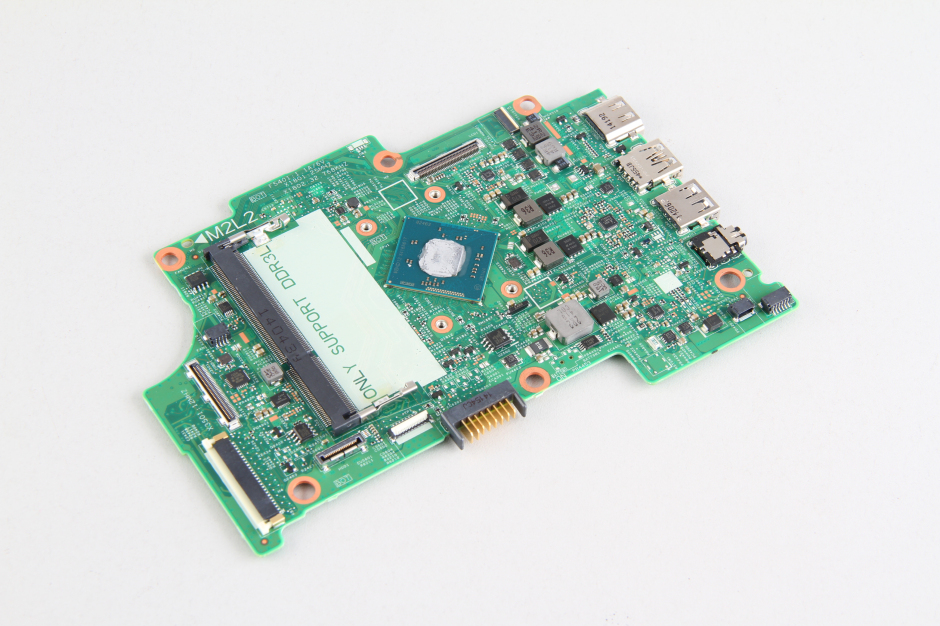
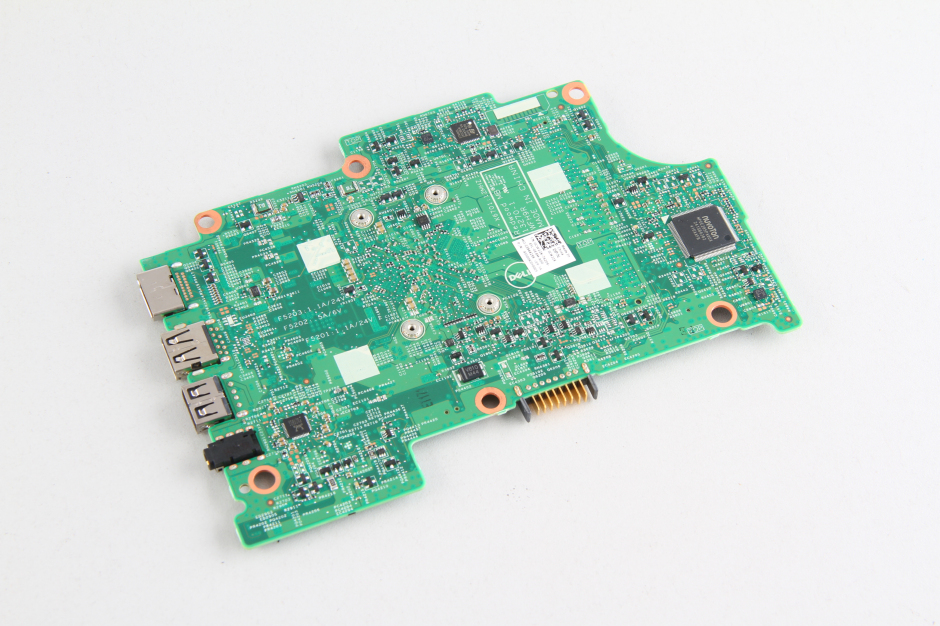
The back of the motherboard
-
- The processor of the Dell Inspiron 11-3147 is soldered to the motherboard, so its processor cannot be upgraded.
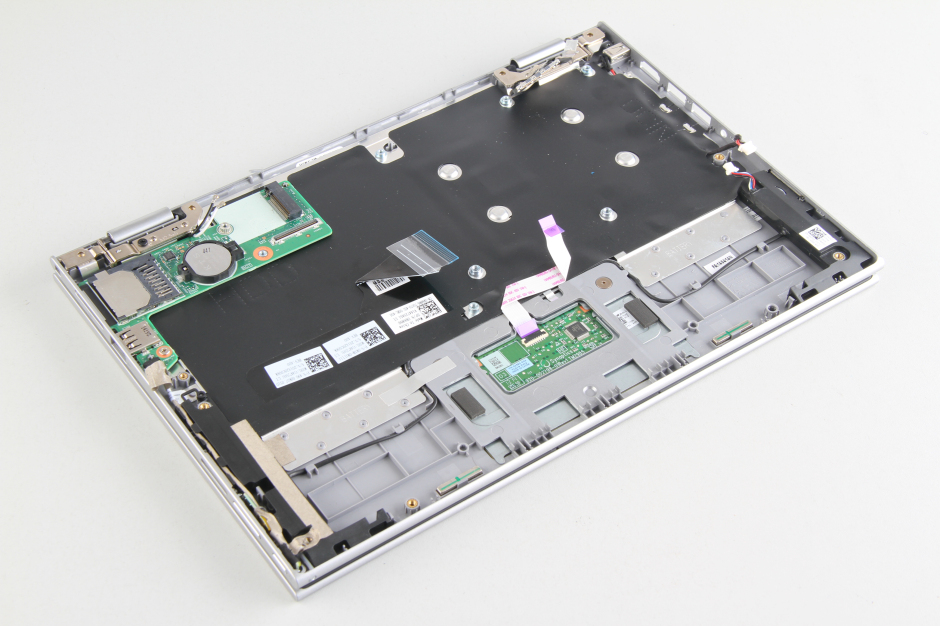
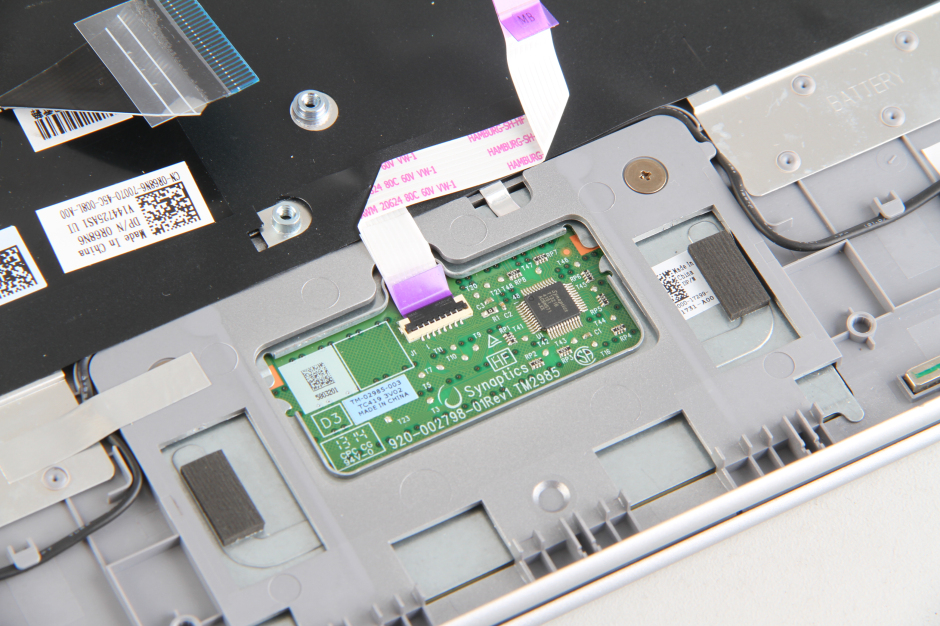
Step 8: Other details
-
- The motherboard has been removed.
-
- Touchpad
-
- Sub-board
-
- The speaker module

Dell Inspiron 11-3147 internal parts
Hi, can you please help me? I want to replace the 4GB RAM module for the Dell Inspiron i3147, but when I try to open it after removing the 9 screws, the button won’t come out. I tried to pry with the flat screwdriver, but it won’t come out from the rear or the sides. Can you please help me?
Fernando
There are some snaps you should release, pry them with a pry bar.
Can the CPU be removed from the motherboard and upgraded to an i5 or so?
It seems the CPU can not be removed. It is soldered to the motherboard.
Could you put a dual-band wireless card in this? If so, what kind?
Hi
I’m wondering how I can reseat the keyboard ribbon cable and where exactly it is and can be accessed easily (hopefully). My internal keyboard stopped working but the USB external keyboard I have does work.
Best
Harold
Is it possible to add any more than the included 4GB of RAM?
Yes! You can replace it with an 8GB PC3L-12800S.
I’m looking at a couple of options from Hynix and Samsung, but neither one shows the ‘S’ at the end of the number. But they are just listed as 8GB PC3L-12800.
I’m also planning on swapping the drive to the largest hybrid I can get, which I think will probably have a 32GB SSD on a 1TB 7mm drive. Do you have any suggestions outside of these two that will bring meaningful improvements?
Hi, I’m wondering how complicated it would be to replace just the plastic display cover, which is developing hairline cracks; the display itself works fine. Dell is offering to replace that part with an onsite tech, but I’m wondering if it’s an involved job that could screw things up in the machine, which otherwise works ok.
I want to replace the stock Wi-Fi/Bluetooth card with a better one. What Intel card can be replaced? Most I see have two screw holes, and the in-place card has only one mounting screw.
Thanks, ordered!
In Step 1: Remove the bottom case.
Remove nine screws from the bottom case
What are the sizes of all the screws? Are they all the same size? Thanks
Some keys on my keyboard do not always work. How could I replace the keyboard?
I have the same problem. The (A, Q, 1, Tab, and Caps Lock) sometimes don’t work; I have to press them several times for them to work.
The left side of my keyboard does not work either. Any ideas?
Best
Just replace it with the new keyboard.
I need to make sure the monitor display connection is tightly connected since I’ve got a vertical line appearing on my screen. I’ve successfully switched out the memory and HDD in the past, but I can’t locate the display cable connection. Where is it? Please help!
How to change Windows 10 to Kali Linux?
So I just replaced the power adapter cable in my Inspiron 11 3147 because the battery was not charging. Of course, this requires the motherboard to be removed. Once everything was put back together, it started charging just fine. I very quickly discovered that there was now a problem with the Bluetooth. The mouse I’ve been using for ages no longer works. The computer showed as being paired. I checked the mouse batteries. I removed the mouse and tried to re-add it. Doesn’t find it. I took this mouse and was actually able to pair it with my iPad Pro and use it, so that rules out the mouse. Is there a particular cable I may not have gotten attached all the way or something? Everything else on it seems to work normally.
I just want to say thank you.
This guide helped me replace the charging port on this laptop!
Thank you VERY MUCH.
Is there any other slot on this board for RAM?
No, this laptop only has one memory slot.