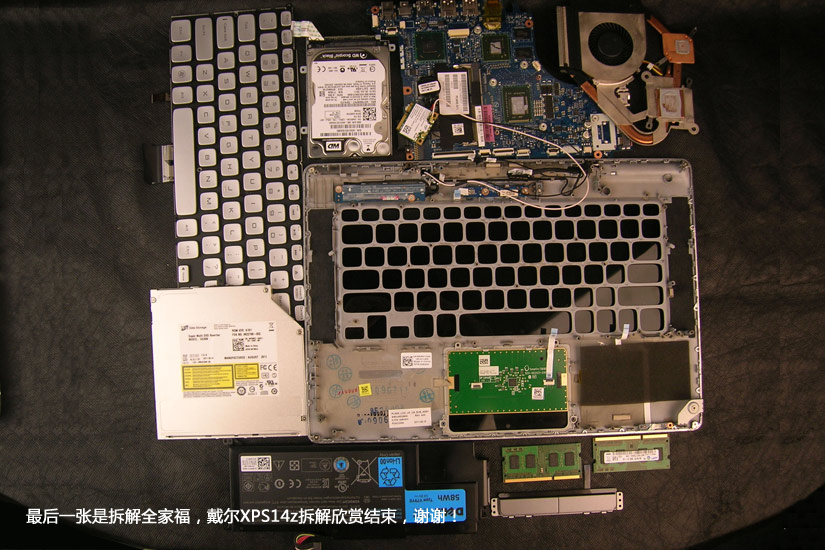
In this guide, I will explain how to disassemble the Dell XPS 14z L412z. I will remove the battery, keyboard, palm rest, speakers, DVD drive, wireless card, hard drive, heat sink, cooling fan, and motherboard.
Want to keep in touch with us? Follow us on Facebook for more repair news.
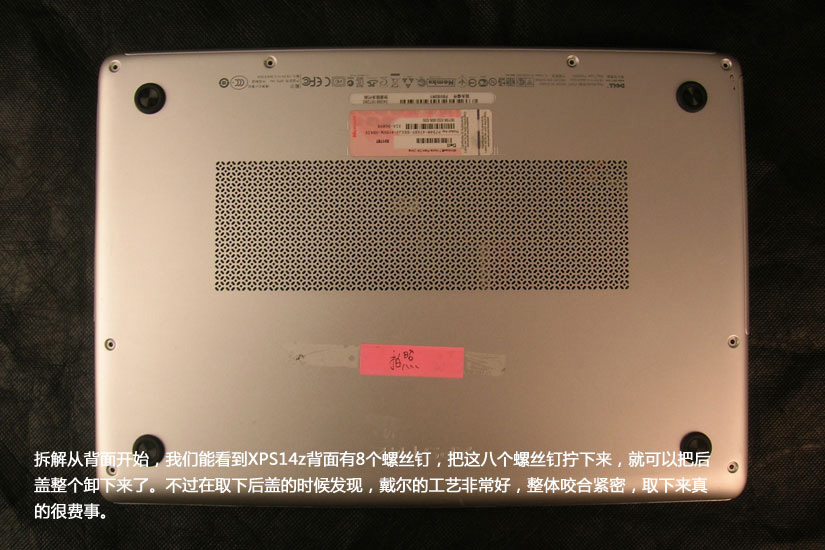
Remove the eight screws from the bottom cover. Insert a plastic pry tool between the bottom cover and the palm rest. The bottom cover has several clips that secure it to the palm rest. Unlock all clips to remove the bottom cover.
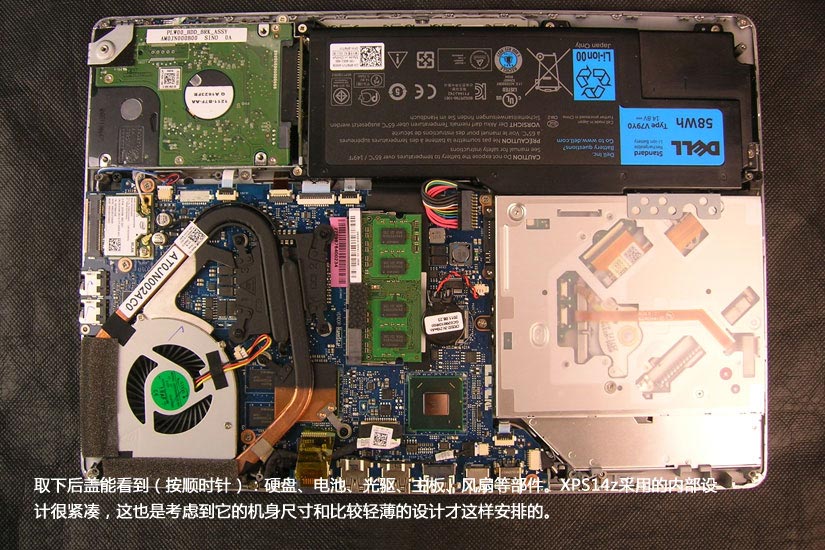
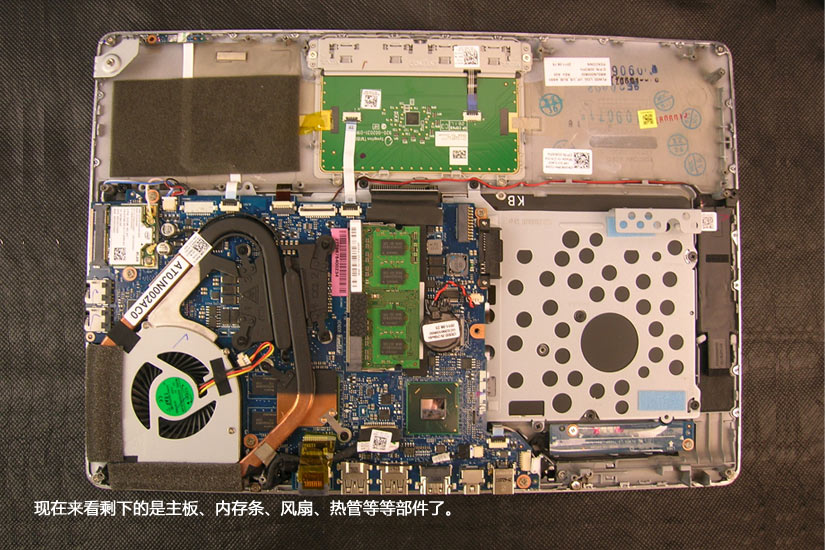
Under the bottom cover, you can access the battery, hard drive, RAM, wireless card, DVD drive, and cooling fan.
Remove the screws securing the battery, disconnect the battery power cable, and then remove the battery.
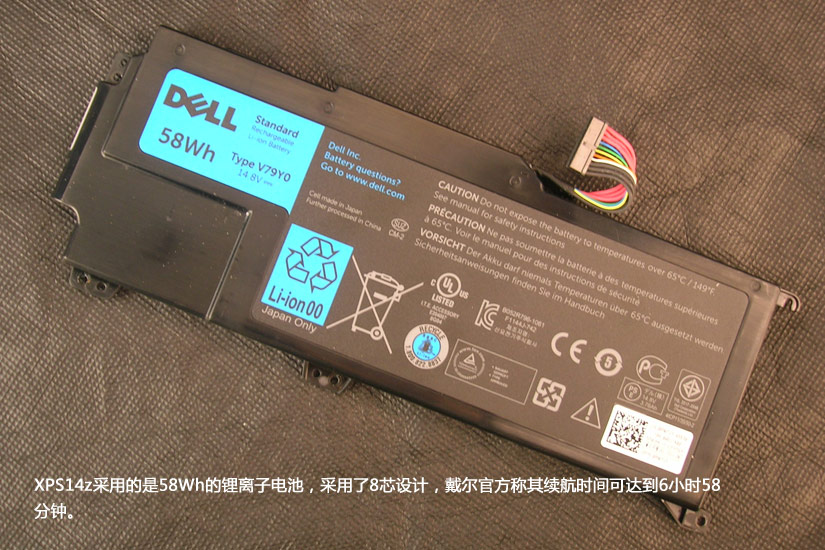
The Dell XPS 14z L412z comes with a 14.8V, 58Wh Li-ion battery. The Dell part number is V79Y0.
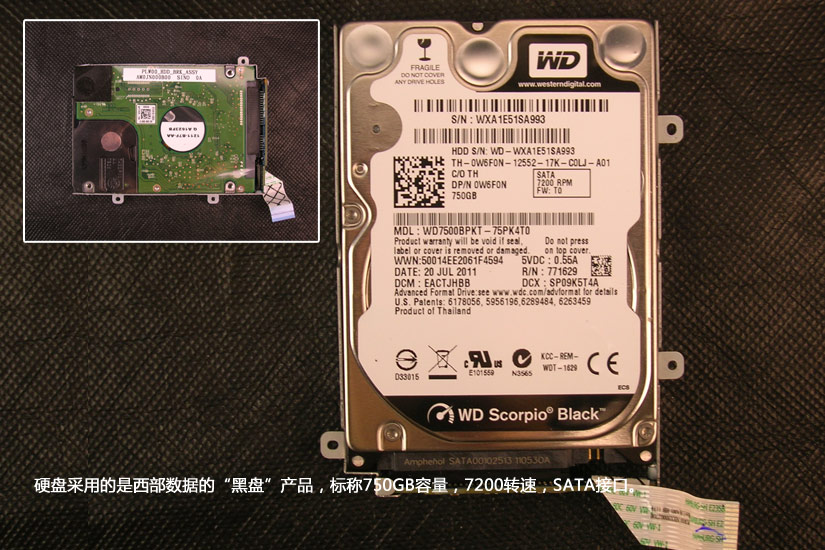
The Dell XPS 14z L412z features a 750GB 7200RPM WD hard drive.
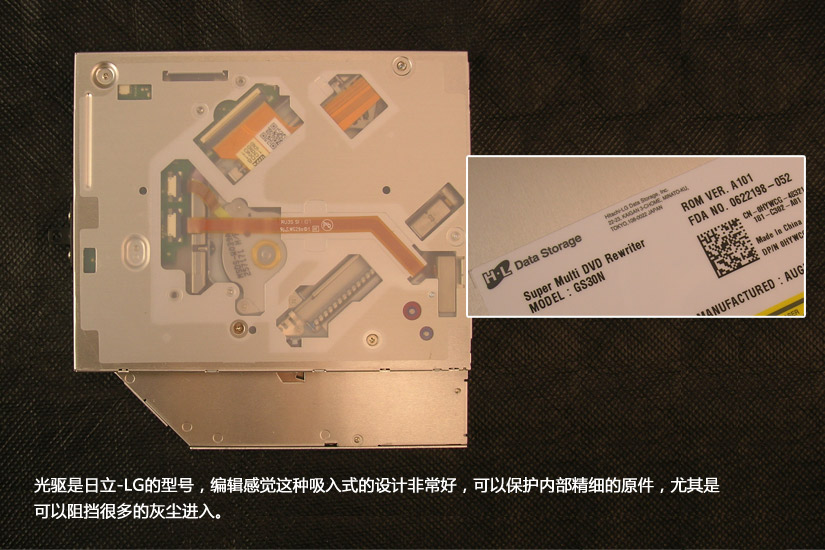
Remove the screw securing the DVD drive, and then remove the DVD drive.

The Dell XPS 14z L412z comes with a Hitachi-LG GS30N 8X 9.5mm DVD drive.
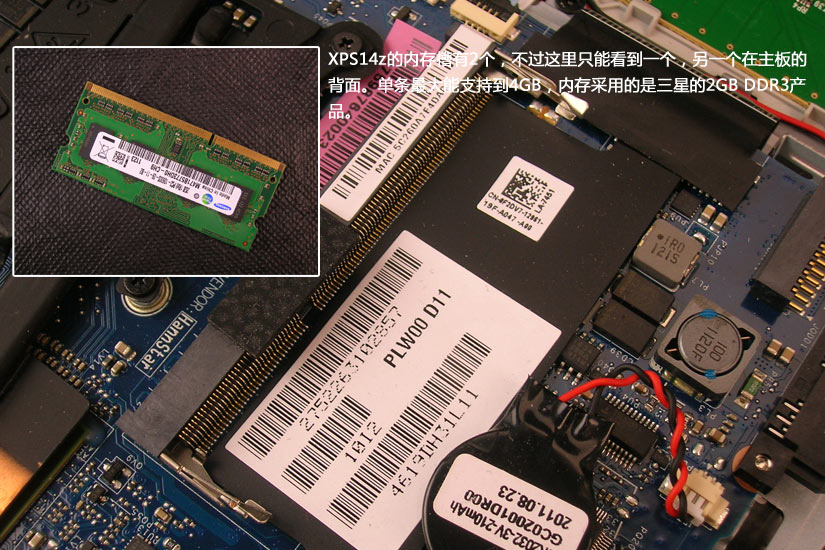
Use your fingers to separate the clips from both sides, and the memory module will pop out automatically.
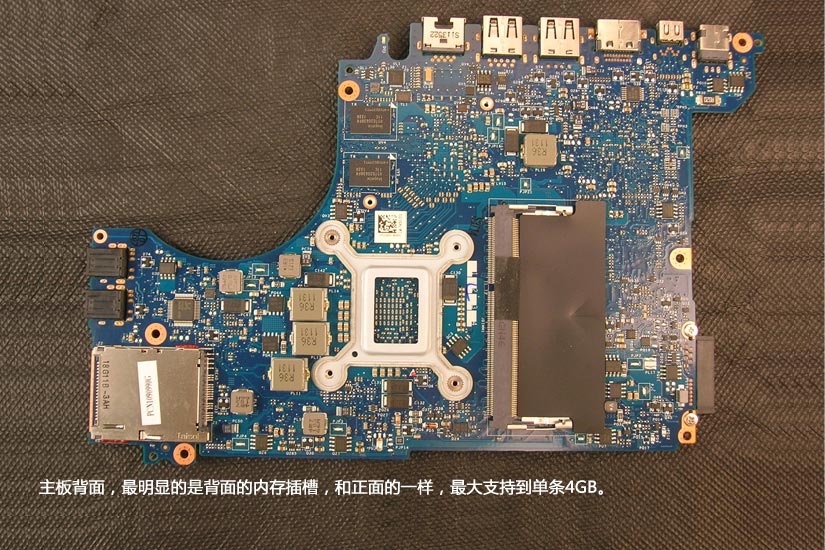
The Dell XPS 14z L412z features a Samsung 2GB DDR3 RAM module. This laptop has two memory slots, with the other slot located on the back of the motherboard.
The Intel Core i7-2640M processor and NVIDIA GeForce GT 520M graphics card are soldered onto the motherboard, so they cannot be upgraded.
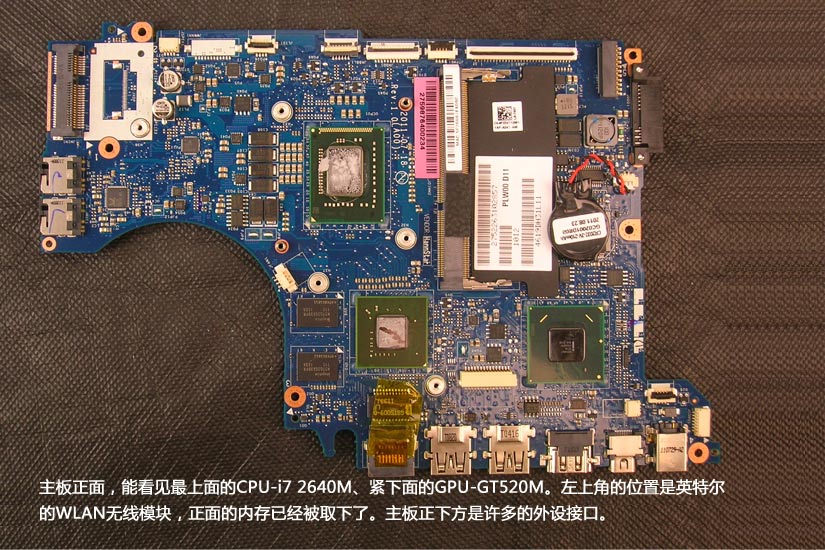
There is a RAM slot on the other side of the motherboard. You can add another memory module to upgrade the memory, but you need to remove the motherboard to access the memory slots, which is not user-friendly for inexperienced users.
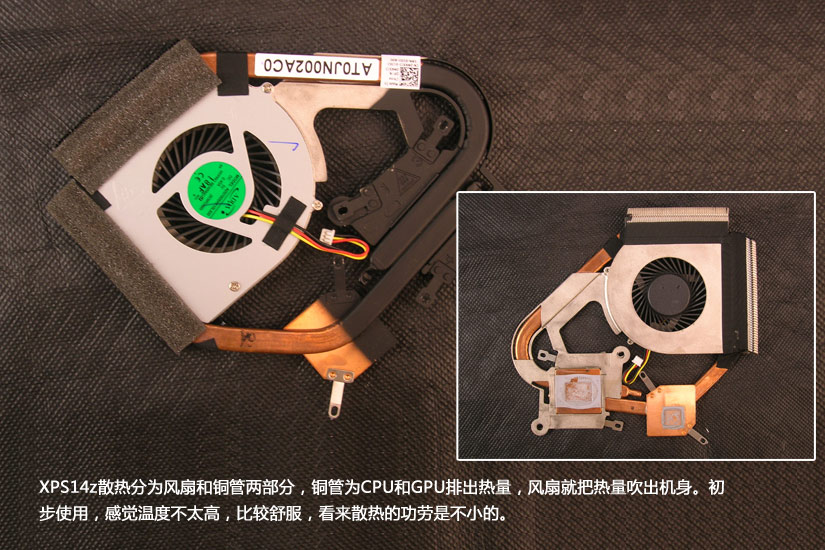
Remove the screws securing the fan and heatsink, then disconnect the fan ribbon cable from the motherboard to remove the cooling system.
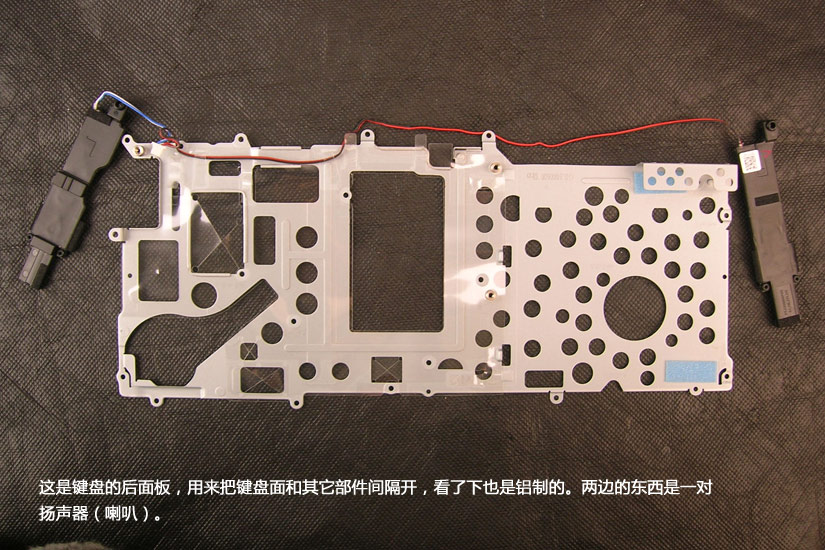
There is a metal plate on the back of the keyboard to secure the keyboard to the palm rest. Remove all the screws on the metal plate to remove the keyboard.
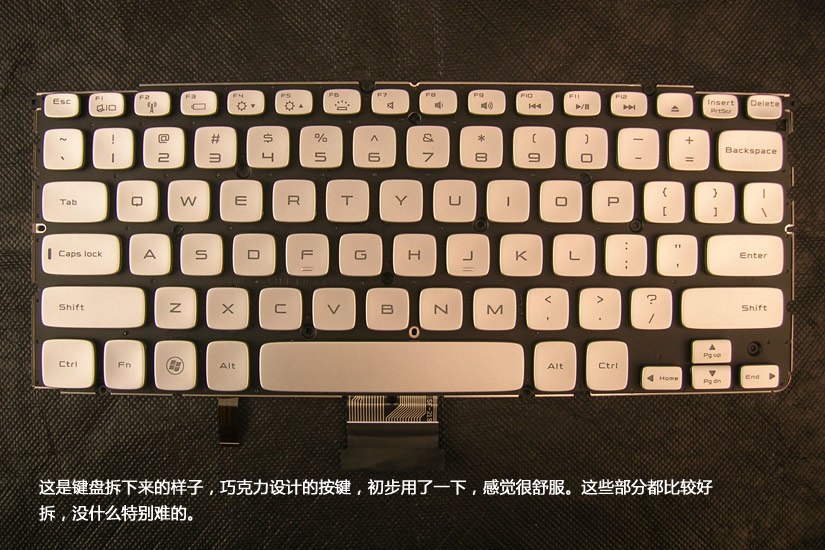
XPS 14z L412z keyboard
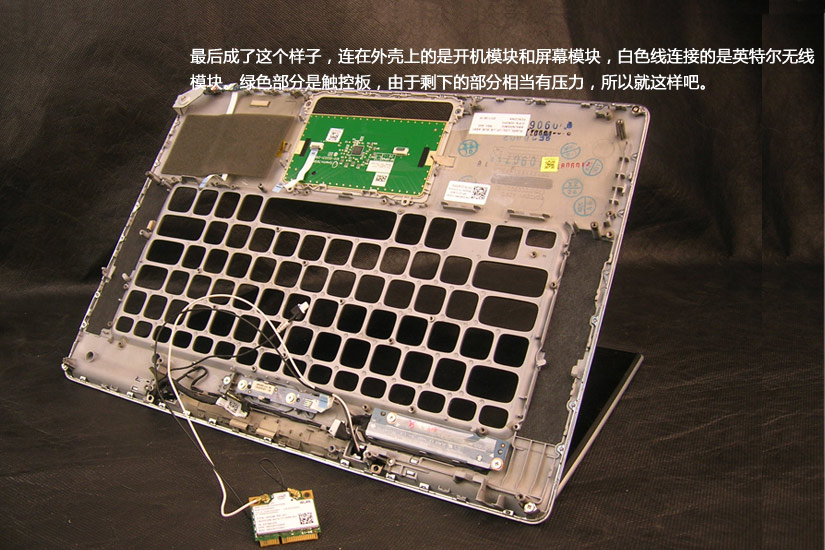
The palm rest and wireless card
Dell XPS 14z L412z internal parts