
Asus LaptopAsus X502CA
Asus X502CA Disassembly
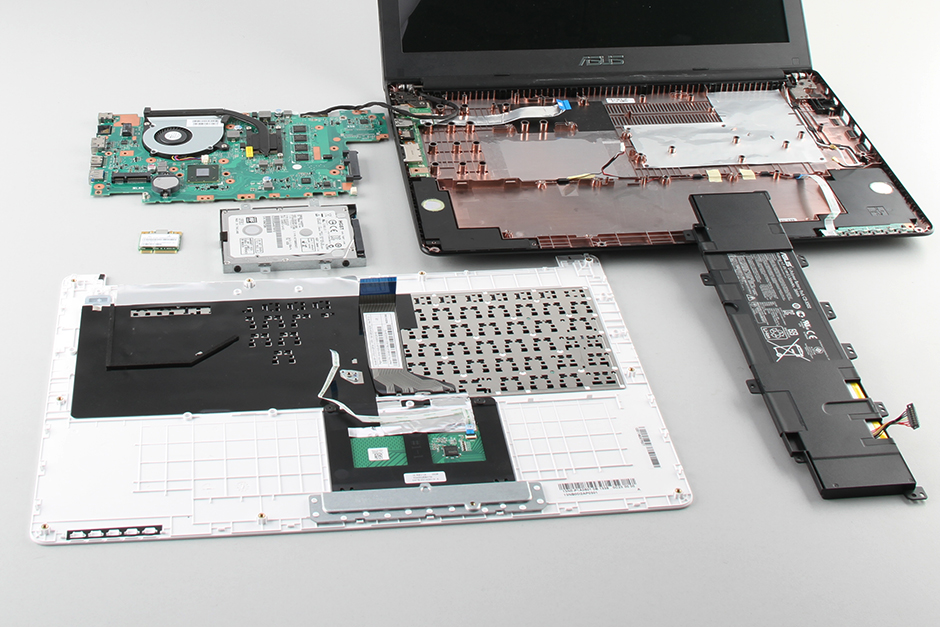
In this guide, I’ll explain how to disassemble the Asus X502CA to remove and replace the battery, hard drive, heat sink, wireless card, cooling fan, and motherboard.
Want to be the first to see inside of the latest smartphone and laptop? Follow us on Facebook for the latest teardown news.
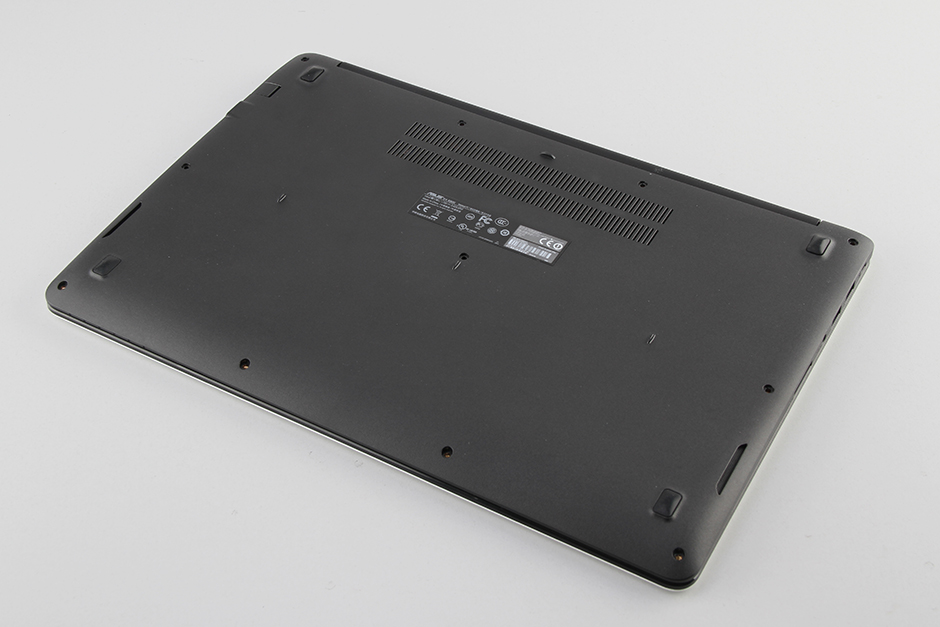
Remove all screws from the bottom case.
Turn over the laptop and pry up the palm rest with a pry bar.
Lift up the palm rest, disconnect the keyboard cable and touchpad cable, and remove the palm rest.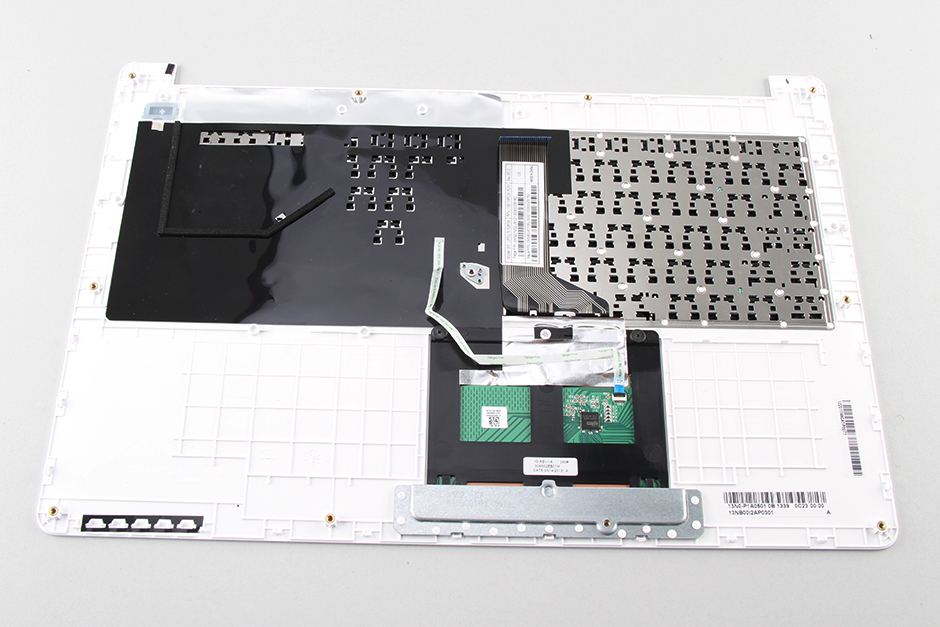
Here are the palmrest and keyboard.

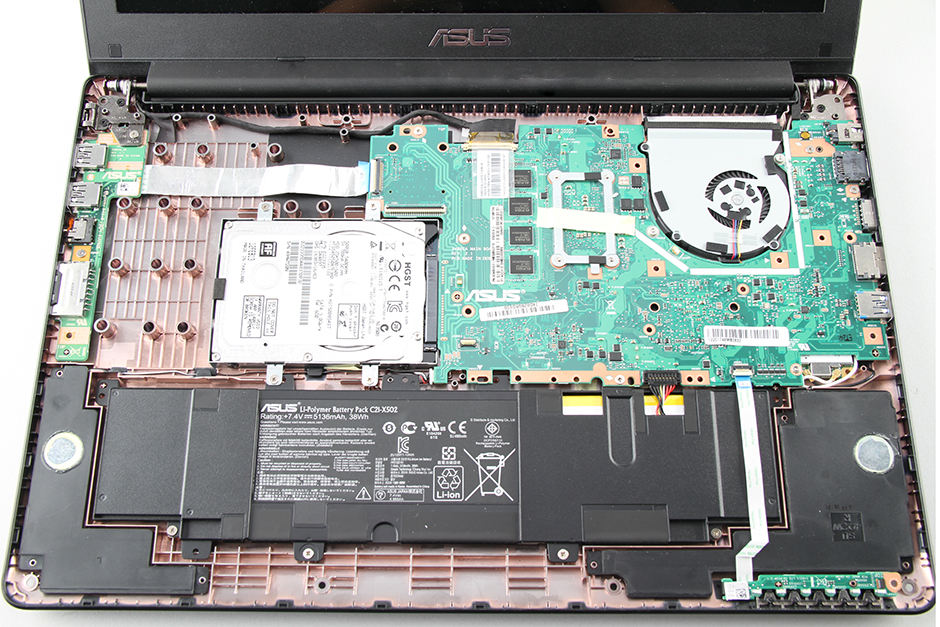
When the palm rest is removed, you can get access to the battery, hard drive, speaker, USB board, and motherboard.
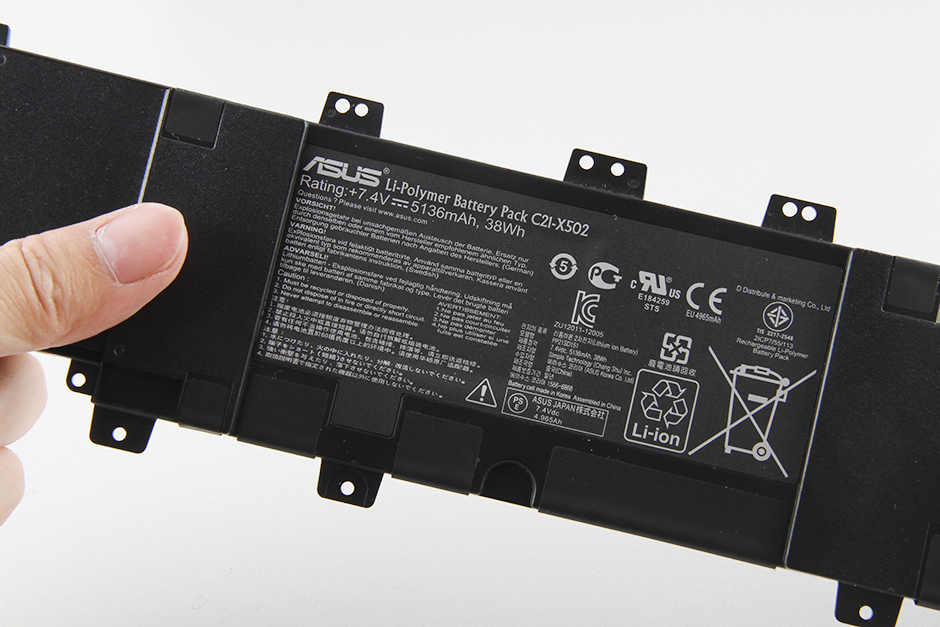
Remove four screws securing the battery, unplug the battery connector from the motherboard, lift up, and remove the battery.
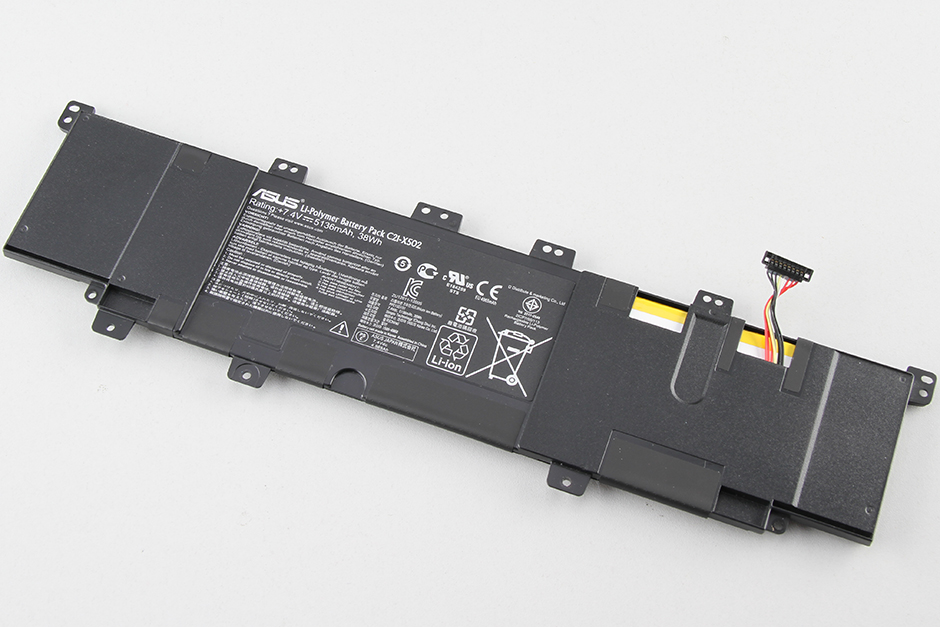
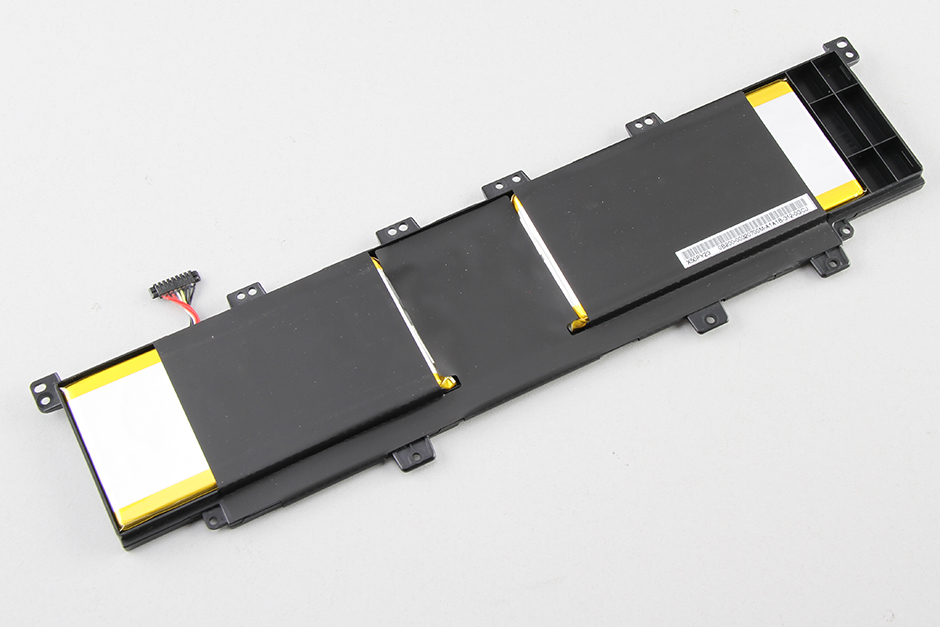
The laptop has a 5136mah, 38wh Li-polymer battery, Asus P/N: C21-X502.
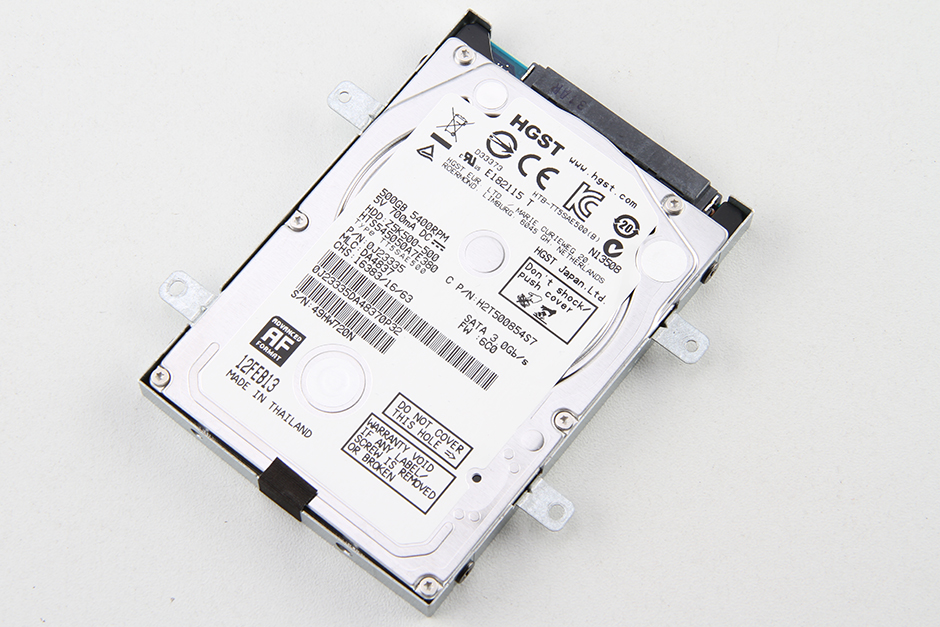
Remove four screws securing the hard drive module, sliding it to the left.
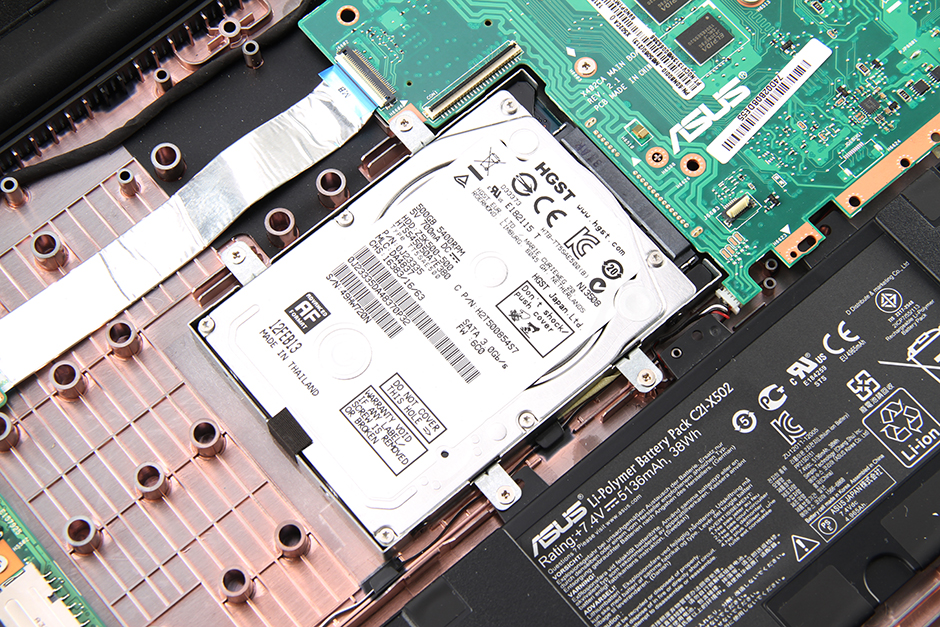
Asus X502CA comes with an HGST 500GB 5400RPM hard drive.
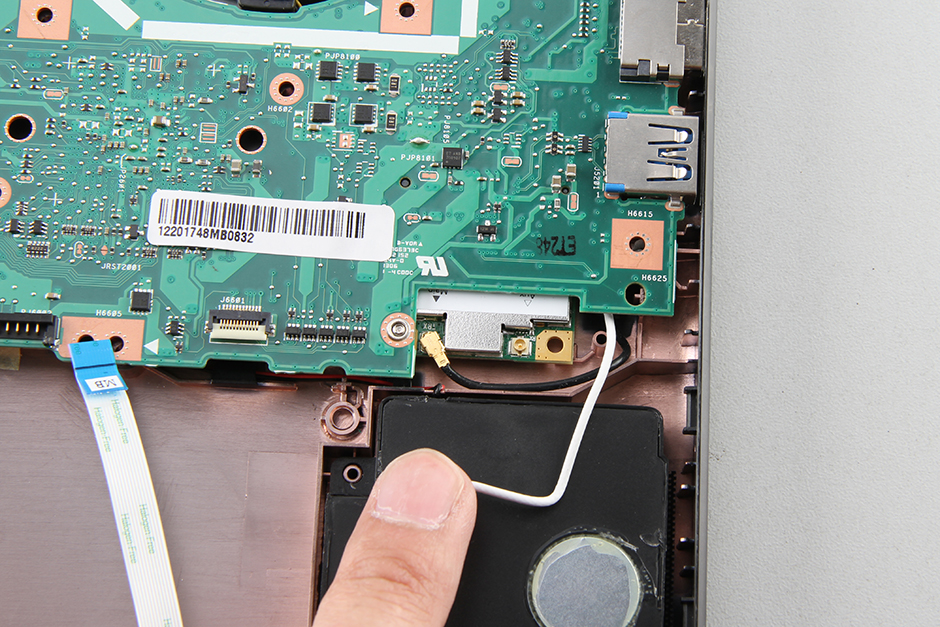
Now, disconnect all cables from the motherboard.

Disconnect two wireless card antenna cables.
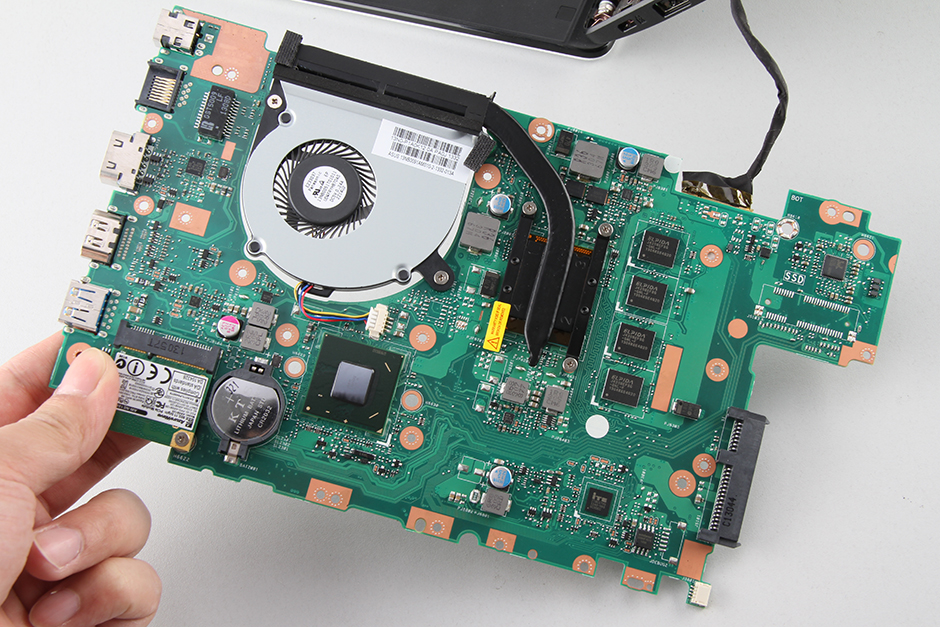
Remove all screws securing the motherboard, lift up, and remove the motherboard from the base.
On the other side of the motherboard, you can access the wireless card, CMOS battery, heat sink, and cooling fan.
The 4GB RAM is soldering on the motherboard.
Remove one screw securing the wireless card.
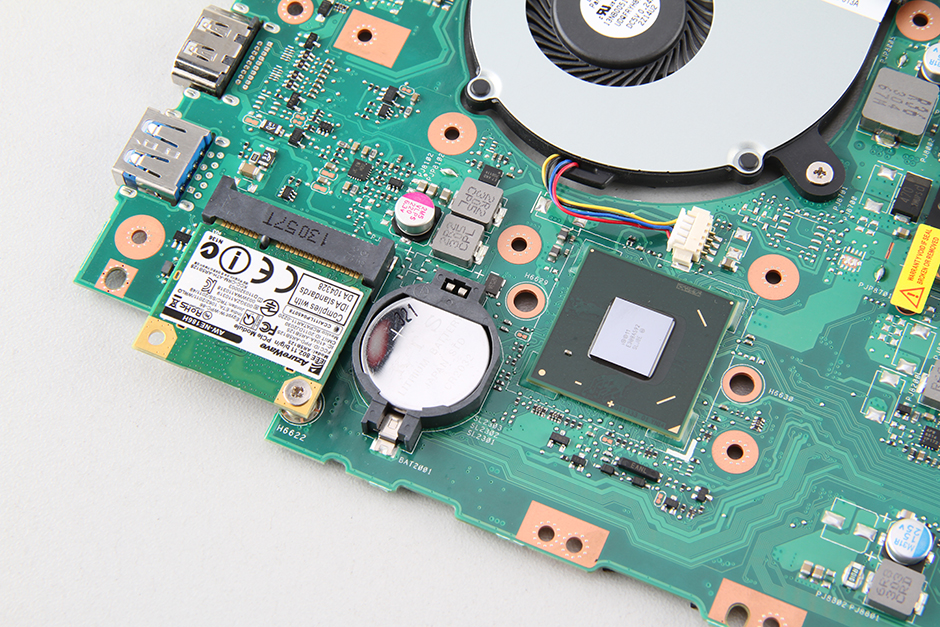
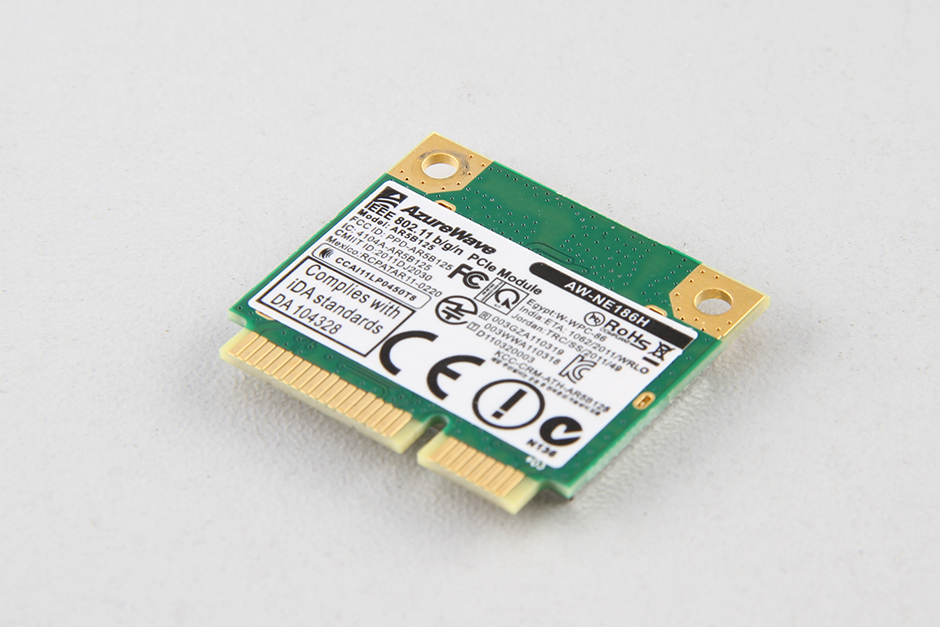
The laptop featured an AZUREWAVE AR5B125 wireless card.
I’ve disassembled it to replace the keyboard. How do you remove the keyboard from the top cover? I don’t see anything holding it in place except some plastic tabs.
I’m having exactly the same issue. The new keyboard works perfectly but no apparent way to reattach it to the case. I’m thinking of glue at this point. 🙁
I’m sure you’ve figured it out by now but for anyone new.
I pried up the edge of the keyboard from the back until the little plastic button popped off. There’s no way to remove the keyboard without destroying all the little plastic buttons that hold it in. There are a ton of them. I then used packing tape to hold the keyboard in place while reassembling it. It makes the new keyboard a bit “bouncy” to type on, but it works. If you really want the original firmness, you’ll either have to spray the underside of the palm rest keyboard outline with strong glue (the spray glue used by automotive shops to hold up headliners is a good choice) and then carefully place the keyboard in. Otherwise, you have to buy the entire palm rest assembly in the proper color and replace the entire unit.
Umm, I can’t seem to be able to reattach the keyboard. Help?
just connect the keyboard cable and touchpad to the motherboard
Tried that several times and only can get 5 keys to work. please help!
Is there another area where I can install additional RAM, or am I stuck with the soldered RAM on the mainboard?
Can I add more RAM or am I stuck with the onboard memory?
You can’t, there are no spare RAM slots
You’ll have to remove the existing RAM and replace it with larger capacity DIMMs. I know this is an older post, but for anyone coming across it, perhaps it will help.
Do you have a link to what parts I need to switch out my existing RAM so I can have 8GB?
I cannot find a close-up video of how the keyboard and touchpad cables actually fit into the connectors on the motherboard. Is there anything available that shows how these connectors actually accept the ribbon cables and how the locking device works?
Please, where is the RAM found? My PC won’t come on or even charge, so I want to check the RAM but I don’t know its location.
I have a question about this particular model: Is the keyboard replaceable? It looks like it is plastic-glued permanently, and you have to crack the plastic to remove it. How can I put in a new keyboard if I already cracked the plastic pins? Another one is putting a built-in RAM. Everything here is a result of poor engineering. I hope they stop doing this.