
MSI GS60MSI Laptop
MSI GS60 Disassembly
In this guide, I’ll explain how to disassemble the MSI GS60. I will remove the battery, RAM, SSD, hard drive, wireless card, keyboard, heat sink, cooling fan, and motherboard.
Looking for more funny teardown? Follow us on Facebook for all the latest repair news.
Remove all screws from the bottom case.
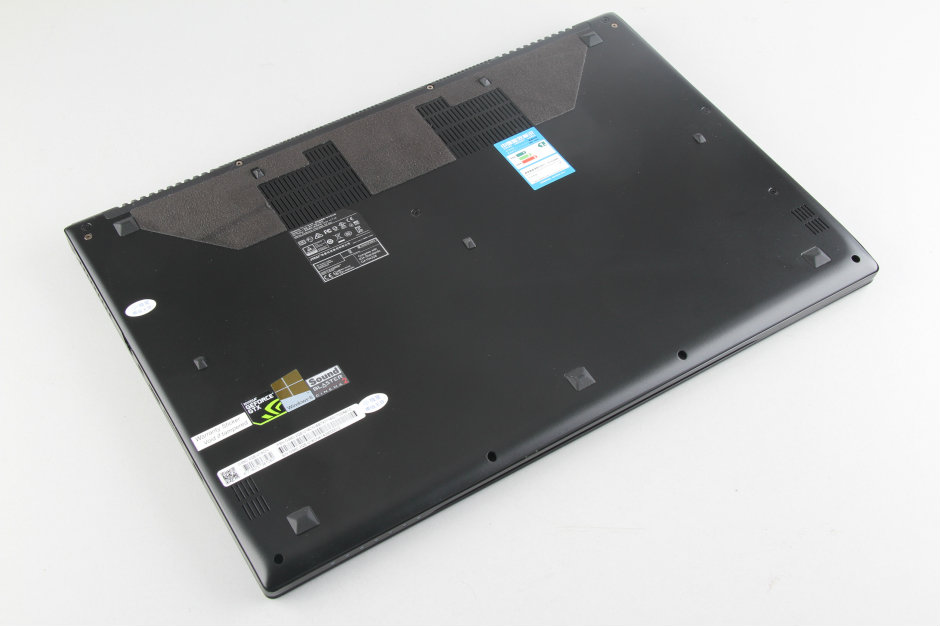
Pry up and remove the bottom case.
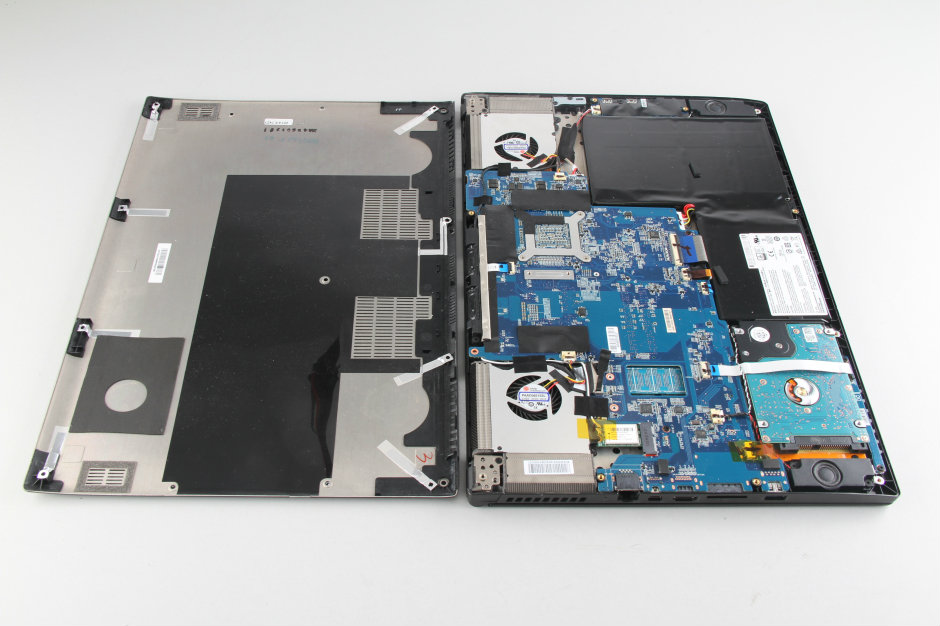
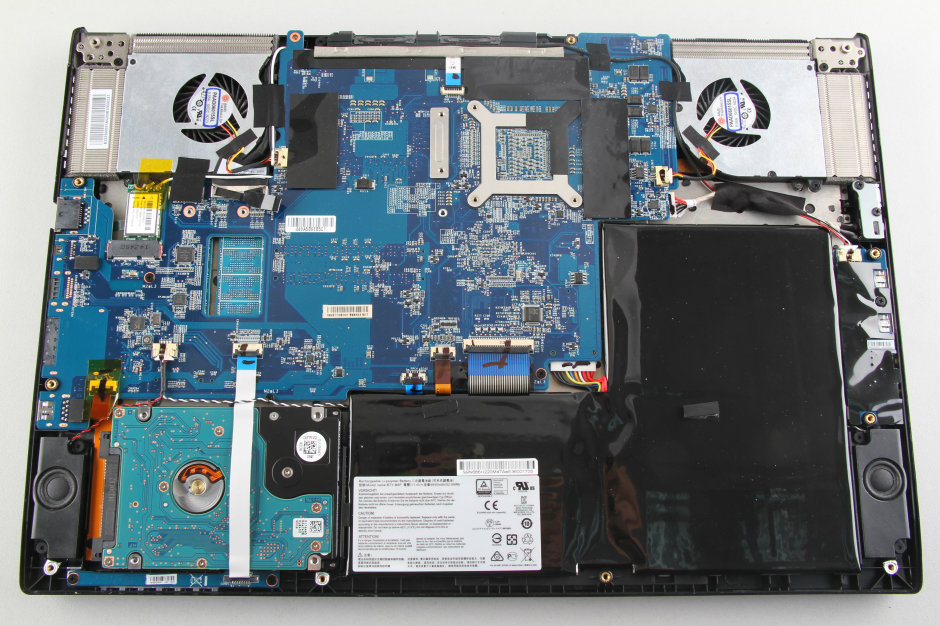
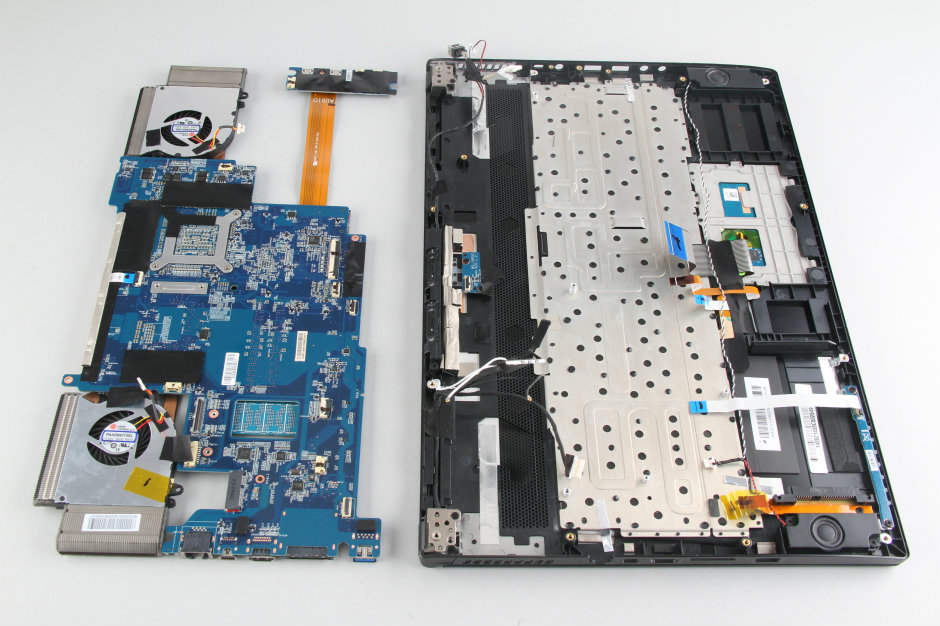
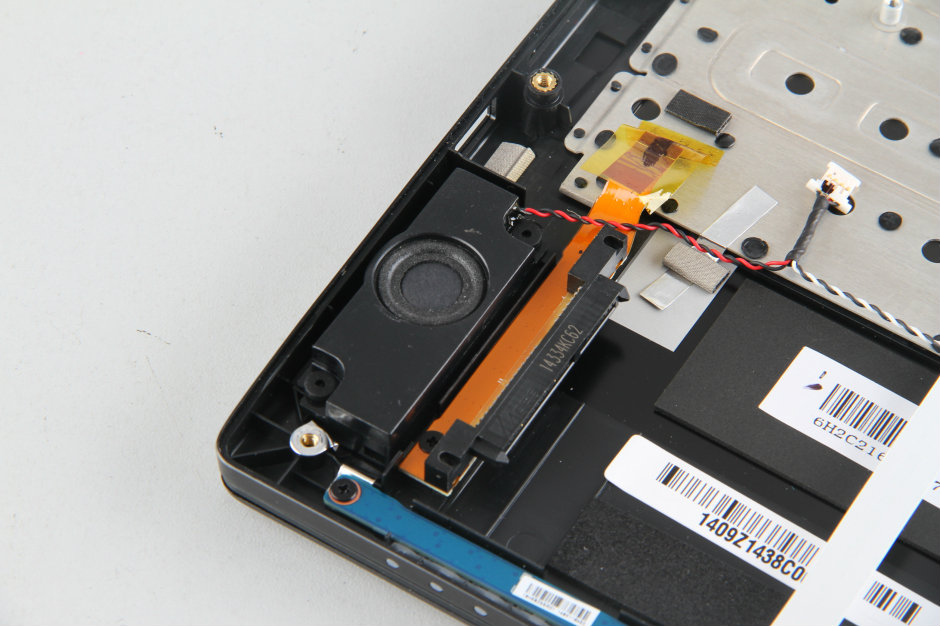
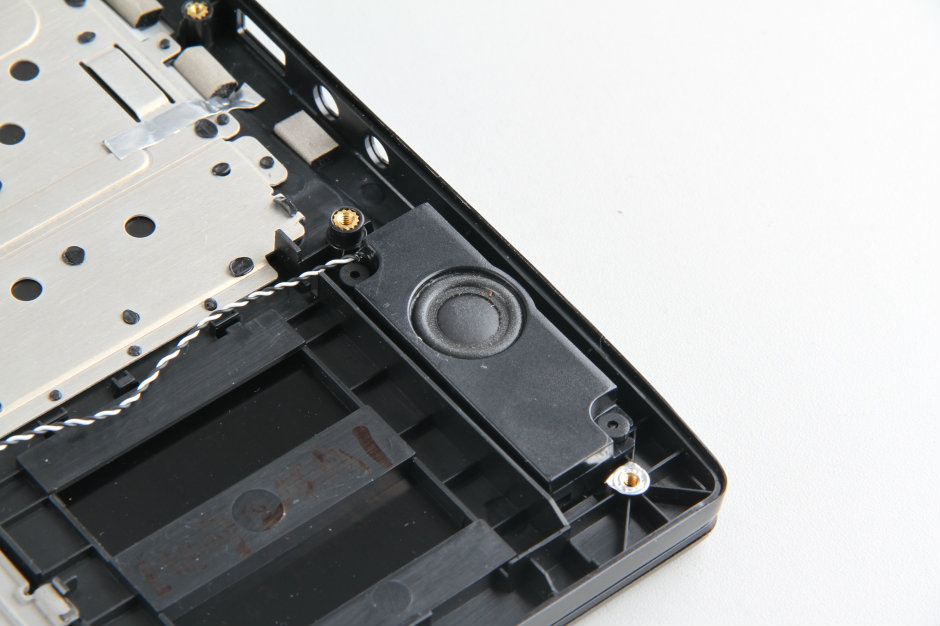
When the bottom case was removed, you could access the battery, hard drive, speakers, wireless card, heat sink, and cooling fan.
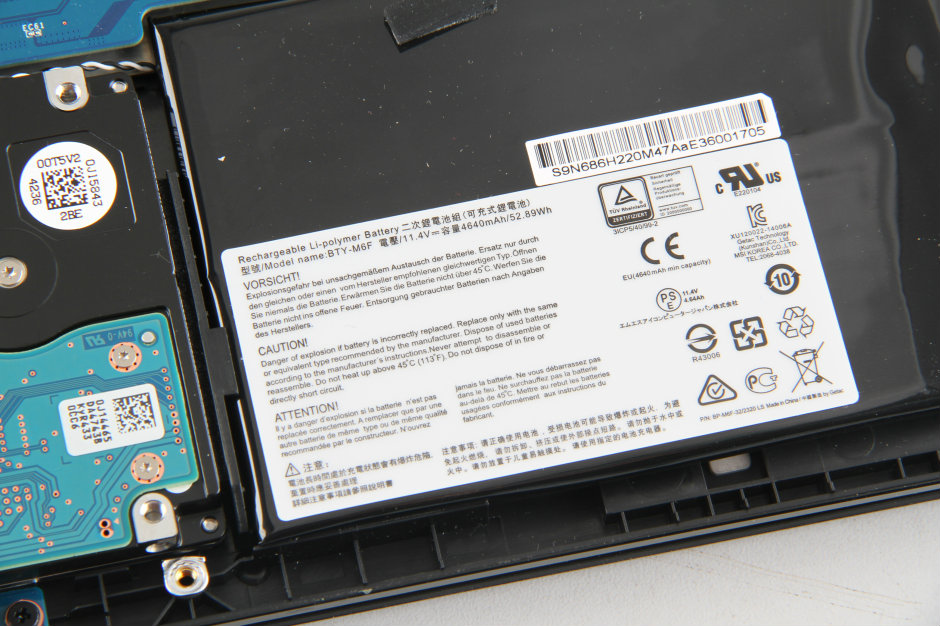
MSI GS60 comes with an 11.4v, 4640mah Li-polymer battery. MSI model: BTY-M6F.
Disconnect the white cable and remove the hard drive.
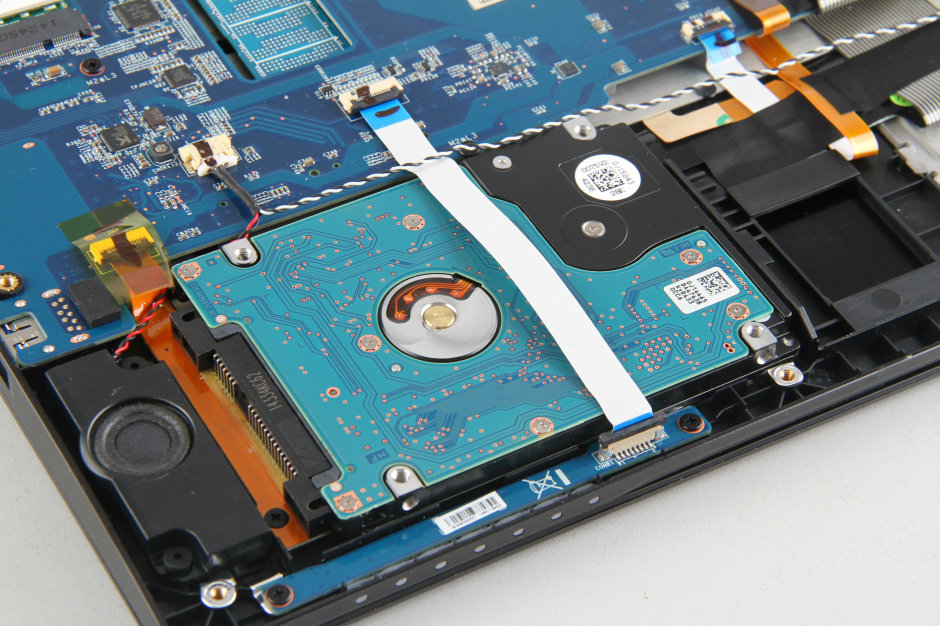
The MSI GS60 features an HGST 1TB 7200RPM hard drive.

Disconnect two antennas and remove one screw. Remove the wireless card.
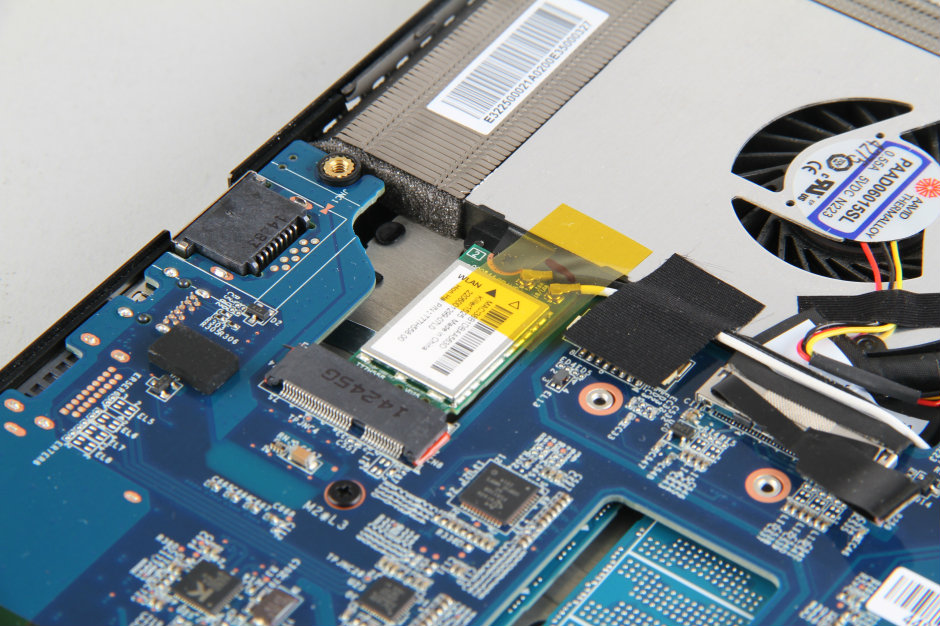
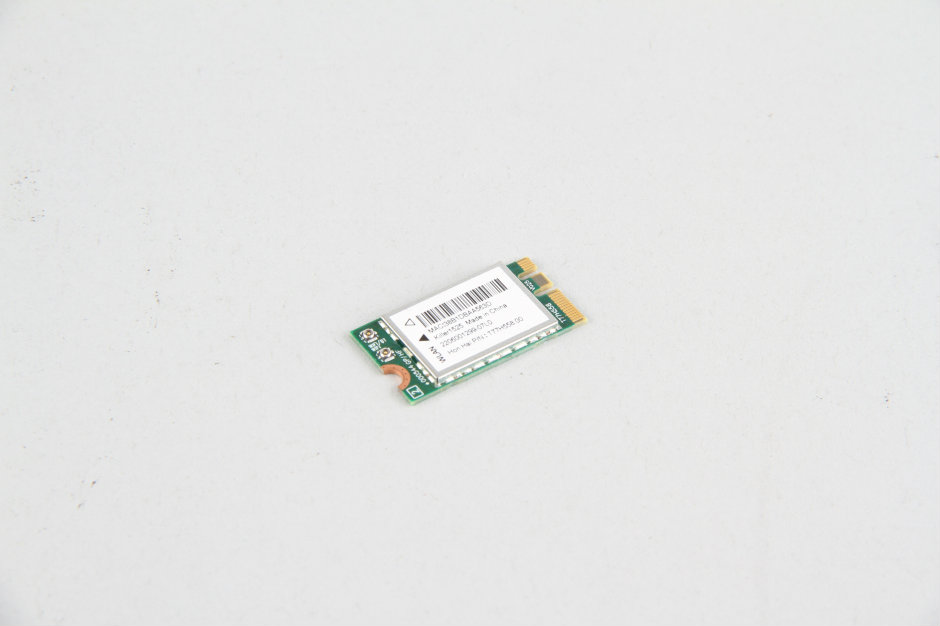
The wireless card
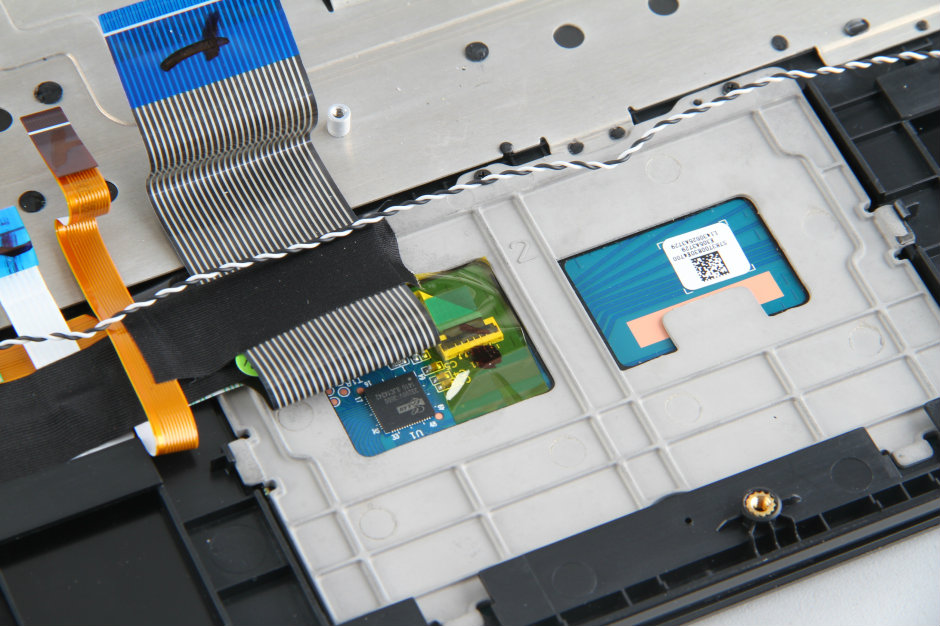
After the motherboard is removed, you can access the keyboard and touchpad.
Right speaker
Touchpad
Left speaker
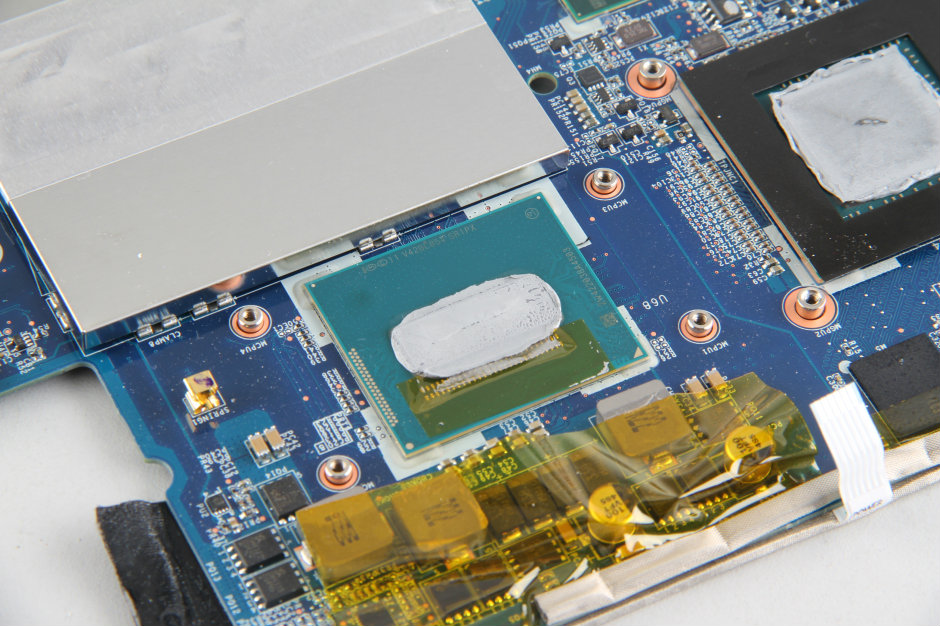
MSI GS60 motherboard
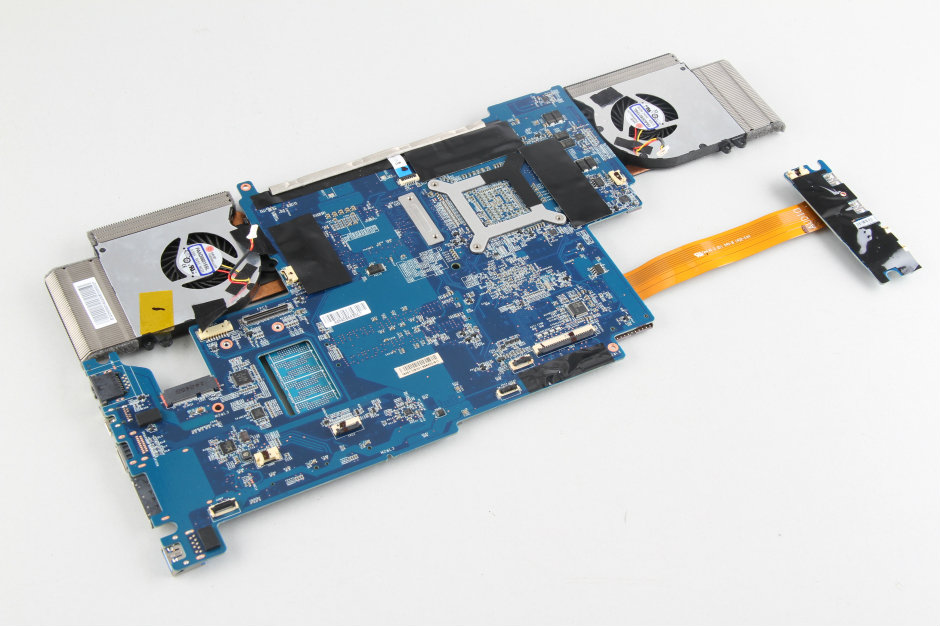
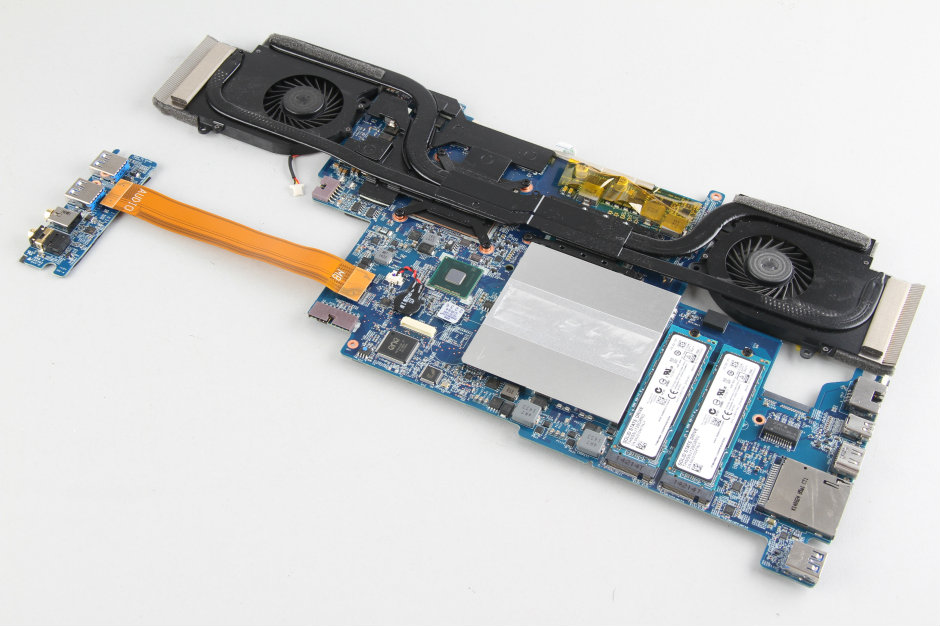
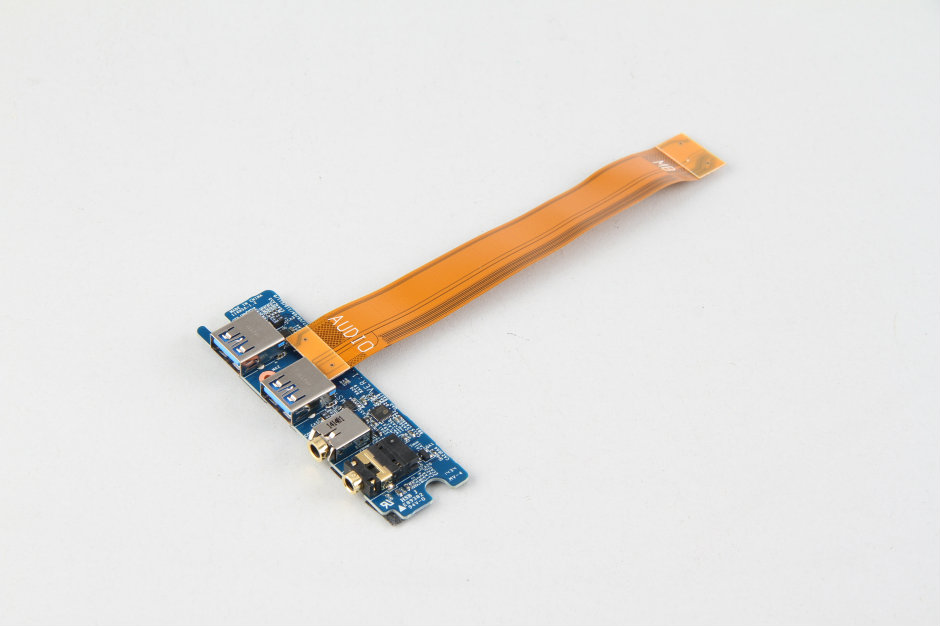
The i/o board is connected to the motherboard via a soft cable.
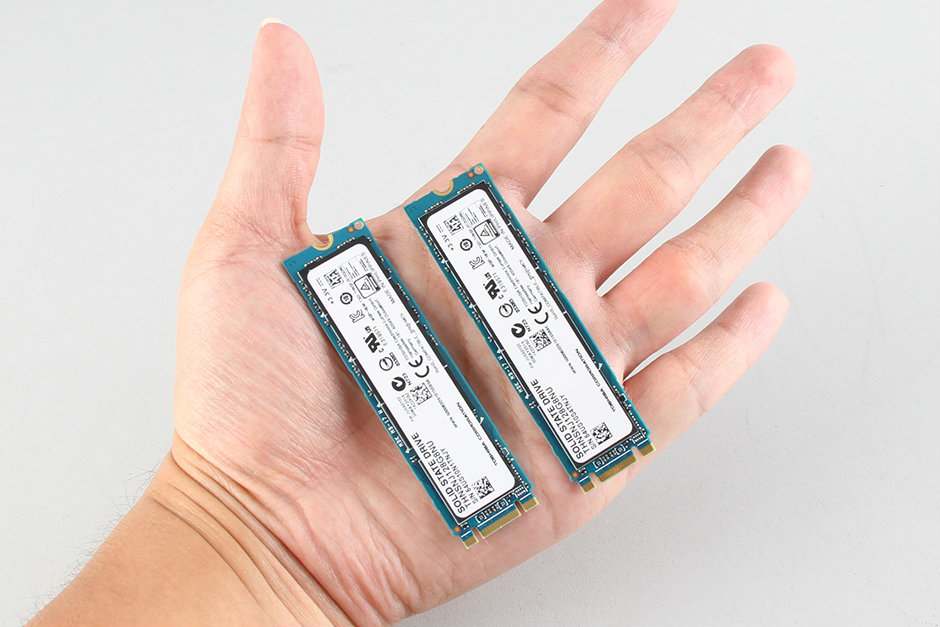
Remove the screws securing the SSD and remove two M.2 NGFF SSD.
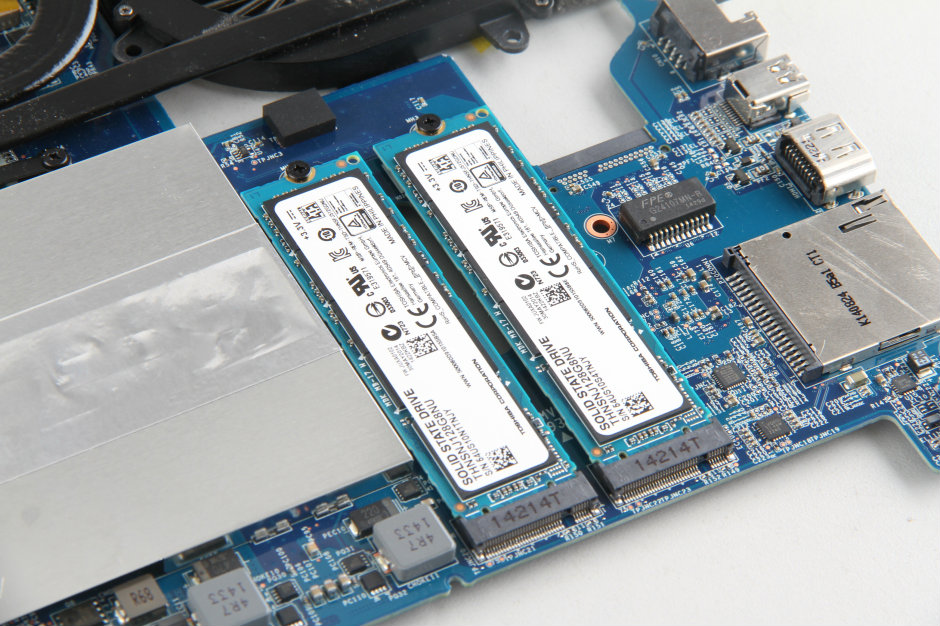
Two Toshiba 128GB M.2 NGFF SSD
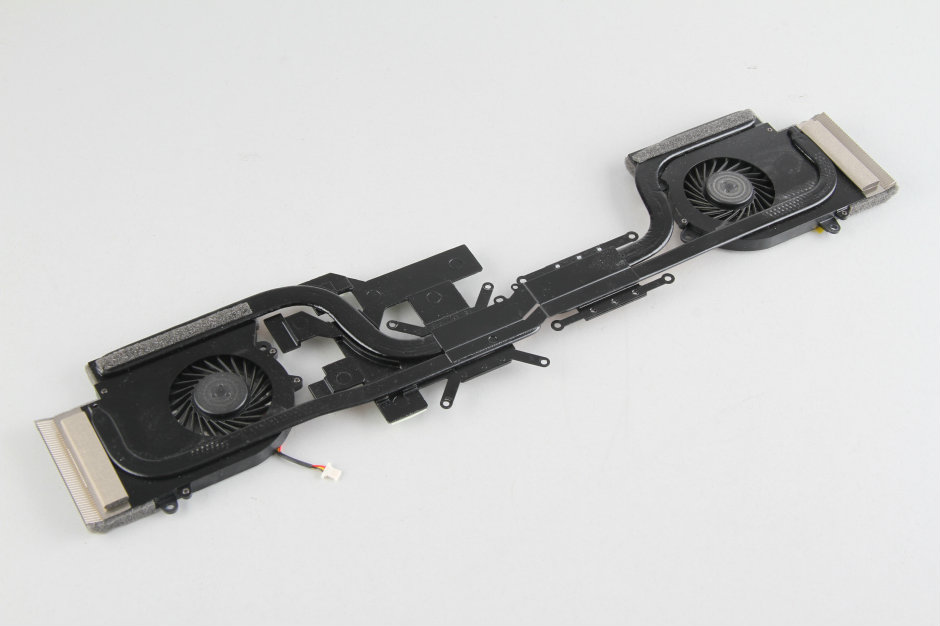
Remove the heat sink and cooling fan.
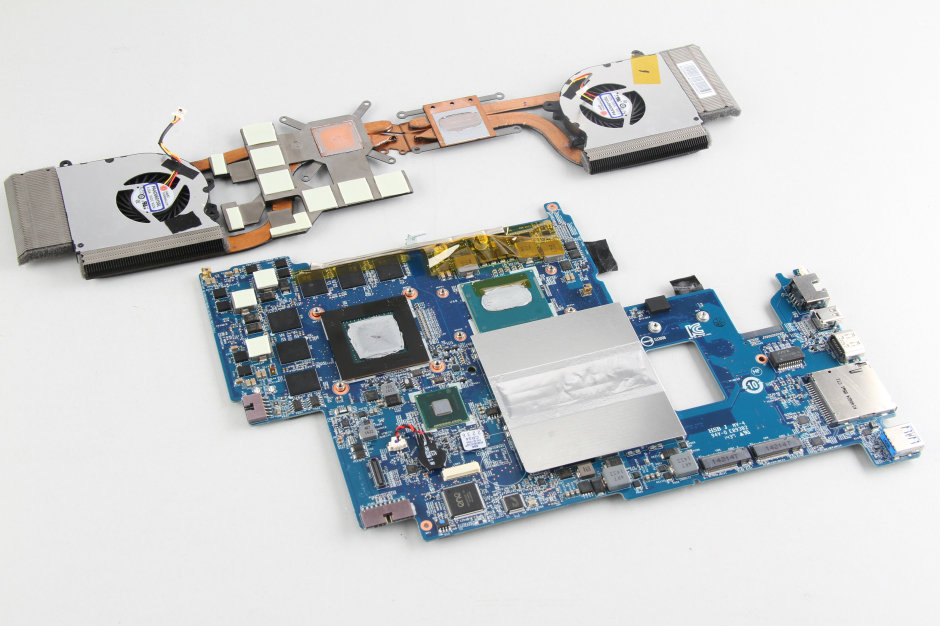
MSI GS60 heat sink and cooling fan
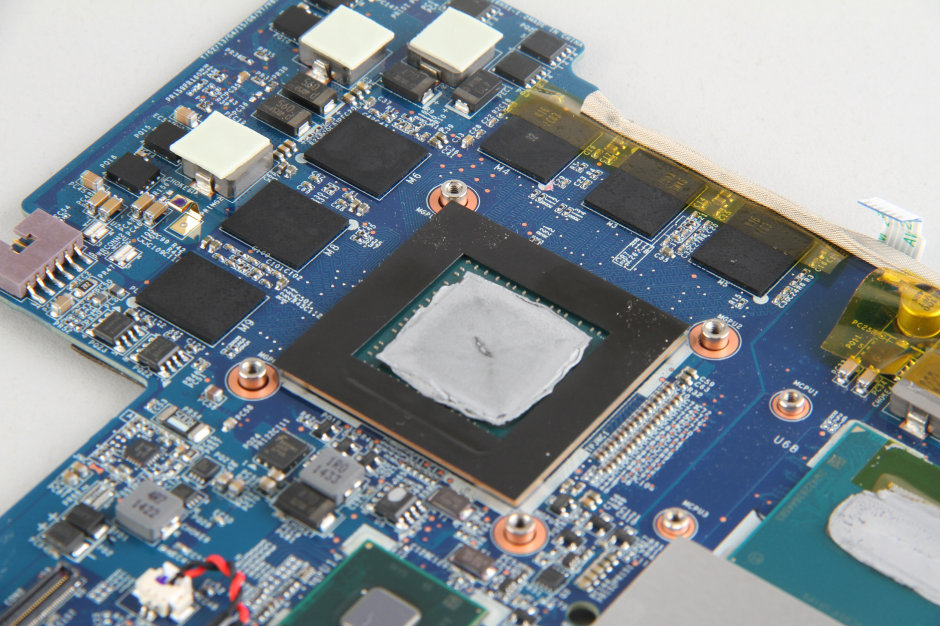
NVIDIA GeForce GTX 970M graphics card
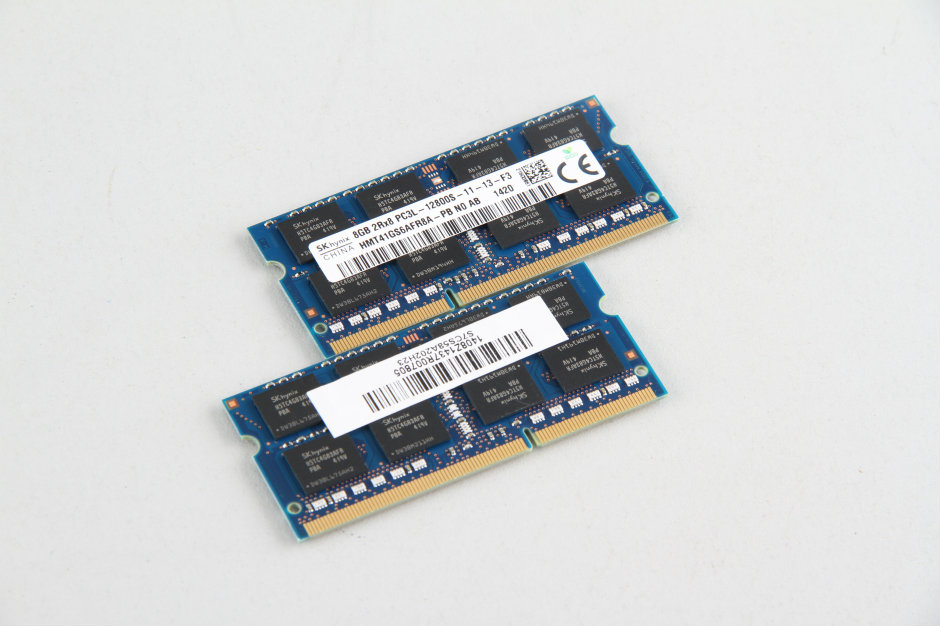
Remove the cooling sticker. You can find two 8GB RAM.
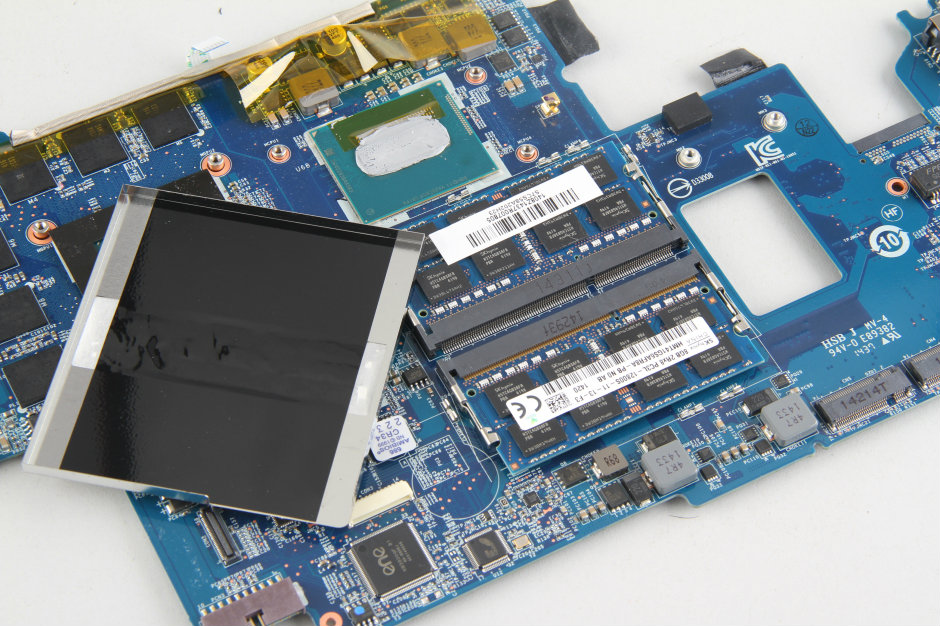
Two SK Hynix 8GB PC3L-12800S RAM

Hi, could you please give me the exact type of CPU fan so I can try to find a replacement? Thanks.
Hi,
Does anyone know where to find replacement parts for this laptop (the touchpad particularly)?
Is it possible to remove the cooling fans from the heat sink? I would like to switch out the current fans to this laptop, With new ones
Hi! The cooling fan model is PAAD06015SL, 0.55A 5VDC, and it is very expensive.
Can you replace the ethernet/LAN controller? or is it attached to the motherboard?
The wireless LAN card can be replaceable, it’s not attached to the motherboard.
Right now, mine is not working for the ethernet cable but it is working for the wireless internet. also I did go to the MSI page and downloaded the driver for this, but it still won’t work.
Does anyone have a part number for the ribbon cable connecting the 2.5″ hard drive to the MB, or know where I can find a replacement?
It seems there is no HDD SATA cable on eBay or other websites, and you should contact MSI to buy it.
I need the ribbon cable connecting the 2.5″ HDD to the mobo. Please let me know if you ordered one.
Contact MSI support to purchase the part. I just sent my request in for the cable. From what I was told, there is about a 6-8 week lead time on delivery. Just an FYI
Great disassembly guide! It helped me out a lot. (I would have completely derped adding my new RAM without this)
Hey, what about the battery, keyboard, and bottom cover? I spilled some water on mine. Some keys are not working. The battery is not charging, and the bottom plate paint has bubbles of sorts.
The keyboard seems available on eBay and Ali Express, but if somebody has experience, please point out a genuine one. I also need a battery, and I couldn’t find a source at all.
Help would be much appreciated
Hi Panysu,
I’m having the same kind of problem.
Did you manage to replace your keyboard?
Is it possible to remove it without removing the motherboard?
Have you changed your keyboard?
Is it difficult to disconnect and remove the battery?
Is it possible and safe to run the laptop without a battery?
Did you manage to remove the batter? I need to remove mine because it inflated. I want to know if the battery is attached in some manner or if it comes off easily.
Does anyone know how to fix the GPU controller if it goes out? Or is it a complete motherboard replacement?
Has anyone arrived to change the keyboard?
I’m not sure if anyone is still looking for a battery, but I found this replacement on Amazon. My battery started to expand as well. I’m switching to a desktop, so I haven’t purchased this particular battery, but it looks like a suitable replacement.
https://www.amazon.com/dp/B00XHPH4GI/ref=wl_it_dp_o_pC_S_ttl?_encoding=UTF8&colid=2VUI5XARY70LP&coliid=I3112OX7IE1BQ3
Does anyone know how to remove the keyboard? Am having a really difficult time trying to install a new one.
Please let me know if you were able to replace the keyboard!
Does anyone was able to replace the keyboard?
Thanks
Please help.
How to replace this keyboard?
Hello,
I have to change my keyboard too.
I have tried to extract the actual keyboard but it seems to be fixed with the case.
Jose, Em, Gustavo, Cdric, Did you replace your keyboard with success?
Thank you
Was this a 15.6″ or 17″ model? Just hoping to confirm whether the 15.6″ version can support 2 SSDs.
How do I replace the CMOS battery? Where is it, and what battery is needed to replace it? My clock doesn’t tell the right time on my PX60 (which is the same as the GS60, except it’s silver not black), so I guess the CMOS battery is dead.
Hi, I have been using an MSI Ghost directly without a battery for months. There was a short power outage, and my laptop went off. When the light came on, my laptop could not display again, but the fan was working.
I had a question about the CMOS battery. This might not be the right place, but I have looked everywhere and can’t find out how to reset the battery or jumper, perhaps? I bought an MSI MS-16H2 from a pawnshop and didn’t check for a BIOS password…whoops! I’ve built plenty of desktops, but I have never taken apart a laptop, so I would like a good idea of where it is located before tearing into it. If there is anyone who can help, please let me know.
Also thank you for the guide on disassembly. It will come in handy when I do begin deconstruction 🙂