
In this guide, I will explain how to disassemble the Xiaomi Mi Note to remove the back cover, battery, rear camera, front camera, speaker, and motherboard.
Want to keep in touch with us? Follow us on Facebook for more repair news.
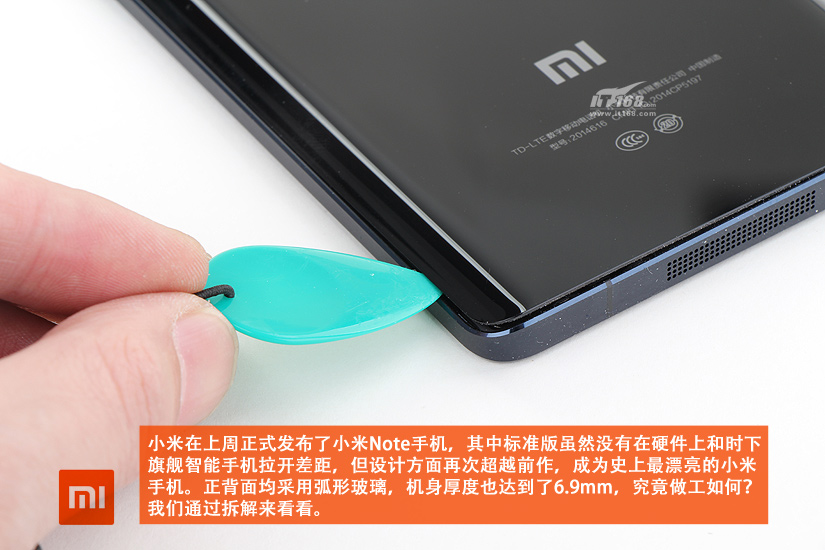
The Xiaomi Mi Note uses curved glass to give it a graceful edge. It actually has glass fronts on both sides. Use guitar picks to pry up the back cover.
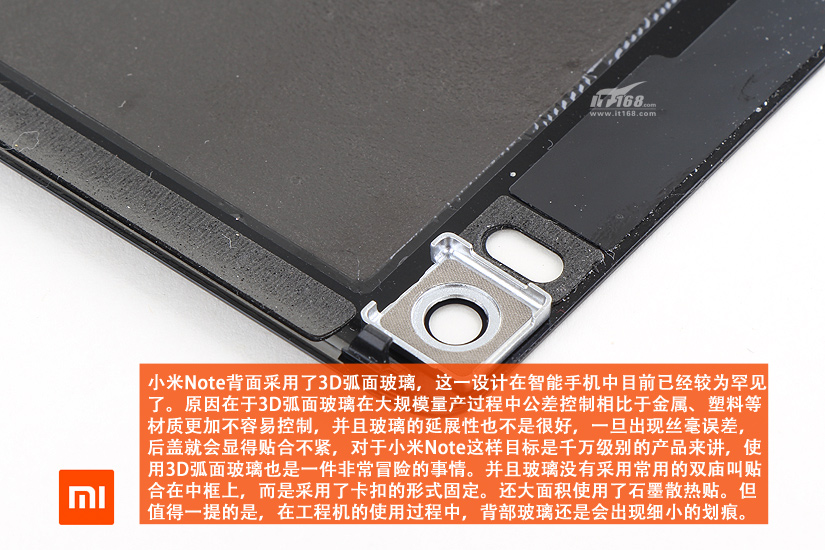
The back cover uses 3D curved glass and is secured by clips.
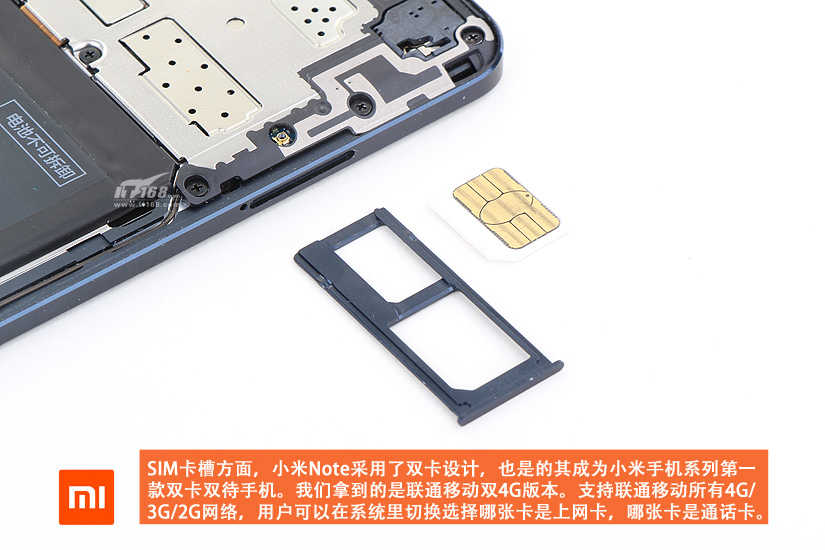
The Xiaomi Mi Note supports dual cards and dual standby.
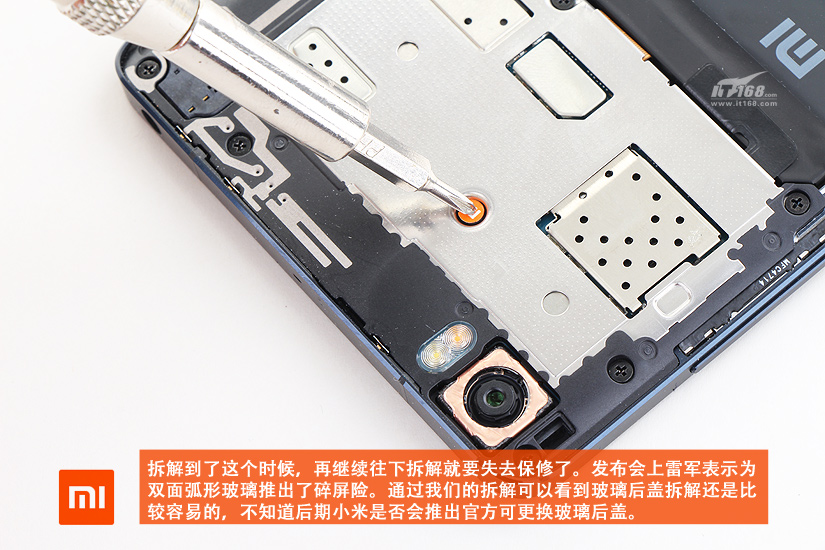
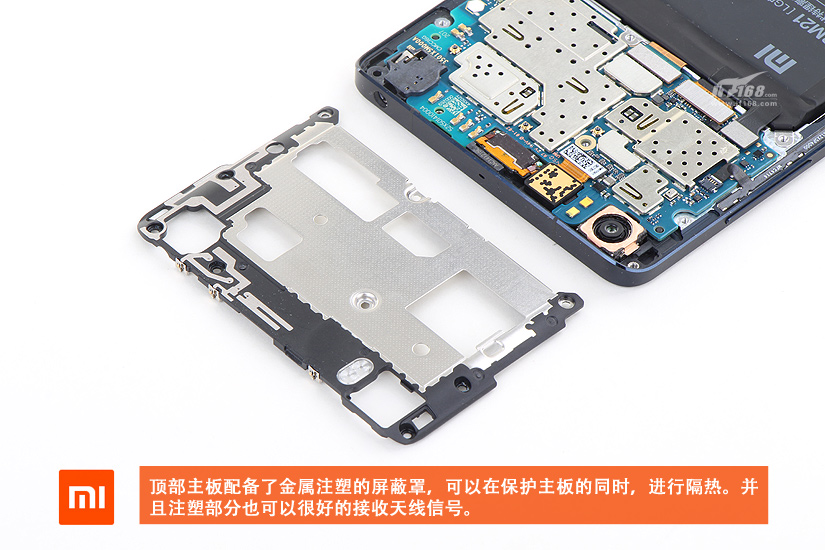
Remove all screws securing the metal shield.
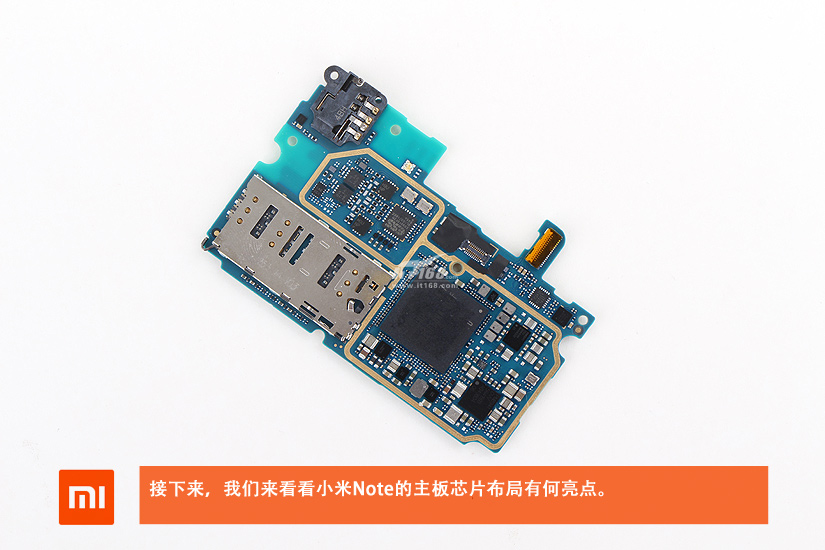
Once the metal shield is removed, you can access the motherboard.
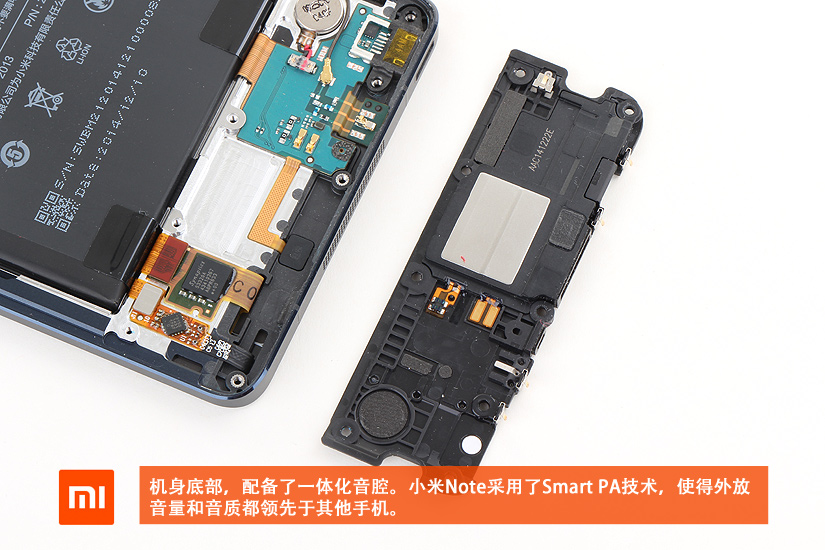
Remove the screws securing the sound chamber module.
The Xiaomi Mi Note uses smart audio amplification technology to produce better sound and audio quality than other phones.
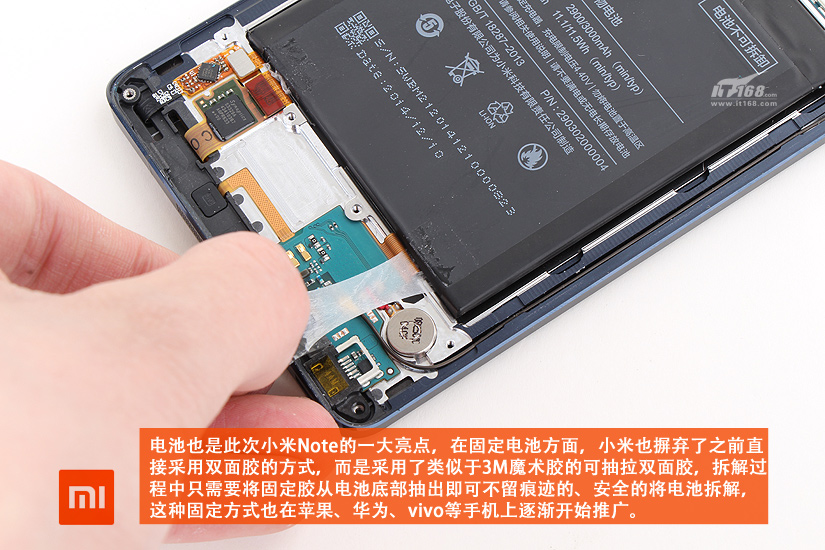
Now, pull the double-sided adhesive tape, and you can remove the battery.
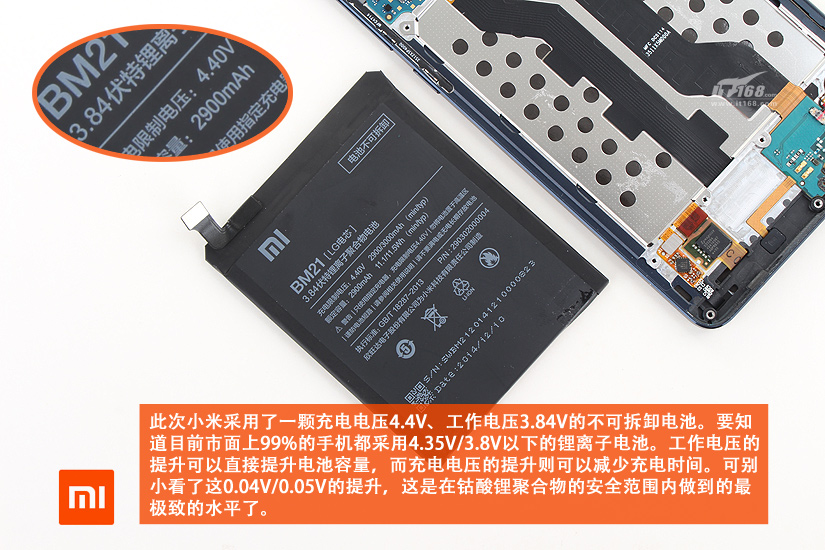
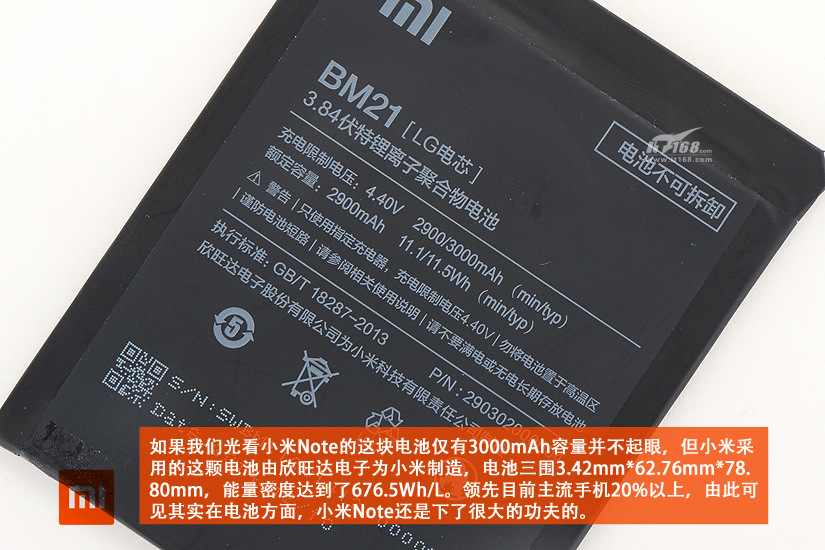
The Xiaomi Mi Note comes with a 2900mAh Li-Polymer battery. The battery cells come from LG.
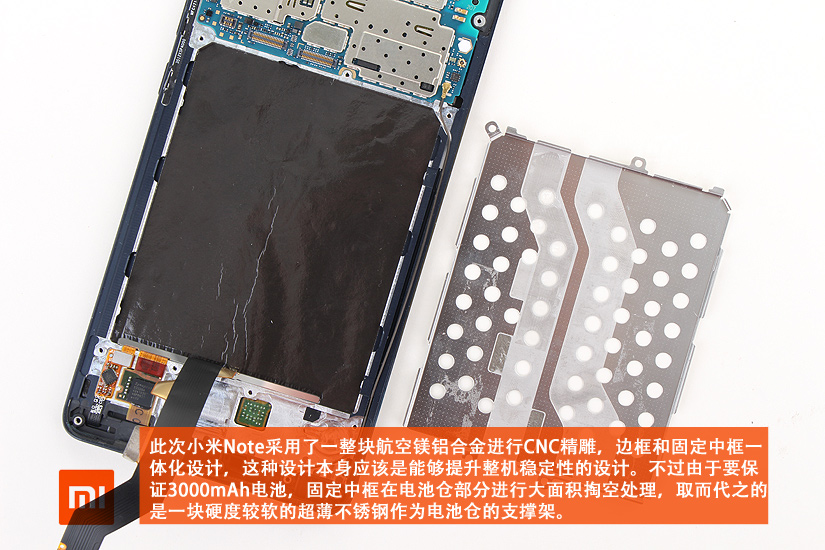
The battery caddy is made of magnesium alloy.
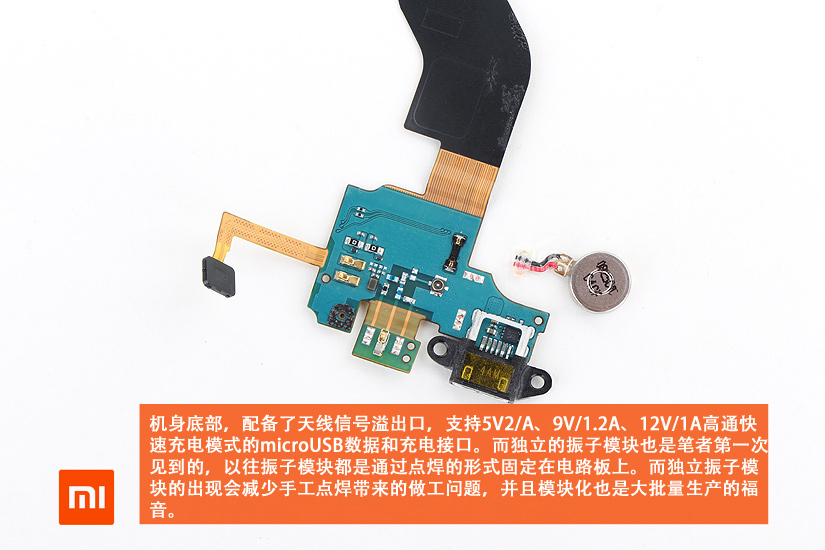
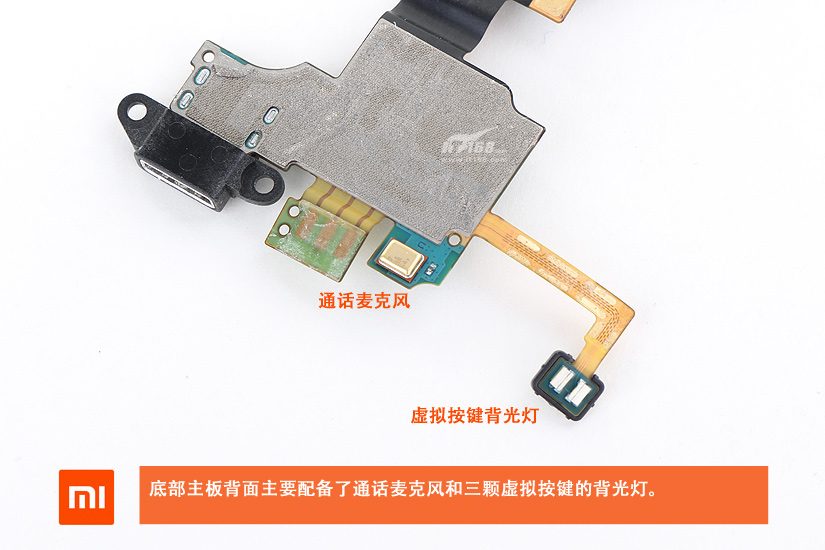
The circuit board integrates a micro-USB port, microphone, virtual key light, and vibrator.
The microphone and the virtual key light
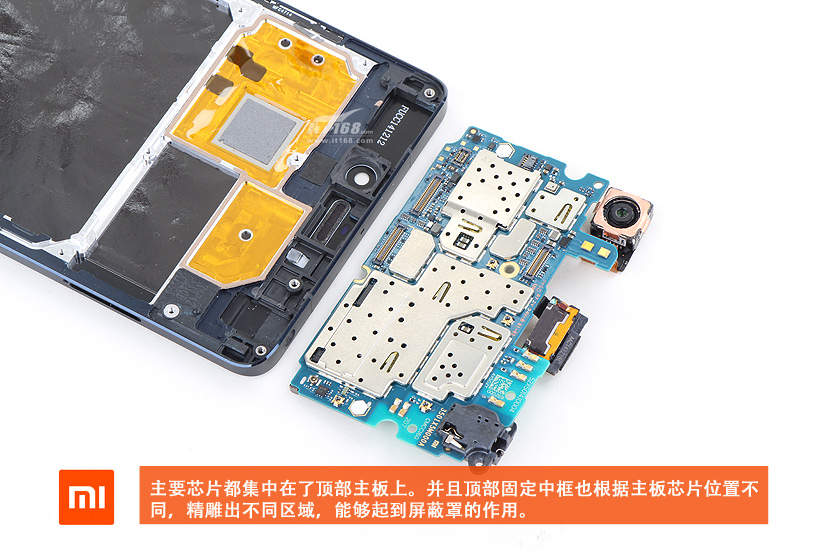
All the chips on the motherboard are covered by metal shields, and we need to remove the metal shields to access the chips.
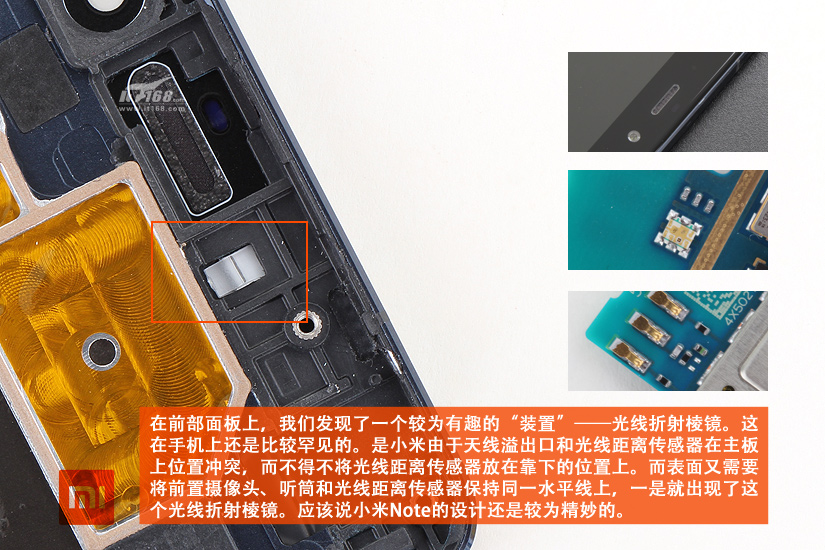
On the front panel, we found a small device – a light-refracting prism.
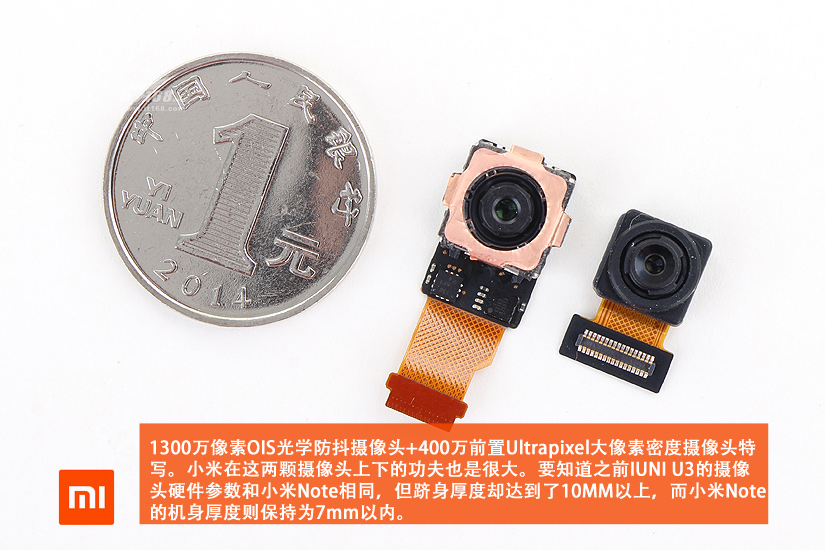
The rear camera and front camera
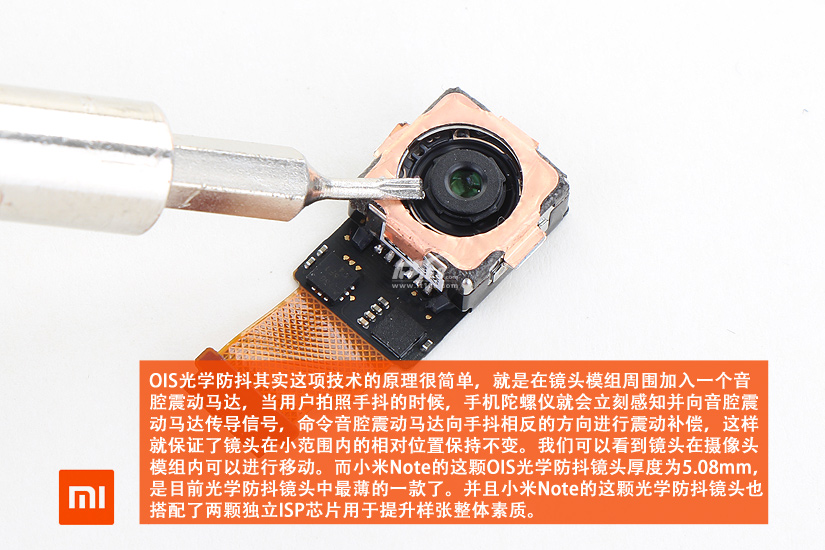
The thickness of the optical image stabilization lens is only 5.08 mm, making it one of the thinnest designs, and it features dual image signal processing chips.
Remove all metal shields on the motherboard.
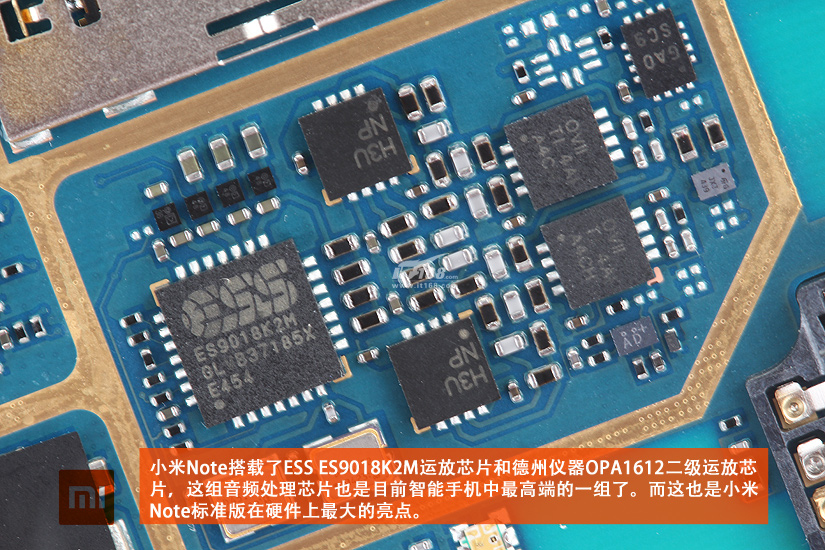
ESS ES9018K2M 32-bit Stereo Mobile Audio DAC and TI OPA1612 Operational Amplifier
This set of audio chips is currently the most high-end chip in smartphones.
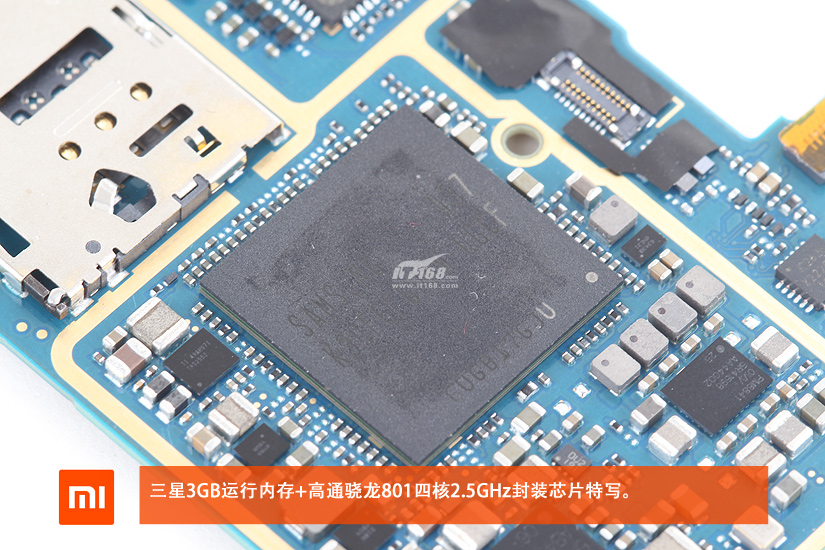
Samsung 3GB RAM + 2.5GHz Qualcomm Snapdragon 801 processor
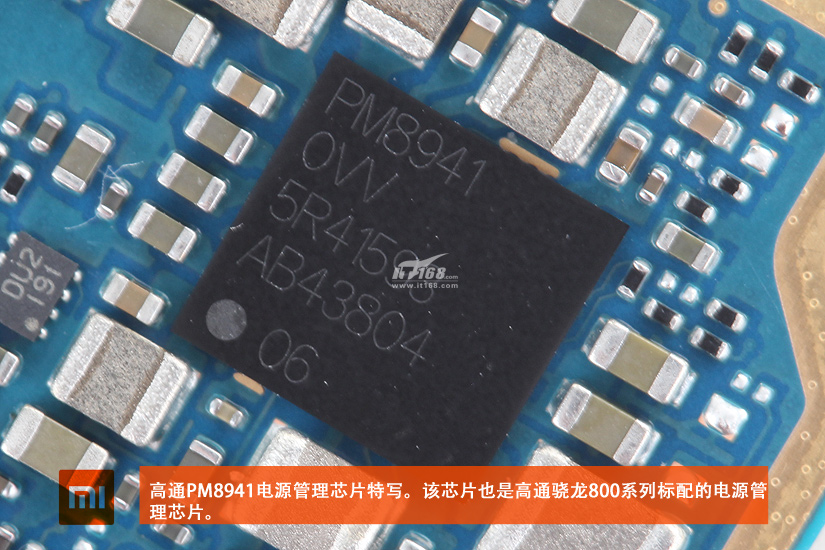
Qualcomm PM8941 Power management chip
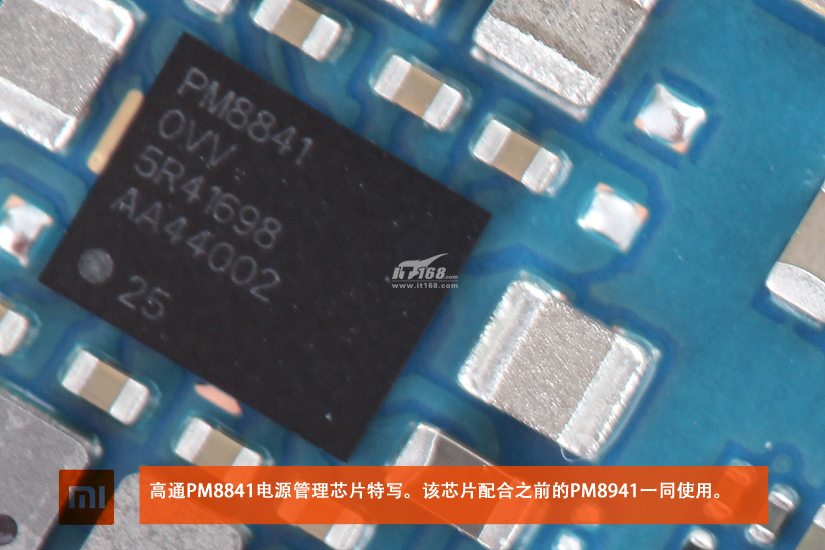
Qualcomm PM8841 Power management chip
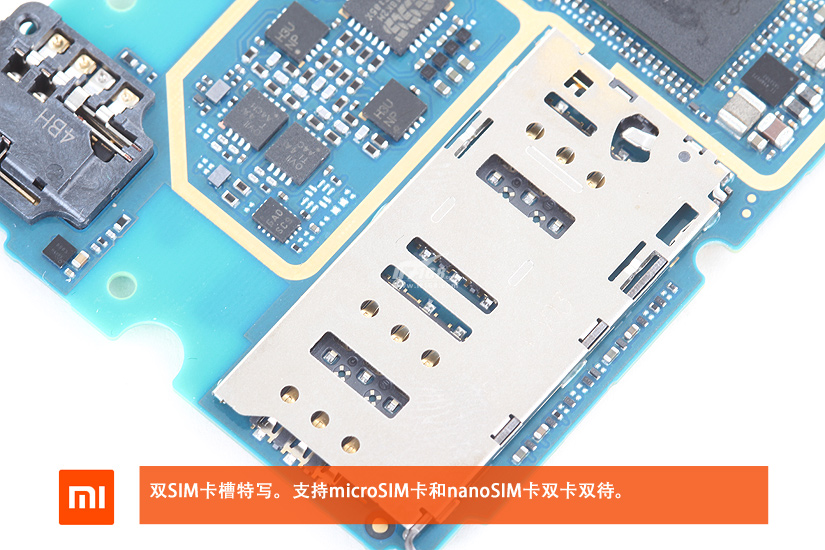
Dual SIM Card slots, it support the microSIM card and nanoSIM card
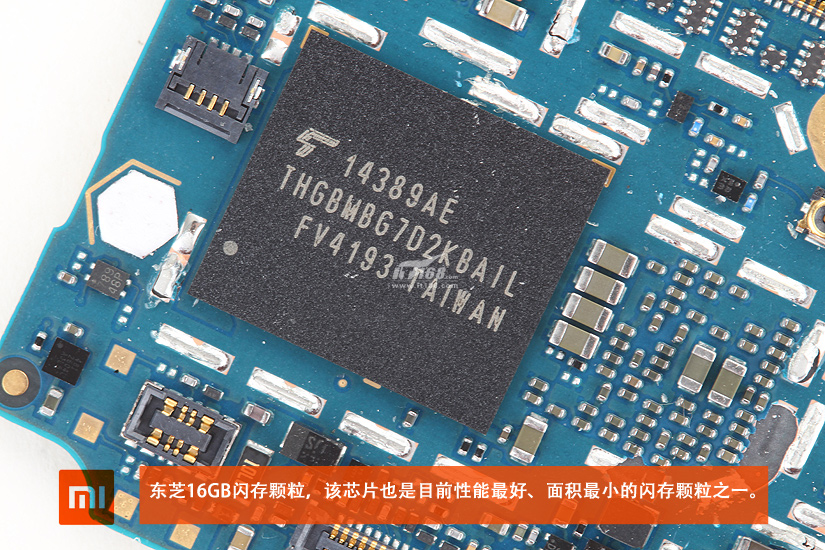
Toshiba 16GB ROM
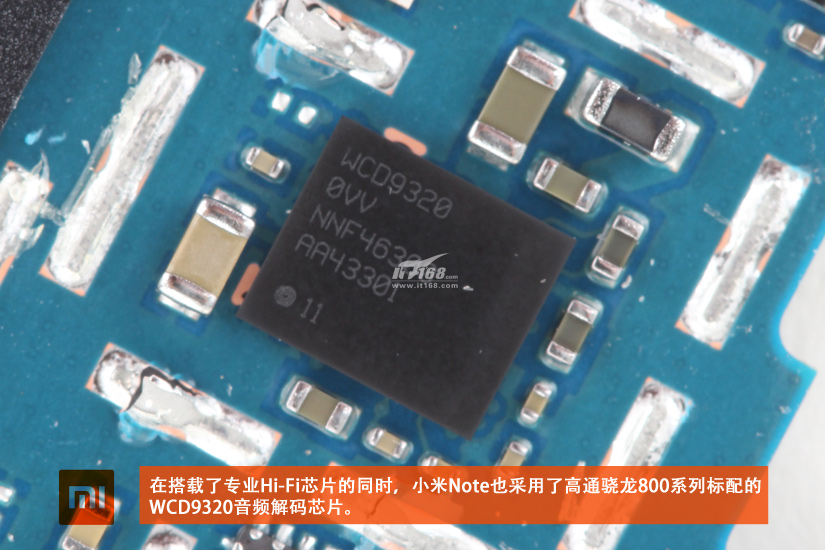
Qualcomm WCD9320 Audio decoder chip
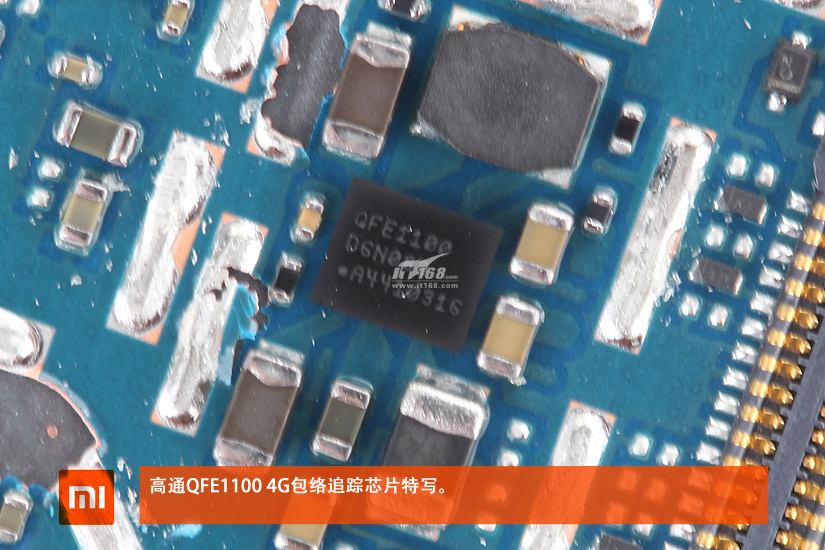
Qualcomm QFE1100 Envelope Tracking Chip
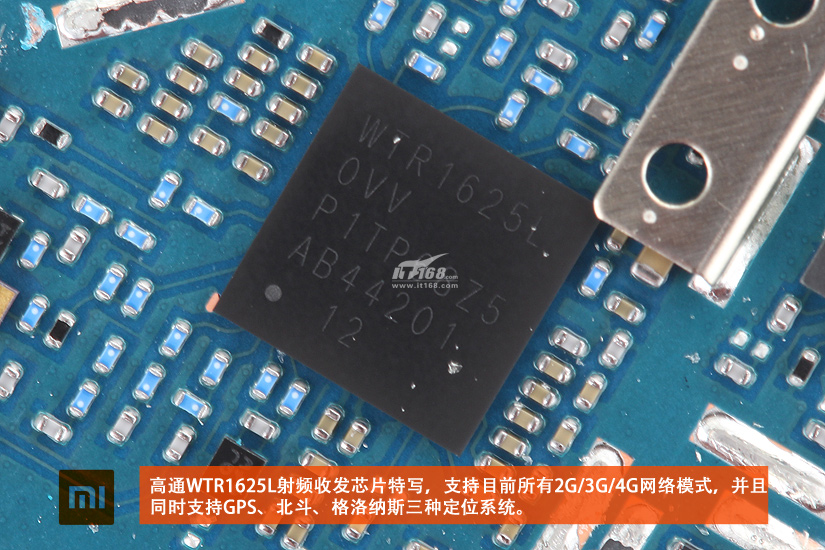
The Qualcomm WTR1625L RF transceiver supports GPS and China’s BeiDou navigation satellite system.
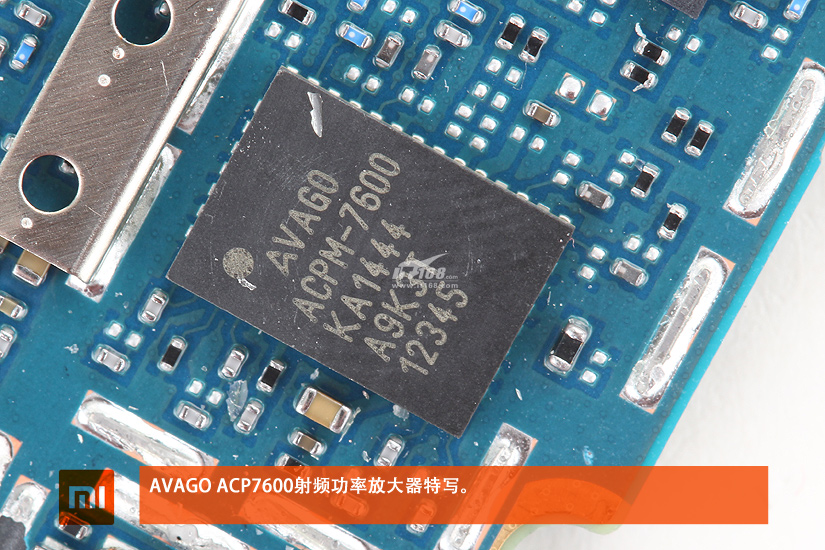
AVAGO ACP7600 RF power amplifier
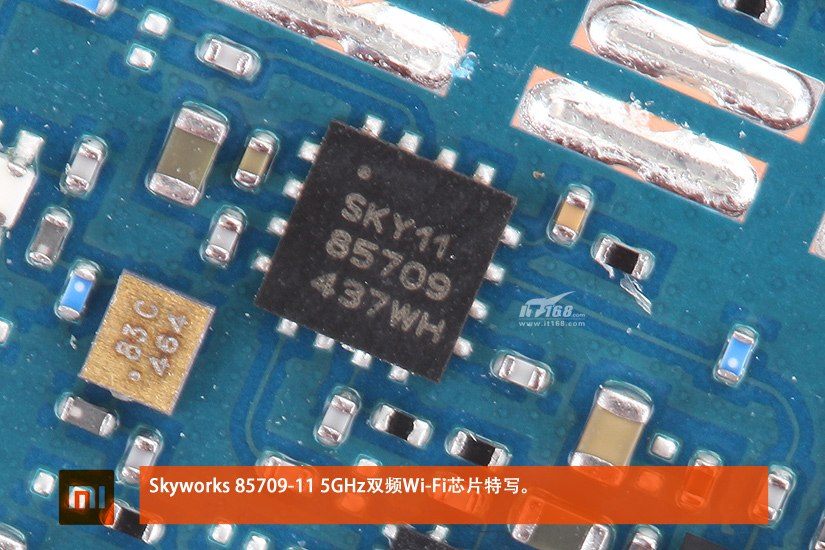
Skyworks 85709-11 5GHz Wi-Fi chip
Qualcomm WCN3680 Bluetooth 4.0 chip

Source: it168


Hi, I just bought a Mi Note 64GB with water damage. The phone turns on and operates with few errors.
The only issues I have found are…
1. The external speaker does not work. No sound at all. The earpiece on calls works, and the headphone jack works.
2. The flash/ torch doesn’t work. The LEDs show no sign of life.
3 The vibration does not work.
4 The main camera is intermittent. The camera app crashes when opening most of the time. If I open the Google Camera app, dismiss the error, and then open the Mi Camera app, it usually works. If I take a picture with the main camera and then view it, the app crashes when I return to the camera. The front camera works all the time, for example, when using a selfie app.
Everything else, including display, touch, Wi-Fi, calls, mic, etc, works.
My purpose is to help identify where damage to the motherboard may cause these errors. I understand it may damage the internals of a chip. I have already tried to clean the motherboard with a toothbrush and 99% alcohol.
Any ideas are welcome, thanks.
Hi, great experiment there. Could you tell me how to open or replace the on/off button? I can remove the top case, but I’m stuck removing the button from the bezel. Should I also tear down the screen?
I think you should remove the back cover, battery, and motherboard to replace the on/off button module.