
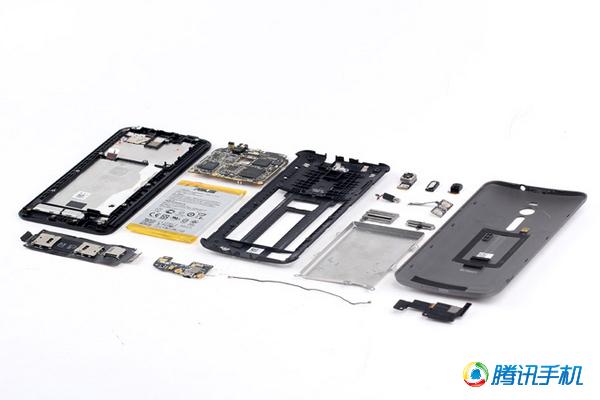
In this guide, I will explain how to disassemble the Asus ZenFone 2 to remove the back cover, battery, camera, and motherboard.
Teardown is what we do! Follow us on Facebook for the latest repair news.
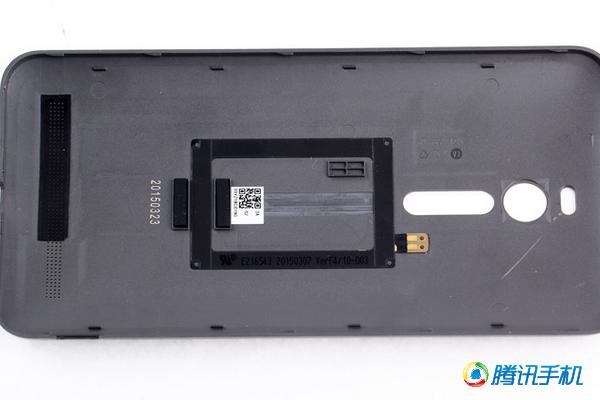
The Asus ZenFone 2 back cover is removable. There is a slot in the lower right corner of the body so that it can be easily removed.

1. Removing the back cover
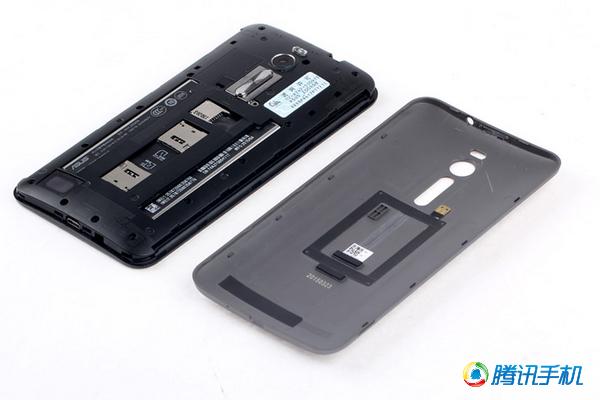
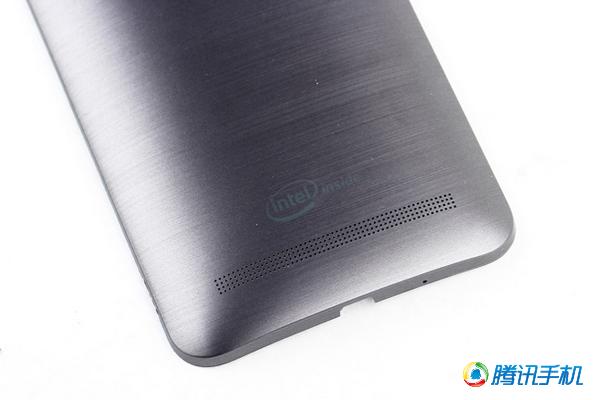
The back cover is made of PC + ABS material, which is flexible. The bottom is marked with the Intel logo, which means the ZenFone 2 uses an Intel processor.
An NFC coil is integrated into the back cover.
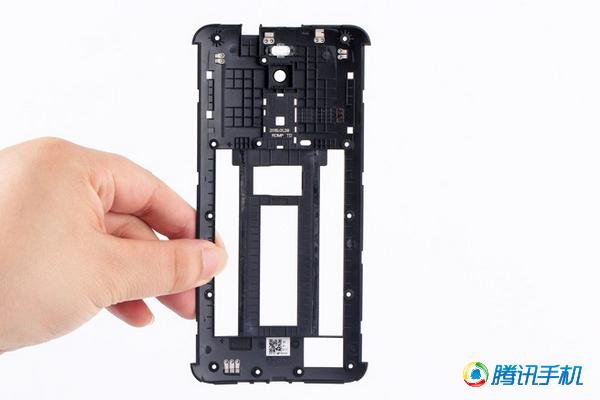
2. Removing the middle frame
Remove the fourteen screws securing the middle frame. You can remove the volume button and the middle frame.
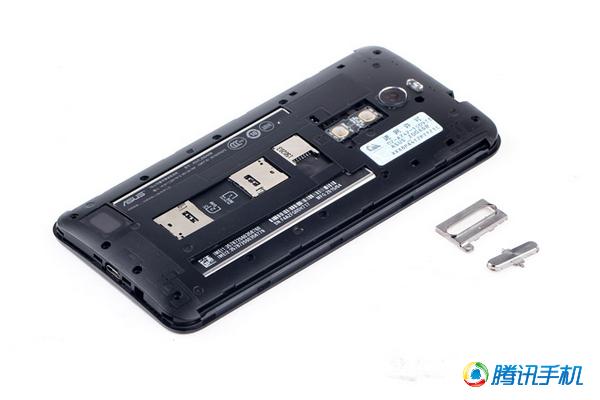
The volume control cable of the ZenFone 2 is secured with double-sided tape. The top of the middle frame integrates Wi-Fi, Bluetooth, and GPS antennas, while the bottom of the middle frame integrates the communication antenna.
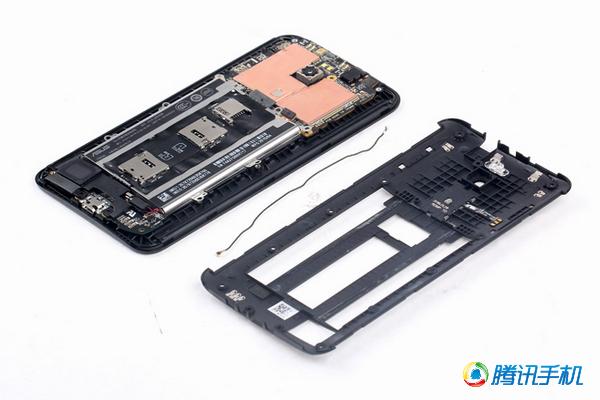
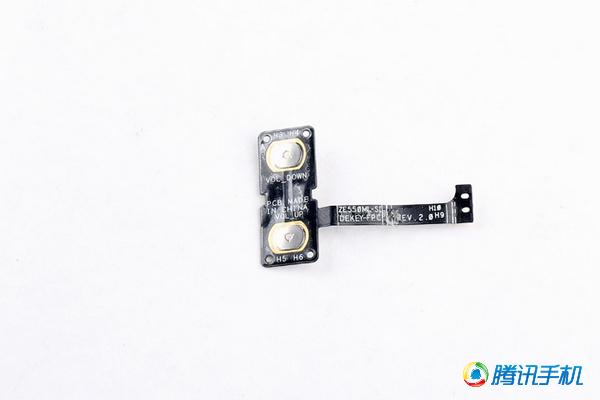
3. Removing the volume control cable
Close-up of the volume control cable.
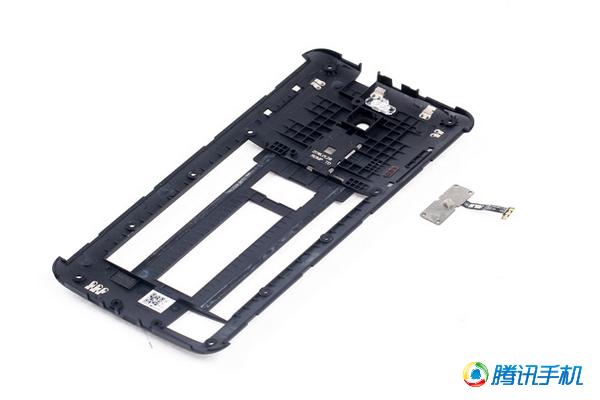
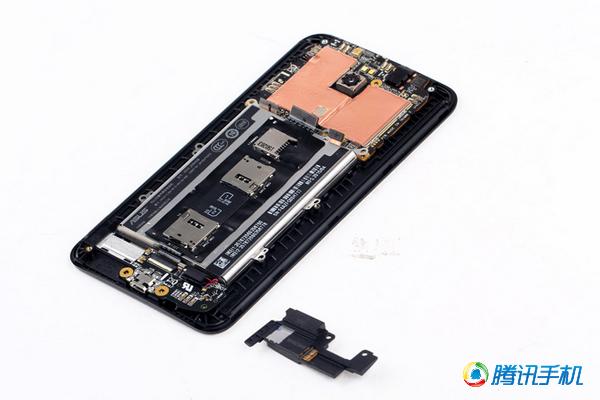
4. Removing the speaker
Remove the speaker module.
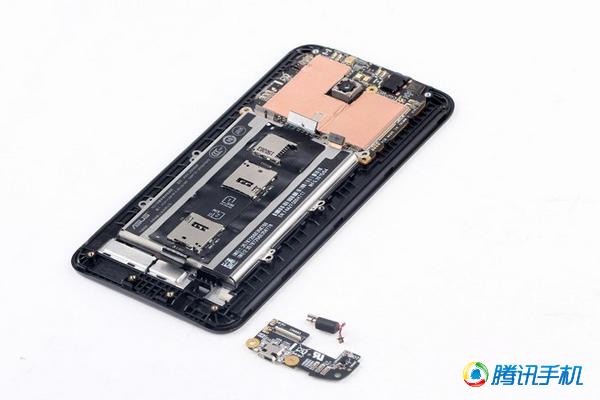
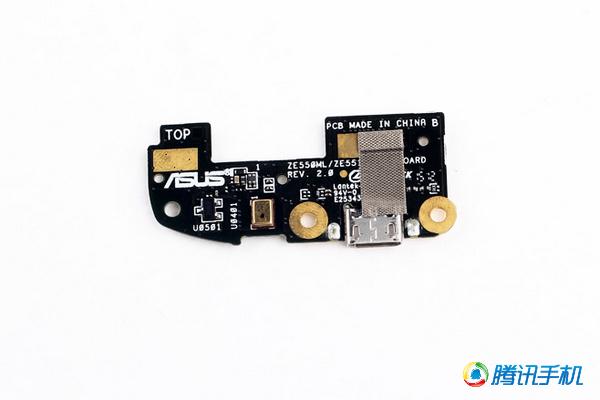
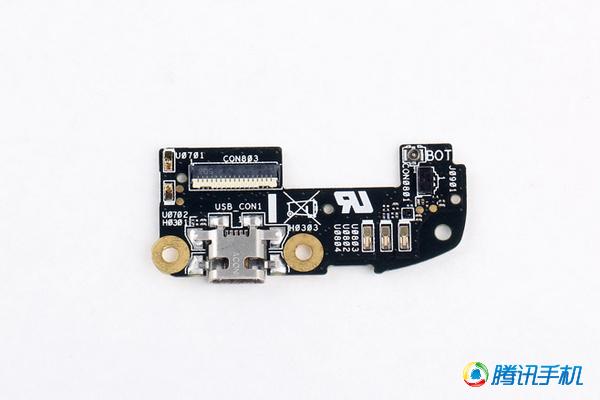
5. Removing the bottom board
Now, remove the small circuit board. The front side of the circuit board is equipped with a noise-canceling microphone, while the back side has a vibrator.
Close-up of the circuit board
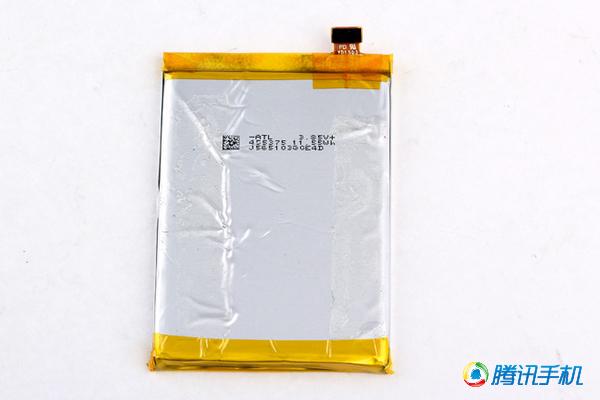
6. Removing the battery
Remove the screws securing the battery and take out the battery. Since the SIM card tray is attached to the battery, replacing the battery can be a bit of trouble.
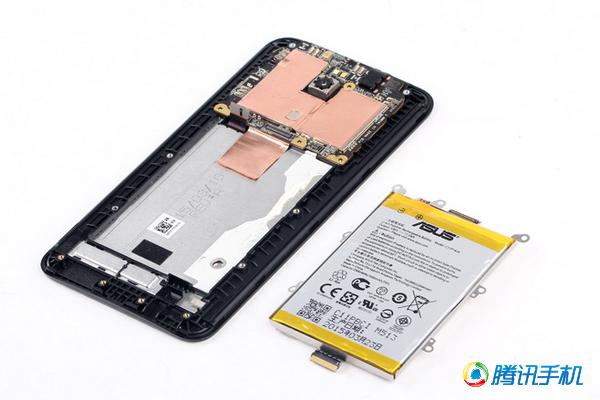
The Micro SIM card slot and Micro SD card slot are fixed to the battery. The battery replacement guide for the Asus ZenFone 2 is very simple. To replace the battery, the SIM card tray module needs to be removed, which is fixed to the battery with glue.

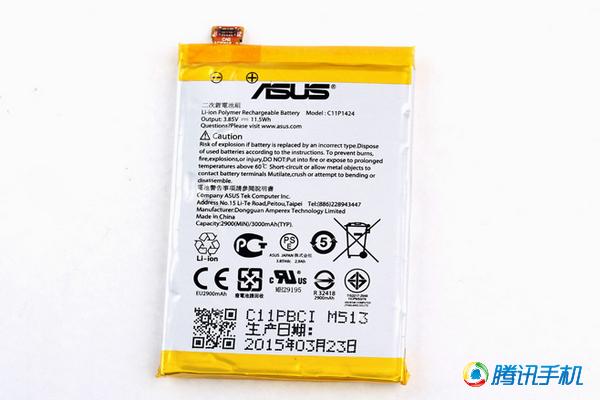
The Asus ZenFone 2 comes with a 3000mAh lithium polymer battery. The part number is C1191424.
7. Remove the motherboard
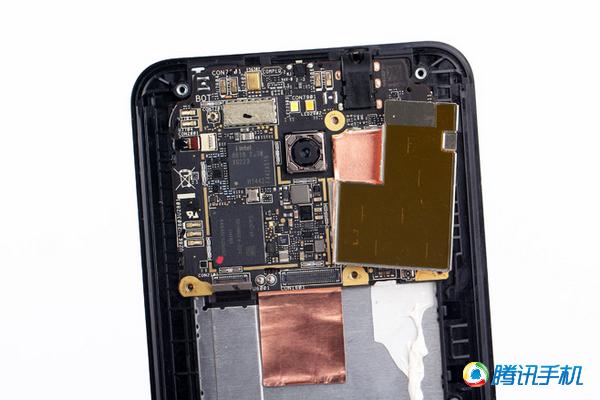
Remove the rear camera, front camera, and earpiece.
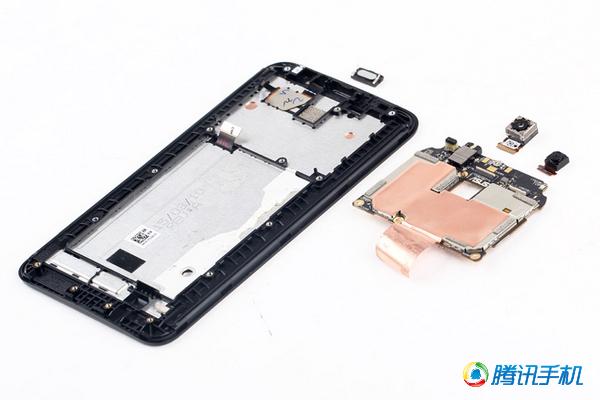
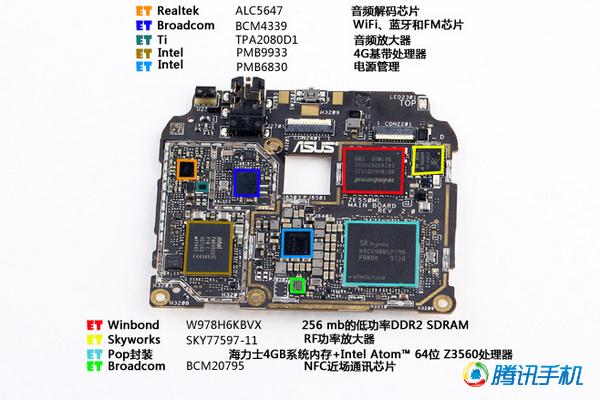
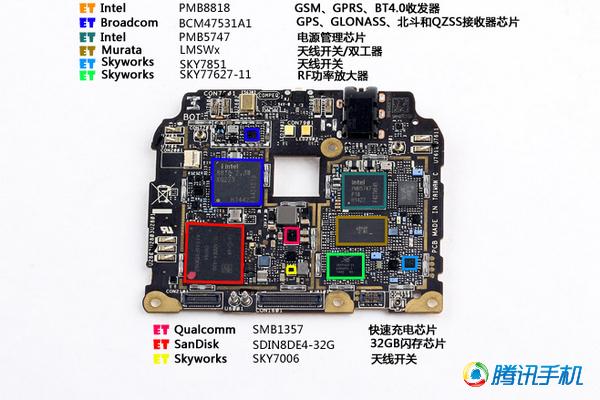
The motherboard is manufactured by Taiwan COMPEQ. The front of the motherboard integrates a light proximity sensor, a 3.5mm headphone jack, a rear camera, a front camera connector, a power connector, and a lock key button. The back of the motherboard integrates a noise-canceling microphone and an LED indicator light. The Intel 64-bit processor and 4GB RAM were packaged together.
Realtek ALC5647 audio decoder chip
Broadcom BCM4339 Wi-Fi, Bluetooth, FM chip
TI RPA2080D1 audio amplifier
Intel PMB9933 4G baseband processor
Intel PMB6830 power management chip
Winbond W978H6KBVX 256MB DDR2 SDRAM
Skyworks SKY77597-11 RF power amplifier
SK Hynix 4GB ROM + Intel Atom Z3560 processor
Broadcom BCM20795 NFC chip
Intel PMB8818 GSM, GPRS, BT4.0 transceiver
Broadcom BCM47531A1 GPS, GLONASS, Beidou, QZSS receiver
Intel PMB5747 power management chip
Murata LMSWX antenna switch
Skyworks SKY7851 antenna switch
Skyworks SKY77627-11 RF power amplifier
Qualcomm SMB1357 fast charging chip
SanDisk SDIN8DE4-32G RAM
Skyworks SKY7006 antenna switch
Asus ZenFone 2 internal parts
Source: qq.com

Is the headphone jack detachable from the mainboard, and can it possibly be replaced?
Have you managed to get a replacement? If so, could you point me in the right direction to get one?
How to replace the screen Assembly?
I already cracked the screen and need to replace it. Can you post a guide for this?
SAME!
Lol. It uses a Qualcomm Quick Charge 2.0 chip, which is strange. It’s the SMB1357 one.
I have no signal on SIM1. How to fix it?
To fix this question, you should contact Asus.
The battery is nearly impossible to remove; it is completely glued to the phone. We punctured the battery using something sharp to try to remove it. We can’t find a replacement battery anywhere. Do you have any sources for this battery to be purchased?
Hey Leslie, I had the same problem. Did you find a battery replacement? Thanks
You can make purchases online. Visit Lazada. You can also Google the web to find suppliers for the battery. One of my favorites is lelong.com. You can easily find what you need there. Good luck!
I may have found one: http://www.asusparts.eu/it/Asus-0B200-01370000. It says it’s for both the Ze550ml and Ze551ml. I didn’t try it, though. Is it hard to remove the battery with glue?
That is not true; the battery is not glued down. It almost falls out once you take the screws out (there might be a piece of double-sided tape which you have to gently release. But do be very careful not to puncture the battery; it is only wrapped in foil!
Replacing the screen takes about 2 hours from start to finish. Note that the digitizer and screen are virtually impossible to separate. Don’t try to save $12 by purchasing only one of them; buy them as an assembly (about $25-35).
You’ll need a heat lamp (or bulb) or hairdryer to soften the adhesive holding the screen to the mid-frame, and you’ll need about 16″ of some 1-2mm double-tape. Rolls are cheap and will last you a lifetime.
If you’re my age (60), the magnifying visors with built-in lights are worth the $10-12 you’ll pay for them.
Hello, I’m looking for schematics (service manual) for this Zenfone 2. Do you have it?
Thanks
Please go to Asus.com to download it.
I didn’t find the schematics (service manual) on the Asus website. Do you have a link?
Thanks
Please check this URL https://www.asus.com/us/Phone/ZenFone_2_ZE551ML/HelpDesk_Manual/
Hi, I noticed that on the second motherboard image, with the chip descriptions, the Intel PM88818 chip is marked with the wrong colored square.
How did you remove the metal cover of the Broadcom BCM43531A1 (GPS, Glonas) chip? It seems to be soldered to the motherboard.
My phone has been submerged in water, and the GPS is not working. I have to fix it.
Thanks
Just use a little violence, but it can not be restored after removal.
I disassembled my Asus because the acceleration sensors got stuck. I removed the battery, but that didn’t work. Then I assembled it back and hit it hard, which solved the problem. Now, when connecting through USB, the phone charges, but it is not recognized by the PC. I’d appreciate any help.
Thanks!
I fixed it. I realized I had bent one small wire, and it was not making contact. Thanks!
Hi, it appears that the SIM card flex cable connection to the USB board is loose. Try lifting the connection bar and resetting it again.
It seems that the connection between the Flex SIM card holder and the USB board has been lost. Please reset the connection and double-check.
It appears that the LCD is affecting the digitizer due to heat or pressure.
To solve this, you need to leave the screws on the cover a bit loose, but place some thin foam under the cover to keep the parts secure.
In fact, it seems the screws on the cover are creating an uneven gap between the LCD and the digitizer.
Loosening the screws improves the problem, and a bit of thin foam in the proper points keeps parts safe.
I have broken the power button for the Asus Zenfone 2 Z551ML phone. It has lost its shoulder point. How can I fix it through any alteration? Please send it to me on my WhatsApp at 7789202997. Please, it’s very urgent. I’m also a mobile repairer. But I don’t have its circuit. That’s why I’m asking you.
My phone battery is stuck at 50%, and to turn it on, I need to plug in the charger. When I unplug the charger, it will soon turn off again.
I charged it overnight, but the battery level is still at 50%. I also need to plug the charger in to turn it on.
This happened after I forgot to charge my phone and drained the battery to 0%.
Hey, I know this is an old post, but I recently received a Zenfone 2 Z008 from a friend. However, the flex for the charge port was not properly set, so I managed to fix it, as well as the camera position. But here is what happened: I accidentally ripped the antenna port cable on the board, and now there is no signal showing for both SIM cards. Is there a way to fix this without replacing the motherboard? Thank you in advance.
Try to solder it back in, using a good magnifier and a thin soldering iron tip.
Will it matter if you solder it anywhere (where the port was before) because it has 2 legs on the board? You know, or it doesn’t matter if you combine and blend.
Chris
It does matter a lot; you have to place it as it was. But if you don’t know how it works, you can try turning the phone on while it is apart and putting the socket with the wire connected to the board on the contacts to check for a signal.
Will try and see what happens. I read another article that you can do a jumper and connect straight to one of the transistors, but I am not ready to do that until someone can give me clear directions. 🙂
I can’t say anything about a direct link. I mean, it is possible, but you’d better contact the folks at the forum where you read that information.
I did that, and it worked just fine. If I can open it later and take a picture, I’ll show it here later.
Thank you, Axle and BP. I like this phone, but coughing up $70 for the motherboard is just too much. Here in Indonesia, spare parts are expensive, so I’d have to choose between a DIY solution and buying the latest Android.
Yeah, I perfectly understand you. Good luck with fixing it, and I adore using it. Take care!
I am using a 551ml, and one of the microphones makes a lot of noise when activated, as per the test process(BoardMic test). Would that be the one on the small PCB with the micro-USB port or the other one on the motherboard? BoardMic2 is fine(the one used for speakerphone mode).