In this guide, I will show you how to remove and replace the hard drive on a Lenovo ThinkPad Edge E40 laptop.
Step 1: Remove the battery
- Unlock and remove the battery.

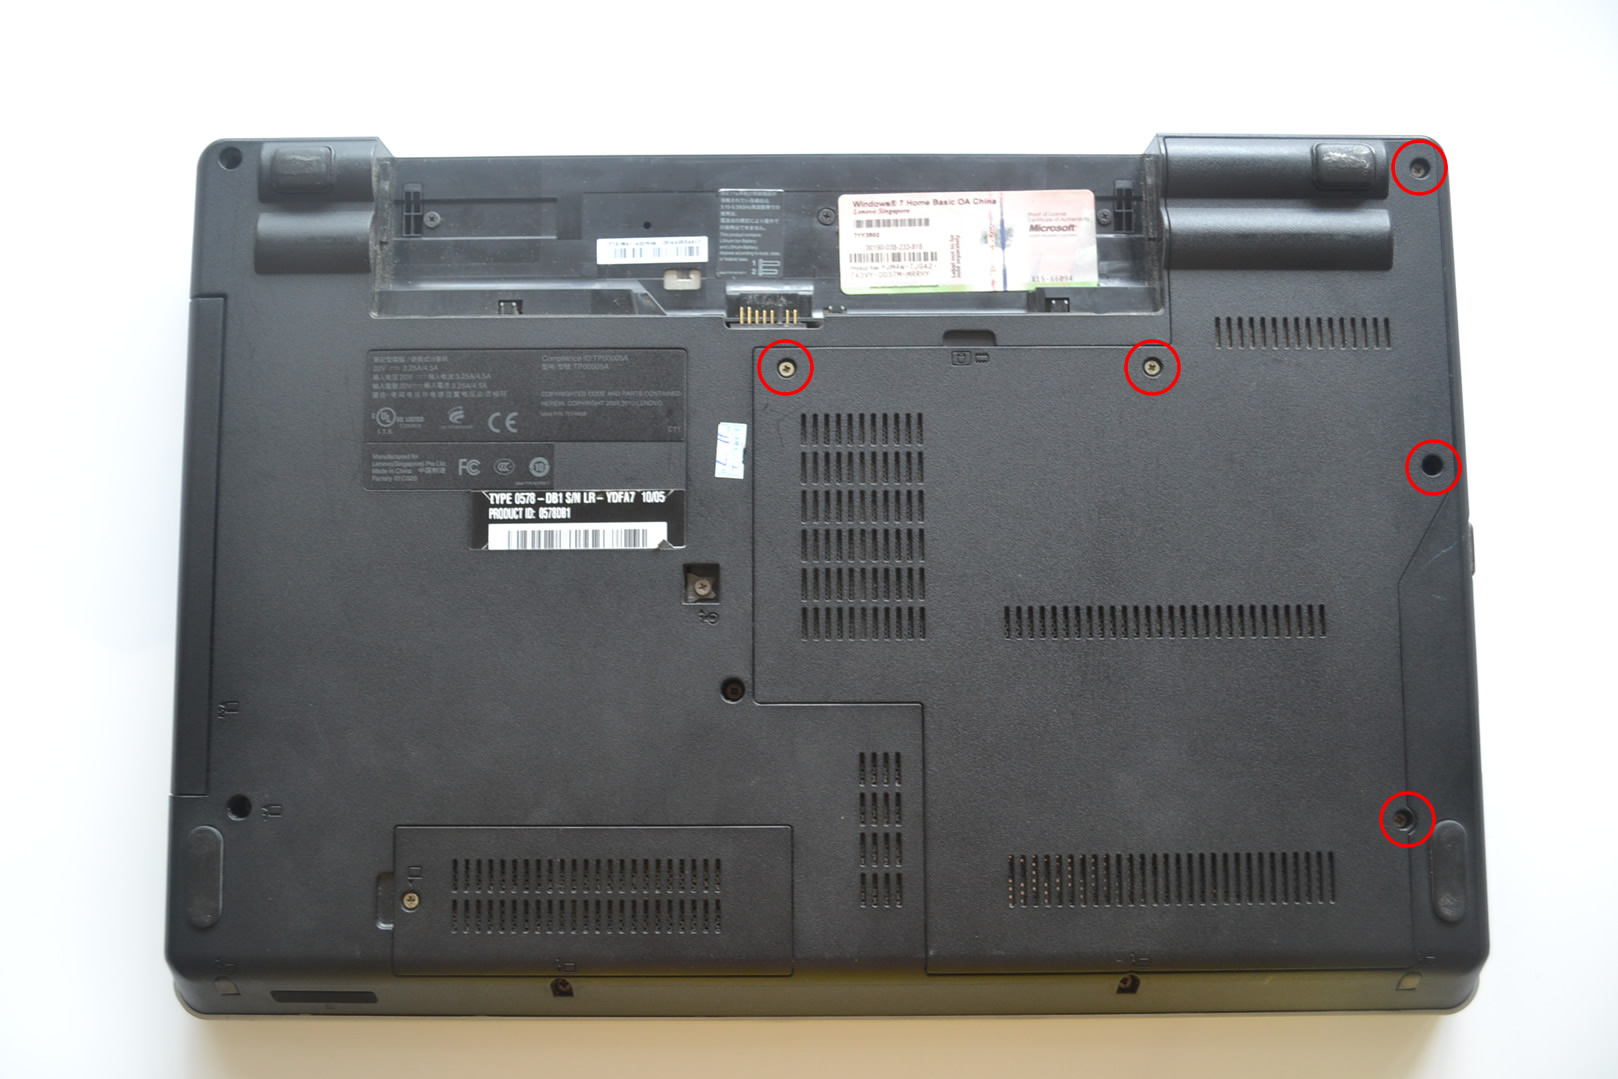
Step 2: Remove the service cover.
- Remove the five screws securing the service cover. Insert a screwdriver into the groove on the service cover, then remove the service cover.
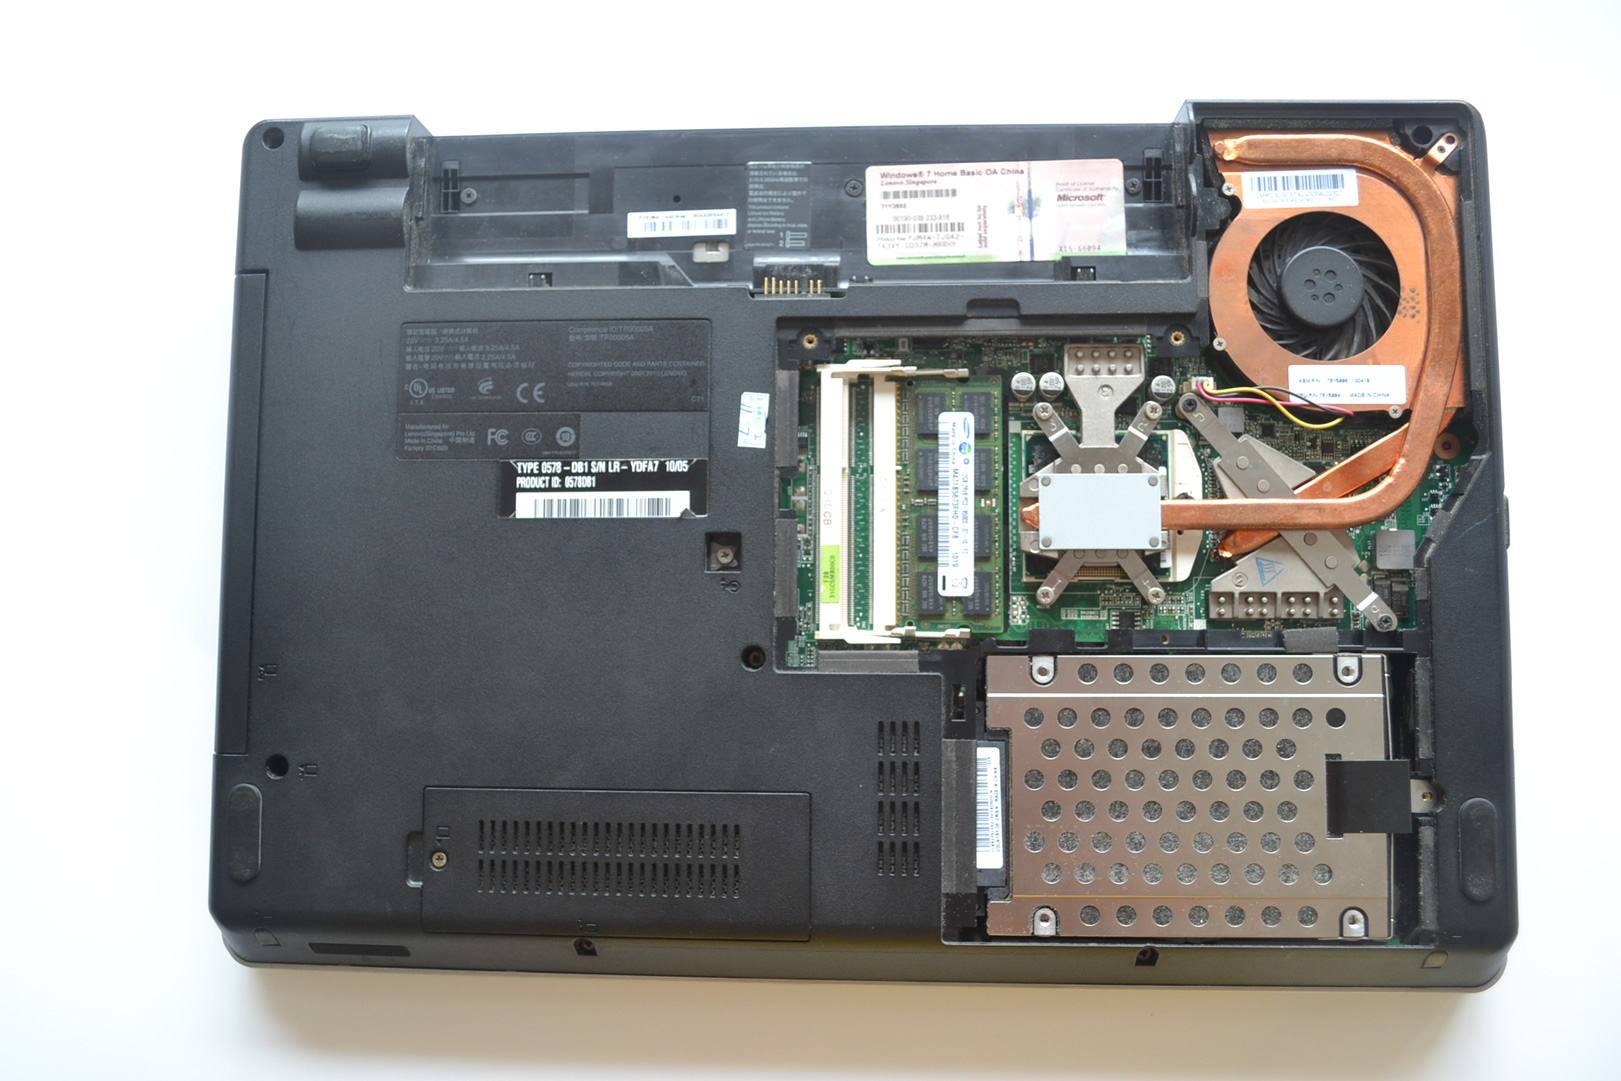
- The service cover has been removed. Now you can see the hard drive. There are no screws securing the hard drive.
Step 3: Remove the hard drive
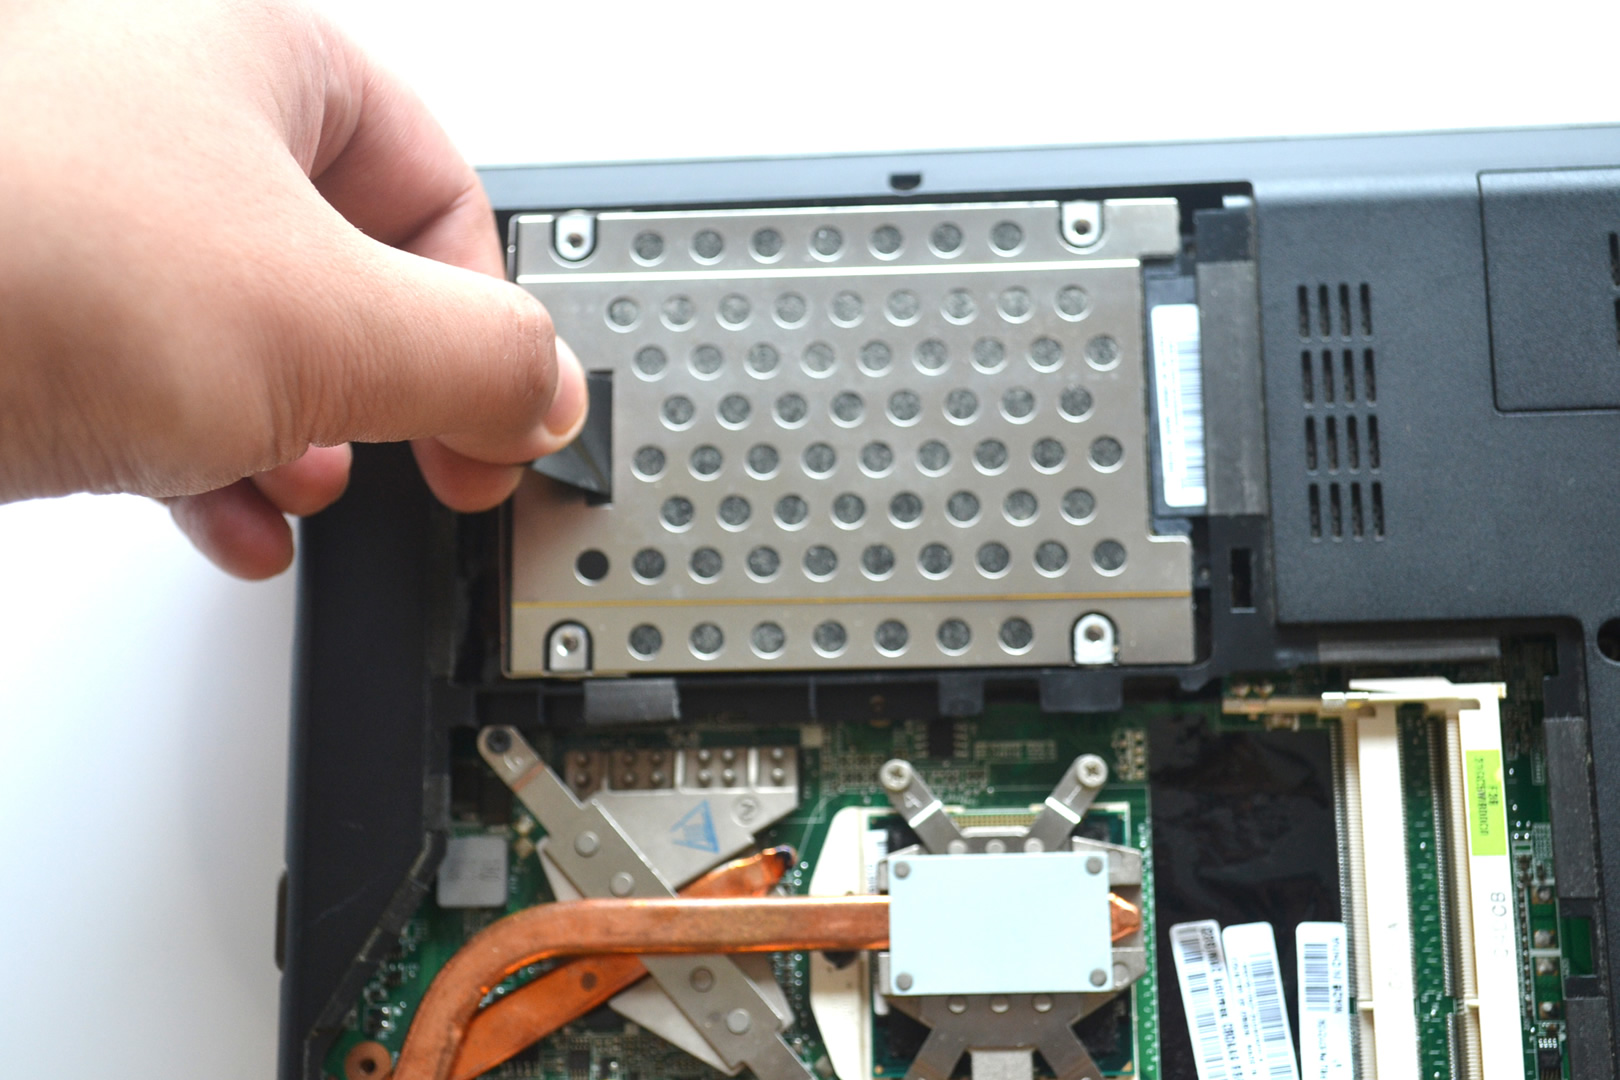
- In order to remove the hard drive, lift the black tape, slide it to the left, and disconnect it from the motherboard.
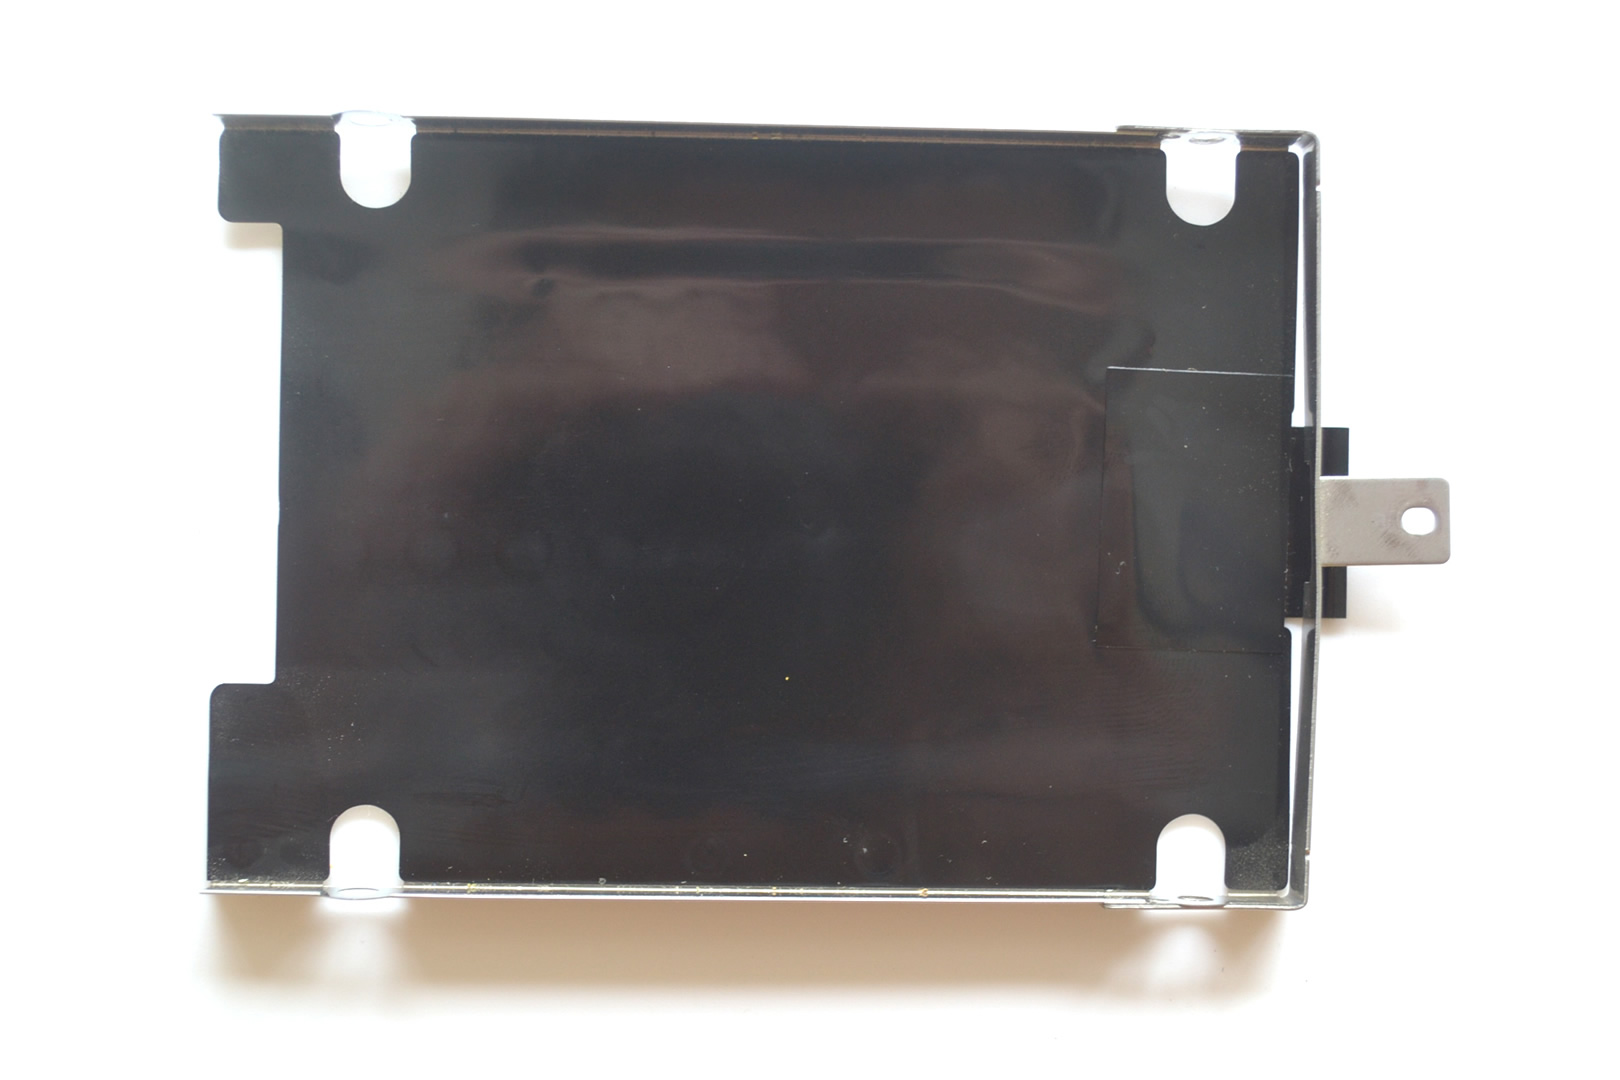
Step 4: Remove the hard drive caddy
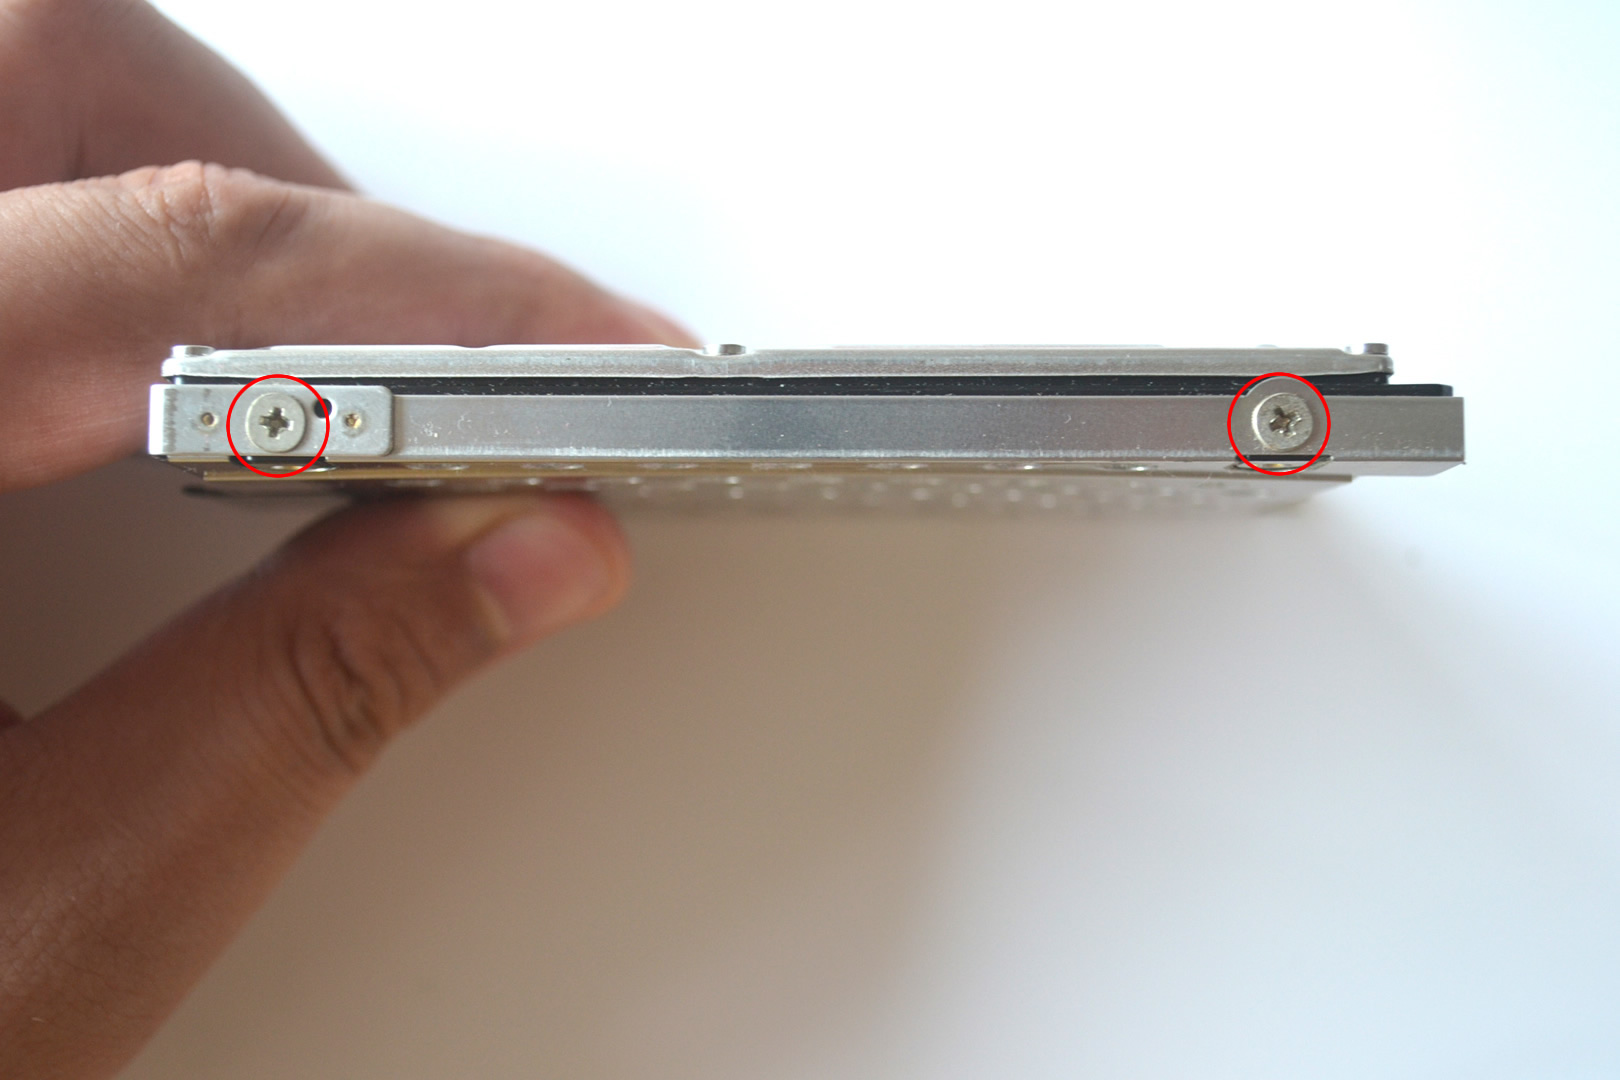
- Remove the four screws from the hard drive assembly.
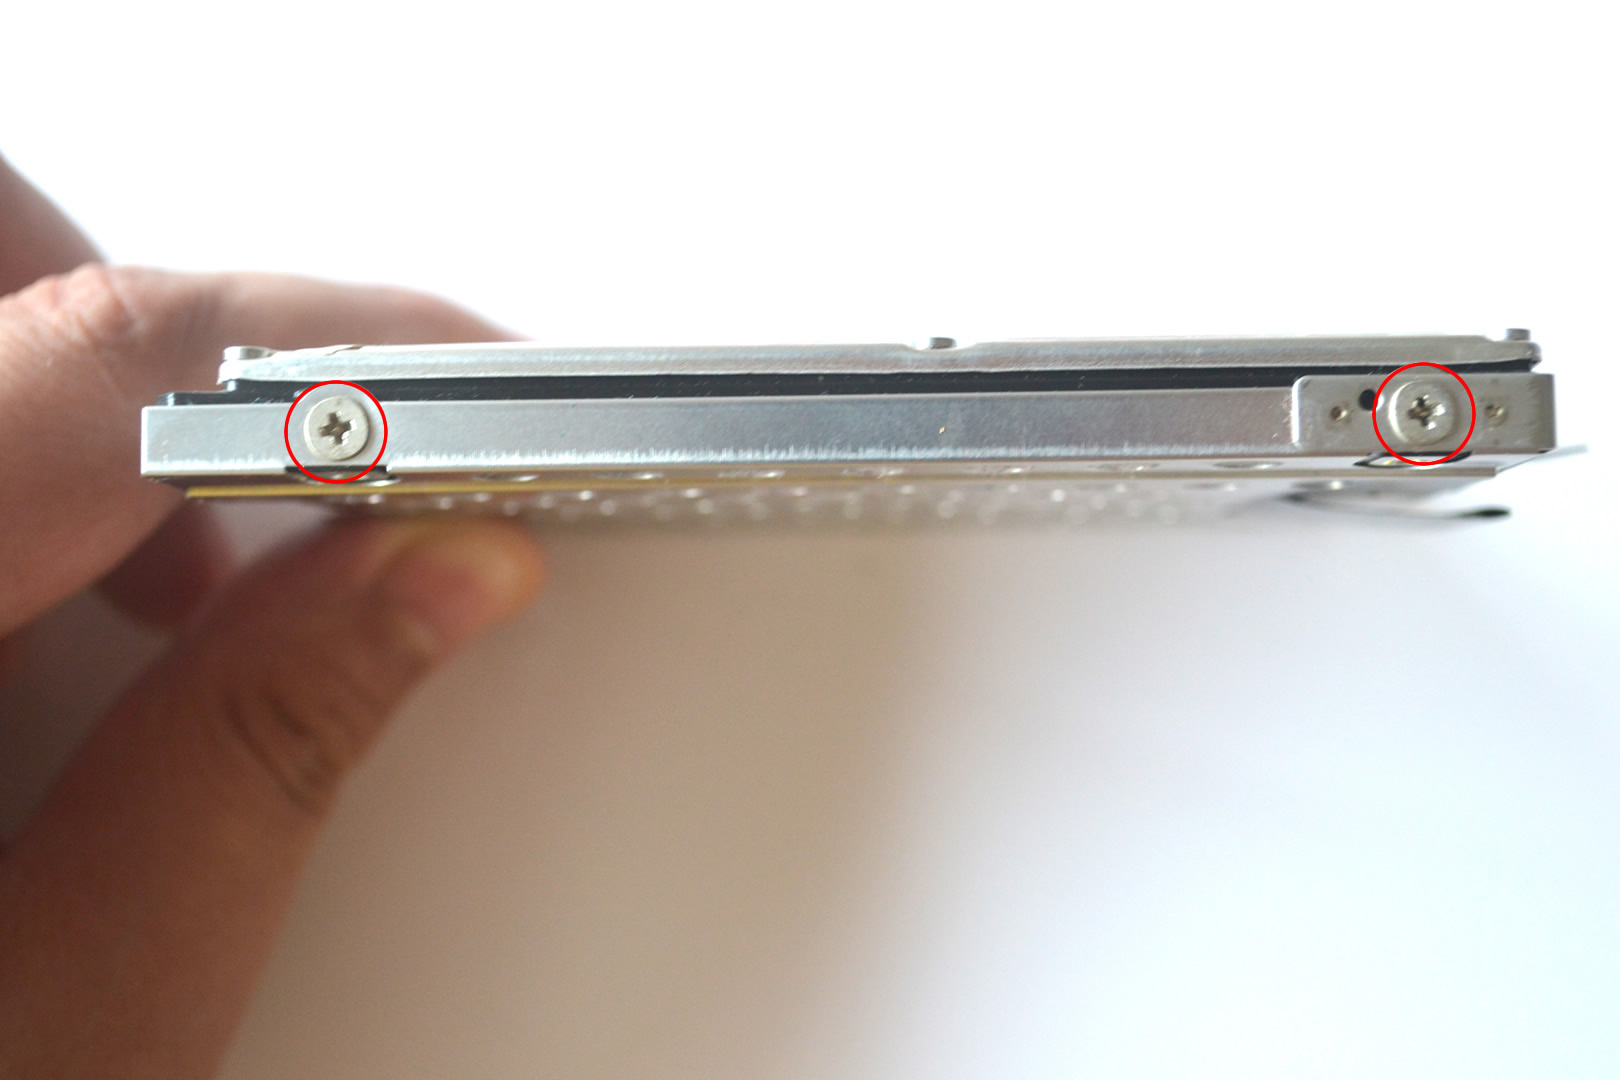
- The hard drive caddy has been removed.