

Prepare the tools, shut down the laptop, and unplug the external power adapter. Remove the battery, memory, and hard drive.
Remove the screws in the red circle at the bottom of the X220.
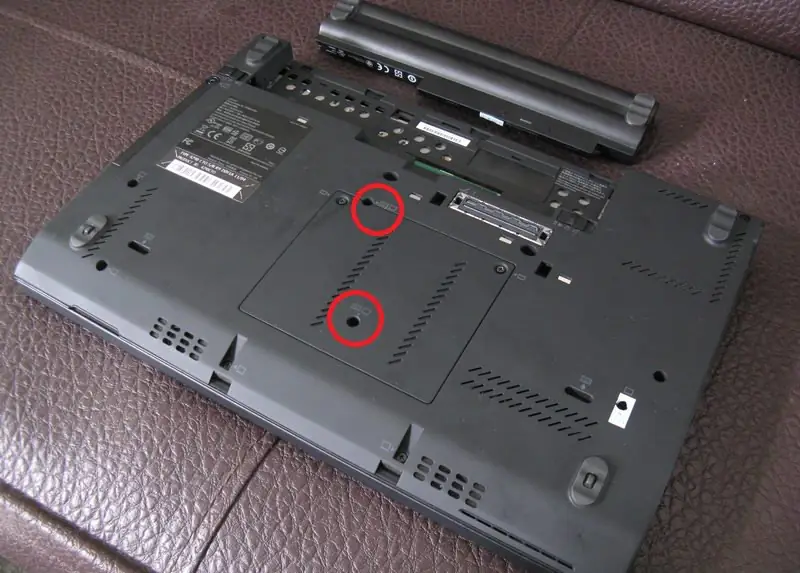
Flip the laptop over, slide the keyboard upward, and then you can access the ribbon cable on the back of the keyboard.
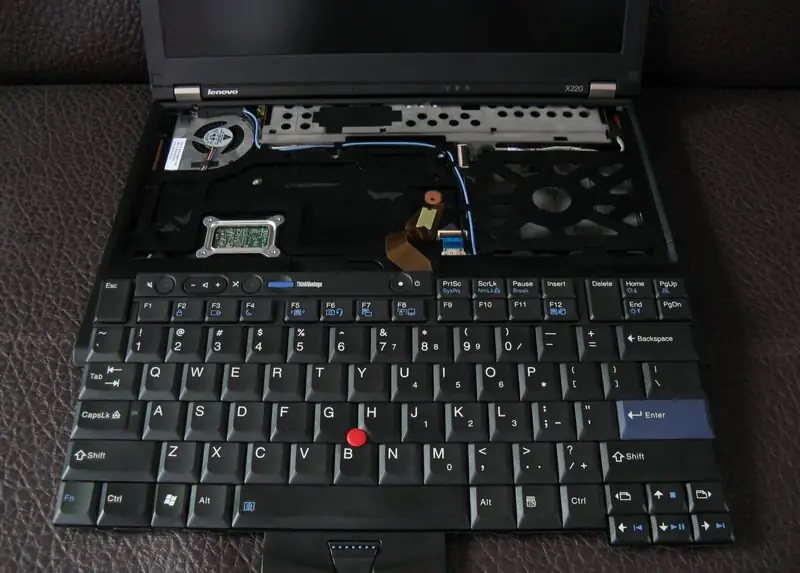
After removing the keyboard, we will remove the palm rest next.
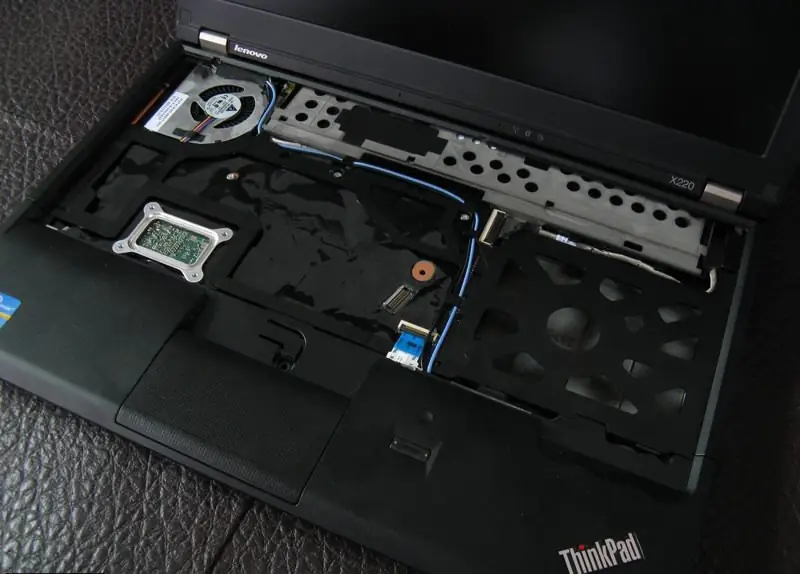
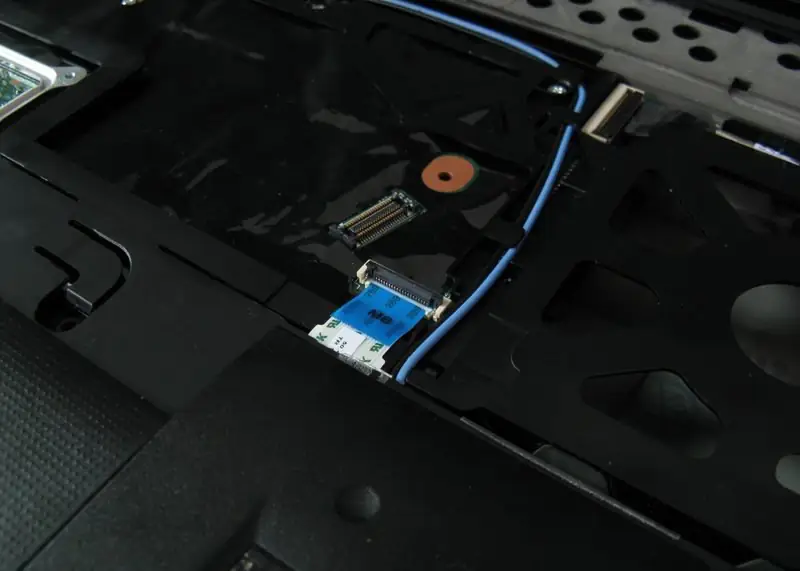
Disconnect the data cable connecting the palm rest to the motherboard. Then insert a card or pry bar between the palm rest and the body, and slowly pry open all the clips on the palm rest.
Remove five screws that secure the palm rest, press both sides of the palm rest toward the inner surface to loosen the buckle that connects the palm rest to the bottom cover, and then you can get the palm rest up, and then gently push it towards you, and you can remove the palm rest.
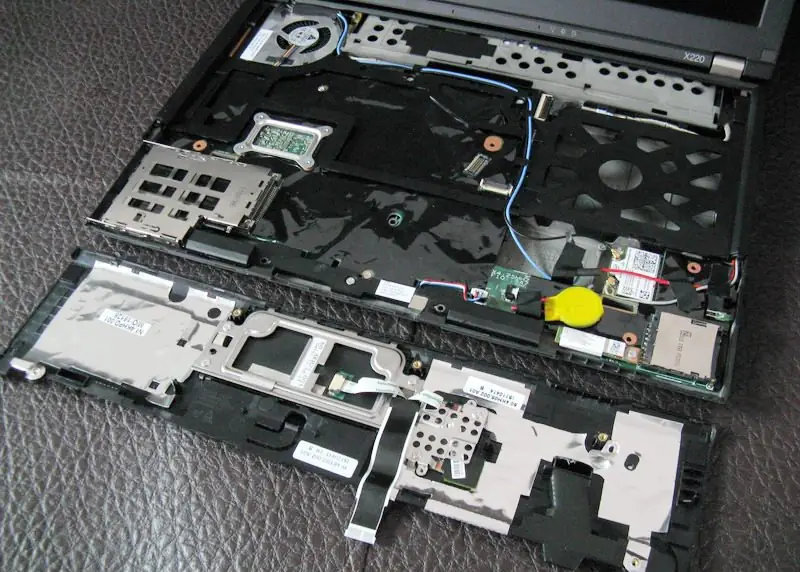
After removing the palm rest, the lower left corner is shown in the figure below: there is only one 54 ExpressCard slot, which is currently unused and cannot be removed.
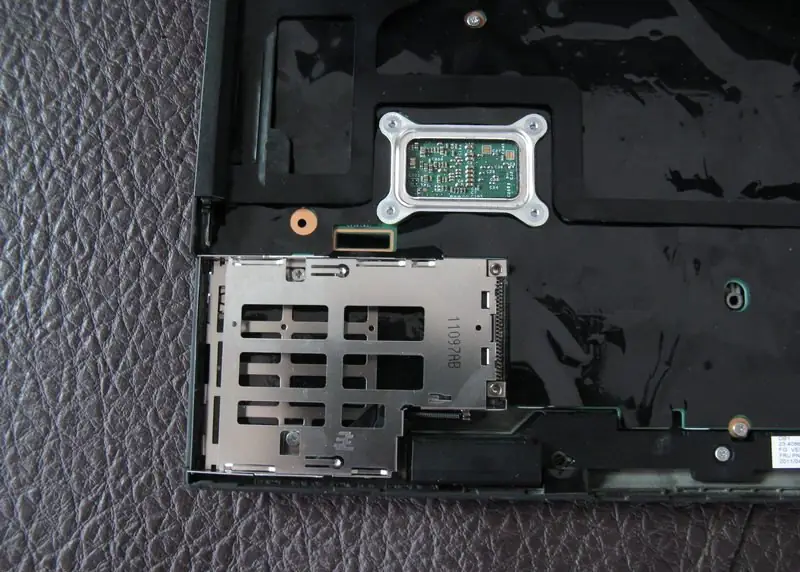
The lower right corner of the palm rest is as follows:
The part connected by the black and grey antenna is a mini PCI-E wireless half-height card.
The red and blue antenna convergence is a mini PCI-E full-height card slot.
The circular part is the motherboard COMS battery.
The long strip below the motherboard COMS battery is a Bluetooth card.
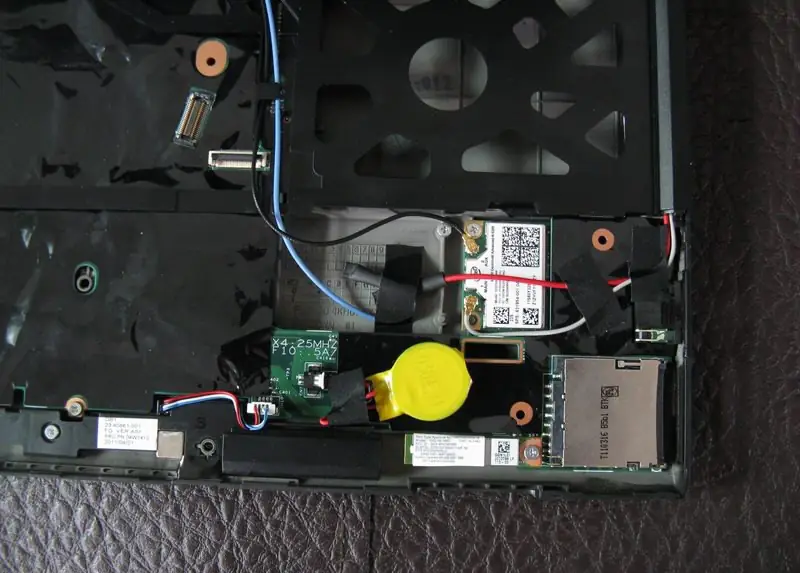
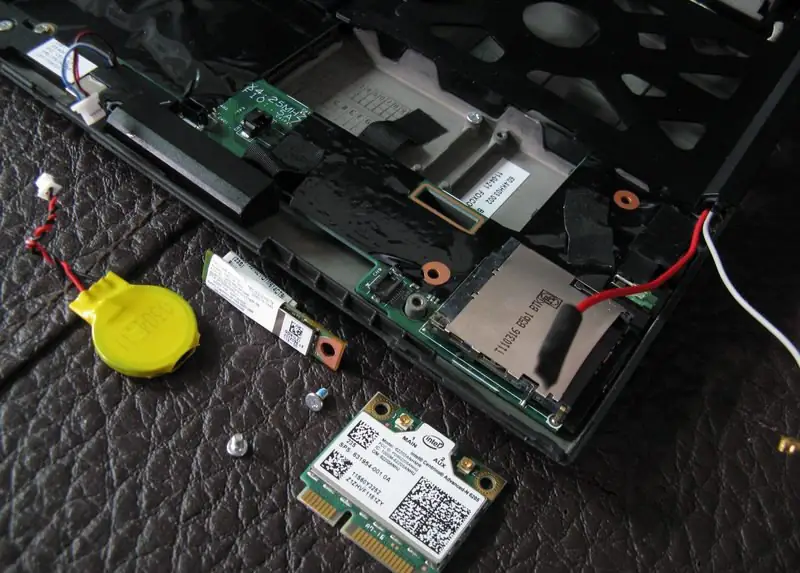
Unplug the plug that connects the CMOS battery to the motherboard, and remove the CMOS battery.
Remove the antenna from the wireless card, and loosen the screw so you can pull the wireless card out.
The Bluetooth card can also be removed by loosening one screw.
Remove the keyboard dock (commonly known as the palm rest).
First, unscrew the screws at the bottom (marked below).
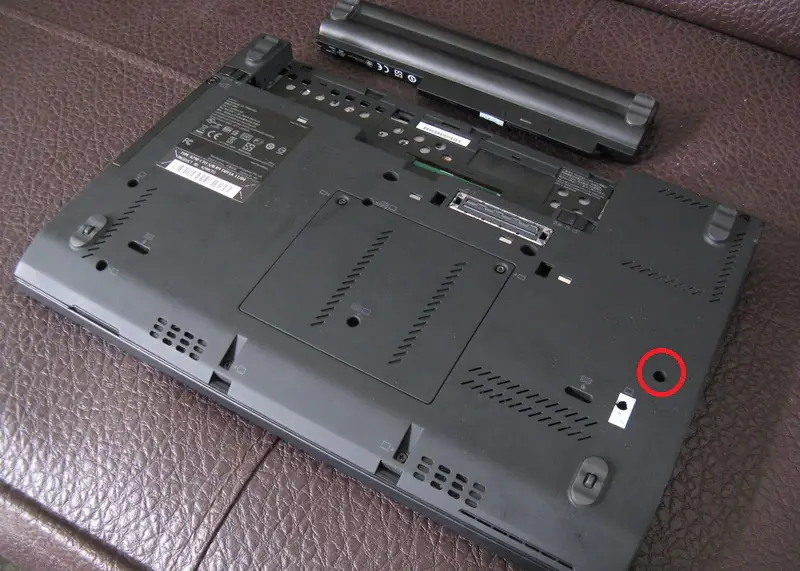
Then remove the antenna embedded in the keyboard base and the two screws marked below.
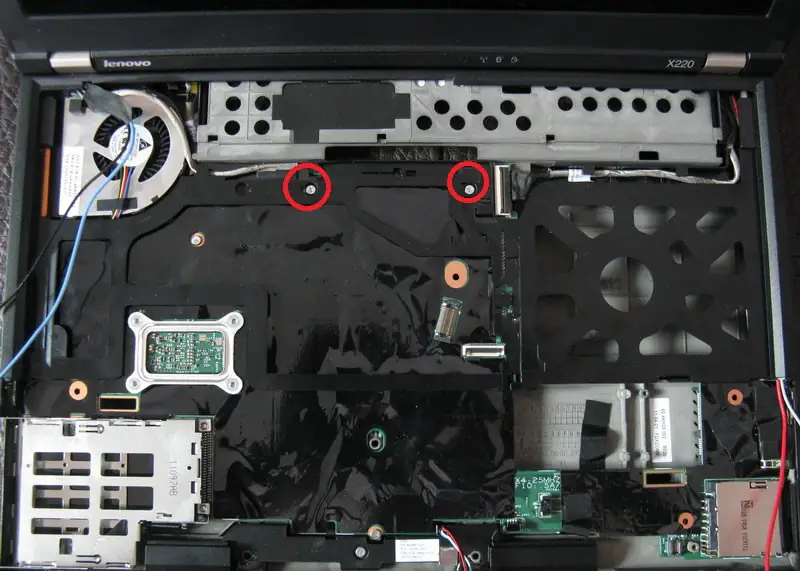
Then disconnect the display cable from the motherboard on the right.
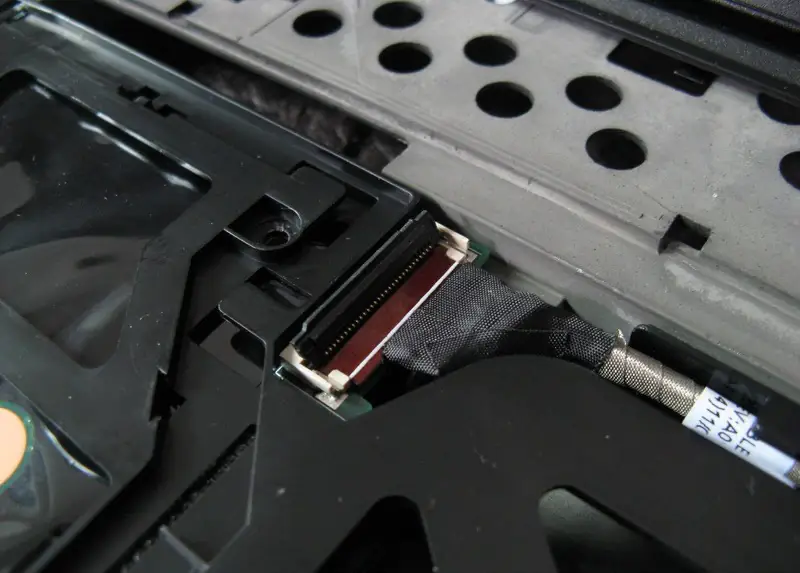
Finally, press both sides of the keyboard base toward the inner surface to loosen the snap joint, and you can remove the keyboard from the keyboard dock.
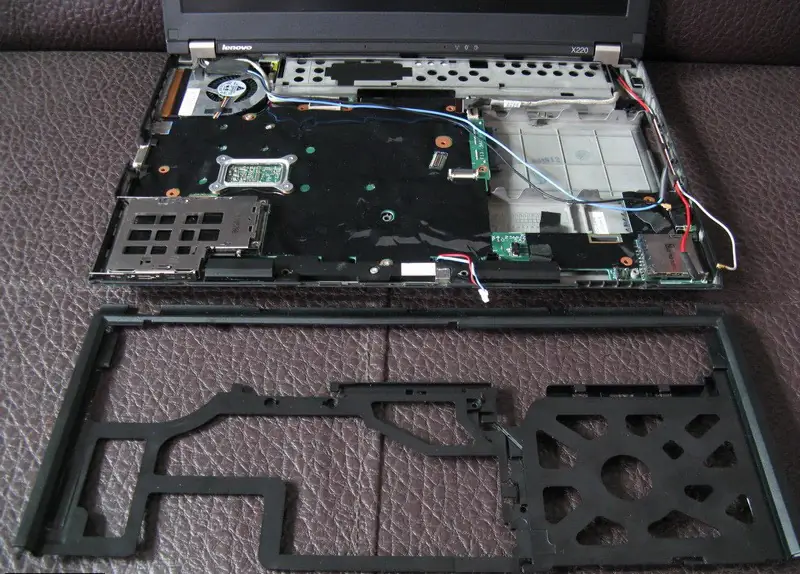
Remove the top cover part from the bottom base.
Note: First, remove the four screws on the bottom.
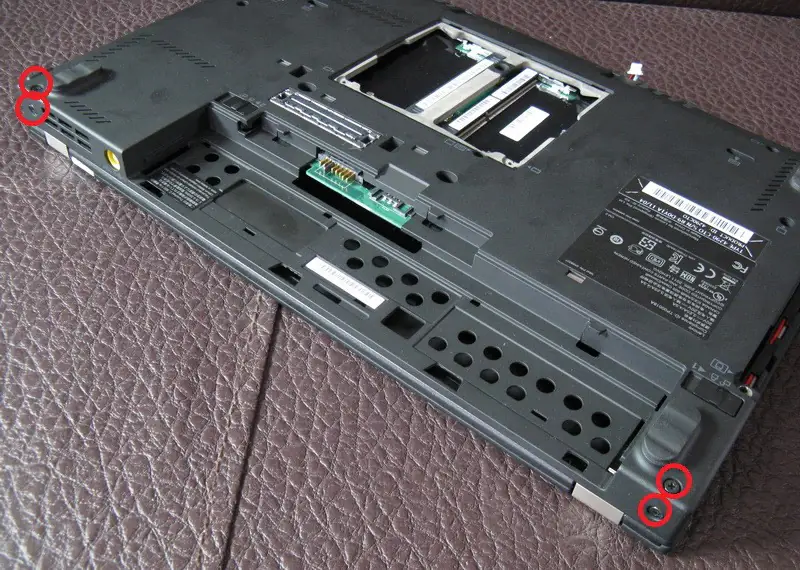
Then, disconnect the cable on the left side connecting the screen to the motherboard.
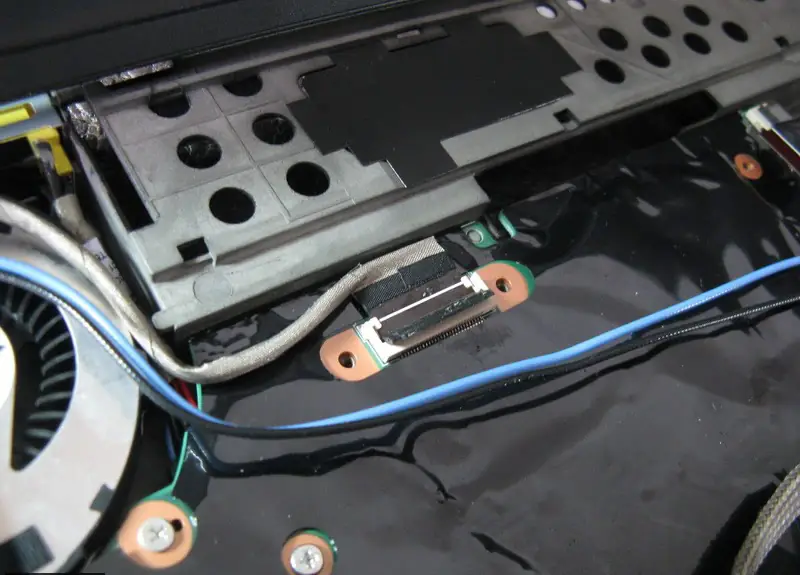
You can easily remove the entire top cover screen part (note the two red-grey antennas on the right side). Before removing the top cover, you need to first remove these antennas from the bottom cover.
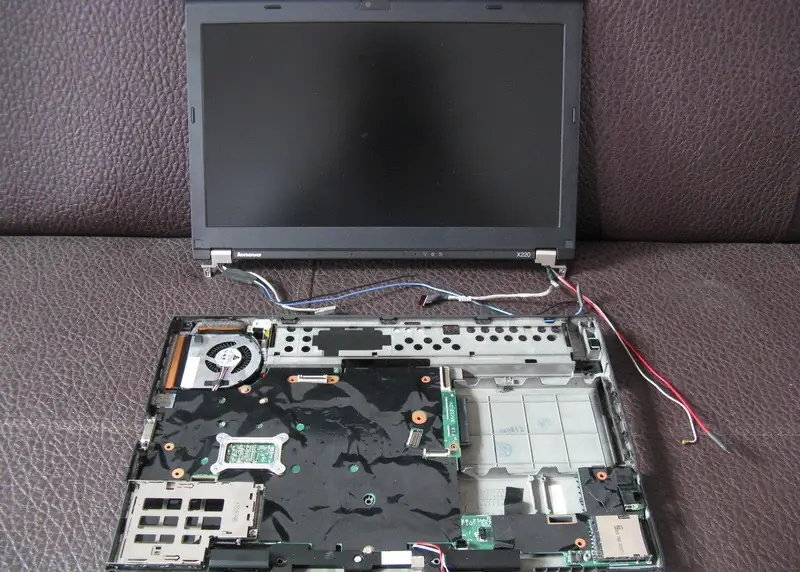
Then remove the X220 stereo speaker system. This is very simple: just unplug the cable connecting the speaker to the motherboard and loosen one screw.
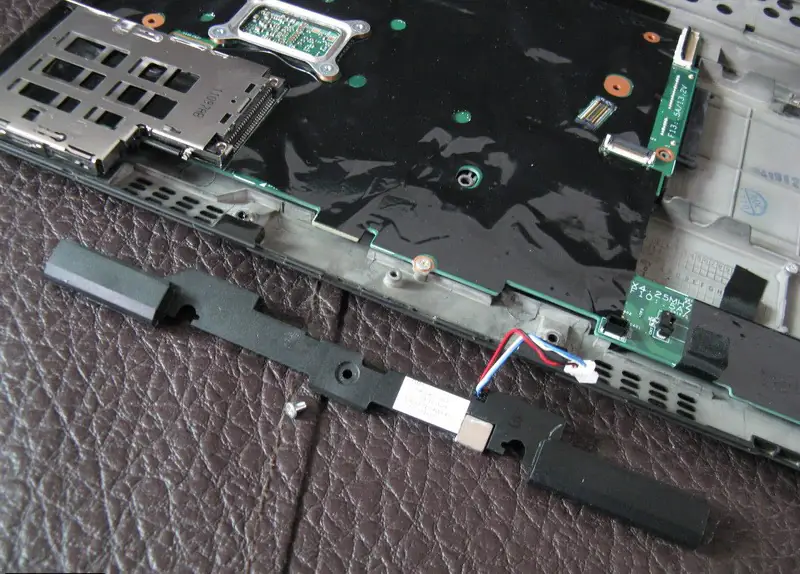
At this point, you can begin removing the motherboard and the bottom cover.
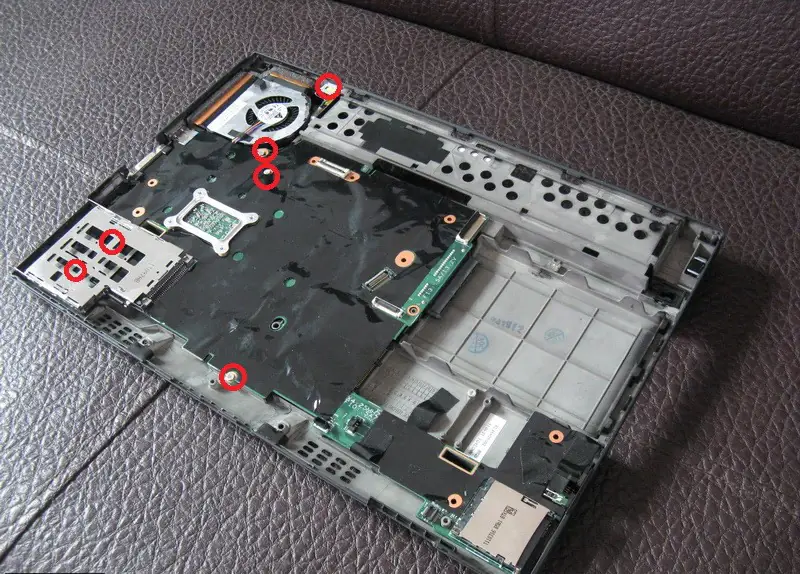
Remove the five marked screws.
The screw at the top secures the external power connector.
The two screws on the left are located inside the ExpressCard slot.
The remaining three screws secure the motherboard directly to the bottom cover.
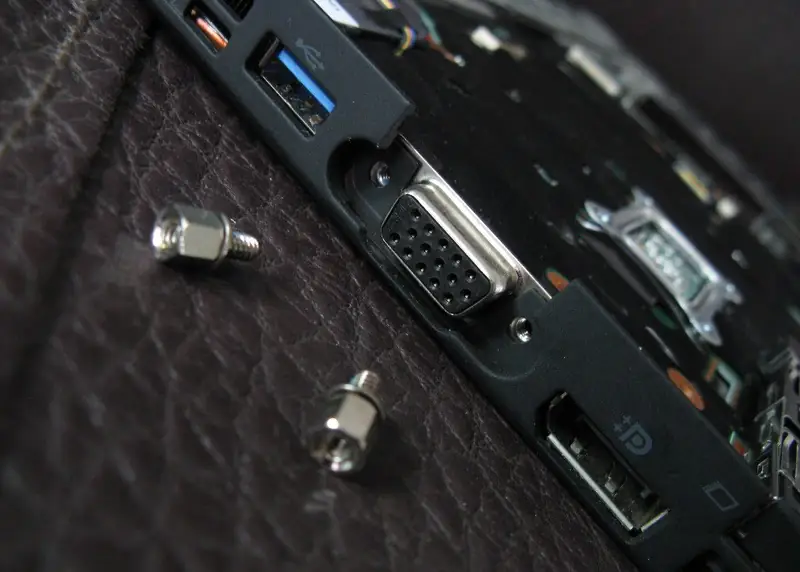
Then remove the two screws near the VGA port.
According to the official instructions, place the wireless hardware switch in the open position, then gently bend the right side of the motherboard (the side with the LAN port) upward to remove the right side of the motherboard from the bottom cover.
You can then pull the motherboard out to the right and remove it.
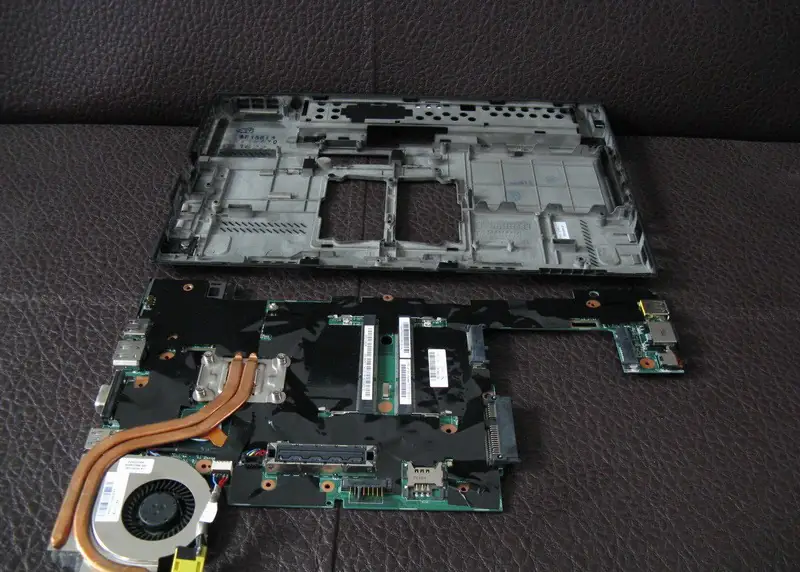
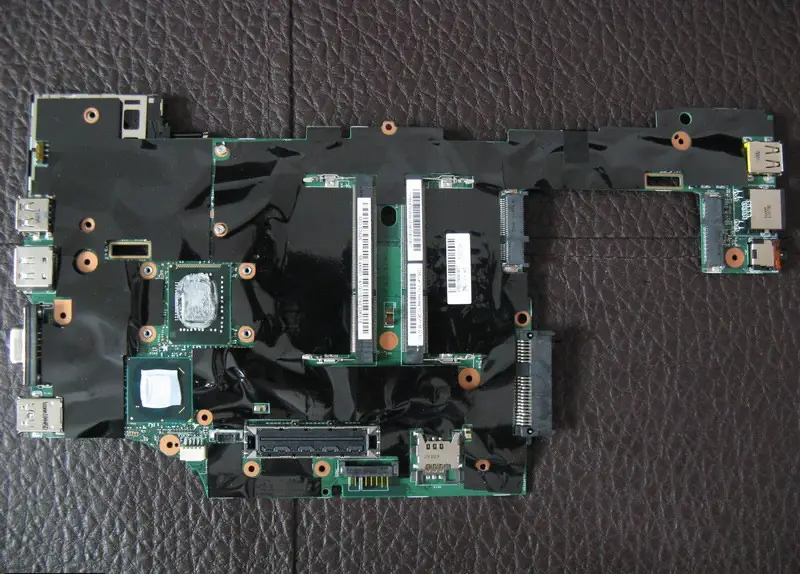
The front view of the motherboard after removing the fan.
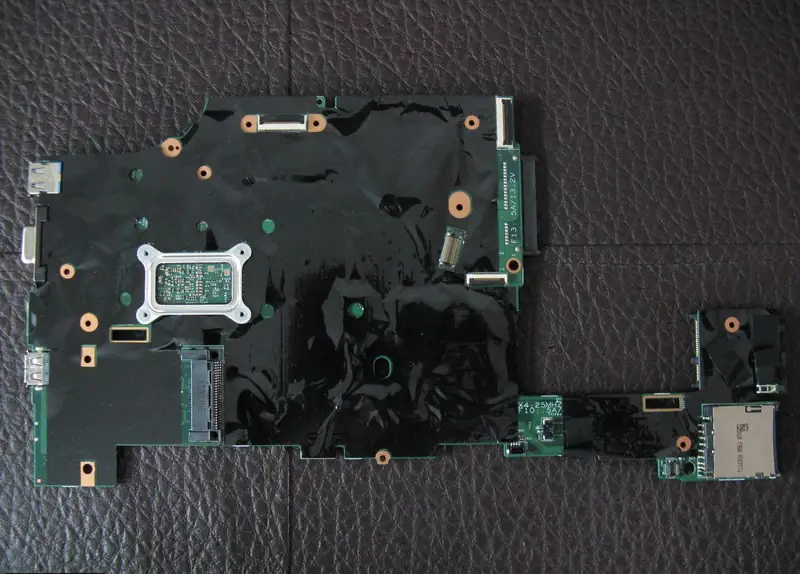
The rear view of the motherboard without the fan.
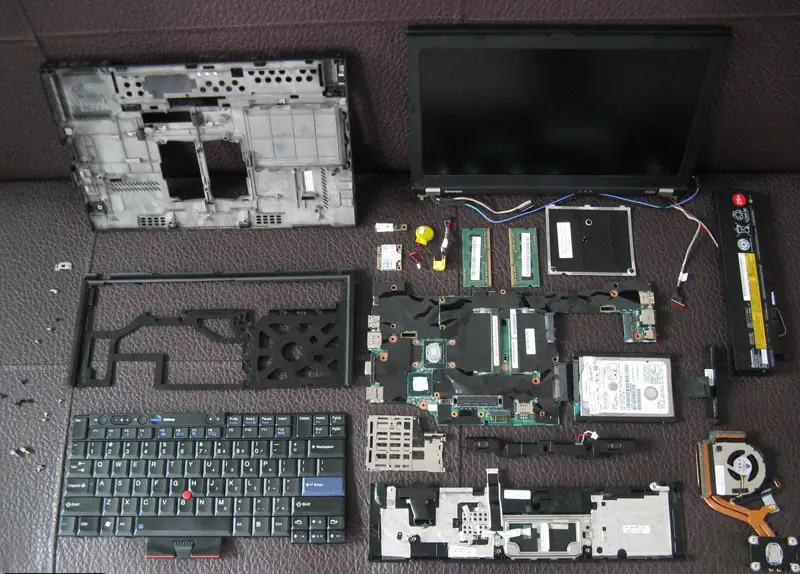
A photo of the X220 removed parts.
Close-up of the front of the motherboard.
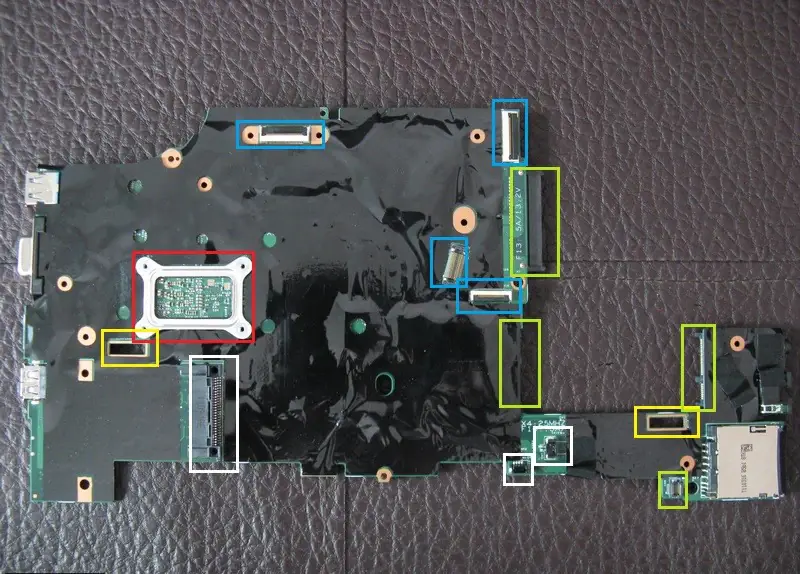
The red box is the back of the CPU.
Yellow boxes are the keyboard-yielding water channel. One is at the lower left corner of the CPU. The other is at the top left of the right card reader.
Four blue boxes are cable sockets: two cables used to connect the screen top cover to the motherboard, a palm rest cable, and a keyboard cable.
Four green boxes are the SATA hard drive port, mini PCIe card (WWAN card or mSATA device), half-height mini PCIe card(Wi-Fi card), and the slot used to install the Bluetooth card.
Three white boxes are the 54 ExpressCard port, stereo speakers interface, and CMOS battery socket.
Close-up of the back of the motherboard
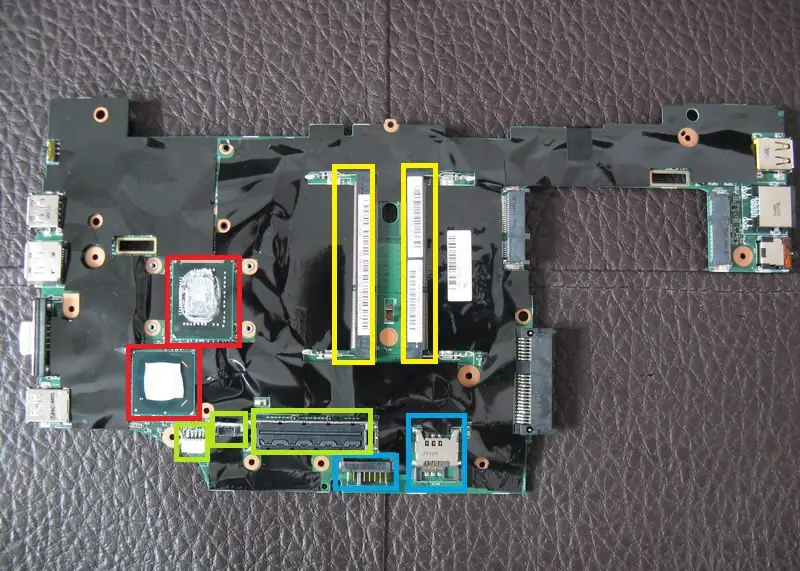
There are two red boxes. The upper one is the CPU, which uses GBA packaging and therefore cannot be replaced directly. The lower one is the PCH.
The two yellow boxes are two memory slots.
From left to right, the three green boxes are the DC jack, fan power socket, and expansion port (for connecting to a dock or docking station).
The two blue boxes are the battery connection port and the SIM card slot.
A close-up of the back of the CPU
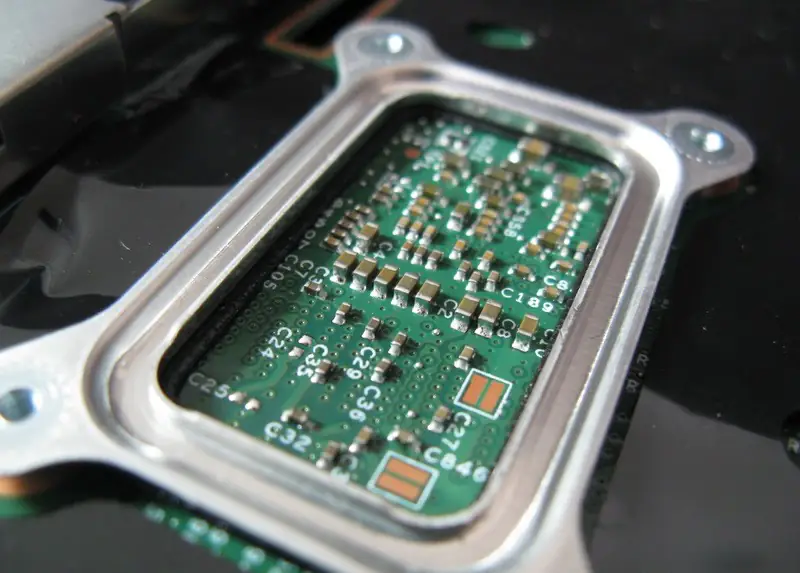
The parts on the back of the CPU still look very seductive.
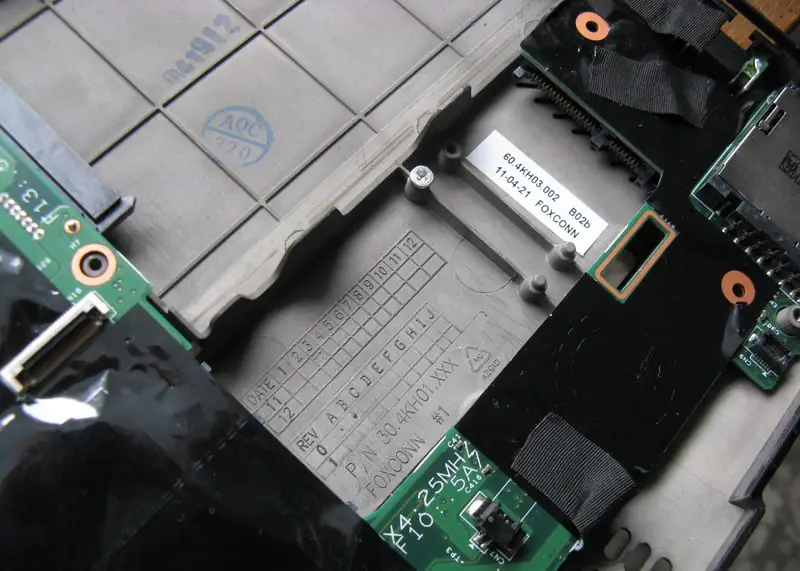
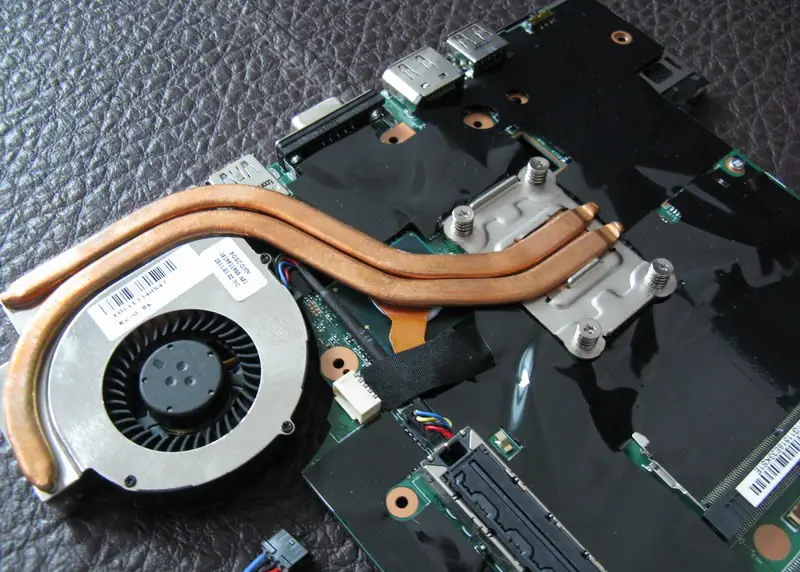
This is the cooling system module for the ThinkPad x220.
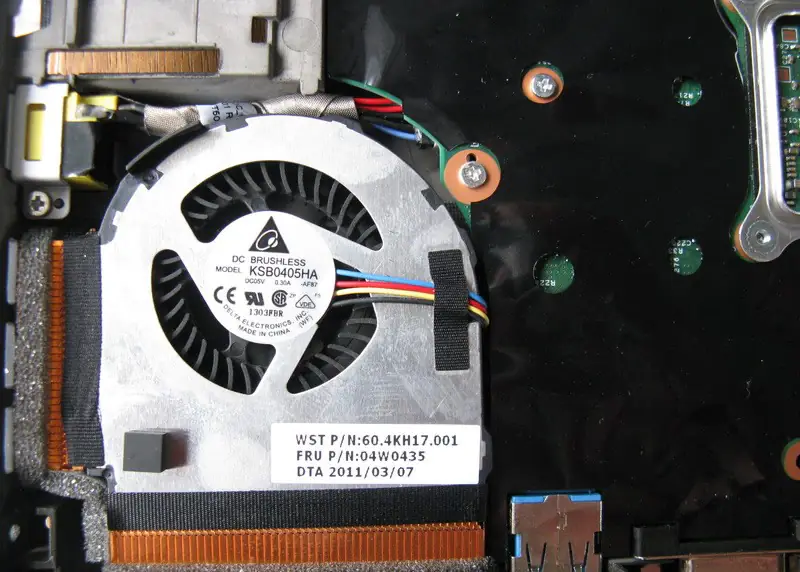
The X220 cooling system fan is manufactured by Delta Electronics; the parameters marked above are 5V DC, 0.30A, and 1.5W.
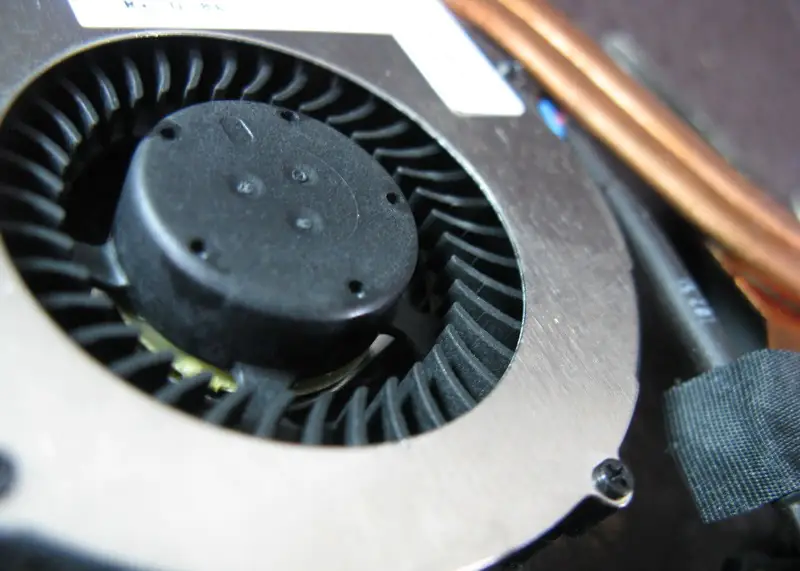
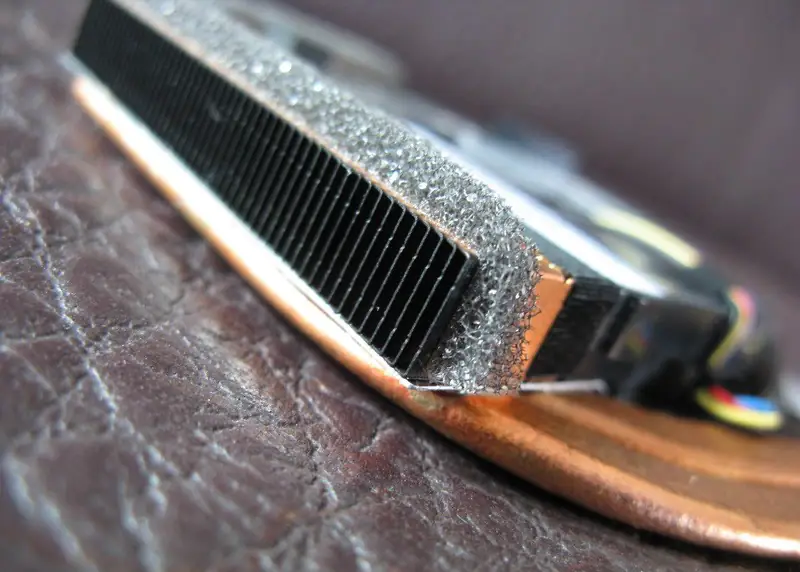
The cooling system consists of a fan, two copper heat pipes, and a heat conductor.
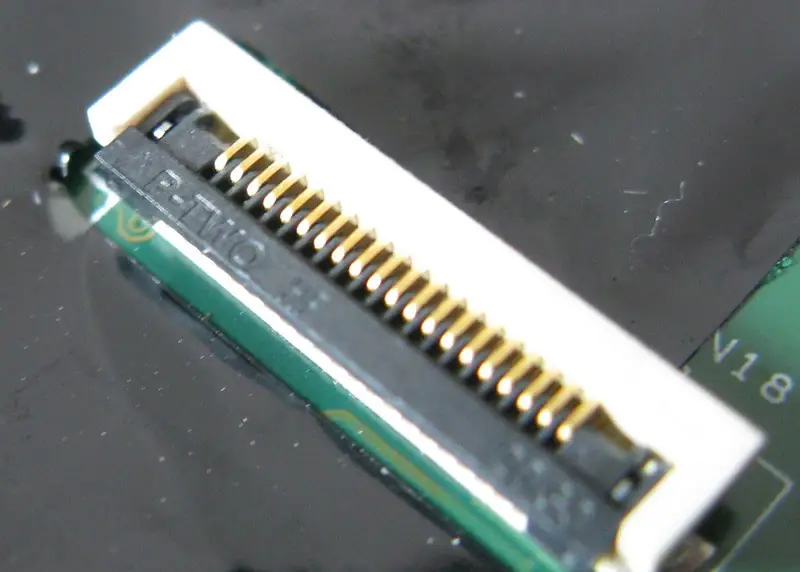
The port is connected to the palm rest.
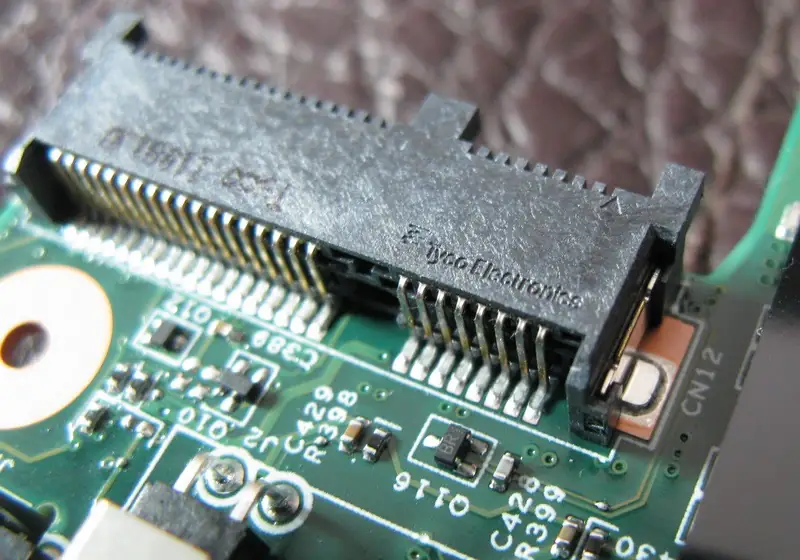
Here’s a mini PCI-E slot.
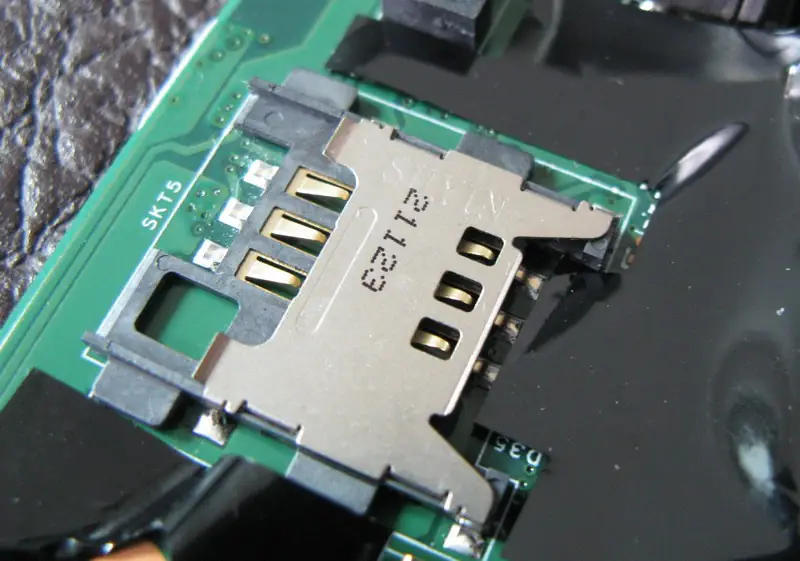
SIM card slot
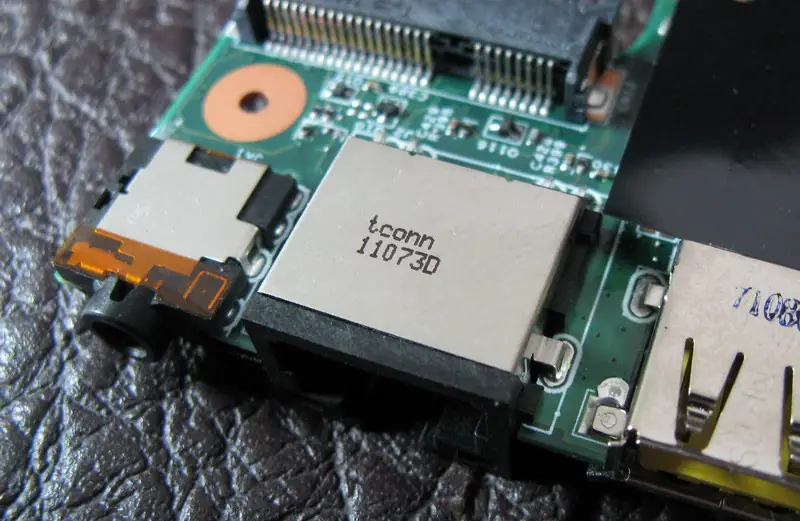
Gigabit Ethernet port
This is a blue USB 3.0 port on the laptop.
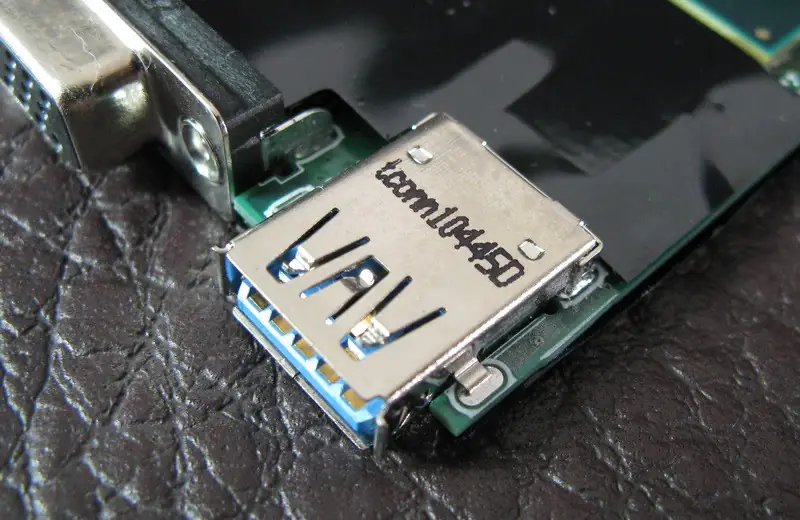
Both sides of the X220 motherboard are covered with black insulating tape.
Uncover a corner of the black insulation tape. You can see the third-party chipset used for USB 3.0.
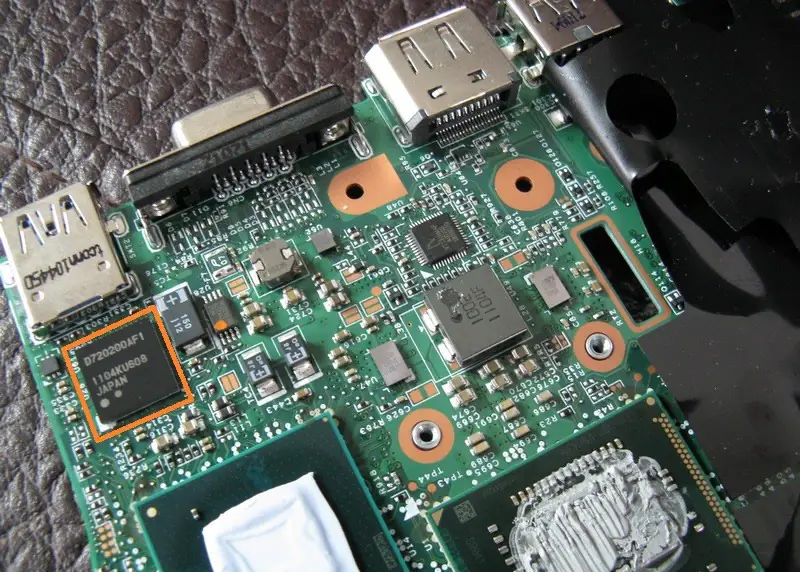
The details around the X220 motherboard CPU
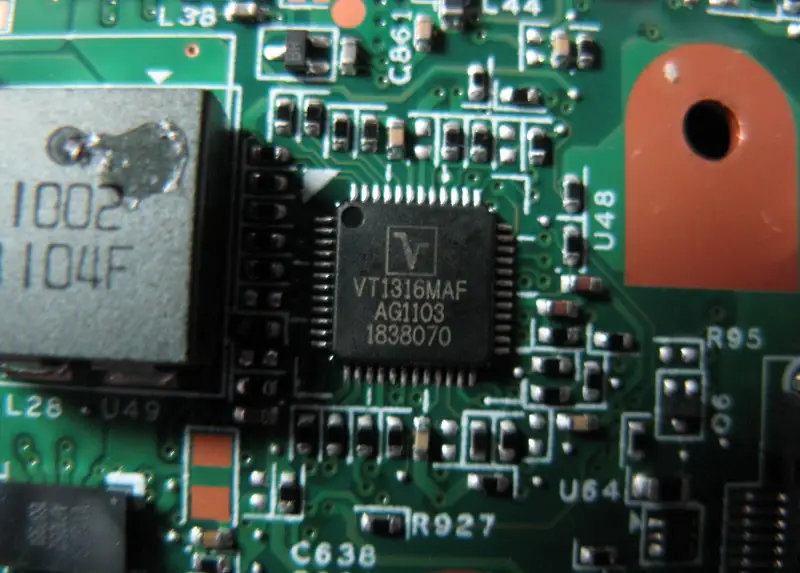
The VT1316MAF produced by Volterra Semiconductor has never been seen before. It should be a new model.
According to the number, it should be similar to the VT1317SF, and it should be responsible for the CPU power.
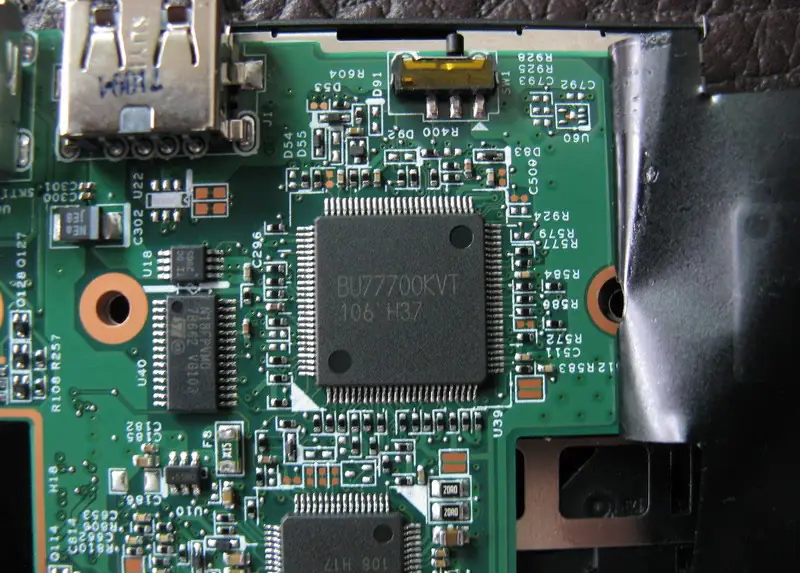
Finally, I uncovered all the insulation stickers covering the back of the motherboard.
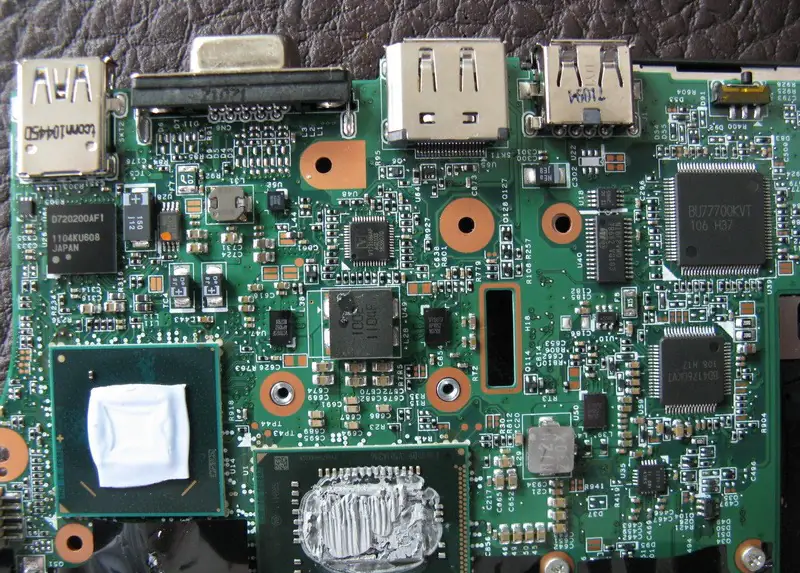
Continue to uncover the insulation tape around the memory.
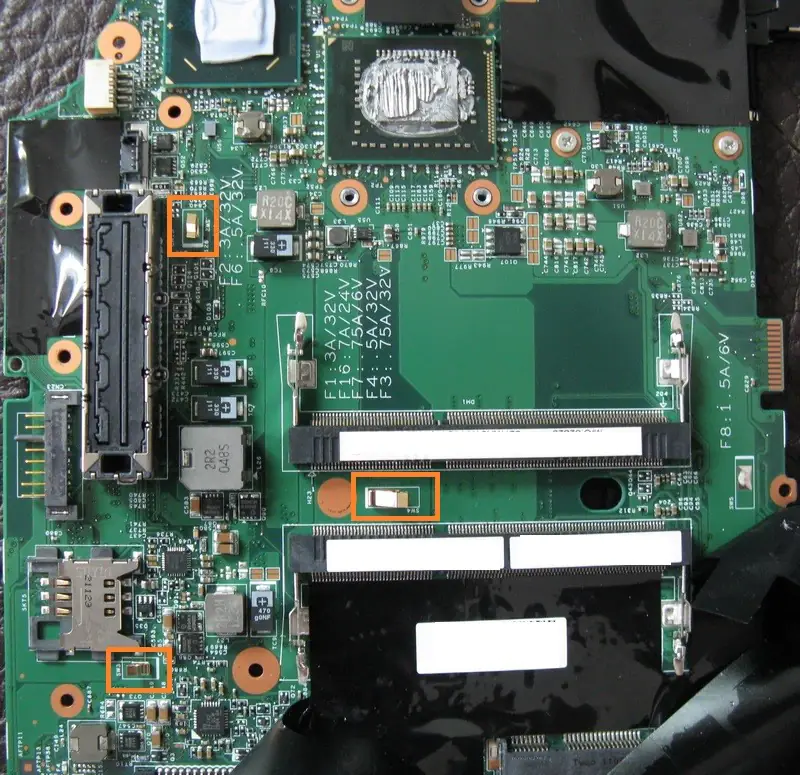
The three copper contact switches marked with orange squares are labeled SW2, SW3, and SW4. They are used to determine whether the motherboard is installed correctly and to ensure that it has good electromagnetic compatibility (EMC) and electromagnetic interference (EMI) performance when used with the bottom cover.
Readers may notice a fairly large empty space in the upper right corner of the bottom cover, between the security slot module and the hard drive tray, which seems sufficient to accommodate the RJ45 Ethernet port.
Thanks for posting this. The Lenovo hardware manual doesn’t specify that the screws holding the VGA in place can be removed. I was stuck there until I found your page.
Now, wish me luck with putting this thing back together!
Very nice! Thank you!!
You have to remove 5 screws to finally remove the palmrest. Please add this to your tutorial!
We have added this to the guide. Thank you very much!
There is no power coming on the board at all.
Good morning. I have a problem with my ThinkPad X220. It turns off after a few minutes of use, and then if I try turning it on again, it goes back to turning off after a few seconds. I have considered a problem with the motherboard capacitors, but if I remove the keyboard while keeping it connected to the motherboard, the handset works without issue. Do you have any idea what caused the problem?
The notebook works with no problem.
Sorry for my English!
Hi, I’m Bilal
I have a Lenovo X220 tablet
The problem with it is that the screen can move freely and cannot be fixed in a specified direction.
It can stay only at 90 degrees.
How can I resolve this issue?