Lenovo IdeaPad Y480Lenovo Laptop
Lenovo IdeaPad Y480 Disassembly
In this guide, I’ll explain how to Lenovo IdeaPad Y480 to remove and replace the RAM, wireless card, DVD drive, keyboard, palm rest, hard drive, speaker, heat sink, cooling fan and motherboard. Refer to this guide, you can repair, upgrade and clean your Lenovo Y480.
Looking for more funny teardown? Follow us on Facebook for all the latest repair news.
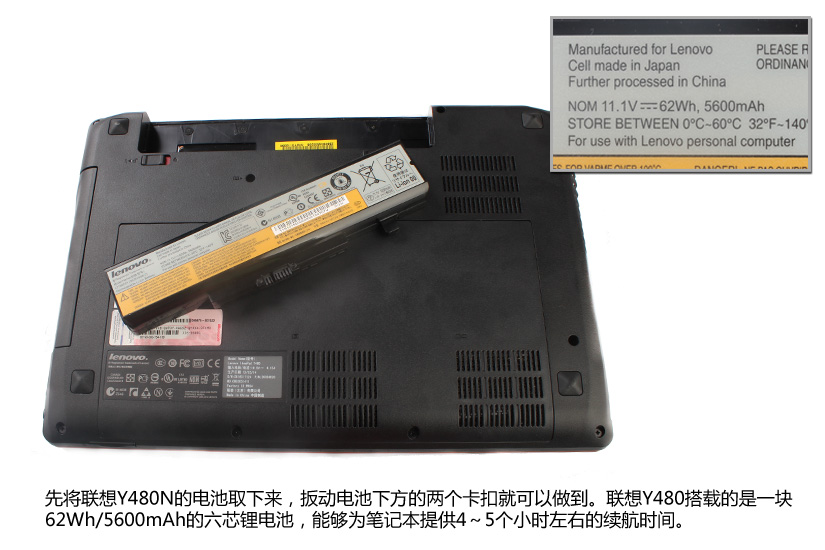
Unlock and remove the battery.
The laptop installed an 11.1v, 5600mah Li-ion battery.
Remove two screws securing the service cover. You can remove the cover.
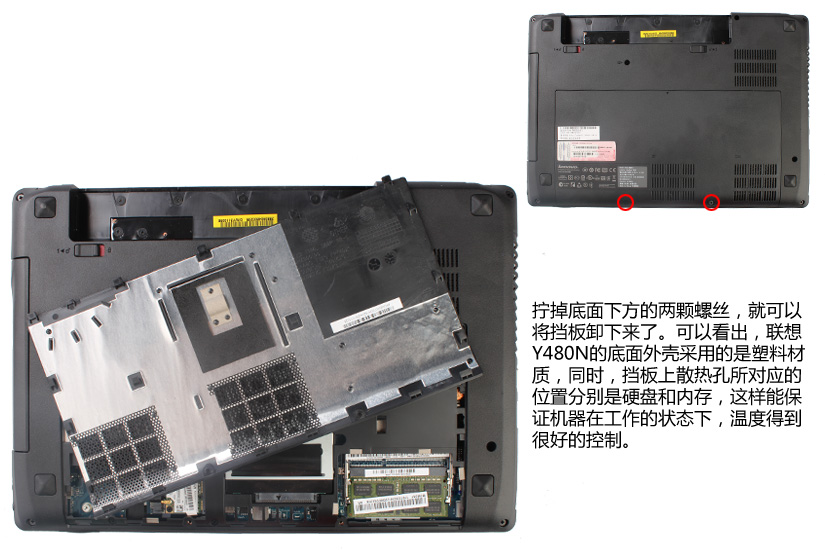
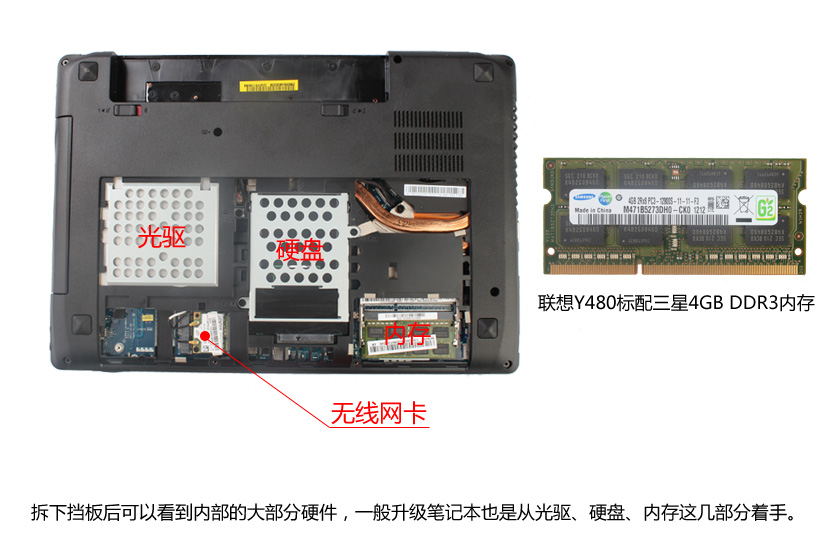
Under the service cover, you can find the RAM, hard drive, DVD drive and wireless card.
It installed a Samsung 4GB DDR3 RAM.
Remove one screw securing the DVD drive. Pull out and remove the DVD drive.

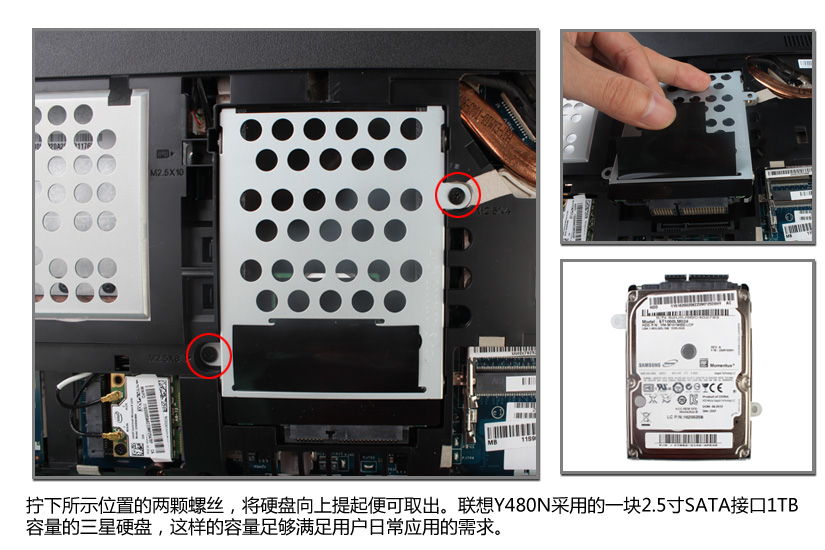
Remove two screws securing the hard drive. Lift up and remove the hard drive.
It installed a 1TB 2.5″ SATA hard drive.
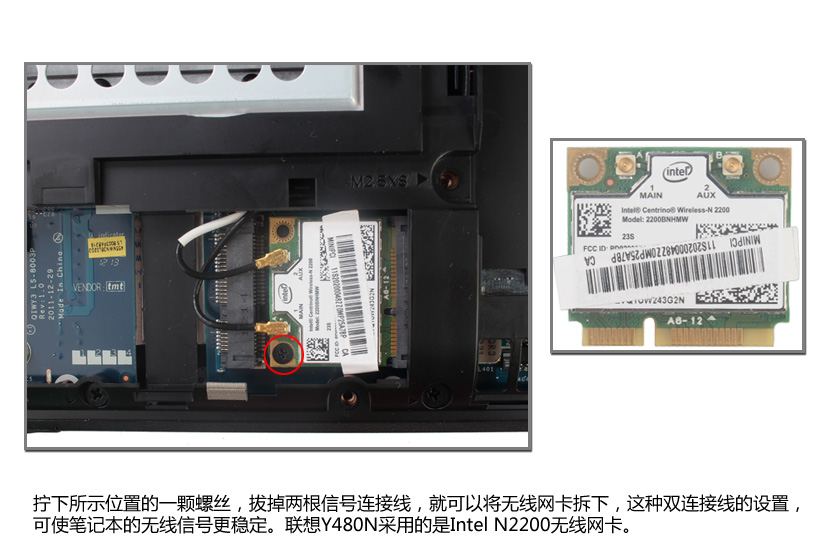
Disconnect two antenna cables and remove one screw. You can remove the wireless card.
The laptop installed an Intel(R) Centrino(R) Wireless-N 2200 wireless card.
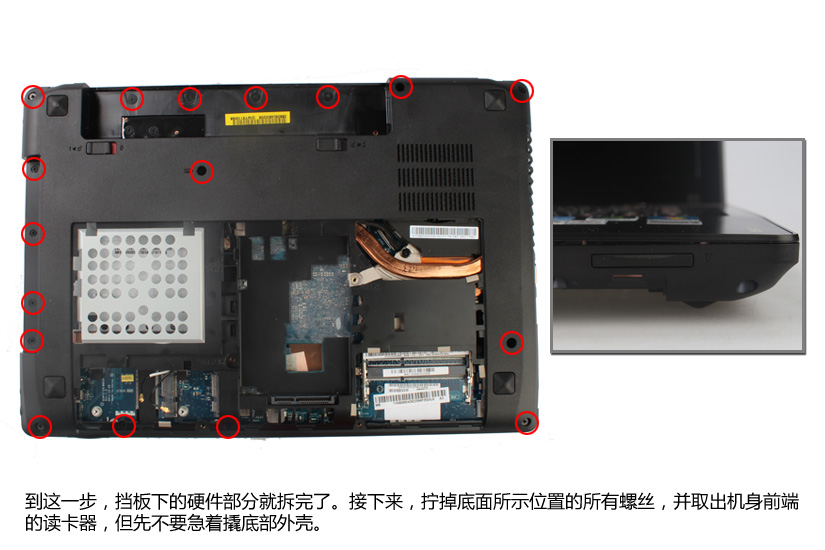
Remove all screws from the bottom case.
Remove the card reader.
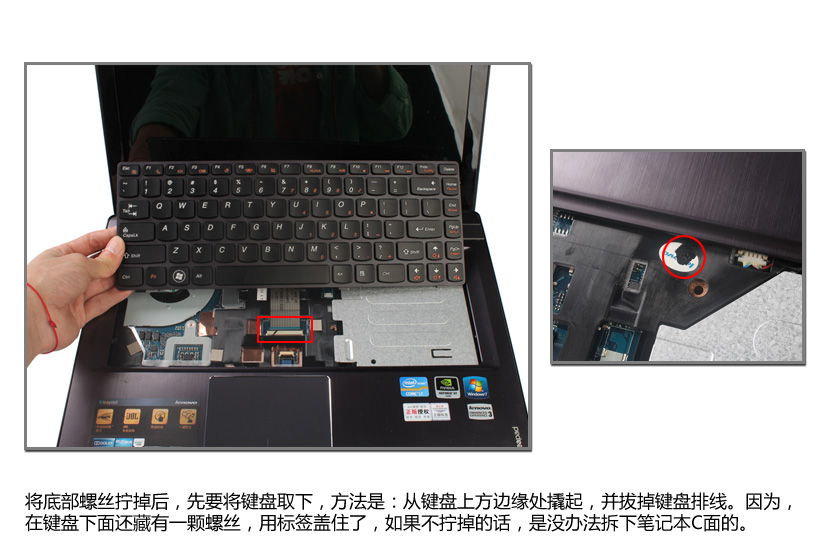
Flip over your laptop. Pry up the keyboard. Lift up the keyboard and disconnect the keyboard cable.
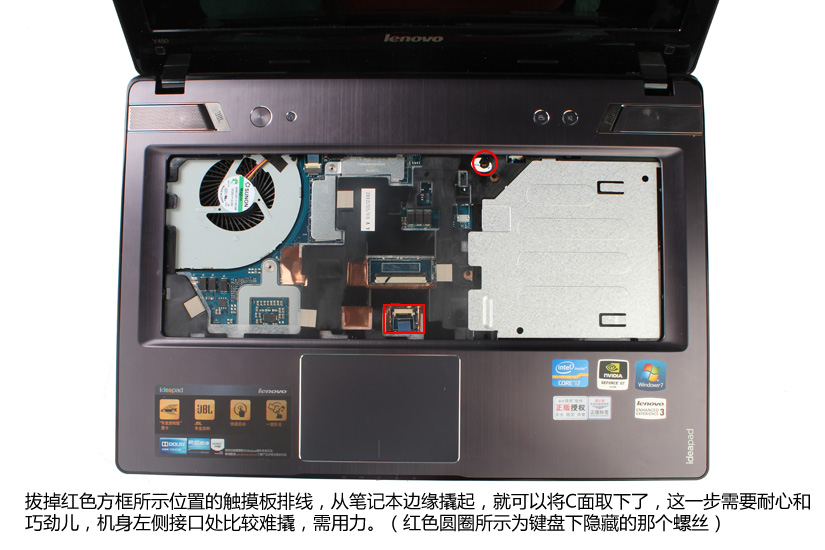
Remove one screw securing the palm rest. Disconnect the touchpad cable.
Pry up the palm rest with a pry bar.
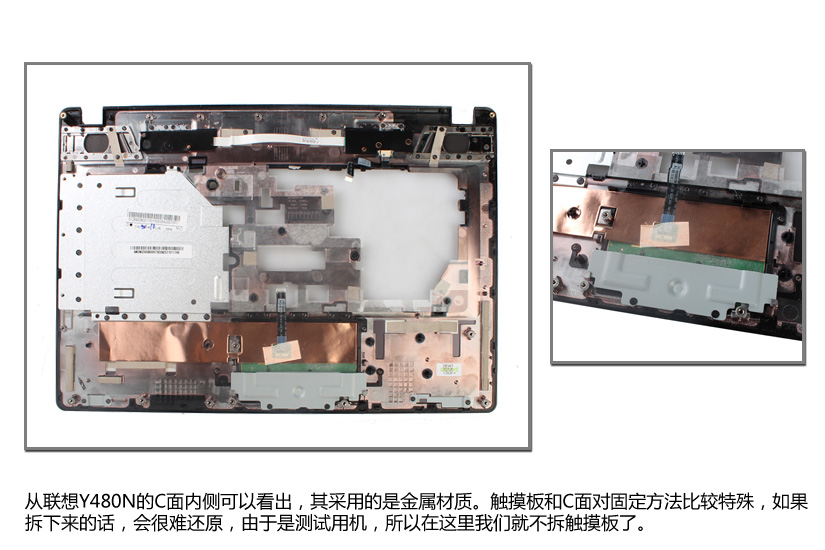
Lenovo IdeaPad Y480 palm rest
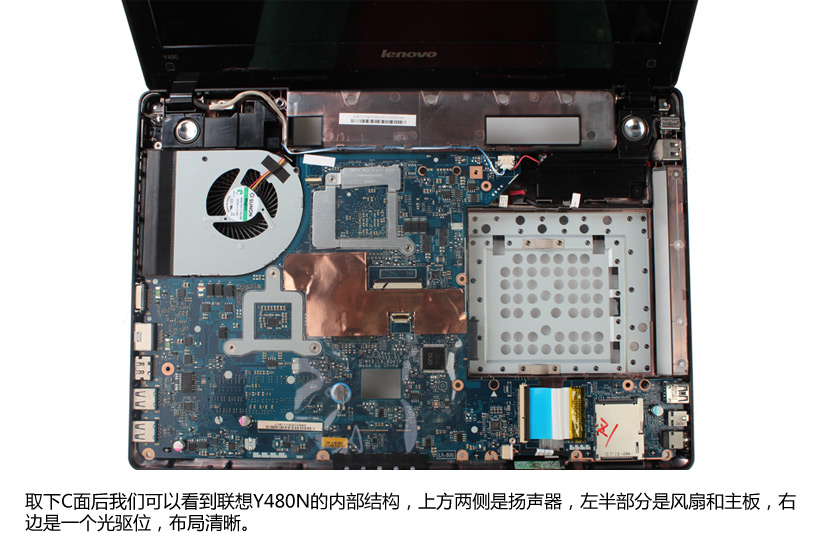
Under the palm rest, you can access the motherboard, speakers and cooling fan.
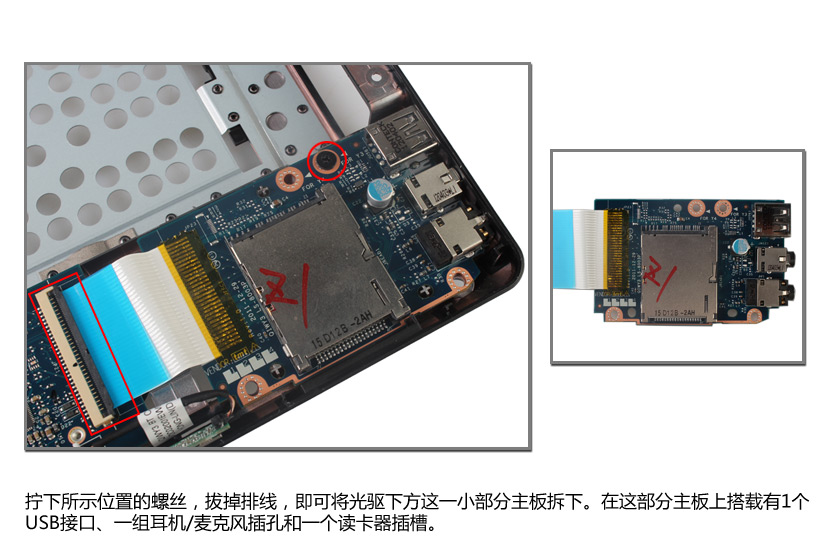
Disconnect the cable and remove one screw. You can remove the little board.
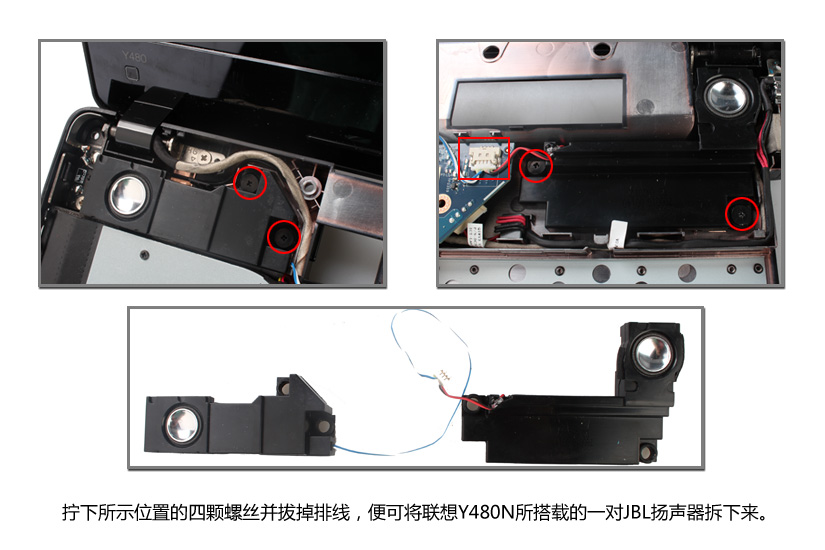
Remove four screws securing the speakers and disconnect the speaker cable.
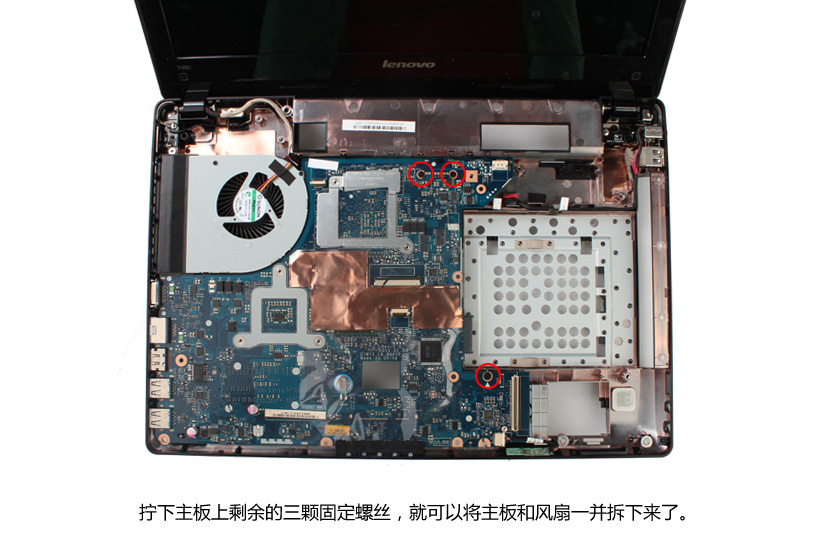
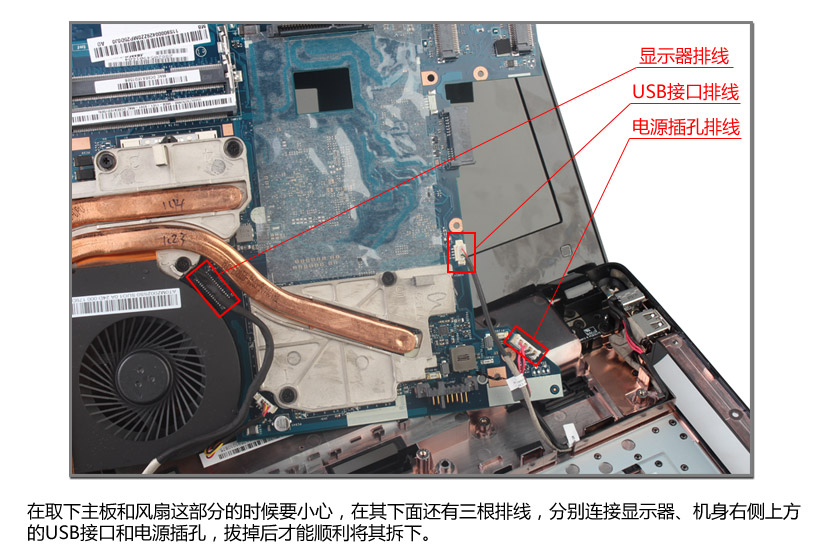
Remove three screws securing the motherboard.
Lift up the motherboard and disconnect the LCD cable, dc jack power cable and USB cable. Remove the motherboard.
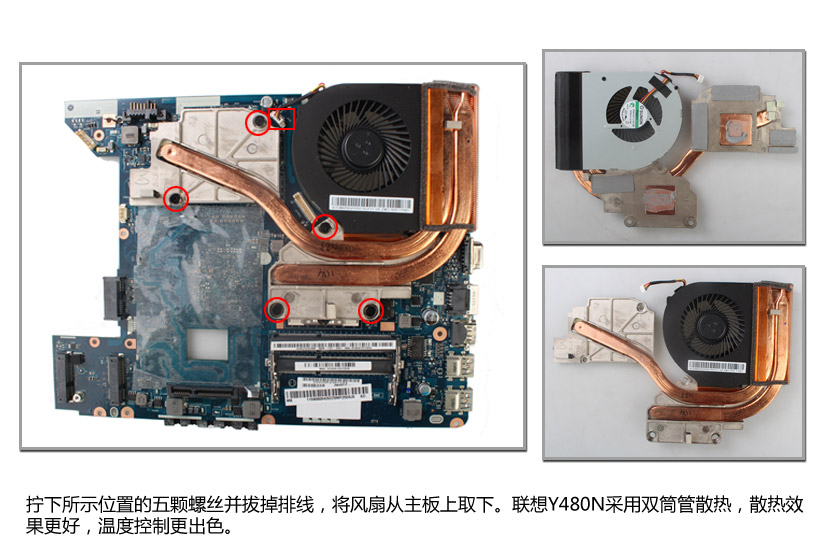
Remove five screws securing the heat sink.
Disconnect the cooling fan cable. You can remove the heat sink and cooling fan.
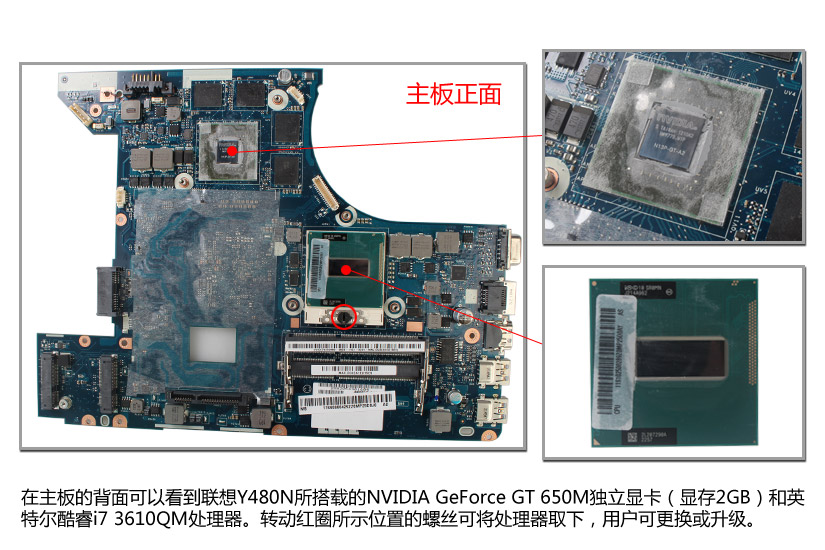
NVIDIA GeForce GT 650M graphics card and Intel Core i7-3610M processor
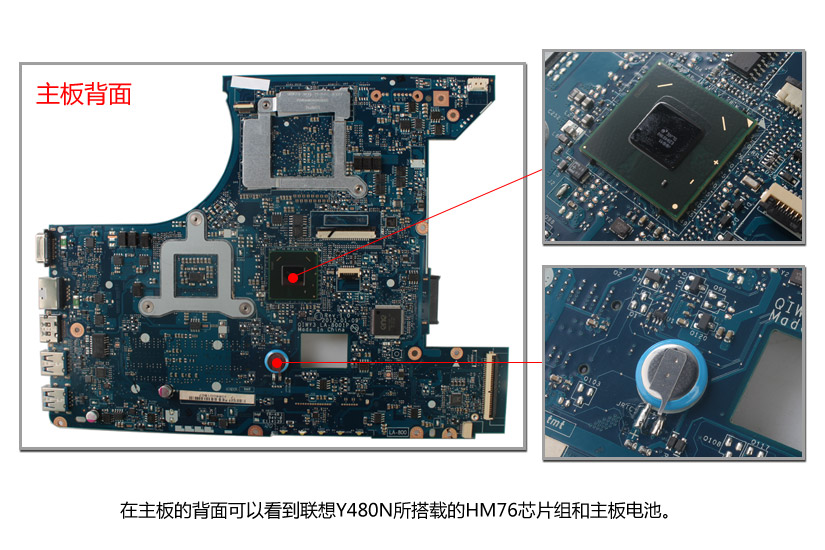
Lenovo Y480N HM76 chipset and CMOS battery
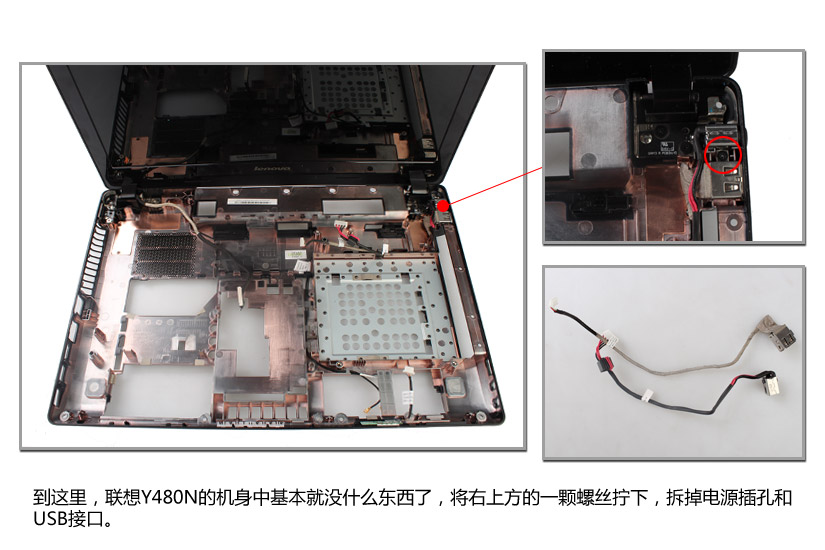
Remove one screw. You can remove the dc power jack cable.
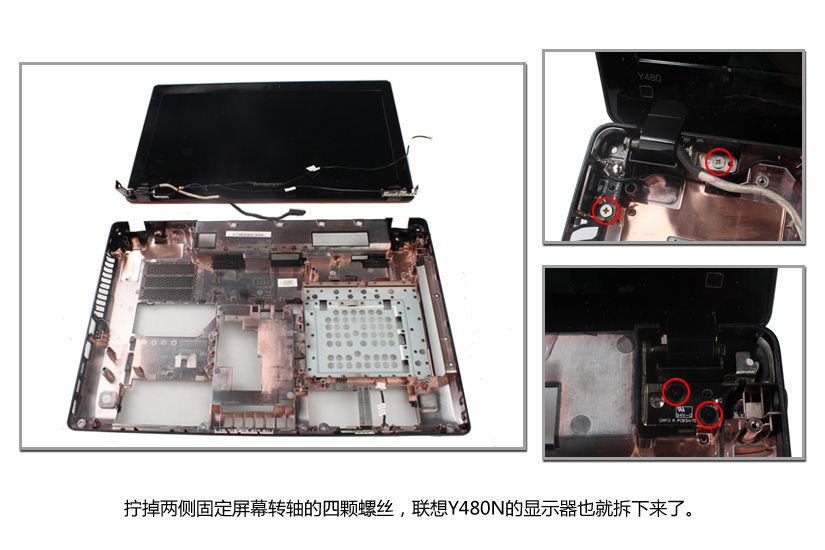
Remove four screws securing LCD hinges. You can remove the screen assembly.
For more guides, check out the Lenovo IdeaPad Y480 device page.
Via it168.com